In this article, we introduce various technical tips useful for your drawing works with Advanced Mode of “Tilt Brush (for HTC VIVE)” Let’s learn advanced techniques on Tilt Blush by drawing a simple “watermelon”.
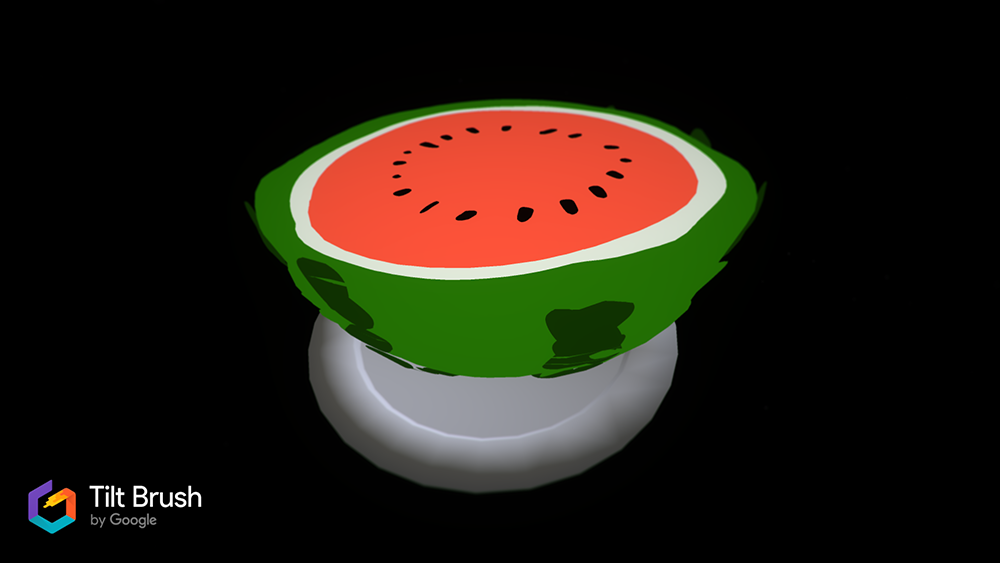
A completion image
To learn basic operations, you can follow the link below. →Draw VR illustrations by Tilt Brush – for beginners +++++++++++++++++++++++++++++++++++++++++++++++++++++ Hereafter, I call the controller for brush “brush-side”, and the controller for tools “palette-side”. +++++++++++++++++++++++++++++++++++++++++++++++++++++
Regarding the end of Google Poly (Added on March 19, 2021)
In this article, we used Google Poly to explain how to upload 3D models created with Tilt Brush.
However, Google Poly will be shutting down its service on June 30, 2021.
For instructions on how to upload a Tilt Brush 3D model to STYLY without using Google Poly, please refer to the following article.
Advanced Mode
Firstly, switch from Beginner Mode to Advanced Mode. You can find the button to switch between them below the palette.
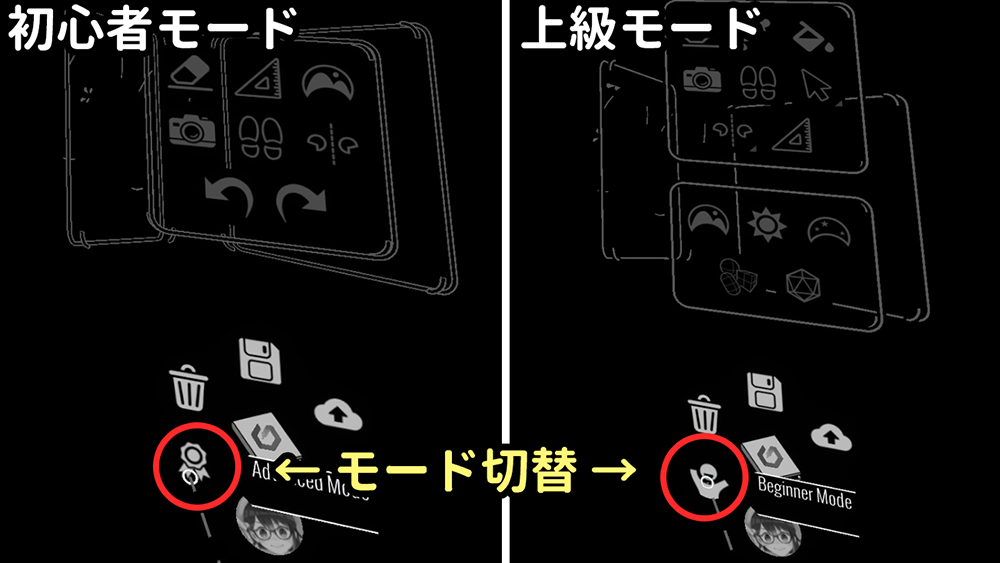
switching to Advanced Mode
Useful shortcuts
You can keep frequently-used tools at hand by holding Brush-side menu button (one with three lines). It’s handy for you to change tool quickly by releasing the button, keeping the cursor at the tool icon you change to.
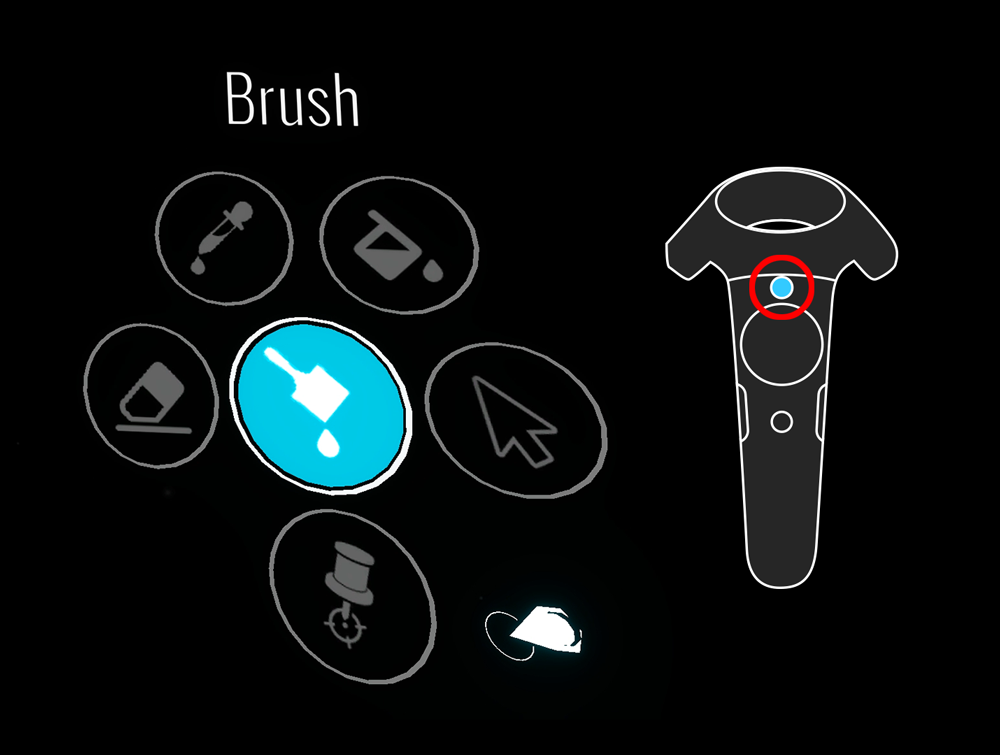
Shortcut for Tools
Guides
Guides allows you to draw a neat sphere, cube and shell. Let’s try to draw a watermelon. Without Guides, it would be poor-looking as follows.
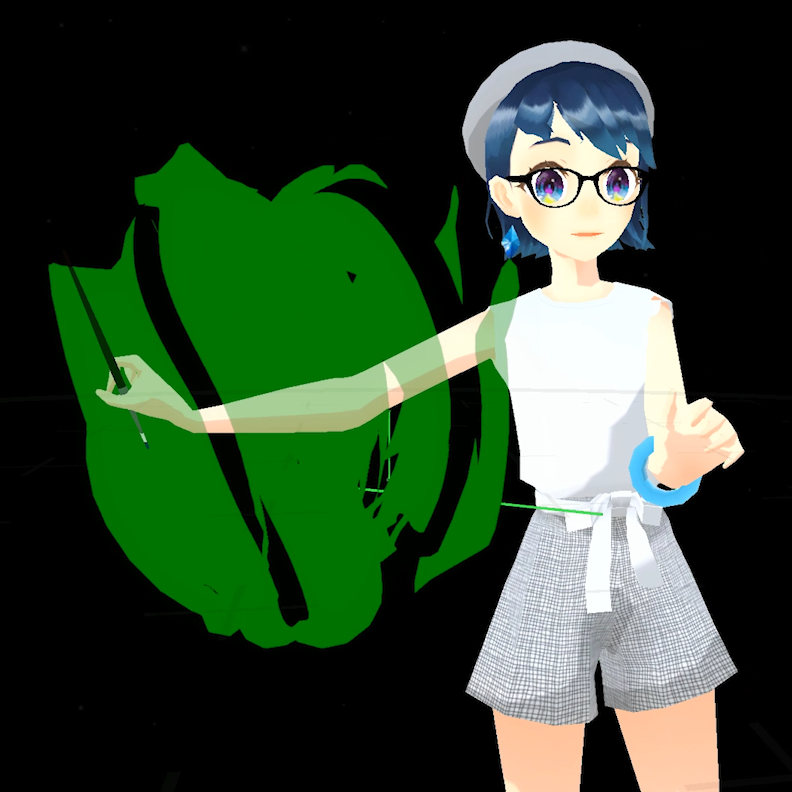
Bad example (It looks like a green pepper…)
Select Guides from the palette. Select Sphere Guide, which suitable to a shape like a watermelon.
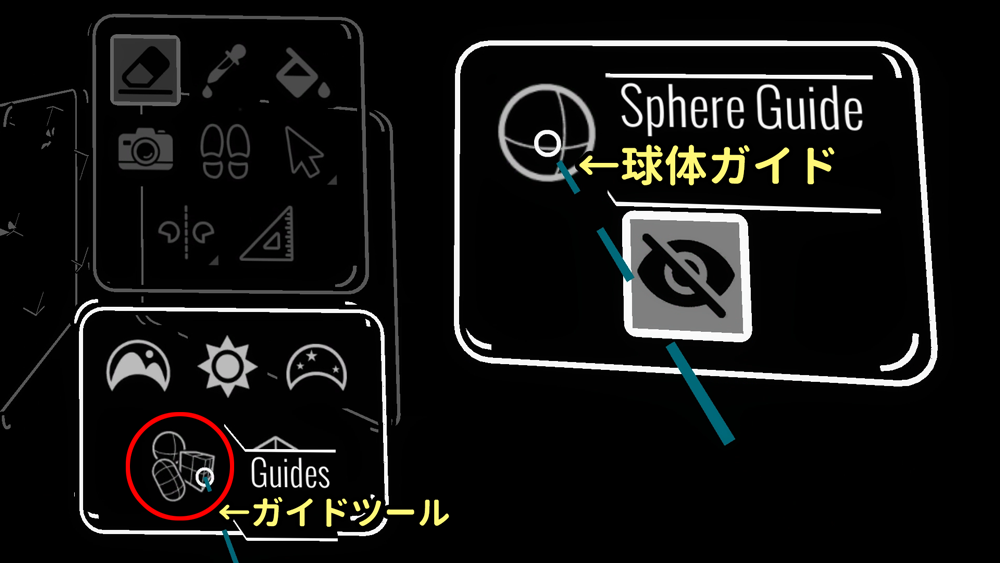
Select Sphere Guide
You can grab the Sphere Guide displayed by moving your hand to it and then pulling the trigger. Move the guide to where you want to draw a watermelon. You can scale up and down the guide by spreading and narrowing arms with the guide being held by both hands.
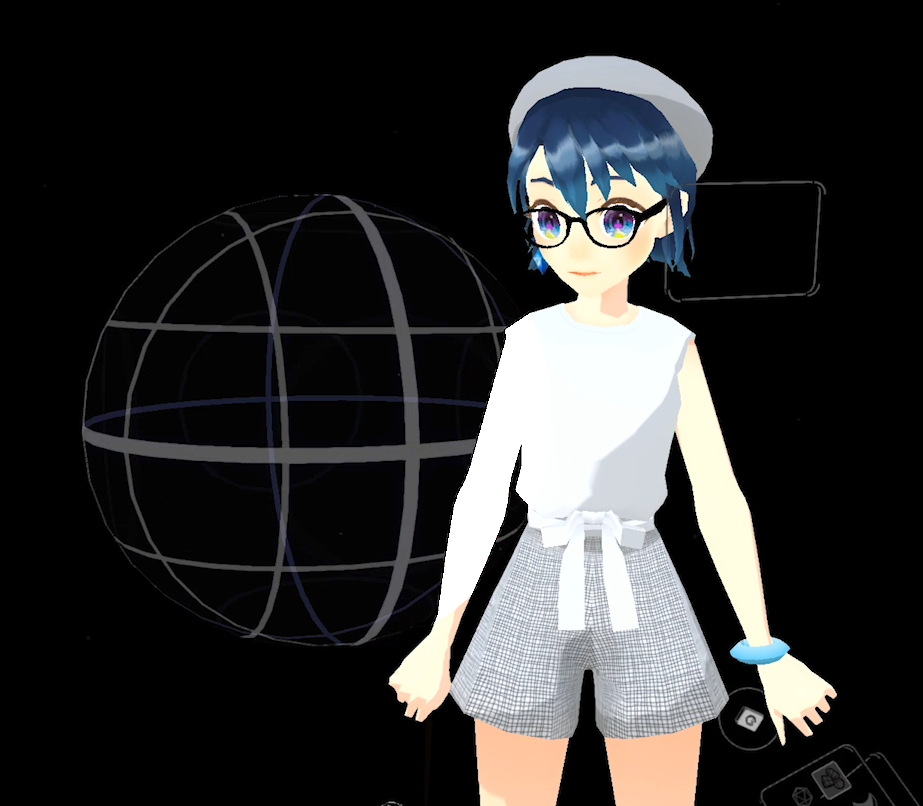
Adjust the location and size of the guide
Once the guide is set, you can start drawing. To draw a watermelon cut in half, we draw the skin with green colour for the bottom half and then make the guide a little bigger and draw stripes in black.
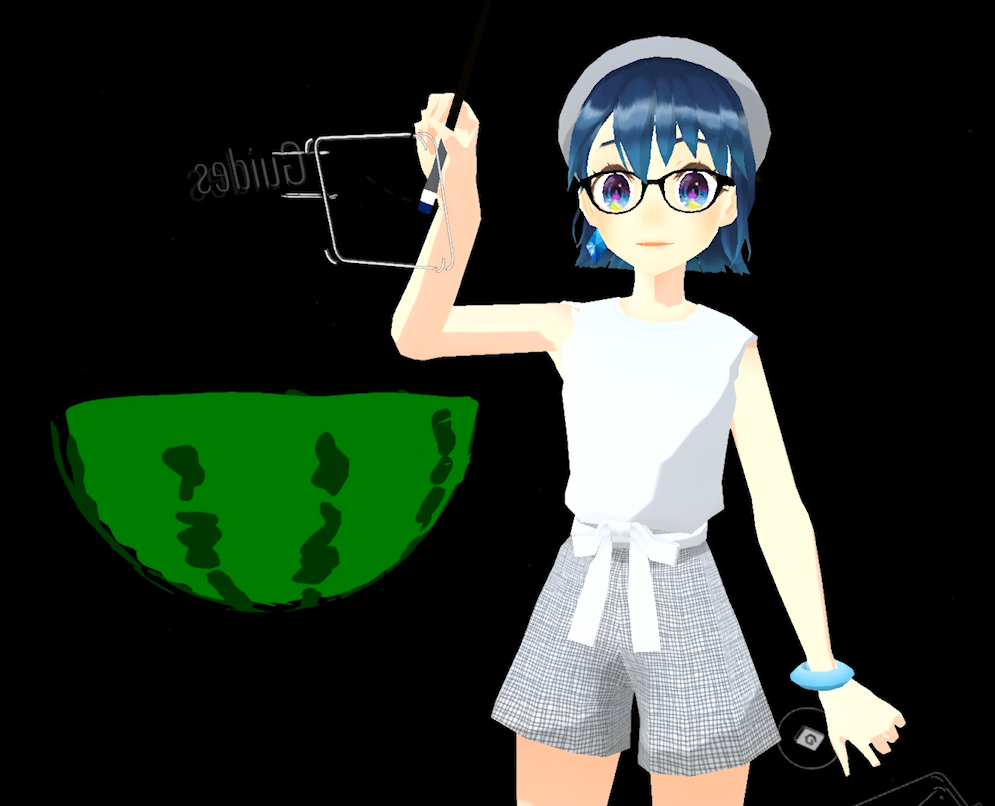
Drawing the skin and stripes of the watermelon
Next, let’s draw the contents of the watermelon. Delete Sphere Guide as you don’t need it anymore. You can throw away it by the motion: Grab the guide > swing your arm > release the grip at the end of the swing motion. You can also make all guides invisible by selecting Toggle Guides(Eye icon) in Guide Tool menu.
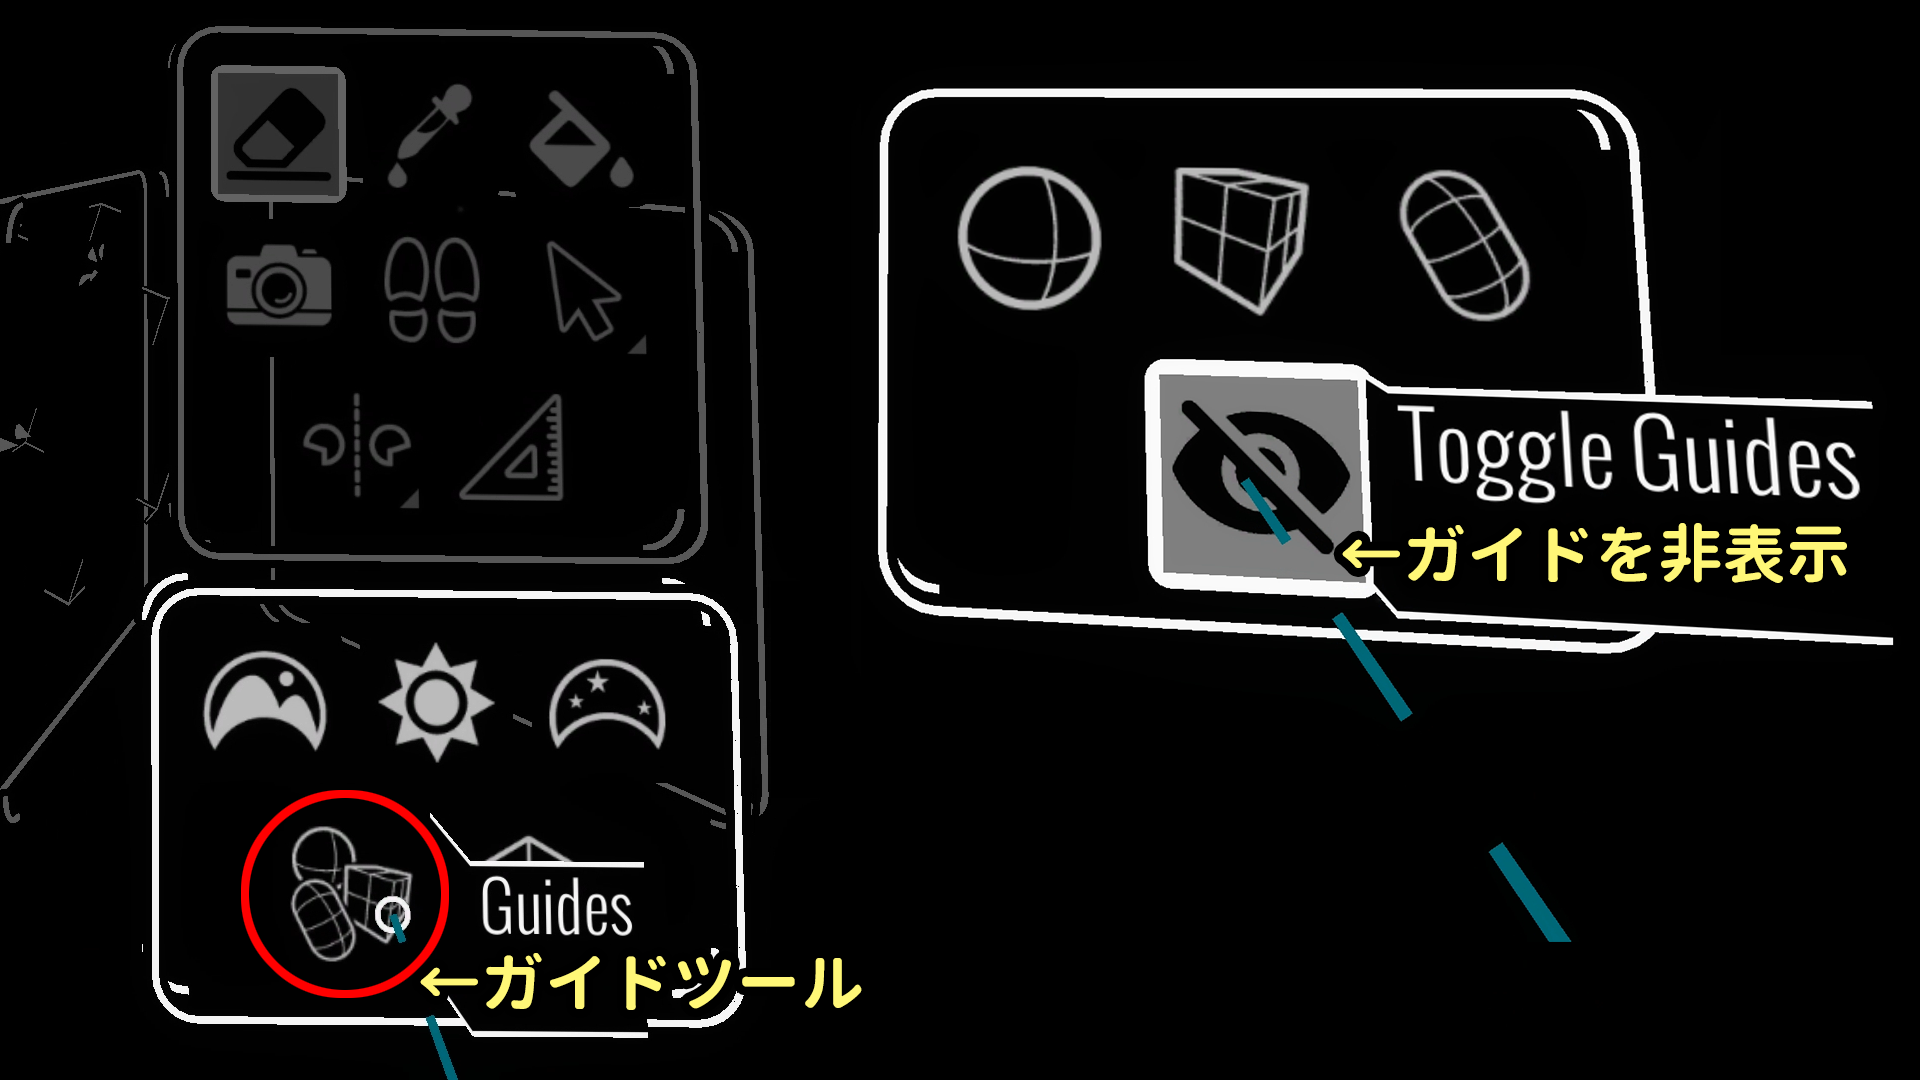
“Toggle Guides” button
To draw a neat planer cut of the watermelon, select Cube Guide from Guide Tool and then place the upper surface of the guide at where you cut the watermelon. Once you place the guide, you paint as you draw circles in green, white and red in sequence from the periphery. And, draw seeds as a final touch.
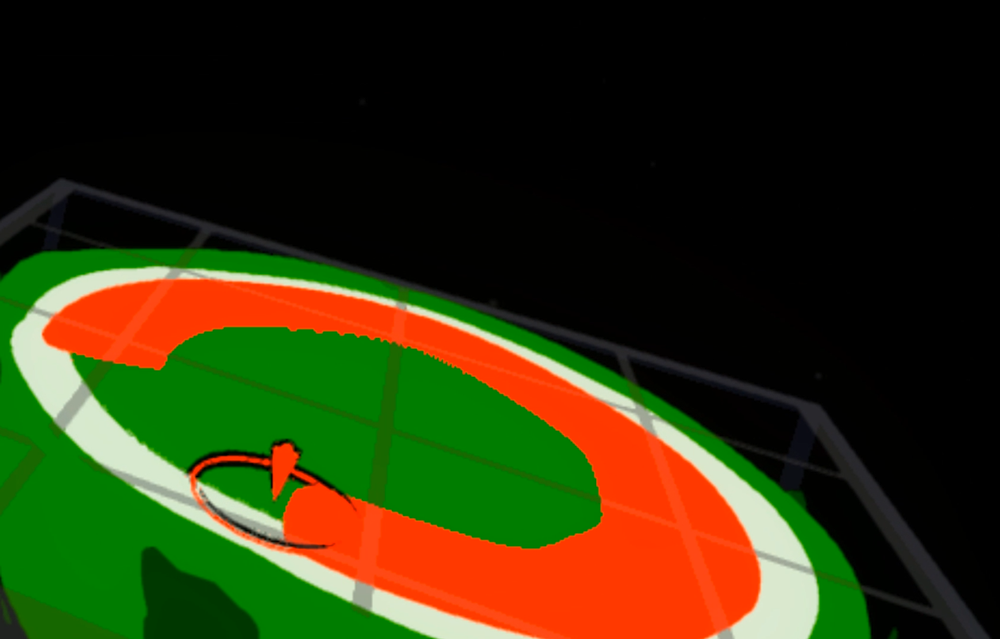
Drawing the contents of watermelon
Selection
“Selection” tool allows you to move, scale and copy the drawn objects.
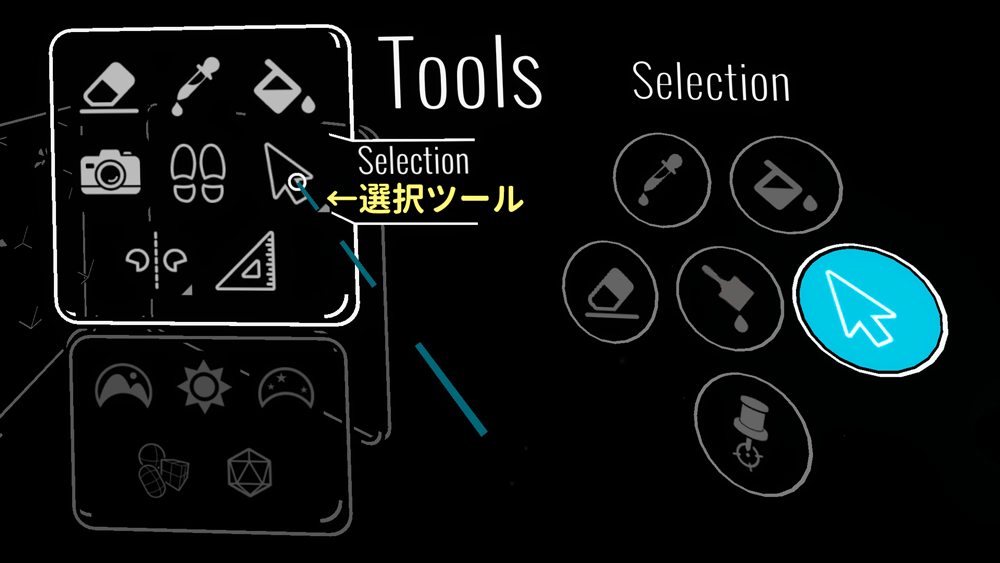
“Selection” tool
After selecting Selection from shortcuts on palette-side or brush-side, you can select an object by pulling the trigger with the brush tip kept close to it. The selected object is highlighted as seen below.
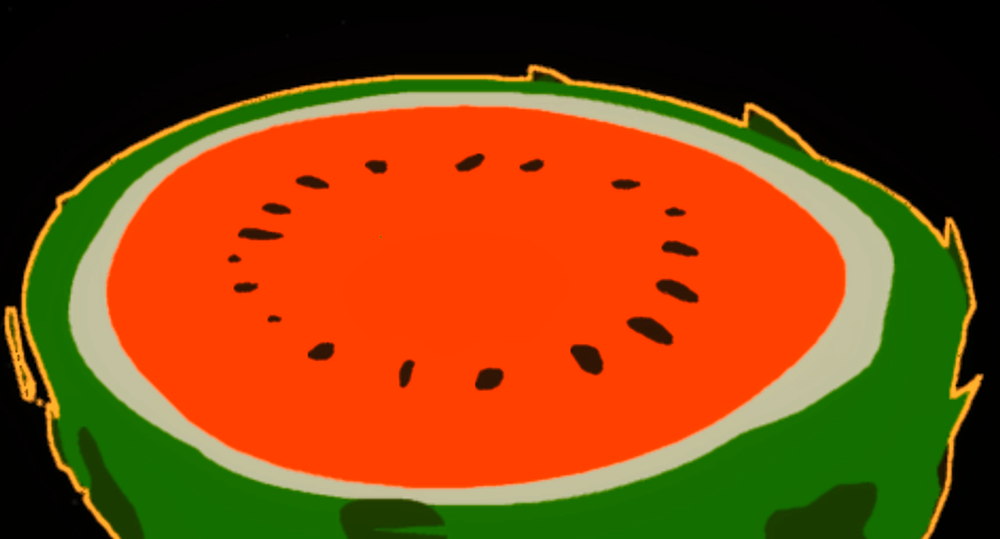
A selected state
With Selection selected, you can switch between “select tool (plus sign at brush tip)” and “deselect tool (minus sign at brush tip)” by pressing the brush-side trackpad at a blank space. When you select the wrong part, use “deselect tool” to correct it. Move With an object selected, you can move it by holding the grip.
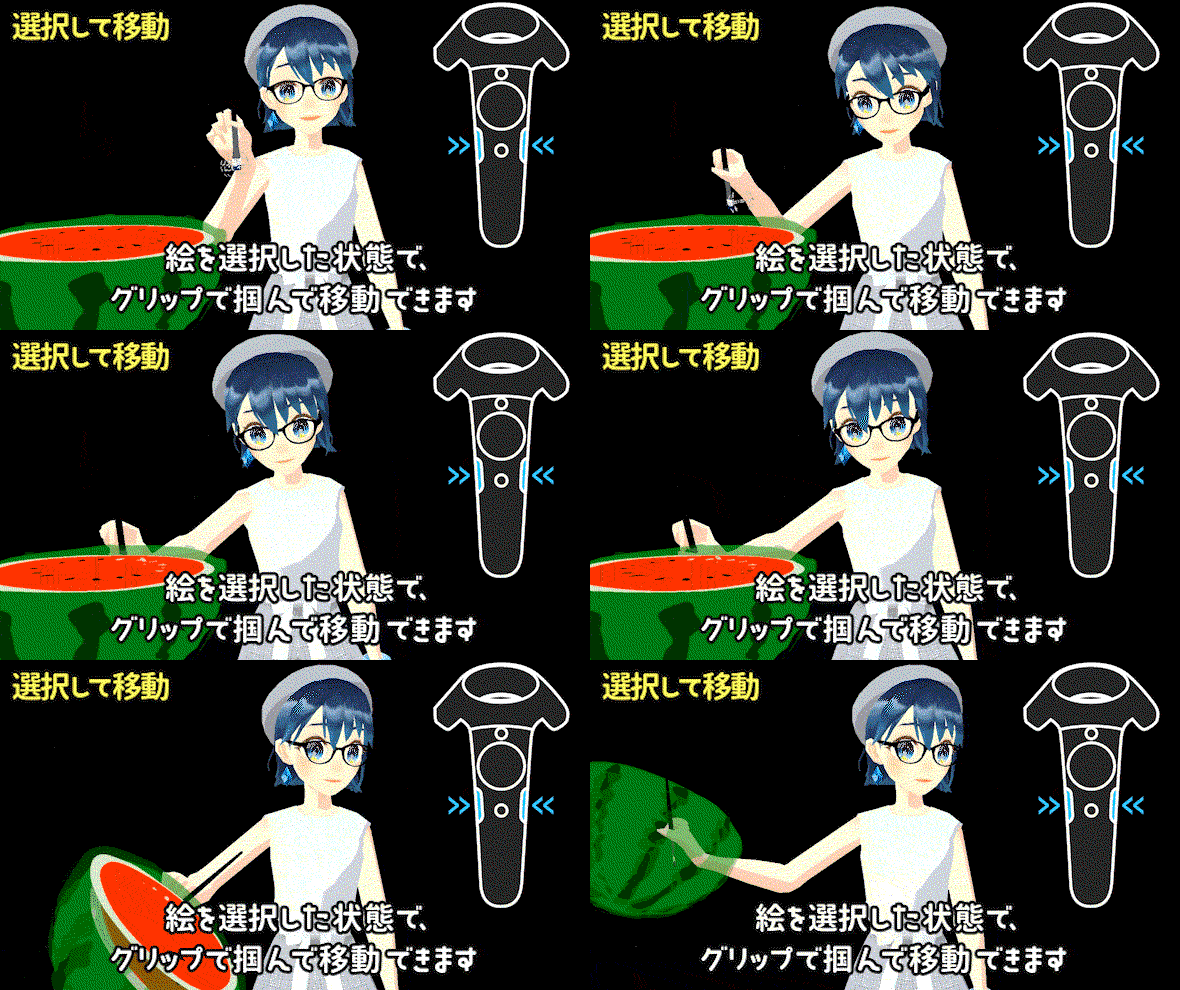
Move the object selected
Scale up and down Spread and narrow your arm by holding the both-hand grips with the object selected.
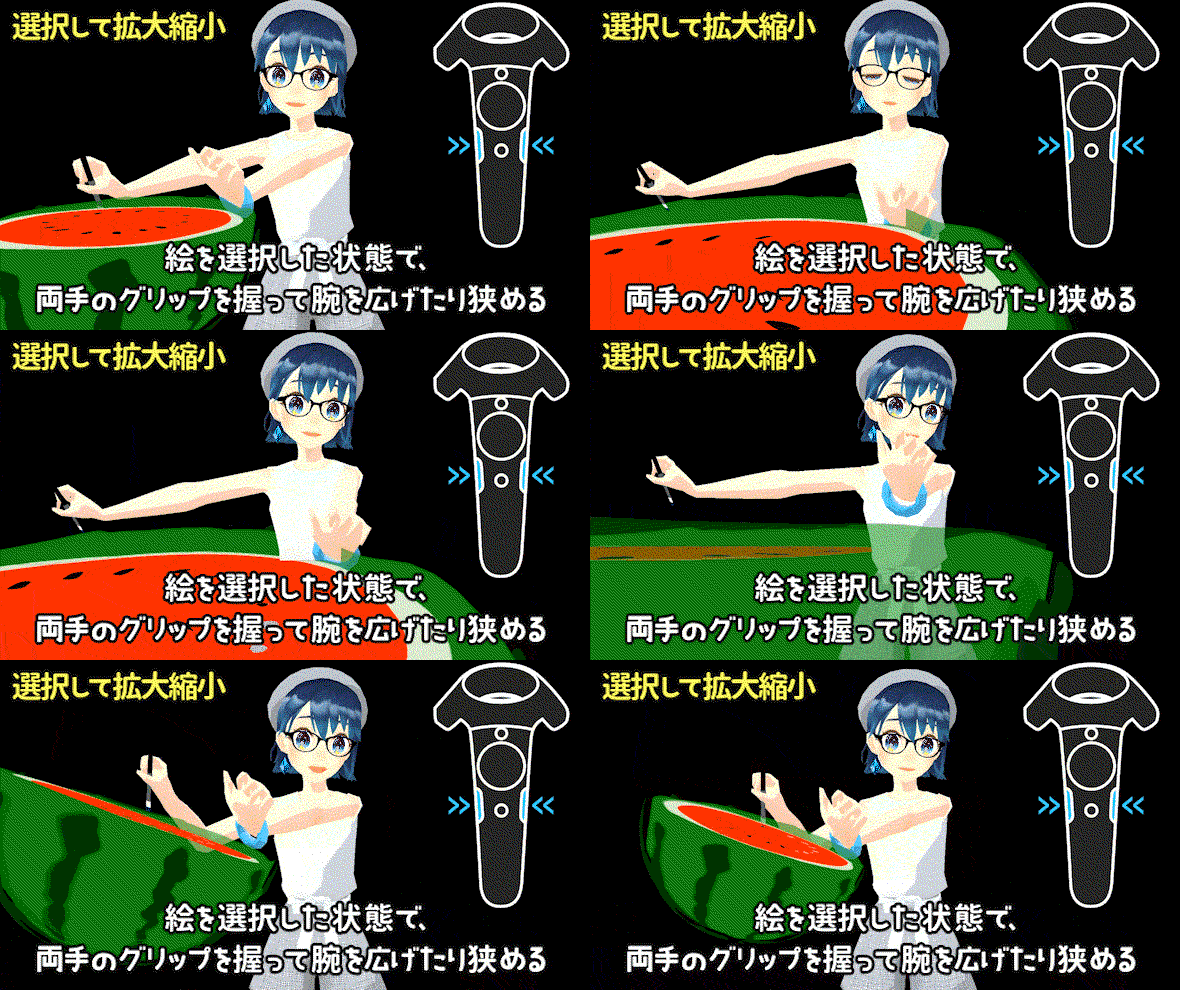
Scale the object selected
Copy Press the brush-side trackpad with the brush tip at the selected object.
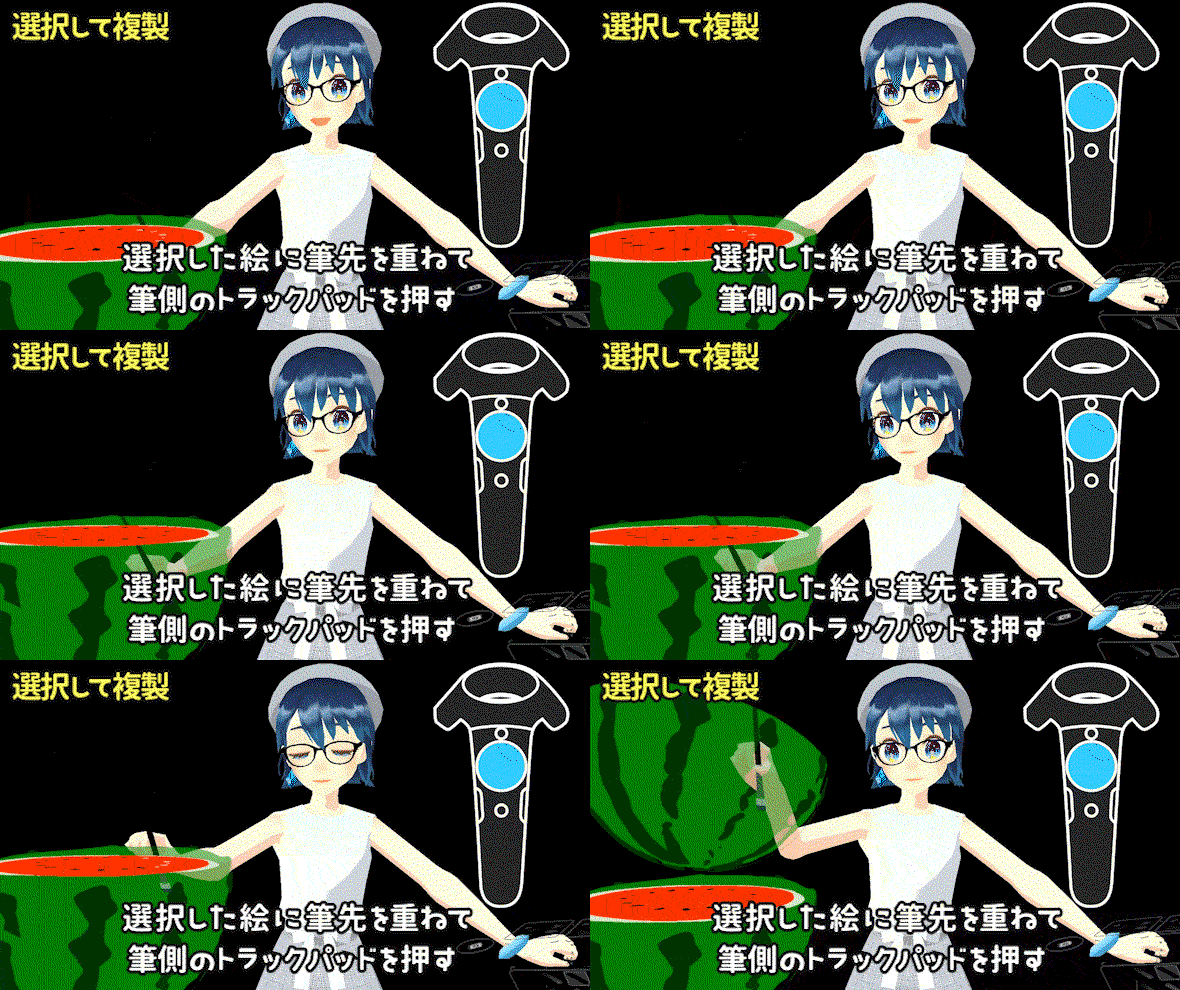
Copy an object selected
You can “Select All” and “Invert Selection” by holding “Selection” button on the palette. It’s useful to select many drawn objects at the same time.
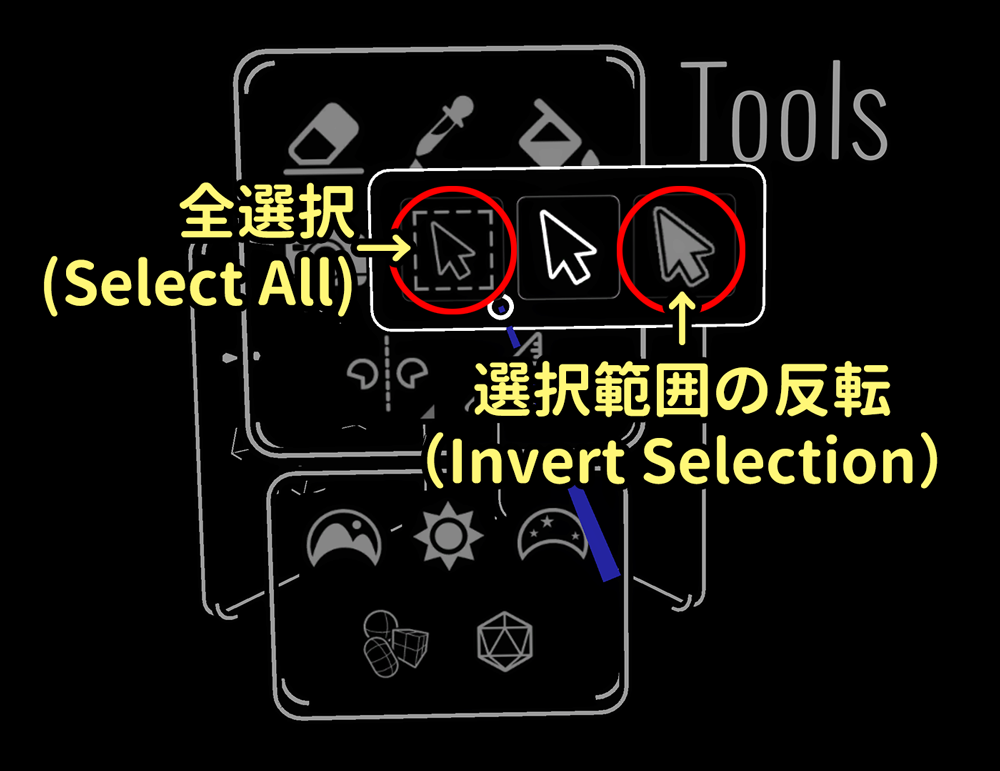
“Select All” and “Invert Selection”
Re-colour and Dropper
You can change the colour later and copy colour by Dropper.
Re-Colour
Re-Colour allows you to change the colour of curves later. You can change colour by selecting Re-Colour from palette-side or brush-side menu, picking up colour from colour palette and then pulling the trigger with the brush tip close to where you change colour.
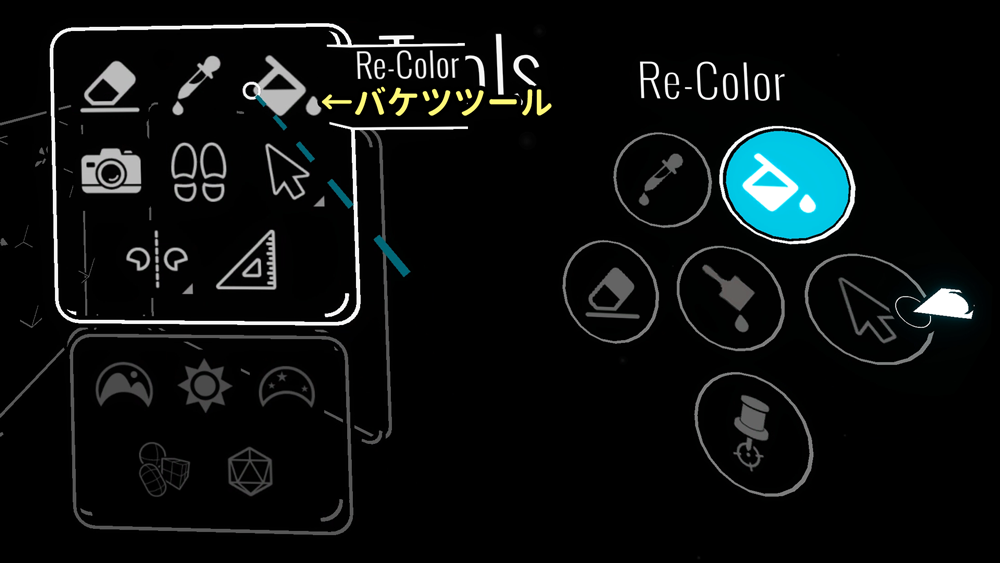
Re-colour tool
Dropper
Dropper allows you to copy colour and brush setting you want from other objects. Use it as you add an object with the same colour. You can copy colour and brush setting by selecting “Dropper” from pallet-side or brush-side shortcuts and pulling the brush-side trigger at where you want to copy from.
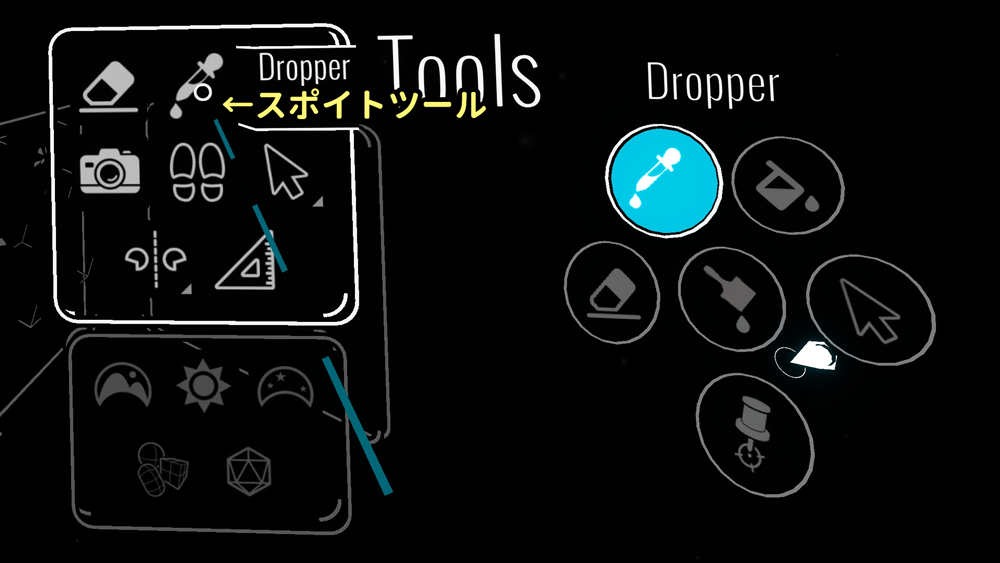
Dropper tool
Background colour and Lighting
You can change the impression of your drawings by adjusting the background colour and lighting.
Background colour
Backdrop allows you to change the colour of the backdrop. On “Sky” window, you can set the gradation pattern of the background by changing colours in the upper box (+ colour) and in the lower box (- colour). You can change the angle of gradation by tilting the ball shape on “Sky” window with the brush-side trigger kept pulled.
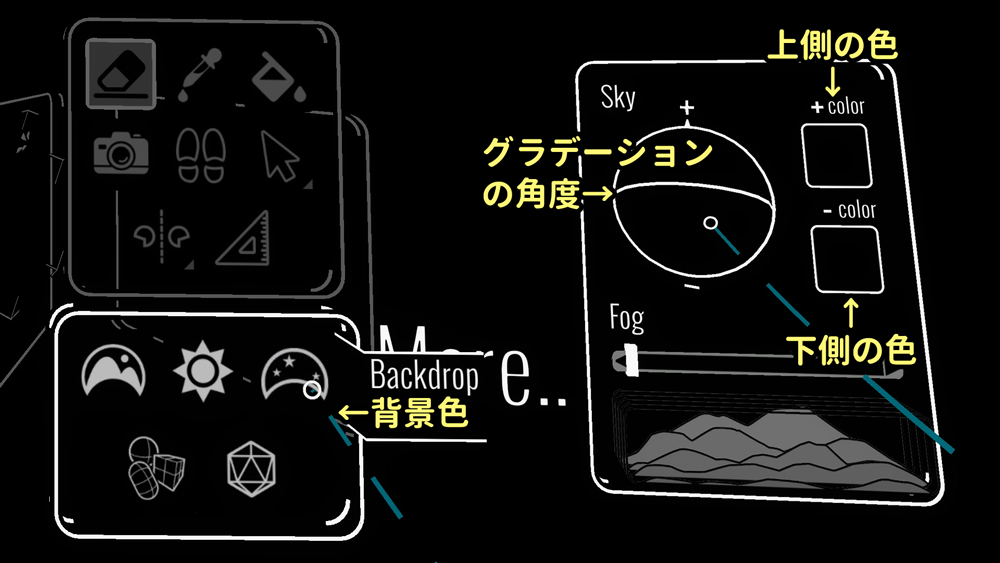
Tools to adjust background colours
Fog allows you to adjust the intensity of fog, but you hardly see its effect unless your draw a wide-ranged picture.
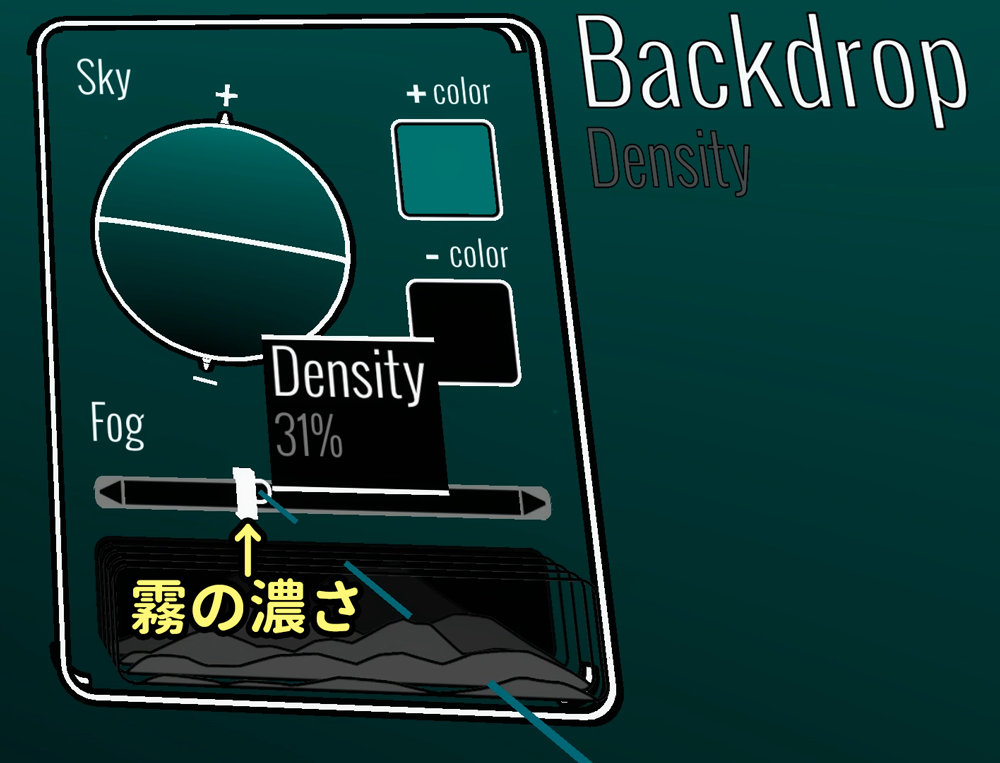
You can adjust the intensity of fog
Lighting
Lighting contains three commands, Main Light, Secondary Light and Fill Light. Adjust the position and the colour (Light Colour) of each light by monitoring changes of your picture.
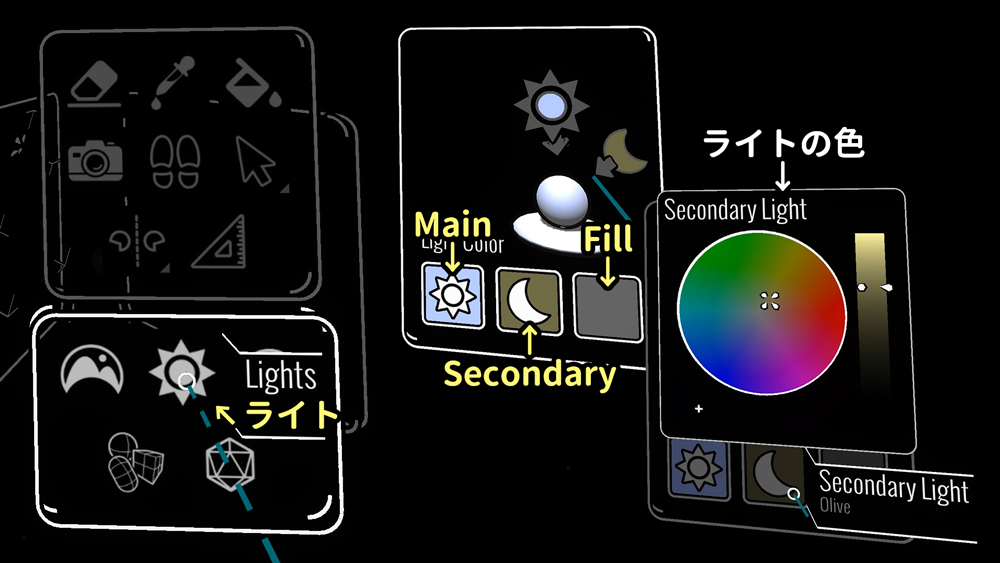
Lighting tool
Import 3D data
You can read 3D data from “Poly Library” on the palette. “Poly” is a free 3D-object library by Google. Let’s try to place a “dish” under the watermelon. Firstly, access Poly website by PC. Log in with your Gmail address by the button in the upper right.
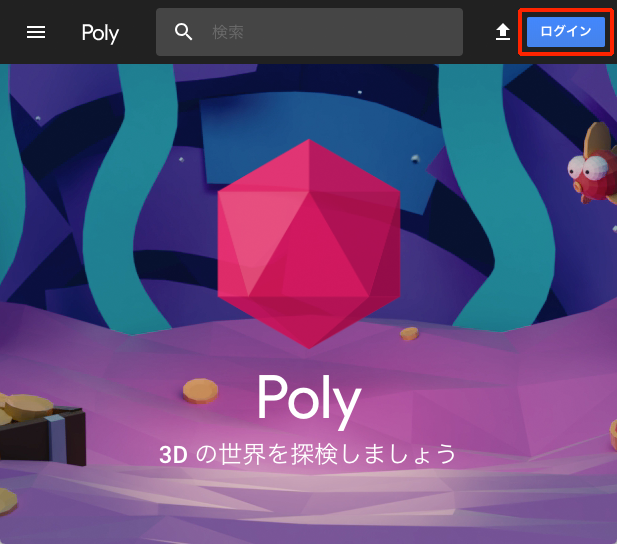
Google Poly: https://poly.google.com
You can use the 3D data with “Remix OK” by displaying its copyright information. You can find various dishes by typing “dish” in the search bar at the top. Let’s pick up your favourite one and press “favourite button (heart icon)”.
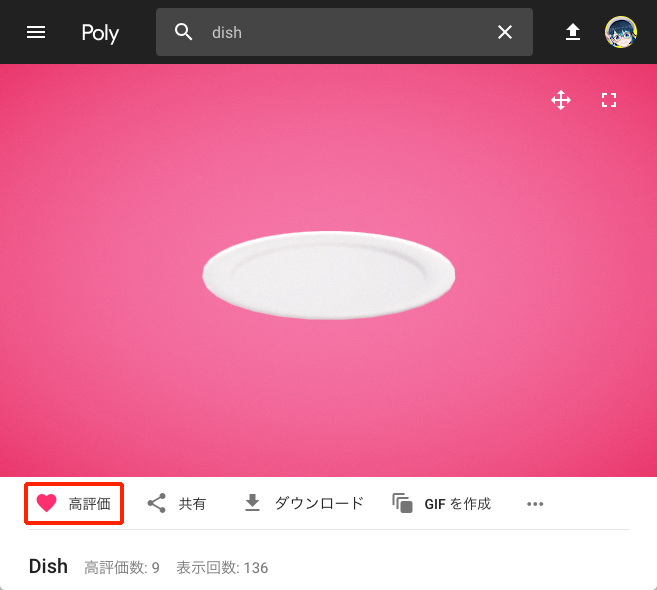
Title: Dish Author: Poly by Google URL: https://poly.google.com/view/4MPLFcKuJde
You also need to log in Tilt Brush with your Gmail address. Log-in screen appears on the PC when you select “Sign in” from the bottom of the palette.
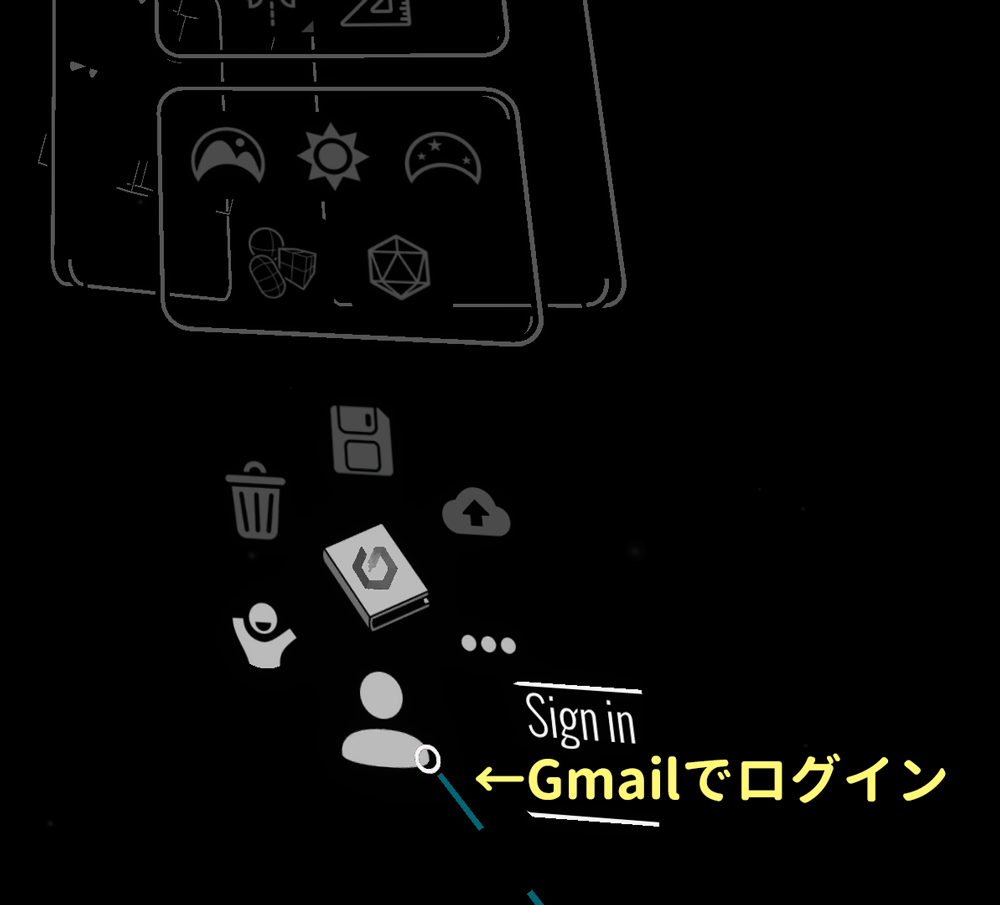
Sign in
Next, select Poly Library and then press Liked Models (Heart icon). Now you can see the dish selected earlier in Poly. Select and import it.
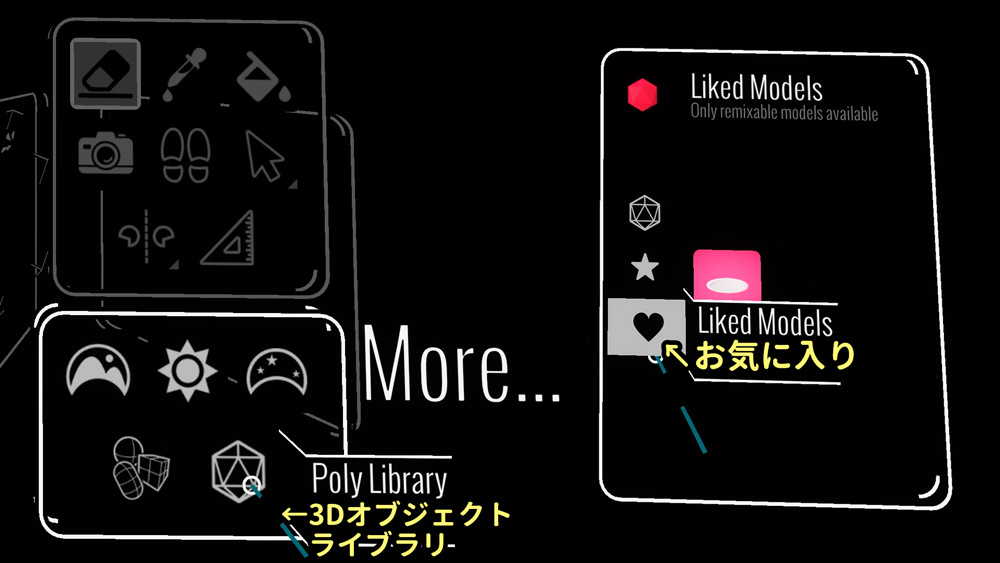
Import a dish from Poly
You can also import your DIY model. Make a new folder under “Tilt/Media Library/Models” and then place your model as .obj file.

The folder to place your 3D data in
You can open the 3D data by Local Model (box icon) under “More Options > Labs > Local Media Library” on the palette.
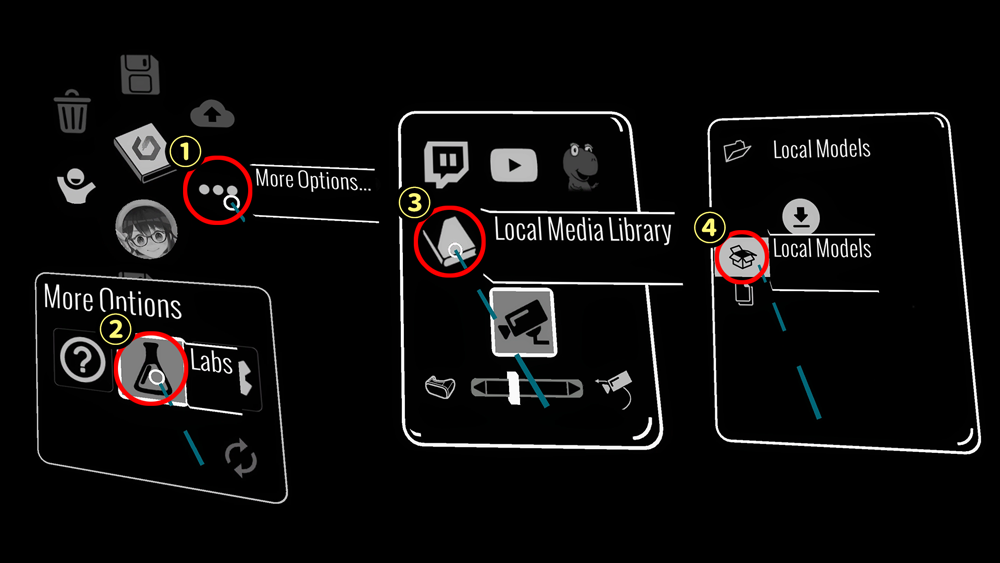
Import 3D data in your PC
You can pin the imported 3D data at a place by Model Pin. It’s handy to avoid the 3D data moving around accidentally when drawing.
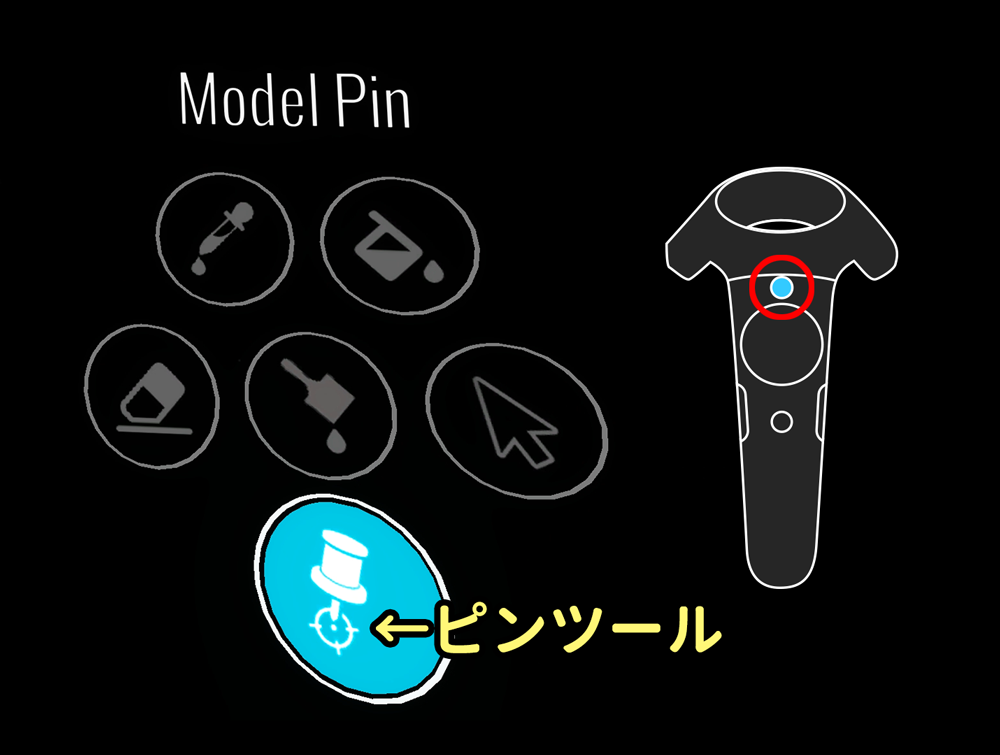
Model Pin
You can pin it by selecting “Model Pin” from brush-side shortcuts and then pulling the trigger with brush tip pointing at the object you want to pin.
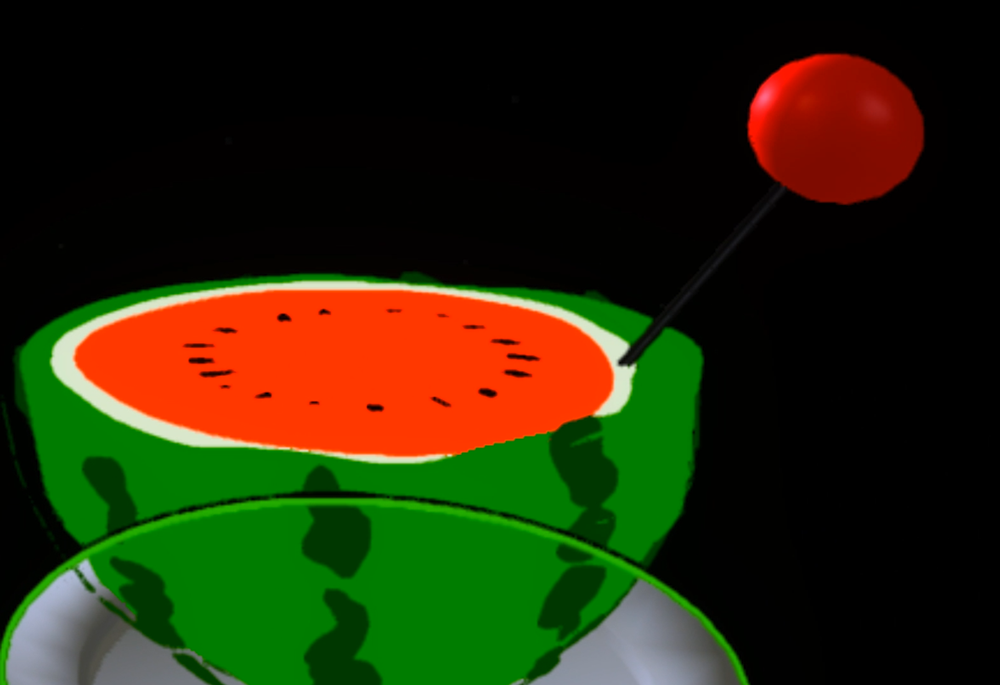
Fix 3D object by Model Pin
To undo the pin, press the brush-side trackpad at a blank space, with Model Pin selected, to change the brush tip to “x” shape. In this mode, you can undo the pin by pulling the trigger with the brush tip pointing at the pinned object. It’s completed now. Congratulations!

A completed image
Useful Tips
There are handy tips to improve working efficiency.
Move Palette
You can move the palette by placing the brush-side hand close to the black frame around the palette and then holding the grip. It also allows you to swap the locations of the palette around and detach them from the controller. For instances, you can change colour quickly if you detached the colour palette and placed it close.
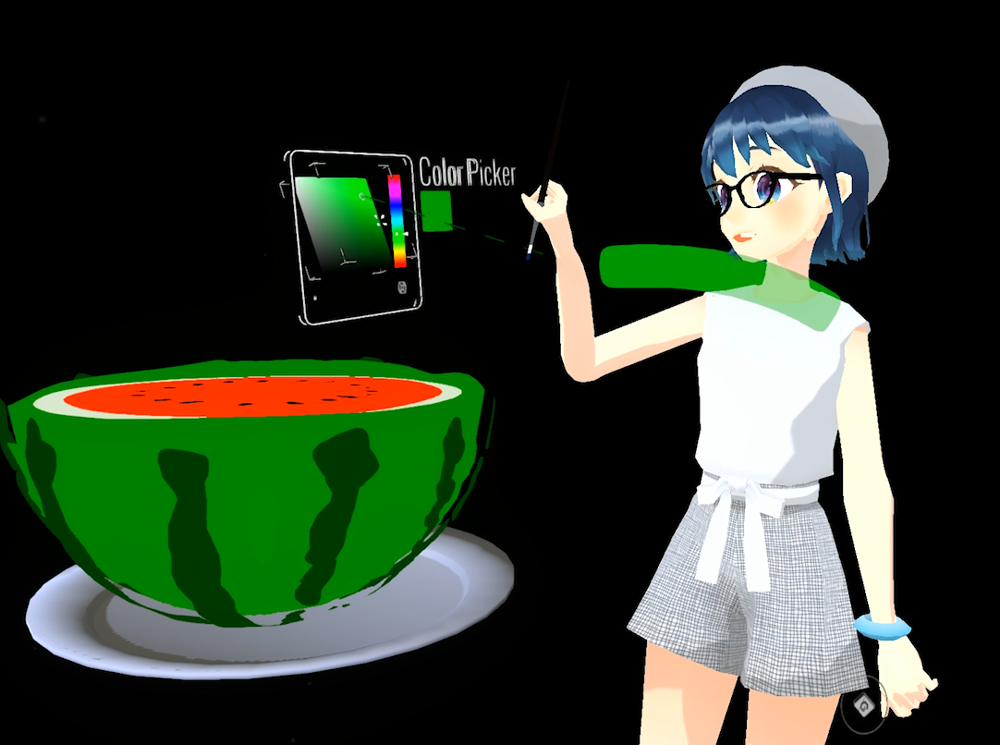
Palette detached from the controller
You can reset the position of the palette by selecting More Options from the palette, and press Rest Panels (Arrows icon) at the bottom right corner.
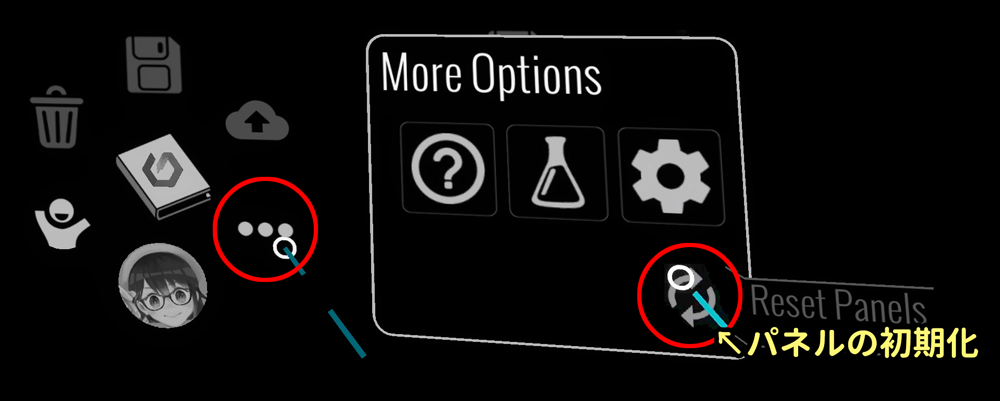
Reset the position of the palette
Show References
You could draw from a reference image (photo etc.). The quality of your complex drawing could be improved much when you have some reference images in hand. Place the photo you want to show as a reference under “Tilt Brush/Media Library/Images” in Windows Document folder.

The folder location to place photo data
Now, you can open the photo data placed by pressing Local Images (Document icon) under “More Options > Labs > Local Media Library” on the palette. You can also scale the reference image opened, and move to your favourite location.
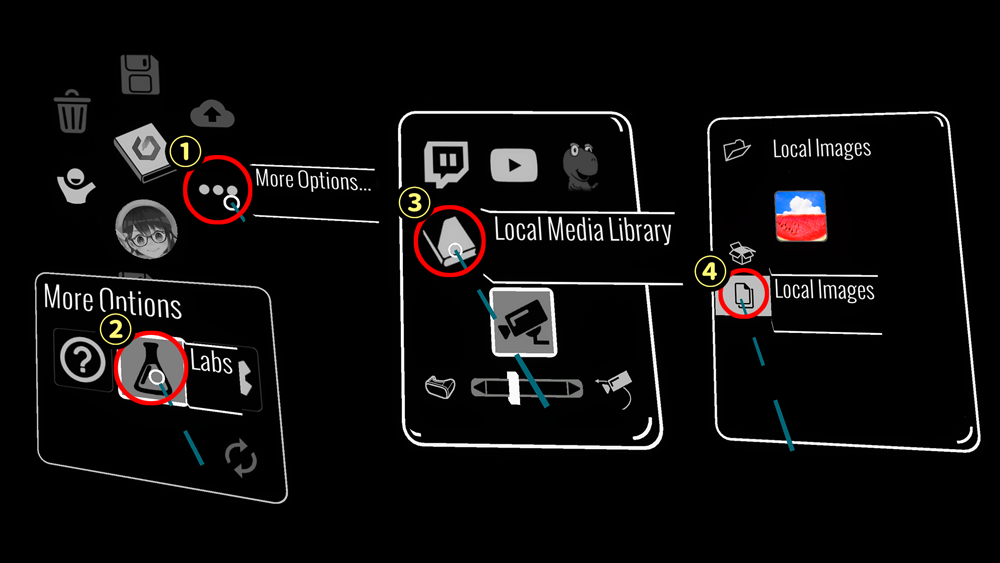
Import photo data from your PC
Summon Mirror (Call Mirror Tool close to you)
You might lose where Mirror Tool is after you use it here and there. In that case, you can call it back by Summon Mirror. Select Summon Mirror by pressing and holding the brush-side trigger at Mirror icon.
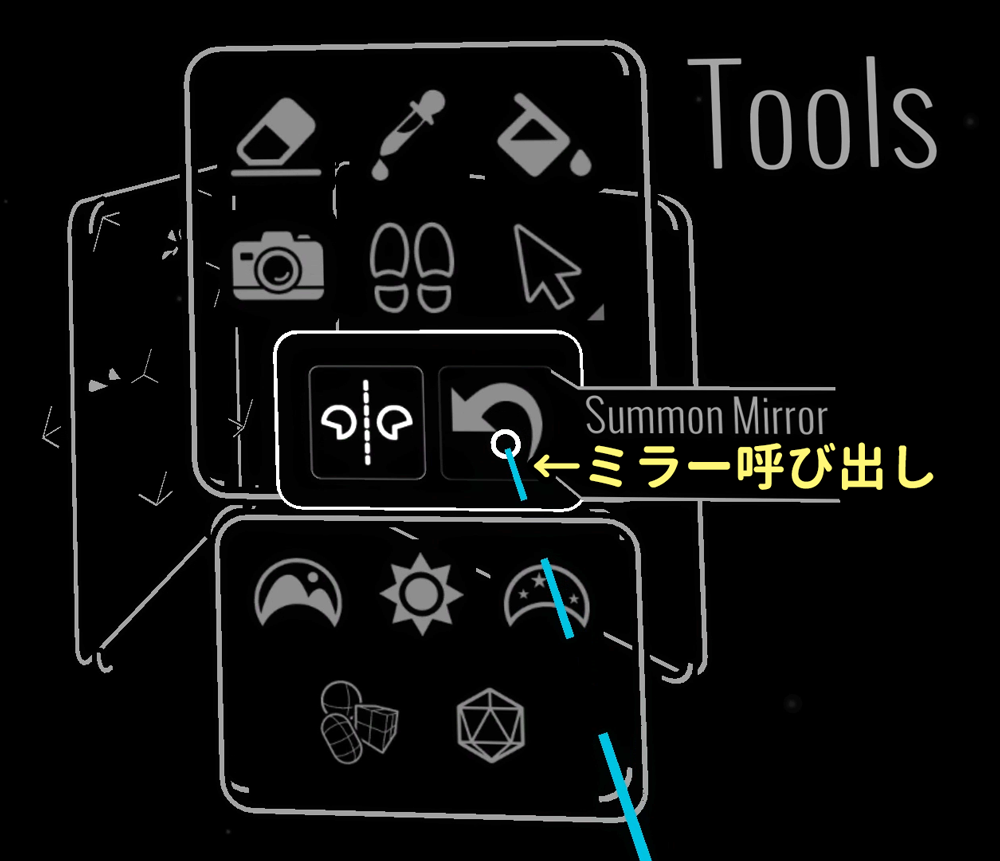
Call back Mirror Tool
Audio-Reacting Brush
You can make the drawn curves dance by selecting Audio Reactor under Brushes with music played on your PC.
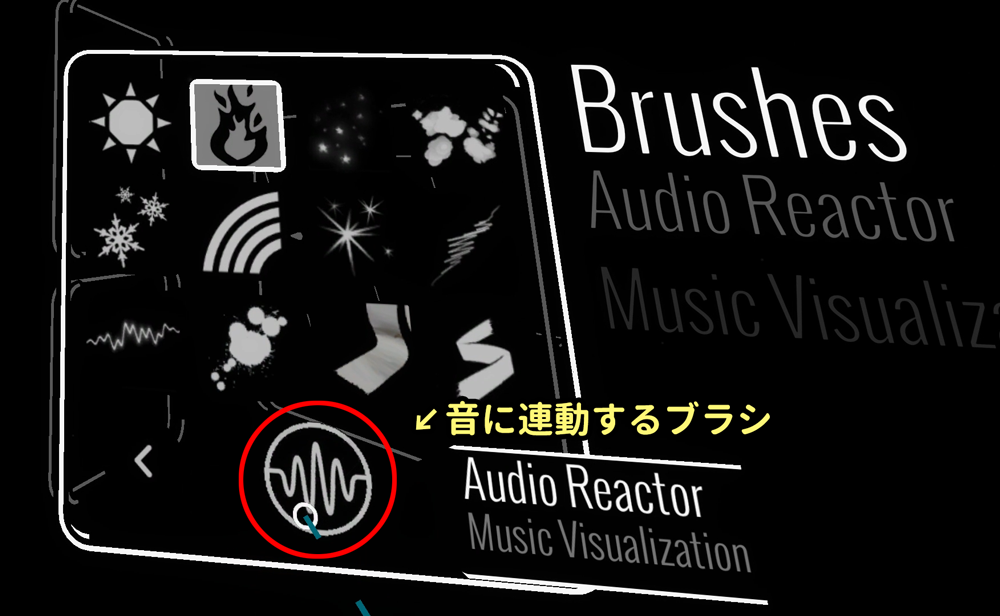
Audio Reactor icon
Some brushes don’t cope with Audio Reactor so please try to find a suitable use.
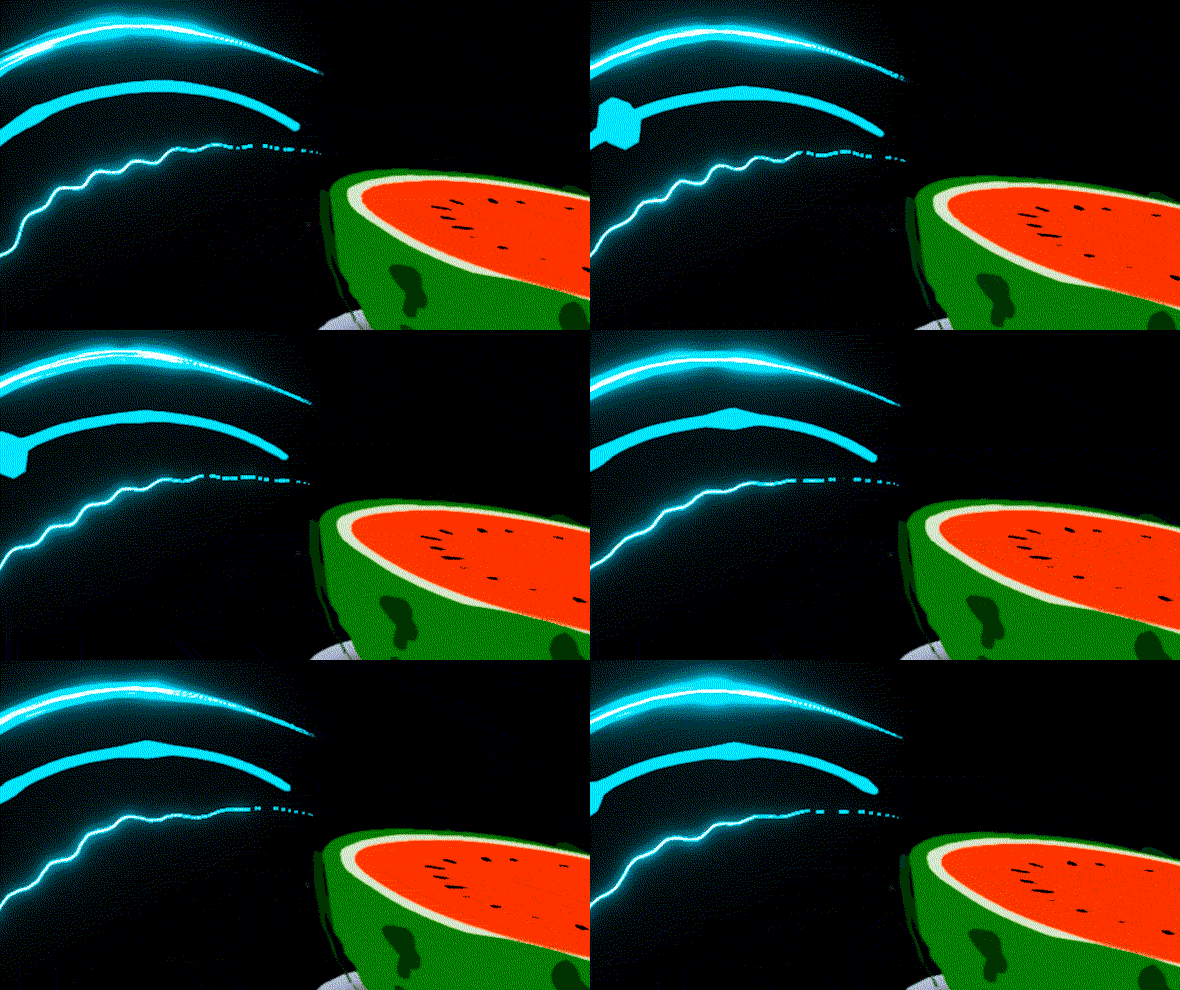
Curves react to sound
As this article was written for advanced use, I explained various techniques by showing my hands-on examples to improve working efficiency. Please make good use of them for various drawing works. Please refer to the article below to upload your own VR illustrations to “STYLY”. →Upload your VR illustration by Tilt Brush to STYLY! If you are keen to have closer look at the drawing process with the techniques in this article, please refer to the video material below.
![How to Upload a 3D Model Created with Tilt Brush to STYLY [Latest Version]](https://styly.cc/wp-content/uploads/2021/03/EYECATCH-1-160x160.jpg)