I will explain the workflow to create an electric bulletin board in Unity and upload it to STYLY. ※ you can access the sample project at https://github.com/styly-dev/STYLY-Unity-Examples/tree/master/Assets/STYLY_Examples/Denkou 
- 1 Environment
- 2 Place UI in the space
- 2.1 Create a Canvas
- 2.2 Place UI in the space
- 2.3 Adjust the size of UI.
- 2.4 Adjust the position of UI
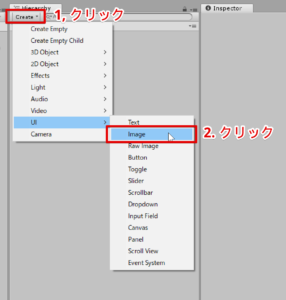
- 2.5 Create UI Image
- 2.6 Set the size of UI Image
- 2.7 Set the position of UI Image
- 2.8 Colour UI Image black
- 2.9 Create UI Text
- 2.10 Set the colour of UI Text
- 2.11 Make UI Text fit to the length of words
- 2.12 Make UI Text left-aligned
- 2.13 Scale up UI Text
- 2.14 Type a sentence
- 2.15 Set the font
- 3 Add a motion to the UI text
- 4 Clip the UI text
- 5 Adjust the animation: Make the text come from the edge of the board.
- 6
- 7 Upload it to STYLY
Environment
- Please see below for Unity version
STYLY Plugin for Unity DOWNLOAD - STYLY Plugin (https://styly.cc/download/?lang=ja)
Place UI in the space
Firstly, I explain how to make a UI floating in 3D space. 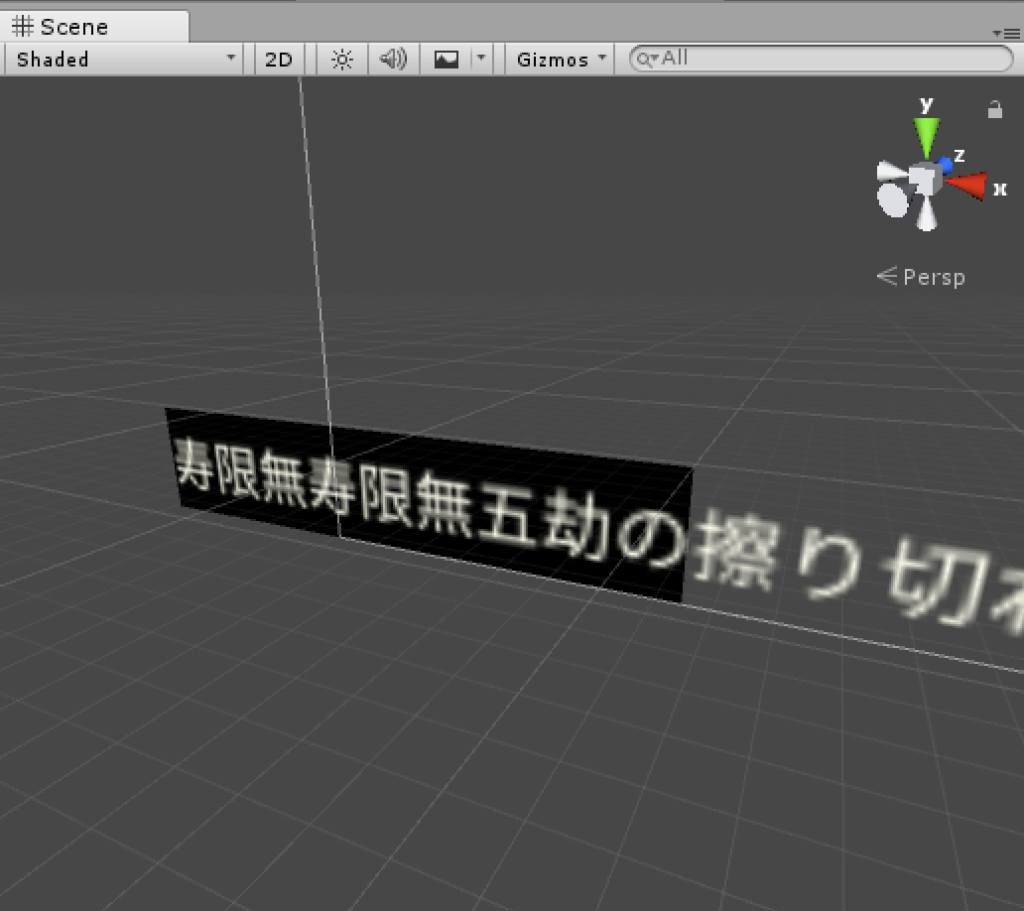
Create a Canvas
Create a Canvas at first. 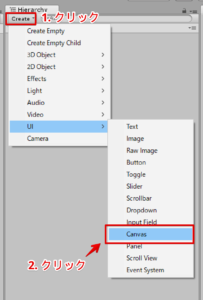 Rename the created Canvas ‘Denkou‘.
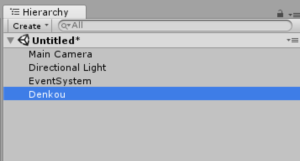
Place UI in the space
Set the ‘RenderMode’ of the Canvas to ‘WorldSpace’. 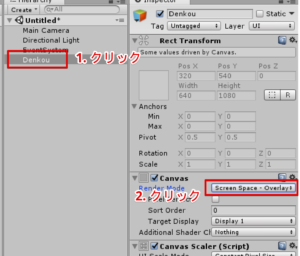
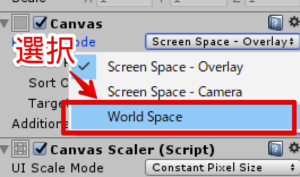 The UI is attached on the screen by default. However, by setting Canvas’s RenderMode to ‘Worldspace’, the UI is placed in the middle of the space.
Adjust the size of UI.
As the size is too large, set the scale factor of ‘Denkou’ to (X=0.01, Y=0.01, Z=0.01). 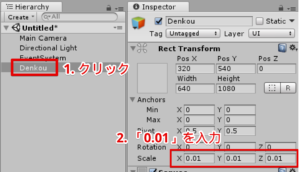
Adjust the position of UI
Set both Pos-X and Pos-Y to zero. 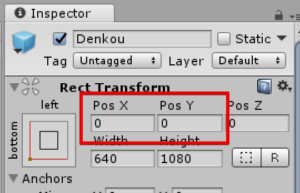 If their value is not zero, there might be a gap between the actual position and the displayed position when the UI is uploaded to STYLY.
Create UI Image
Set the size of UI Image
Set the width and height of the UI Image to 500 and 100 respectively. 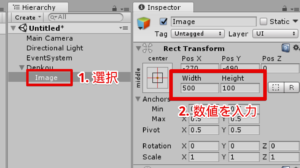
Set the position of UI Image
Set the Pos-X and Pos-Y of the UI Image to zero to place at the origin. 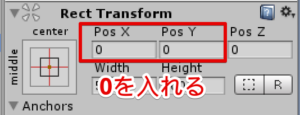 If their value is not zero, there might be a gap between the actual position and the displayed position when the UI is uploaded to STYLY.
Colour UI Image black
Colour the UI Image black. Firstly, click the colour bar of the UI Image. 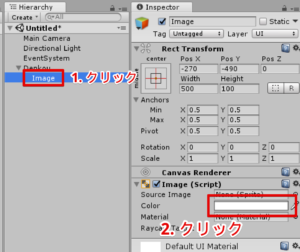 It brings up the colour-setting window. Select black.
 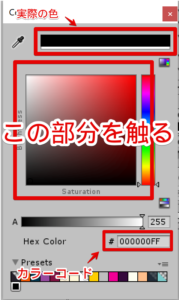 Then, the UI will look as shown below.
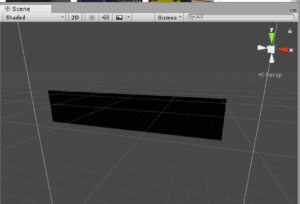
Create UI Text
Create a UI Text and put it in the UI Image. 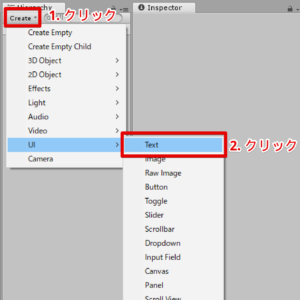
Set the colour of UI Text
Color the UI Text whitish-yellow. 
Make UI Text fit to the length of words
Add ‘ContentSizeFitter’ and set ‘Vertical/Horizontal’ to ‘Preferred Size’.  With the default setting, the words going out of the range aren’t displayed. But, by adding ‘ContentSizeFitter’, the text box is adapted to the length of the sentences.
Make UI Text left-aligned
For the UI Text, set its Anker to ‘Middle-Left’, and ‘Pivot X’ to 0. With regard to the position, set both Pos-X and Pos-Y to zero.  By setting Anchor and Pivot this way, the UI text is set to left-aligned (The text is aligned along the left edge).
Scale up UI Text
As the UI Text is too small, set the scale factor to (X=4, Y=4, Z=4) to scale it up by a factor of four. 
Type a sentence
Type a sentence you want to display on the UI Text. For example: ・Llanfairpwllgwyngyllgogerychwyrndrobwllllantysiliogogogoch Anything is OK! 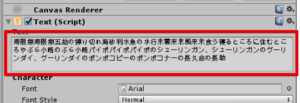
Set the font
*Note by translator: Ignore this section assuming your default language is English. For your information, the original article was written in Japanese. The font of the UI text is set to Arial at the moment. Change it to another font. 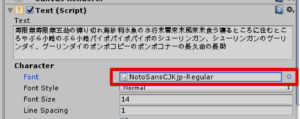 I used a free font, NotoSansCJKjp-Regular, this time.
Why do you need to change the font?
*Note by translator: Ignore this section assuming your default language is English. For your information, the original article was written in Japanese. Since the default font data in Unity doesn’t support Japanese. So you need to prepare the font data that supports Japanese.
Add a motion to the UI text
I explain how to add a motion to the UI text. 
Open the Animation window
Select ‘Windows > Animation’ in the top menu. 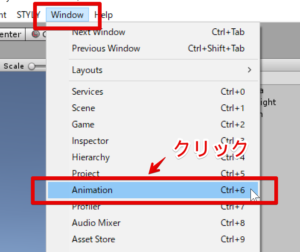 It brings up the Animation window.
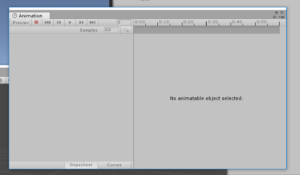
Create the Animation data
With ‘Denkou’ selected in the Hierarchy window, press the Create button in the Animation window. 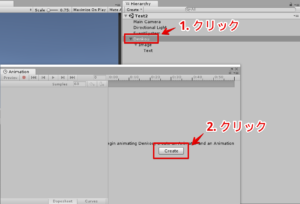 It displays the ‘Create new Animation’ window. Name it Denkou and save it.
 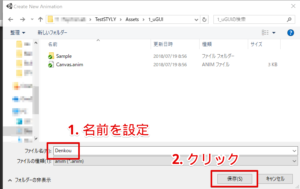 The data related to the animation has been created.
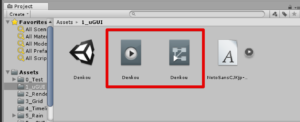
Activate the record mode
Press the red button in the Animation window to start the record mode. 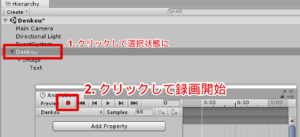 When recording, the timeline bar turns red.
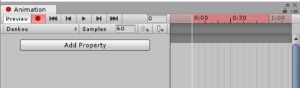
Record the position of UI Text
Add an animation so that the text moves to the left. In the recording mode, Right-click the ‘Pos X’ label of the UI text and select ‘Add Key’. 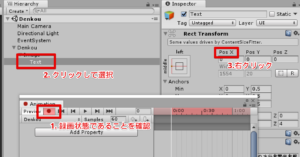
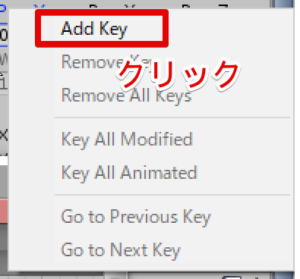 When you clicked ‘AddKey’, a key is added to the Animation window.
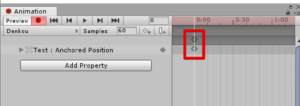
Move the UI text by animation
The setting of animation
Set ‘Samples’ to 600 and ‘Pos X’ to -10000. 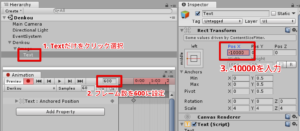 It moves the UI text from PosX=0 to PoX=-10000 in 600 frames.
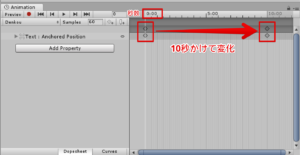
Check the animation
Press the Play button to check the animation. 
Straighten out the animation curve
The default animation curve is not linear
When adding a key to the animation, by default, the animation curve is not linear. 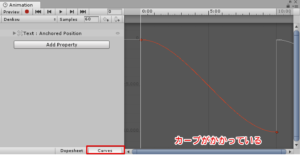 I want to make it linear this time.
Make the animation curve linear
With the two animation keys selected, select BothTangent > Linear. 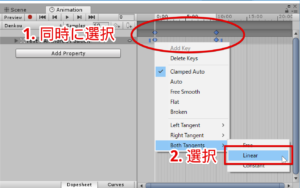 Now the curve became linear.
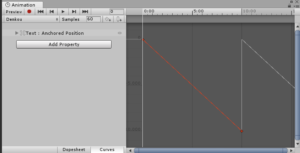
Clip the UI text
Finally, clip the UI text to hide the text outside the blackboard.  We clip the text by the UI image.
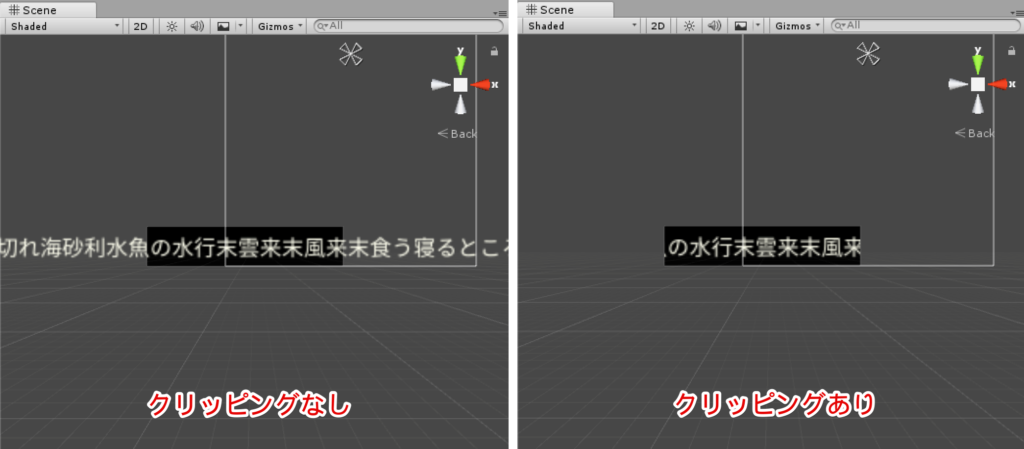
Select the UI Image and add Mask component
Click the UI Image to select. Then, click the ‘Add Component’ button. 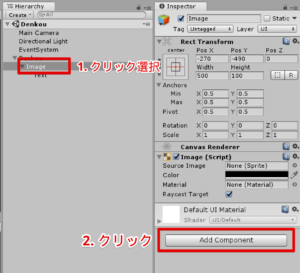 Search and select ‘Mask’.
 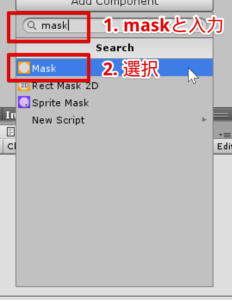 When you add a Mask component, it clips the UI text so that the text outside the blackboard is hidden.
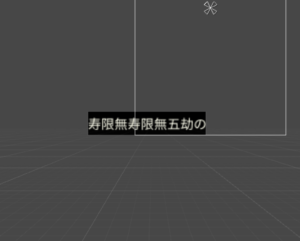
Play the animation. It completes your electric bulletin board.
Adjust the animation: Make the text come from the edge of the board.
At this state, when staring the animation loop, the text appears at once ‘unnaturally’ since it stars at X=0.  Adust the animation so that the text comes in from the edge of the blackboard.
Open the Animation window.
Click Windows > Animation in the top menu.
Modify the x value
With the playhead (a white vertical line) moved to 0:00, Set x to 1000. 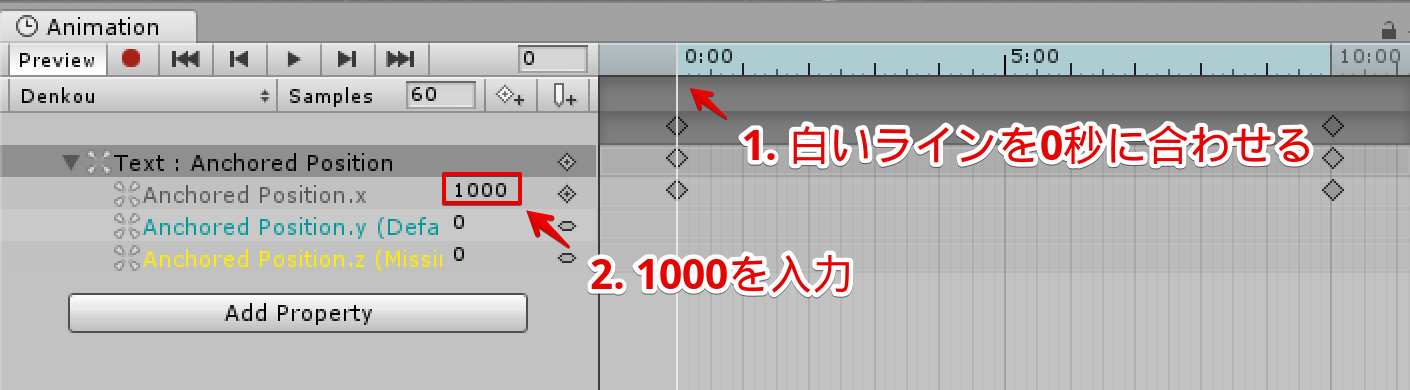
It’s finished!
Play the animation. You now see the text coming in from the edge of the blackboard. 
Upload it to STYLY
I explain how to the electric bulletin board created to STYLY.
Change the Layer for ‘Denkou’
As Denckou’s Layer is ‘UI’ at the moment. Change it to ‘Default’. Click the Layer drop-down list. 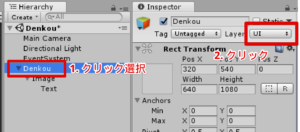 Select ‘Default’.
  It brings up a window. Press the ‘Yes Change Children’ button.
 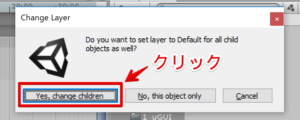 When uploading to STYLY, you need to change the layer of the assets to ‘Default’.
Make Prefab from UI
Drag ‘Denkou’ onto the Project window. 
It creates a Prefab. 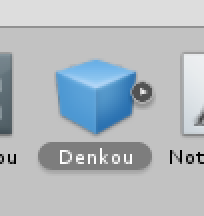
Upload Prefab to STYLY
Right-click the Prefab and select ‘STYLY > Upload Prefab to STYLY’ to start uploading. 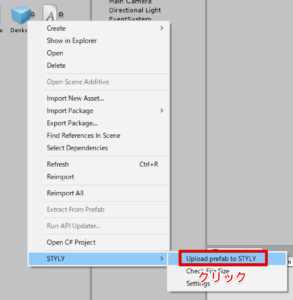 For large data like font data and etc., it takes a long time to upload. Please wait with patience. When the upload is completed, a window pops up with the message ‘Upload succeeded’ as shown below.
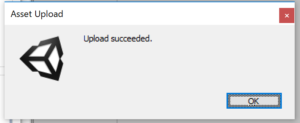
Check the data uploaded
Access to styly and open STYLY Editor. Select ‘Asset > 3D Models > My Models’. Now you can find ‘Denkou’ uploaded earlier in My Models. 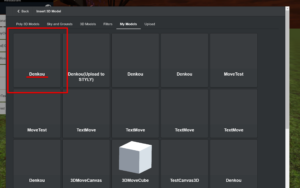 You can place ‘Denkou’ by selecting it.
  You can access the sample project at https://github.com/styly-dev/STYLY-Unity-Examples/tree/master/Assets/STYLY_Examples/Denkou