In this article, we will introduce how to convert an FBX humanoid avatar file into VRM!
Installing UniVRM
Open Unity. The conversion of FBX to VRM is done within Unity.
If you want to upload your model to STYLY, make sure to check the supported Unity version here:
STYLY Plugin for Unity DOWNLOAD
To handle VRM files in Unity, first, import UniVRM.
Download the latest .unitypackage from the following site:
https://github.com/vrm-c/UniVRM/releases
Opening the URL will bring up a page like the one below. Select the latest version.
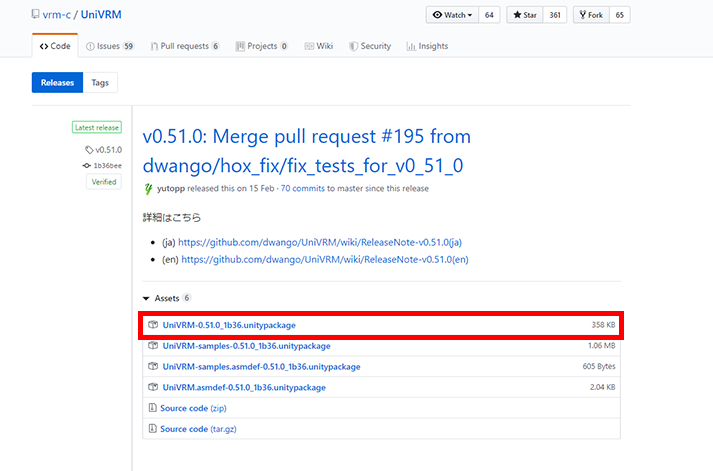
Downloading UniVRM
Once downloaded, open a new Unity project.
Double-click the UniVRM .unitypackage file to import it into Unity. A window will appear as shown below; click “All” and then “Import”.
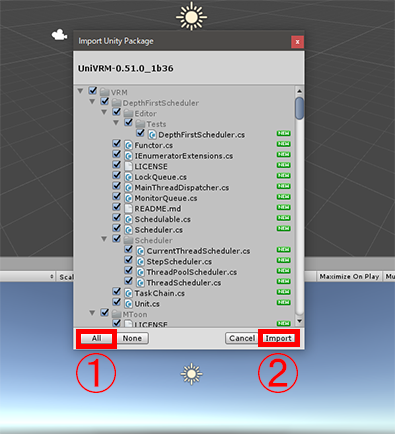
Importing UniVRM
Now you can handle VRM files in Unity!
Adjusting the Model Data
Bone Adjustments
Import the FBX model you want to convert to VRM into Unity. Be sure to include the texture files as well.
Drag and drop the files into the Assets folder in the Project window.
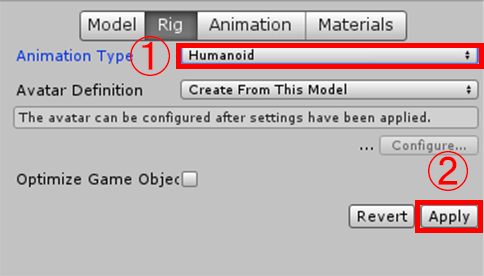
Select the imported model, go to the Inspector, navigate to the “Rig” tab, set “Animation Type” to “Humanoid”, and click “Apply”.
Selecting Humanoid
After clicking “Apply”, the “Configure…” button will become clickable. Click it to open another scene.
In this scene, check the bones. Red indicates errors; if no red is visible, click “Done” to return to the original scene.
If red errors appear, you need to fix them. The automatic bone recognition during FBX import may sometimes cause errors.

Checking Bones: Errors Detected
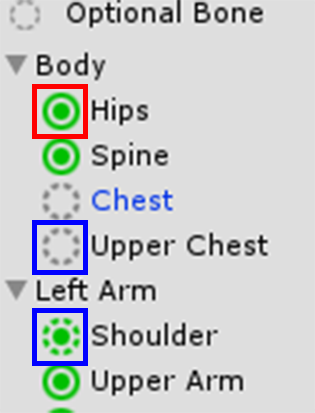
In the bone settings, bones with a solid circle (red) are essential, while those with a dotted circle (blue) are optional.
Essential and Optional Bones
If errors occur, use this as a reference.
Once the necessary adjustments are made, click “Apply” and then “Done”.
Setting Up Materials
Once the bones are properly configured, place the object in the scene.
Adjust the material shader settings.
The default materials assigned to the model do not allow shader changes, so create new materials and assign them.
To create a material, right-click in the Project Window, select “Create > Material”, and drag and drop it onto the model in the Scene view.
Assign textures in the red-marked area of the screenshot below.
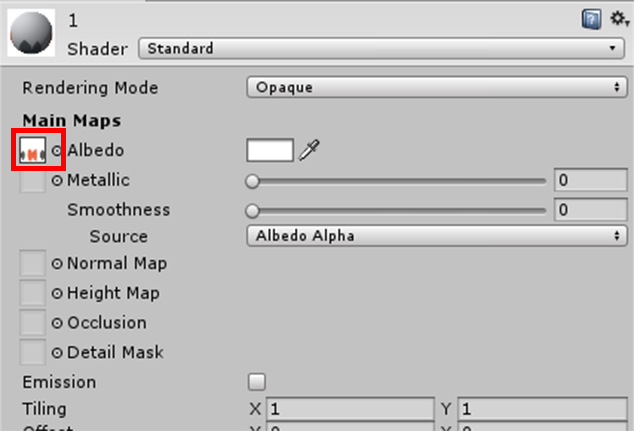
Assigning Textures
Select the newly created material, go to the Inspector, and change the Shader to one of the VRM options.
VRM officially recommends using either the “Standard” shader or one from the VRM category.
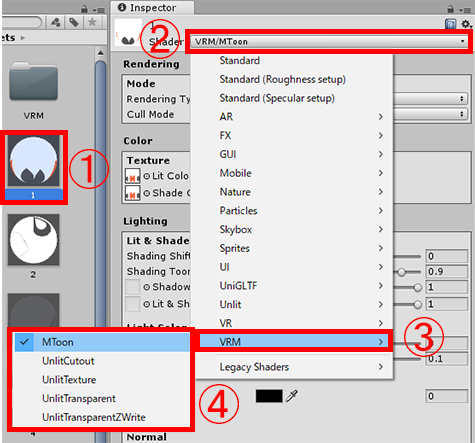
Changing Shader
In this case, the MToon shader was used. A common choice is “UnlitTexture”.
It is best to select multiple materials at once and modify them all together.
Exporting to VRM
Once everything is confirmed, select the object in the Hierarchy, then navigate to “VRM > UniVRM > Export humanoid” from the menu.
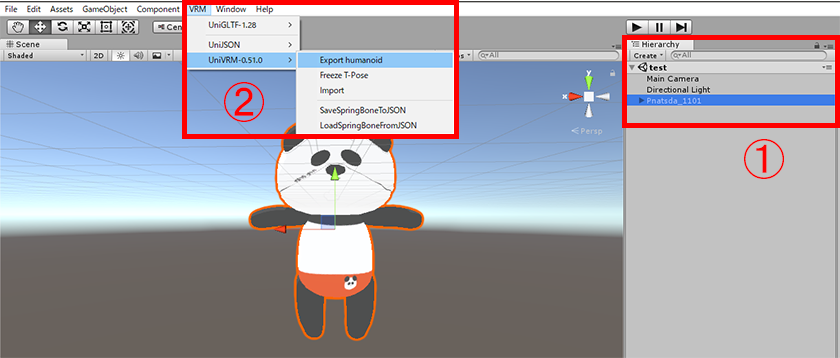
Exporting to VRM
Enter the author’s name in the “Author” field, check all boxes, and click “Export”.
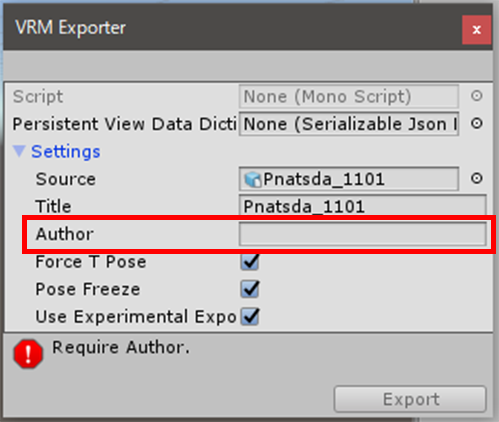
Entering Author Information
After export, the VRM prefab and additional folders will be created in the Assets directory.
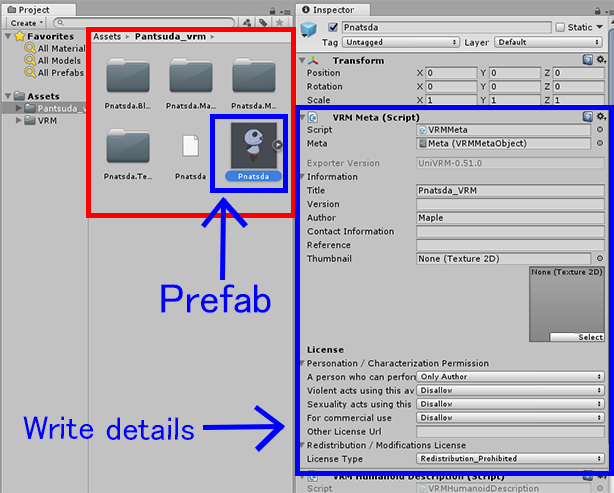
VRM Settings
Uploading to STYLY
If you want to upload your converted avatar to STYLY, follow these steps.
Download and import the STYLY Unity plugin:
![[Unity] Convert Humanoid FBX File into VRM](https://styly.cc/wp-content/uploads/2019/05/8-1-160x160.png)
Enter your email and API key.
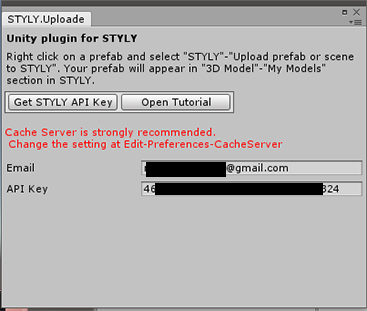
Setting API Key
Drag the VRM object in the Hierarchy to the Assets folder to create a prefab.
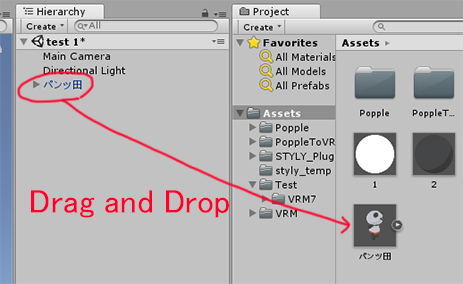
Creating Prefab
Right-click the prefab and select “STYLY > Upload Prefab or Scene to STYLY”.
Uploading to STYLY
After uploading, your model will be available in STYLY under “Assets > 3D Models > My Models”.