Introduction
This series is created for beginners with little to no experience in modeling. We will go over the basics of Blender, create a simple 3D model, and upload it to STYLY.
In the Previous Article
In the previous article, we learned how to model with basic techniques in Blender.
![[Blender for Beginners] Let’s Start Modeling Part 3 – Adding Materials](https://styly.cc/wp-content/uploads/2018/09/46.png)
We also went over how to color the model with materials.
What We Will Create
Having learned how to give material a solid color, we will now learn how to add patterns or texture to the surface.
One way to do this is with image textures. In this article, we will explain how to apply textures to a material.
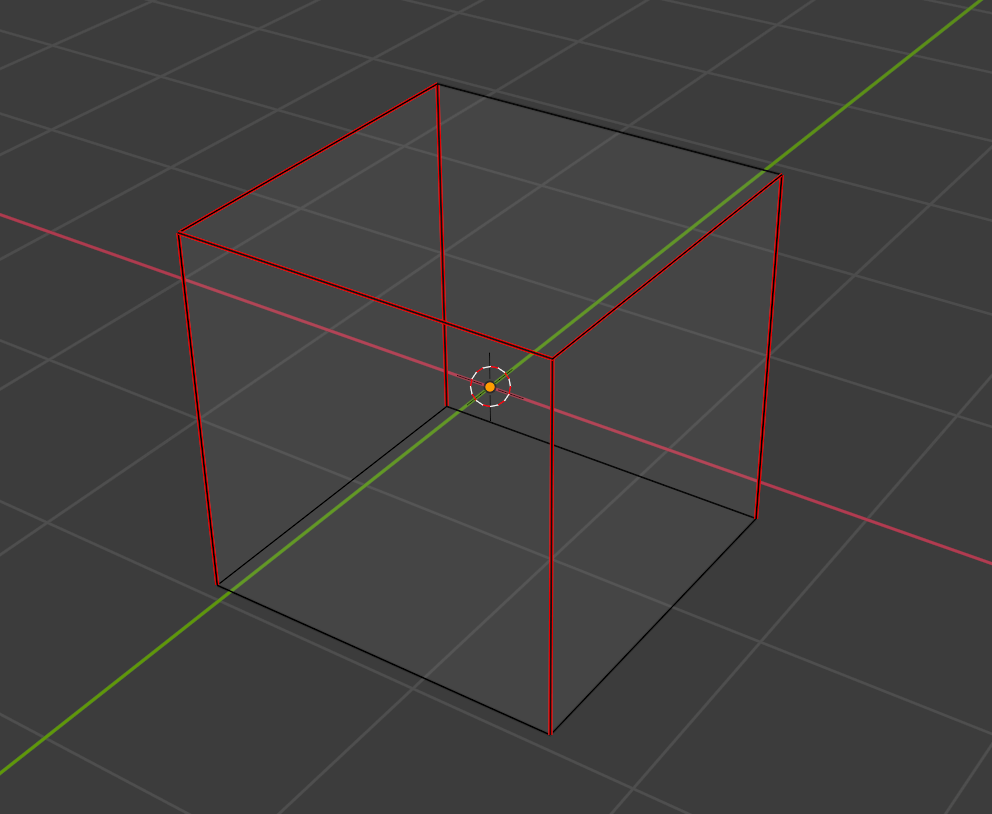
The finished result will be something like this – a texture applied to the default cube:
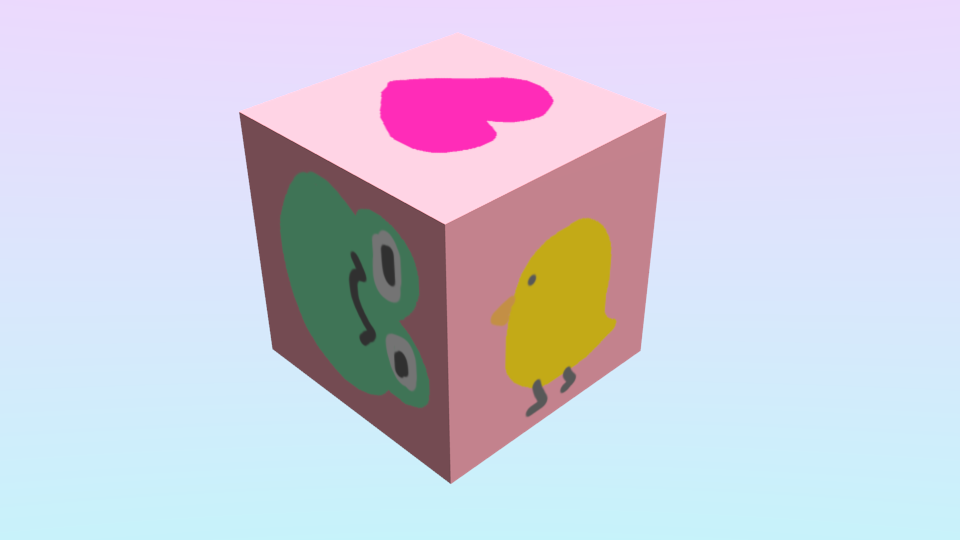
The Finished Render
UV Unwrapping
In order to apply an image texture to a model, the model must be “unfolded” and flattened, like drawing a picture on the net view of a cube and pasting it onto an object.
This process is called UV Unwrapping.
To UV unwrap your object, first click on the UV Editing tab at the top of the screen to switch workspaces.
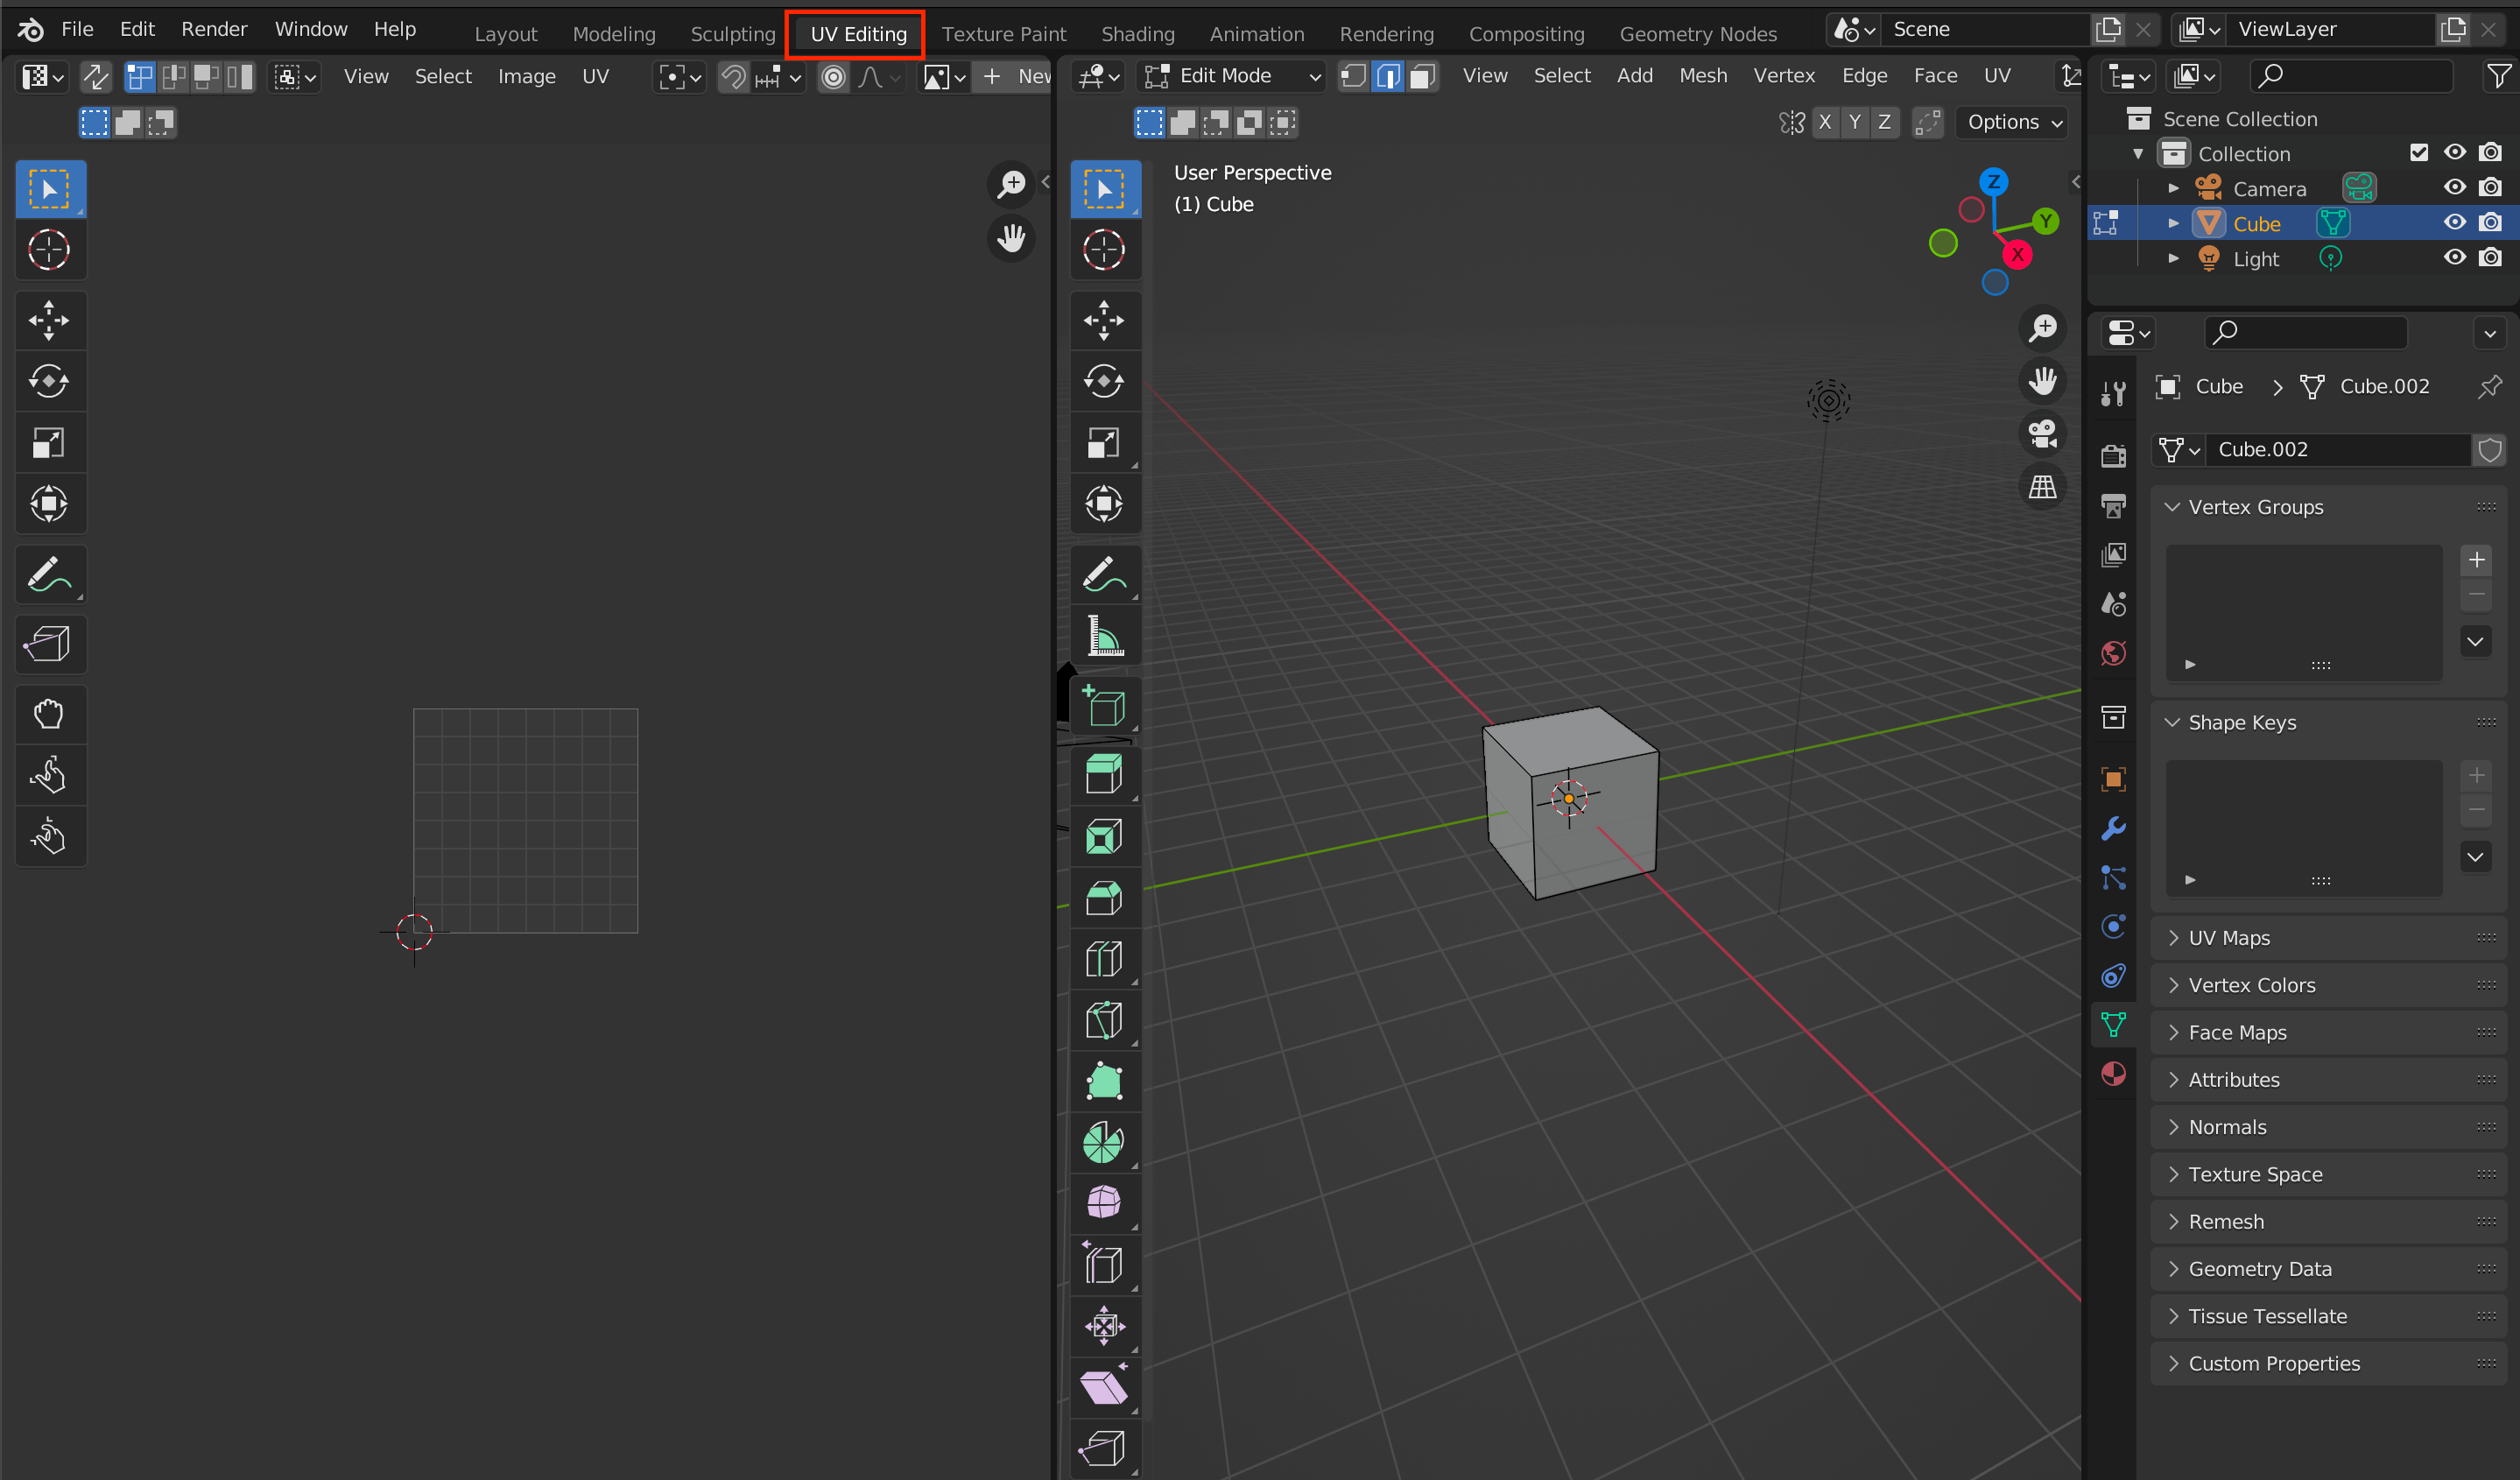
UV Editing
Click on the arrows button in the upper-left corner of the screen to activate UV Sync Selection.
The UV map on the left will be synced with the model on the right.
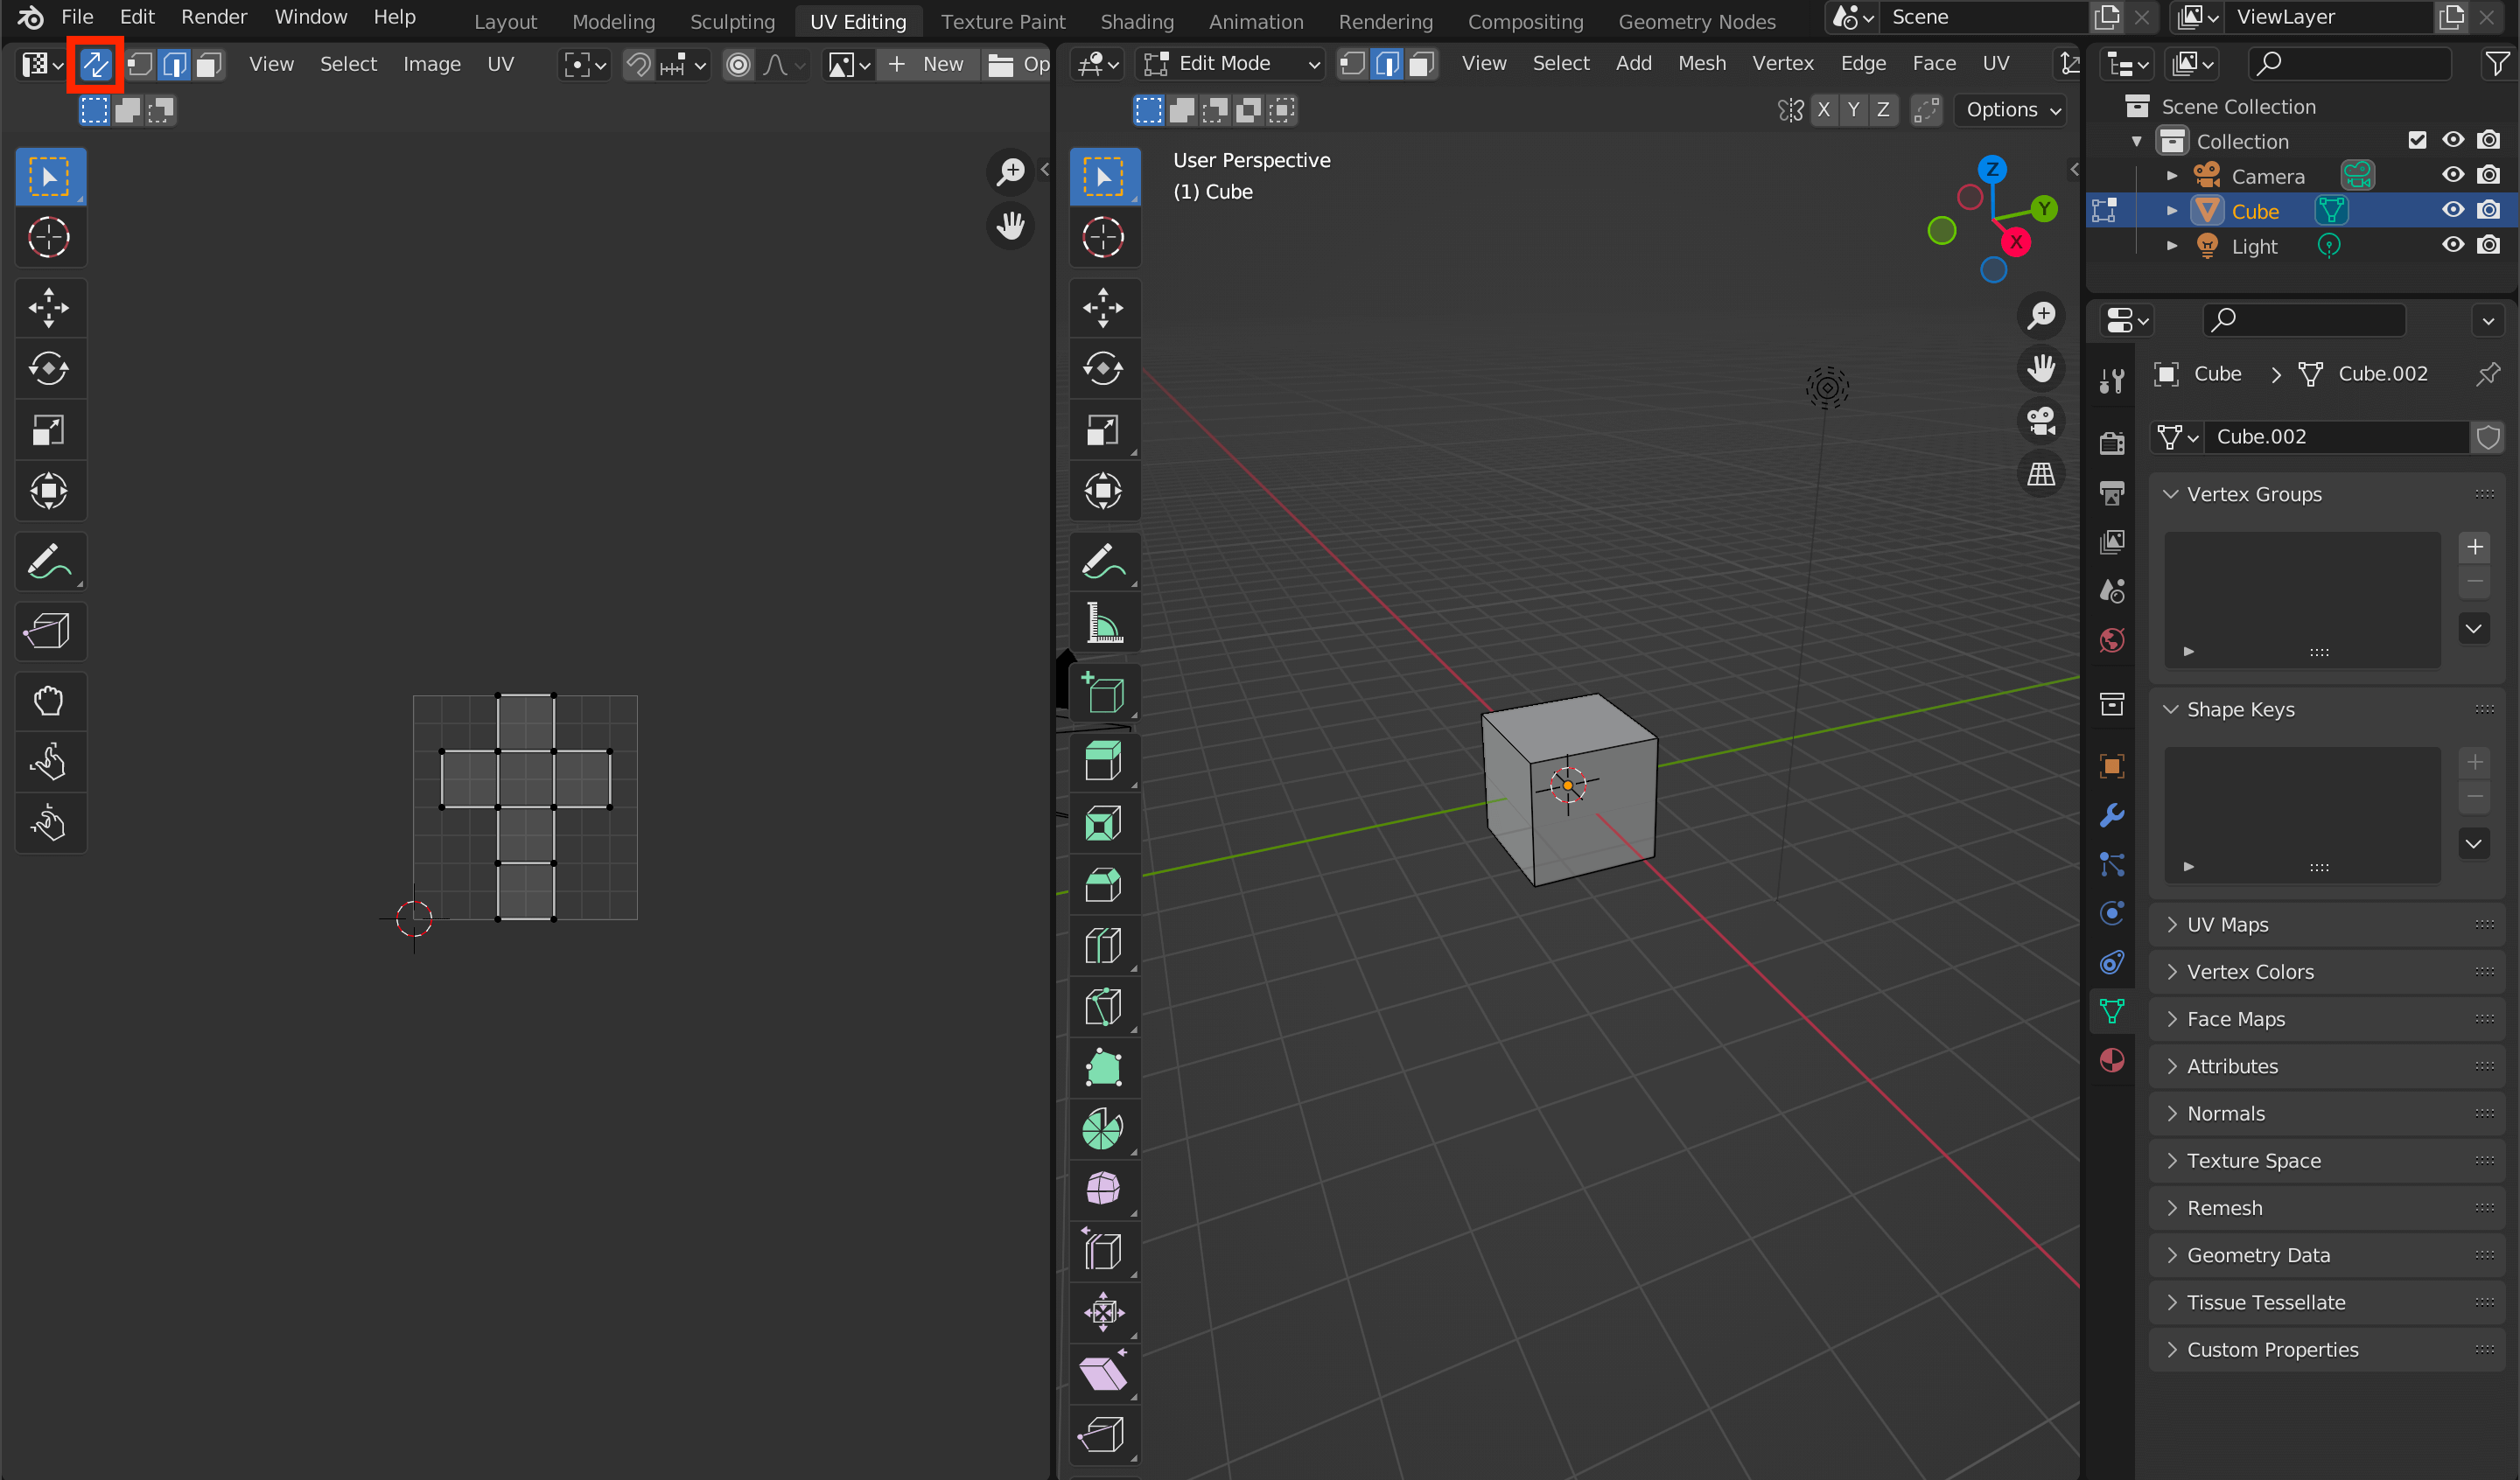
UV Sync Selection
There are many ways to unwrap the UV, but we will explain the two main methods – manual and automatic.
Manual UV Unwrapping
To manually unwrap the UV, the first step is to mark the seams on your object.
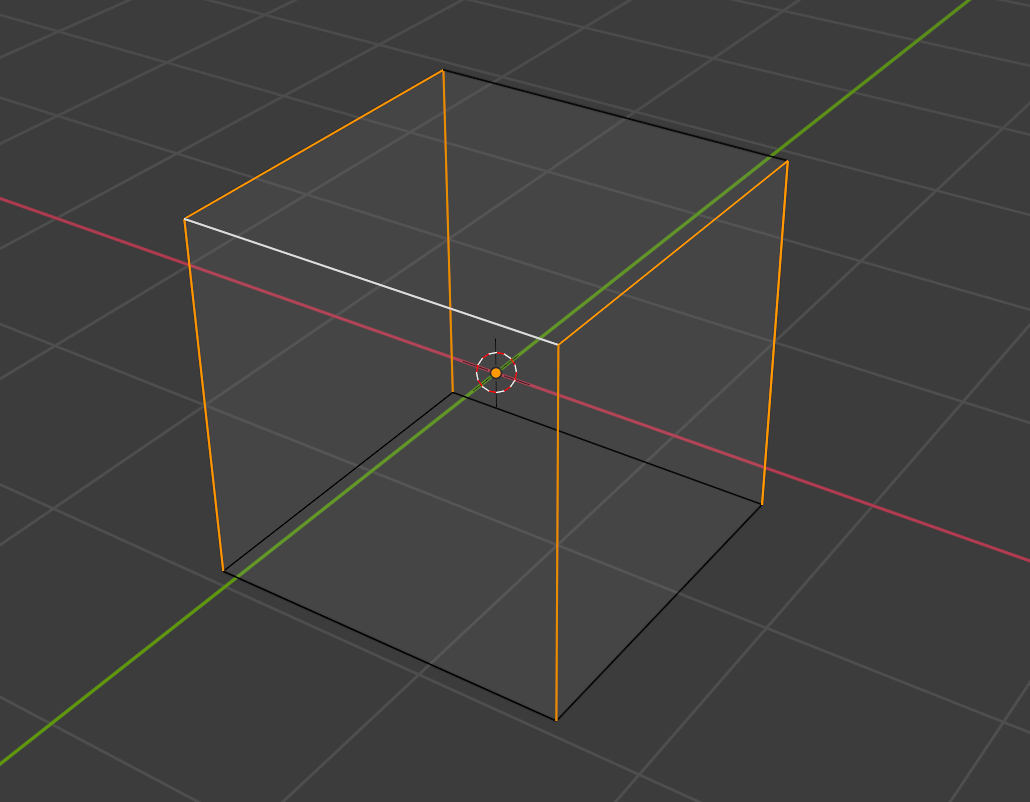
You can already see all edges in the left area, but you can also switch the right area to Wireframe View for better visibility.
You can switch the display modes by pressing [Z] while hovering over the right area.

Switching to Wireframe Mode
Imagine what you’d like the outcome to be and select the edges where you want to mark the seams.
Selecting edges where you would like to mark seams
Once you have selected the edges, press [Ctrl]+[E] and select Mark Seam.
This is similar to Mark Sharp, so make sure to select Seam.
The edges marked as seams will turn red.
Marked Seams
You also can add additional seams by selecting more edges and performing Mark Seam again.
Once the seams are marked, select the entire mesh by pressing [A] and then pressing [U] > Unwrap.

UV Editor
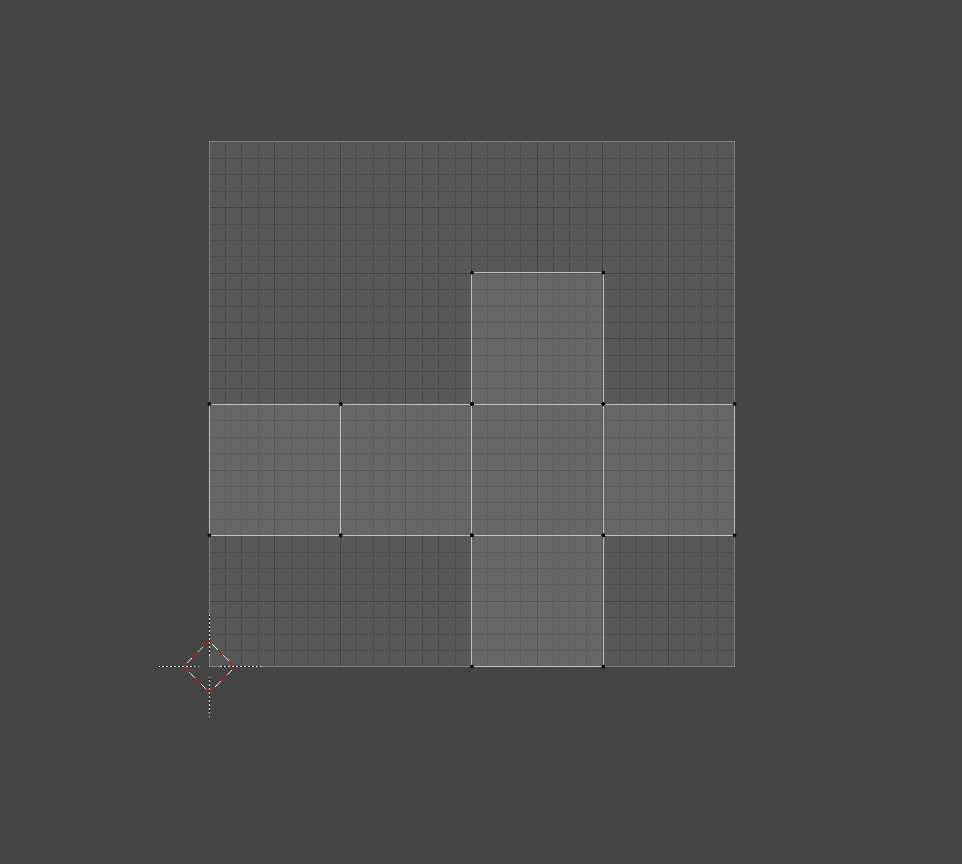
UV Map
Smart UV Project
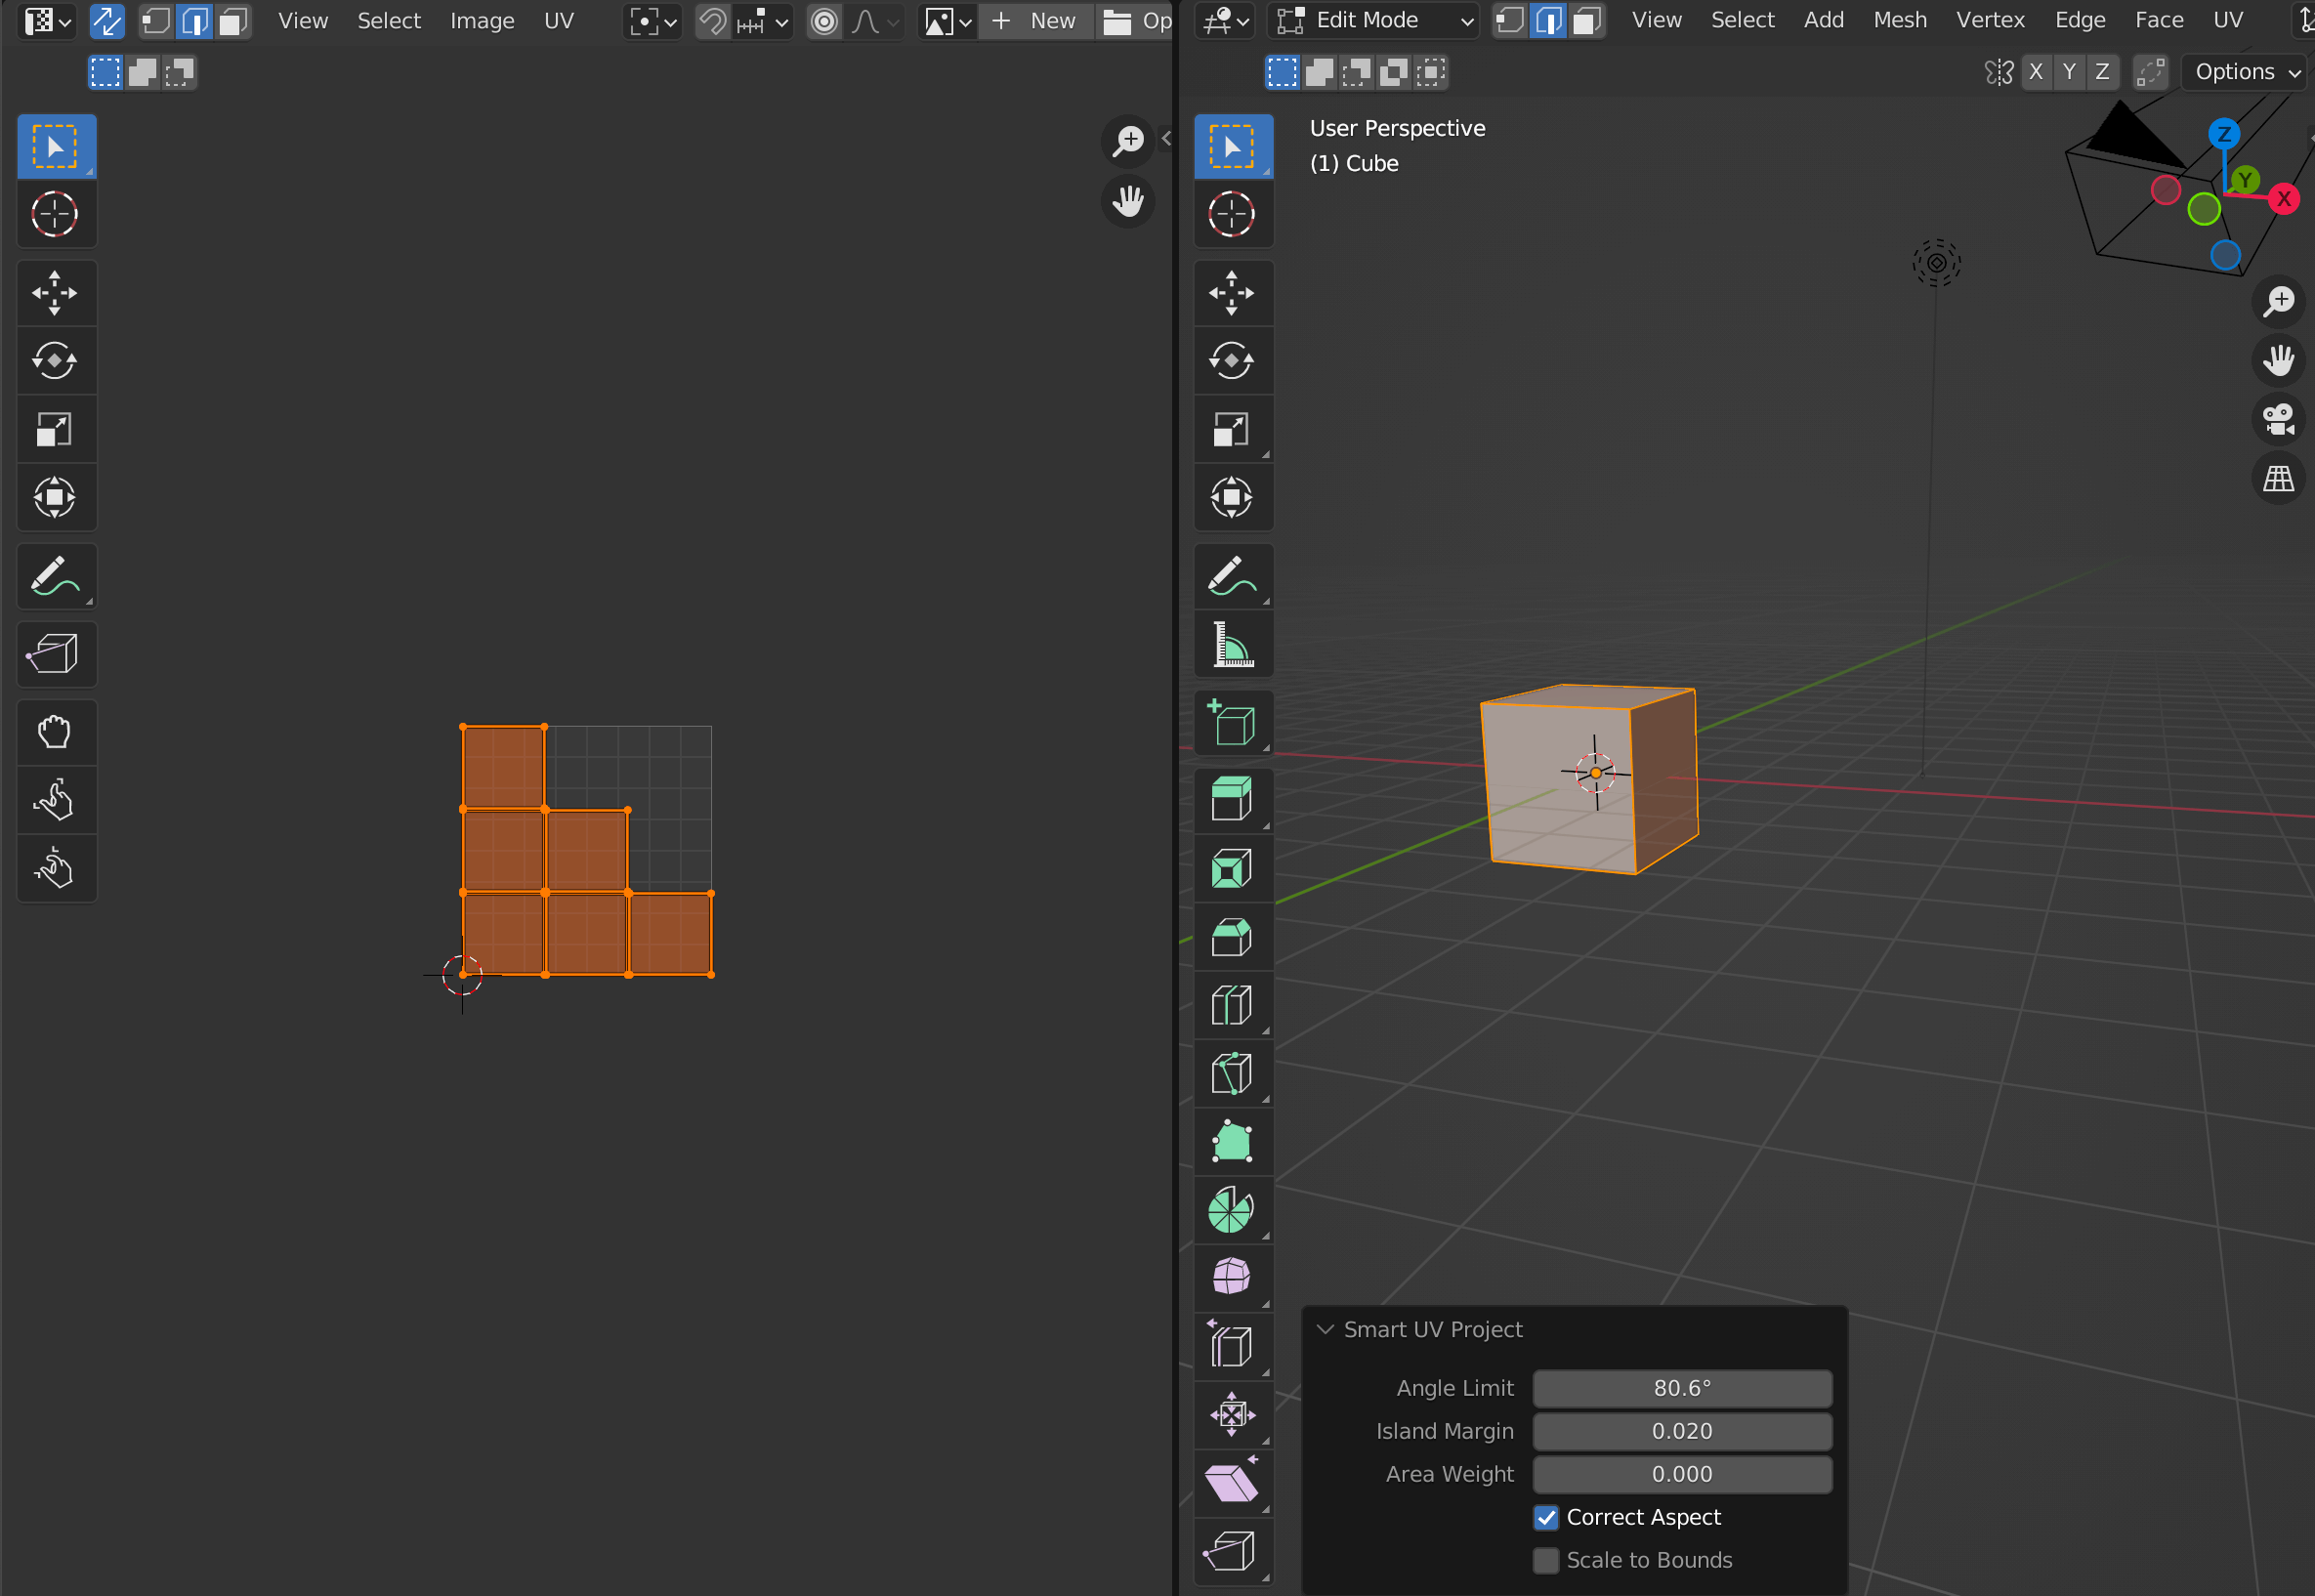
To automatically UV unwrap your object, we will use a feature called Smart UV Project.
Press [A] to select all vertices and then select Smart UV Project from the UV menu in the upper-right corner.
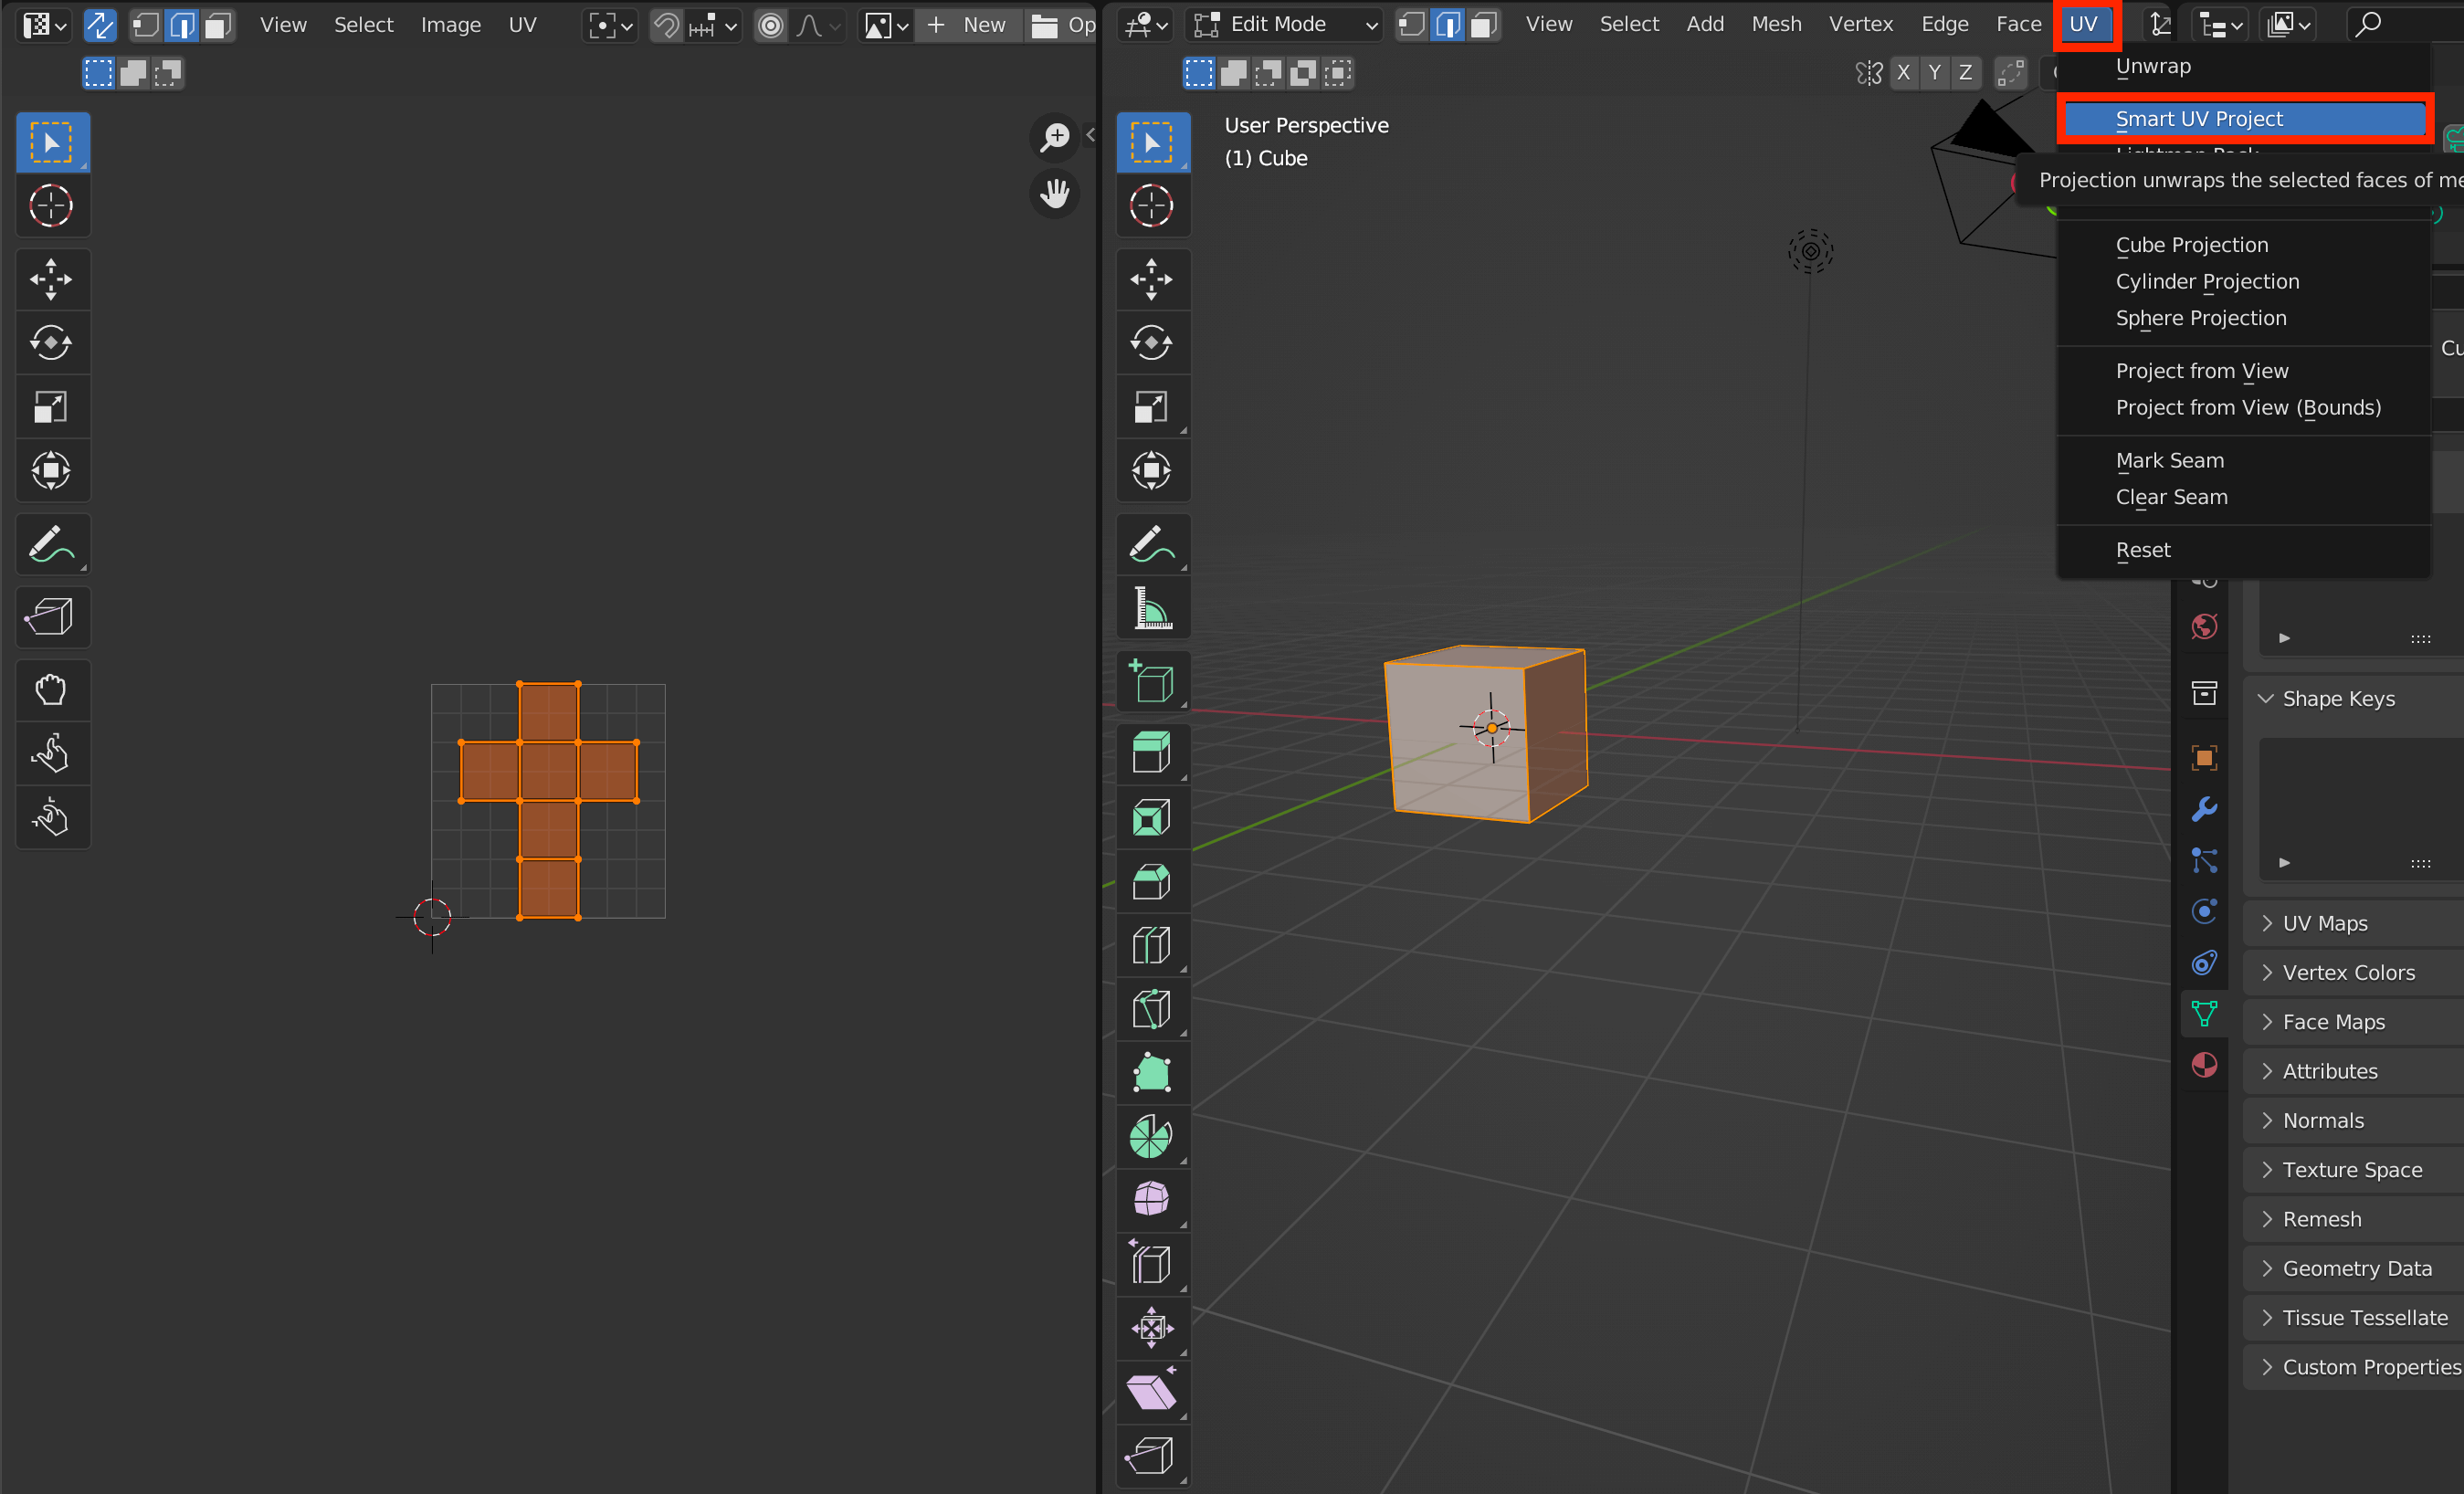
Smart UV Project
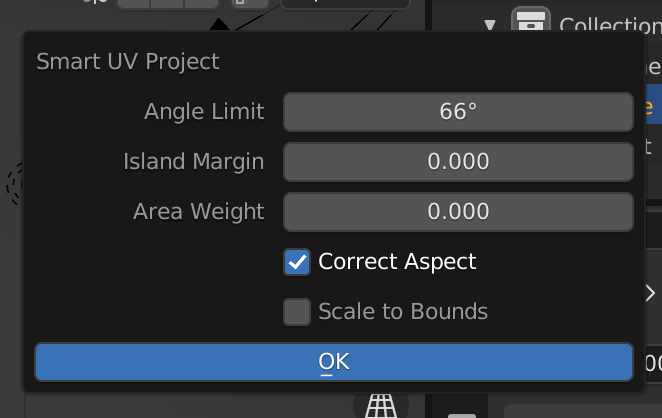
A configuration window will appear where you can configure elements such as the Angle Limit and Island Margins. In most cases, it will be fine with the default values.
To generate the UV map, click OK.
Smart UV Project
| Angle Limit | This controls how faces are grouped: a higher limit will lead to many small groups but less distortion, while a lower limit will create fewer groups at the expense of greater distortion. |
| Island Margin | This controls how closely the UV islands are packed together. |
| Area Weight | This controls the weight projection’s vector by faces with larger areas. |
| Correct Aspect | Map UVs will take an image’s aspect ratio into consideration and distort the mapping to appear correct. |
| Scale to Bounds | This scales the UV map to fit inside the bounds. |
You can also make modifications from the bottom-right side of the screen after UV unwrapping your model.
Smart UV Project
Drawing onto the UV Map and Applying it to your Model
There are two ways to paint a texture onto object:
- Use the built-in Texture Paint feature
- Export the UV map and paint a texture in an external application
Please choose one method according to the functions you wish to use.
Texture Painting in Blender
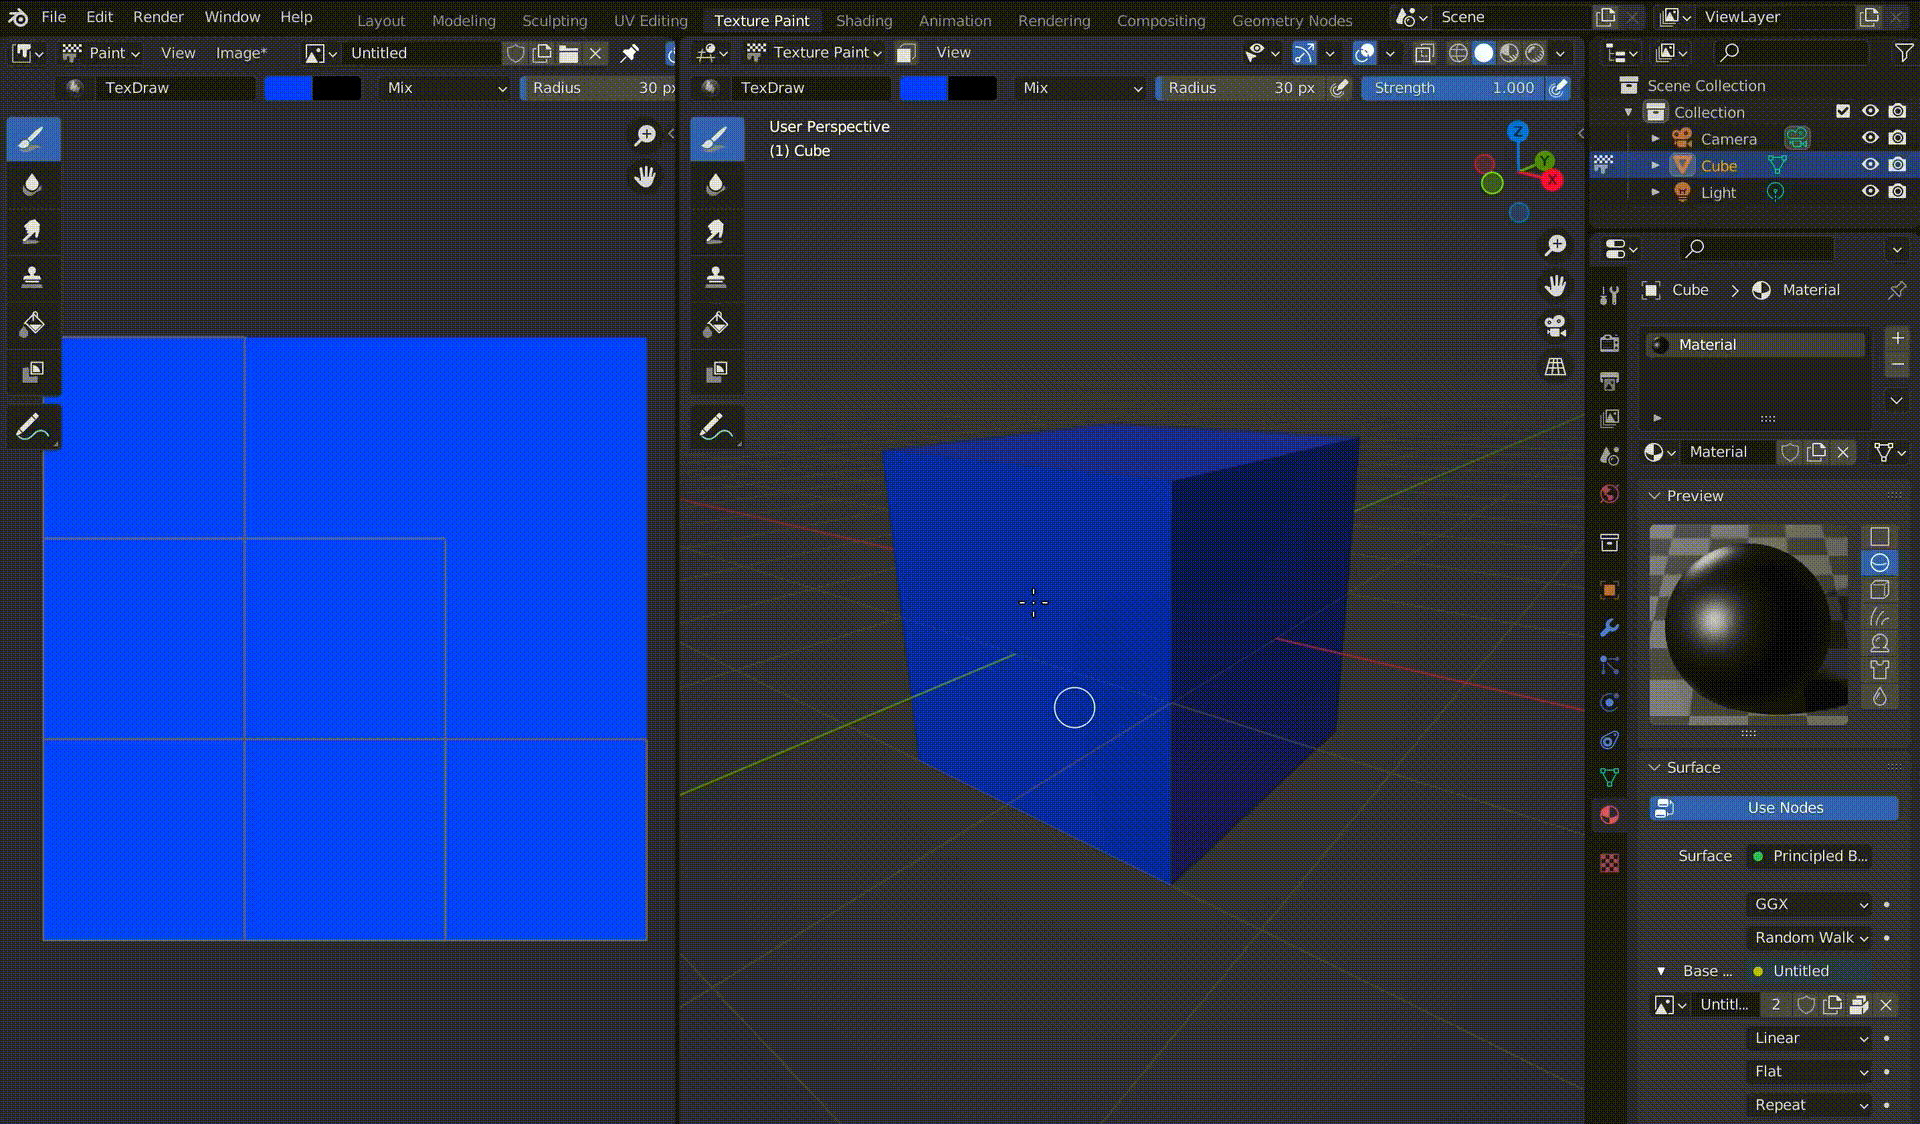
To texture paint in Blender, switch to the Texture Paint workspace.
The screen will look like this:

Texture Paint Workspace
By default, there is no texture assigned to the cube.
Let’s create a new texture from the top of the screen by clicking the +New button.

+New button for creating a new image texture
If you want to modify the settings, you may do it here.
Because this is our first time texture painting, we will click OK and use the default settings.
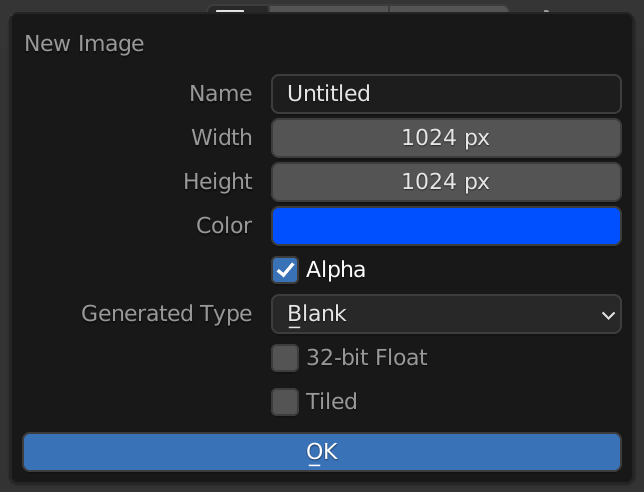
New Image
| Name | Name of the texture |
| Width(ピクセル) | Width of the texture in pixels |
| Height(ピクセル) | Height of the texture in pixels |
| Color | Background color of the texture |
| Alpha | If you want to use alpha, check here |
| Generated Type:Blank | Generates a blank texture |
| Generated Type:UV Grid | Generates a UV grid (a black-and-white checkered texture) |
| Generated Type:Color Grid | Generates a color grid (a rainbow grid with numbers) |
| 32-bit Float | Makes the texture a 32-bit image (the file will become larger due to the number of colors) |
| Tiled | Generates a tiled texture |
After this, follow the steps below to set up your texture painting workspace.
- Change from Viewpoint Shading to Solid Mode (the second-left white circle icon in the upper right corner).
- Make sure the material settings are set to Use Nodes, and if this button is not blue, click to enable it.
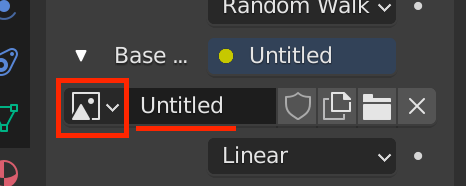
- Set the base texture. Click the yellow circle below to open the list and select Image Texture.

Texture Paint

Image Texture
4. Click on the photo icon to select Untitled, which is the new texture created in step 3.
Untitled
Now we are ready to start texture painting!
Just select the color and thickness of the brush from the top menu and draw directly onto the object.
The brush strokes should automatically synchronize with the image texture on the left screen.
Paint
To save the texture, select Image > Save at the top-left corner of the area.

Save
After selecting the desired destination,
- Enter a file name,
- Select an extension from the pulldown,
- and click Save As Image to save the file.
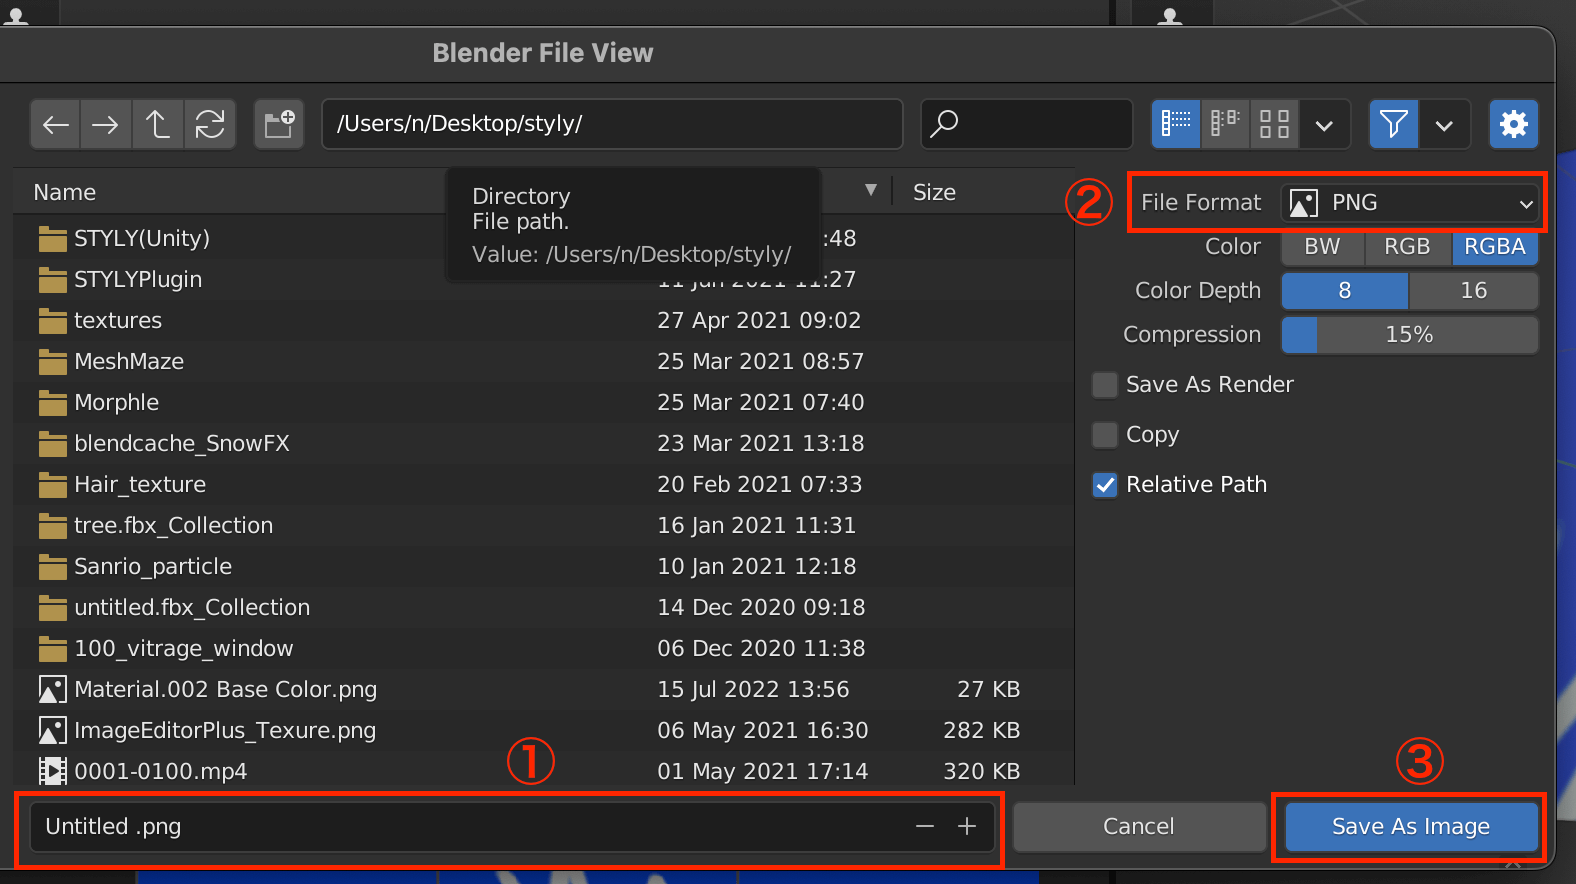
Save As Image
Creating Textures in Illustrator or Photoshop
To use an external application to paint a texture, we will first save the UV map as an image and export it.
Select UV > Export UV Layout from the menu above and save the PNG image to your preferred location.
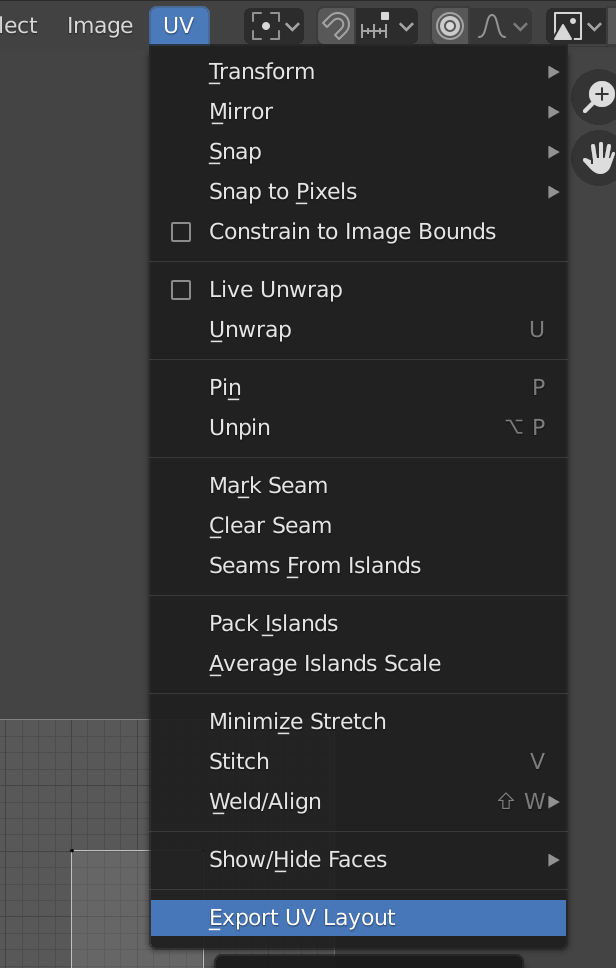
Export UV Layout
Then, open the file in an image editor such as Illustrator or Photoshop.
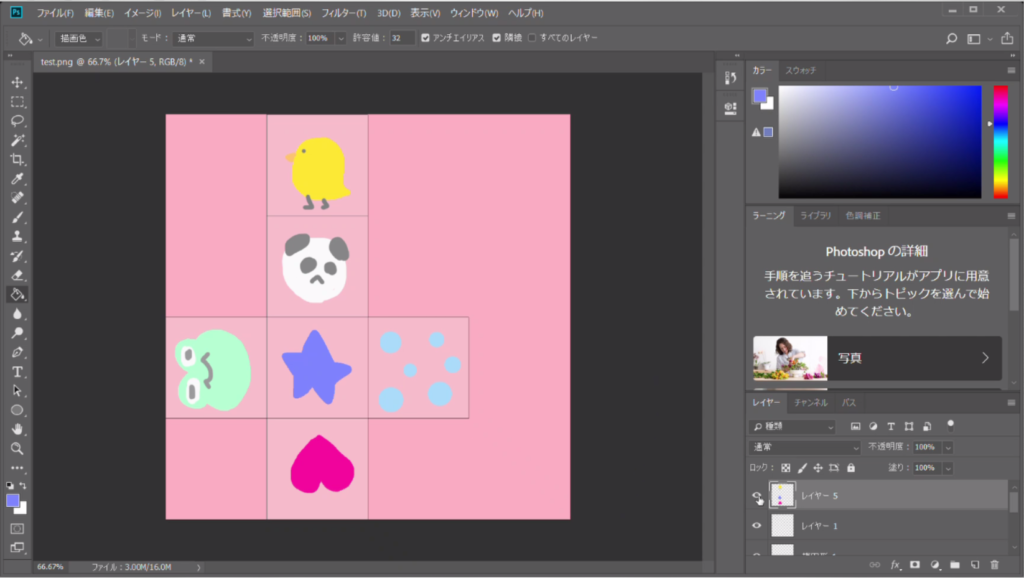
Painting your Texture
Keep in mind that if you save the image like above, the lines of the UV map will be saved to the image as well and will therefore be visible on your model. Make sure to hide the UV map layer before exporting to a JPG or PNG.
If you’re planning to export your model in OBJ format to upload it to STYLY, this texture must be in JPG format. Otherwise, formats like PNG will also work for Blender.
Export the image texture in the suitable format, and let’s go back to Blender.
First, assign a material to the cube. If you don’t know how to do this, please refer to the previous article where we explain how to add materials to your object. After you’ve done this, and with all the vertices selected, select Image > Open… from the top menu bar.
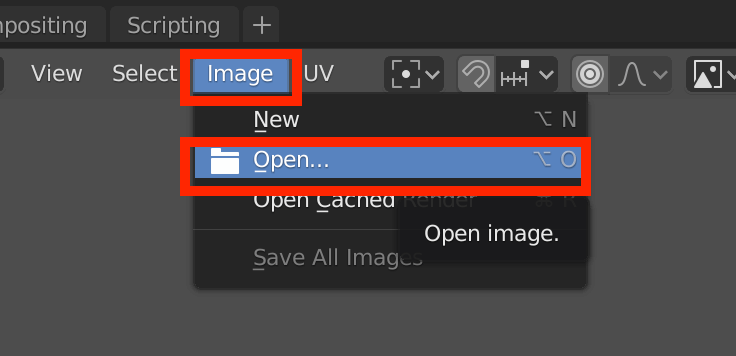
Select the image you drew in Illustrator/Photoshop.
Importing the image we painted in Photoshop
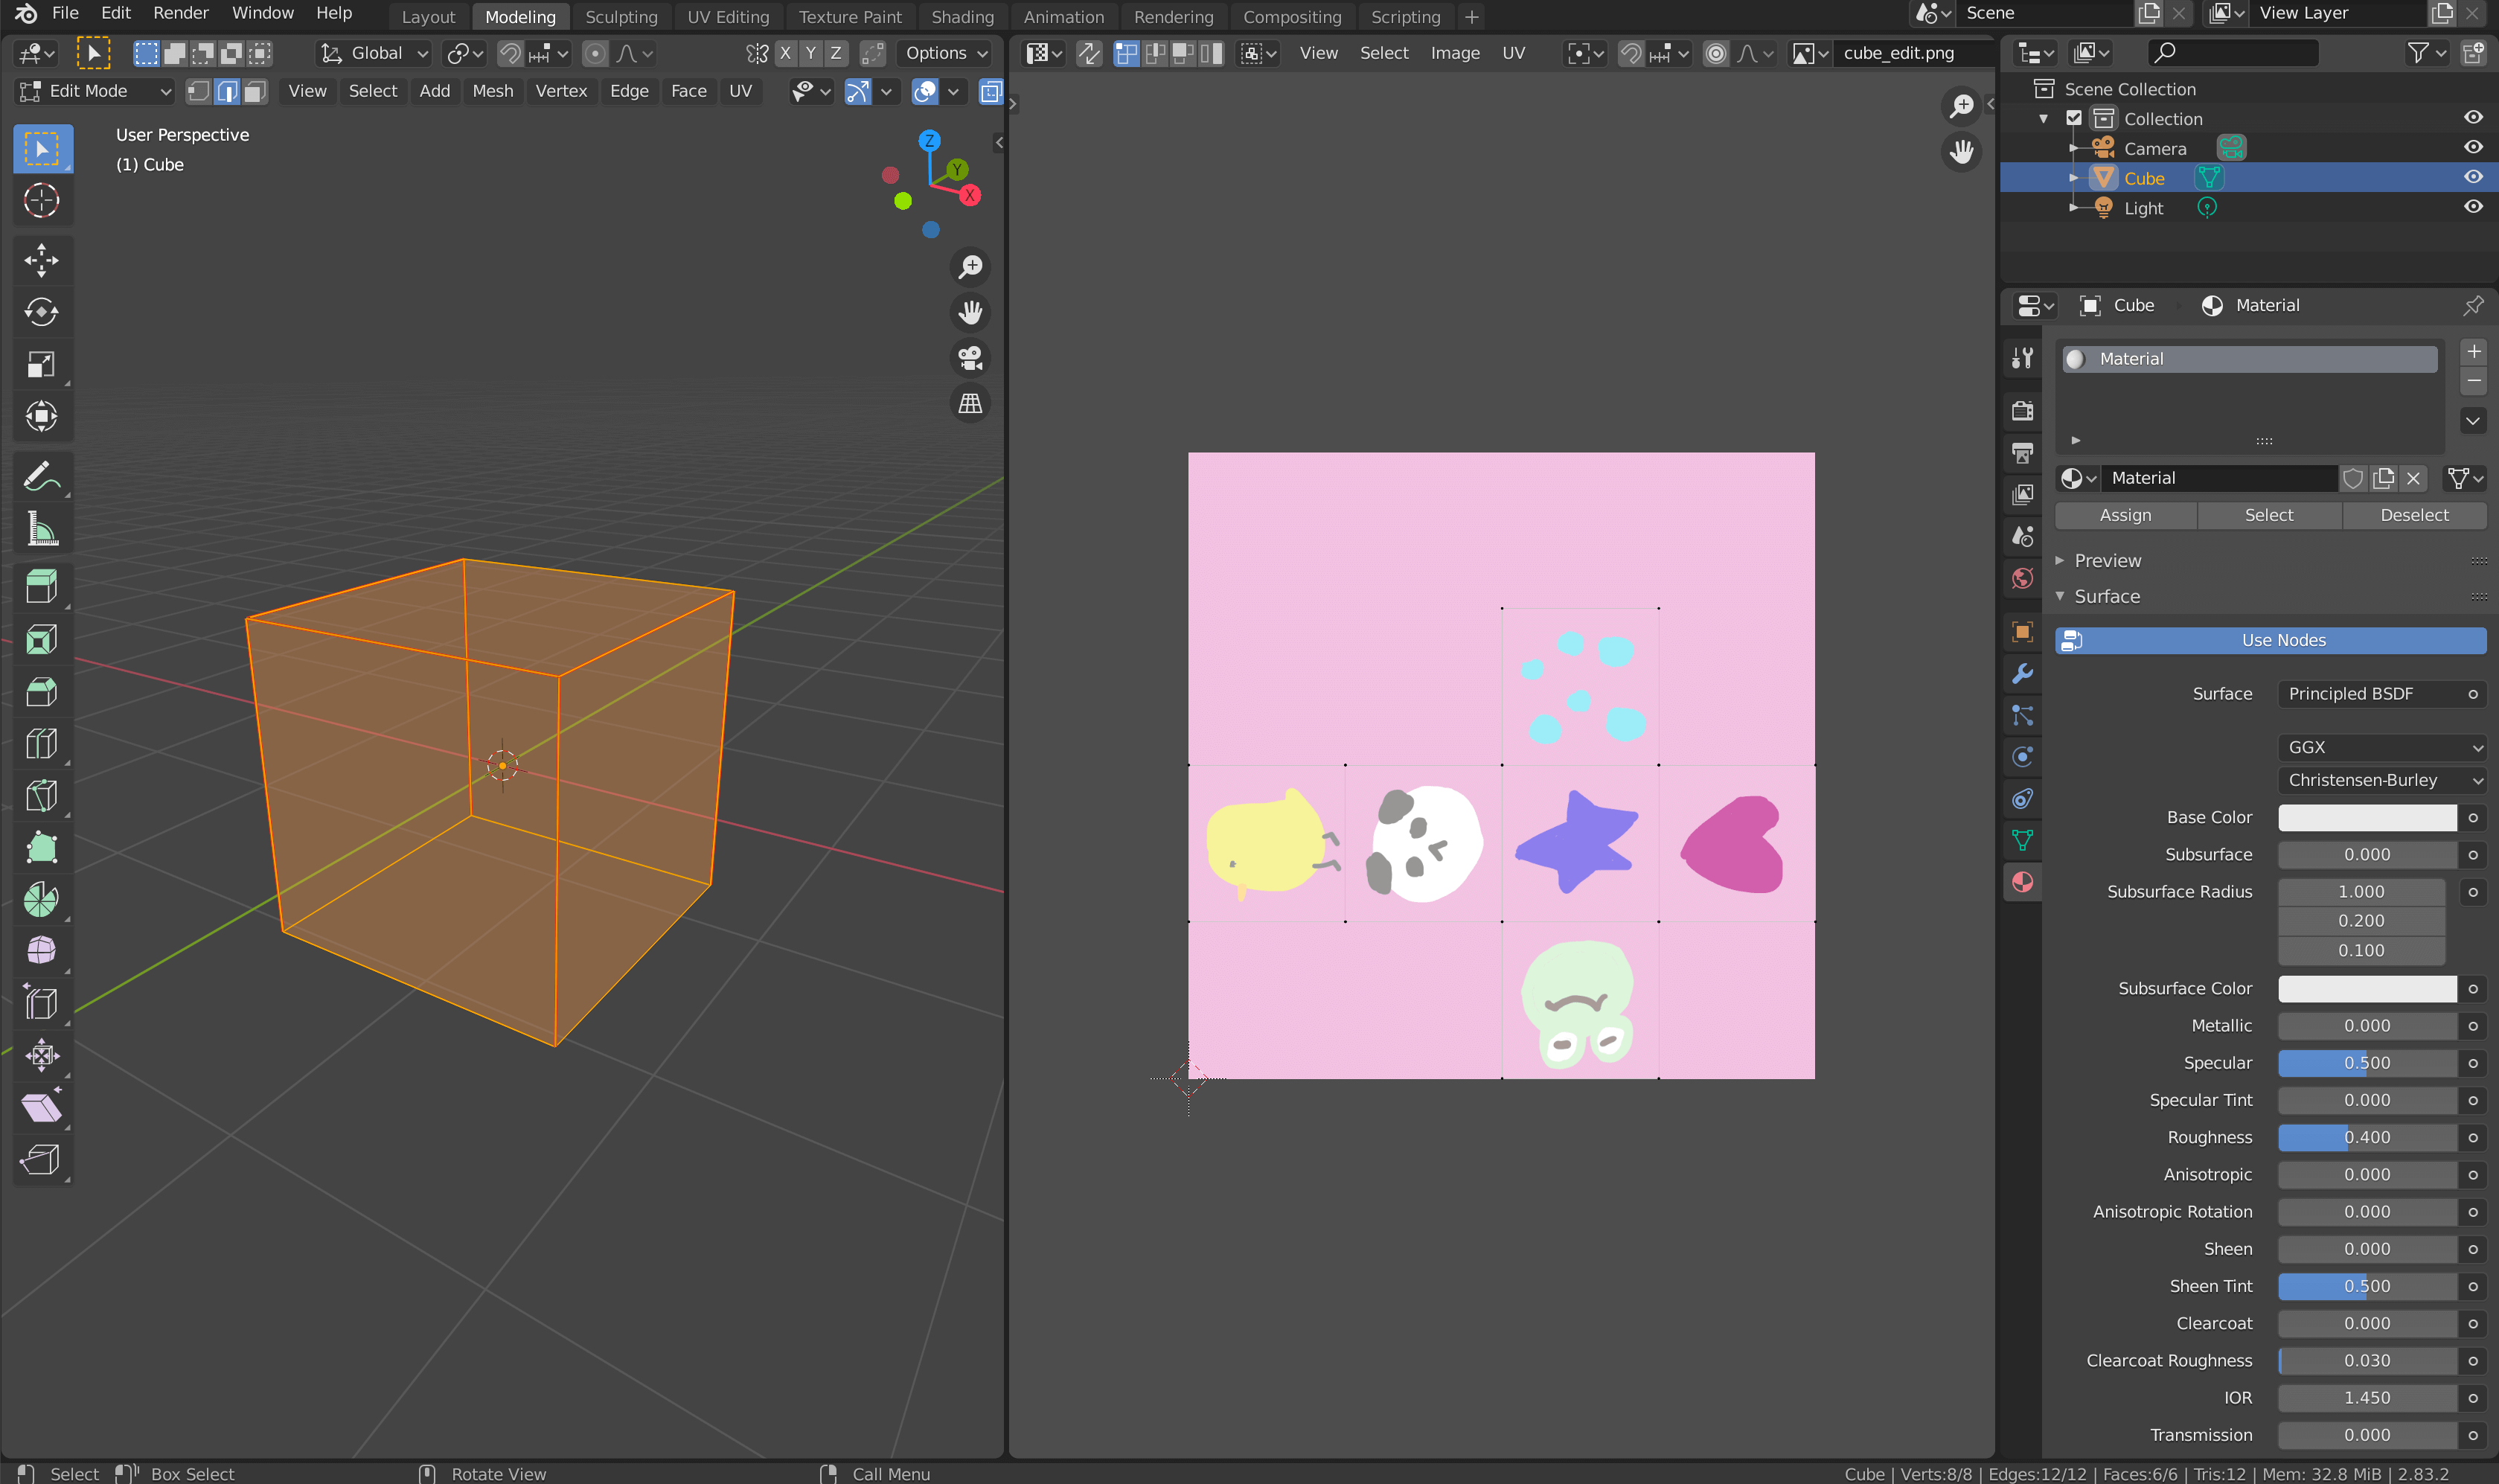
Right now, the texture is not assigned to the left cube.
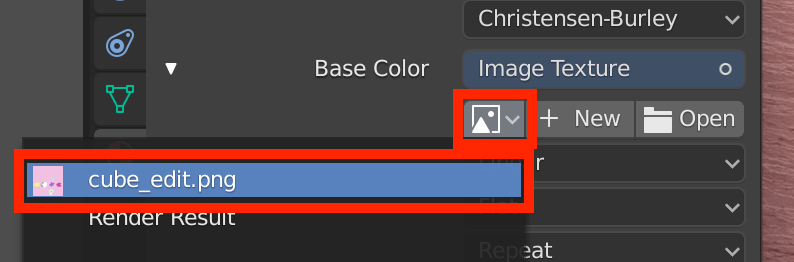
To do this, go to the Materials tab, click the circle button under Base Color, and select Image Texture.

With this, a button for selecting image textures will appear. Click on the picture icon beside + New and select the file that you created.
Switch the Viewport display to Rendered or Material Preview to check if the texture has been applied to the cube.
![[Z]キーでRenderedに切り替え](https://styly.cc/wp-content/uploads/2018/11/Screen-Shot-2020-09-19-at-16.52.48.png)
Press [Z] to switch to Rendered View.
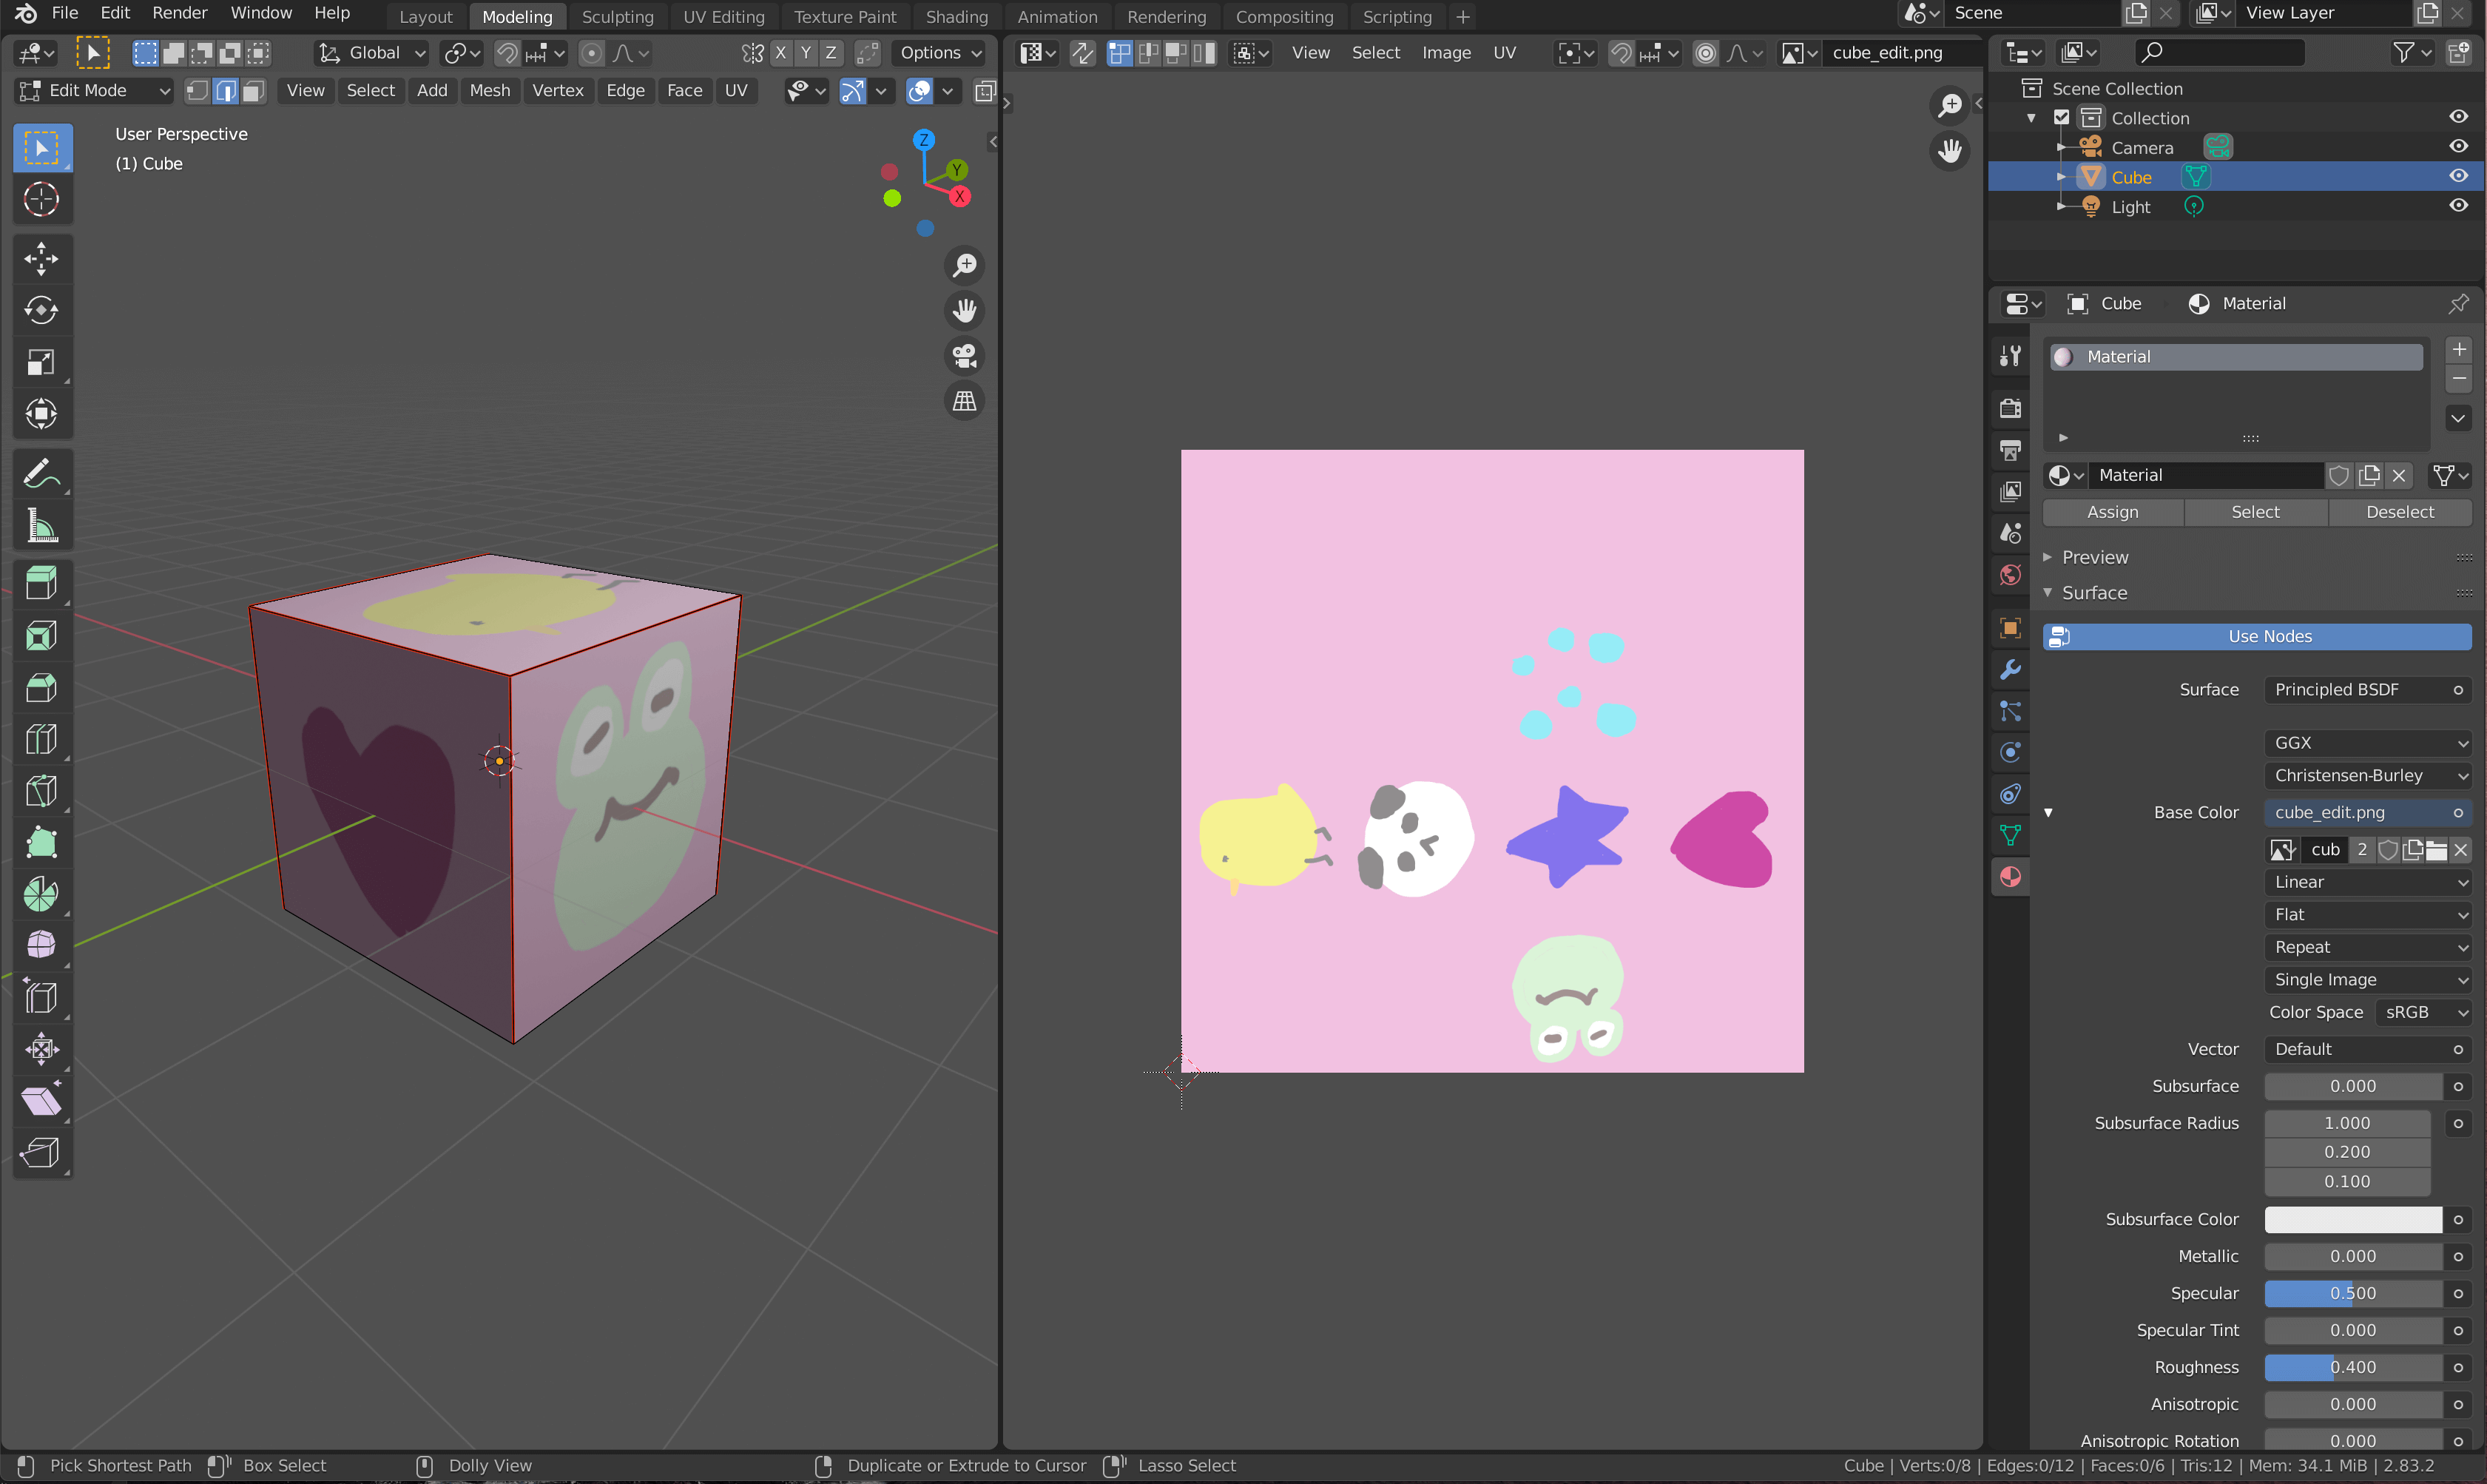
Your texture has been applied to the cube.
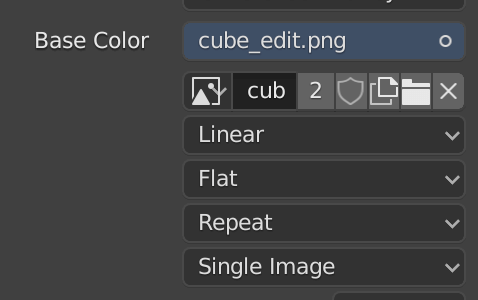
If your texture does not show up properly, check if your Base Color settings are the same as below:
We have successfully applied an image texture to the cube!
If you created your texture in another image editing software, simply save over the image and click Reload in Blender to bring it up to date.
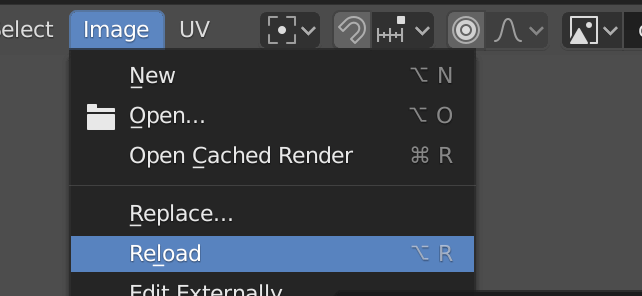
Reload Image
That’s all for this article. We hope you now understand the basic methods for painting and applying textures.
In this article, we applied a texture to the default cube, but this process can be more difficult as the objects become more complex.
When texturing a humanoid model, we recommend using seams to divide the model into different parts (such as the face, body, or hands).
UV mapping is a difficult process but a very important one as it is almost always necessary in modeling.
We recommend practicing UV unwrapping by creating many different objects.
Importing the Model to STYLY
Export the Model
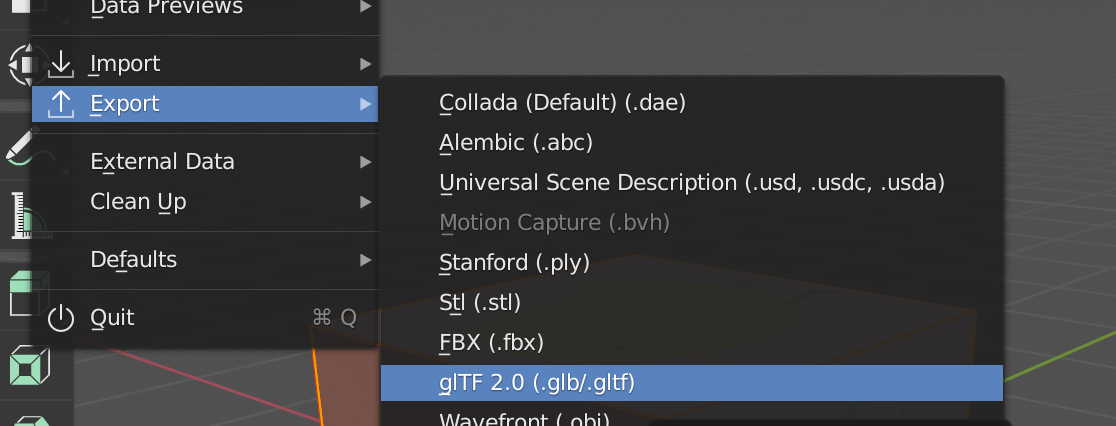
Now let’s export our model and upload it to STYLY.
With the cube object selected, select File > Export > glTF2.0(.glb/.gltf) from the top menu to export.
モデルをエクスポート
Upload to STYLY
Let’s upload your model to STYLY.
Create a STYLY account:

How to upload to STYLY:

How to upload from Unity to STYLY:

And it’s uploaded!
Preview the demo scene here:
Vocabulary and Shortcut Keys to Remember from this Article
Vocabulary
- UV Unwrap: The output/process of flattening an object to a UV map in order to give it a texture.
- UV Editor: The editor screen where you can view/edit the map.
Shortcut Keys
- [Ctrl]+[E] > Mark Seam: Make seams in the mesh to UV unwrap.
- [A]: Select all.
- [U] > Unwrap: Unwrap after marking seams.
Read the next article here:
![[Blender for Beginners] Let’s start Modeling Part 5 – Adding Bones Manually](https://styly.cc/wp-content/uploads/2018/12/8-1.png)
For questions about STYLY, bug reports, and improvement requests, please contact the STYLY FORUM
https://en.forum.styly.cc/support/discussions
Certified (QA) by Shota Shawn Yoshizawa
Edited by SASAnishiki
Translated by cpnnn