Introduction
This series is created for beginners with little to no experience in modeling. We will go over the basics of Blender, create a simple 3D model, and upload it to STYLY.
In the Previous Article
This article is continued from Part 2, where we made the base model of a duck potty.
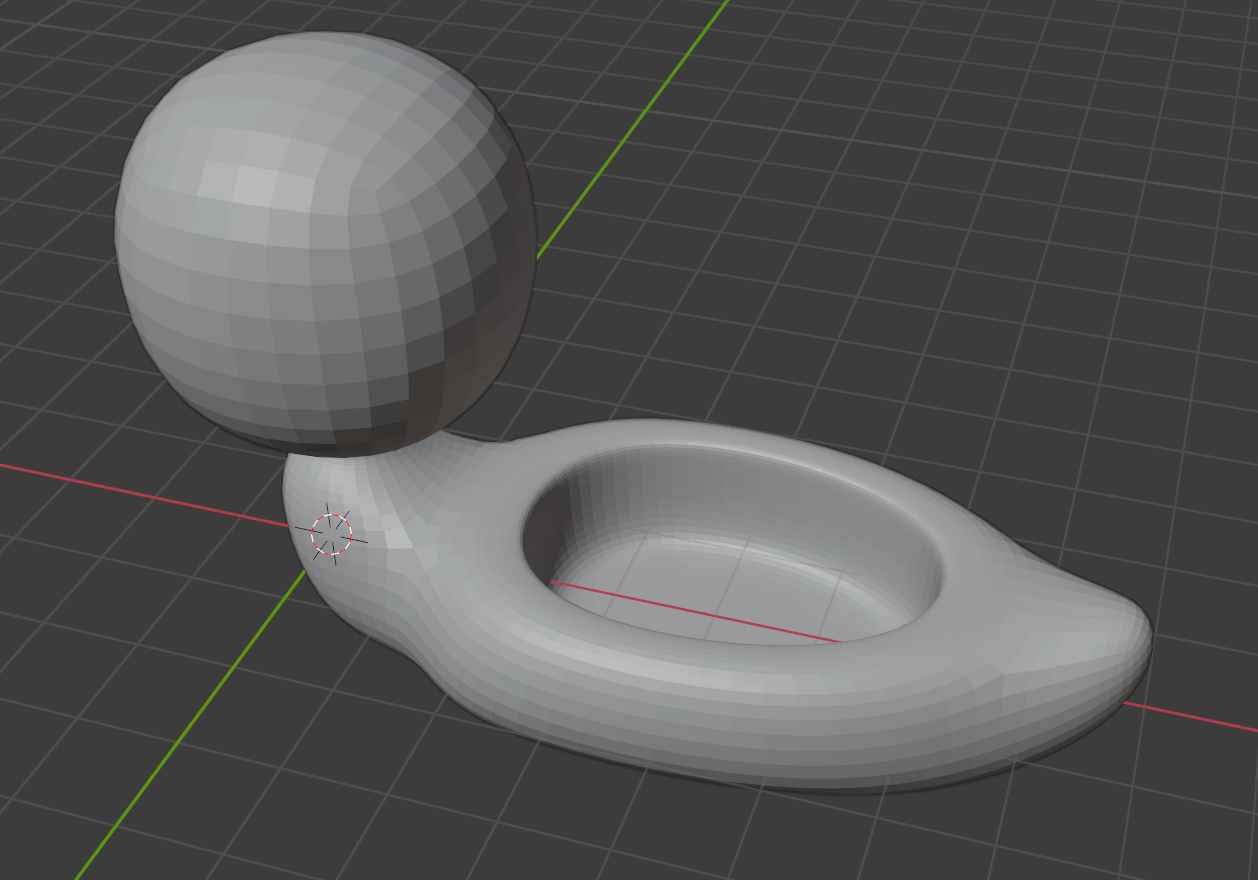
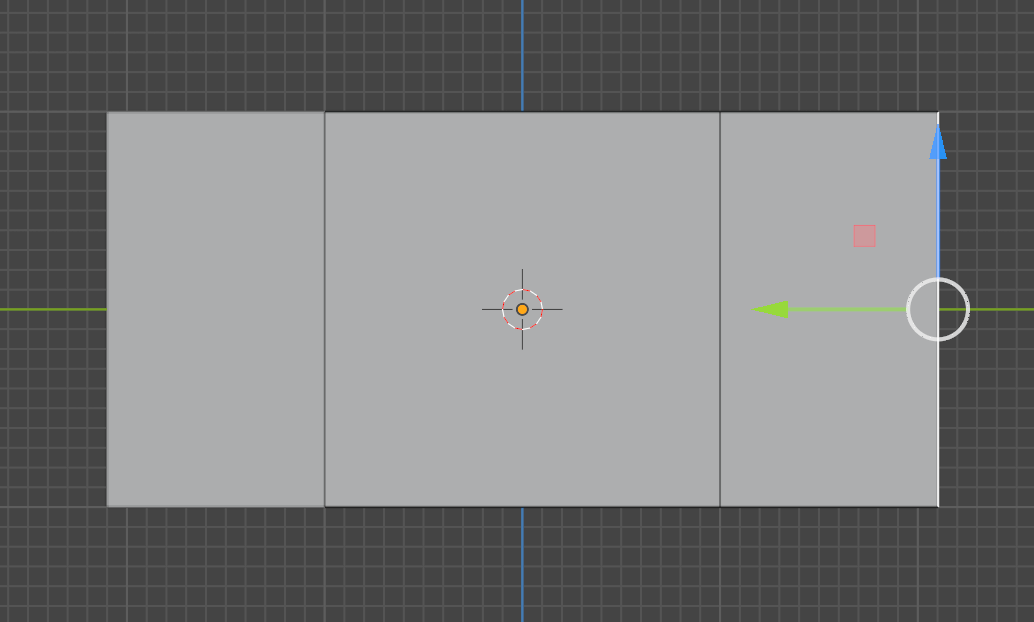
Where We Finished in Part 2
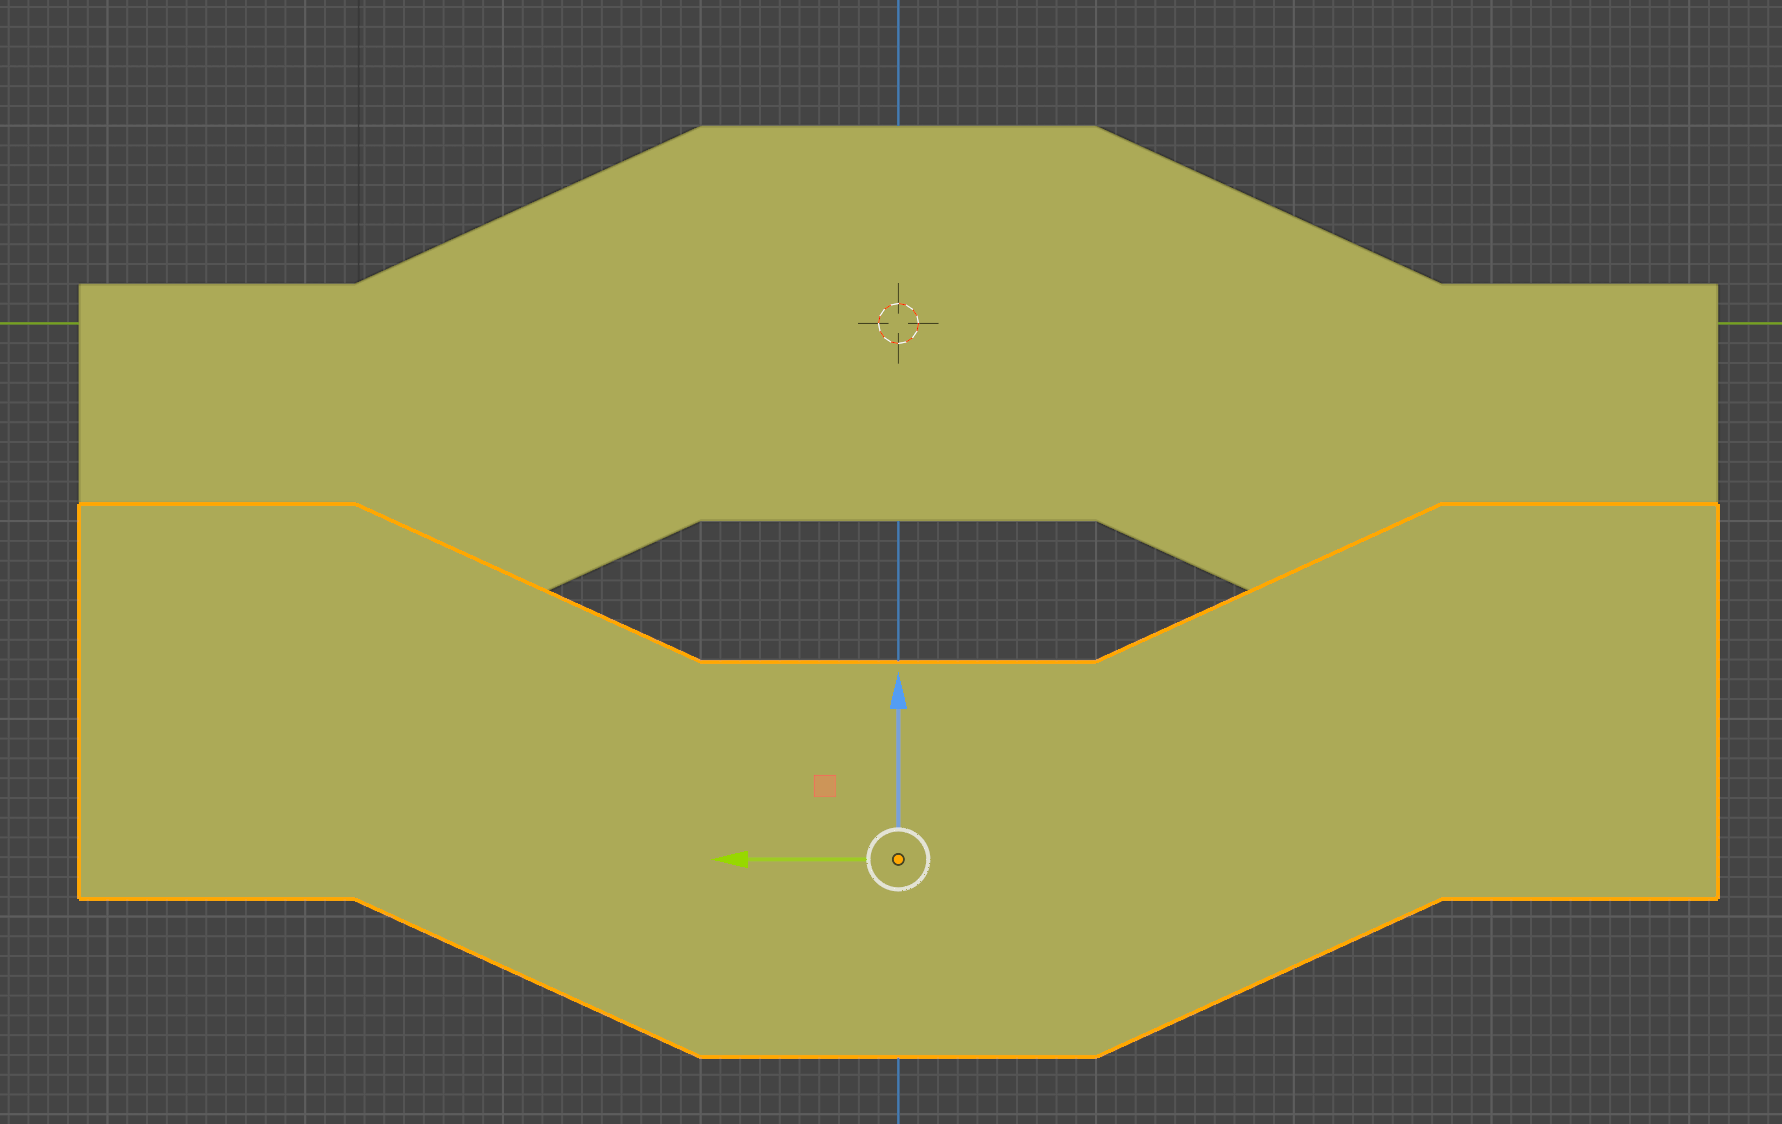
What We Will Create
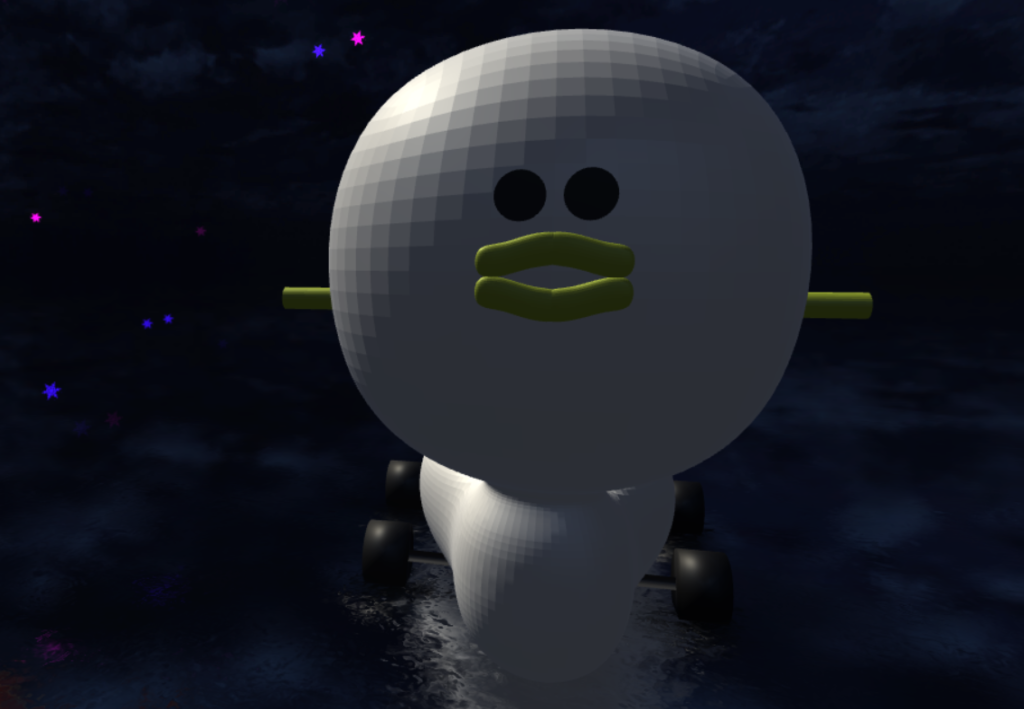
In Part 3 of this series, we will create the face of the duck potty and add color to the model.
Modeling
Adding Color
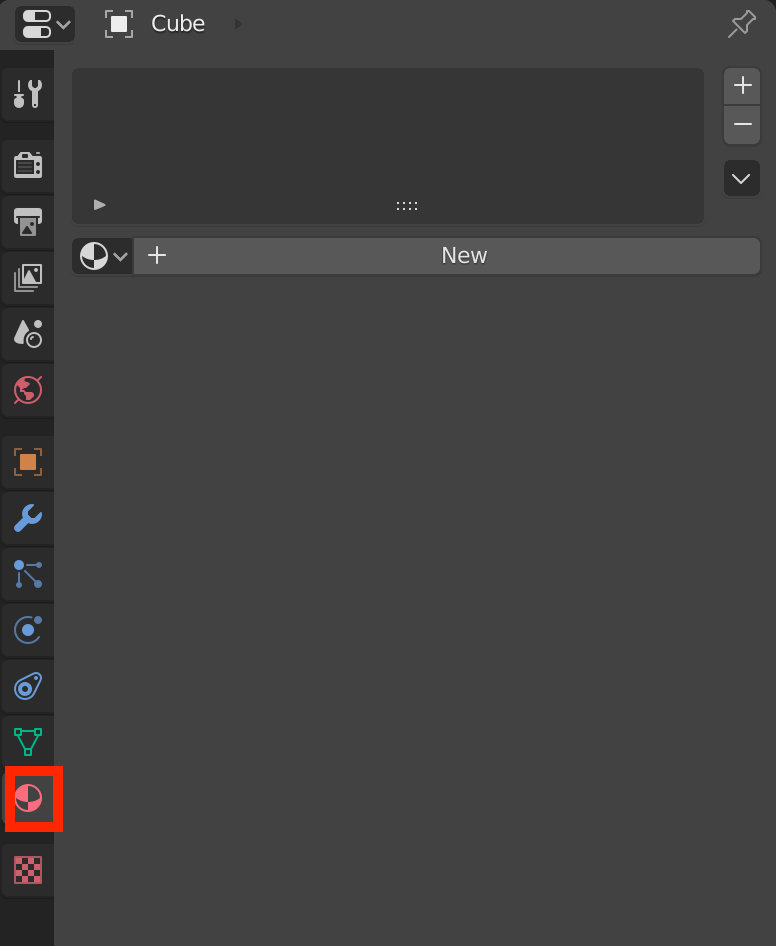
After selecting our previously made object, open the Materials tab with the sphere icon in the Properties menu, and click the New button. The Materials tab is for adding color and so on to objects.
After clicking New, your screen should look something like this:
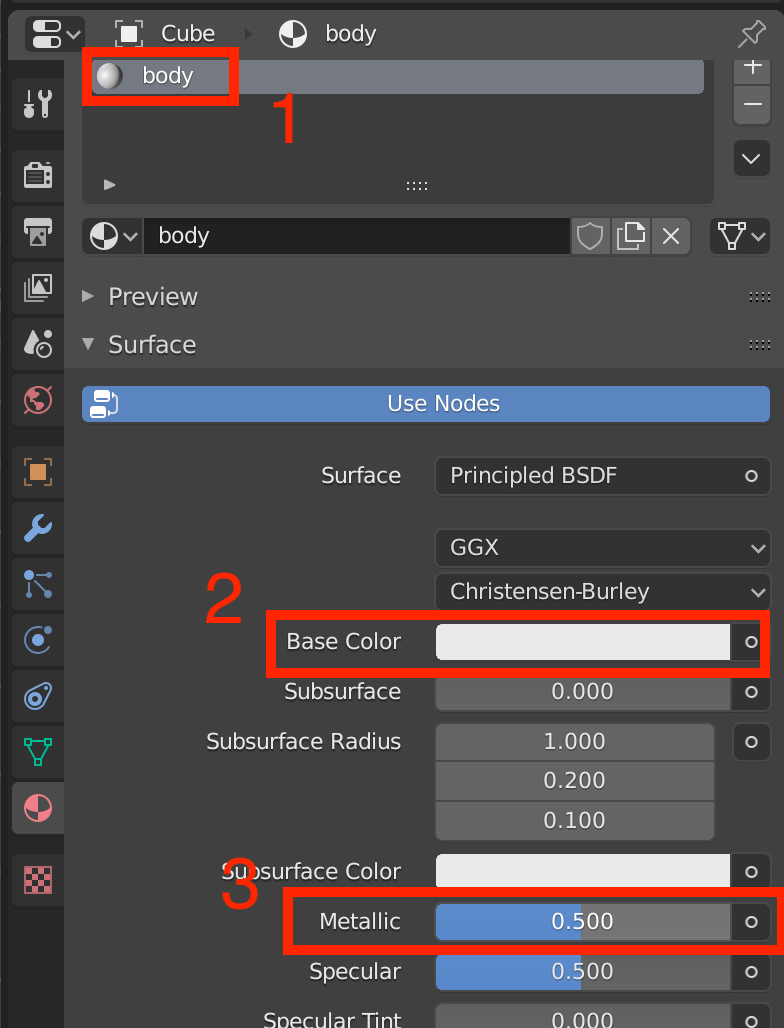
Adding Materials
- A material has been added. To make sure we know what it is, rename it to “body.”
- Change the color of your material here. For our example, we chose a white color.
- To make the material glossy, change the value of Metallic to something similar to the value above. By adjusting these properties, you can change the texture of the material.
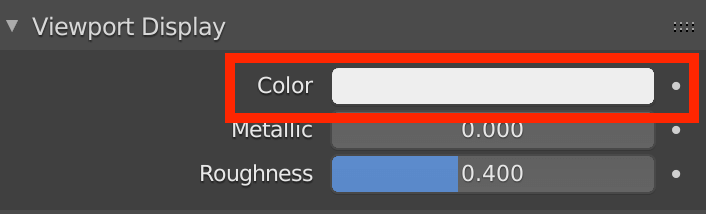
The model itself is colored, but the color is not reflected on the screen at this point. To see it in the viewport, scroll down to Viewport Display and change Color to the same color.
Color Settings
When you add a texture or want to view the image with the scene lighting, switch to Rendered view from the Viewport Shading menu by pressing [Z].
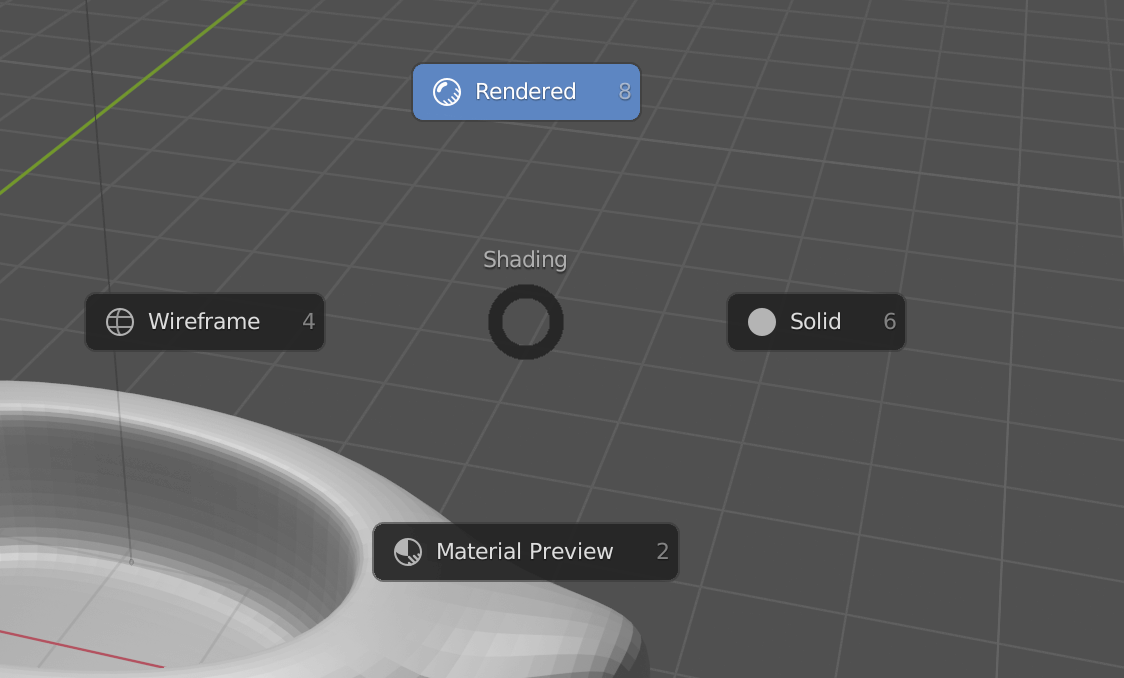
Switching Viewport Shading Modes (from the shortcut key [Z])
You can also switch to Rendered view via the icon below:
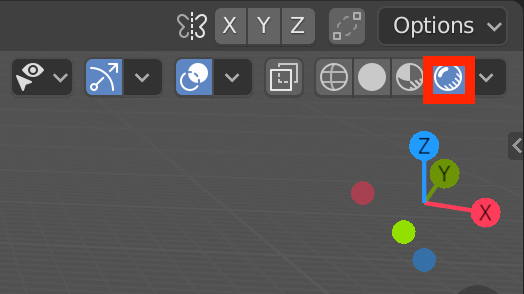
Switching Viewport Shading Modes (from the menu bar)
It is typically easier to do modeling in Solid or Wireframe modes.
Modeling the Face
We’re nearly at the end of our modeling process, so we’ll finish up by making the eyes and mouth.
Let’s start with the eyes. If you are in Edit Mode, first switch to Object Mode by pressing [Tab].
When adding a primitive mesh, it will be placed where the cursor is. If the cursor is not at the center of your scene, use [Shift]+[S] to bring up the Snap menu and select Cursor to World Origin to relocate it to the center.
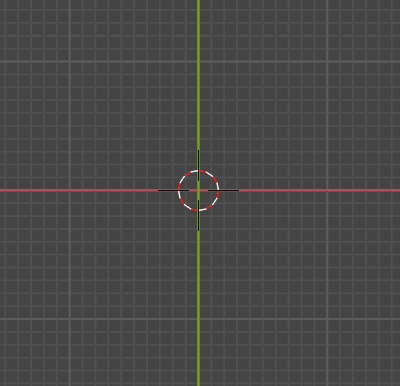
The Cursor (that looks like a dashed red and white circle)
Let’s temporarily hide our Body object by clicking on the eye icon inside the Scene Collection, which should be located at the upper right corner of your workspace.
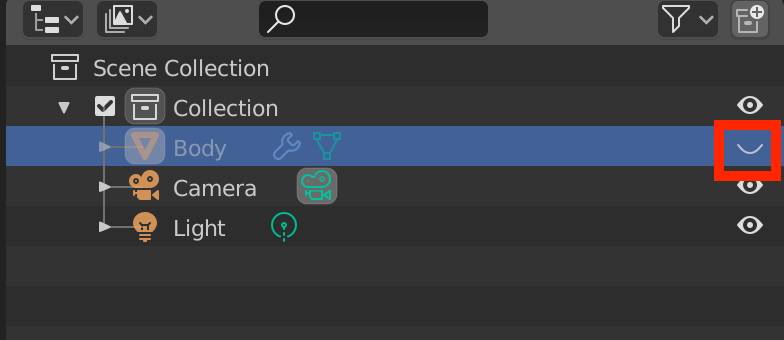
Temporarily Hide the Body Object
Sometimes, the eye icon is not displayed.
If this is the case, click on the funnel icon at the upper right corner to see a list of filters.
Check if the eye icon in Restriction Toggles is enabled, and if not, make sure to enable it.
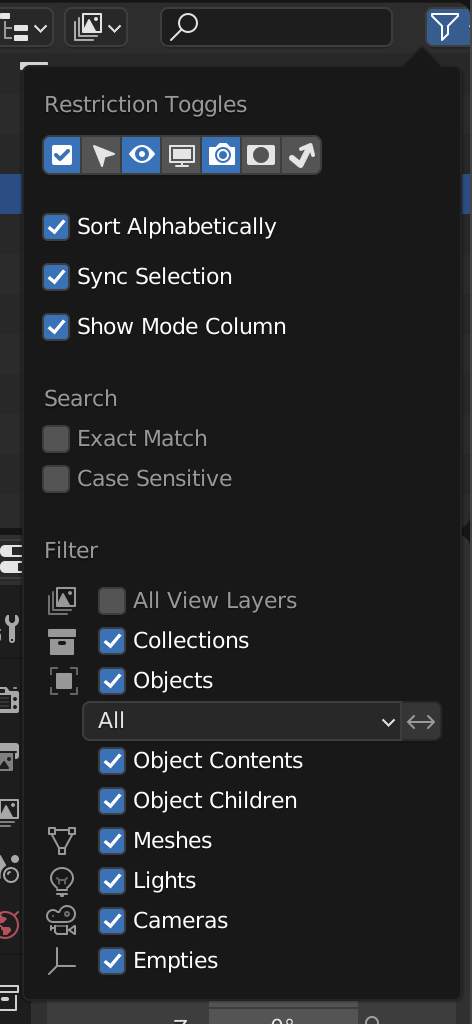
Restriction Toggles
Then, select Add > Mesh> Circle from the menu at top of the screen, or use the shortcut [Shift]+[A].
Switch to Edit Mode by pressing [Tab] and select vertices from the selection modes.
Make sure all the vertices are selected (if not, press [A]), and then press [F]. This will create a face where the hole was.
![[F]キーで埋める](https://styly.cc/wp-content/uploads/2020/09/Untitled-1.png)
Press [F] to create face from selection.
The [F] key is the shortcut for Fill, which creates a face when three or more vertices are selected.
Then, rotate the face 90 degrees (using [R]), change the object color to black (by applying a Material), bring it in front of the face ([G]), and adjust the scale ([S]).
Duplicate the eye by pressing [Shift]+[D] to create another.
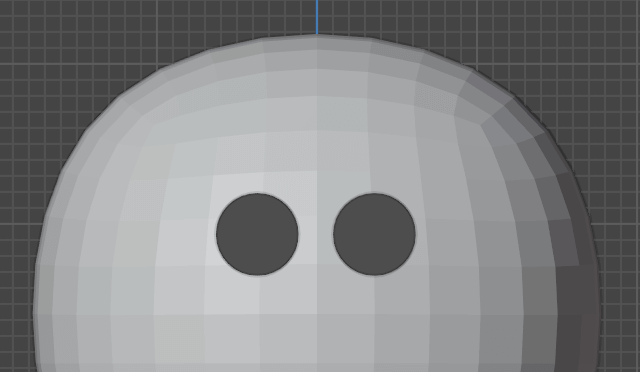
Both eyes are created.
It’s likely that the eyes are slightly floating off the face because they’re aligned with the front of the head, but we will correct this in the next tutorial.
Next, we will create the mouth.
Earlier, we switched from Edit Mode to Object Mode before adding a new mesh.
This is because if we add a mesh in Edit Mode, it will become part of the object being edited.
At the end, we will join all objects, but if separate parts are joined objects from the beginning, it’s inconvenient for editing, moving, and scaling . This is why we create the different parts as separate objects before merging them together.
So, let’s go into Object Mode and add a Cube. After scaling down on the s-axis, go to Edit Mode and select a face on the y-axis.
Scale down on the x-axis and select the face on the y-axis.
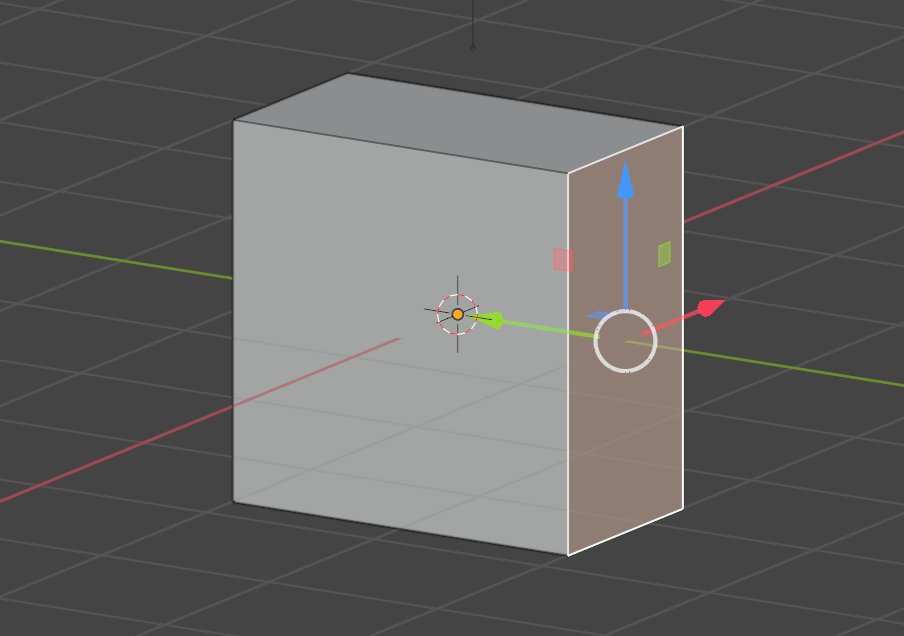
Now, we will add a modifier to this cube. The modifiers tab is the wrench icon at the right-side menu of the Properties.
From Add Modifier, select the Mirror modifier. For the Axis, select only the Y-axis.
Mirror Modifier
Next, press [E] to push out the face you just selected. See that the other side has also extruded.
Mirror Modifier
The Mirror Modifier will mirror the mesh on the selected axes.
Create the following shape for the upper part of the mouth (the beak) and click Apply in the Mirror Modifier in Object Mode.

Creating the Upper Beak
You can find Apply by opening the menu with the v arrow located below:

Apply
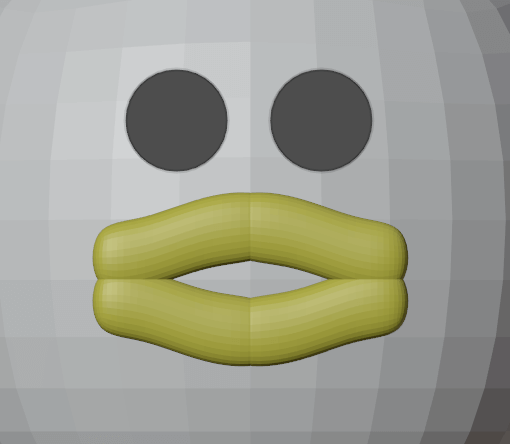
Duplicate the upper beak, flip it upside down, and change the color to yellow to complete the mouth. Press [Ctrl]+[J] to merge them, making one object.
Creating the Mouth
A small tip: if you make the top and bottom objects the same object first, you can apply the material to them in one operation.
To apply the same material to two different objects, click on the material symbol to see a list of materials that you have already created.
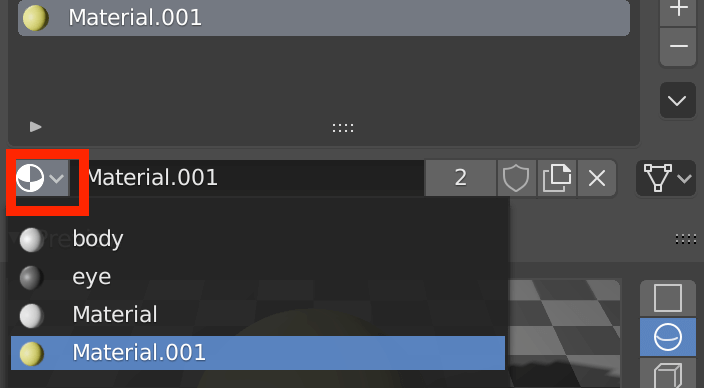
Applying a material we have already made.
Once the mouth is created, place it in front of the face. Then, select the mouth first and the body last, and make them into one object with [Ctrl]+[J].
With this, the shape of the mouth should have become smoother.
A smoothened-out mouth.
The mouth has become smoother because the Subdivision Surface modifier set to the Body object has been reflected on the mouth object, which has now been merged with the Body. Apply the Subdivision Surface modifier to the Body object.
Keep in mind that if you apply the Subdivision Surface modifier before merging the mouth object, the mouth will not become smooth.
It’s important to understand the correct time to apply modifiers. If by mistake, you applied the Body’s modifiers before merging the mouth, you can apply the same Subdivision Surface modifier to the mouth and then merge it with the Body.
The eyes look fine as they are, so click Apply and then [Ctrl]+[J] to merge with the Body object.
Creating Optional Parts
We’re basically finished, but why not customize your model? We added some handles and tires. How we did this:
- Handles: Add > Cylinder, scale on the z-axis, rotate, move etc. Make it the same color as the mouth.
- Tires: Add > Circle, [F] to make face from selection, extrude the face. Make this black. Add > Cylinder and attach it to both ends of the tires. Make this grey.
You can also change the color by different faces.From the Material’s tab, do the following:
- In Edit Mode, select the face that you want to change, and choose the material you want to apply from the Material section. (In this case, we’ve combined the body, mouth, and eyes, so there are three materials in this object. If you want to increase the number of colors, click the + button to increase the number of materials.)
- Click Assign to assign the material to the selected face.
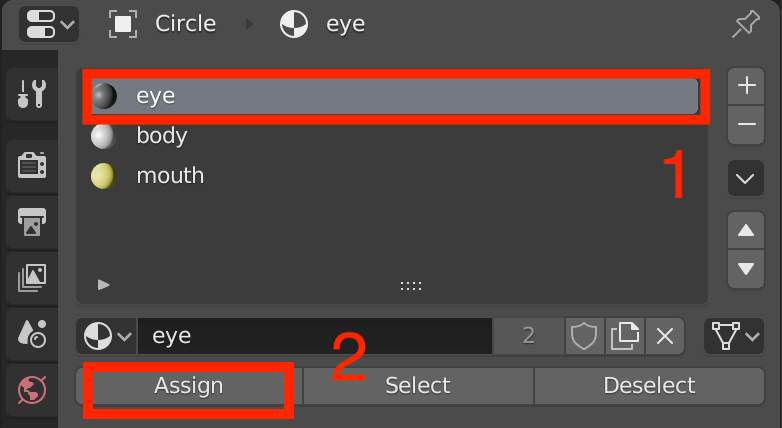
Assigning Materials
In this article we created an object without patterns, but in the next article we will delve into textures.
Using what we learned in this article, we can model almost anything with these techniques.
Importing the Model to STYLY
Export the Model
Now that we’ve finished our duck potty, let’s export our model and upload it to STYLY. If you have added optional parts such as the tires, make sure everything is one object ([Ctrl]+[J] to join the separate objects).
With the single object selected, select File > Export > glTF2.0(.glb/.gltf) from the top menu to export.
Upload to STYLY
Now, let’s upload your model to STYLY.
Create a STYLY account:

How to upload to STYLY:

How to upload from Unity to STYLY:

The Uploaded Duck Potty
Vocabulary and Shortcut Keys to Remember from this Article
Vocabulary
- Material: The material defines the color of the object.
- Viewport Shading: The shading of the 3D Viewport can be switched between multiple modes, such as Solid and Material Preview modes.
- Mirror Modifier: Mirrors a mesh along its X, Y and/or Z axes by selection.
Shortcut Keys
- [Z]: Opens up a pie menu to switch between viewport shading modes.
- [Shift]+[S] > select “Cursor to World Origin”: Opens up the Snap menu, and moves the cursor (the dashed red and white circle) to the world origin.
- [F]: Makes selected vertices into edge/face.
- [Shift]+[D]: Duplicates the selected object(s).
- [Ctrl]+[J]: Joins all selected objects into the last selected active object.
Read the next article here:
![[Blender for Beginners] Let’s Start Modeling Part 4 – Creating Textures](https://styly.cc/wp-content/uploads/2018/10/test_.png)
For questions about STYLY, bug reports, and improvement requests, please contact the STYLY FORUM
https://en.forum.styly.cc/support/discussions
Certified (QA) by Shota Shawn Yoshizawa
Edited by SASAnishiki
Translated by cpnnn