Introduction
In this article, we explain how to import VRM files into Blender.
*VRM is a file format designed for 3D humanoid data in VR applications.
If you are new to Blender, we recommend reading this article first:
About Blender Versions
This tutorial will use Blender 3.2. There may be slight differences between versions, but the basic operations should be the same.
Preparation
Downloading the VRM_IMPORTER Add-on
First, download VRM_IMPORTER from the URL below. Save it to a place you can easily access later.
IMPORTANT: Make sure you do not extract the .zip file.
https://vrm-addon-for-blender.info/en/
Then, after opening Blender, choose Preferences from the Editor Type selector at the top left of the screen.

Editor Type>Preferences
Open the Add-ons tab and click Install….
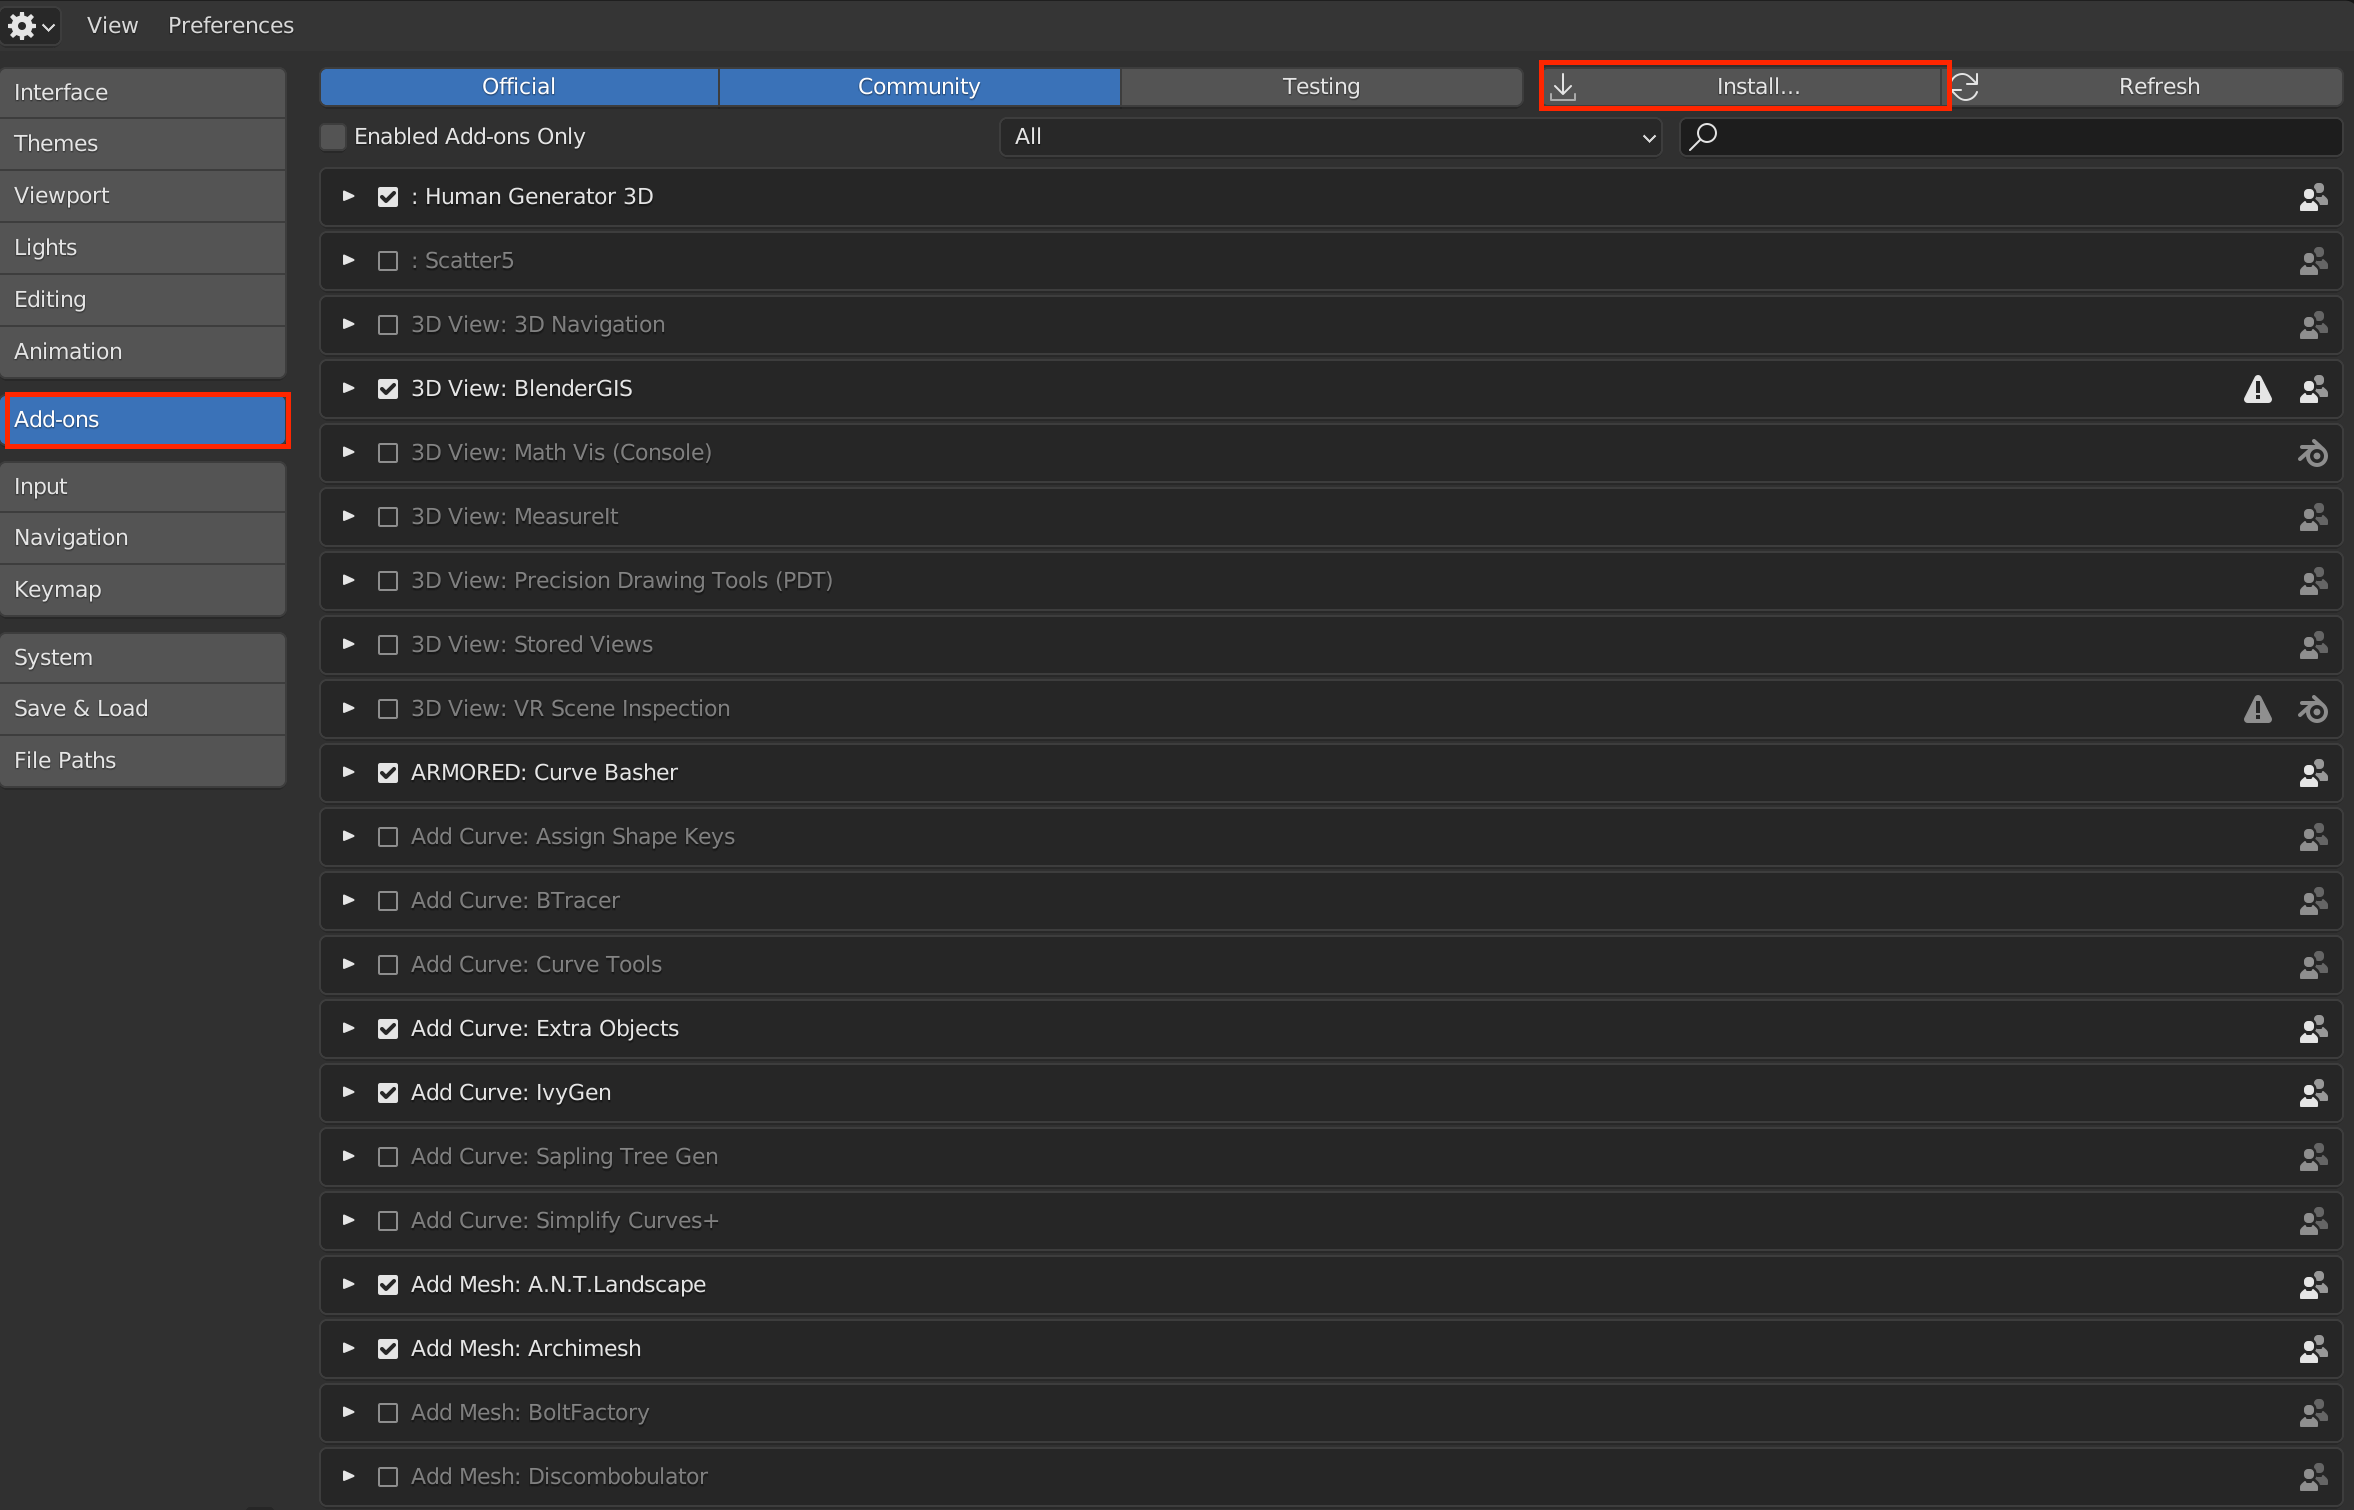
Click Install…
Choosing Install… will open your computer’s file manager application. Go to where you saved the VRM_IMPORTER zip file, select it, and click Install Add-on.
The add-on should appear automatically, so check the box next to Import-Export: VRM format.

Check the box for Import-Export: VRM format
Click the Editor Type selector again to return to the 3D Viewport.
If you open File>Import and see a VRM option, the installation was successful.
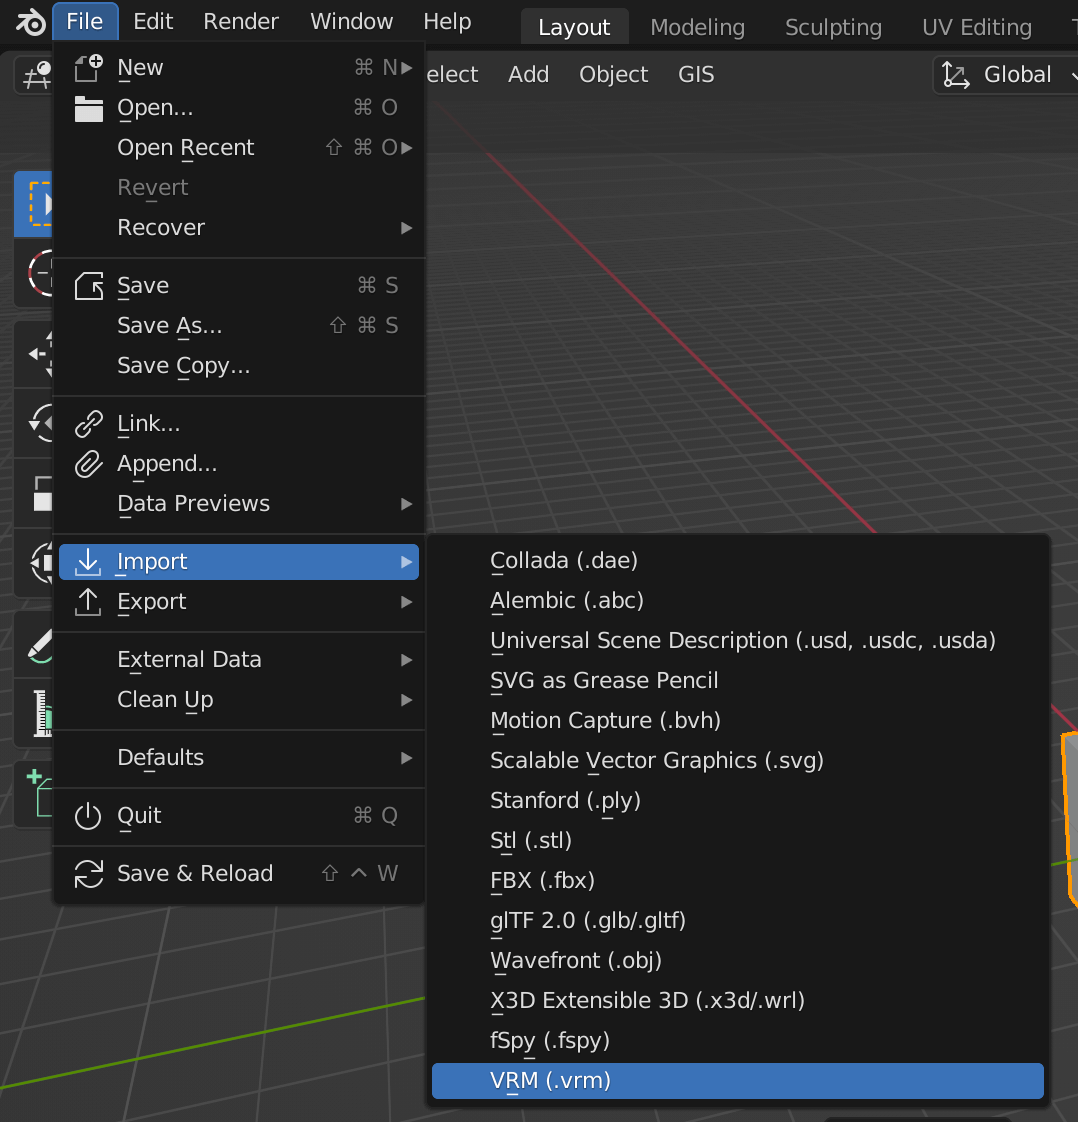
File>Import>VRM (.vrm)
Importing the VRM File to Your Blender Project
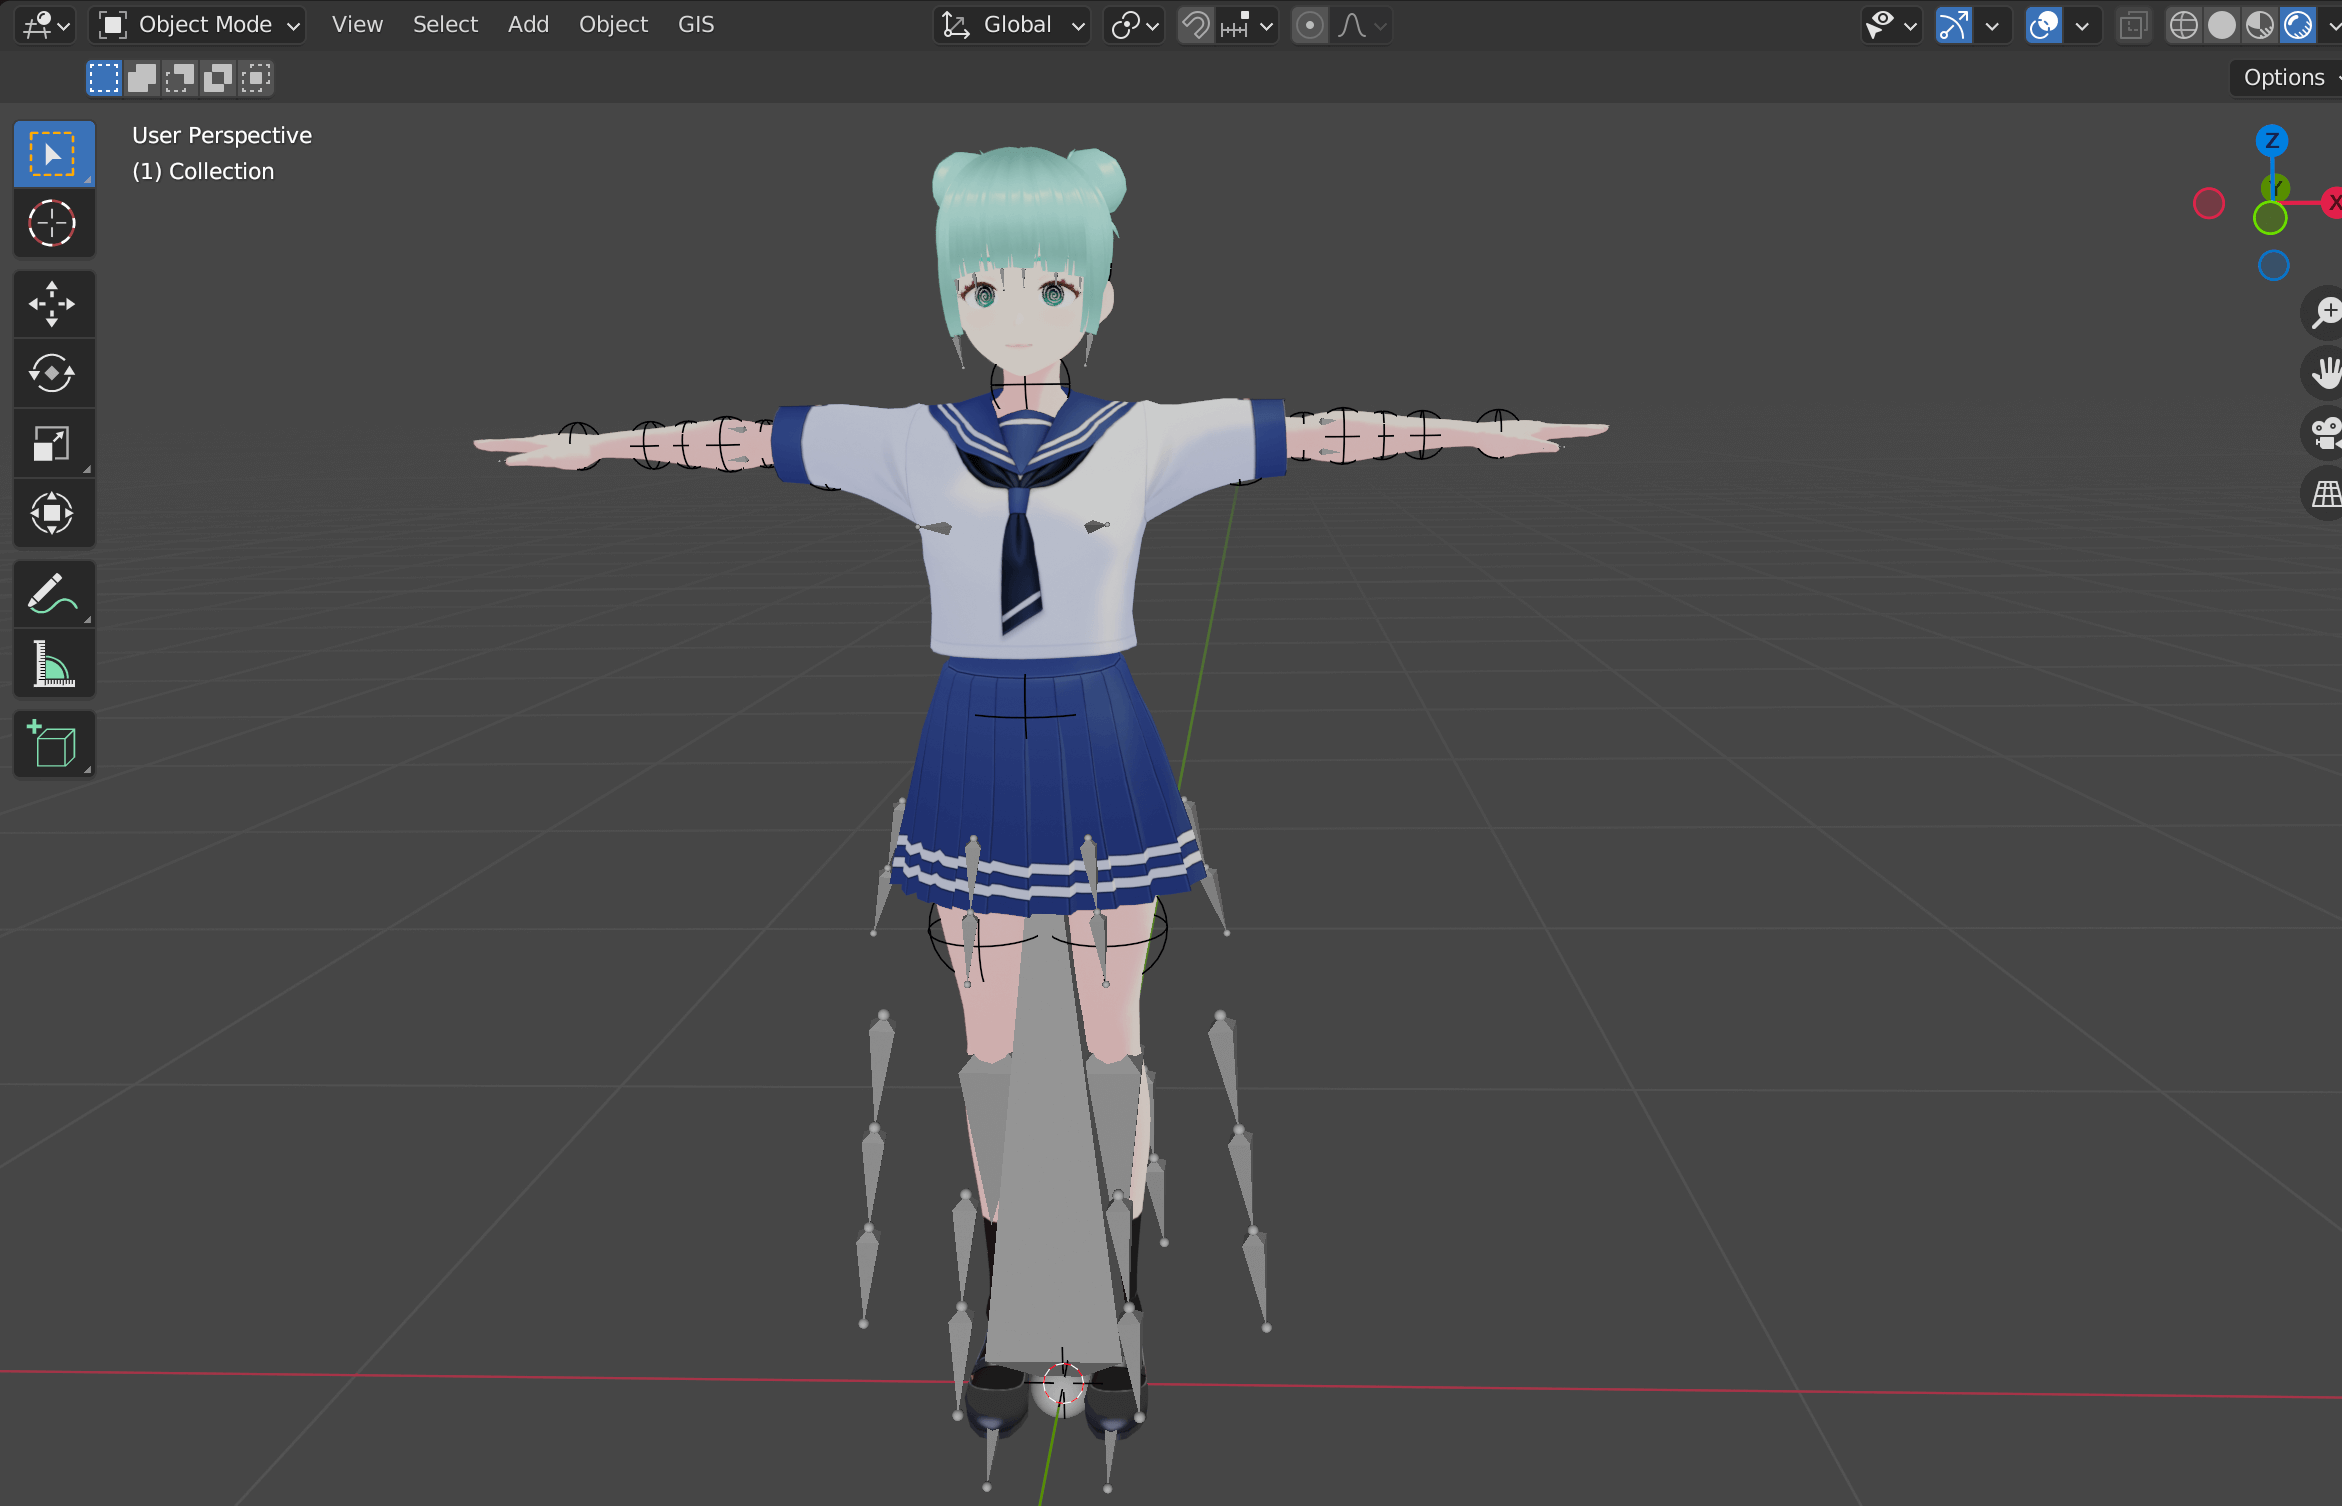
In the top menu, go to File>Import>VRM and select a VRM file from your computer.
Don’t worry if it seems slow—importing time will vary according to the size of your file.
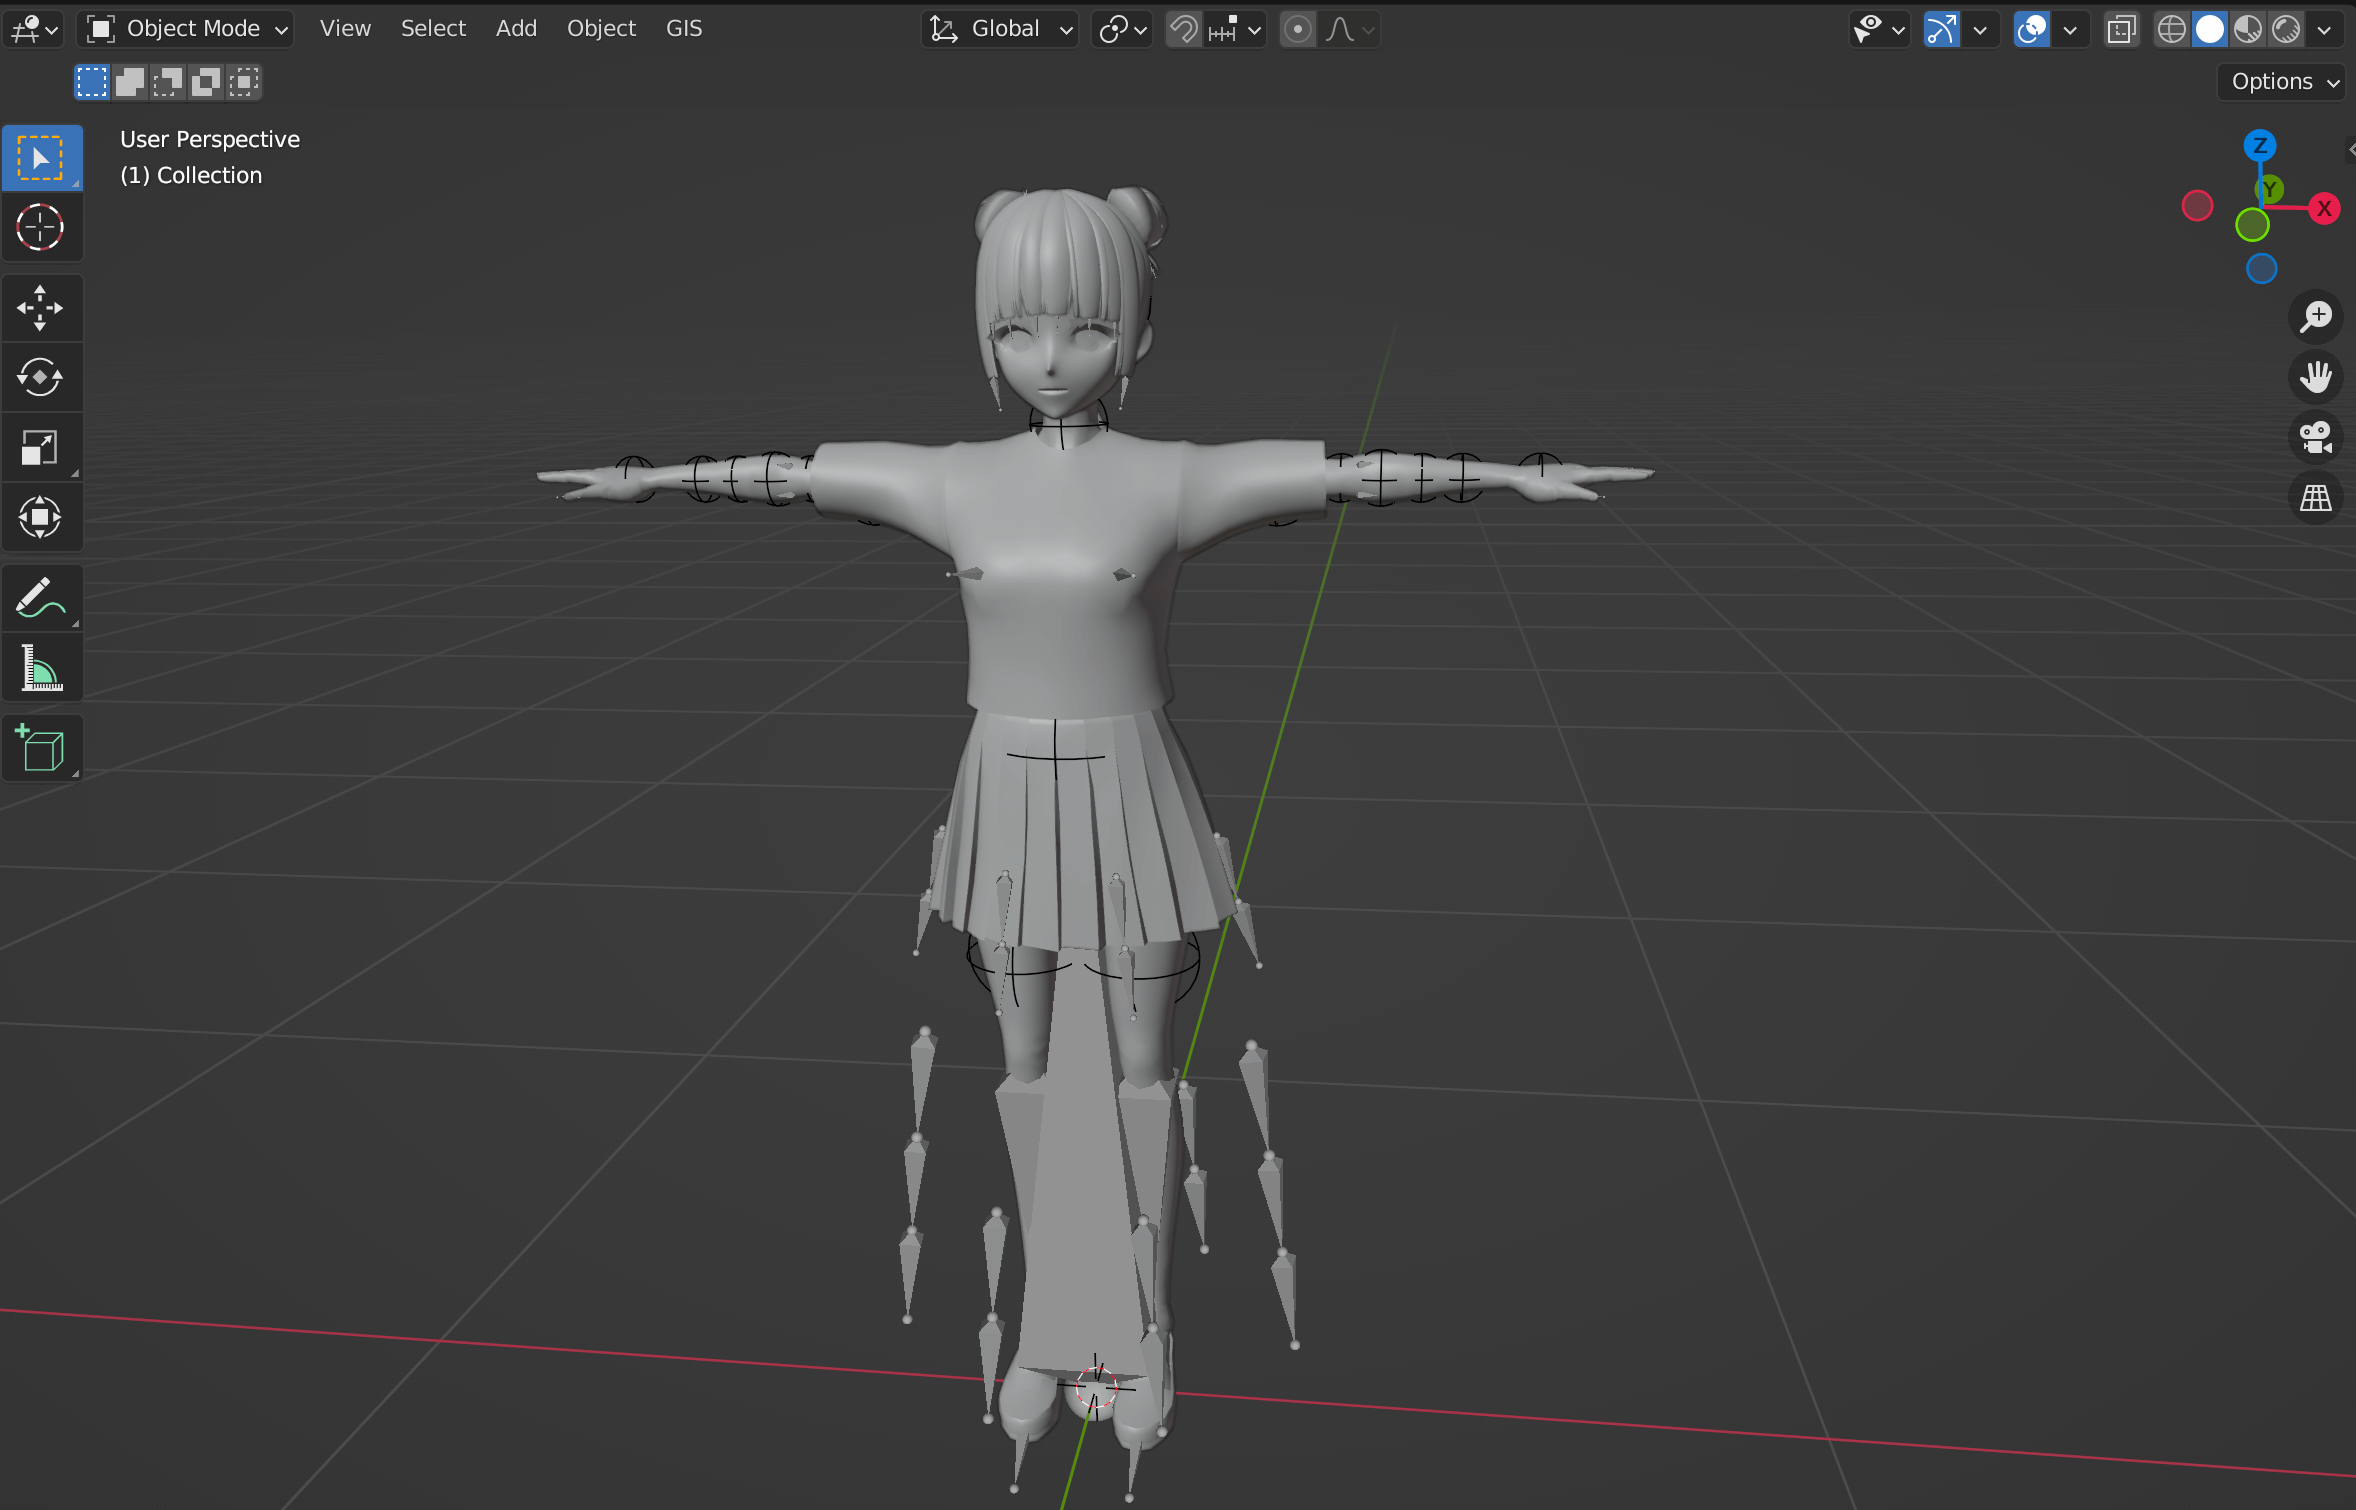
Importing the VRM file
Press [Z] to show the shading pie menu. Then, select Rendered to show the model in Rendered View.
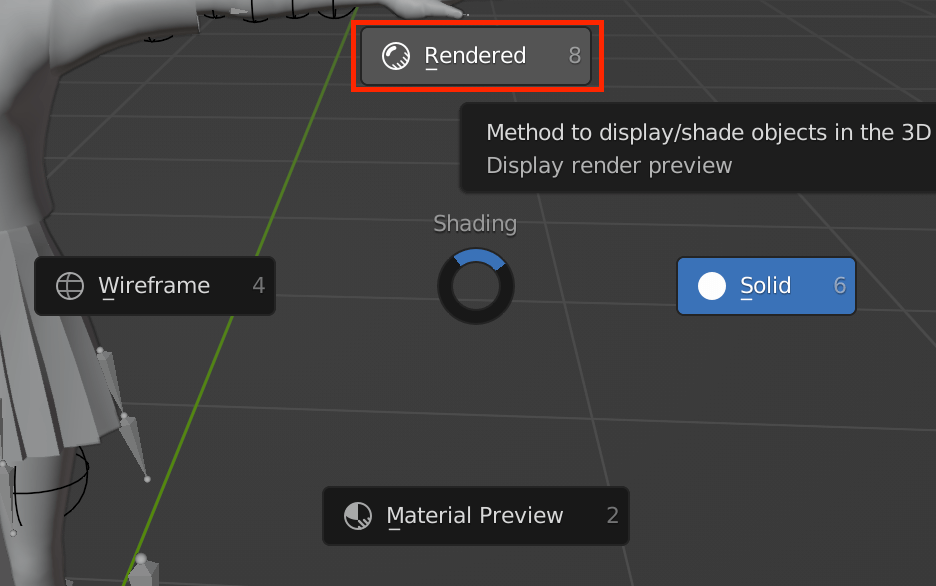
Select Rendered
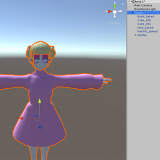
Your model in Rendered View
How to Change the Facial Expression of Your Model
Next, we will demonstrate how to adjust the facial expressions of your model.
When you import a VRM file, its components are sorted into four groups: hair, head and face, body and clothes, and bones.
With the face object selected, you can change the model’s facial expression with the Shape Keys in the Object Data Properties tab (the triangle icon in the right-hand tabs).
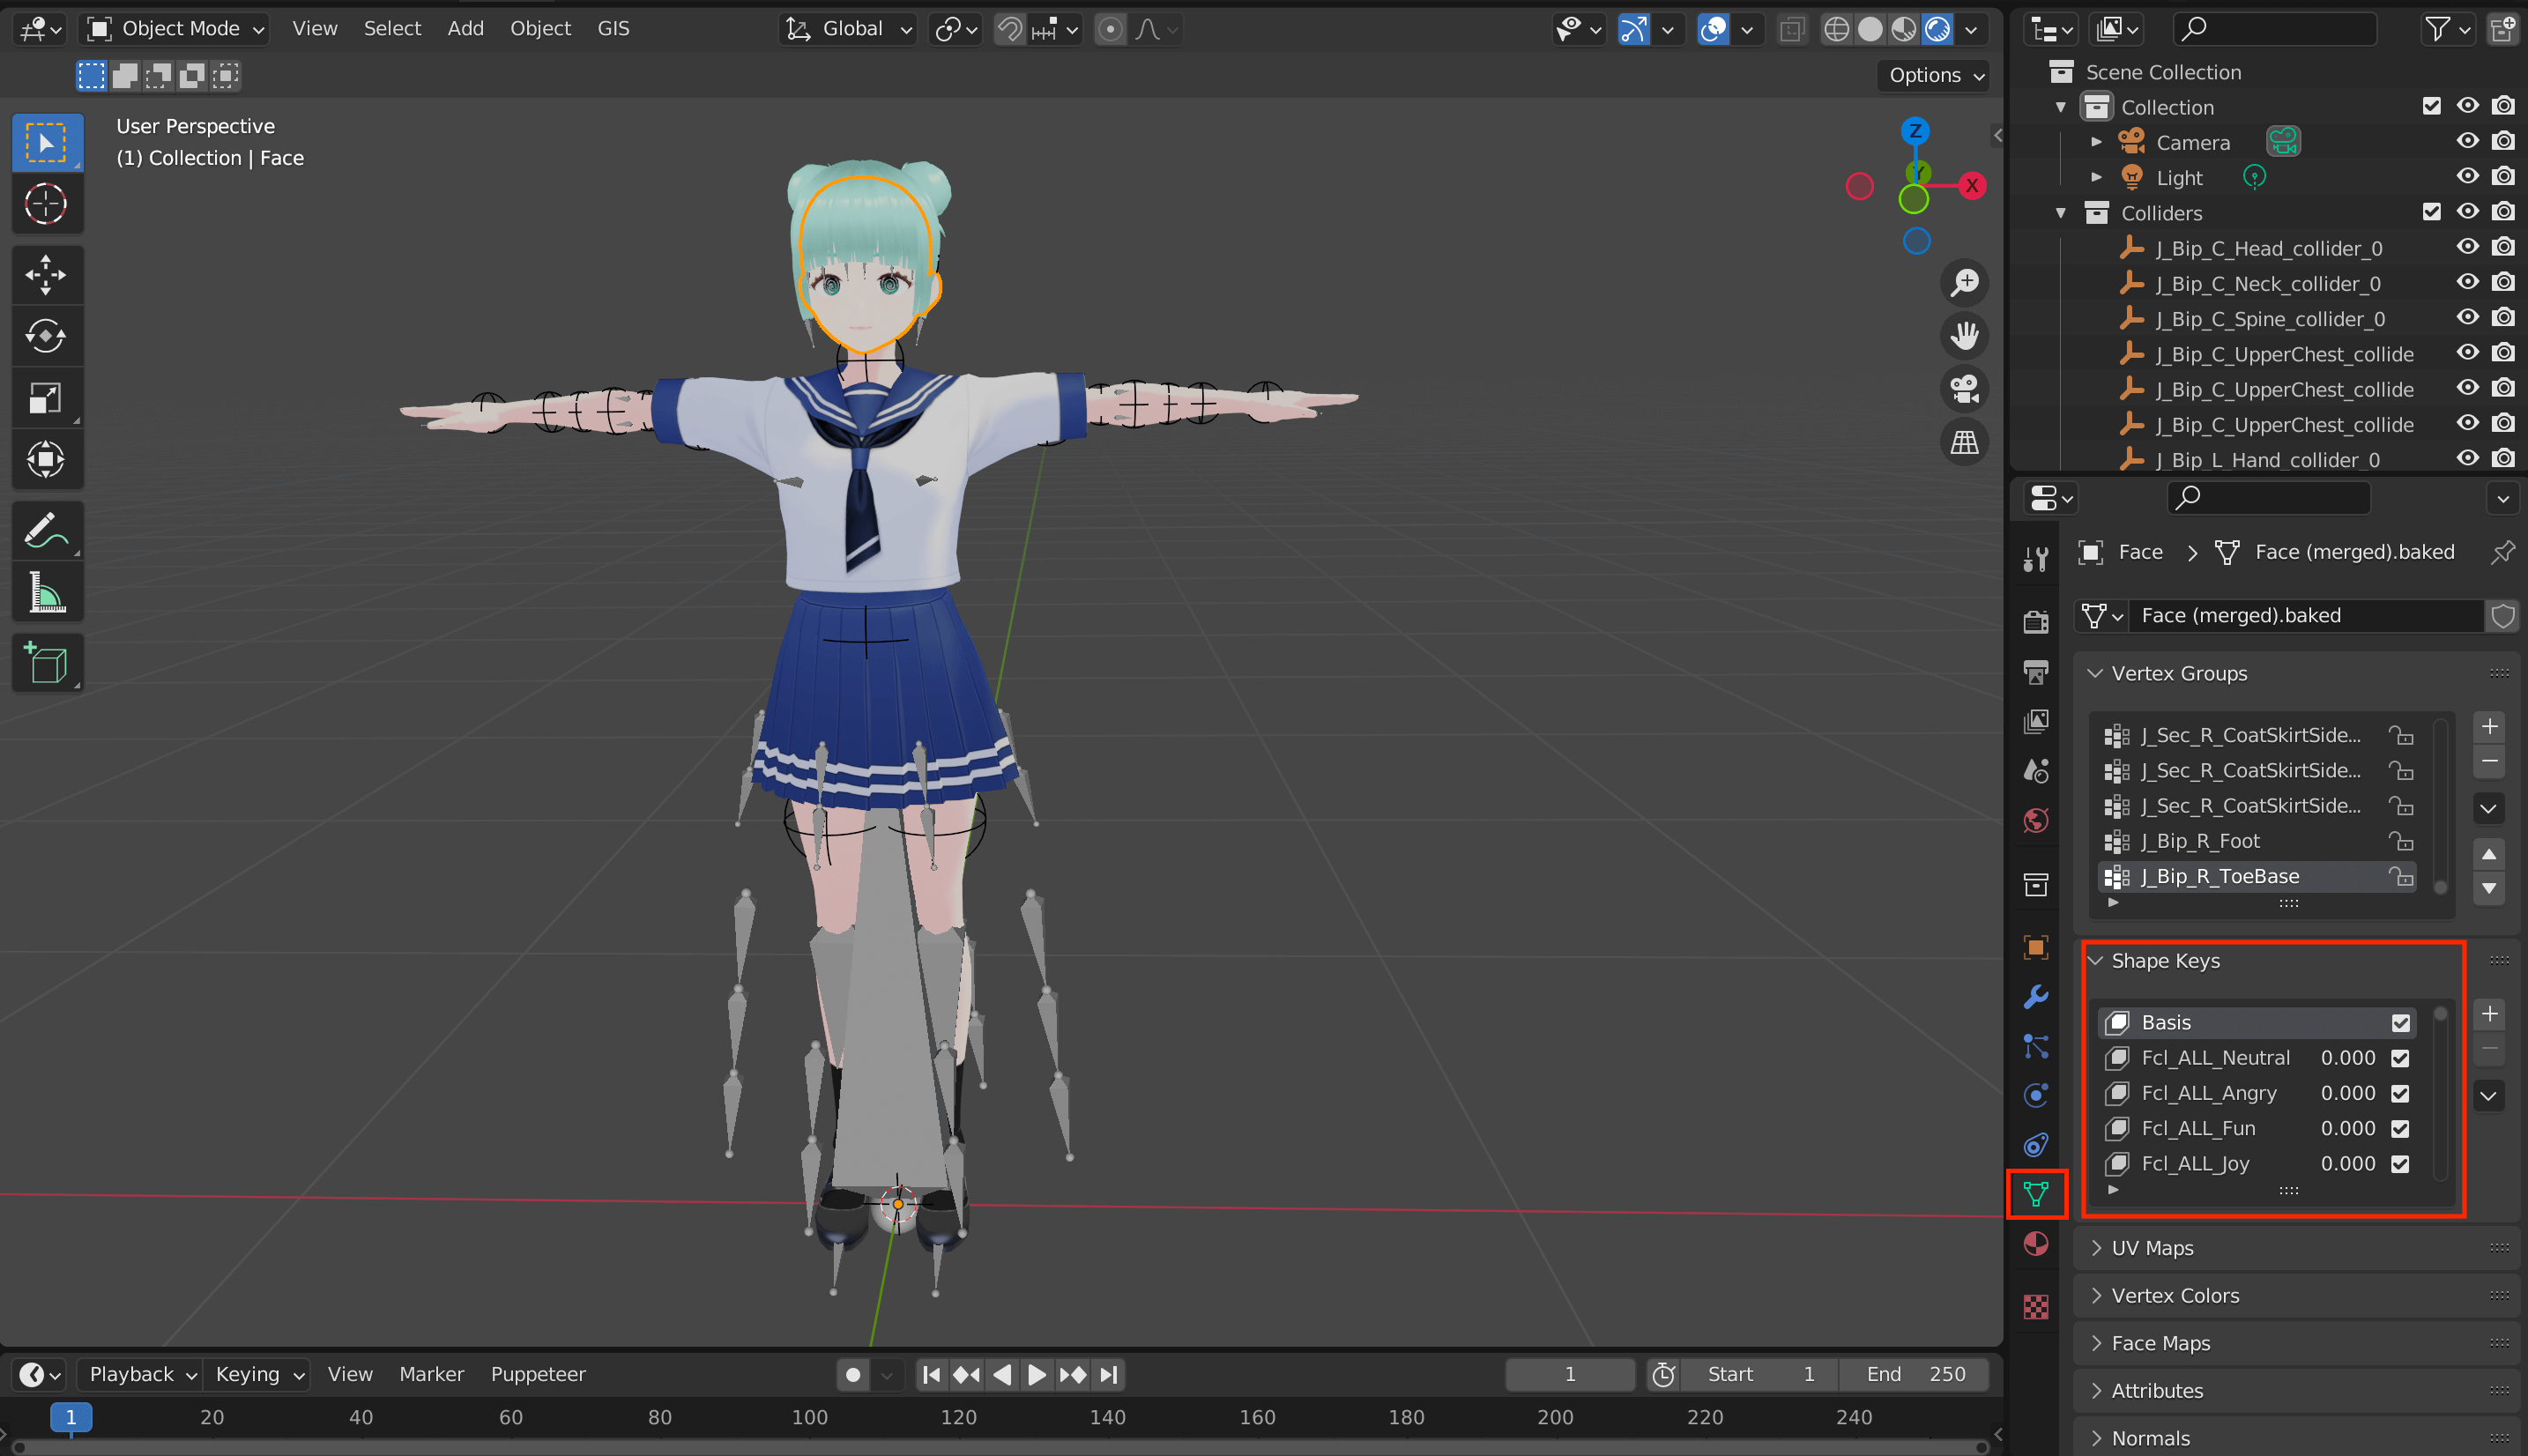
Shape Keys
Shape Keys are essentially a set of expressions. If the VRM file was created with VRoid, then some Shape Keys should already be available.
As shown below, you can change the expression assigned to a Shape Key by selecting it and adjusting its parameters. These parameter values define the mesh movement of each part of the face.

Adjusting the Shape Key parameters
How to Change the Pose of Your Model
We will demonstrate how to change the pose of your model in Pose Mode.
First, select a bone and press [Ctrl+Tab].
The selected bone’s outline should turn light blue. This state is called Pose Mode, where you can create poses by rotating and moving bones.
We recommend pressing [Z] and switching to Wireframe View to see the bones more clearly.

Wireframe View
You can move / rotate bones like other objects by selecting them and pressing [G] / [R].

Moving and rotating the bones
How to Export your Model
Once you have achieved your desired pose, let’s export the model!
Make sure to export it as an FBX file, not VRM. This way, you can export the model with the pose applied to it.
For more information on how to export VRM files and upload them to STYLY, please refer to the following article:

The model with a different pose
Quick tip: If you want to hide the bones, click on the eye icon next to Armature.
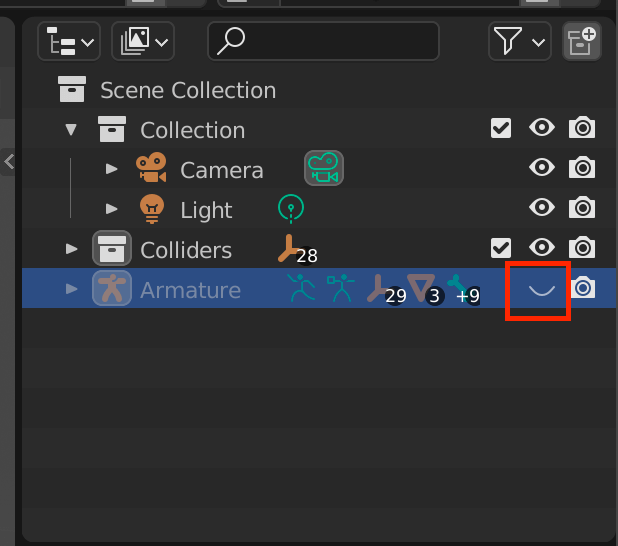
Hiding the Armature
Below are a few additional articles that offer tips on using VRM models in Blender and Unity.
How to link Blender and Unity to export VRM files:
How to add animation to your model (make sure you follow the same procedure outlined in the article above to export models):
![[Blender for Beginners] Let’s Start Modeling Part 7 – Animating Bones](https://styly.cc/wp-content/uploads/2019/01/27.png)
How to add accessories and other items to your VRM model in Blender:
![[Blender] Add Accessories to VRM Avatar](https://styly.cc/wp-content/uploads/2019/05/2-3-160x160.png)
For questions about STYLY, bug reports, and improvement requests, please contact the STYLY FORUM:
https://en.forum.styly.cc/support/discussions
Certified (QA) by Shota Shawn Yoshizawa
Edited by SASAnishiki
Translated by cpnnn