This article introduces how to use “Prefabs” and “Scenes” created in Unity on STYLY.
On STYLY, you can upload prefabs and scenes created using 3D models, Particle System (Shuriken), Light, UI elements, Shaders (such as those created with Amplified Shader), PlayMaker, and Interaction SDK.
You can use assets in STYLY that have been given animations or interactive functions in Unity, as well as assets with colored lights.
If you want to improve the quality of your scenes or explore new ways of expression, give it a try.
Requirements
Check the version supported by STYLY below
STYLY Plugin for Unity DOWNLOAD
Additionally, make sure the following modules are installed.
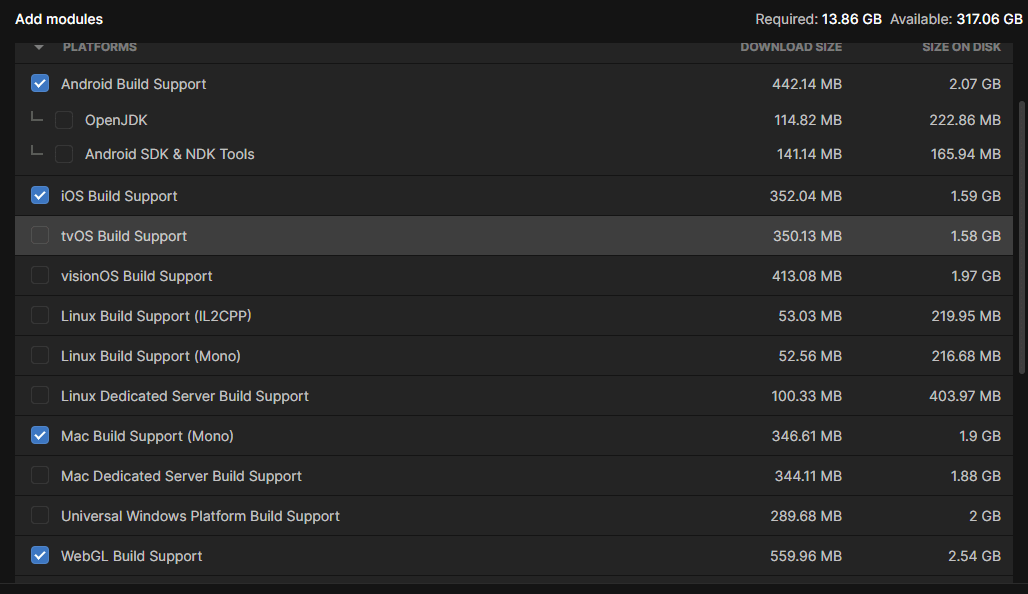
Using Unity Hub
- Windows Build Support (installed by default on Windows)
- Mac Build Support (installed by default on Mac)
- Android Build Support
- WebGL Build Support
- iOS Build Support
If these modules are not installed, please refer to the following article.
Types of Uploadable Assets
By using the “STYLY Plugin for Unity,” you can upload the following types of assets to STYLY.
STYLY Studio
- 3D Models (including those with Mecanim animations)
- Particle System (Shuriken)
- Light
- UI elements
- Shaders (such as those using Amplified Shader)
- Assets using PlayMaker or Interaction SDK
The upload process is the same for different types of assets.
Simply convert the assets you want to use into prefabs and upload them to STYLY.
※Note:
If an action applied with PlayMaker does not work properly on STYLY, try clearing your browser cache.
Also, STYLY does not support scripts written in C#.
Preparing to Upload to STYLY
To upload from Unity to STYLY, import the STYLY Plugin for Unity into Unity.
Downloading and Importing the STYLY Plugin for Unity
By using the STYLY Plugin for Unity, you can upload prefabs and scenes created in Unity to STYLY.
Here’s how to download the STYLY Plugin for Unity.
First, access the download page via the link below or from the [DOWNLOAD] menu in STYLY’s footer menu.


STYLY Homepage
After navigating to the DOWNLOAD page, click the [Download STYLY Plugin for Unity] button at the bottom of the page to download.
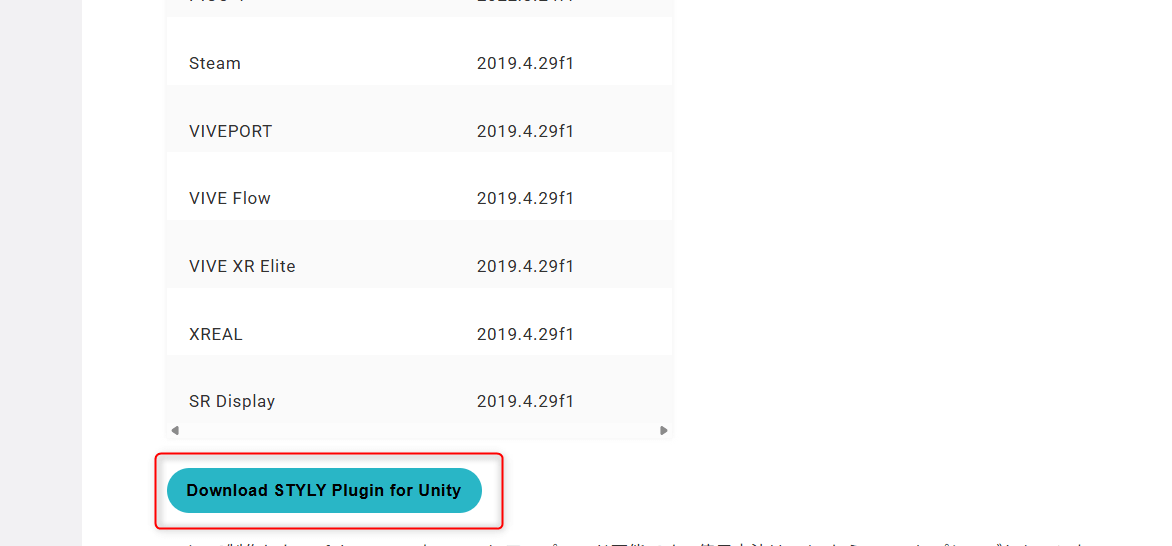
Click STYLY Plugin for Unity DOWNLOAD
Once the download is complete, import the STYLY Plugin for Unity into your Unity project.
Open your Unity project.
Go to [Assets] > [Import Package] > [Custom Package…] and click.
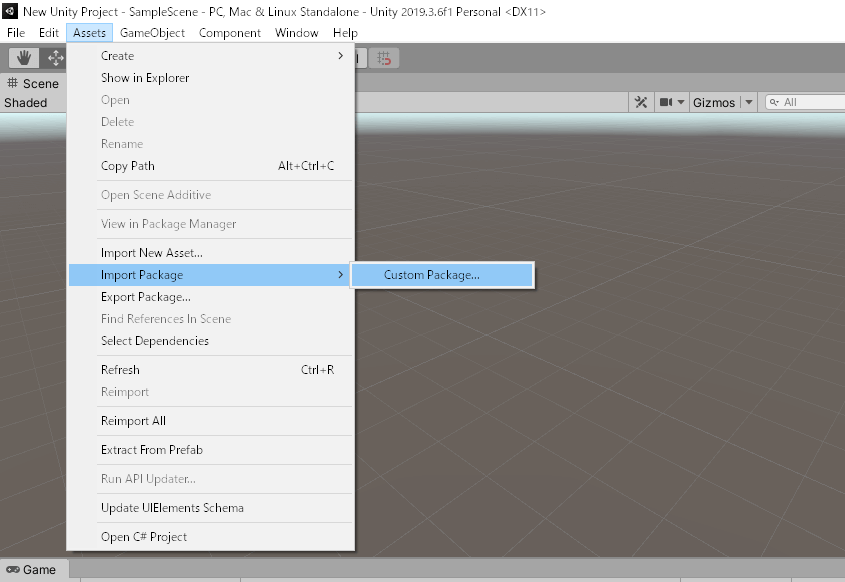
Custom Package…
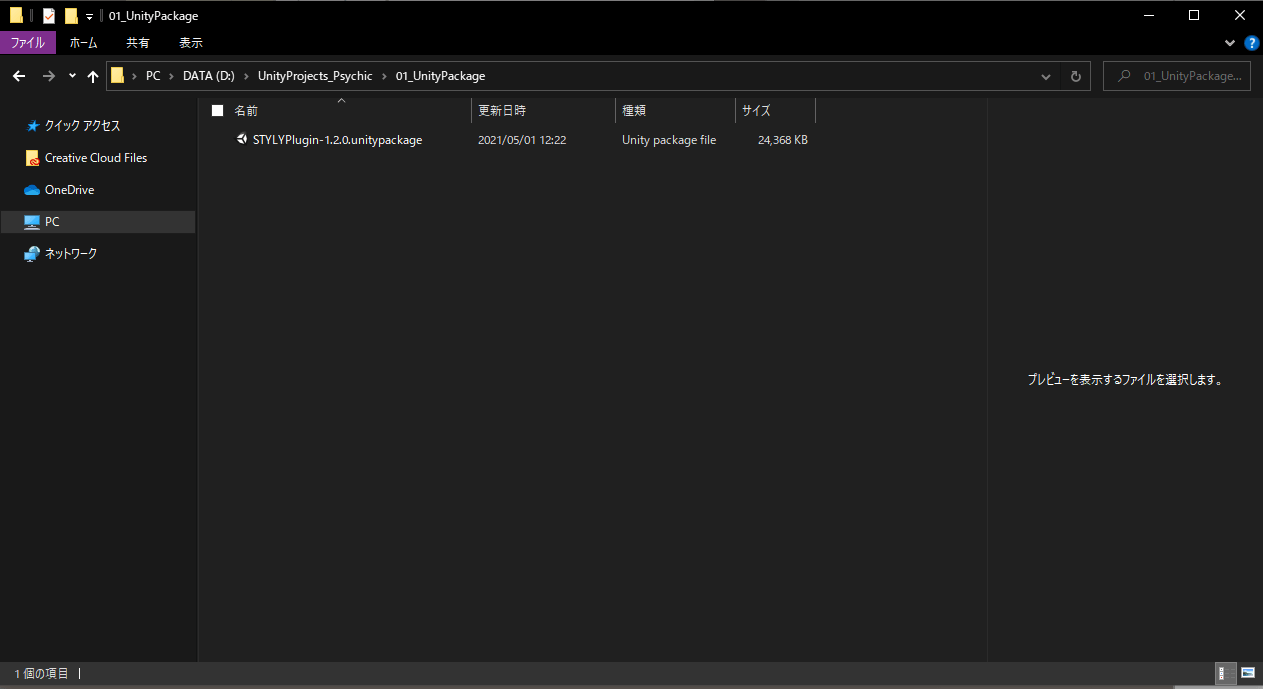
Select the downloaded “STYLYPlugin” and click the [Open] button.
Open STYLY Plugin
Keep all checkboxes checked and click the [Import] button.

Click Import
After importing, the [STYLY] menu should be added, and the [STYLY_Plugin] folder should be created in the Assets folder.

STYLY_Plugin folder created
How to Connect Your STYLY Account with STYLY_Plugin
You need to obtain the API key for your STYLY account.
Here’s how to obtain the API key.
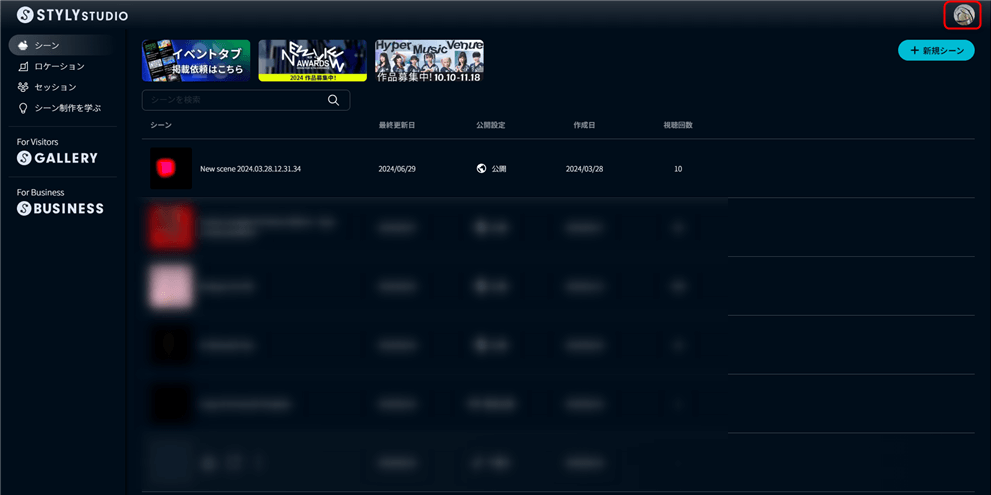
Click on the account icon
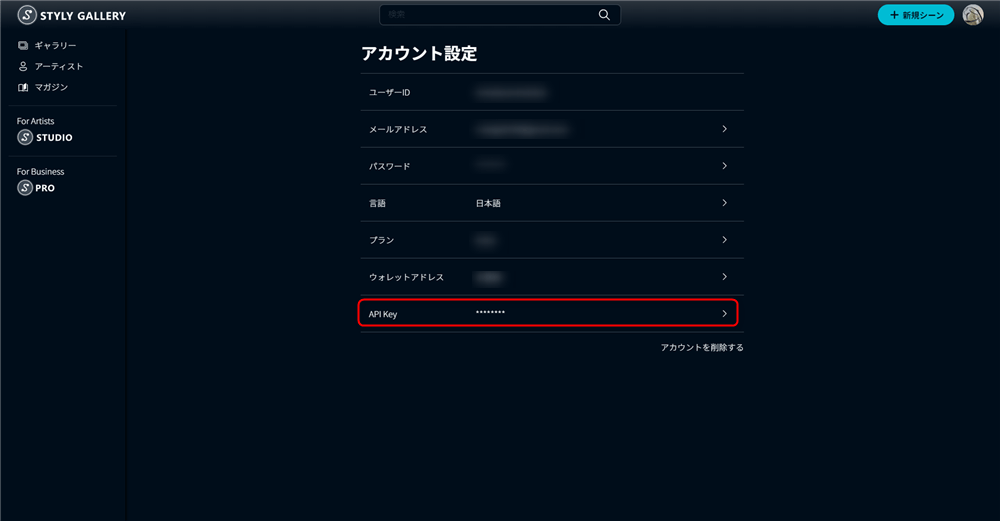
Log in to STYLY Studio and click on your account icon.
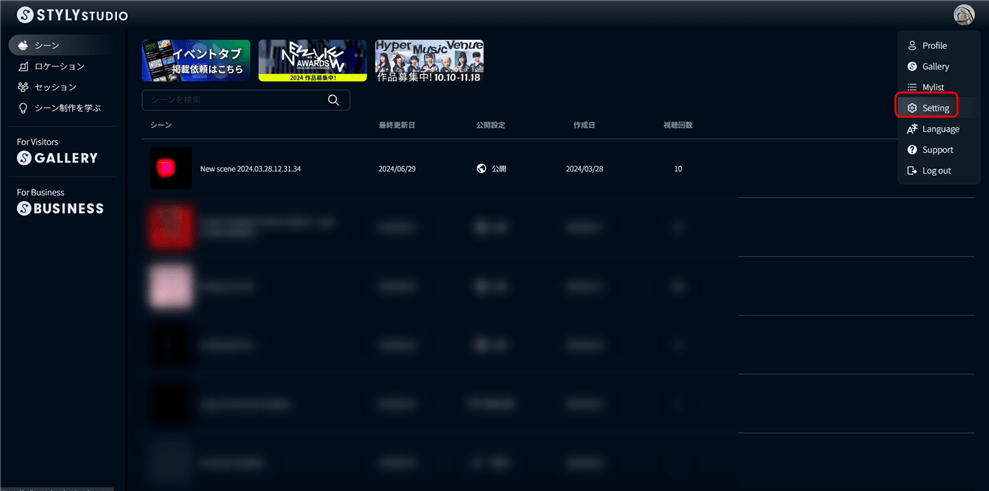
Select “Setting”
When the popup appears, click “Setting.”
Setting
In the Account tab, find the API key and click the copy button to the right.
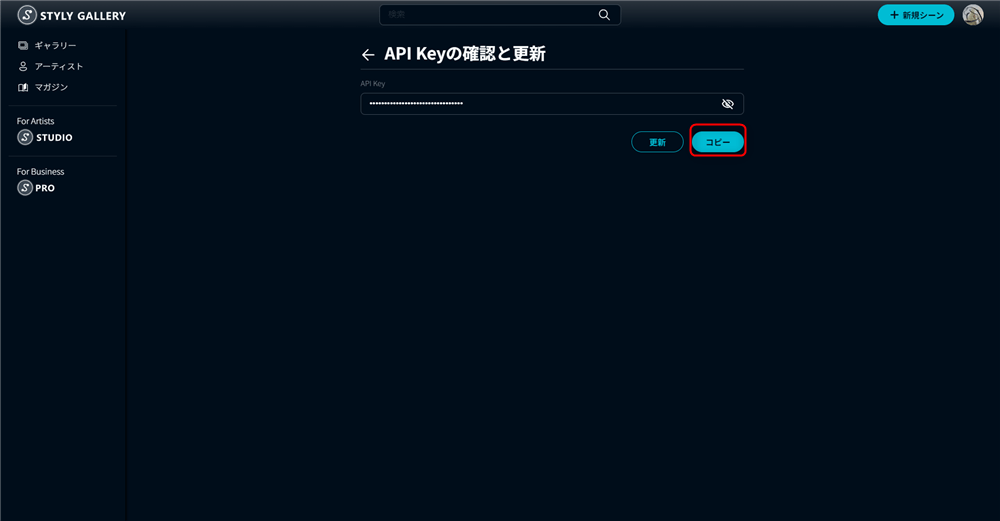
Click the copy button
[STYLY] Menu
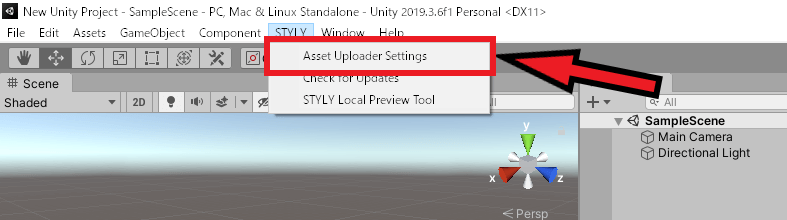
In your Unity project, go to the [STYLY] menu and click [Asset Uploader Settings].
Asset Uploader Settings
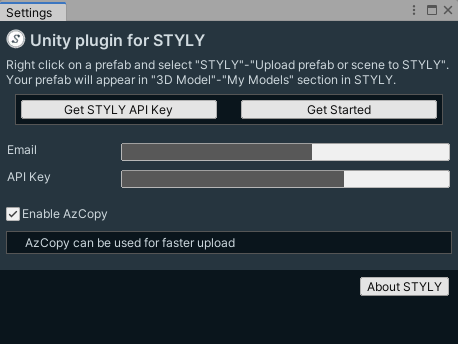
Enter your account email in the Email field.
Paste the copied API key into the API Key field.
This completes the connection between your STYLY account and the STYLY Plugin.
Cache Settings
Regarding the message “Cache Server is strongly recommended. Change the setting at Edit-Preferences-CacheServer.”
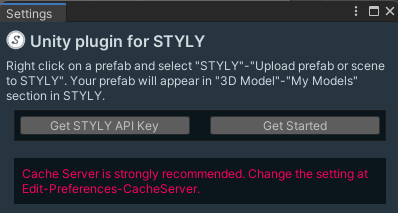
Cache Server is strongly recommended. Change the setting at Edit-Preferences-CacheServer.
Click Edit > Preferences… to open the Preferences screen.
Check if the New Projects default asset pipeline under Cache Server (global) is set to Version 2.
If it is Version 2, no changes are needed.
If it is set to Version 1, change it to Version 2.
Uploading to STYLY from Unity
Once the plugin is ready, you can upload to STYLY using the following steps.
How to Check the File Size for Upload
Here’s how to check the file size of a prefab or scene.
Uploading, especially for large files, can take several minutes or longer, so be sure to check the file size before uploading to STYLY.
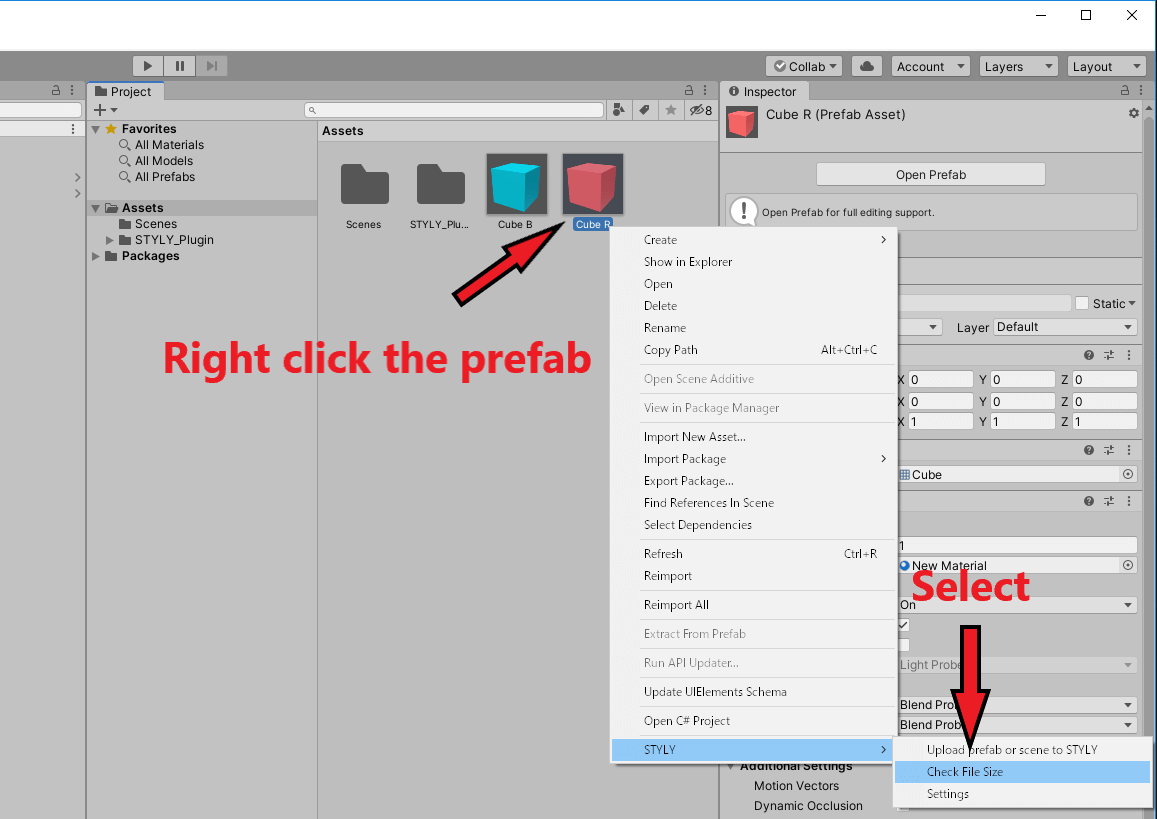
Upload File Size Check Screen
To check the file size, right-click the prefab you want to check and click [STYLY] > [Check File Size].
Upload File Size Limits
When uploading prefabs or scenes from Unity to STYLY, there are file size limits.
- Recommended file size for prefabs: under 20MB
- Recommended file size for scenes: under 100MB
- Maximum upload limit using *AzCopy from Unity: 512MB
- Maximum upload limit without AzCopy from Unity: 256MB
- Maximum upload limit using STYLY Studio’s model upload feature: 100MB
Although the maximum file size is 512MB (or 256MB), it is recommended to stay within the recommended size limits to avoid long upload times.
*You can increase the upload limit from 256MB to 512MB and speed up the upload process by opening [STYLY] > [Asset Uploader Settings] and checking the Enable AzCopy option.
AzCopy is enabled by default on Windows, but not on Mac. If you have large files, enabling AzCopy on Mac can be useful.
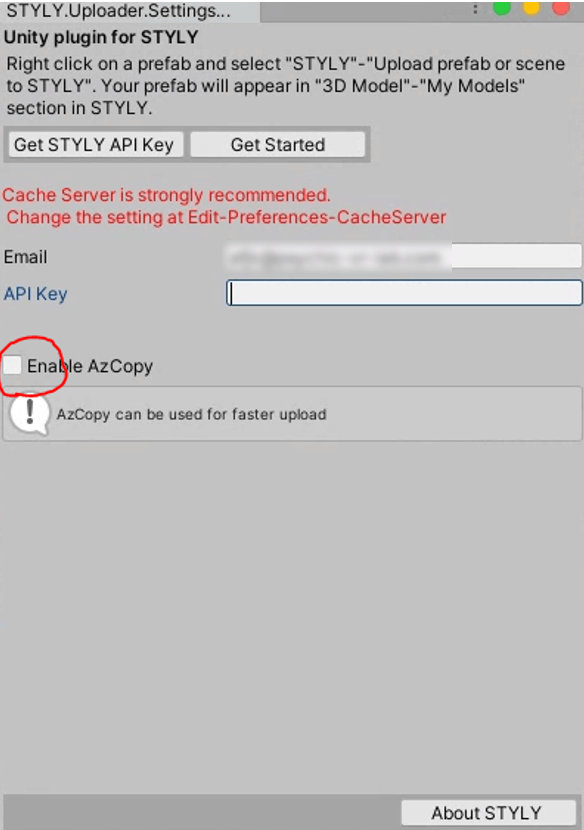
Enable AzCopy
How to Upload a Prefab from Unity to STYLY
After checking the file size, upload the prefab created in Unity to STYLY.
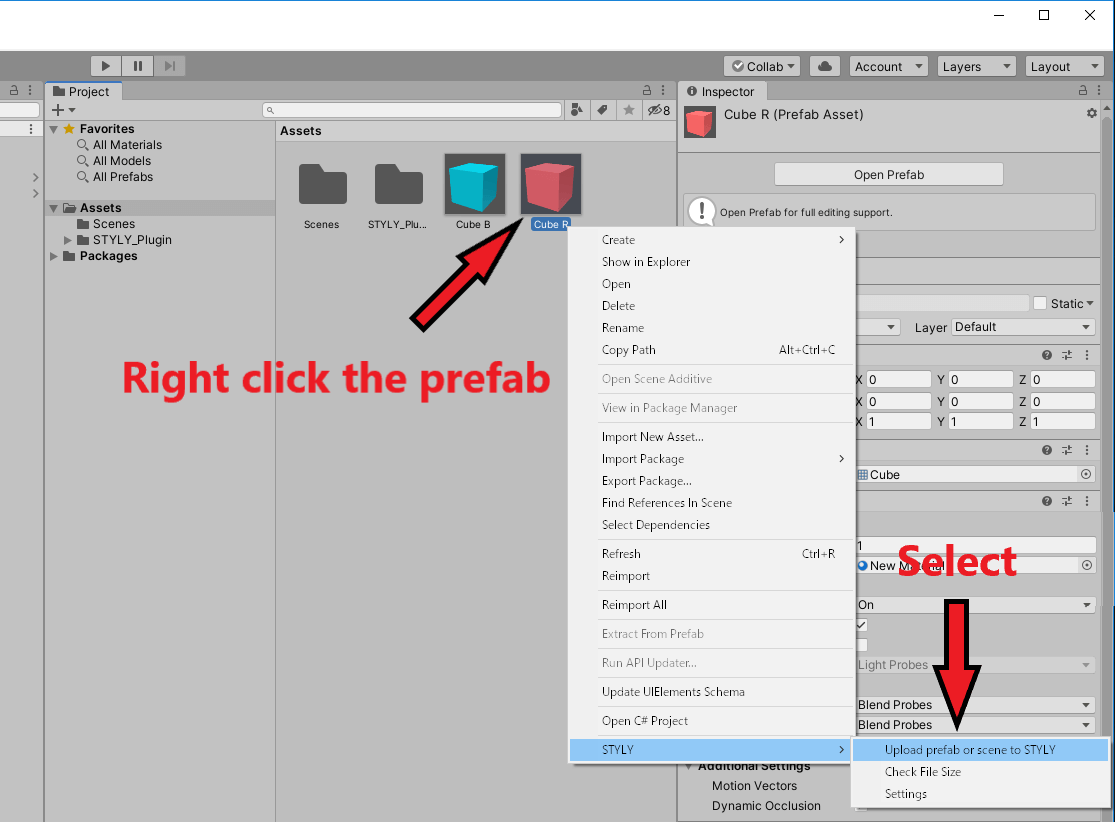
Prefab Upload Screen
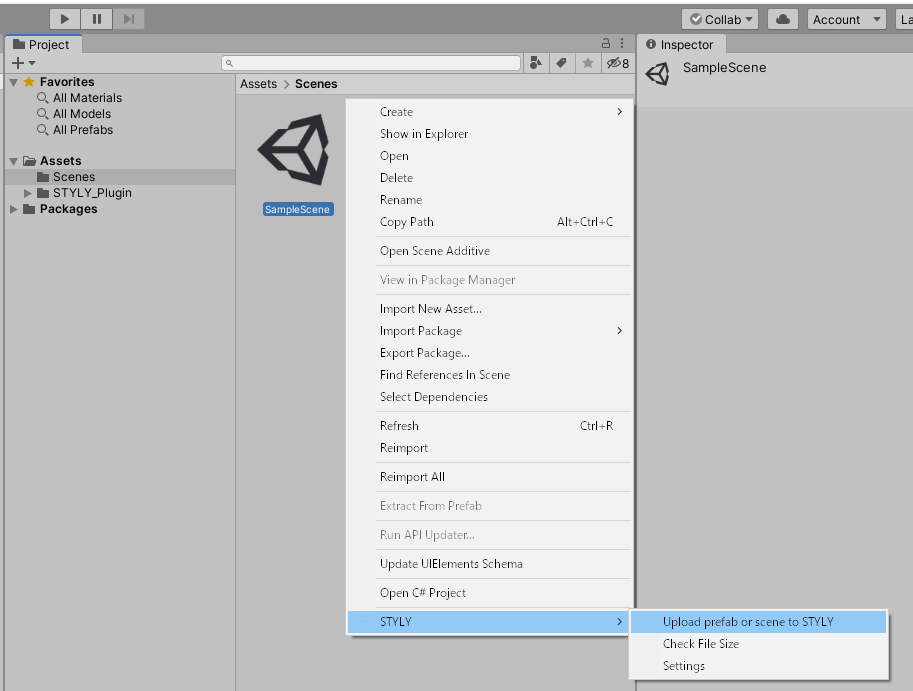
Right-click the prefab you want to upload.
Click [STYLY] > [Upload prefab or scene to STYLY].
The upload process will begin.
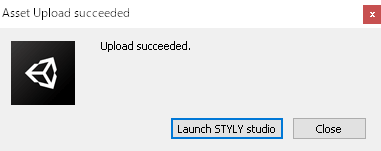
Upload Completion Screen
Once the upload is successful, a popup message [Upload succeeded.] will appear. Click the [Close] button.
If an upload error occurs, please provide detailed information (such as the steps performed and screenshots) in the support forum below.
STYLY FORUM:
https://jp.forum.styly.cc/support/discussions
Uploading Multiple Prefabs
You can upload multiple prefabs at the same time.
In the Project window, select multiple prefabs you want to upload, then right-click.
The procedure is the same as the previous section: select “STYLY” → “Upload prefab or scene to STYLY.”

Selecting Multiple Prefabs
This allows you to upload multiple prefabs at once.
How to Upload a Scene from Unity to STYLY
The method for uploading a scene from Unity is the same as uploading a prefab. Right-click the scene file and select “Upload prefab or scene to STYLY.”
Click “Upload prefab or scene to STYLY”
Restrictions
- Cameras in the scene are automatically disabled when uploaded. However, cameras with the following settings are excluded from this:
- TargetTexture is set to a RenderTexture.
- Camera Target Eye is set to None (Main Display).
- Scripts will not be applied.
- Other dynamic content may not function properly.
- Scenes will be displayed in STYLY Studio, but you cannot move, rotate, or scale them.
- Adjust the scene by changing Your Position.
- If the file size is too large, it may not upload successfully.
- The scene asset thumbnail will be an image from the camera tagged as MainCamera if available.
- If no MainCamera is present, a DUMMY display will appear.
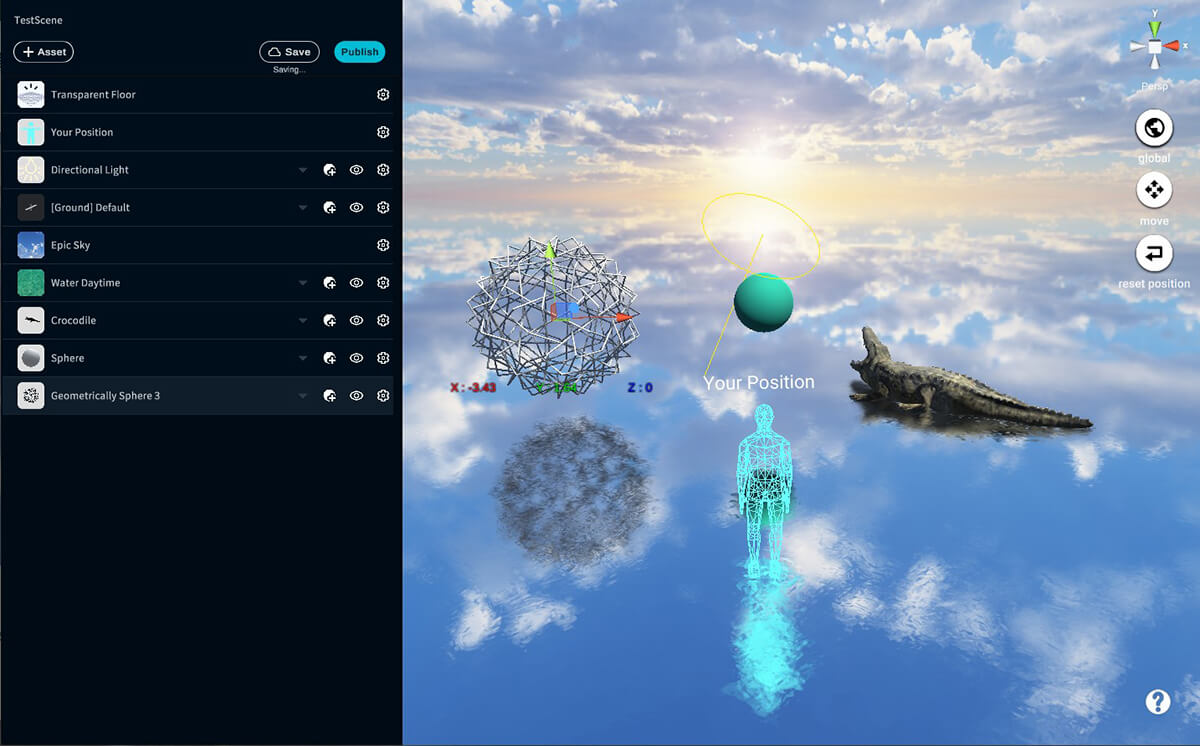
Using Uploaded Prefabs and Scenes in STYLY
Here’s how to check your uploaded prefabs and scenes.
Using Uploaded Prefabs and Scenes in STYLY
Open STYLY Studio and navigate to the scene selection screen.
Click “Open in Editor” to move to the scene editing screen.
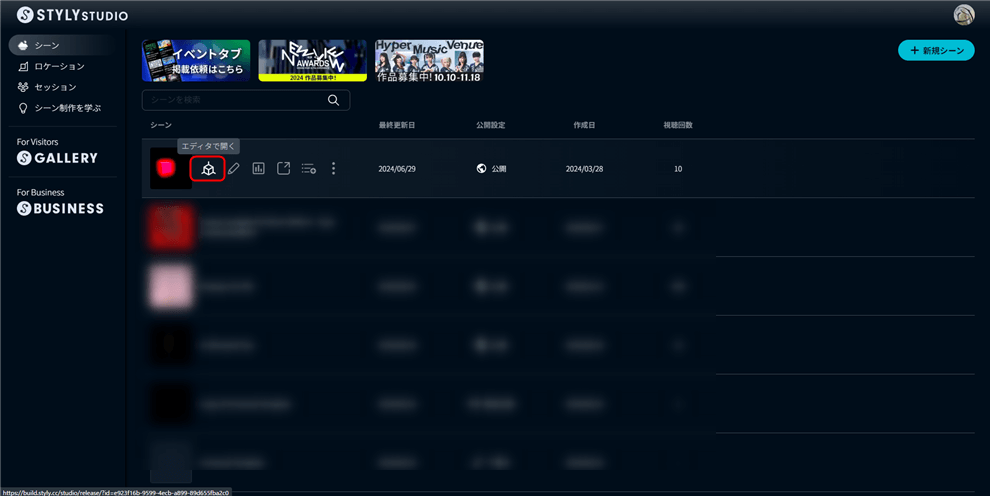
Scene Selection Screen
Once in the scene editing screen, click the asset button in the top left to open the asset addition menu.
From this menu, you can add your uploaded models or assets provided by STYLY Studio to the scene.
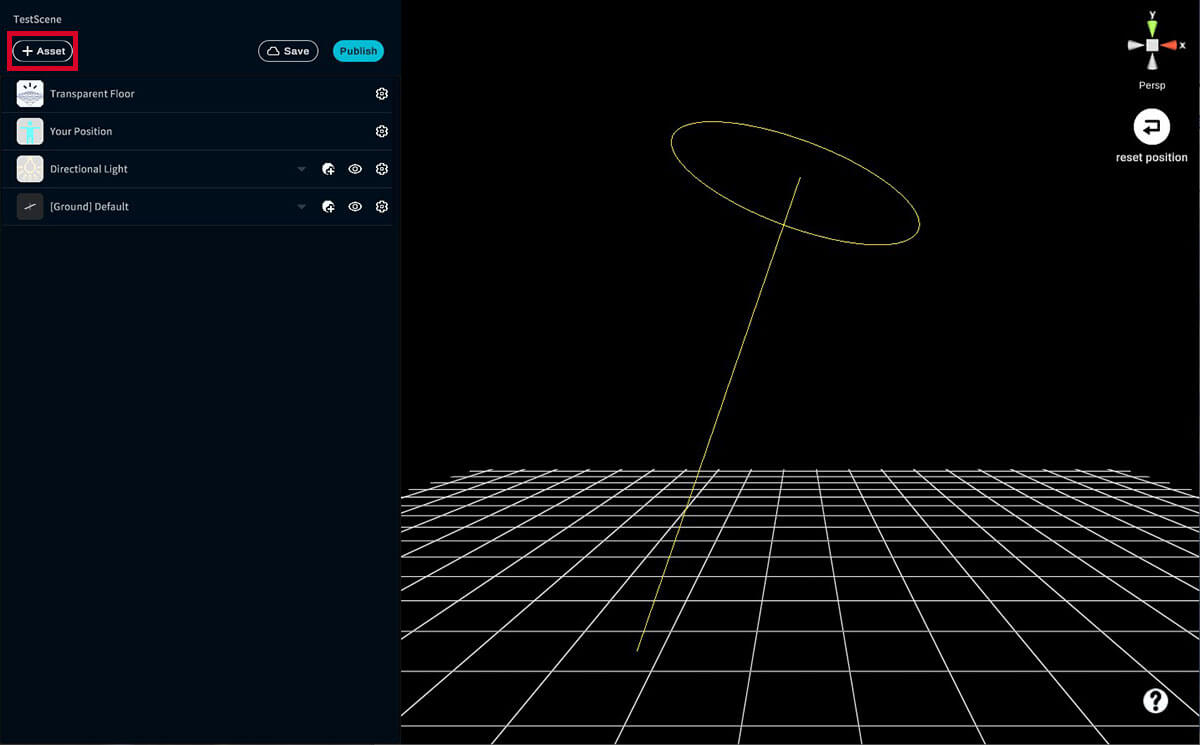
Scene Editing Screen
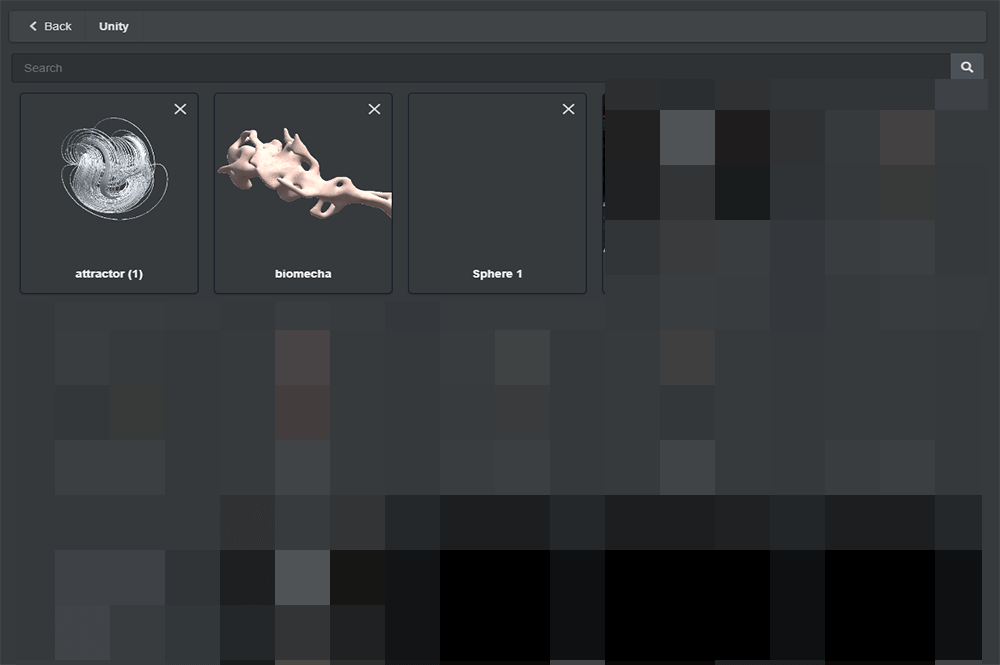
In the asset addition menu, select “My uploads” and then go to “Unity” to find your uploaded assets.

Asset Addition Screen
If your uploaded prefab or scene appears under “Unity,” the process is complete.
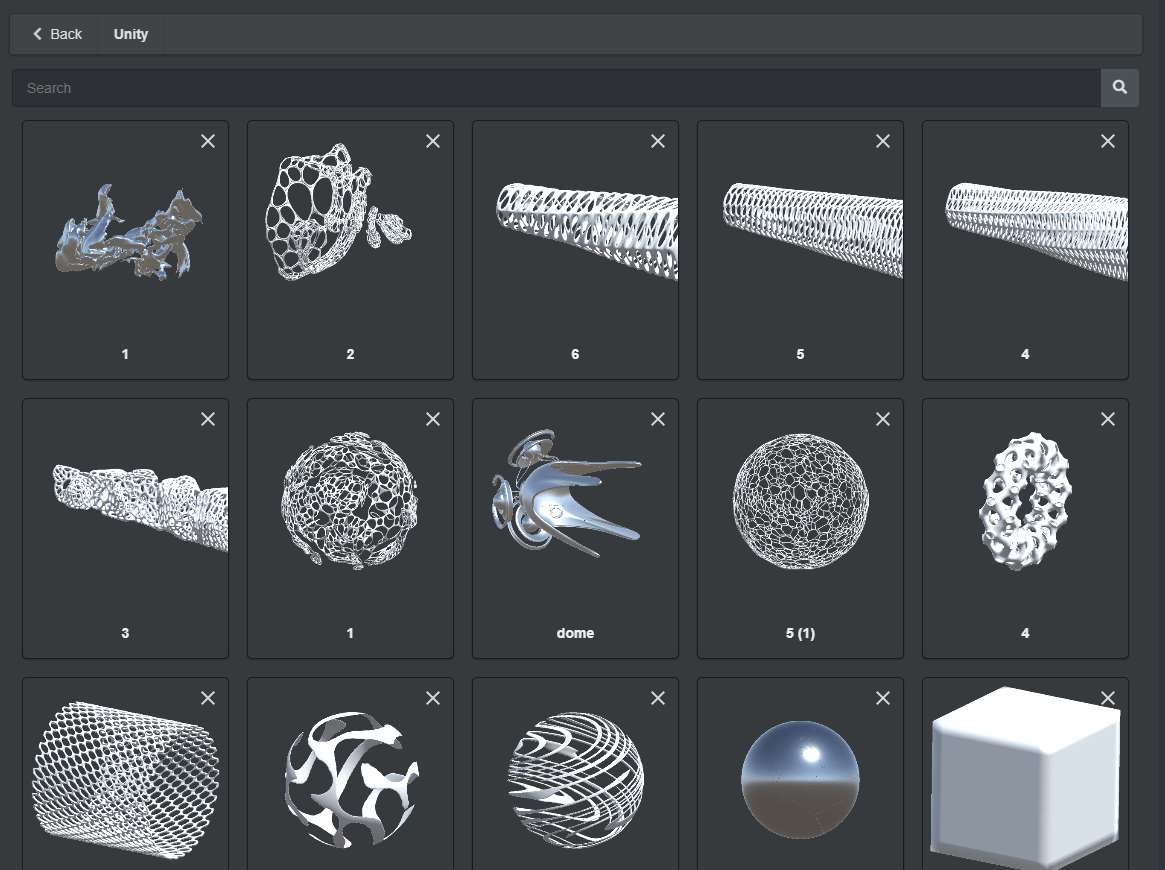
Uploaded Model Confirmation Screen
For questions about STYLY, bug reports, or feature improvement requests, visit the STYLY FORUM.
https://jp.forum.styly.cc/support/discussions