The “Light Probe” feature is now available on STYLY.
This feature allows you to set up more realistic and lightweight spatial lighting textures for VR and AR.
STYLY Release Note:STYLY-VR v2.9.2 (2021/12/21)
Template scenes and assets that already have the “Light Probe” feature implemented can now be used in Studio.
The template scene includes Reflection Probe and LightMap in addition to the Light Probe features, so you can create a scene with well-lit.
In this section, I will explain how to use the template scene in STYLY Studio, as well as the features of the Light Probe and other lighting settings.
List of template scenes
Dim Museum
In this template, objects are displayed in a marble-based set with natural lighting. There is also a space for setting captions in the back, which can convey the world view of the exhibition after the viewers concentrate on the works.
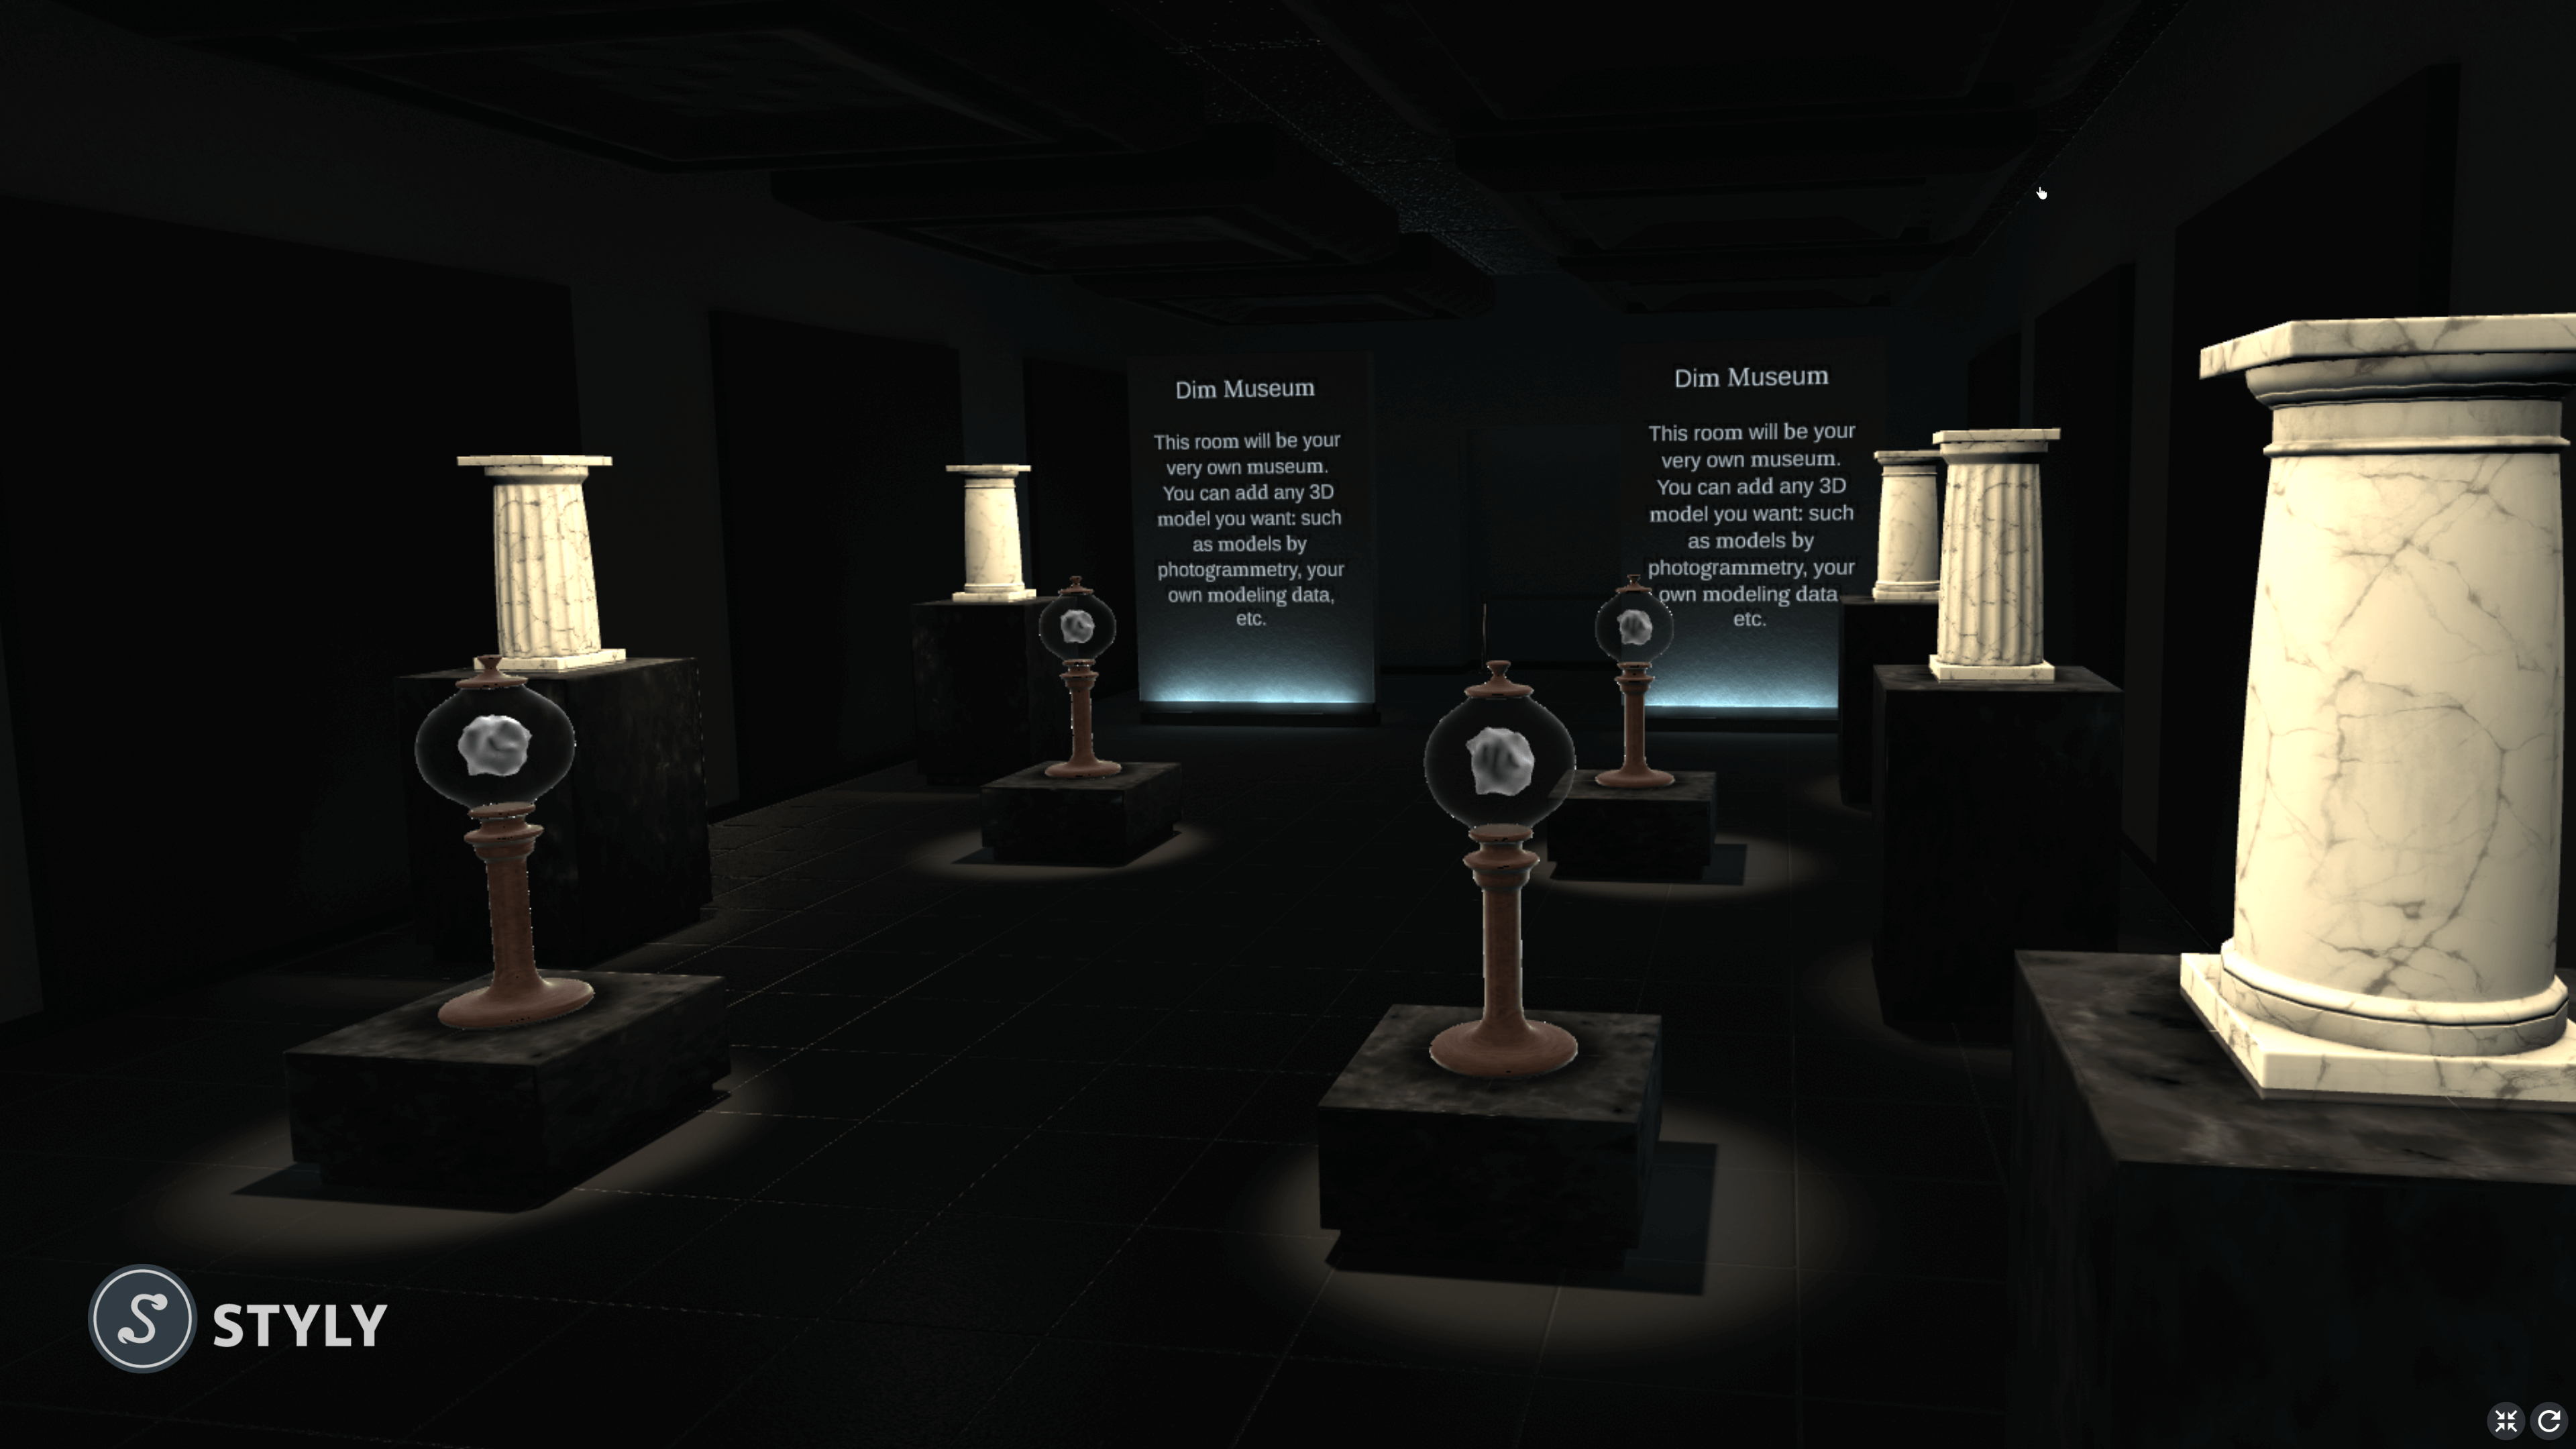
Template scene “Dim Museum”
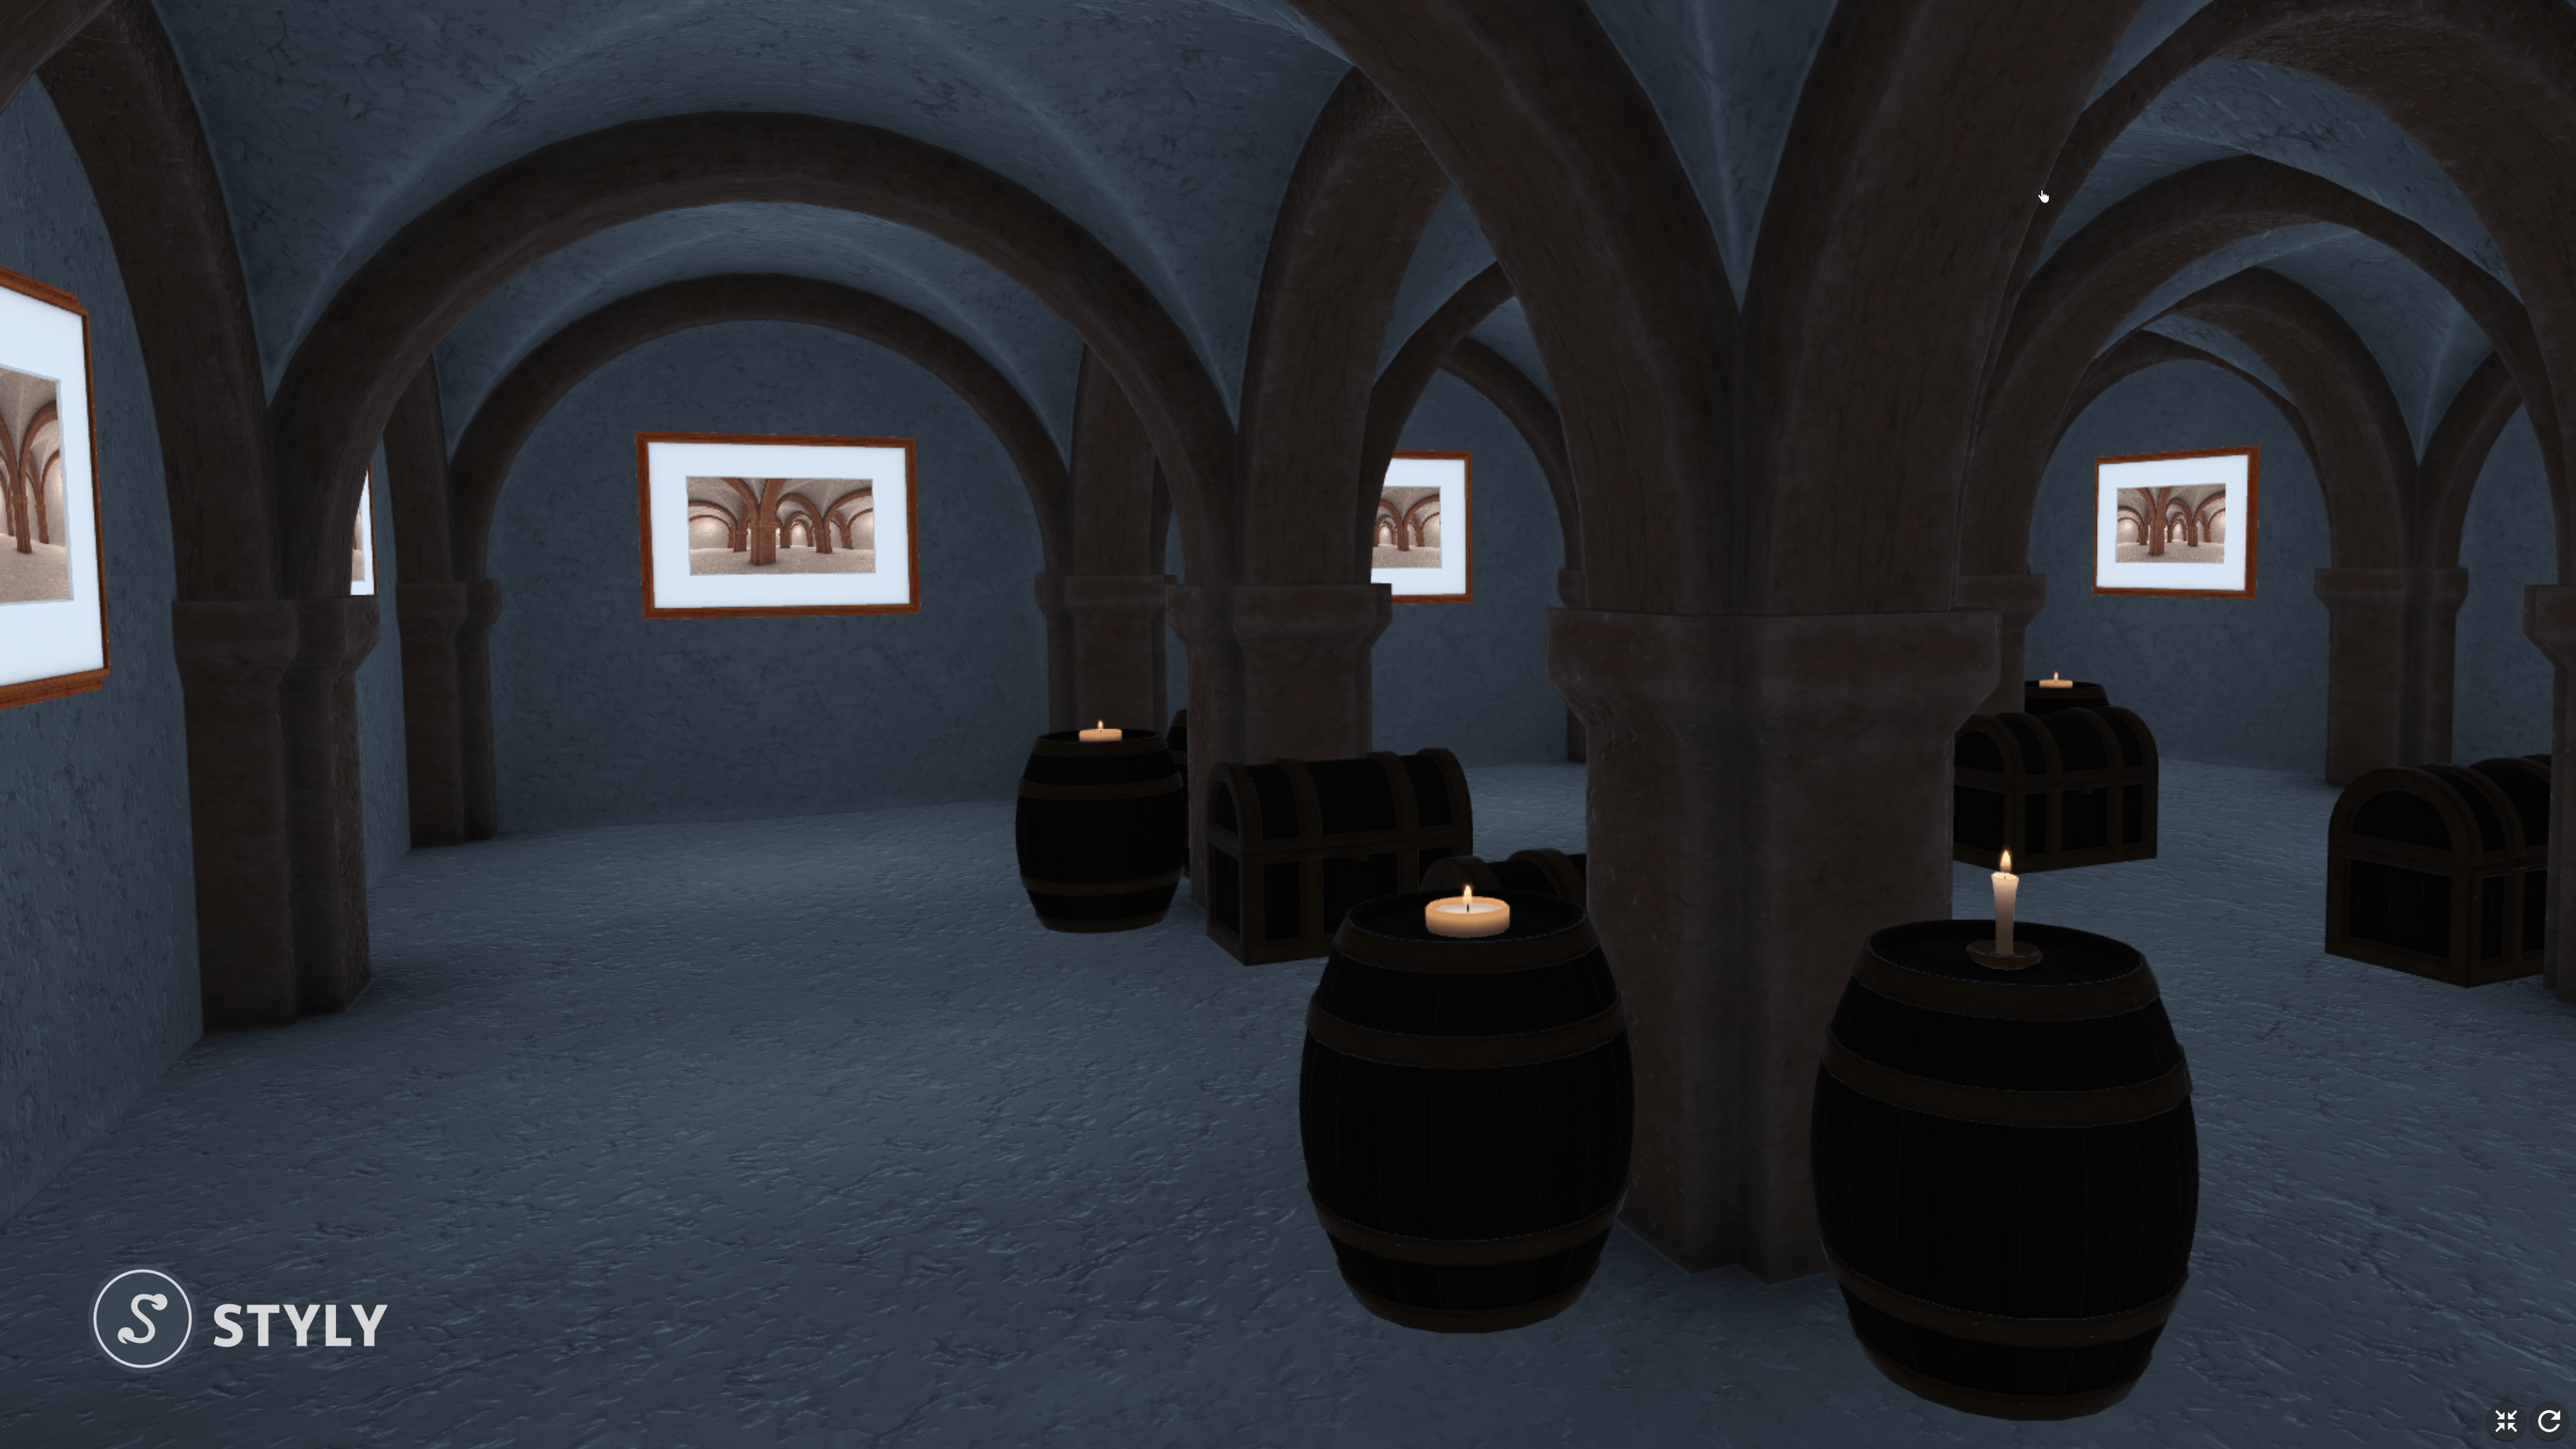
Crypt Light
This template allows you to select your own images from custom assets to display on the wall. The European-style pillars, ceiling lights, and shadow textures are smooth, and the scene allows the viewer to concentrate on the work.

Template scene “Crypt Light”
Crypt Dark
This is a dark version of the Crypt Light template. You can choose between Light and Dark scenes to match the mood of your work. You can enhance the sense of immersion by using Narration and BGM.
Template scene “Crypt Dark”
What is the “Light Probe” that became available in this update?
Light Probe is a setting that simulates the lighting in the scene space for each section in advance, and stores the information about the lighting in the scene. Originally, Unity and STYLY are set to simulate lights in real time, but due to the load, the simulation is limited.
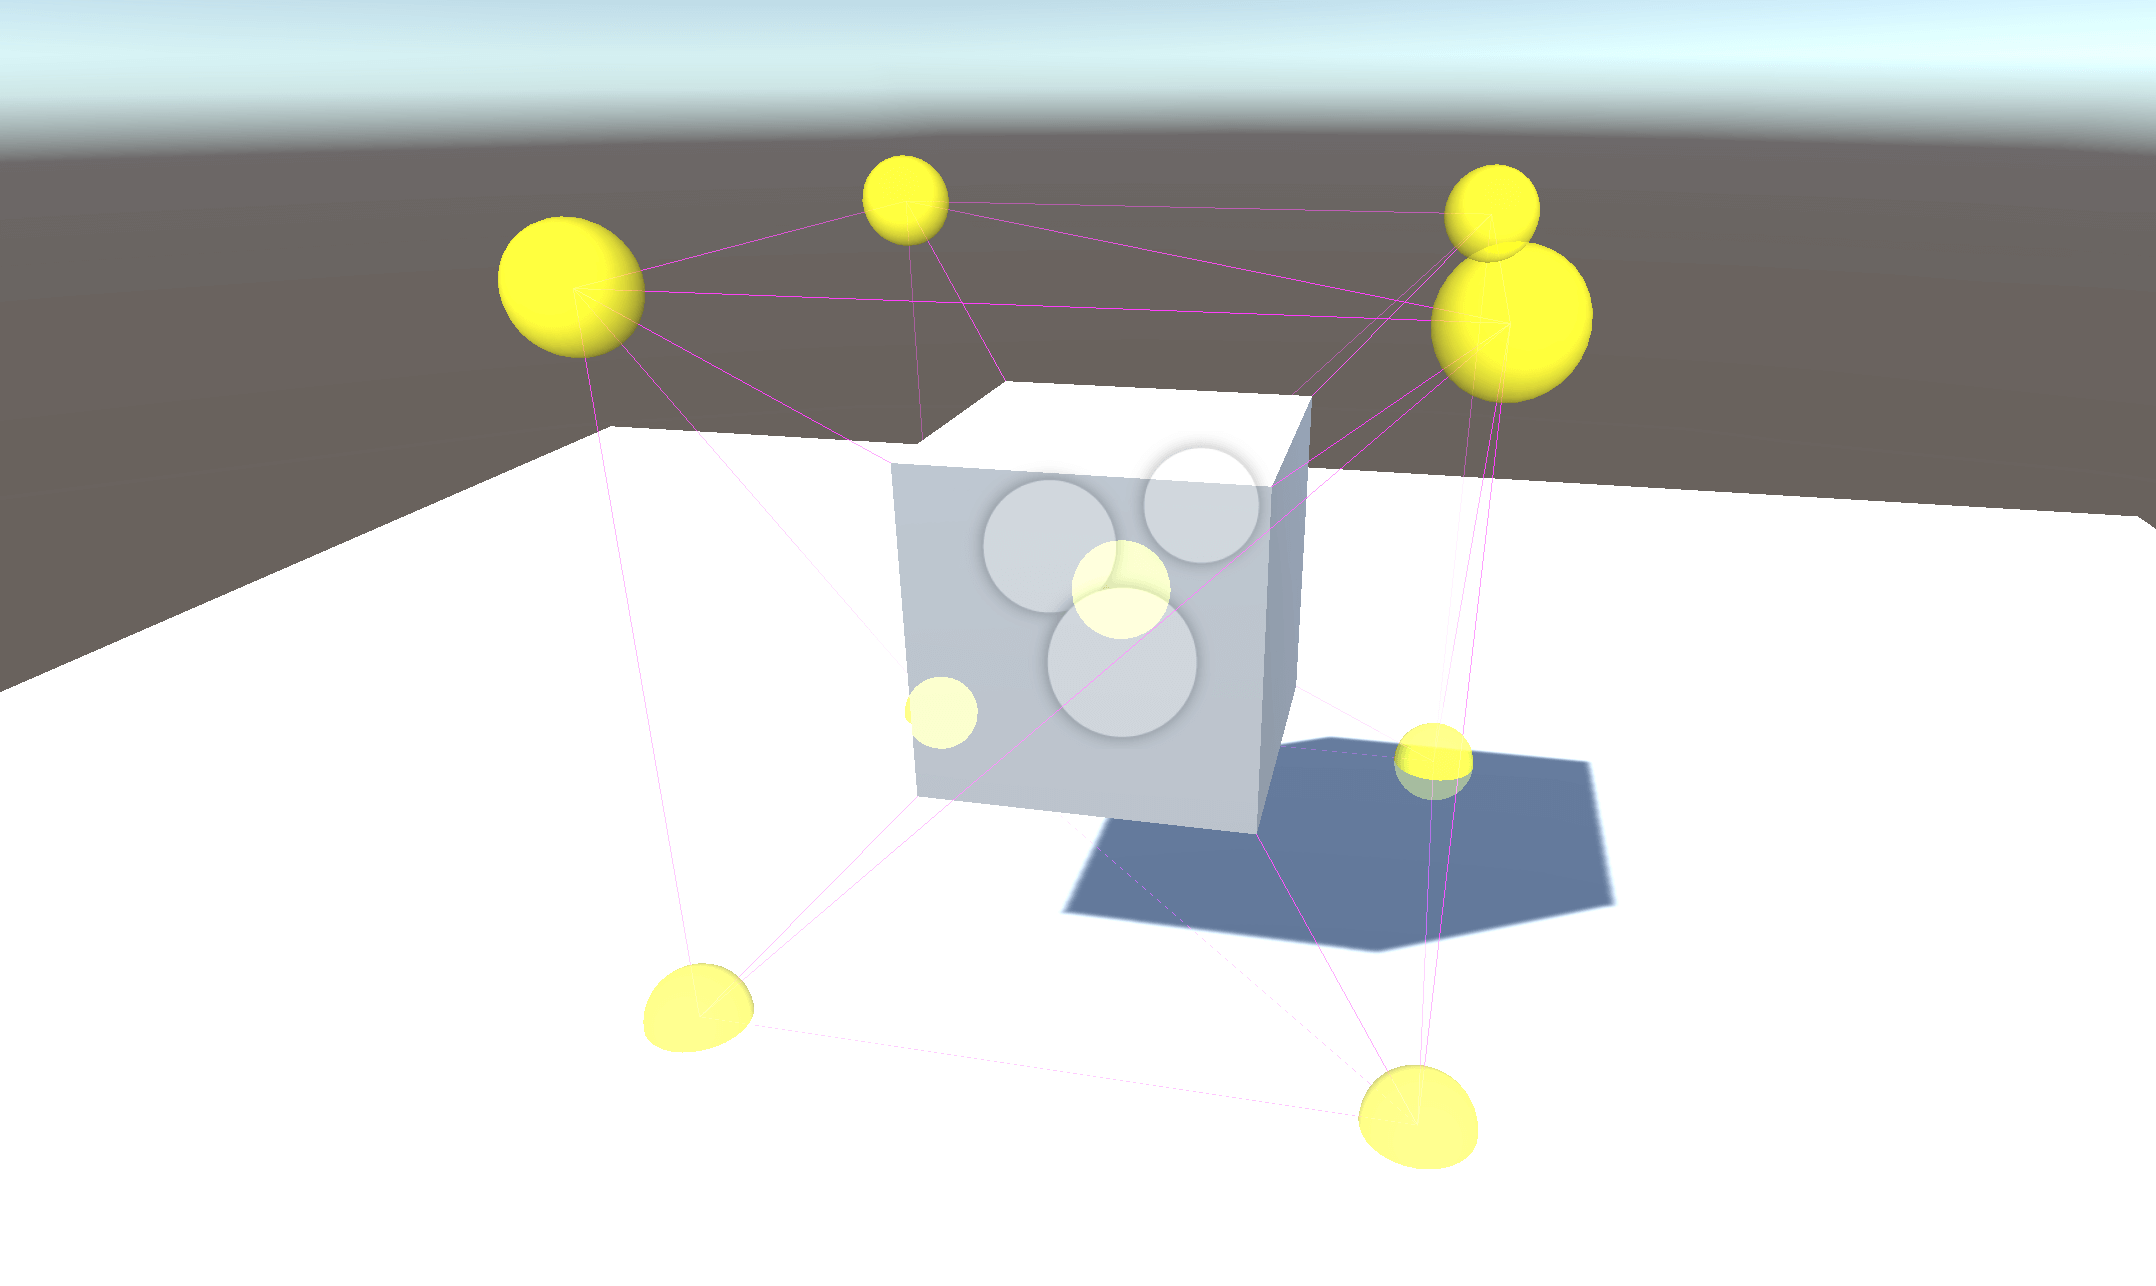
The lighting information is stored in advance for each section of the scene.
Let’s compare the scene without Light Probe setting and the scene with setting in the image.
By setting up the Light Probe, the lighting information of the space can be stored and set up without placing lights that are burdensome to the simulation such as Point Light.
This is a scene without Light Probe. Objects do not blend well with the background in areas not directly illuminated by the directional light.
Scene without Light Probe
This is a scene with the Light Probe set. Even in a shaded area, the lighting of the object and the background match each other naturally.
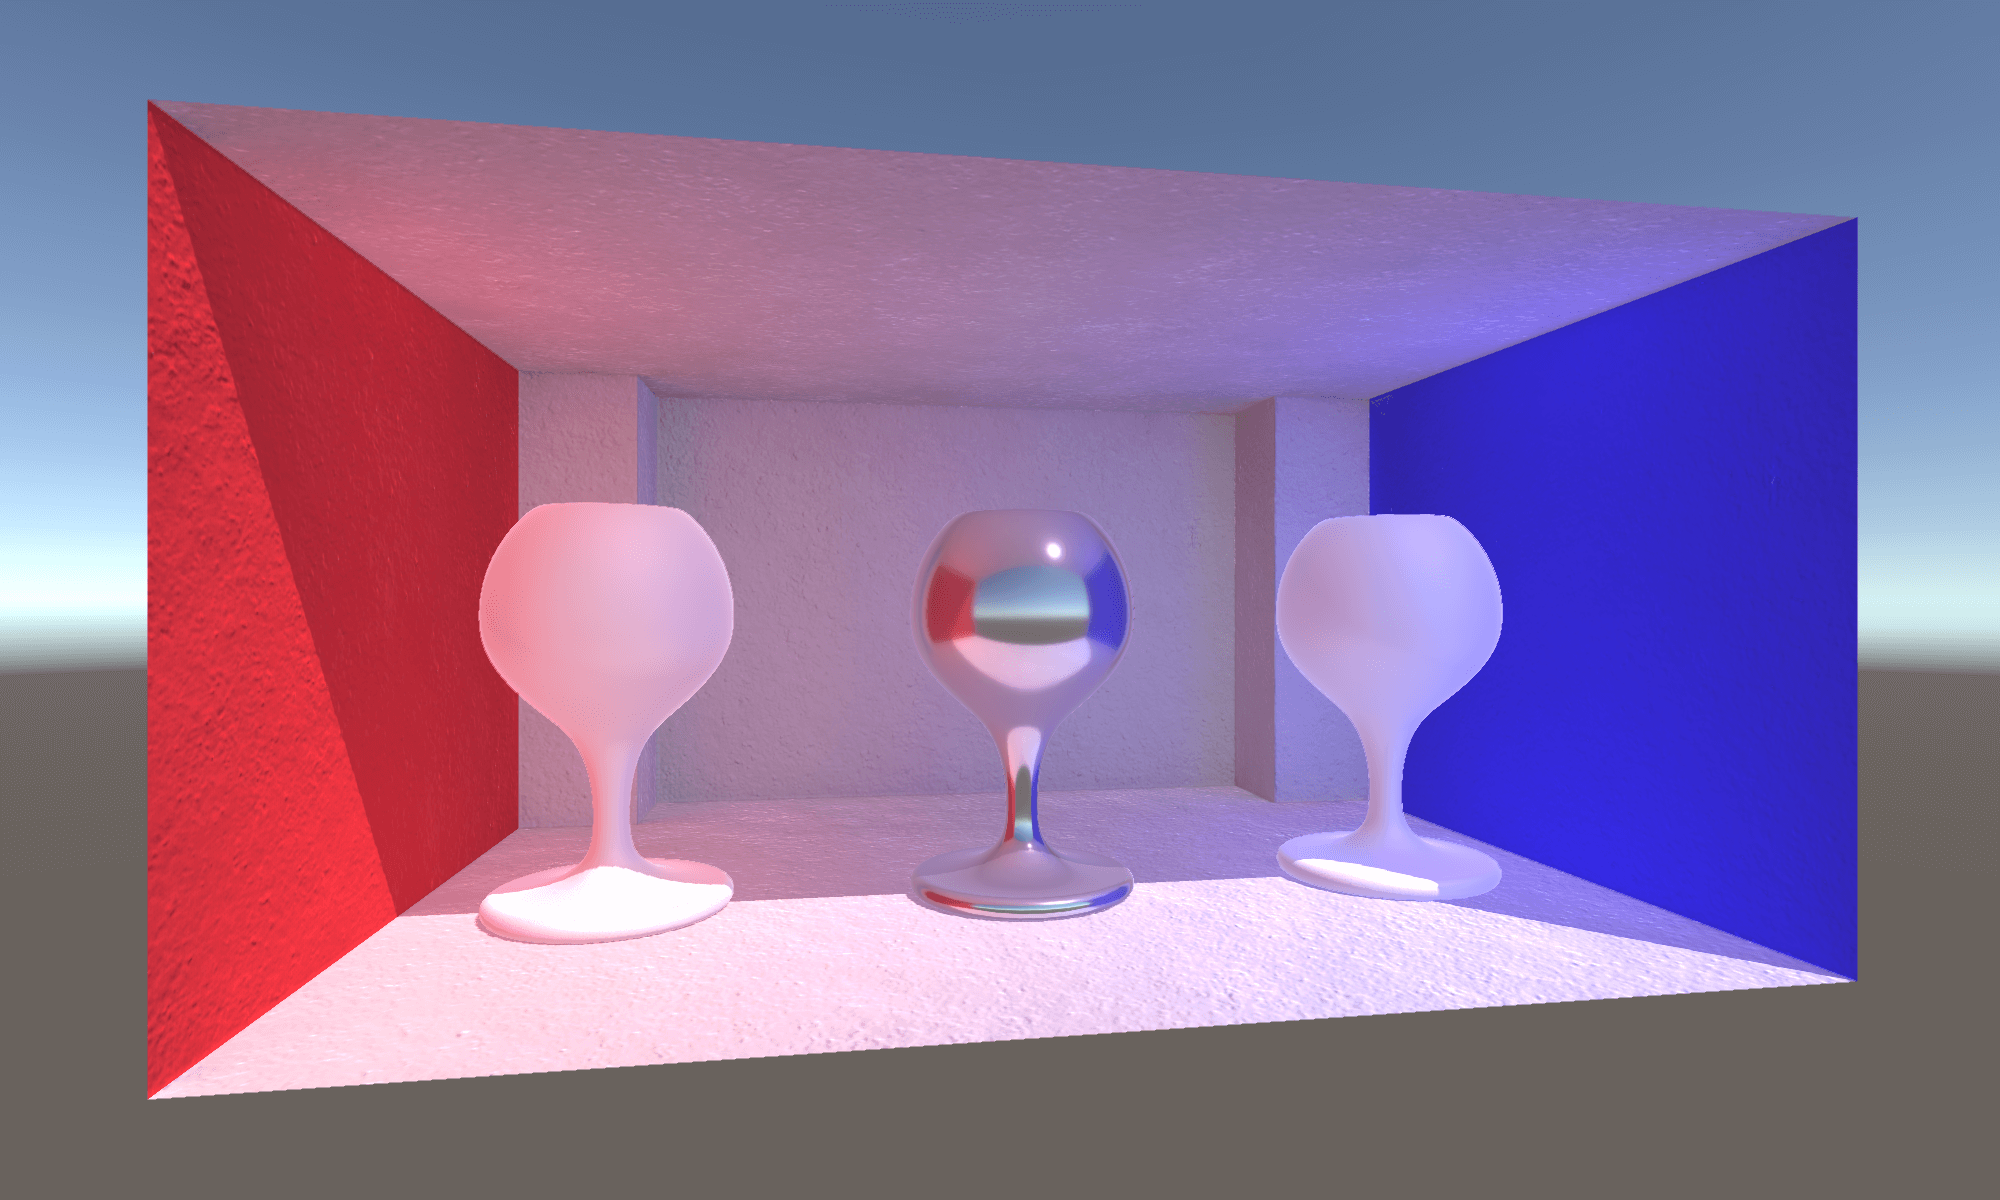
Scene with Light Probe
Specifically, the following characteristics are reflected.
- The accuracy of lighting such as indirect light has been improved, resulting in a more natural appearance.
- Light is simulated in advance, making the scene lighter.
- When using Unity, the degree of shadow detail and the rendering range can be adjusted.
Other lighting features set up in the template scene
LightMap
A “LightMap” is also set in the template scene.
LightMap is a feature that maps and stores the light shining on an object onto the object’s texture in advance. This is especially applicable to backgrounds such as walls and ceilings. It also simulates the light hitting the object beforehand, making the scene lighter and the objects look more natural.
The following is a scene without LightMap. If you don’t place point lights in the shaded areas, there will be dark areas. However, it is difficult to set up a point light that illuminates the entire scene naturally and does not make the scene heavy.
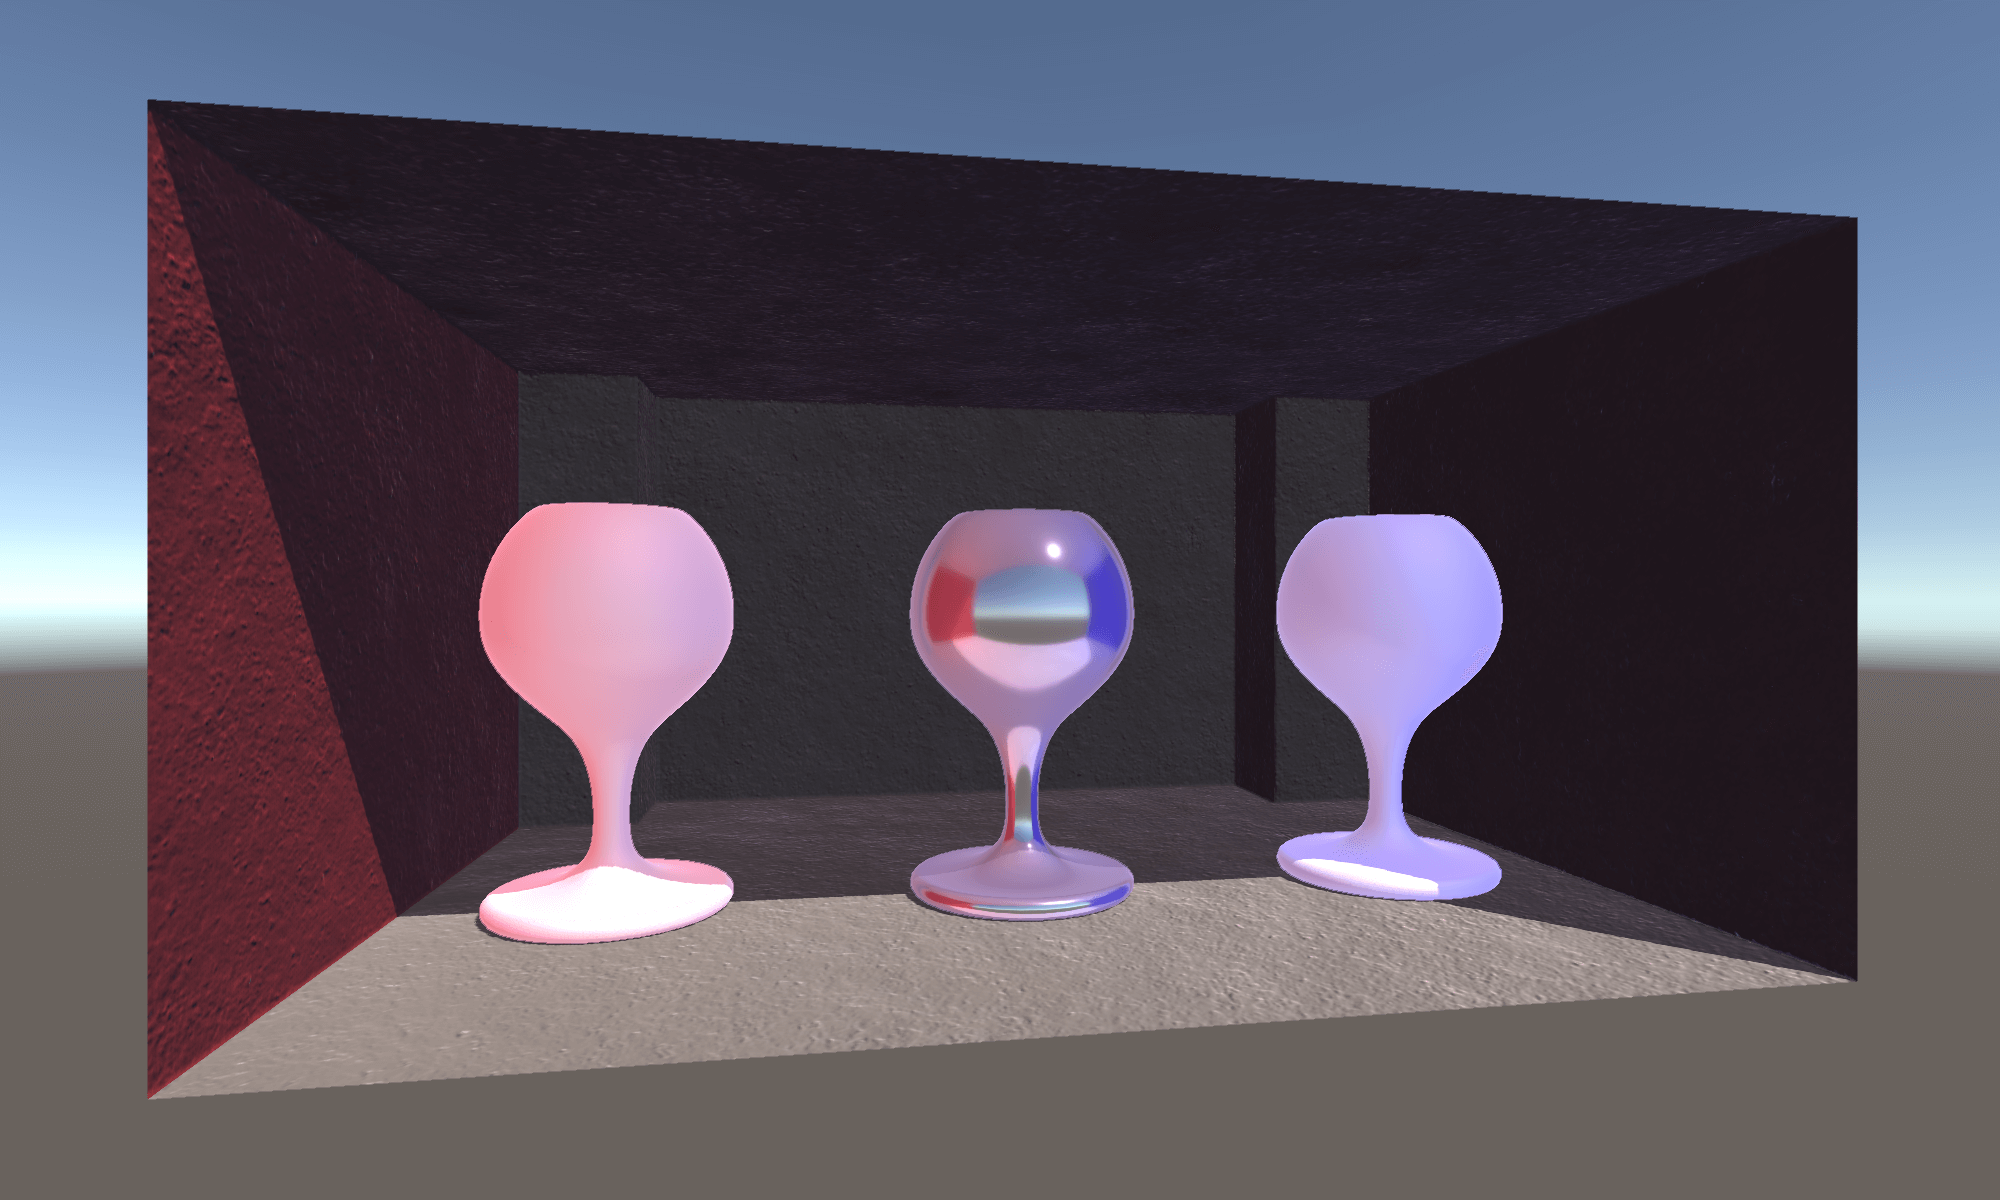
Scene without LightMap
The following is a scene with LightMap set up. The settings for the textures in the room being illuminated are saved in the textures themselves, so the scene is rendered in a lightweight and natural light.

Scene with LightMap
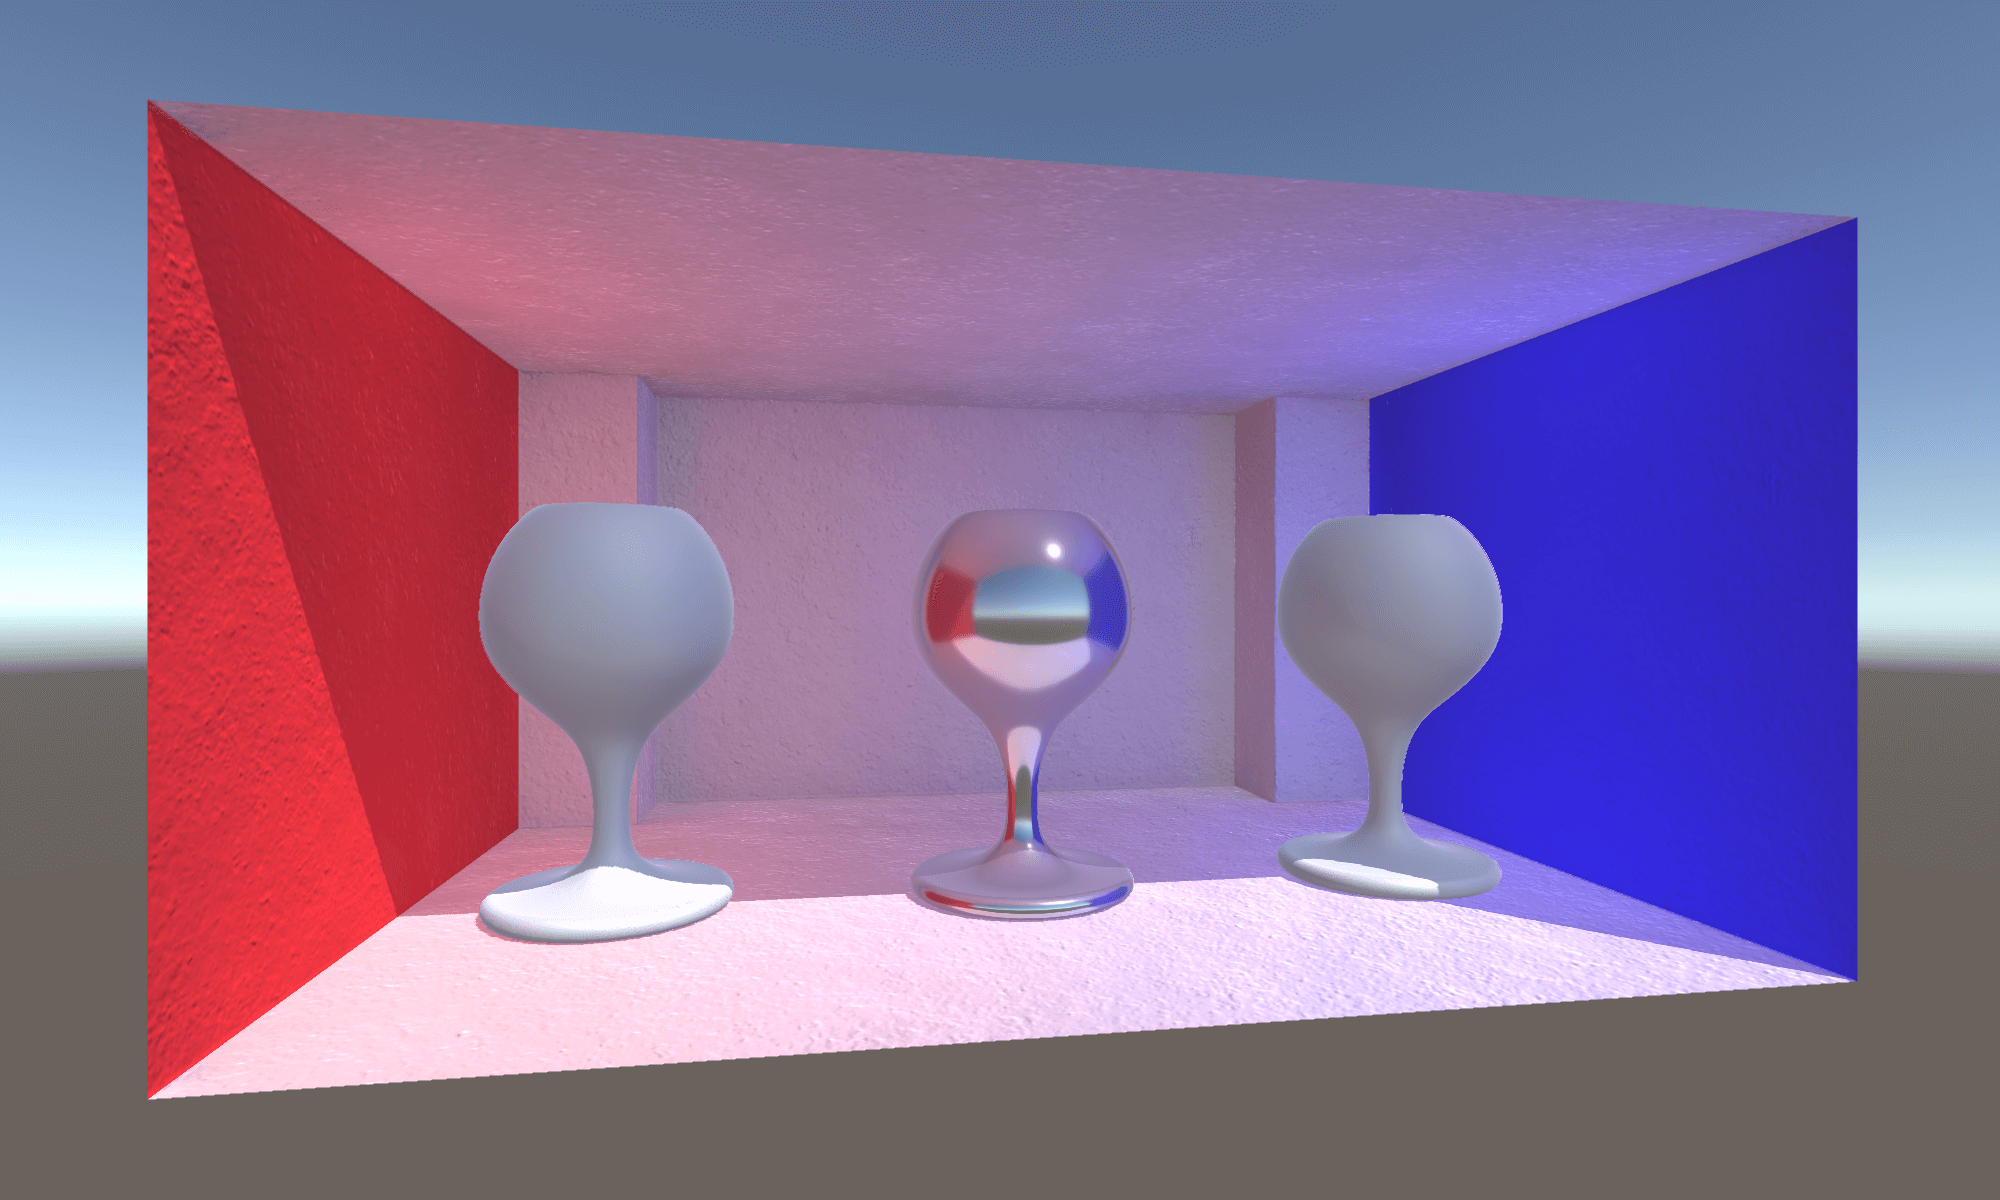
Reflection Probe
In addition, a feature called “Reflection Probe” has been pre-set in the template scene. As the name suggests, this feature allows you to get a simulation of the reflected light. It can be used to show the specular reflection of metal, marble, etc. in a beautiful way.
The following is a scene without Reflection Probe set. Without setting the material and shader, the reflection will look unnatural.

Scene without Reflection Probe
The following is a scene with the Reflection Probe set. The surrounding objects are reflected naturally in the central specular object. Also, depending on the type of shader, the scene can easily be made lighter than simulating with shaders at any time, so you can expect to save weight when placing multiple objects.

Scene with Reflection Probe
How to use the template scene and assets
Let’s try using a template scene that already has the above features implemented.
This time, a “sample scene” with objects already placed in the template scene is also prepared, and you can use it from there.
How to use a template scene
Template scenes can be used from STYLY Studio.
If you are new to STYLY Studio, please refer to the STYLY Started Guide here.
To use a template scene, create a scene in STYLY Studio and open “Assets” indicated by the red frame in the upper left corner.
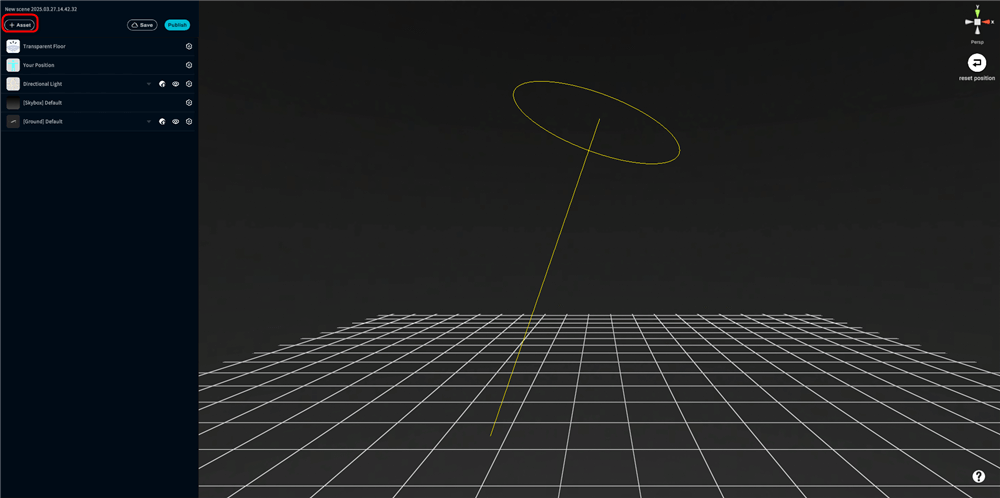
Select “Assets” in STYLY Studio.
Click on “3D object” under Asset, then Then select “Featured”.
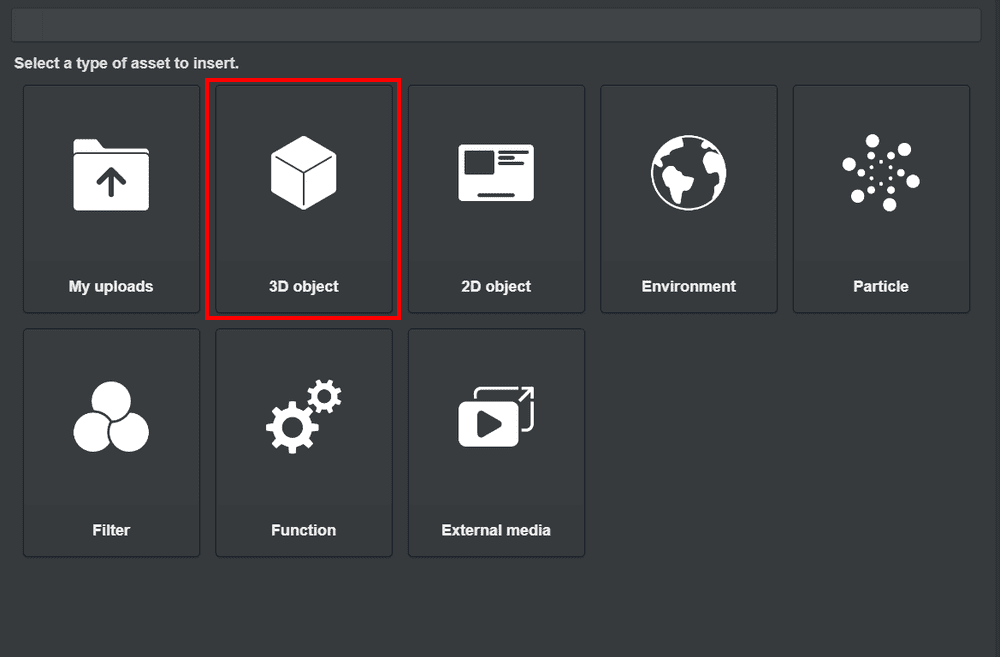
3D object
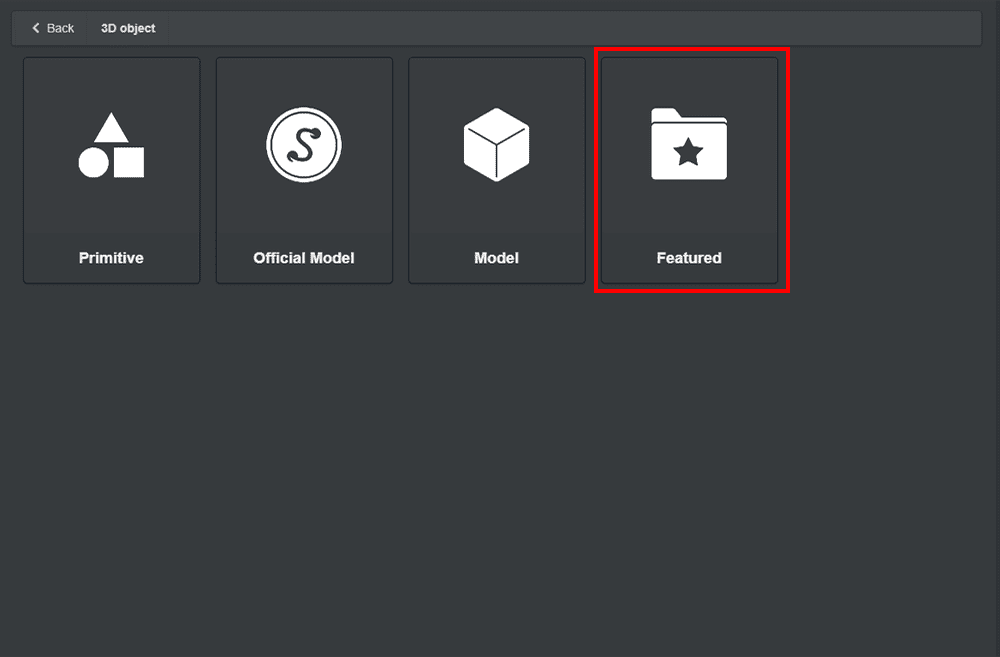
Featured
Open Featured to see the template scene we will be using is available.
Let’s start by explaining how to use the DimMuseum Set. Select “DimMuseum Set”.
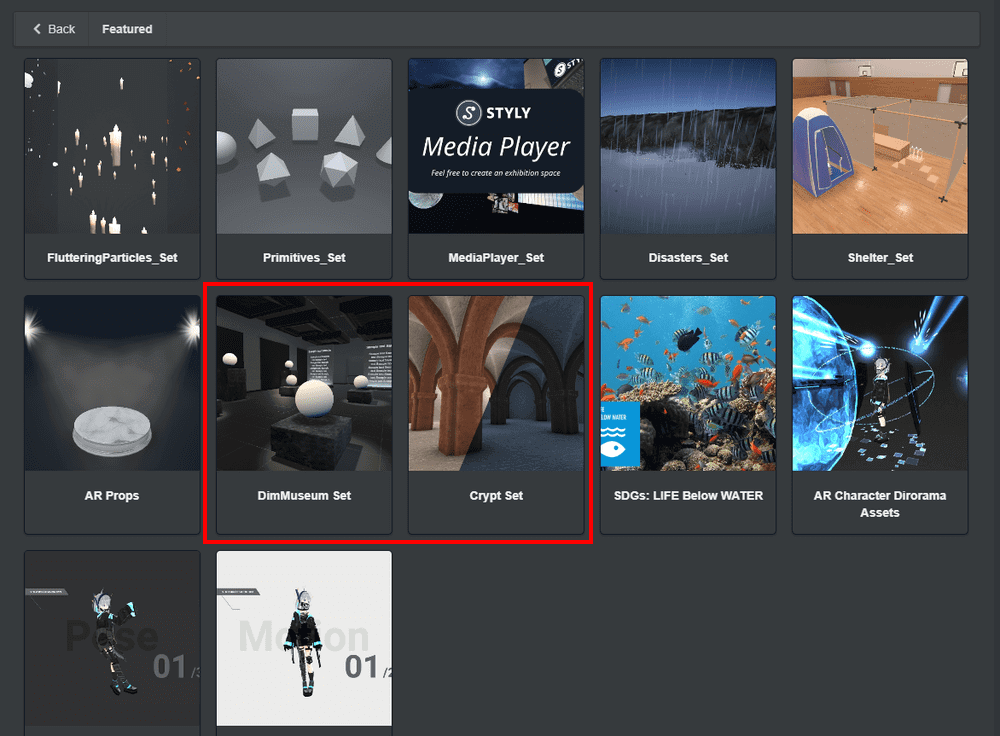
DimMuseum Set
If you open the DimMuseum Set, you will find the following templates. Select “DimMuseum_room_sclupter”.
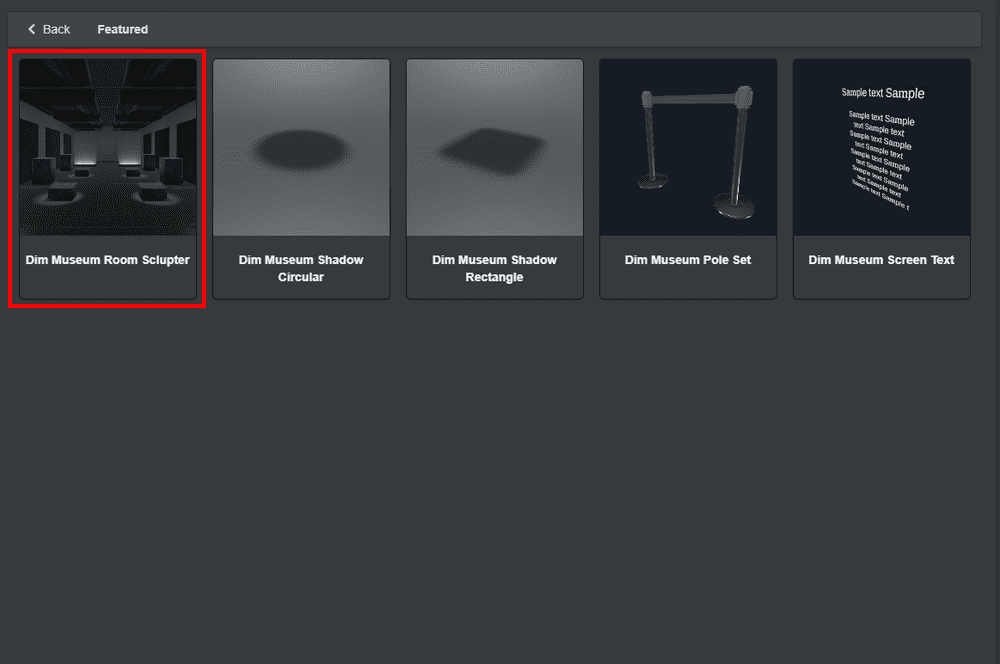
Select “DimMuseum_room_sclupter”
Select “DimMuseum_room_sclupter” and it will look like this.
In this case, we have already set up the lighting for the scene, so select the “Directional Light” icon and turn it off.
This will open the template.
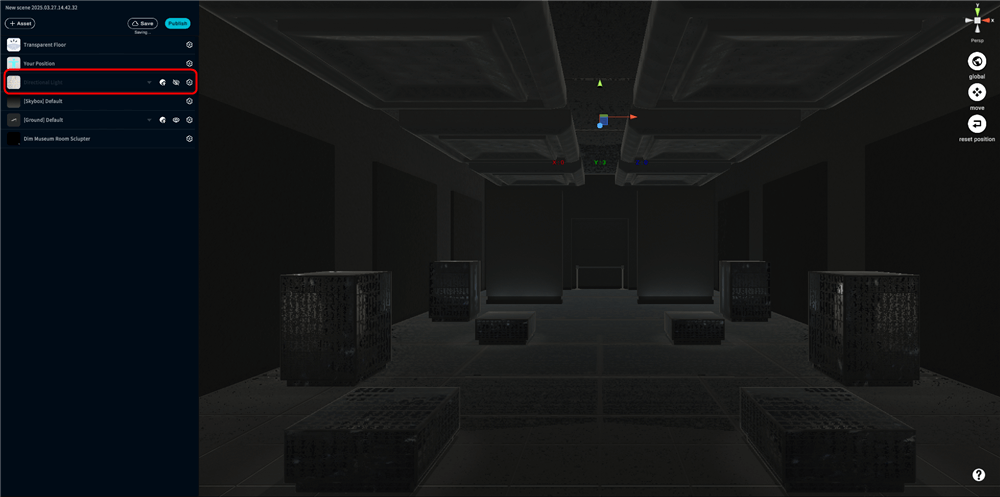
Turning off the “Directional Light
The next step is to actually place the objects in the template scene.
This time, we will place a custom asset from STYLY Studio.
As before, click on “3D object” and continue Select “Primitive”.
3D object
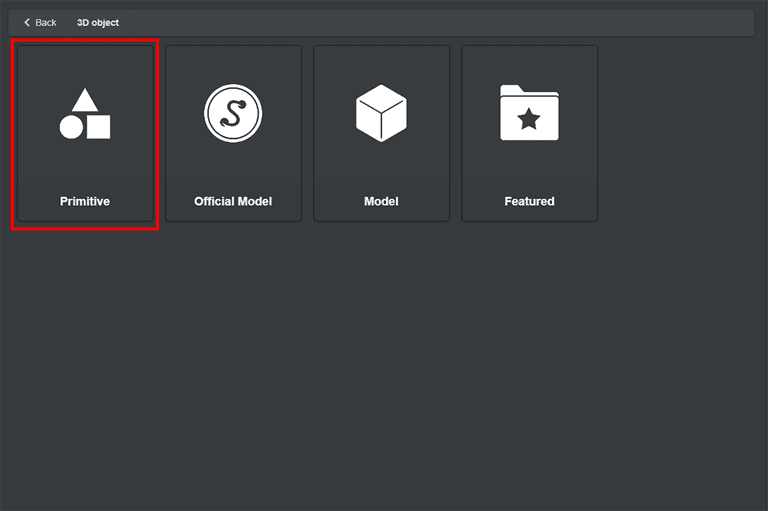
Primitive
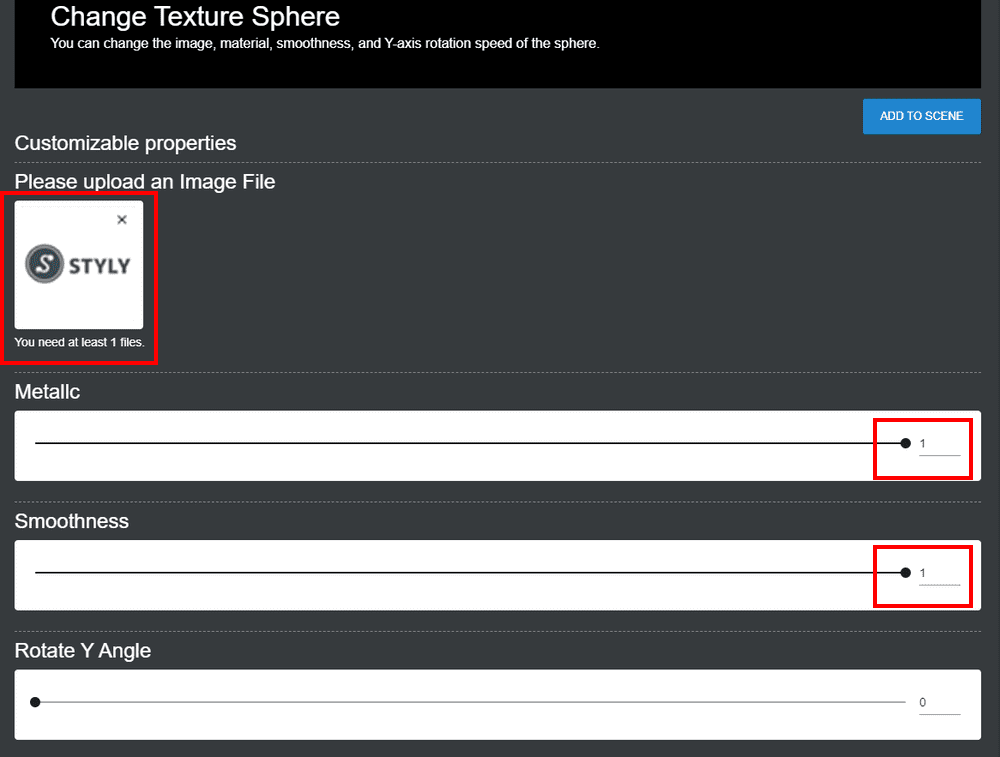
Select “Change Texture Sphere” and place it.
This time, I added the STYLY logo in the “Please upload an Image File” field.
To see how the specular reflection looks, I set the “Metalic” and “Smoothness” values to 1.
Once the settings are made, select the blue “ADD TO SCENE” button and place it on the pedestal.

Change Texture Sphere
This time, we will set it as shown in the red frame above
Also, under the object, select “Featured > DimMuseum Set > Dim Museum Shadw Circular” and place the round shadow in the following image on the pedestal.
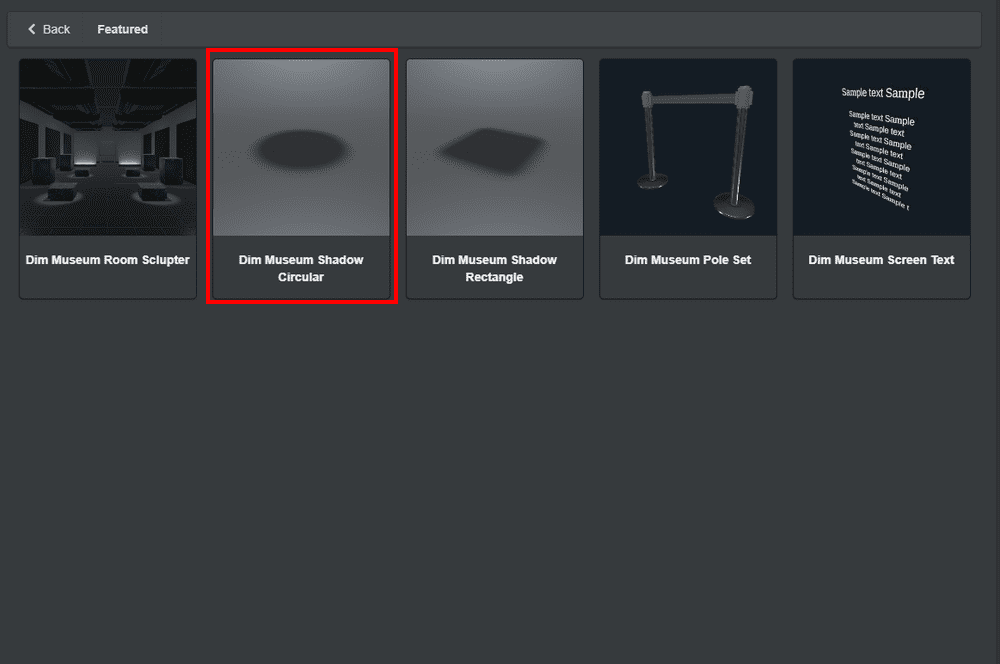
Select “DimMuseum_shadow_circular” and place the shadow.
As you can see below, we have placed an object on the template pedestal that also reflects the simulation of the specular surface.
In this template scene, the image of the object reflected by the object placed in the scene will be the image of a virtual object.
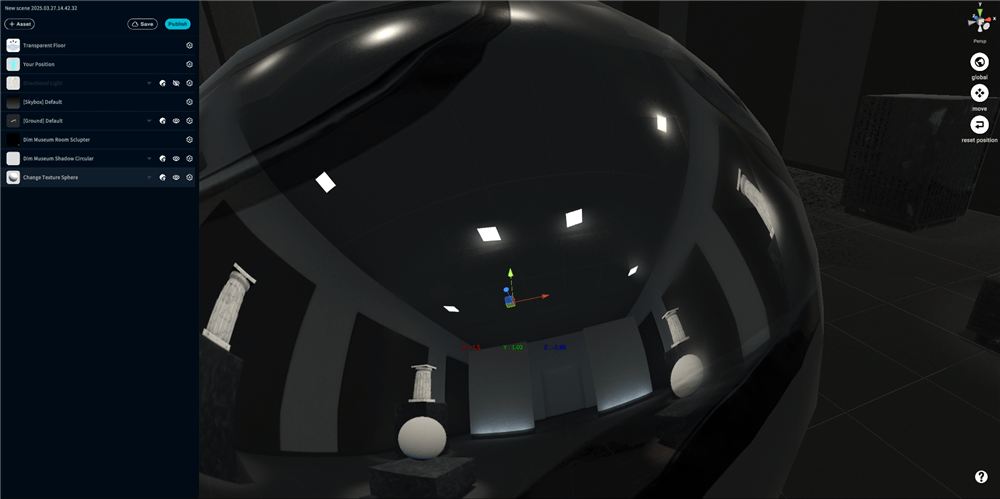
I was able to place objects with simulated lighting and specular reflection.
You can also place text that will serve as a caption.
After selecting “3D object > Featured > DimMuseum Set”, select “CustomAsset” in the upper tab, and you can select “DimMuseum_ScreenText” as shown below.
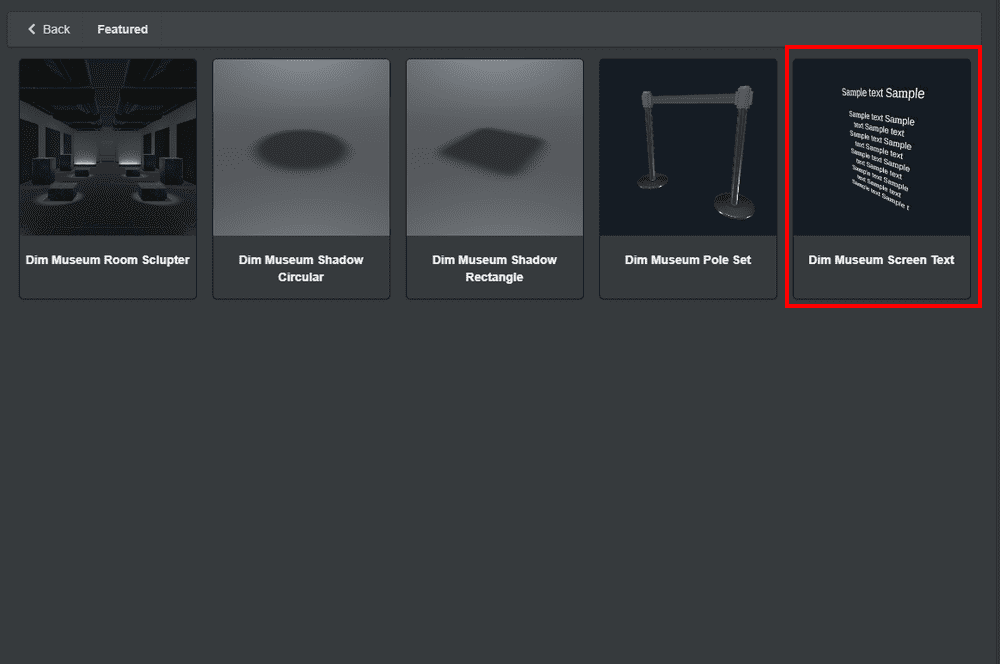
Select “DimMuseum_ScreenText” from “CustomAsset”.
Enter “Title text” and “main text” here (English only) and select “ADD TO SCENE” to create a text object.
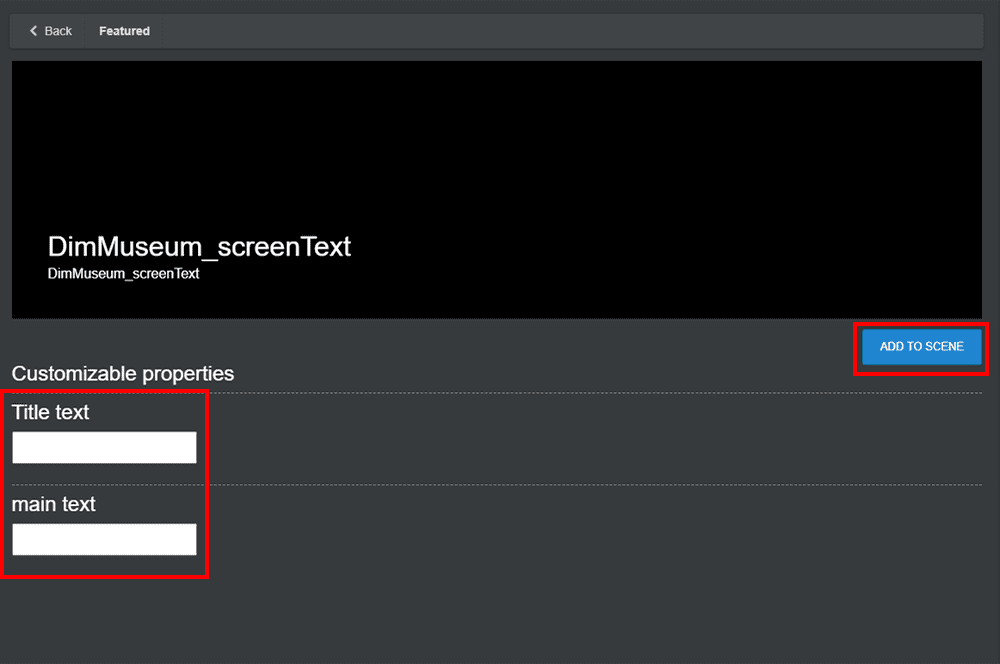
Insert text in “Title text” and “main text” and select “ADD TO SCENE”.
By creating and arranging objects in this way, you can reflect natural lighting on various types of objects, as shown in the following image. If you are a modeler or photogrammetrist, please try placing your own models in this way.
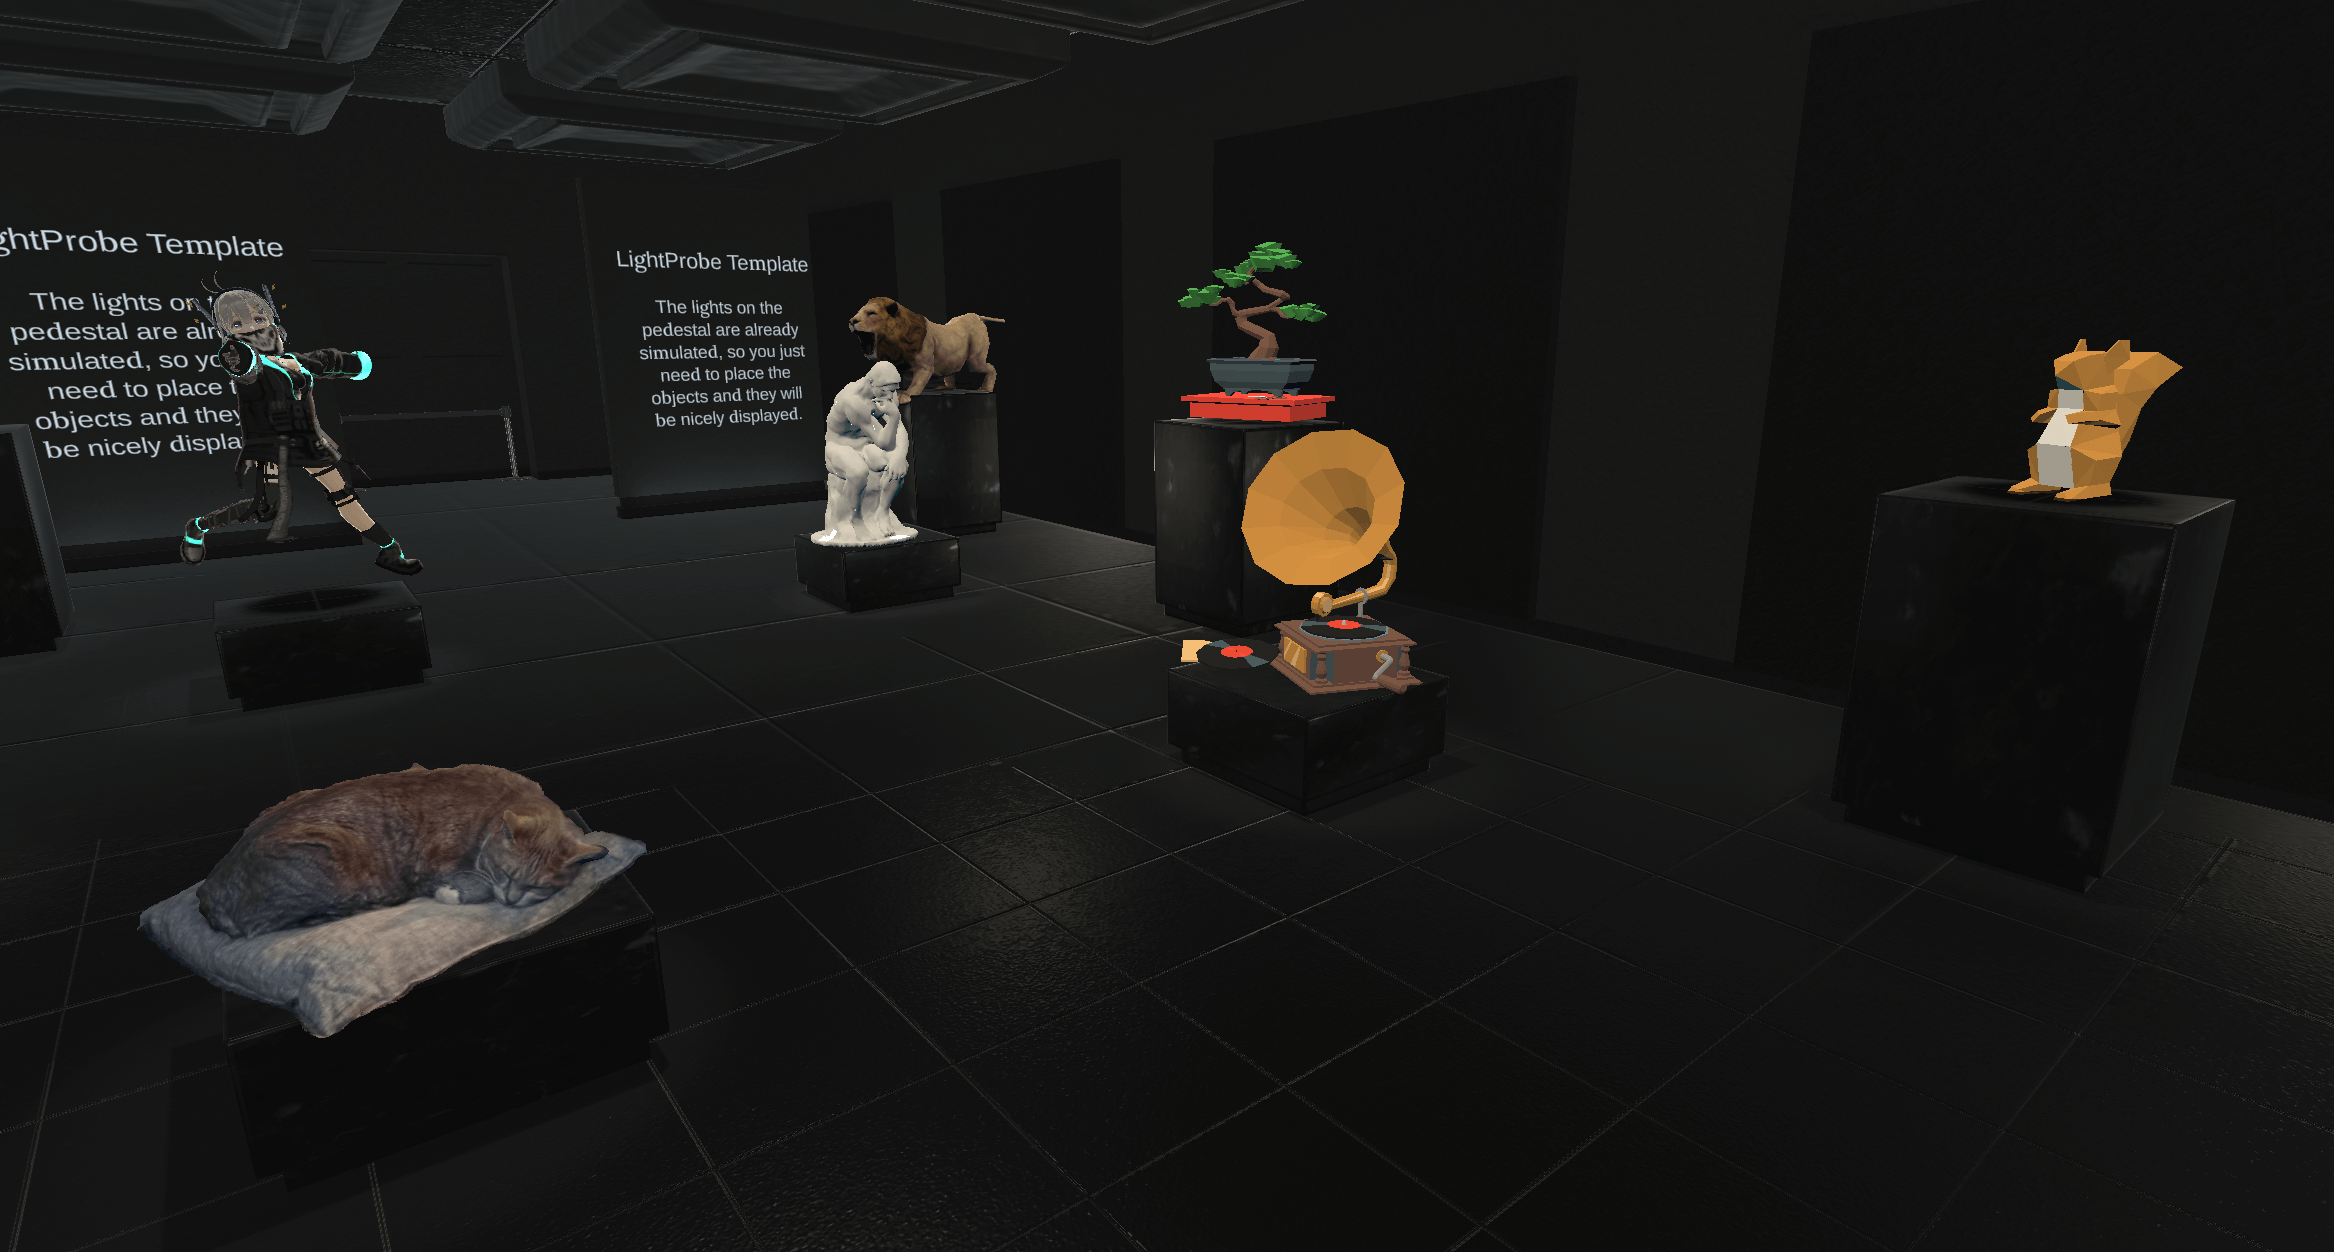
Various objects can be placed and displayed.
If you follow the same procedure as in DimMuseum and select “3D object > Featured > Crypt Set”, you can also use CryptLight and CryptDark templates. Here, if you select “Crypt_photoframe_wood” from Custom Asset, you can display an image with a frame that matches this template.
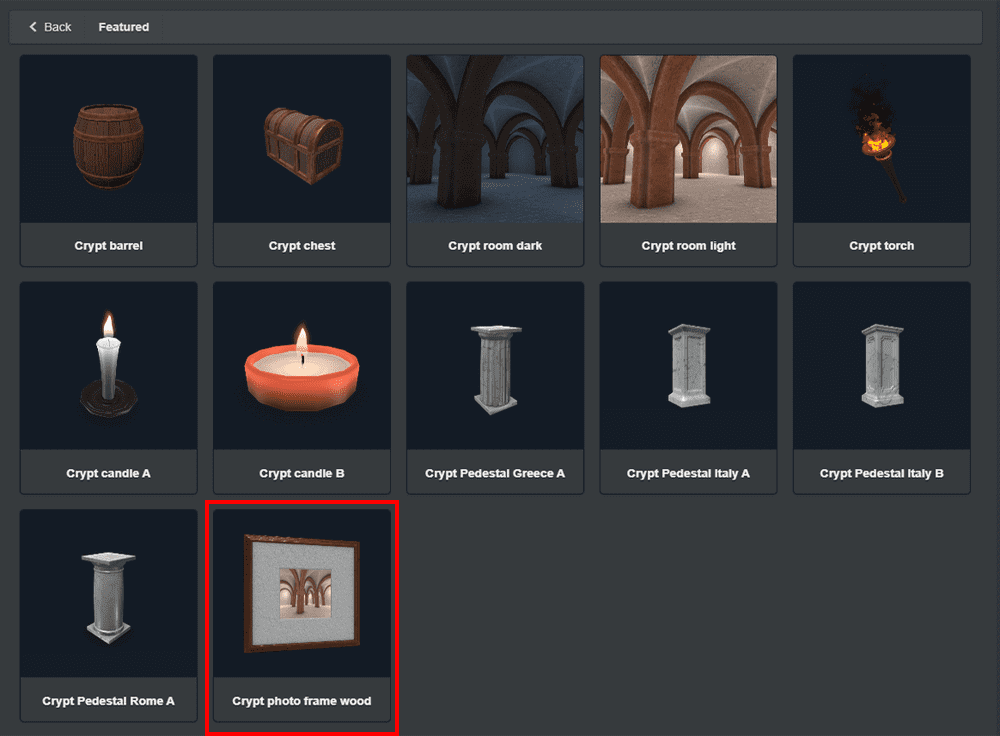
You can set up a framed image from “Crypt_photoframe_wood”.
You can use your favorite painting or image as the photo part of the hand in the following image and place it beautifully.
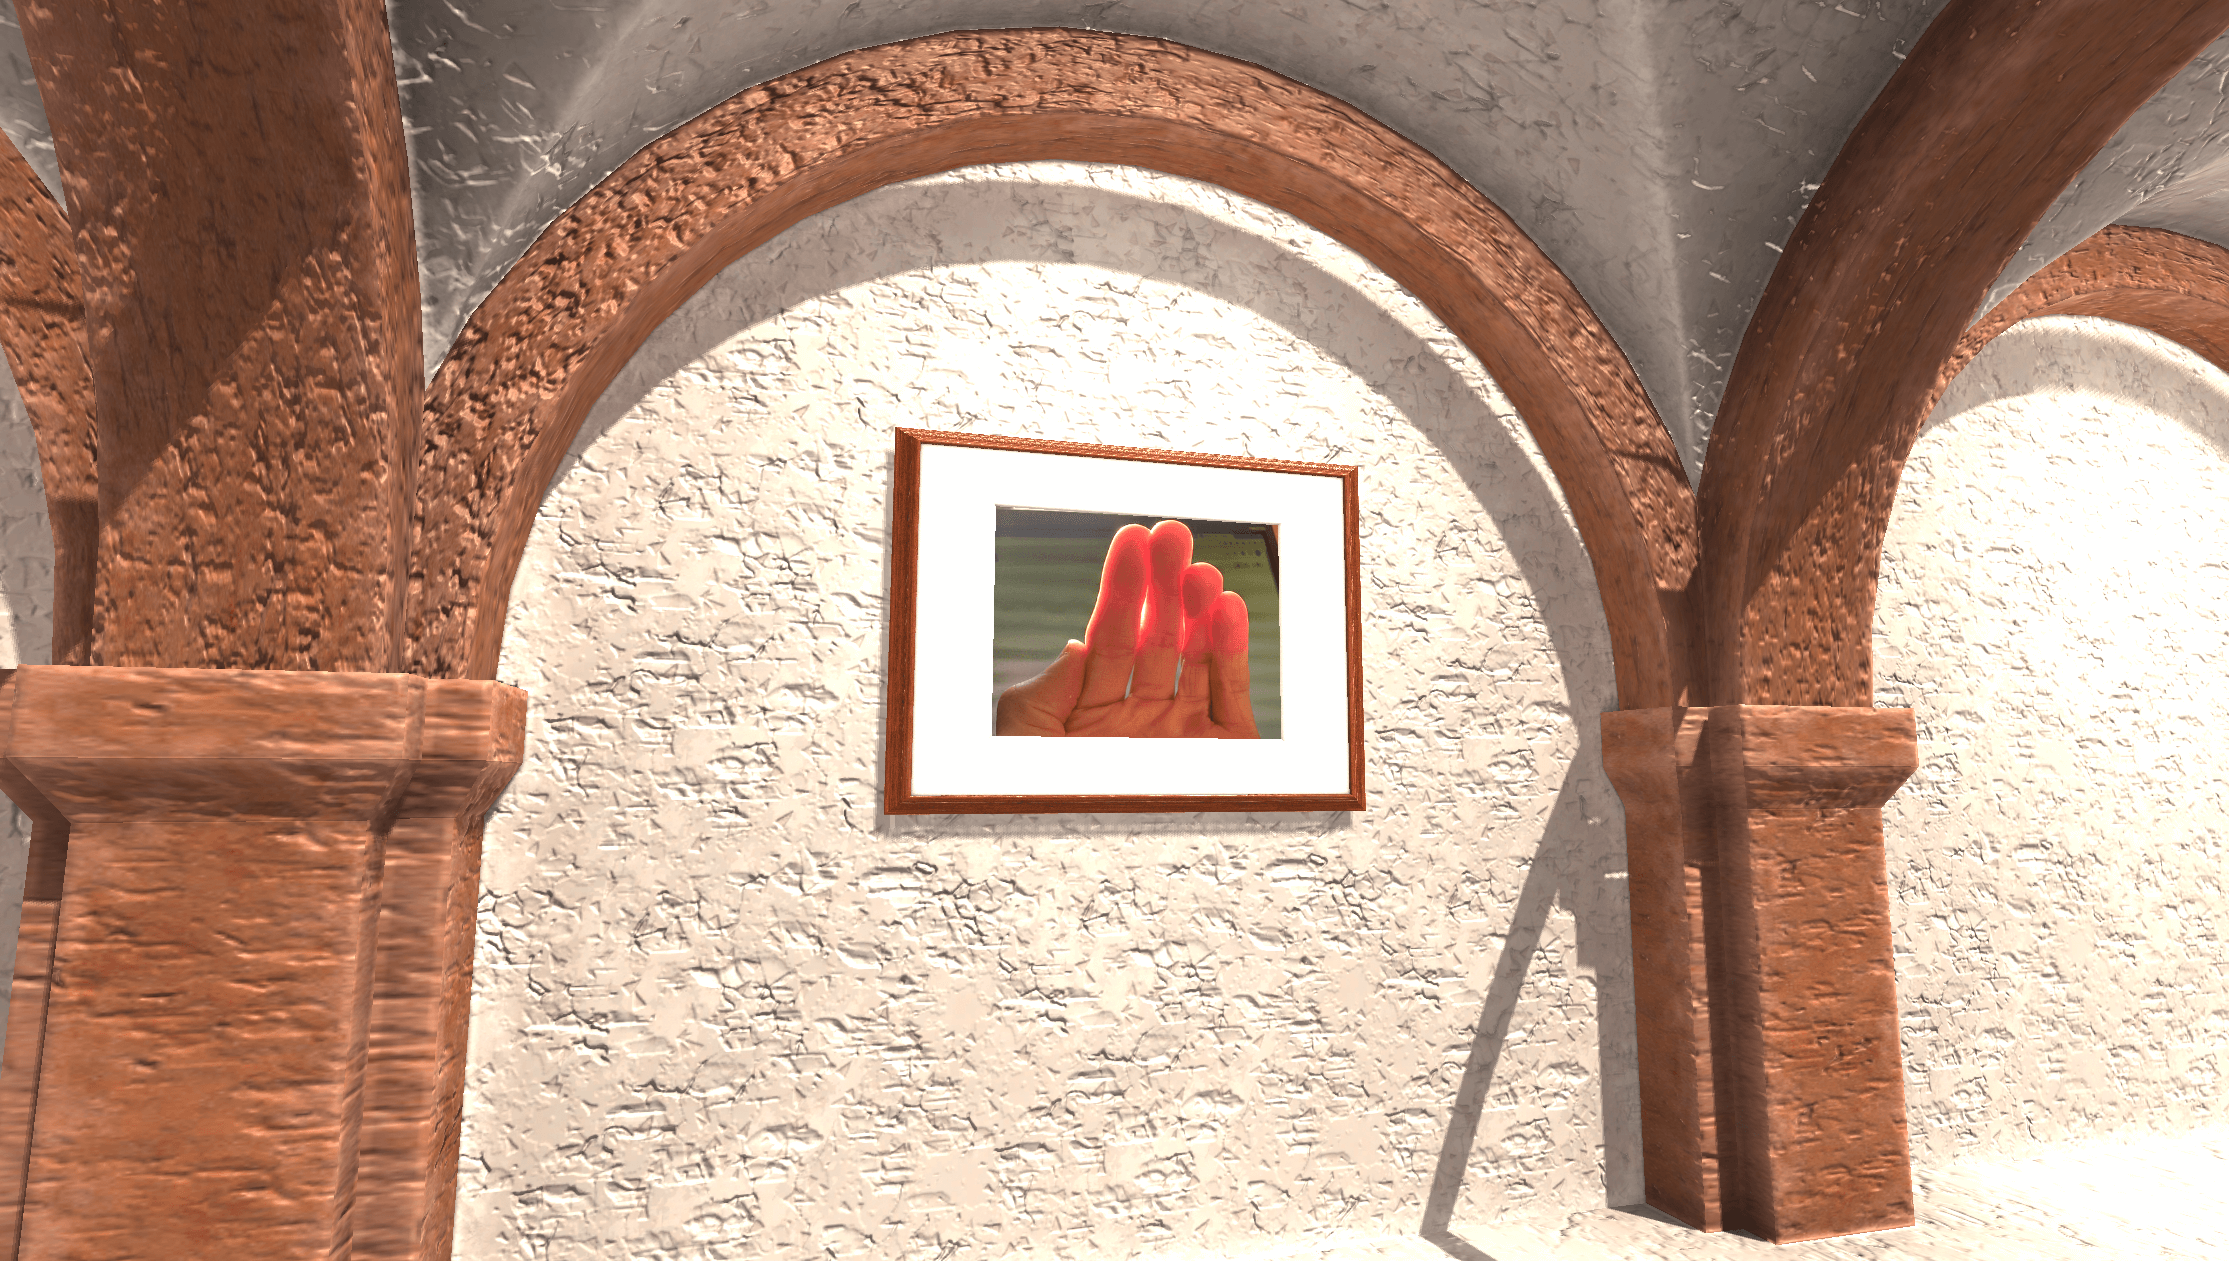
Image of a template scene with your original image set
How to use the sample scene
You can also copy a sample scene that already has sample objects placed in it to your own account.
After logging in to STYLY Studio, click on the URL below and the sample scene will be added to the scene list in the STUDIO screen.
If you want to check the placement image first, or if you want to use the shadows and other settings as they are, it is convenient to open this page.
I hope you will try to publish your scenes created with STYLY Studio.
In this article, I explained about Light Probe, which is a new feature added to STYLY, and introduced a template scene asset using it.
Please exhibit your own 3DCG or images and try out the texture of the lighting.
In the future, STYLY MAGAZINE will also introduce how to set up Light Probe and LightMap in Unity, so please check out those articles as well.