Introduction
This article introduces the steps involved in using Blender, making a simple model, and uploading the model to STYLY, for those who have never done modeling before.
In the Previous Article…
In the previous article, we learned how to apply textures to your material.
![[Blender for Beginners] Let’s Start Modeling Part 4 – Creating Textures](https://styly.cc/wp-content/uploads/2018/10/test_.png)
What We Will Create
In this article, we will learn how to add bones to a model.
There are two ways to do so: by manually creating bones or using bones that have already been provided.
This article describes the manual method. For the method using bones that have already been provided, please refer to this article:
![[Blender for Beginners] Let’s start Modeling Part 6 – How to Add Armatures (bones)](https://styly.cc/wp-content/uploads/2018/12/9-2-1.png)
Modeling
Preparation of the Model
Prepare a 3D model that is in a T-pose.
If each part is a separate object, select them all and press [Ctrl]+[J] to unify them.
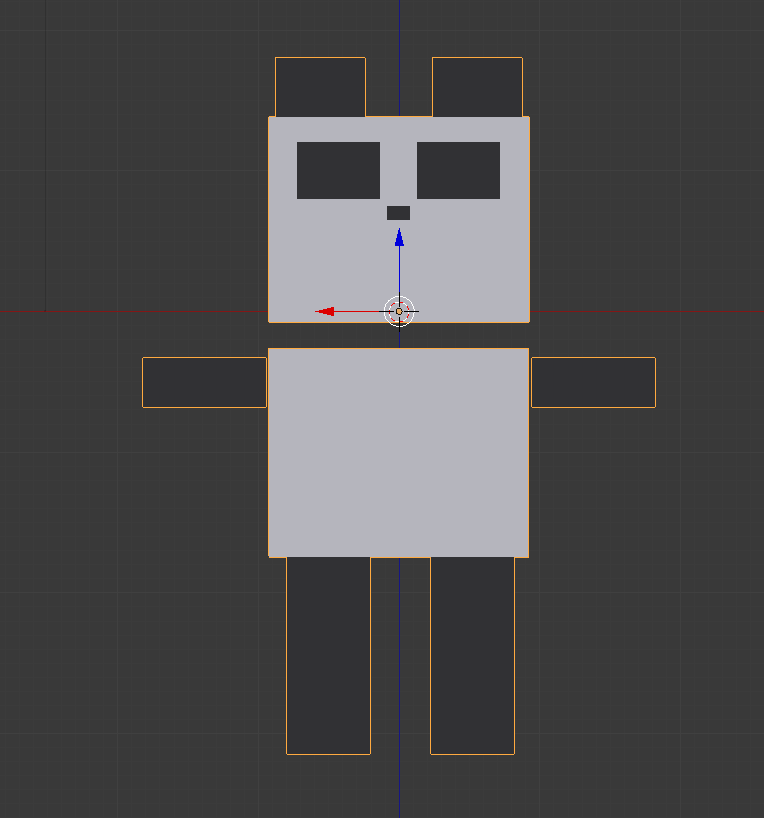
The hair, body, and other parts are combined into one object
Use the [5] key on the numeric keypad to make a parallel projection, and [1] to make a front view.
If you don’t have a numeric keypad, you can select both from [View] in the menu bar above.
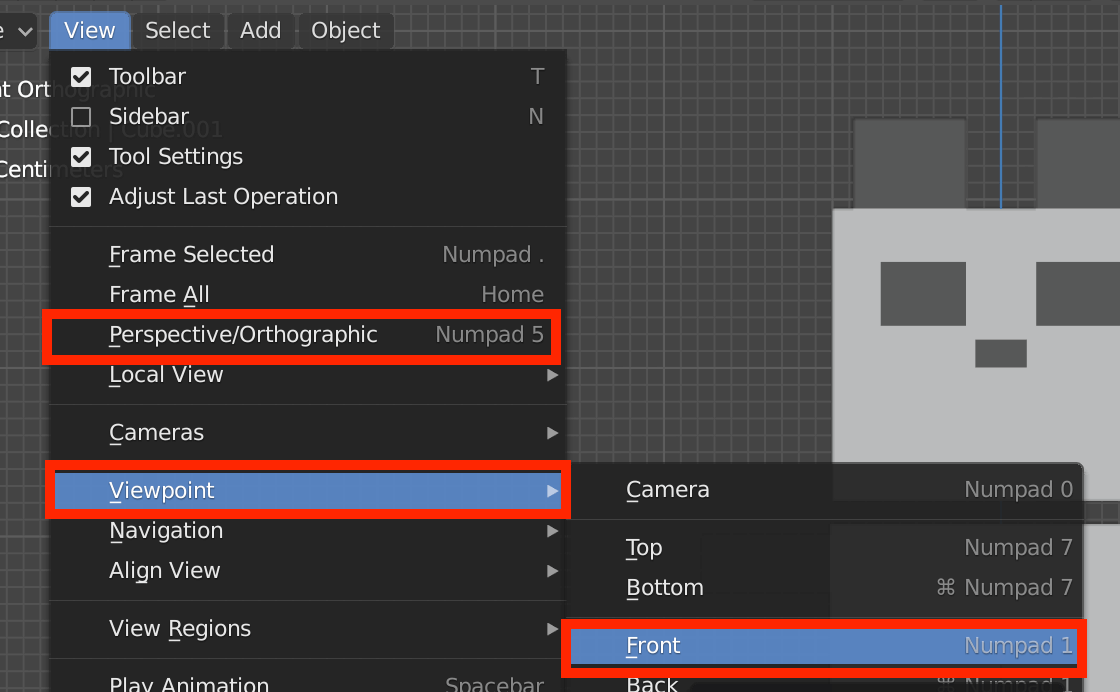
Selecting Parallel Projection and Front View
Adding Bones
Now, let’s add bones.
In Blender, a bone is called an armature.
If the 3D cursor is moving, press [Shift]+[S] to return it to the origin using “Cursor to World Origin”.
In Object mode, press [Z] to go to Wireframe view, and press [Shift]+[A] to select “Armature”.
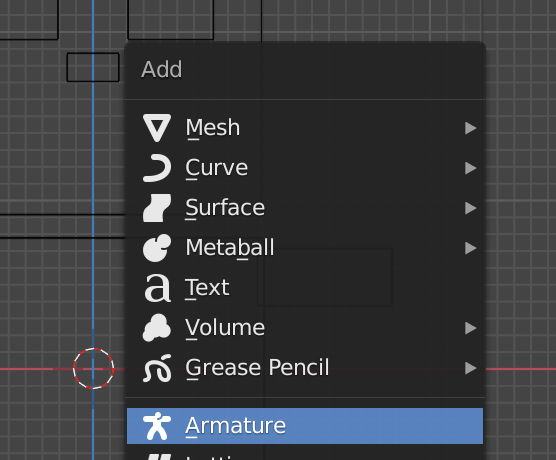
Armature
Then, one bone will appear.
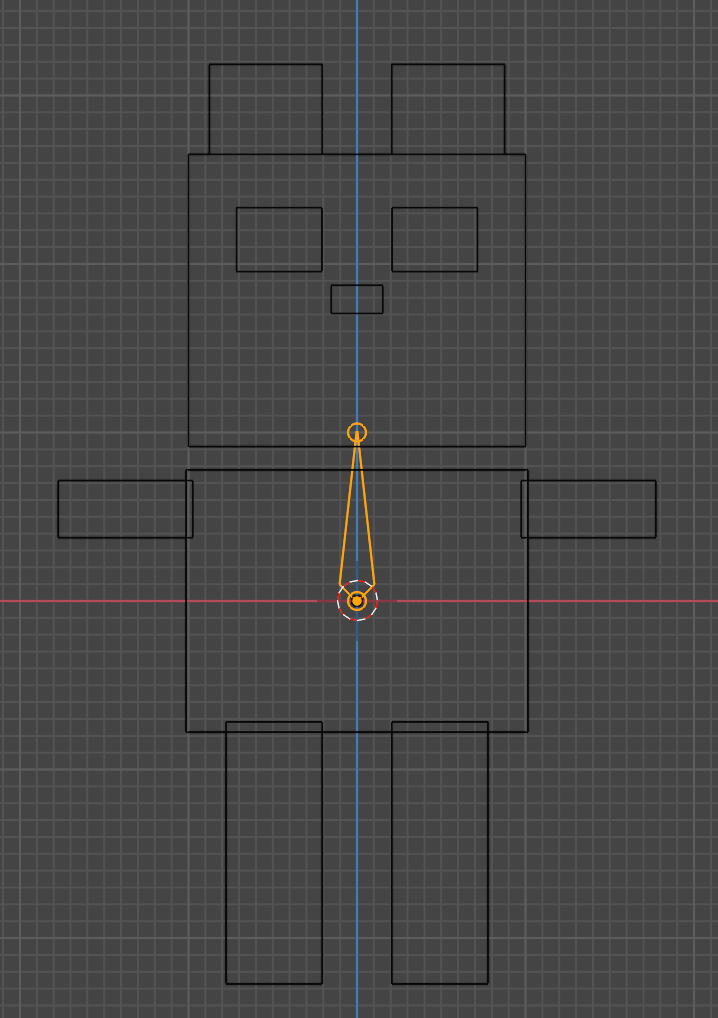
A bone has just appeared
This bone can be moved and scaled just like an object.
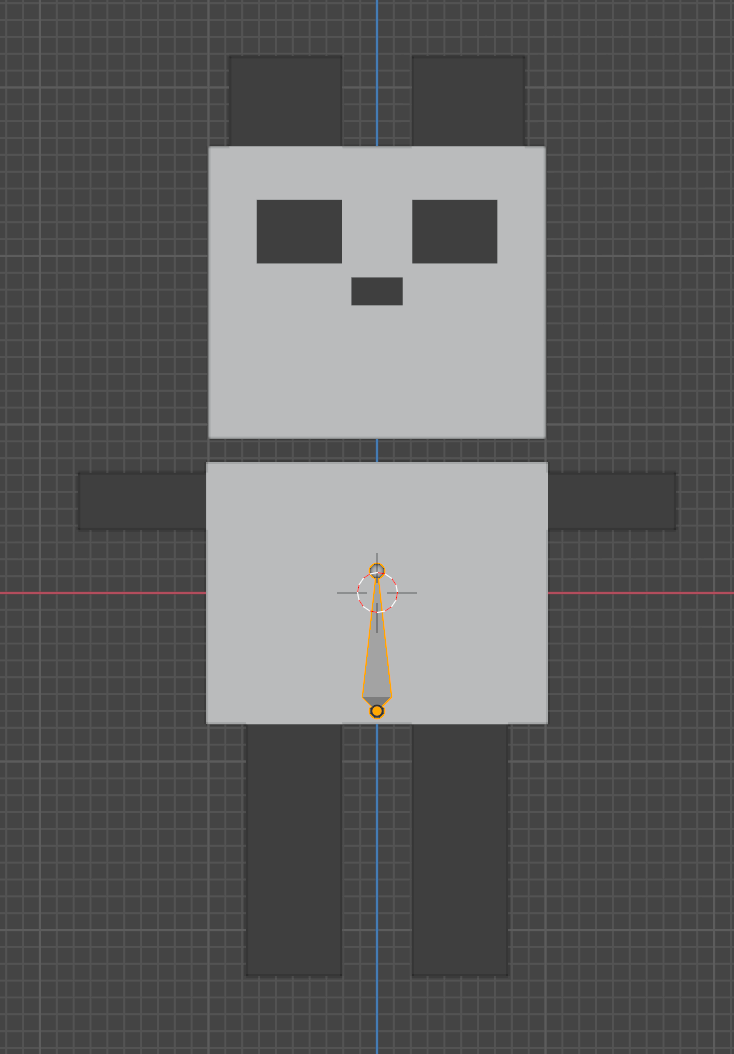
We will use this first bone as the spine. Hence, we will move it to the waist and adjust its size.
Most deformed and animal characters of about the third scale have one or two spines. In this case, I am using two, so I will adjust the size to about half of the upper body.
Then, set the bones. In this current state, the bones are only visible in the wireframe view.
To make them visible in solid view, check “In Front” under “Viewport Display” in the Armature tab on the right menu.
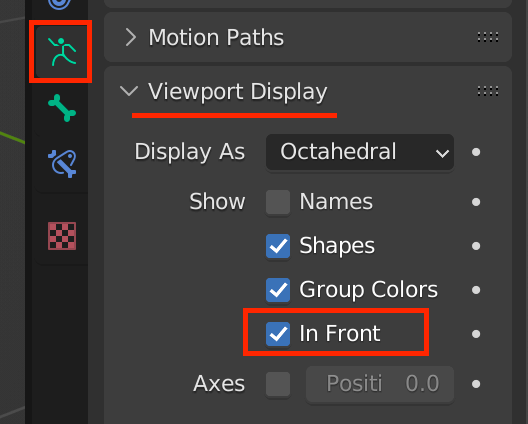
Check “In Front”
The bones are now visible even in solid view.
From here, we will add more bones.
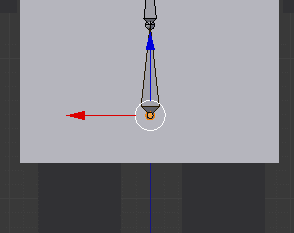
If you place the bone in edit mode by pressing [Tab] key, you can select the circle above and below the bone.
Firstly, select the top circle and press the [E] key to push it out. Then, a new bone will appear.
If you press the X/Y/Z keys immediately after pressing the [E] key, the bone will come out neatly in the direction you want it to go.

Adding more bones
Repeat this process to increase the number of bones.
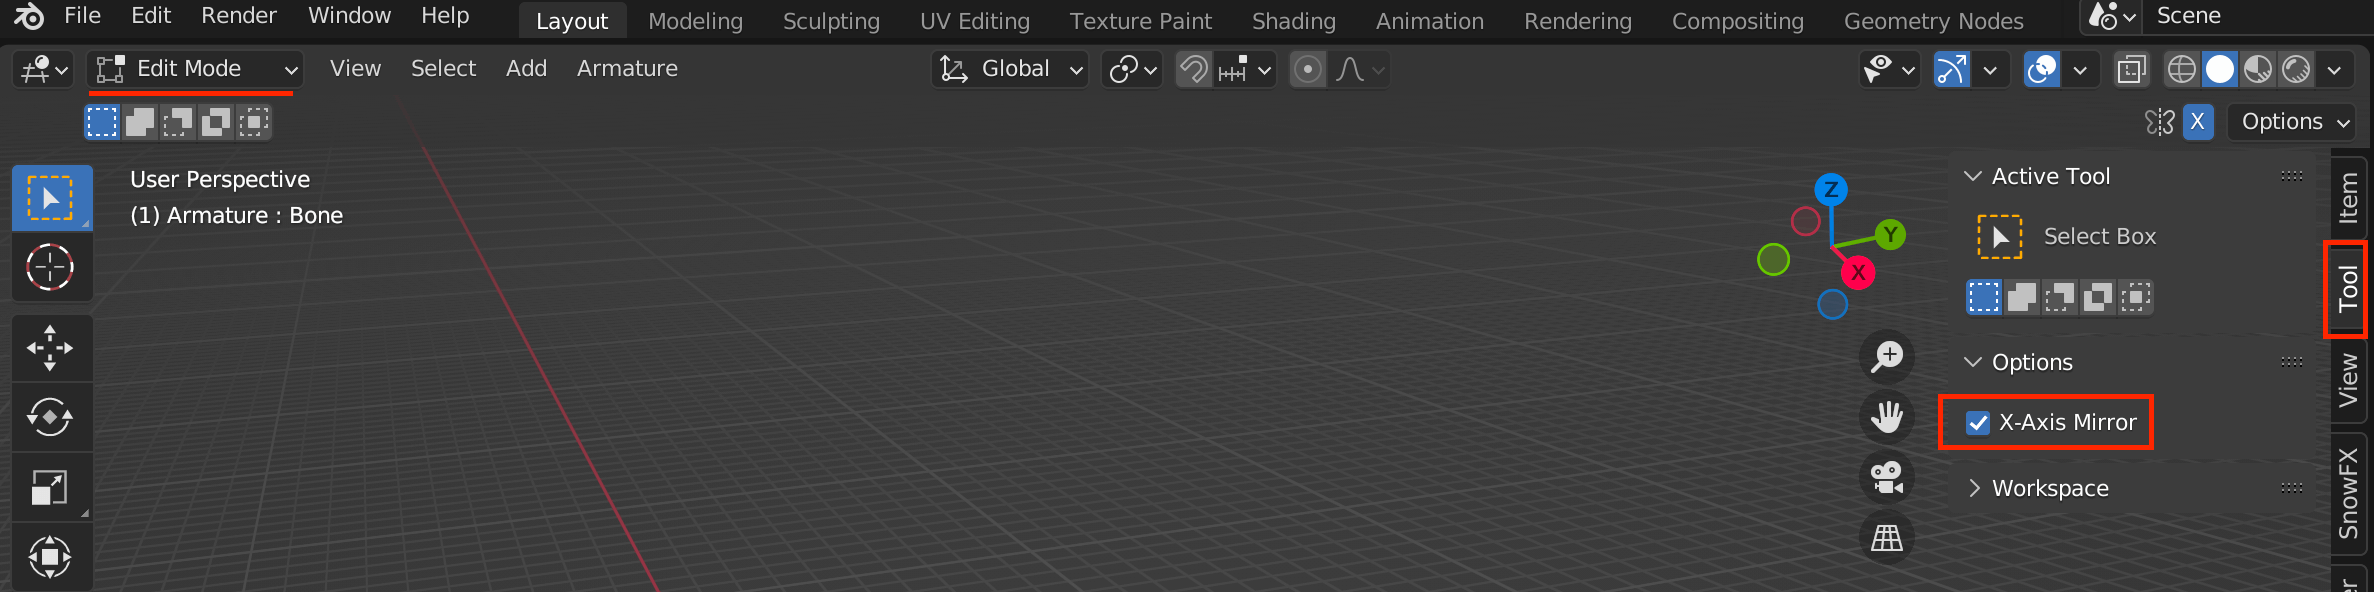
If you want to make the arms and legs symmetrical, go to Edit mode, select “Tool” menu on the right of the 3D Viewport, and check “X-Axis Mirror”.
If the “Tool” or other series of menus are not displayed, press the [N] key to display them.
Press [Shift]+[E] when extruding.
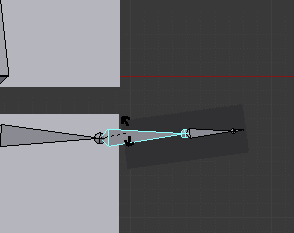
Symmetrical Extrusion
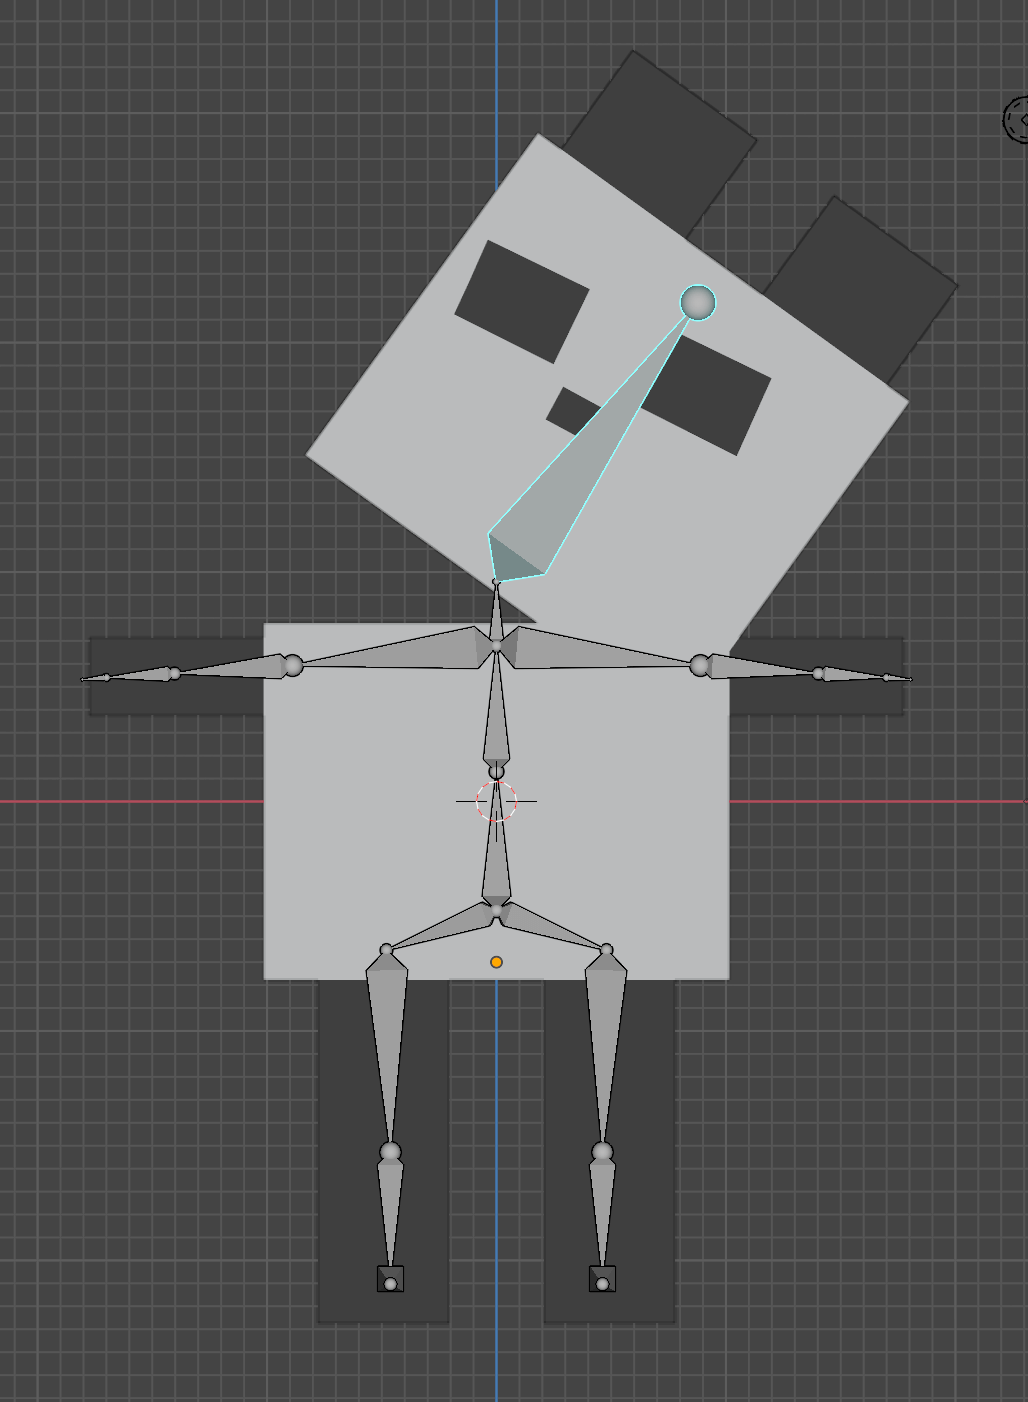
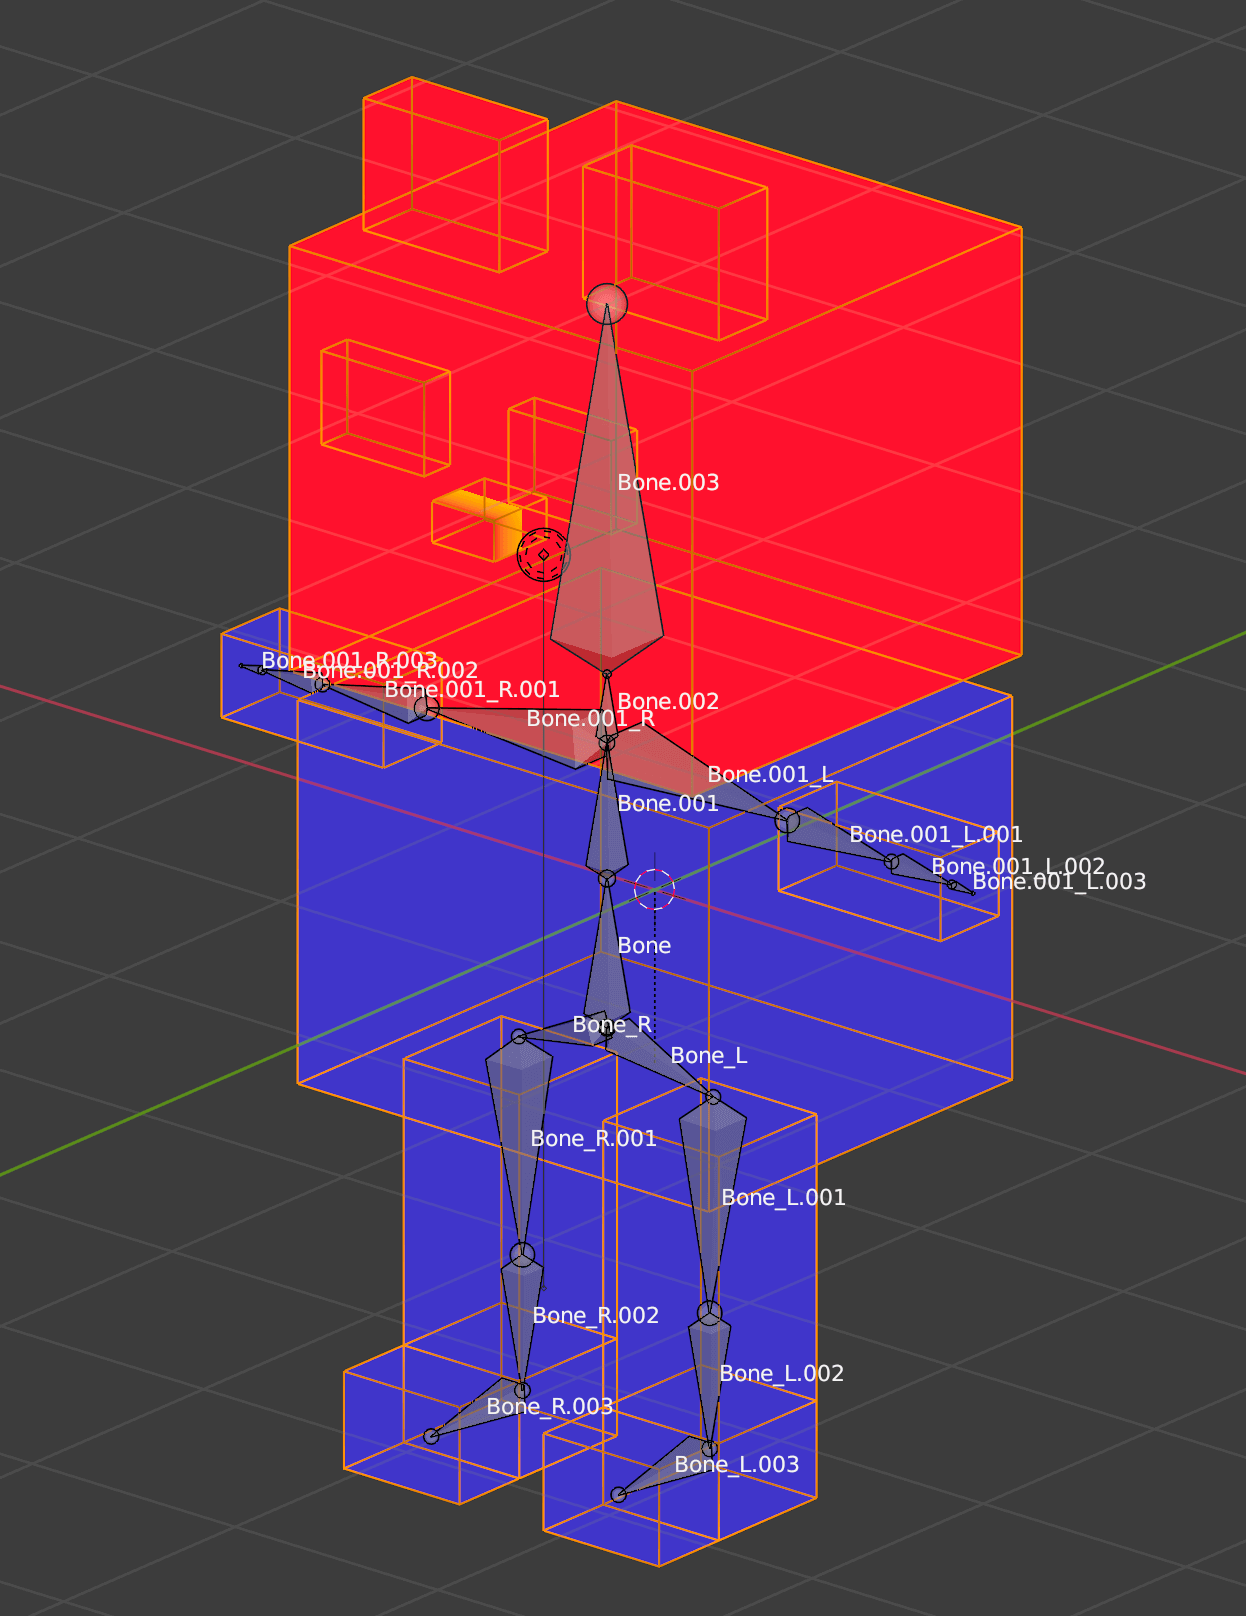
Now, add the bones as shown below. Please refer to the side view for the legs.
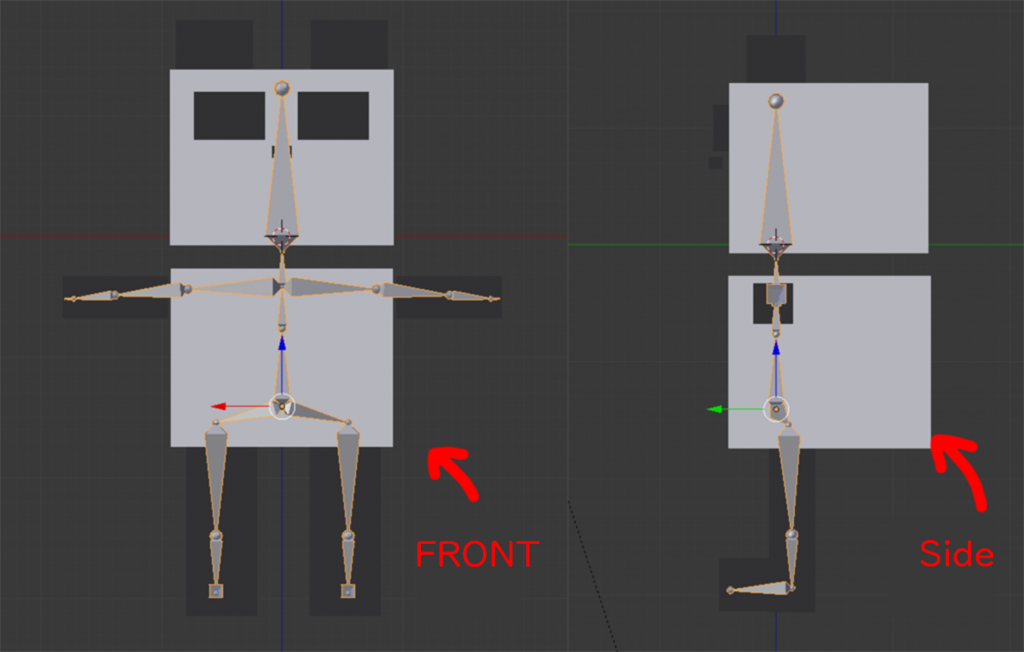
Figure with bones in place
Associating the bones with the mesh (Parenting Objects)
When you have finished inserting the bones, select Mesh > Bones, then press [Ctrl]+[P] and select “With Automatic Weights”.
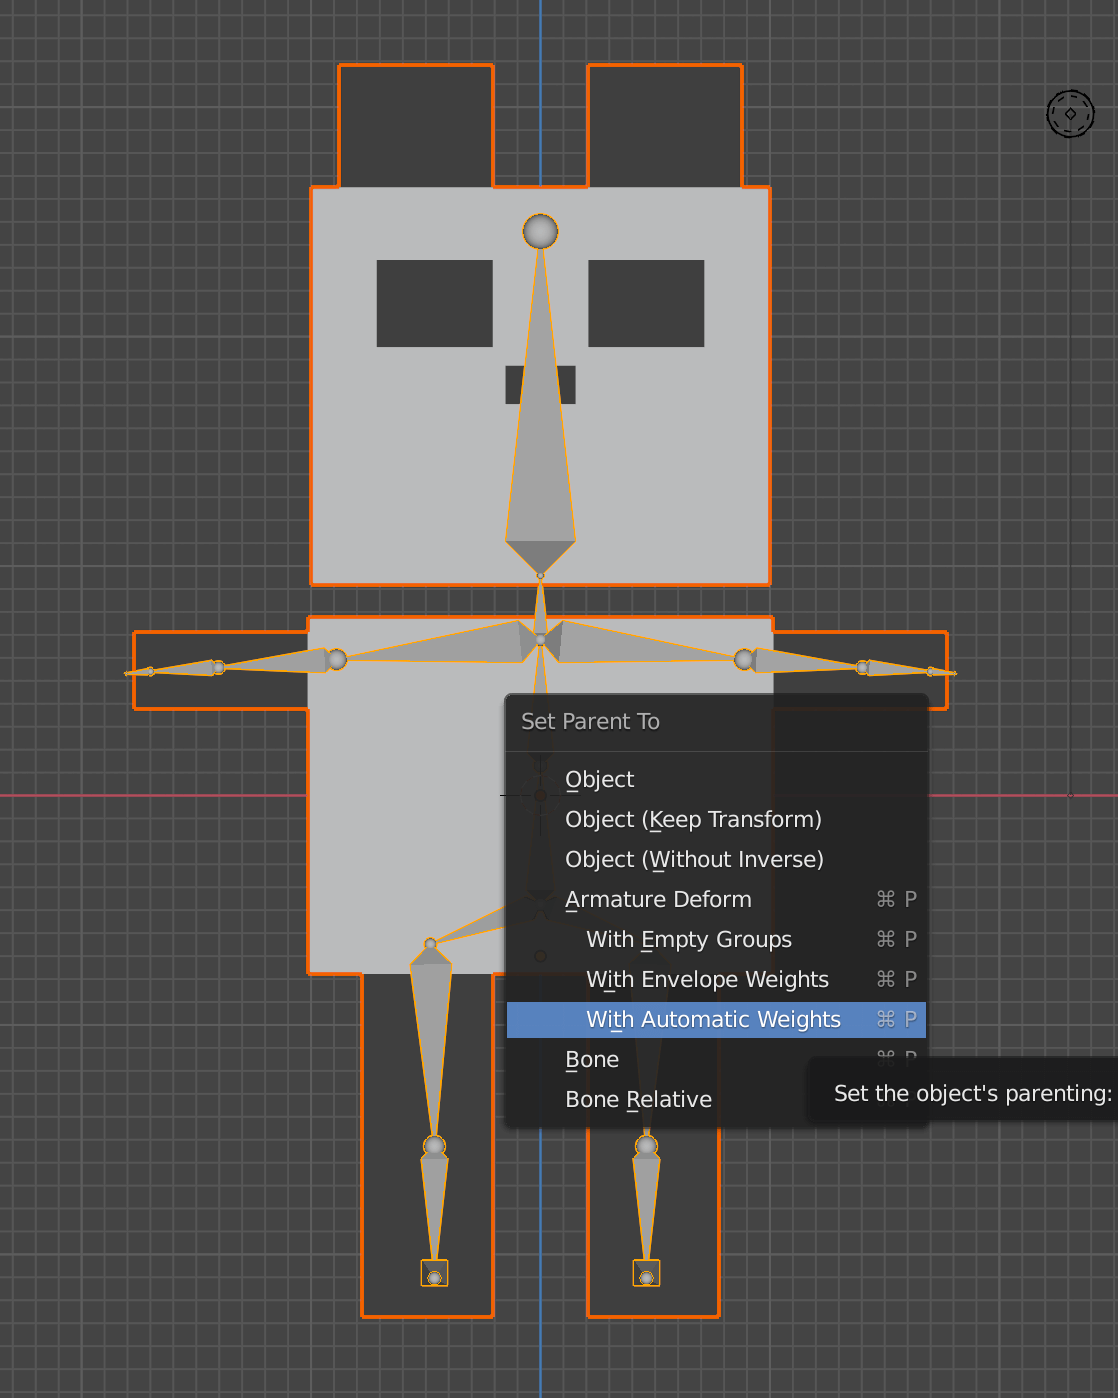
With Automatic Weights
Now, you can associate the bones with the mesh.
In Blender, the association of multiple objects, bones, cameras, etc. is called parent / parenting.
For example, other than its use for bones, it allows you to set up an animation of the movement of object A following object B, or to set up a camera on the child side that always faces the parent object.
Let’s check if the parenting has been done properly. With the bone selected, switch to “Pose Mode” from the menu at the top left of the screen.
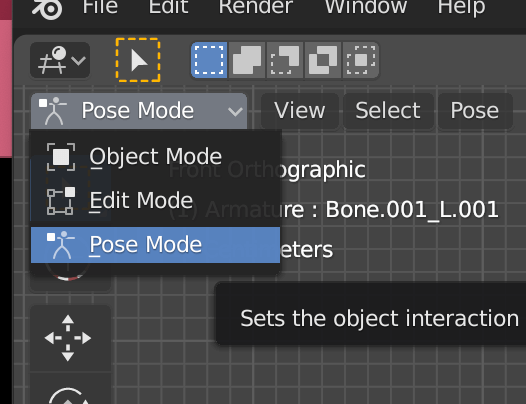
Switch to Pose Mode
The edges of the selected bone will turn light blue.
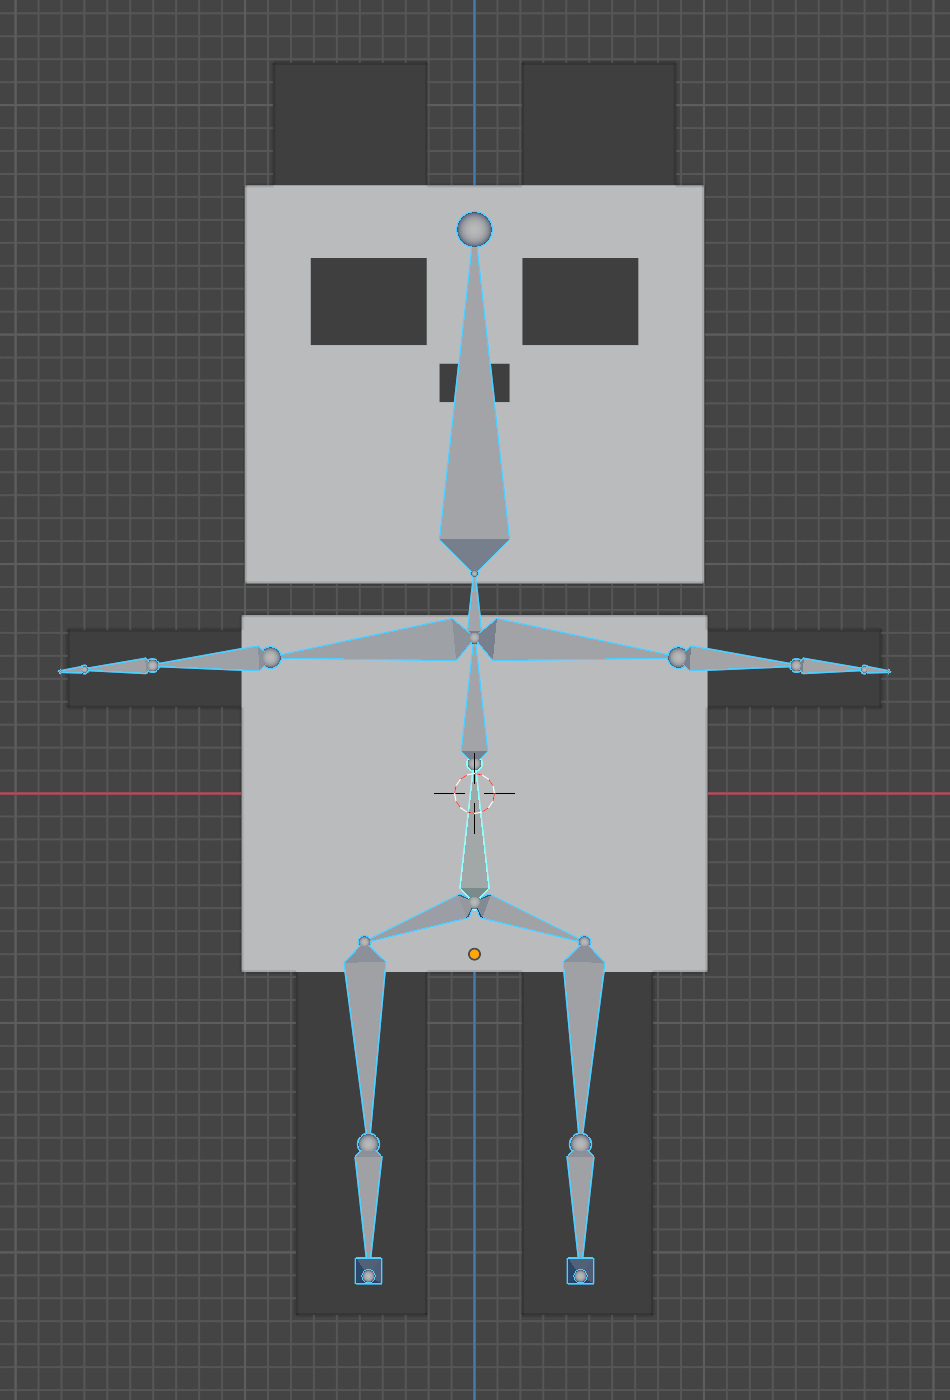
Pose Mode
This state is called Pose Mode. You can create a pose by rotating the bones in Pose Mode.
Select the bone you want to move and rotate it with the [R] key.
Checking in Pose Mode
If all the bones rotate and the meshes are associated with all the bones, you are done.
…However, in most cases, there is something wrong.
Eyes and nose are wrong
In this case, the eyes and nose did not follow the head bones well.
Adjusting the weight of the bones
The reason why things go wrong is because some meshes and bones are not well associated.
The function to adjust this is weight painting.
Before you start, make sure that the name of the bone is displayed in the 3D Viewport. With the bone selected, click on the humanoid icon in the right menu, then go to Viewport Display and check Names.
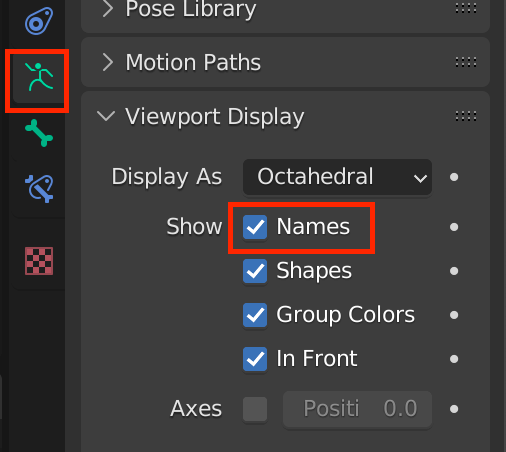
Check “Names”
Then, with the mesh selected, switch to Weight Paint in the upper left corner of the screen.
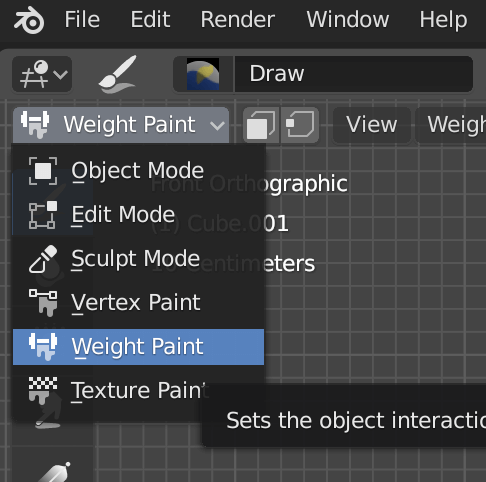
Switch to Weight Paint

The mesh is now colored.
The stronger the connection to the selected bone, the redder it will be, and the weaker the connection, the bluer it will be.
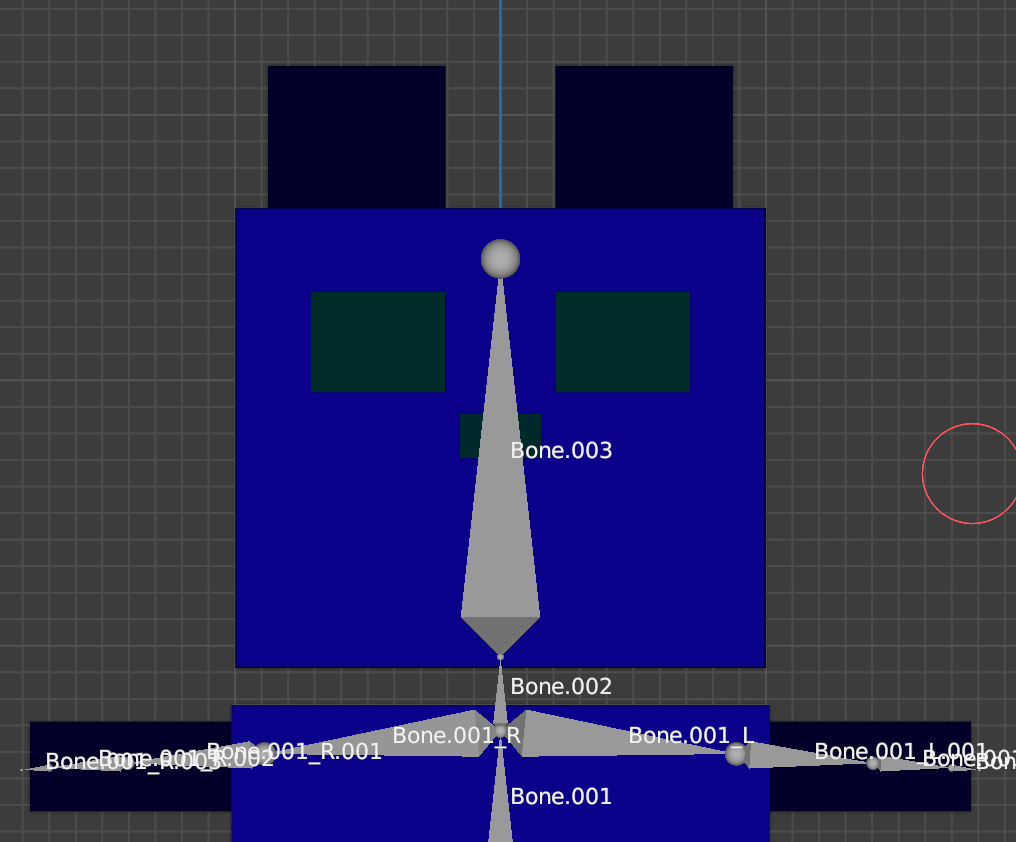
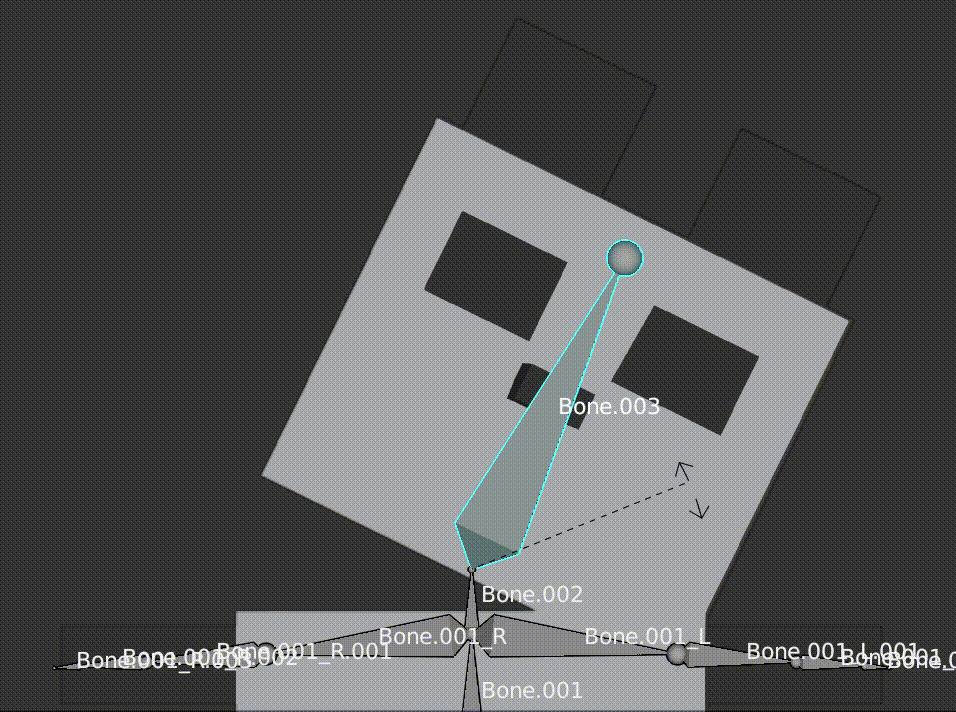
Let’s look at the head bone. The head bone is named “Bone.003”, so select Bone.003 from the green inverted triangle icon in the right menu.
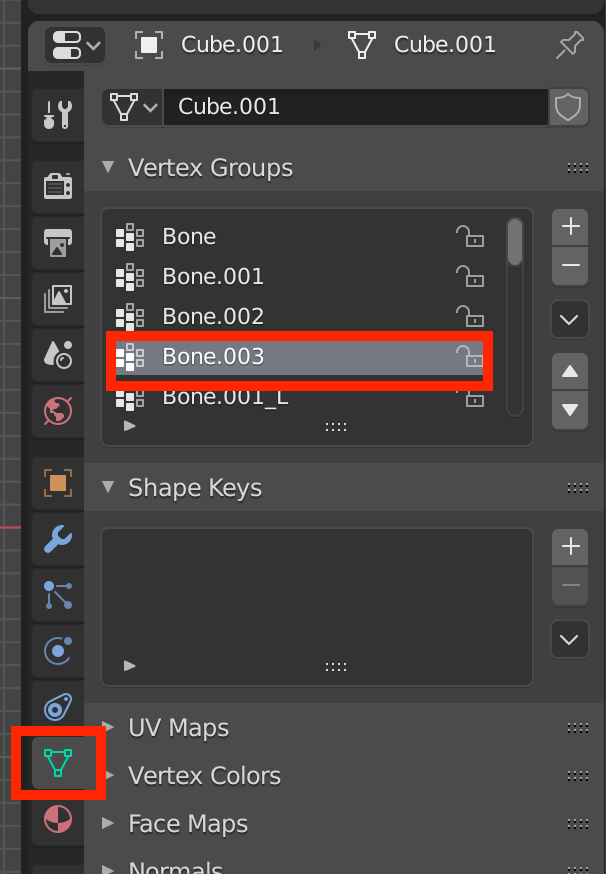
Select the name of the bone you want to adjust
If you check, you will see that the eyes and nose are green. This is the cause of the problem.
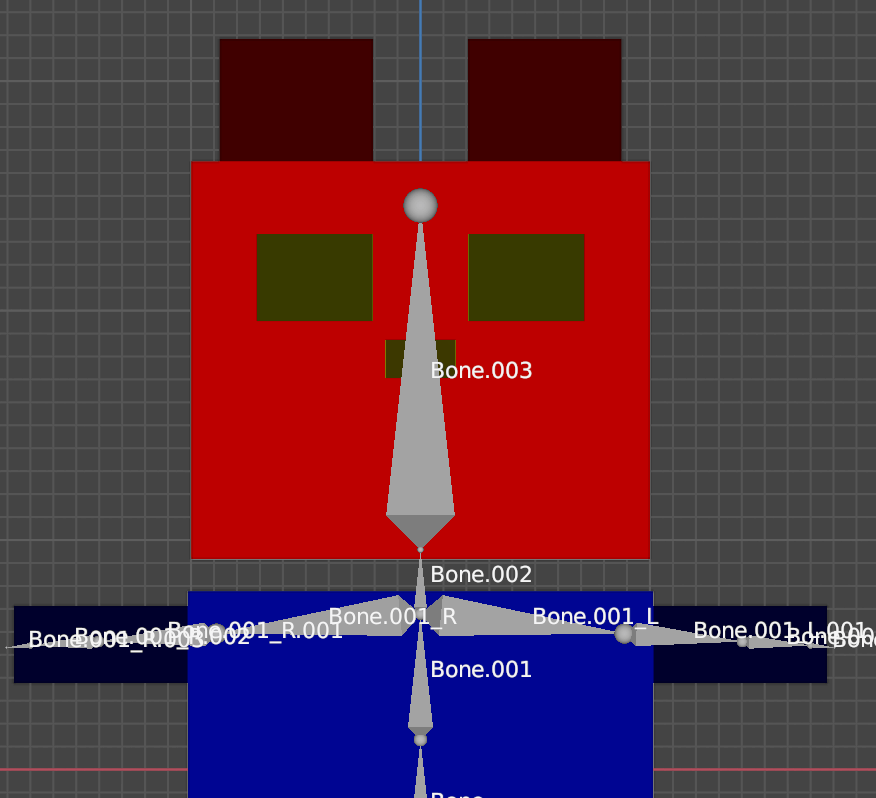
The eyes and nose are green
We will fix this as soon as possible. In weight painting mode, you can adjust the weight of the mesh by painting it.
In this case, we will paint the eyes and nose, which are green, red.
You can adjust the paint settings from the menu above, where Weight is the weight adjustment, with 1 being stronger (red) and 0 being weaker (blue).

Paint Settings
Set the Weight to 1.0 and paint the eyes and nose. It is easier to paint in wireframe view.
Fill in the eyes and nose with red
It may be difficult to paint the border between the nose and the face, but there is no need to worry about it.
After painting the weights, switch to Pose mode again and move the head.

It’s still not following the bones
The head is still not following the bones properly.
This is due to the fact that the eyes and nose have been painted with a different weight than the head bone’s.
If you look at the weight status of Bone.002 (neck bone), you will see that the eyes and nose have been painted green as shown below.
The eyes and nose are weighted
This time, contrary to what we did earlier, we will fill the eyes and nose with Weight 0.0.

Fill in the eyes and nose with blue
Let’s check again in Pose mode.
The eyes and nose are now moving correctly
The eyes and nose now follow correctly.
Next article
I have shown you how to create and insert bones manually. In the next article, I will show you how to use bones that have already been prepared for you.
In the next article, I’ll show you how to create an animation.
![[Blender for Beginners] Let’s Start Modeling Part 7 – Animating Bones](https://styly.cc/wp-content/uploads/2019/01/27.png)
Please also see the following article on how to add bones in Blender (2.7) and run it in Unity:
http://maplesyrup-cs6.hatenablog.com/entry/2018/11/01/113345
Vocabulary and Shortcut Keys to Remember From This Article
Vocabulary
- Armature: Bones
- Parenting: A function to associate bones with objects
- Pose mode: A mode for moving the bones after associating the mesh with the bones
- Weight paint mode: A mode that allows you to associate a mesh with bones, and then see and edit which part of the mesh is associated with each bone.
Shortcut Keys
- [Ctrl]+[J]: Merge selected meshes
- Numeric keypad [5]: Parallel projection
- Numeric keypad [1]: Front view
- [Z]: Wireframe view
- [Shift]+[A]: Show Create menu
- [Shift]+[E]: To extrude bones symmetrically after X-axis mirror is checked.
- [Ctrl]+[P]: To associate the mesh with the bones.
- [Ctrl]+[Tab]: Pause mode when a bone is selected, and weight painting mode when a mesh is selected
For questions about STYLY, bug reports, and improvement requests, please contact the STYLY FORUM
https://en.forum.styly.cc/support/discussions
Certified (QA) by Shota Shawn Yoshizawa
Edited by SASAnishiki
Translated by passerby1