Introduction
This article introduces the steps involved in using Blender, making a simple model, and uploading the model to STYLY, for those who have never done modeling before.
In the Previous Article…
We manually added bones to the created model and used weight painting to set up the body to move correctly.
What We Will Create
This article will show you how to put bones into modeled objects, but unlike the previous article, in which we manually created the bones, this time we will use the bones that are already available in Blender.
Modeling
Preparation of the Model
Prepare the 3D model of the humanoid figure.
If each part is a separate object, select them all and press [Ctrl]+[J] to bring them together.
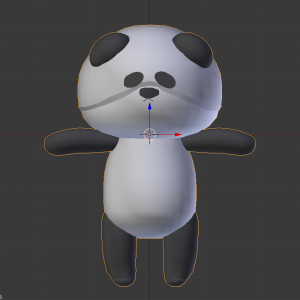
All meshes are connected
Use the [5] key on the numeric keypad to set parallel projection, and the [1] key to set front view.
If you don’t have a numeric keypad, you can select both from the “View” menu above.

Setting Parallel Projection and Front View
Activate Rigify
In order to use the bones (Rigify) already available in Blender, enable the add-on in the settings.
Click on the icon in the upper left corner and select Preferences.
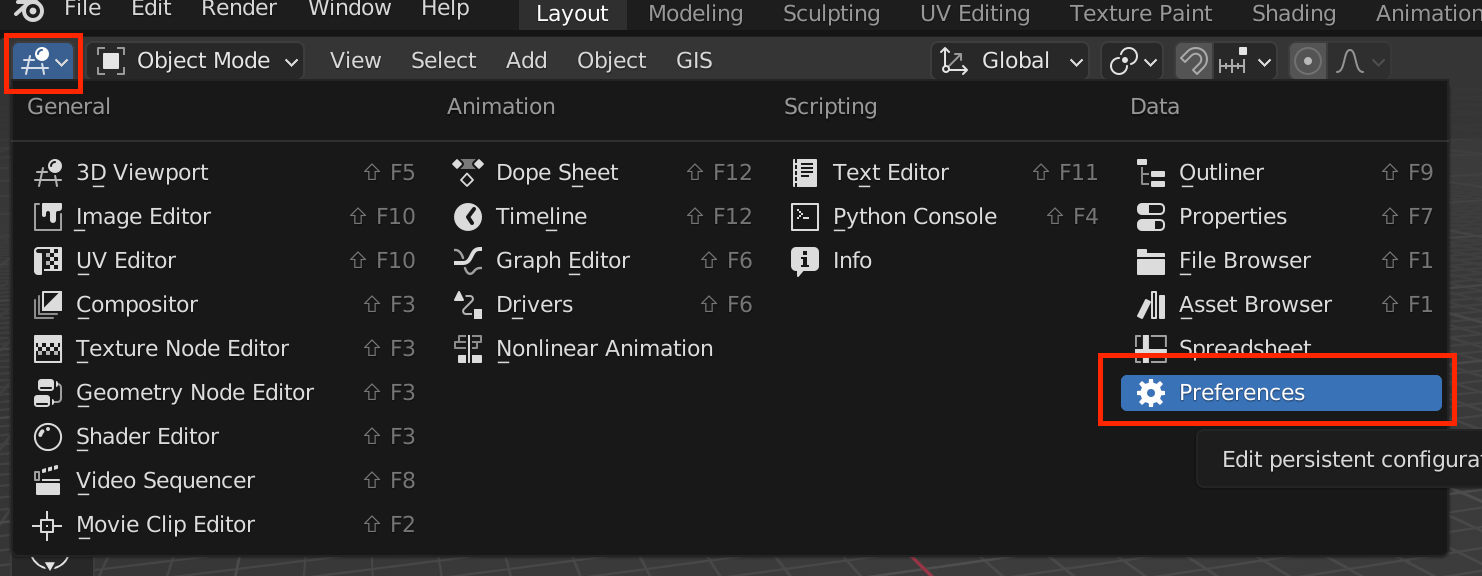
Preferences
Select Add-ons from the menu on the left and search for “rig” in the search box on the upper right.
Rigging: When Rigify comes up, check the checkbox.
Click the gear icon in the upper left corner again to return to 3D Viewport.
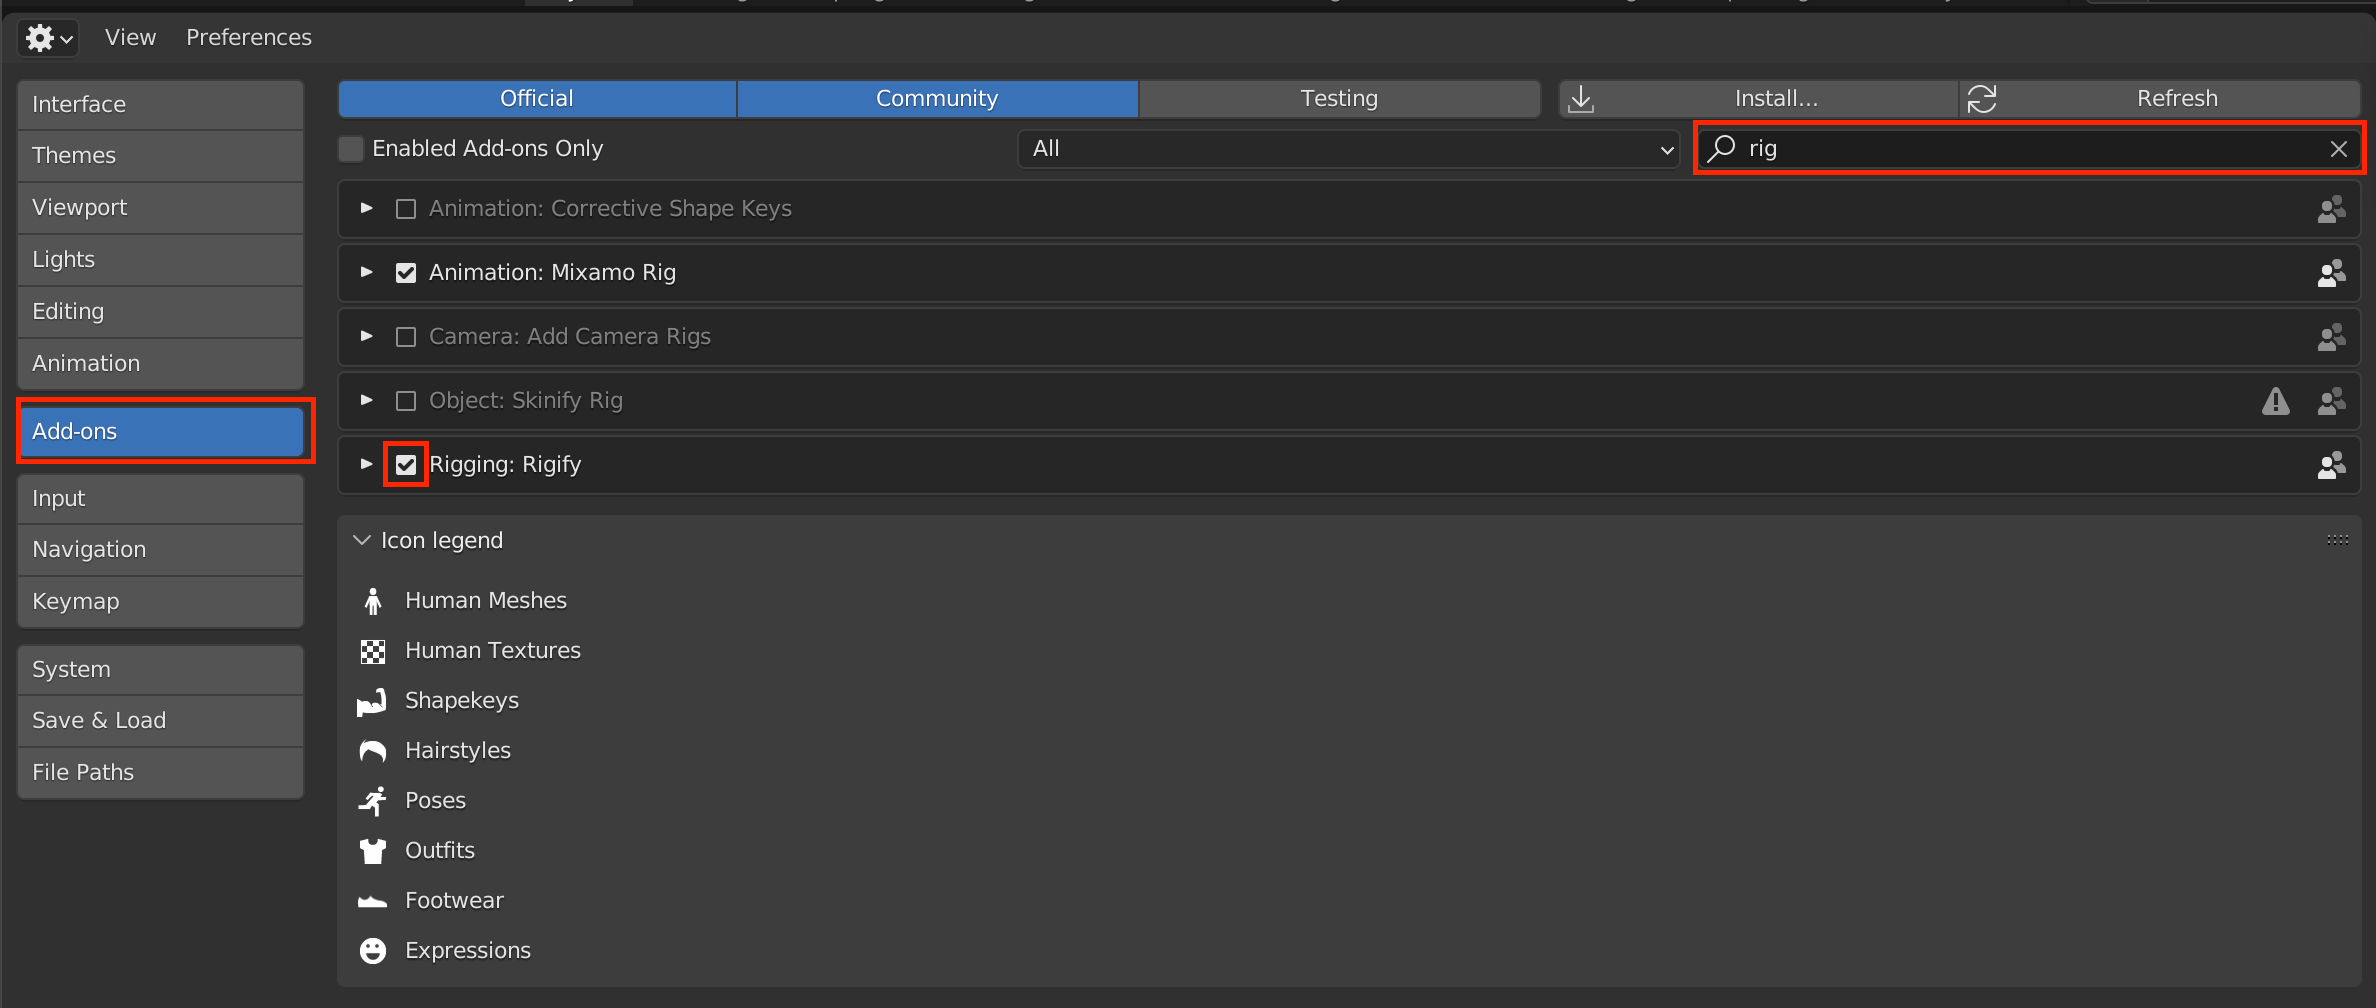
Add-ons
Adding Bones
Display the model in wireframe view with the [Z] key, and select [Shift]+[A]→[Armature]→[Basic]→[Basic Human (Meta-Rig)].
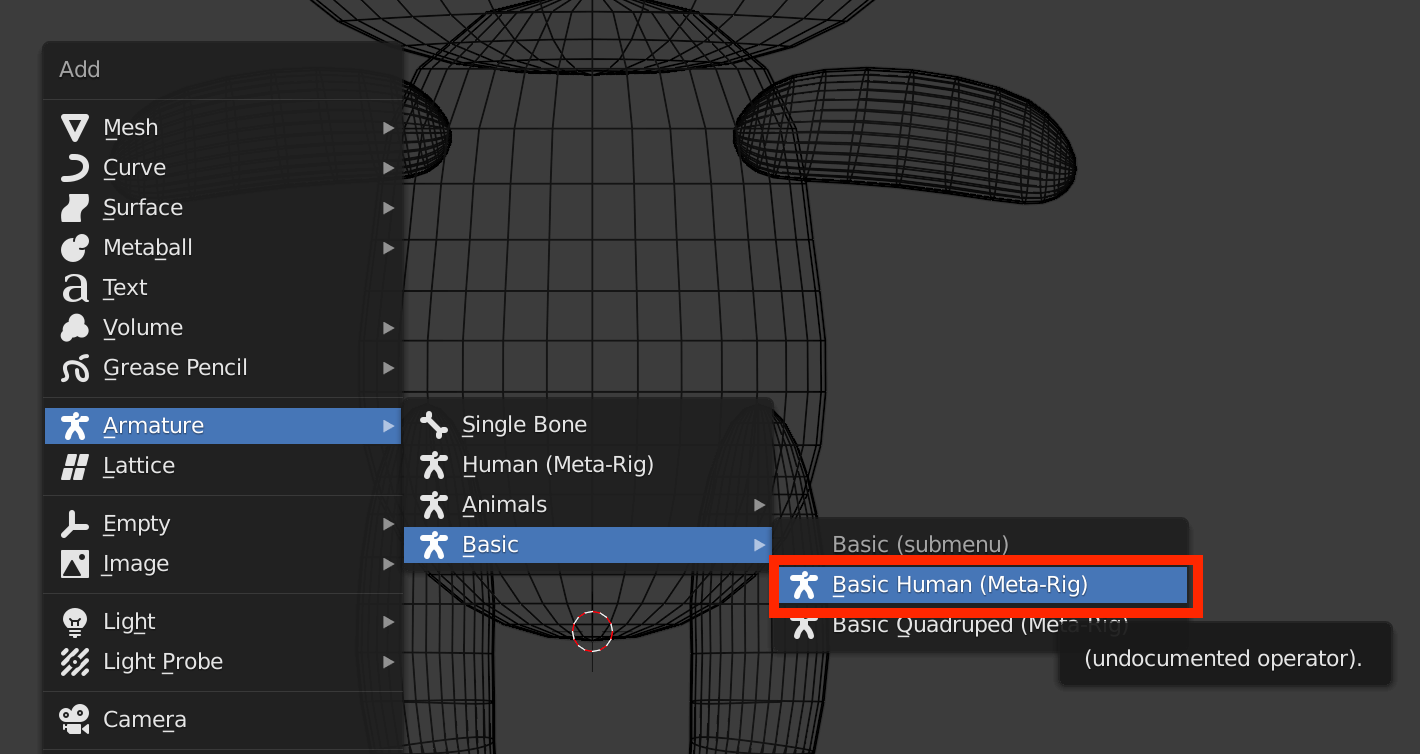
“Basic Human”
Then, the completed bones will appear.
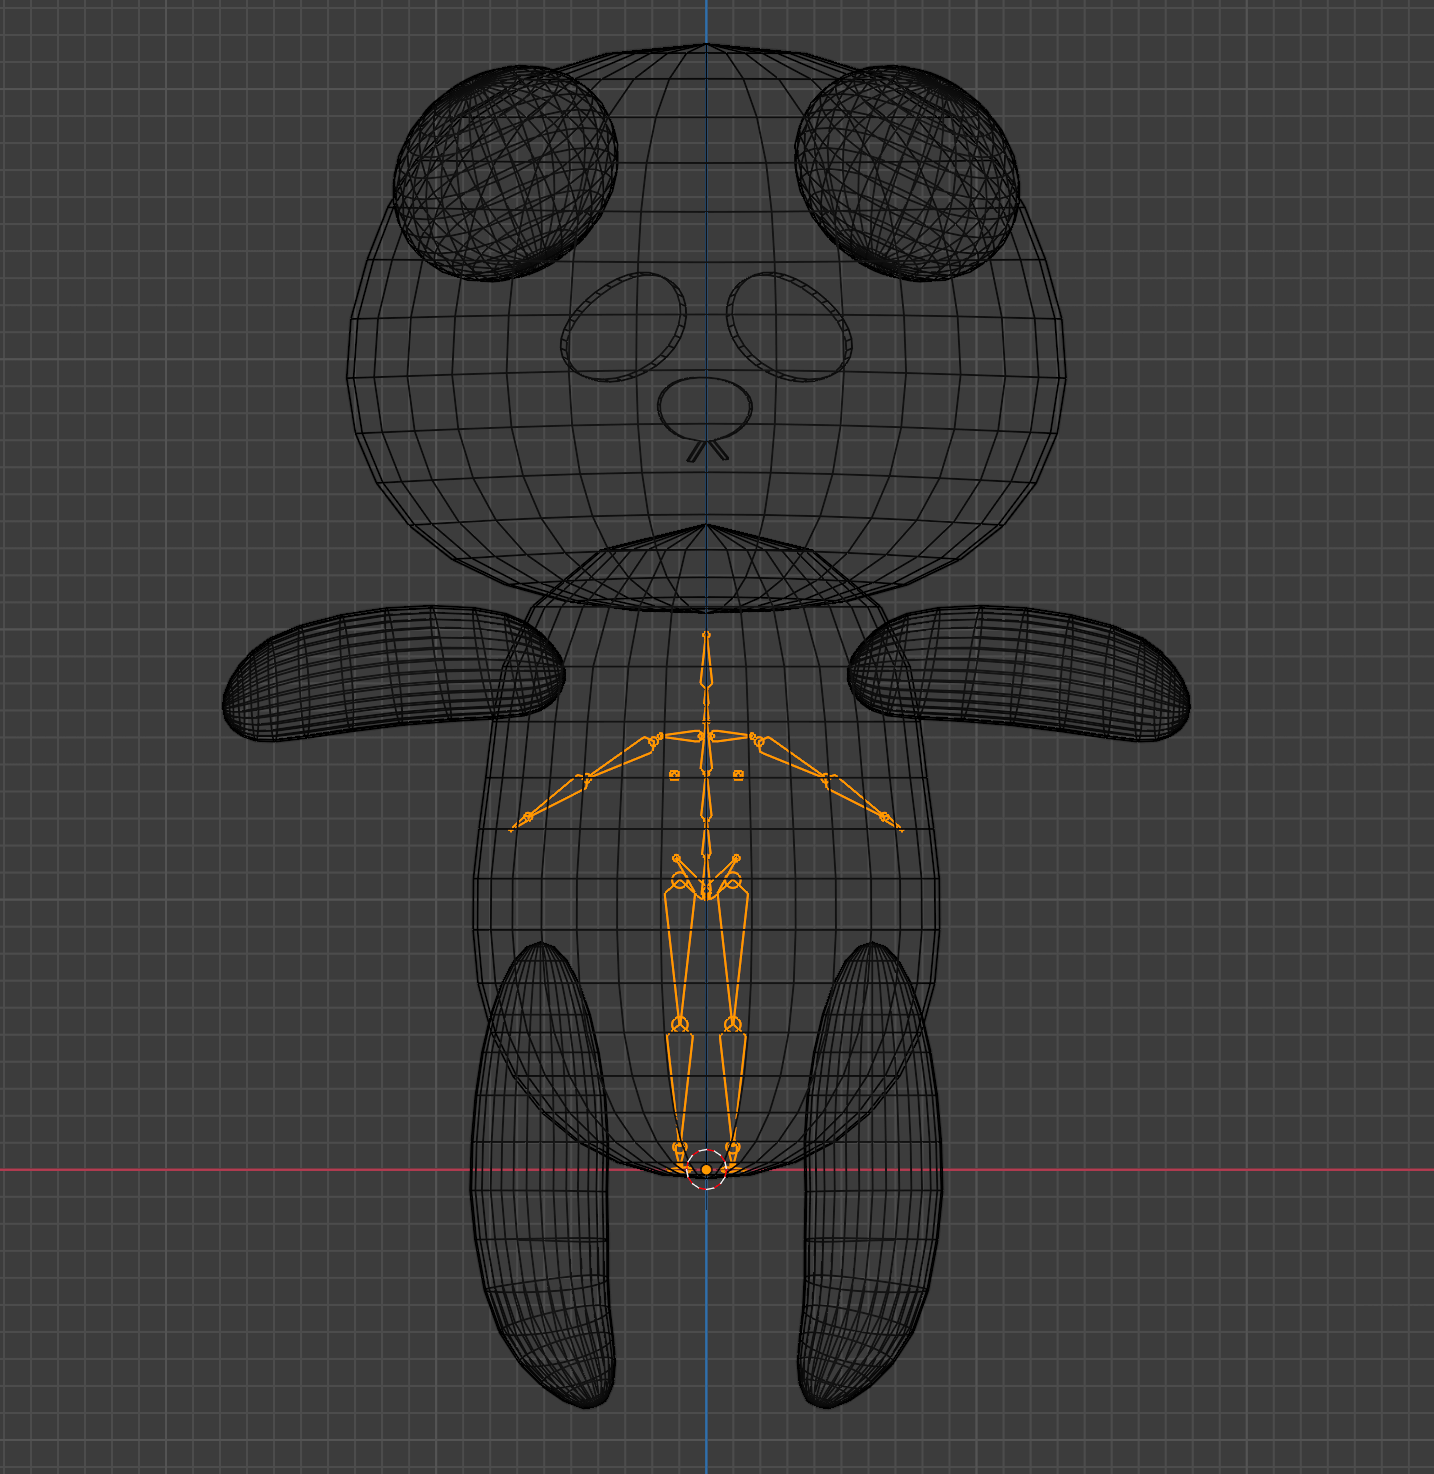
The bones appear
When they first appear, the bones will only be visible in wireframe view.
To make them visible in solid view, go to the Armature tab on the right menu and check the checkbox for “In Front.”
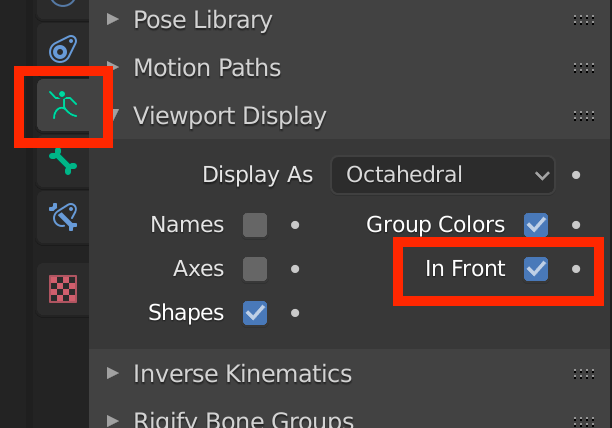
Check “In Front”
From here, you can change the scale to match the body.
With the bones selected, press the [Tab] key to enter Edit Mode and select the bones one by one.
Move, rotate, and rescale the bones to fit your model.
To change the scale of a bone, select the tip of the bone (the red arrow) and move it, instead of using the [S] key.
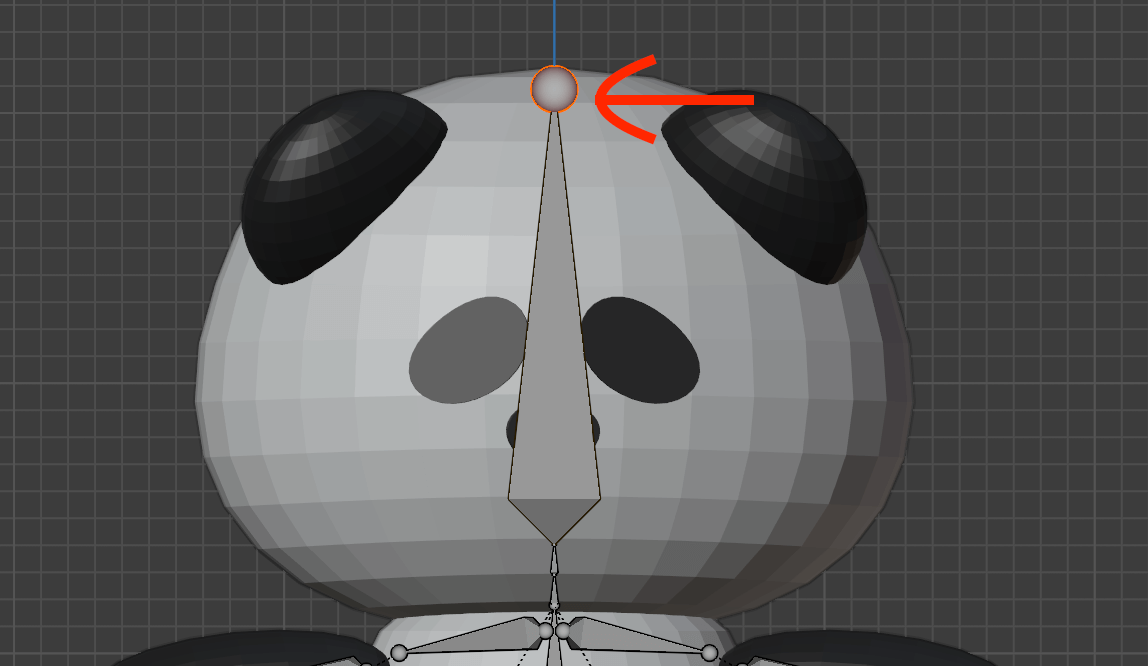
Resize the bone
To resize symmetrical bones such as arms and legs together, check the “X-Axis Mirror” option under Options in the upper right menu. With this option, when you move one side, the other will move as well.
If the “Tool” menu or other menus are not displayed, press the [N] key to display them.
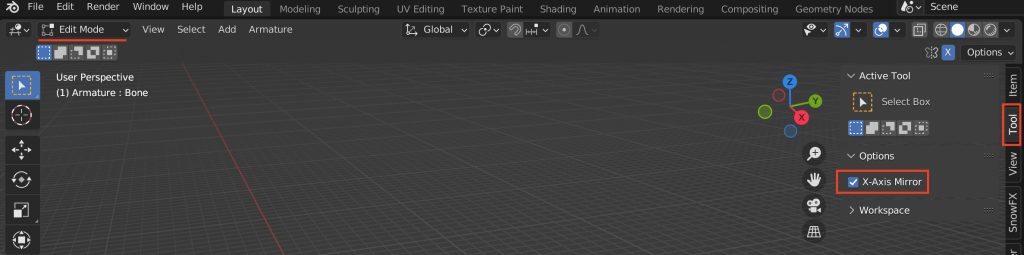
Check “X-Axis Mirror”
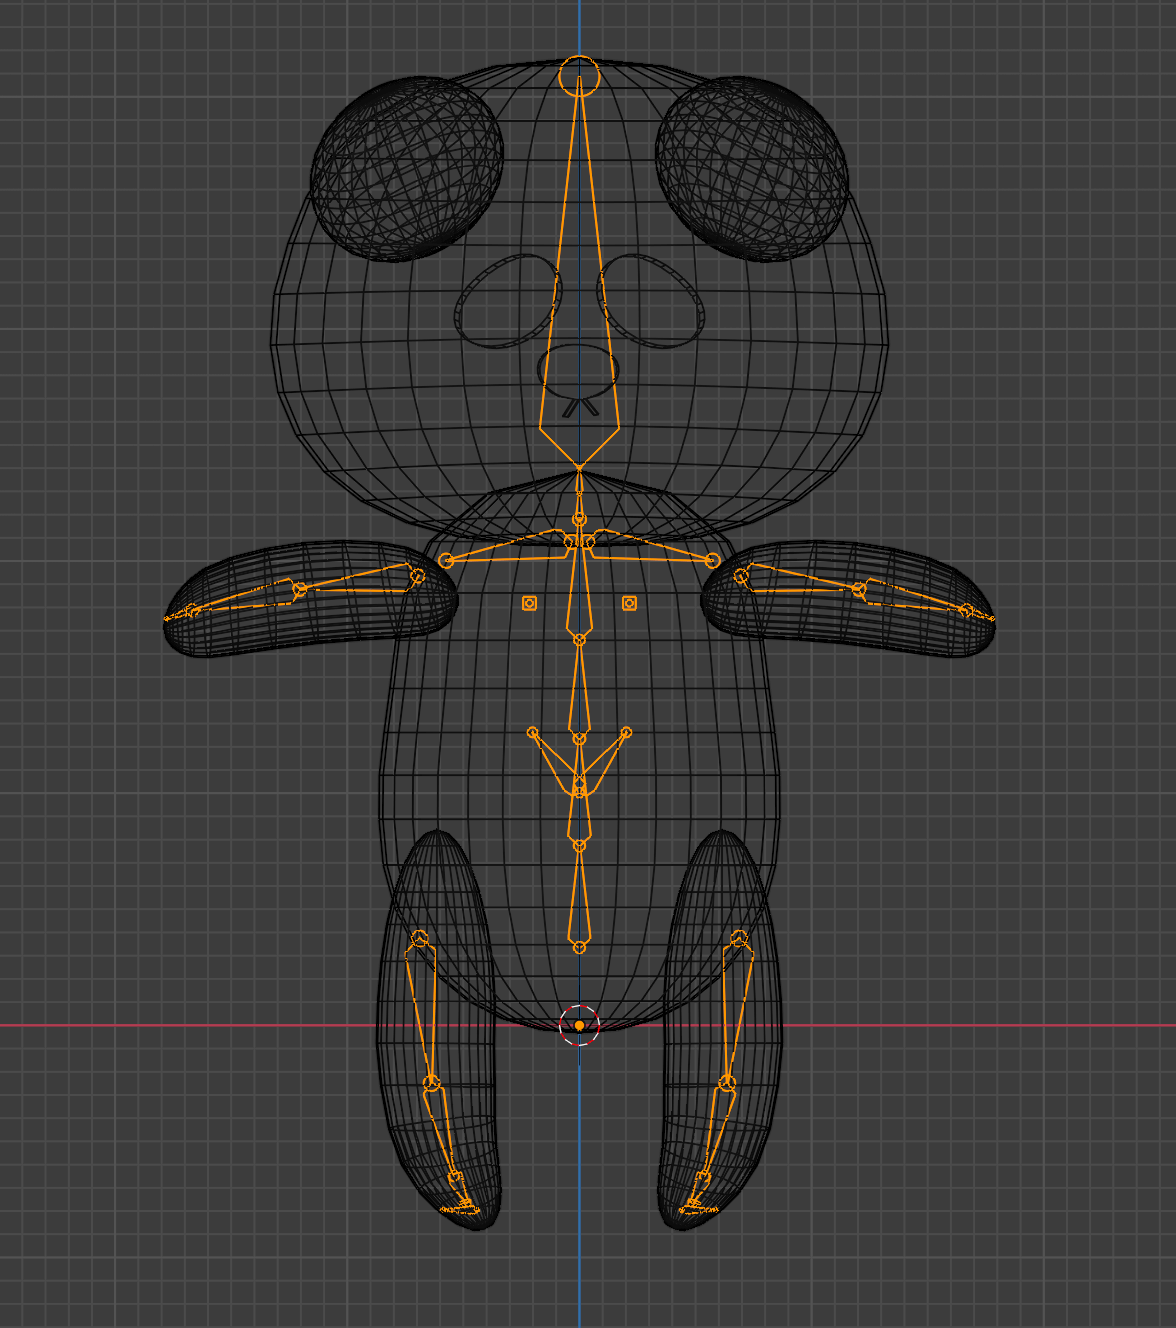
Adjusted bones
Associating Meshes with Bones
Once the bones have been attached to the model, select Mesh > Bones, then press [Ctrl]+[P] and select “With Automatic Weights.”

With Automatic Weights
Now the mesh and bones are connected.
Let’s see how this works. Select the bone and switch to “Pose Mode” from the upper left corner of the screen.
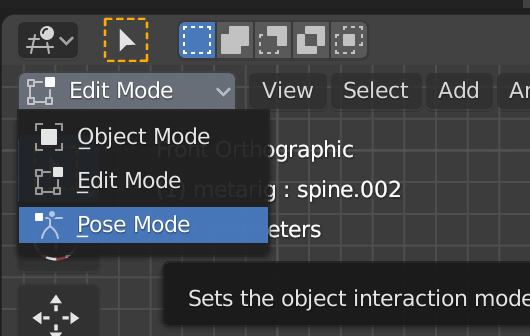
Switch to Pose Mode
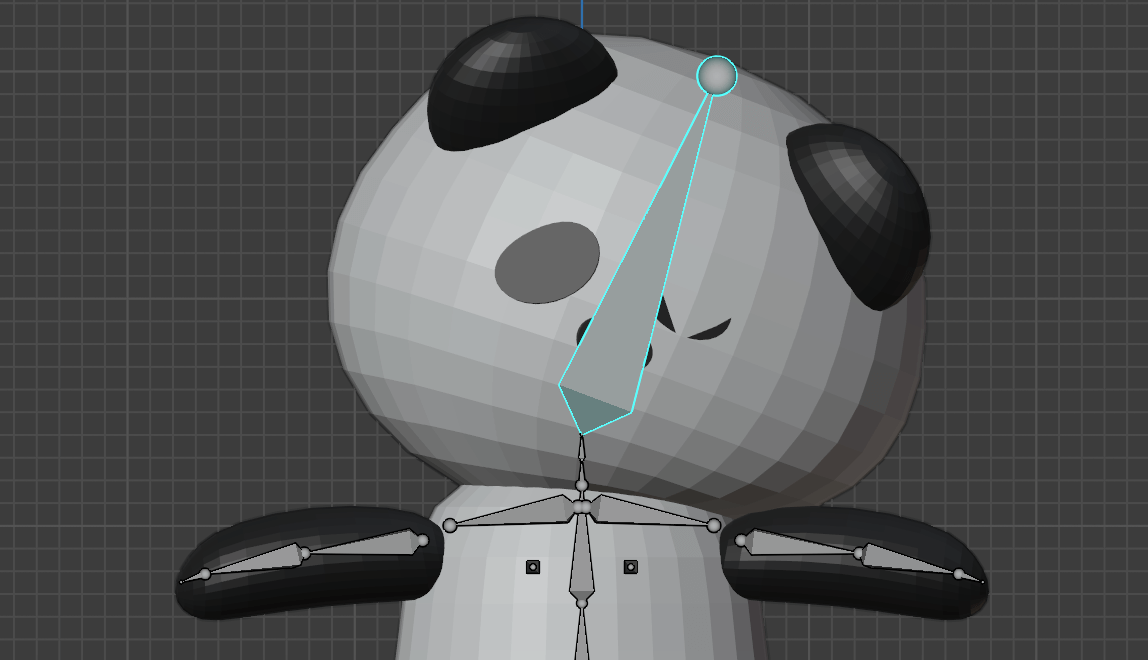
The selected color of the bone is now light blue. As the name suggests, this is the mode for creating a pose.
Select the bones one by one and rotate them with the [R] key.
Moving the arrow to match the bones
When you move a bone, the mesh associated with that bone will move along with it.
Use the [Ctrl]+[Z] keys to move the bone back to its original position. (If you can’t get them back by pressing [Ctrl]+[Z], you can reset the rotation by pressing [Alt]+[R].
When you have moved all the bones and found nothing strange, you are done adding bones. However, if an issue arises, please see the example below.
Some meshes don’t work properly
In the example shown, the eyes are not moving along the bones properly.
Because the bones and mesh are connected automatically, some parts may not connect properly, causing some parts to be left out.
To fix this problem, a function called Weight Paint will allow you to adjust the weight of the bones.
Adjusting the Bone Weight
To adjust the bone weight select the mesh and choose “Weight Paint” from the upper left menu (hereafter referred to as “Weight Paint Mode”).
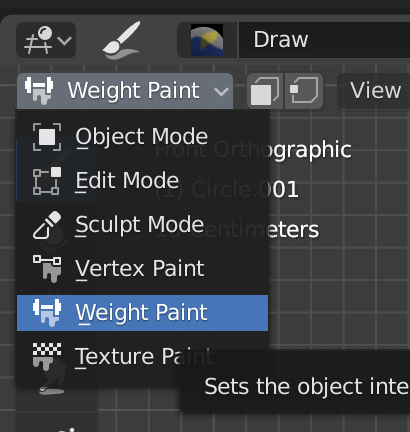
The mesh will change to red or blue. This is the Weight Paint function.
The stronger the connection to the selected bone, the redder it will be, and the weaker the connection, the bluer it will be.
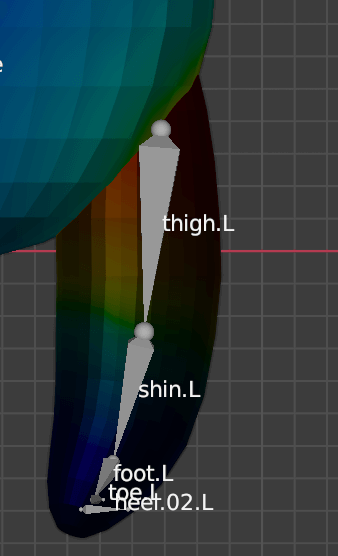
Relatedness to bones
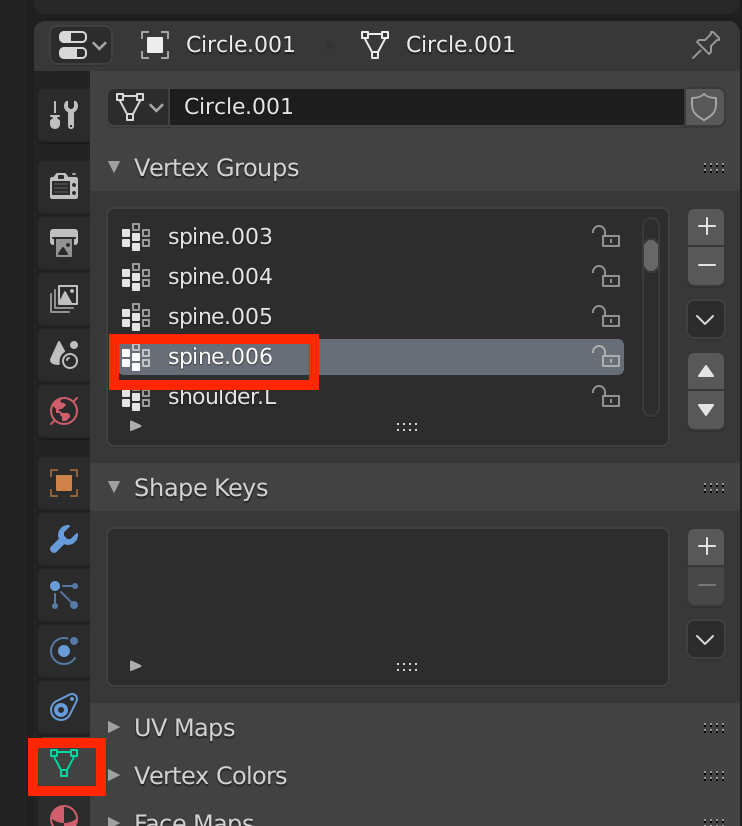
To adjust the selected bone, click on the upside-down triangle icon in the upper right menu (in the red box below), and select the vertex group that corresponds to (has the same name as) the bone you want to select.
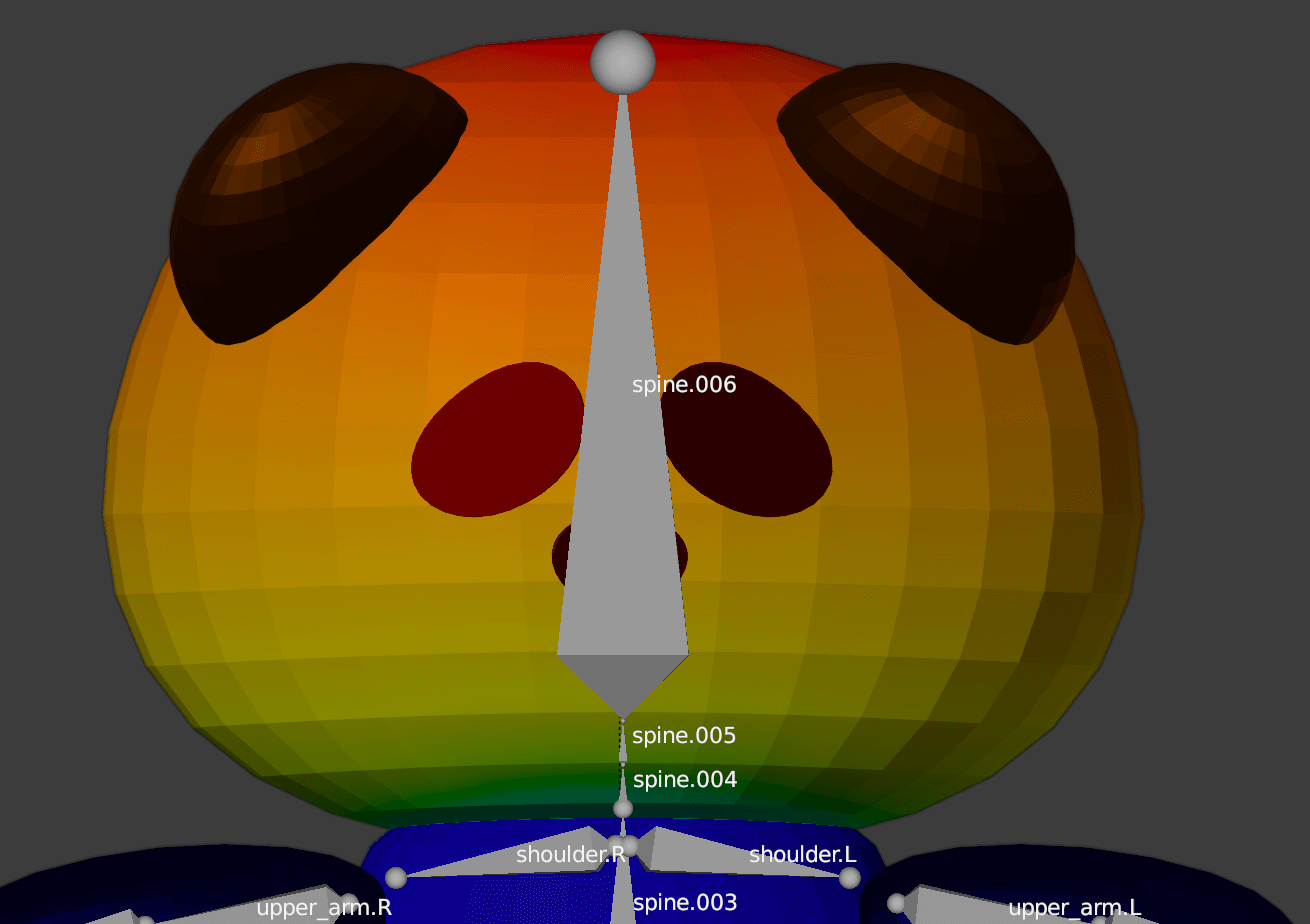
If you look at the panda’s head bone, you can see that the eyes are green and the relevance is low.
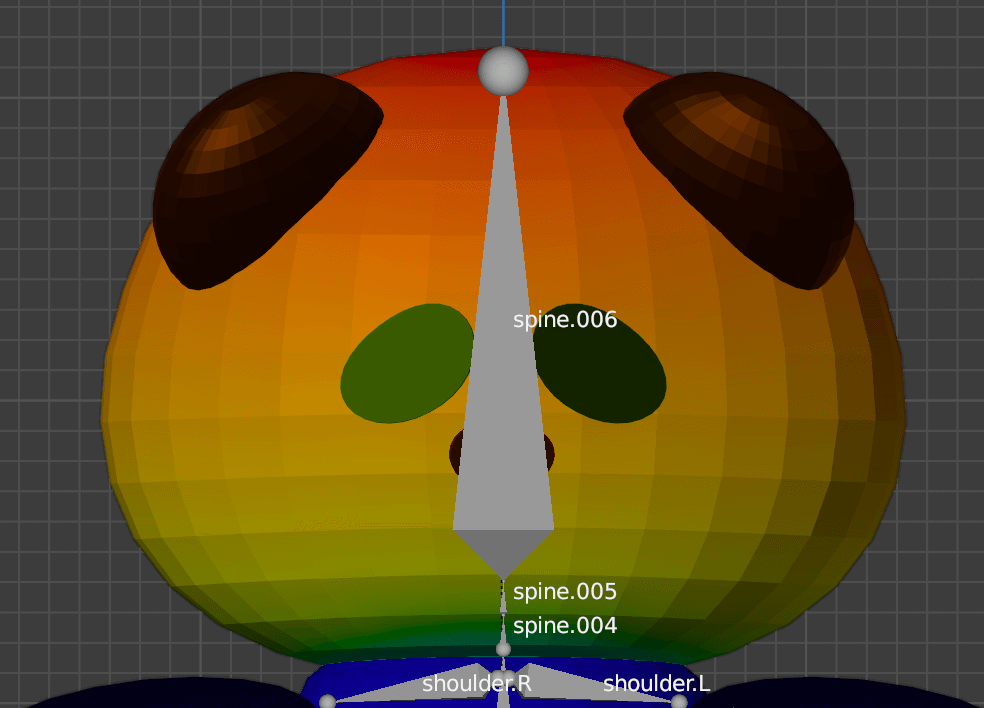
The eyes have low relevance
In Weight Paint mode, you can paint the weights of the mesh, but it is quite difficult to target only the eyes.
Therefore, we will use Edit Mode instead of Weight Paint mode to change the weight value of the eyes only.
(If you prefer to use Weight Paint for this type of adjustment, please refer to the following article.)
![[Blender for Beginners] Let’s start Modeling Part 5 – Adding Bones Manually](https://styly.cc/wp-content/uploads/2018/12/8-1.png)
First, in Edit Mode, press the [L] key on the eye vertices (link selection) and select the eye mesh.
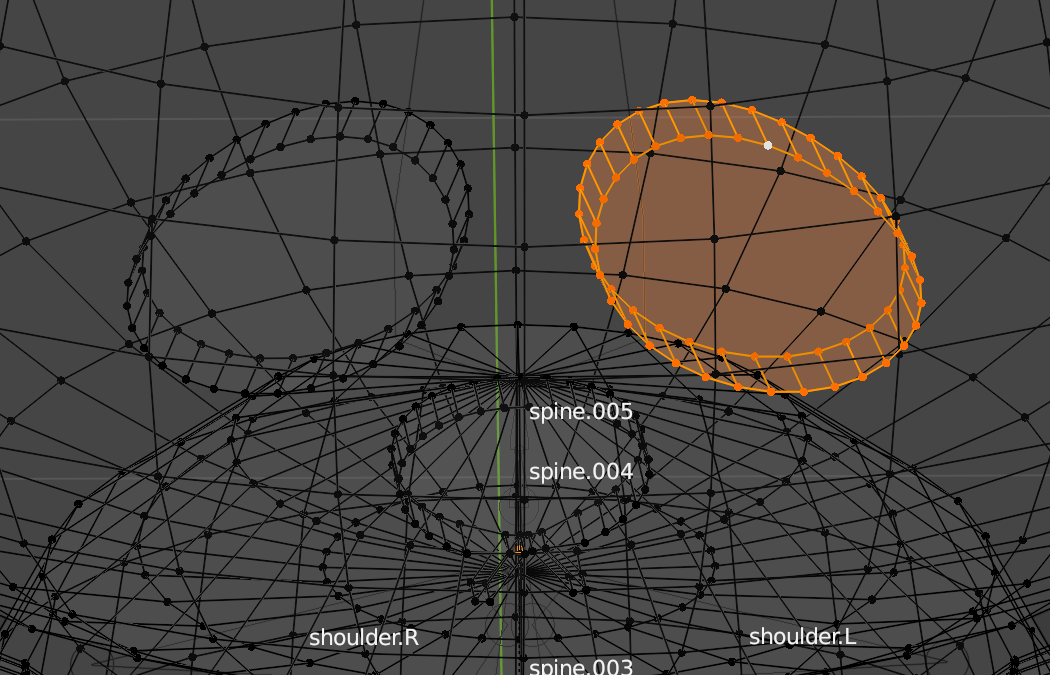
Select the eye mesh
Once selected, look at the “Vertex Weight” item on the right side in the 3D view.
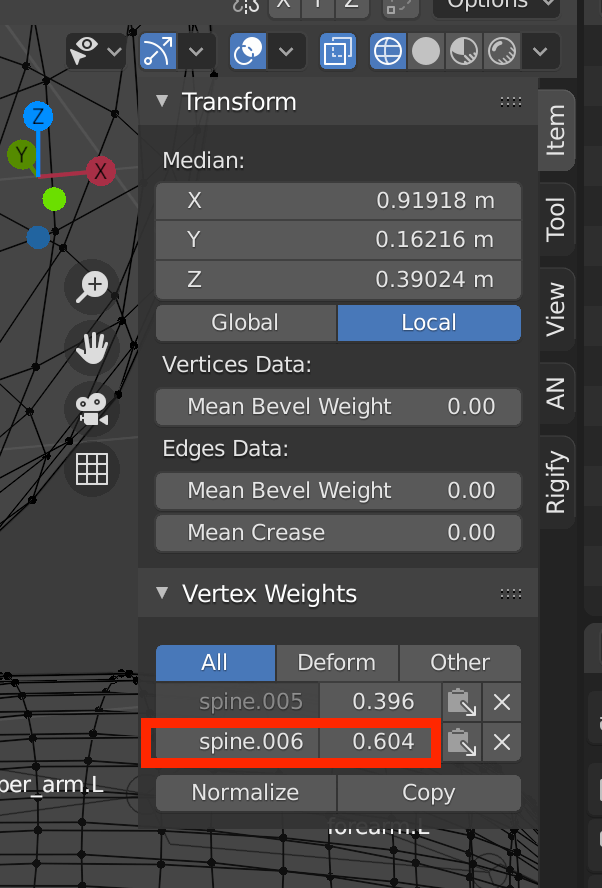
This indicates that this vertex has a spine.006 weight of 0.604 and a spine.005 weight of 0.396.
Since spine.006 in this case is the head bone, change the value of spine.006 to 1.0 and the value of spine.005 to 0.0, then press “Copy” to apply them to the entire selected vertex.
Now switch back to Weight Paint Mode to see the results.
The eyes are now red and will follow you the head.
Try moving the head in Pose mode and adjust it as shown below.

The eyes follow the movement of the head
Next article
In the next article, we will start creating the animation.
![[Blender for Beginners] Let’s start Modeling Part 6 – How to Add Armatures (bones)](https://styly.cc/wp-content/uploads/2018/12/9-2-1.png)
Vocabulary and Shortcut Keys to Remember:
Vocabulary
- Rigify: A ready-made skeleton in Blender.
- X-Axis Mirror: A setting to move bones symmetrically.
- Pose Mode: A mode for moving the bones after the mesh and bones are connected.
- Weight Paint Mode: After connecting a mesh with a bone, you can see and edit which part of the mesh is associated with each bone.
Shortcut Keys
- [Ctrl]+[J] key: Merge selected meshes
- Numeric keypad [5]: Parallel projection
- Numeric keypad [1]: Front view
- [Z] key: Wire frame view
- [L] key: Link selection
- [Shift]+[A]: Show “Create” menu
- [Ctrl]+[P] key: Connect meshes and bones.
For questions about STYLY, bug reports, and improvement requests, please contact the STYLY FORUM
https://en.forum.styly.cc/support/discussions
Certified (QA) by Shota Shawn Yoshizawa
Edited by SASAnishiki
Translated by passerby1