The complete image of an “Explosion” effect
In this article, I introduce how to make an explosion effect from a reference image of a deep-fried chicken (Karaage in Japanese) in Unity. This approach was popular a long time ago but I will dare to introduce it today! Firstly, go shopping for some deep-fried chicken for a reference image. It doesn’t matter where to buy it, at a hyper store or a convenience store. You can cook it by your self, of course. The shown below is what I bought this time.
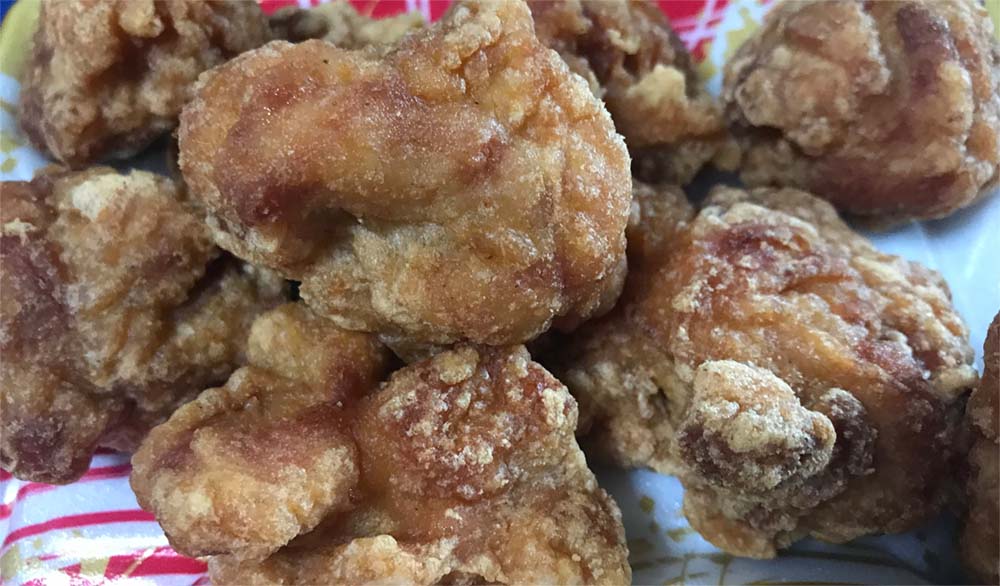
The deep-fried chicken I bought for a reference image.
By the way, I ate them up after taking the photos.
- 1 Samples
- 2 How to make an explosion effect
- 2.1 Add a Particle System
- 2.2 Set Shape to “Sphere”
- 2.3 Create a Material for the particles
- 2.4 Assing a texture
- 2.5 The setting of the Emission module
- 2.6 The setting of the main module.
- 2.7 The setting of the “Size over Lifetime” module
- 2.8 The setting of the “Color over Lifetime” module
- 2.9 Adjust the whole image
- 2.10 The explosion effect completed
Samples
You can taste a sample space in STYLY GALLERY.
You can download the Unity project in this article.
How to make an explosion effect
Add a Particle System
Select GameObject > Effects > Particle System
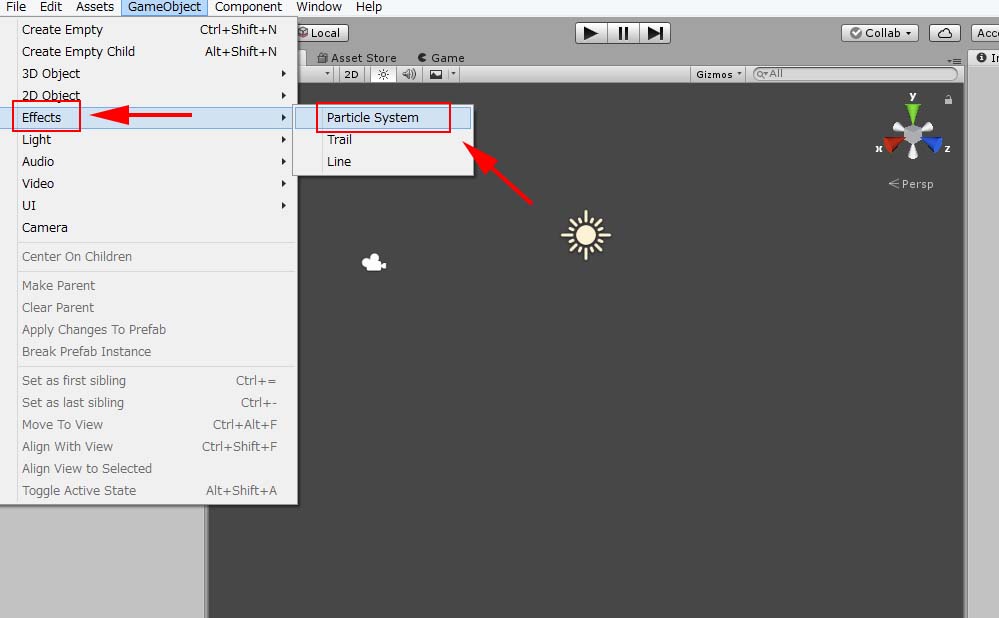
Add a Particle System
It creates particles in the Scene.
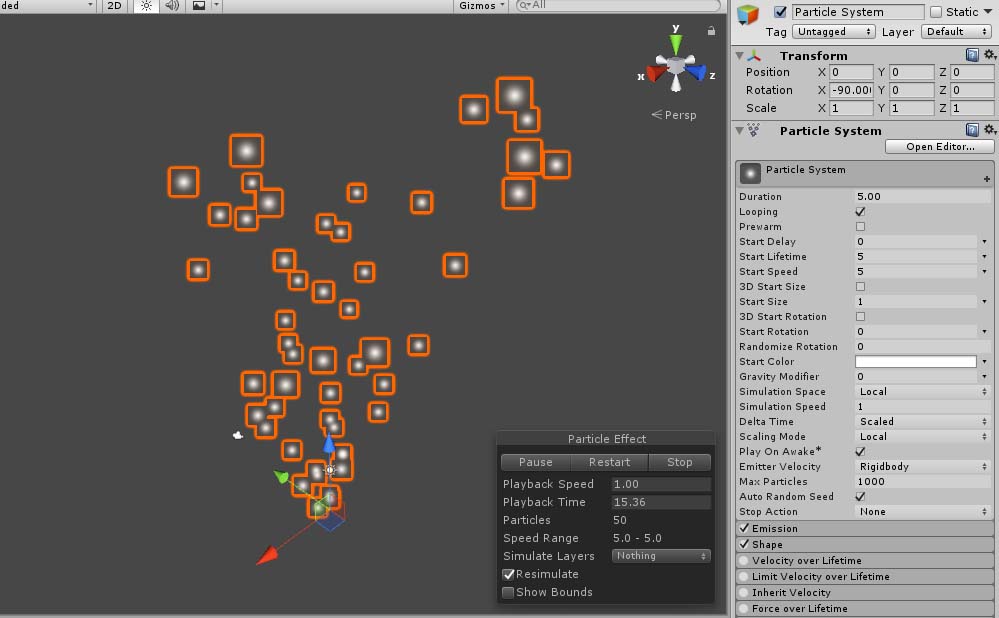
Particles are created.
Set Shape to “Sphere”
In the Shape module, set Shape to “Sphere” and set Radius to 0.2.
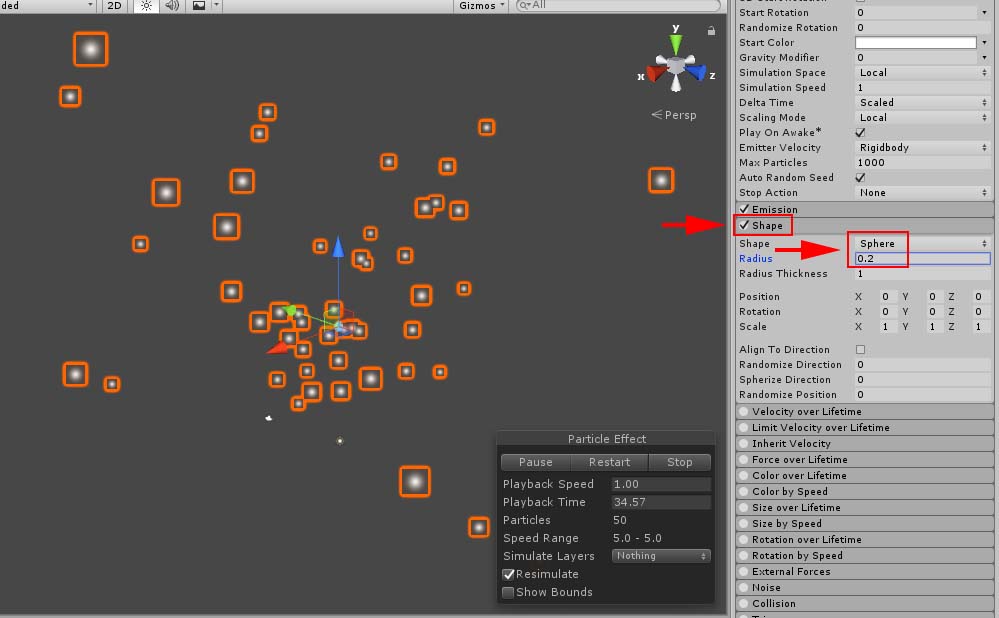
Set Shape to “Sphere”.
Create a Material for the particles
Create a new Material for the effect. Set Material’s Shader to Particle > Additive.
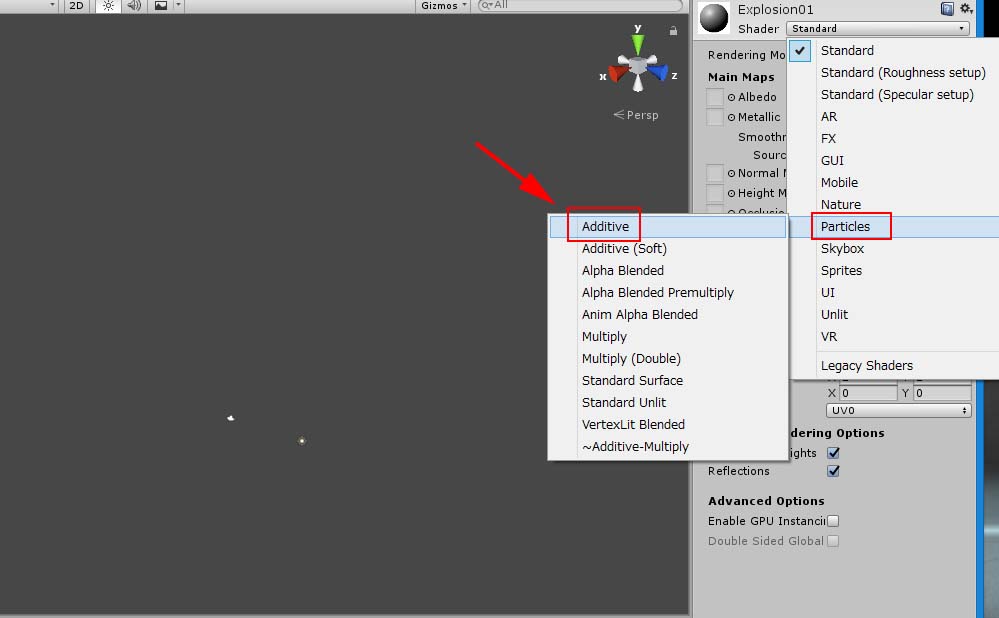
Create a Material for the particle
Assing a texture
Prepare a texture for the effect. I picked up a piece of deep-fried chicken from the image, and make a texture blurred around the boundary.
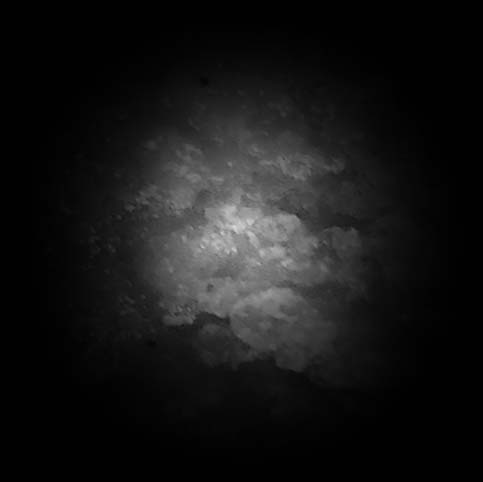
The image of deep-fried chicken processed for the effect.
Assign the image to “Particle Texture”.
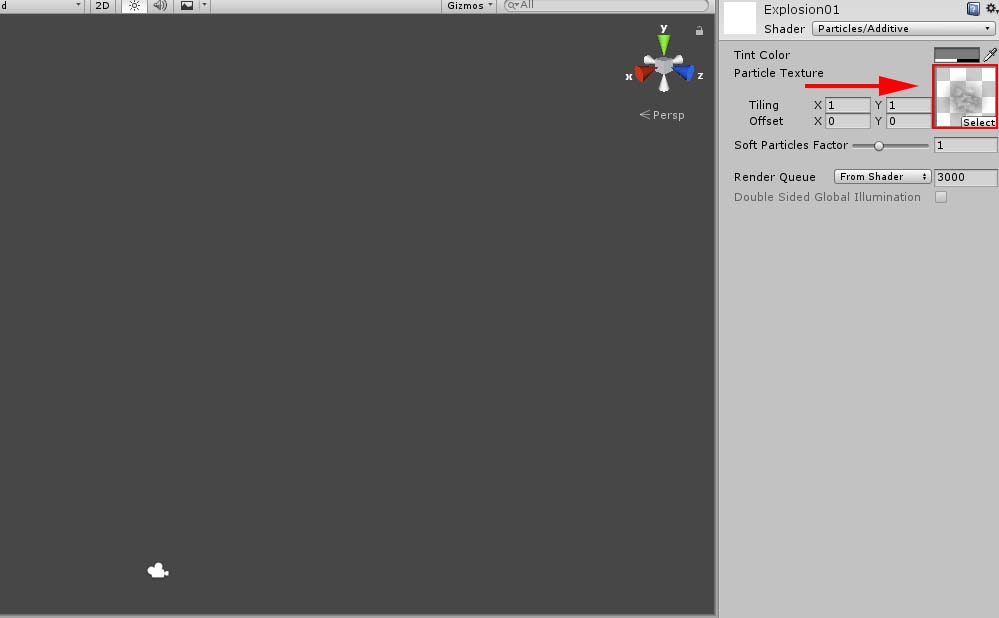
Assign “Deep-fried Chicken” to the texture!
Play the particles to check.
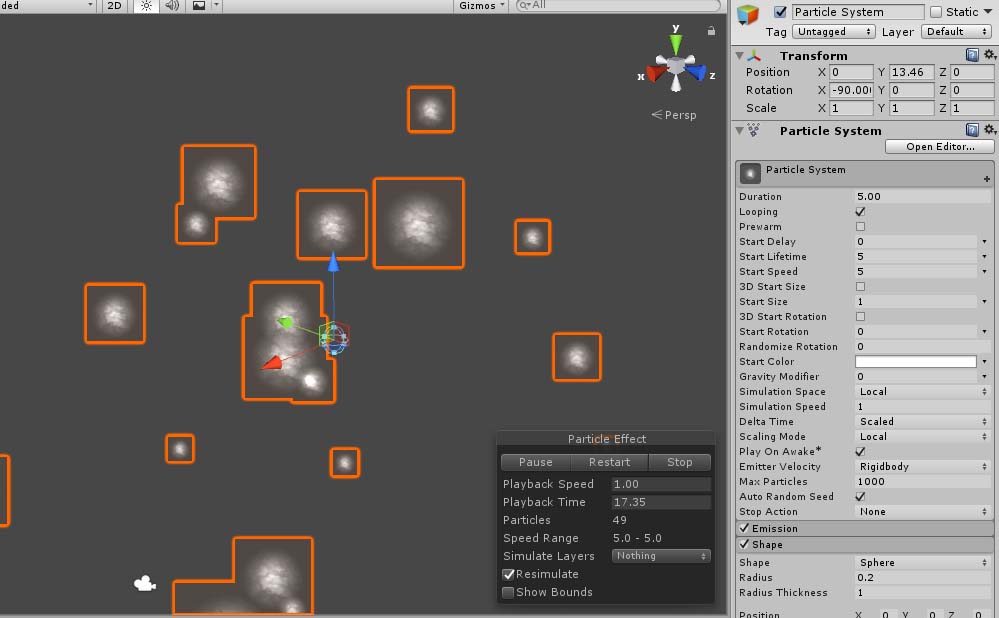
The particle became “Deep-fried chicken” now.
The setting of the Emission module
Set the parameters of the Emission module. Set “Rate over Time” to zero. Add a Burst with Count set to 100.
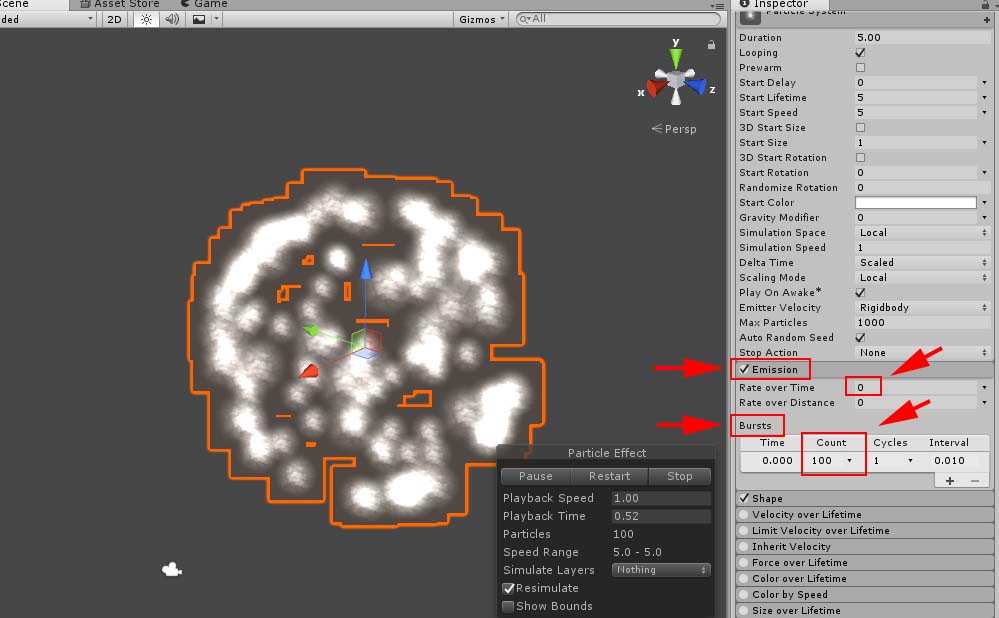
The setting of the Emission module
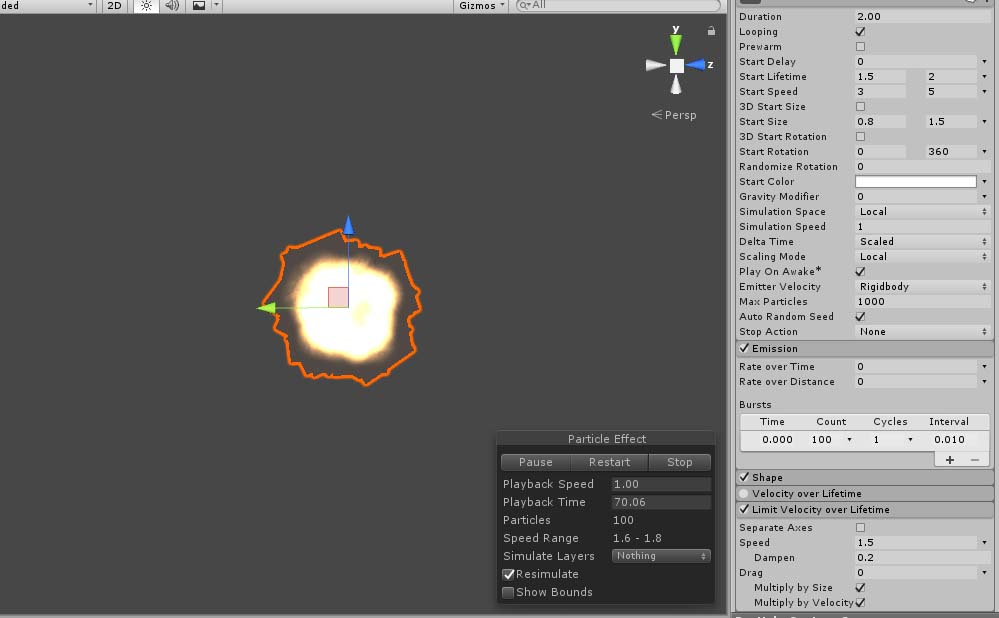
The setting of the main module.
Let’s set the parameters for the main module. Set the parameters as follows: Duration: 2.00 Start Lifetime: 1.5 and 2 with “Random between two constants” selected Start Size: 0.4 and 1.5 with “Random between two constants” selected Start Rotation: 0 and 360 with “Random between two constants” selected
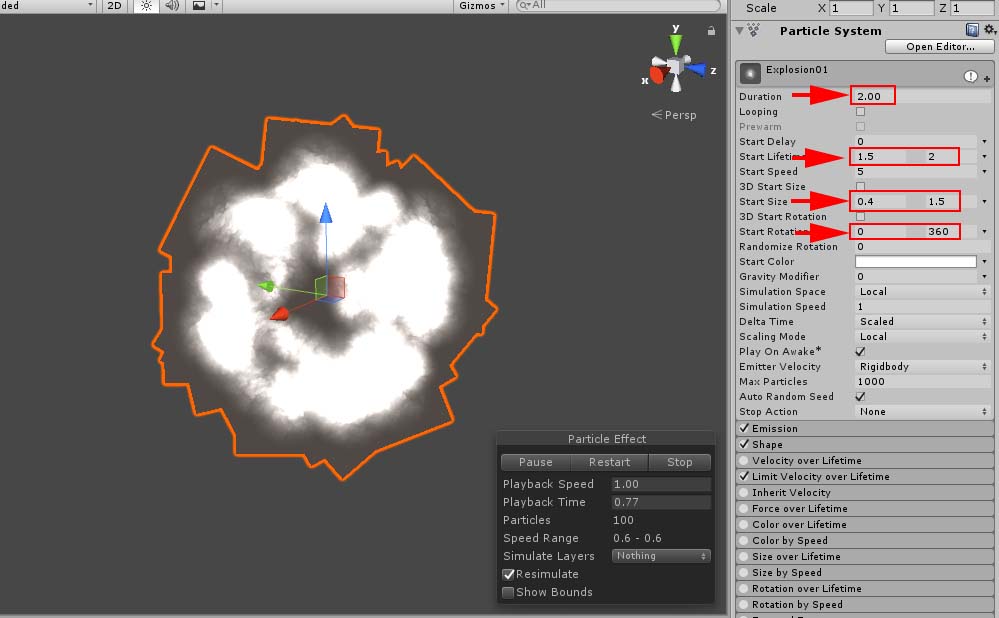
The setting of the main module
The setting of the “Size over Lifetime” module
Set the “curve for Size over Lifetime”. Now, I adjust the “Start Size” once more.
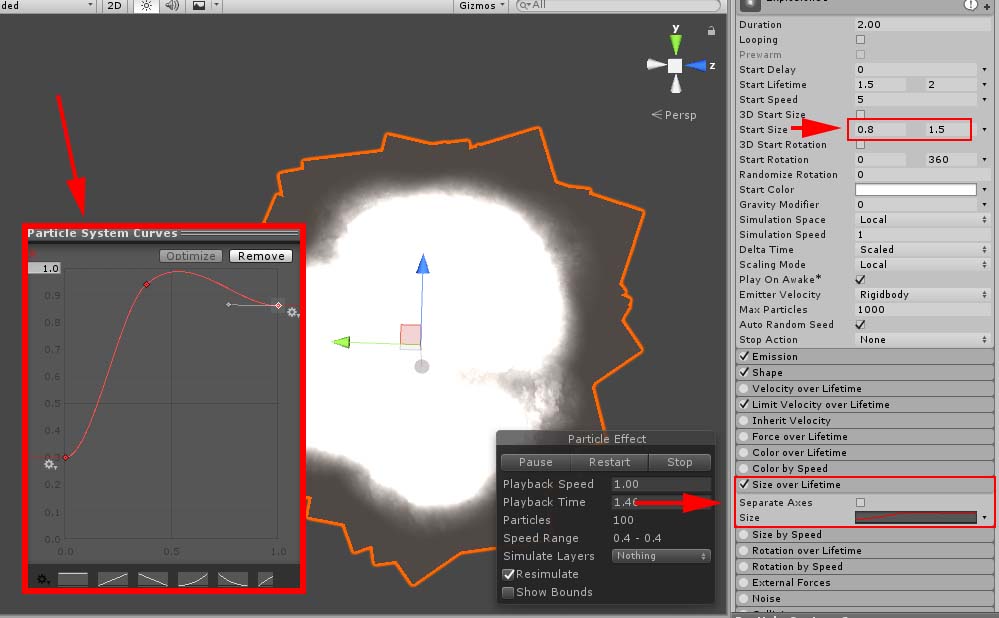
The setting of the “Size over Lifetime” module
The setting of the “Color over Lifetime” module
Let’s colour the explosion. Make a gradation that starts with orange-type colour. Set the parameter for Alpha so that it becomes transparent gradually.
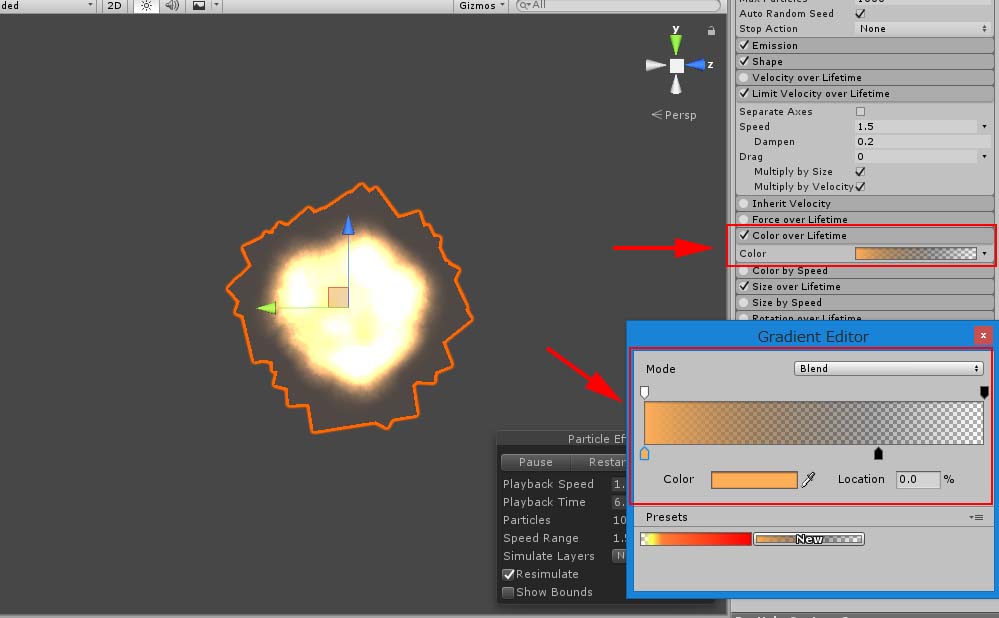
The setting of the “Color over Lifetime” module
Adjust the whole image
Adjust the parameters again while checking how the explosion looks.
Adjust the whole image.
The explosion effect completed
It ended up with the shown below.
The complete image of an explosion effect.
In this article, I introduced how to make an explosion effect from the image of deep-fried chicken as a reference. Deep-fried chicken, or Japanese Kara-age, is tasty not only for dinner but also as a reference image! How to upload an Asset from Unity to STYLY. Read the article