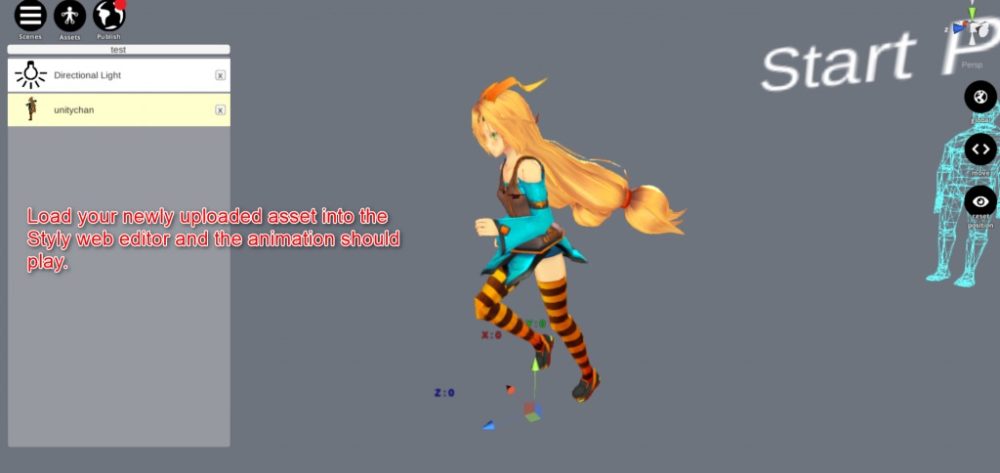
In this article, I will show a series of tasks to add animation to ‘Unity-chan’, and then upload it to STYLY.
Let’s use Mecanim
Let me show how to use Mecanim. Firstly, download ‘Raw Mocap Data for Macanim’ and ‘Unity-chan’ from Unity Asset Store.
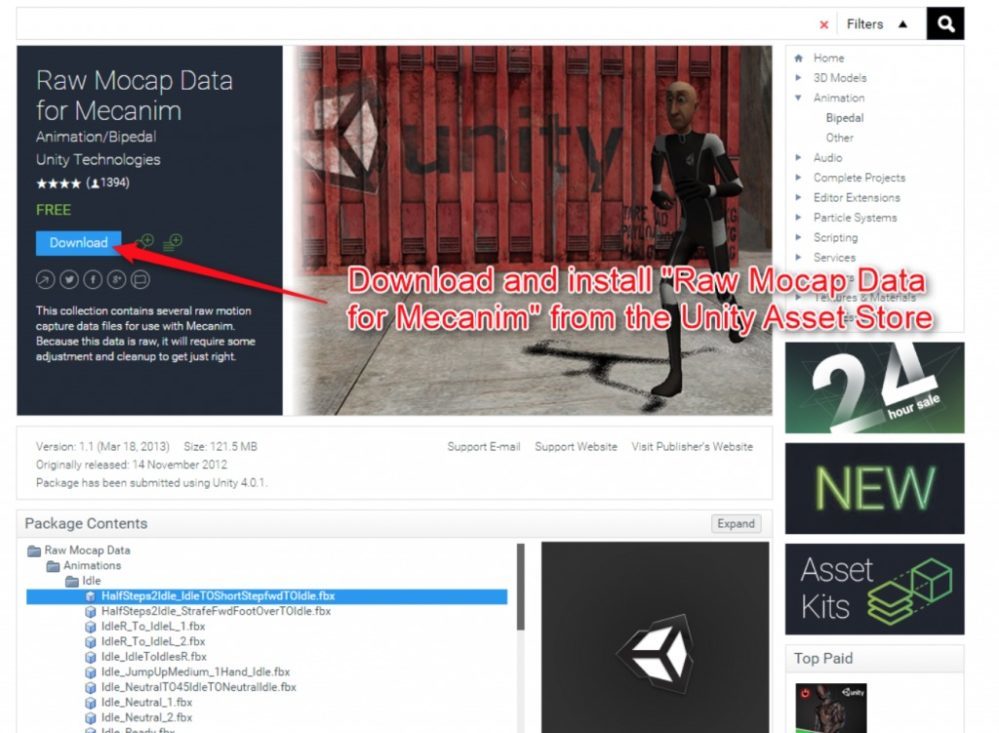
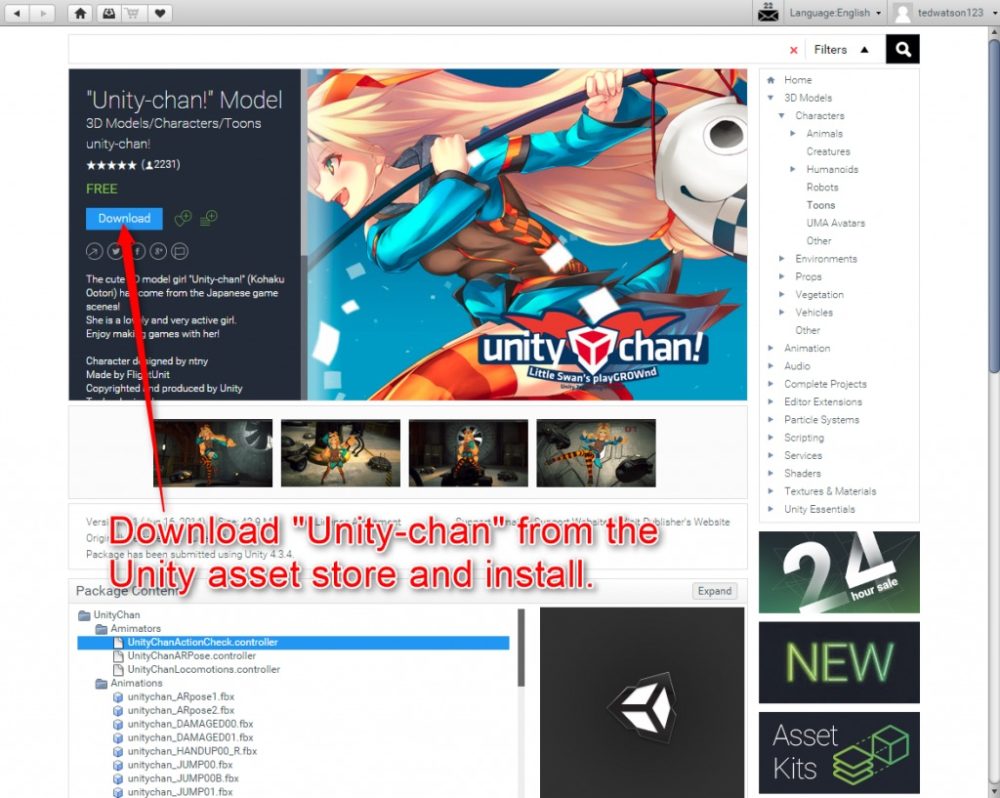
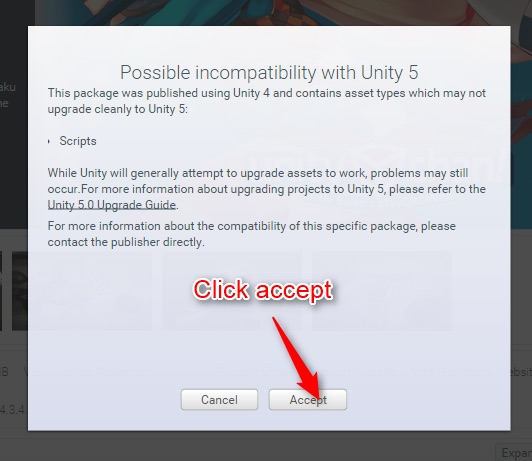
If you use Unity 5, click the ‘Accept’ button when importing ‘Unity-chan’.
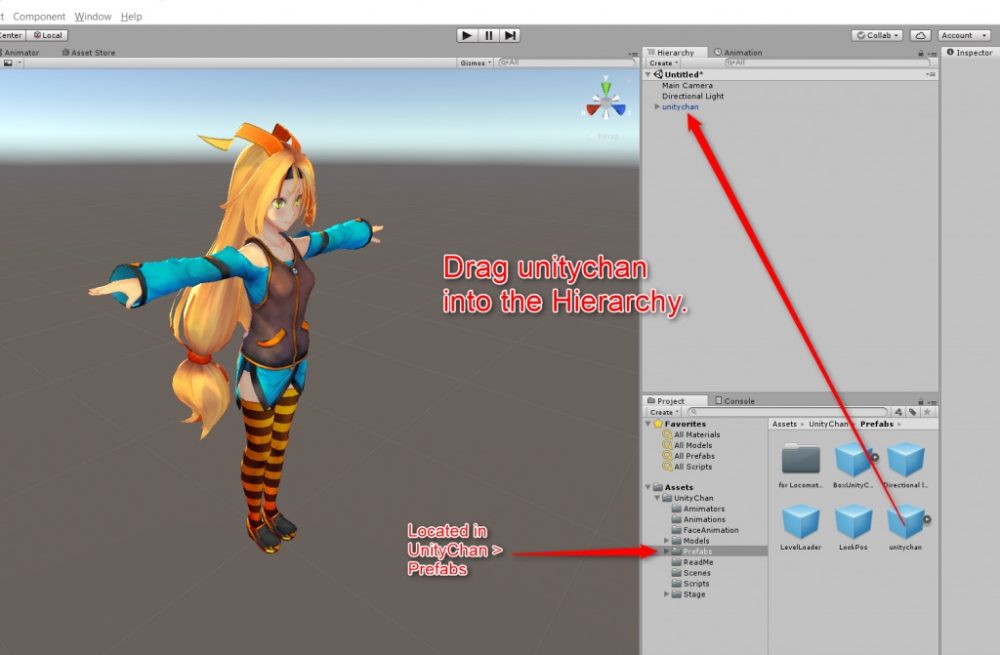
Select Assets > UnityChan > Prefabs, and drag ‘unitychan’ under the Prefabs folder into the Hierarchy view.
Select ‘unitychan’ and remove the Animator component since we will set this up for ourselves later.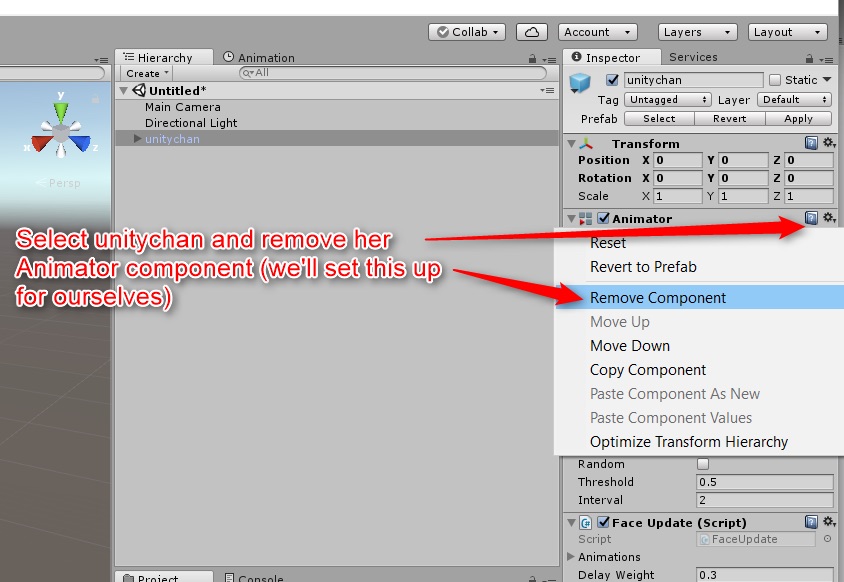
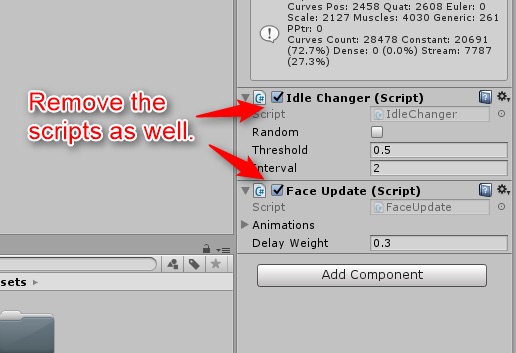
After removing the Animator component, remove the Scripts as well.
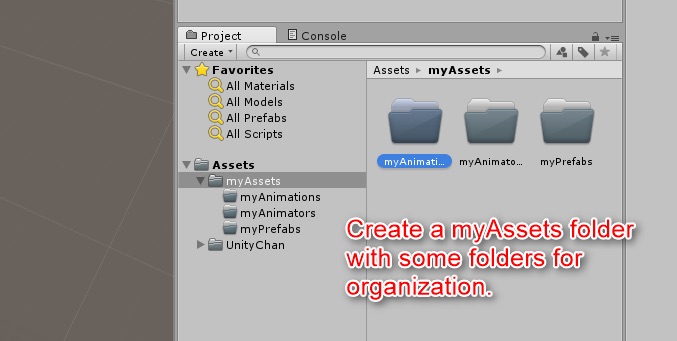
Next, create ‘myAssets’ folder. Then, create ‘myAnimators’ folder and ‘myPrefabs’ folder in it.
Add animation by Mecanim
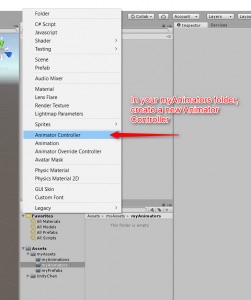
Create a new ‘Animator Controller’ in the ‘myAnimators’ folder.
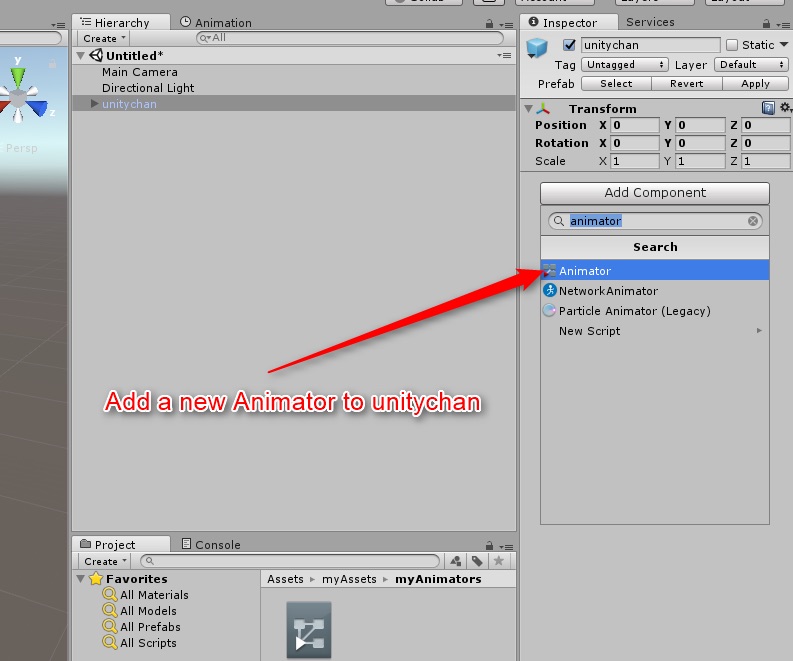
Click ‘Add Component’ and find ‘Animator’ in the Inspector tab to add it to ‘unitychan’.
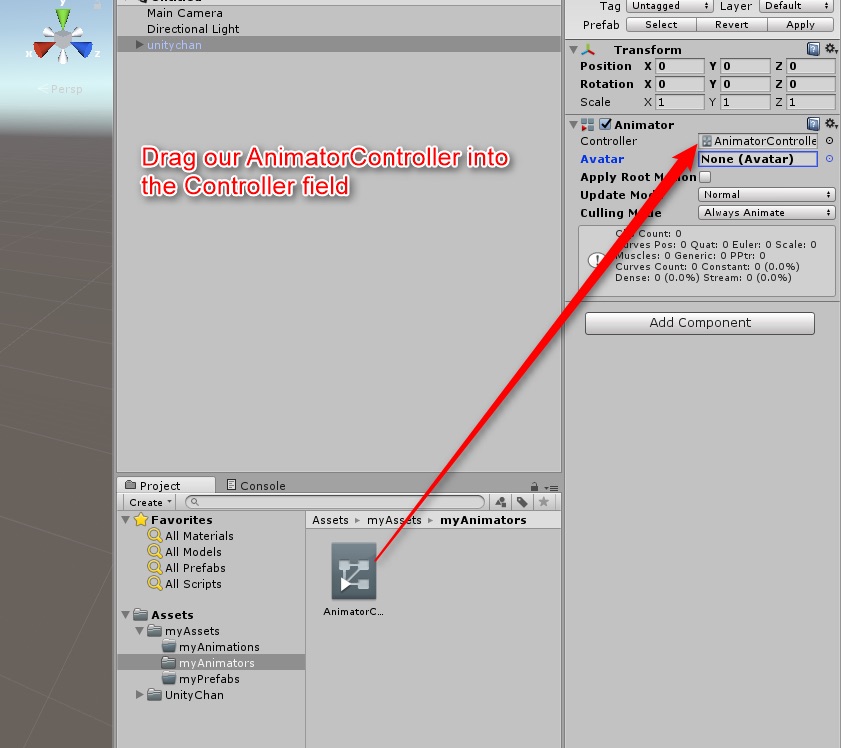
Drag the AnimatorController from the ‘myAnimators’ folder into the Controller field.
For the Avatar field, click the circular button on the right side of the field to bring up the selection menu and select ‘unitychanAvatar’.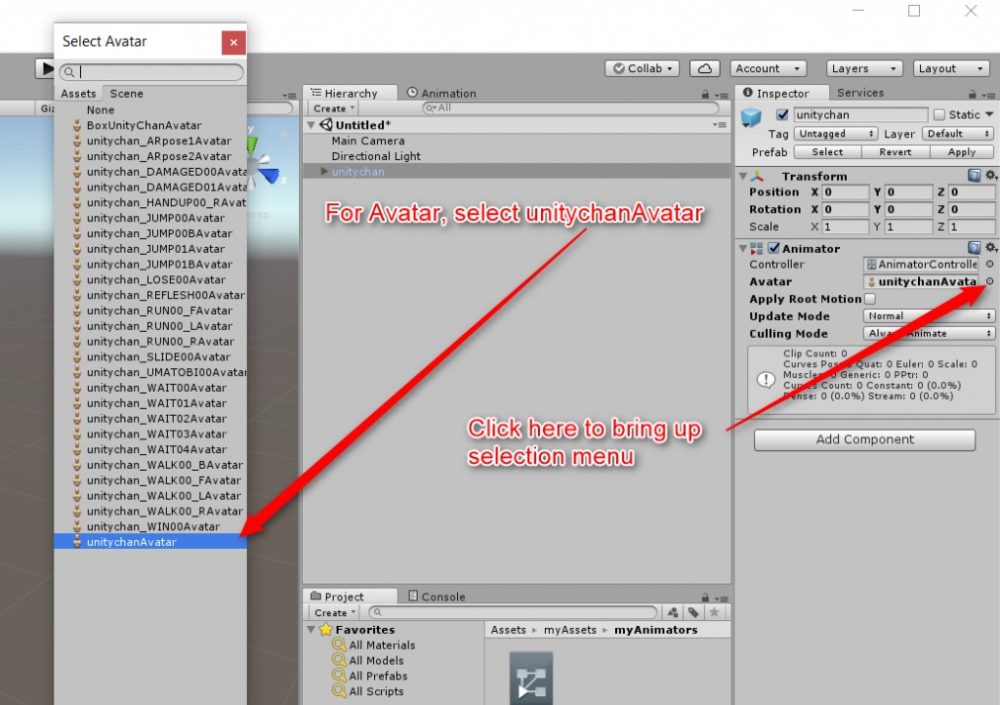
Select a few animations from ‘UnityChan > Animations’ and drag them into the ‘myAnimators’ folder. In this example, I selected ‘unitychan_RUN00_F Import Settings’, ‘unitychan_WALK00_F Import Settings’ and ‘unitychan_WIN00 Import Settings’.
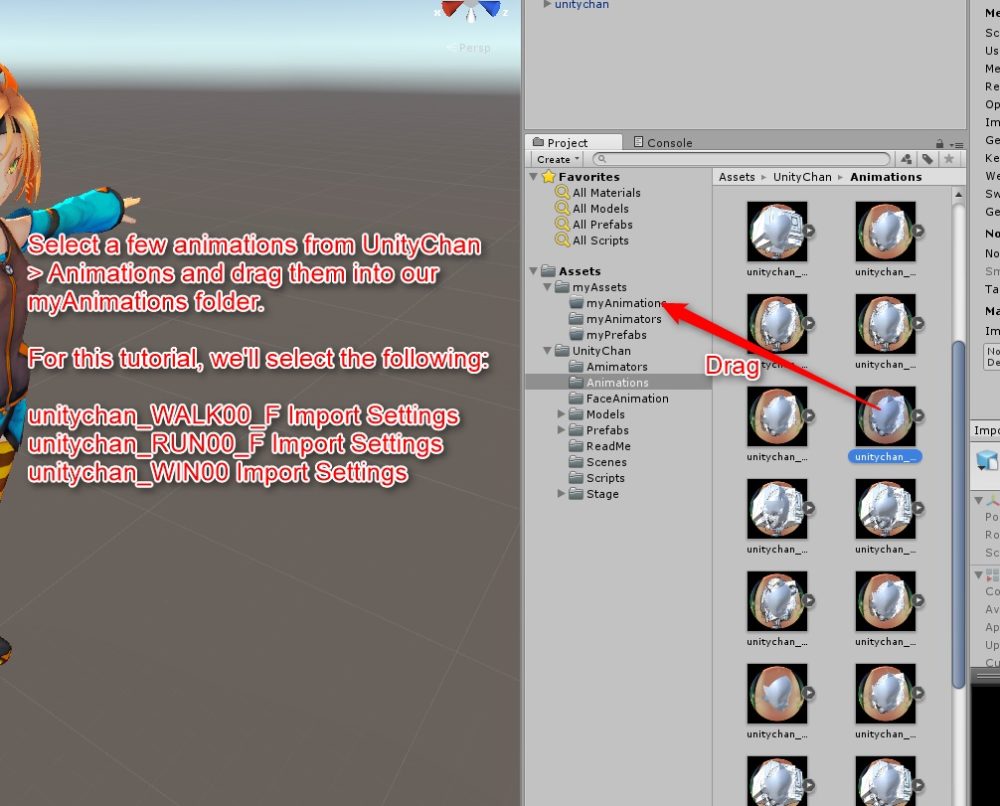
Next, select ‘Window > Animator’ (Alternatively, select the ‘Animator’ tab) to open the Animator window. You can create and modify the ‘Animator Controller’ asset here.
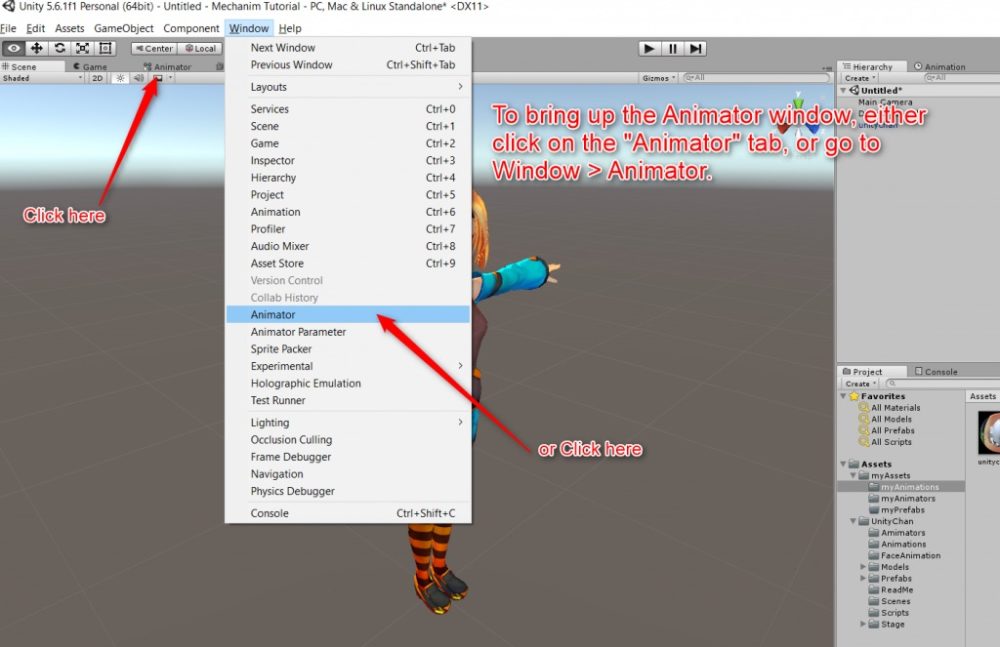
In the Animator window, you can change the states and the transitions of the animation by setting the state machine, which looks like a flow chart.
Drag the Run animation, ‘unitychan_RUN00_F Import Settings’, onto the layout area in the Animation window. The first animation you add is set as ‘Layer Default State’ by default. This default node is connected to the Entry node automatically. As a result, this state machine has been set as the starting state of this Run animator. We change the Layer Default State later.
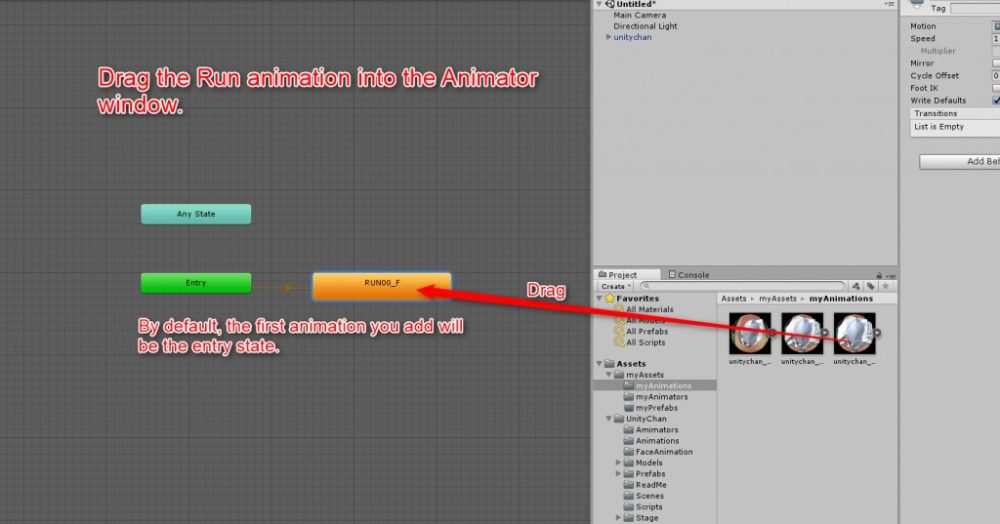
Then, drag your remaining animations, ‘unitychan_WALK00_F Import Settings’ and ‘unitychan_WIN00 Import Settings’ into the window.
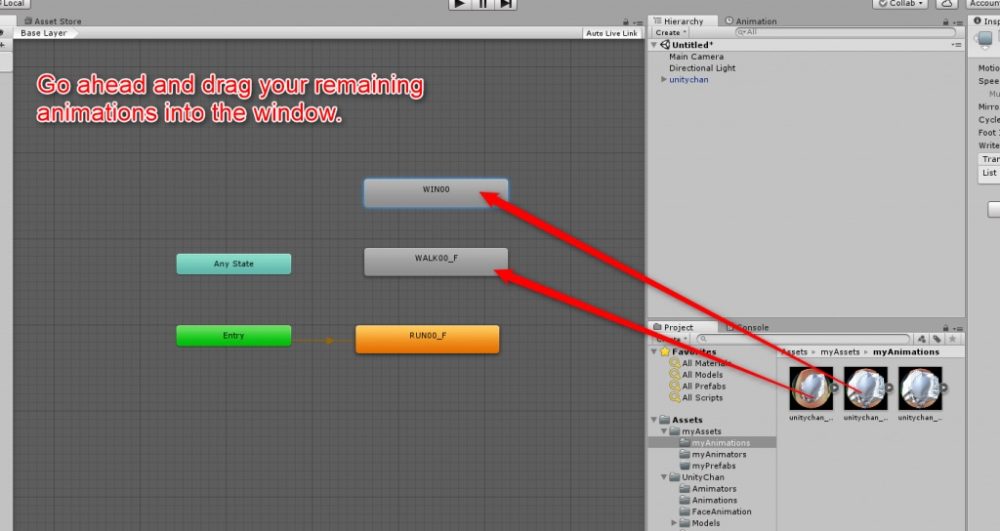
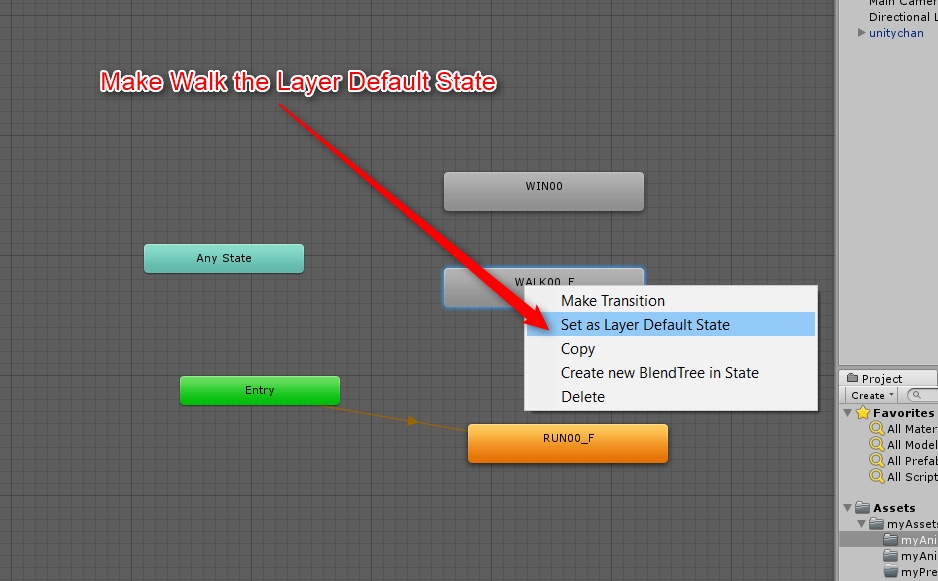
Right-click the ‘WALKoo_F’ state and select ‘Set as Layer Default State’ to make the Walk animation Layer the Default State. The orange colour means that the Walk animation has been set as the Layer Default State. It’s connected to the Entry node automatically.
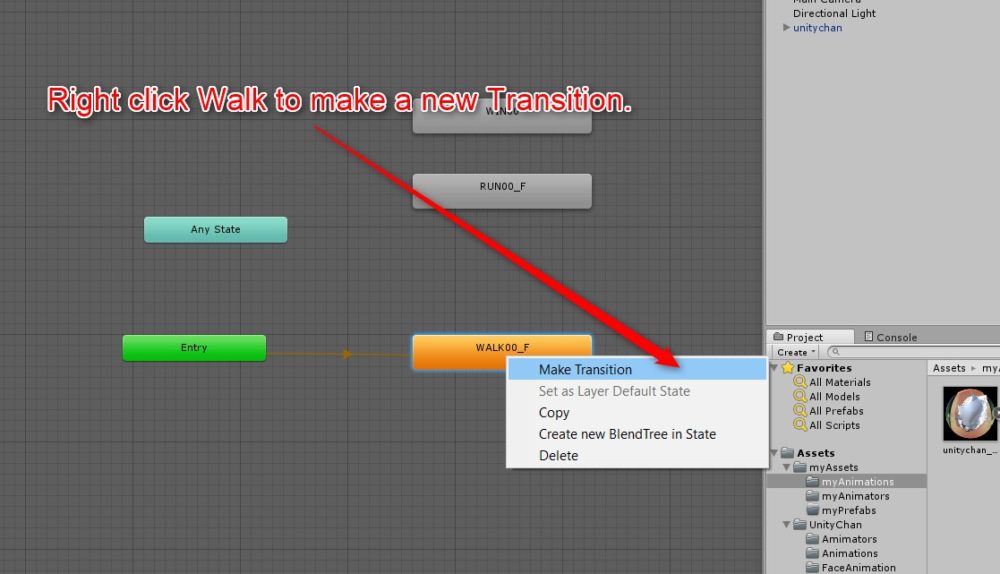
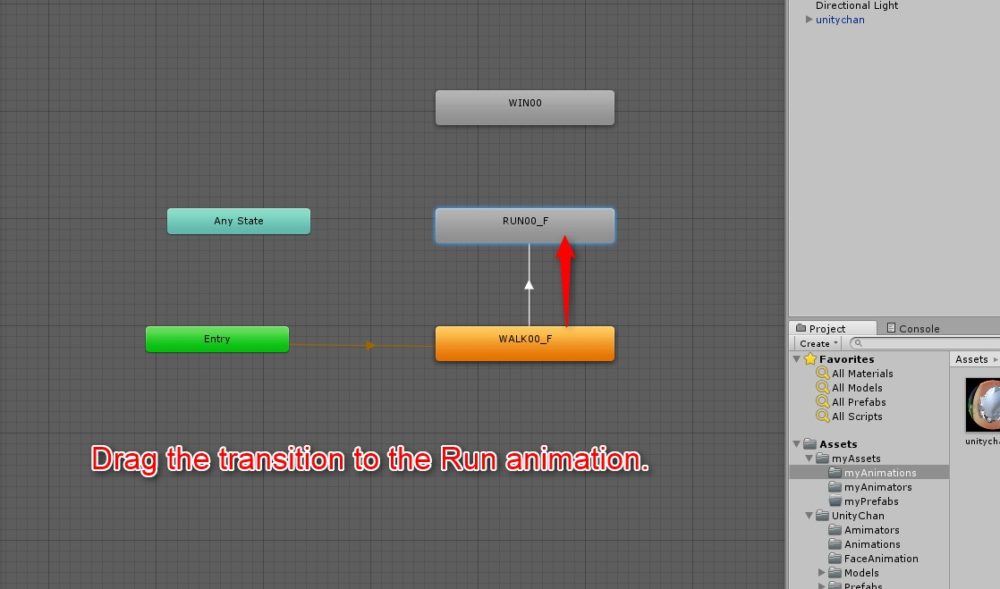
Next, right-click ‘WALK00_F’ and select ‘Maker Transition’ to make an animation transition to ‘RUN_F’. Drag the animation transition to the Run animation.
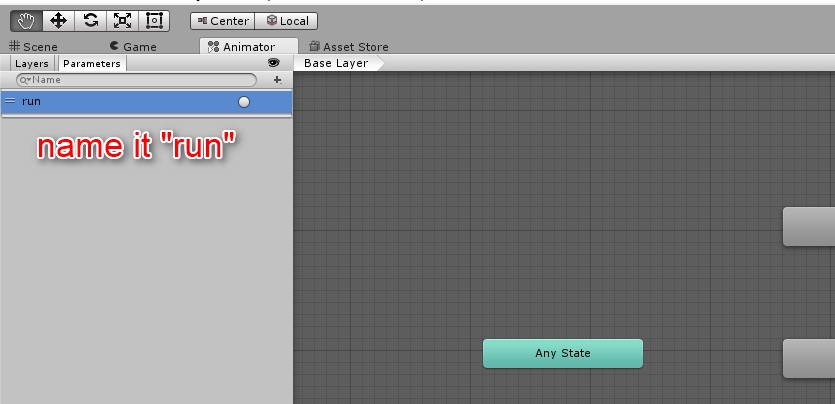
When you create the animation transition between ‘WALK00_F’ and ‘RUN00_F’, click the ‘+’ icon on the Parameters view and select ‘Trigger’ from the pop-up menu to add a new Trigger parameter. By this parameter view, you can modify the Animation Controller Parameters that define the action for the State machine.
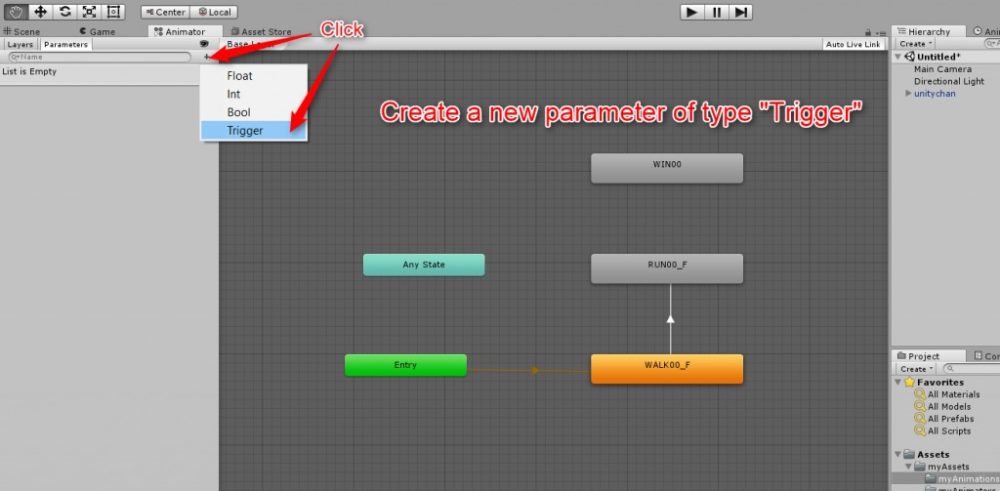
Name this new parameter ‘run’.
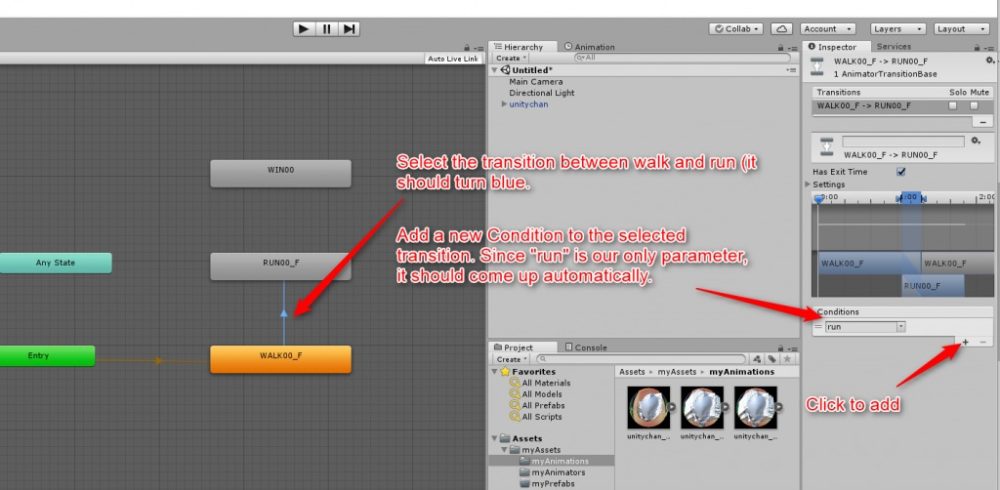
Select the animation transition between ‘WALK00_F’ and ‘RUN00_F’. It should turn blue. Press the ‘+’ icon to add a new Condition to the selected transition. As ‘run’ is only the parameter added so far, it should be selected by default.
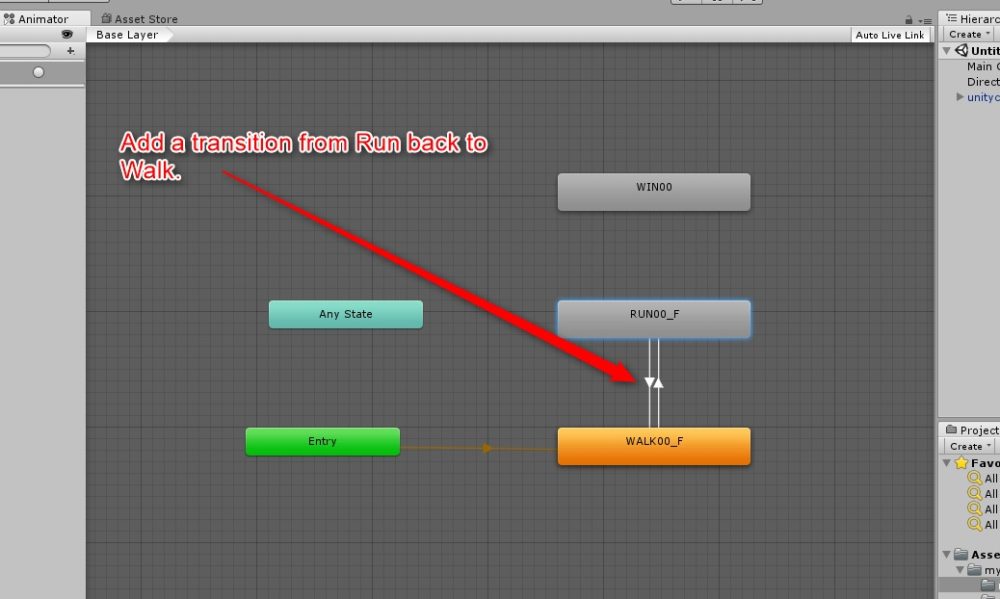
Add an animation transition from ‘RUN00_F’ back to ‘WALK00_F’, which makes the transition from running to walking.
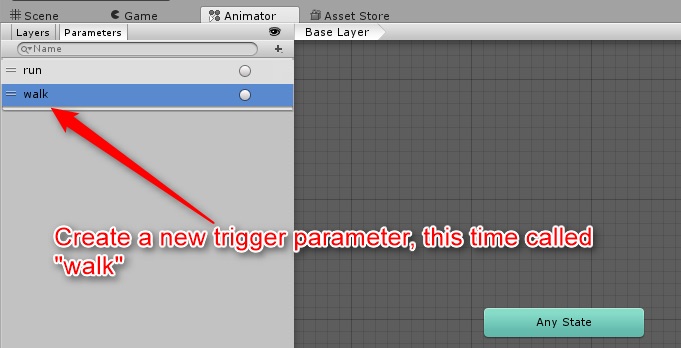
Create a new Trigger parameter in the Parameter view, and name it ‘walk’.
Select the animation transition (RUN00_F → WALK00_F) created earlier and select ‘walk’ from the drop-down menu.
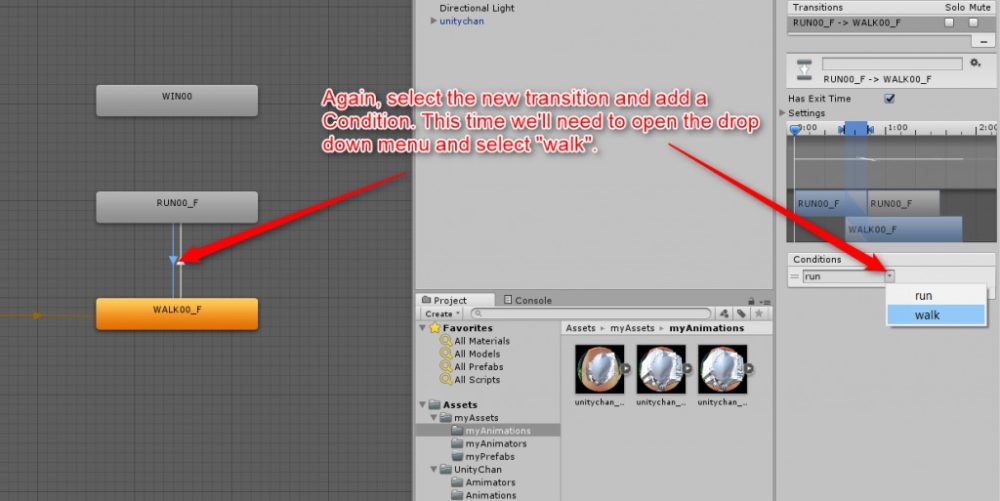
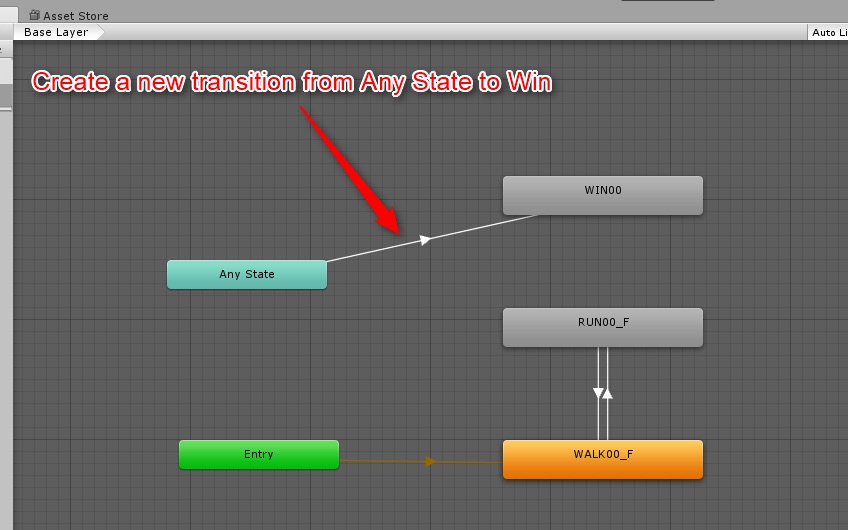
Create a new transition from Any State to WIN00. Any State is a special State and it allows you to jump to the state you need.
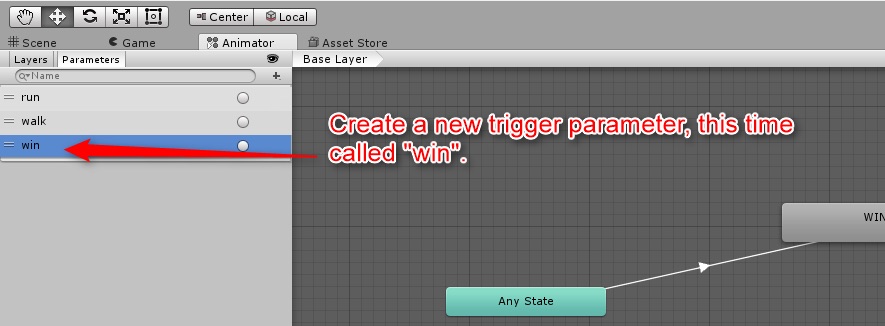
Create a new Trigger parameter and name it ‘win’ this time.
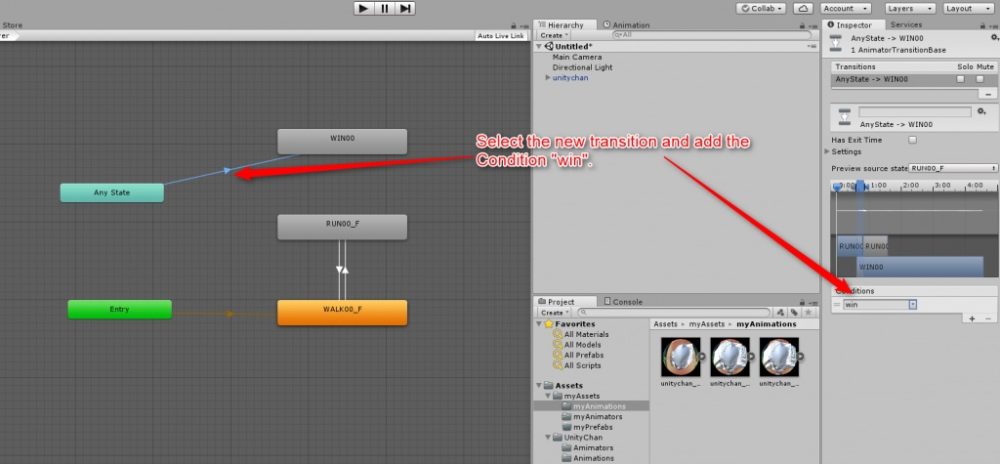
After creating the animation transition, select it and add a new Condition by selecting ‘win’ from the drop-down menu.
The State Machine has been set. Now, let’s prepare to make Unity-chan play various animations. Firstly, click and hold down the Animator tab and drag it to move the Animation Window to a different place on the screen. It allows you to view both the Game scene and the Animator view at the same time.
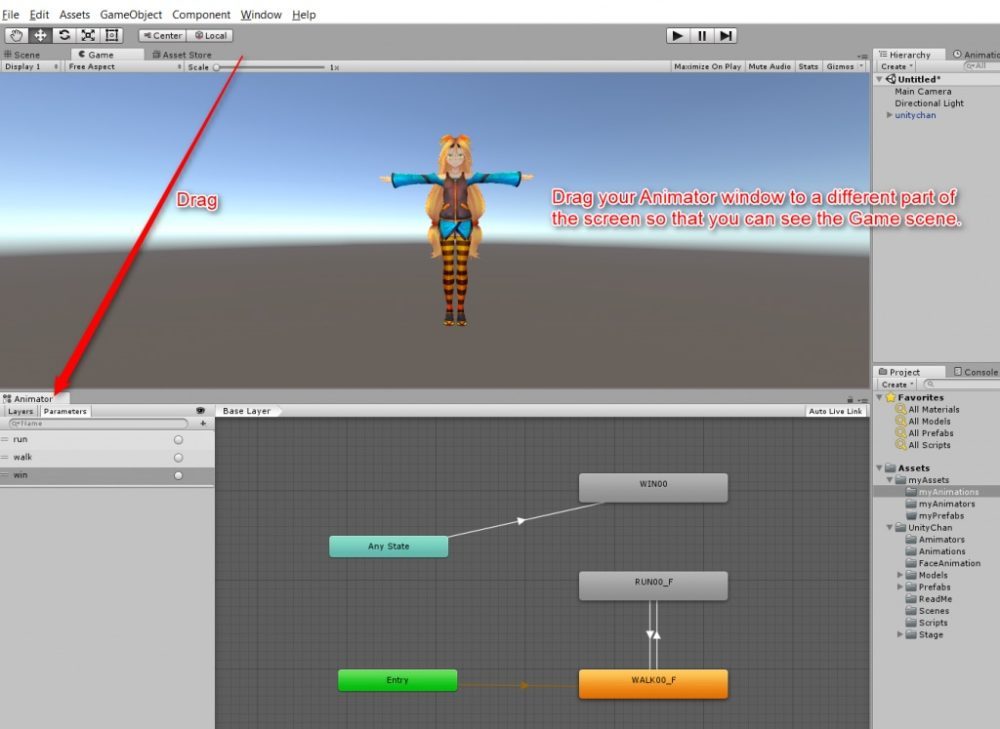
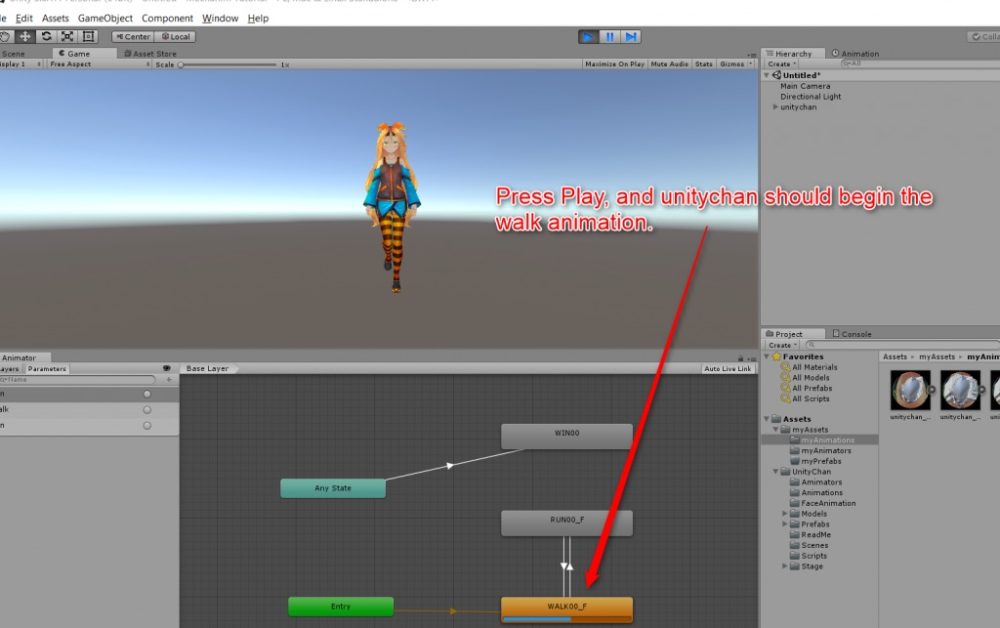
Press the Play button to start the ‘walking’ animation. You can see WALK00_F is loaded in the Animator window. This is because WALK00_F is the Layer Default State, which is activated at the start of the game.
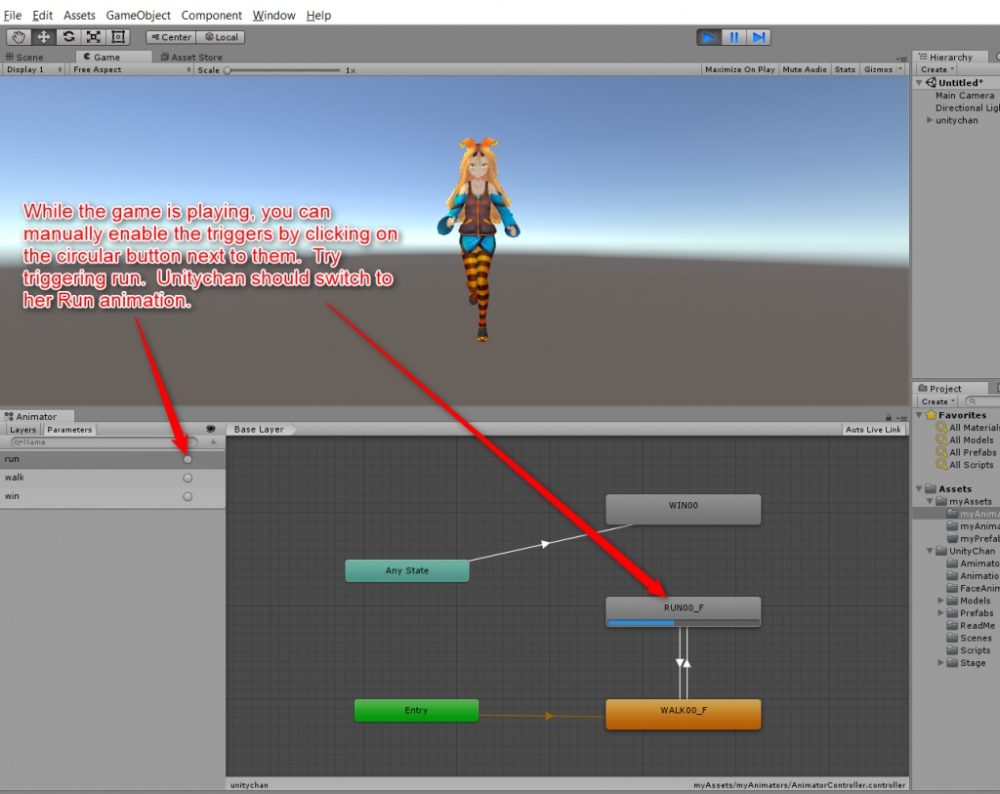
While the game is running, you can activate the triggers manually by clicking on the circular buttons next to them. In the example shown below, it triggers ‘run’ and Unity-chan should switch from the Walk animation to the Run animation. The progression bar below the ‘RUN00_F’ state shows that this state is running at the moment.
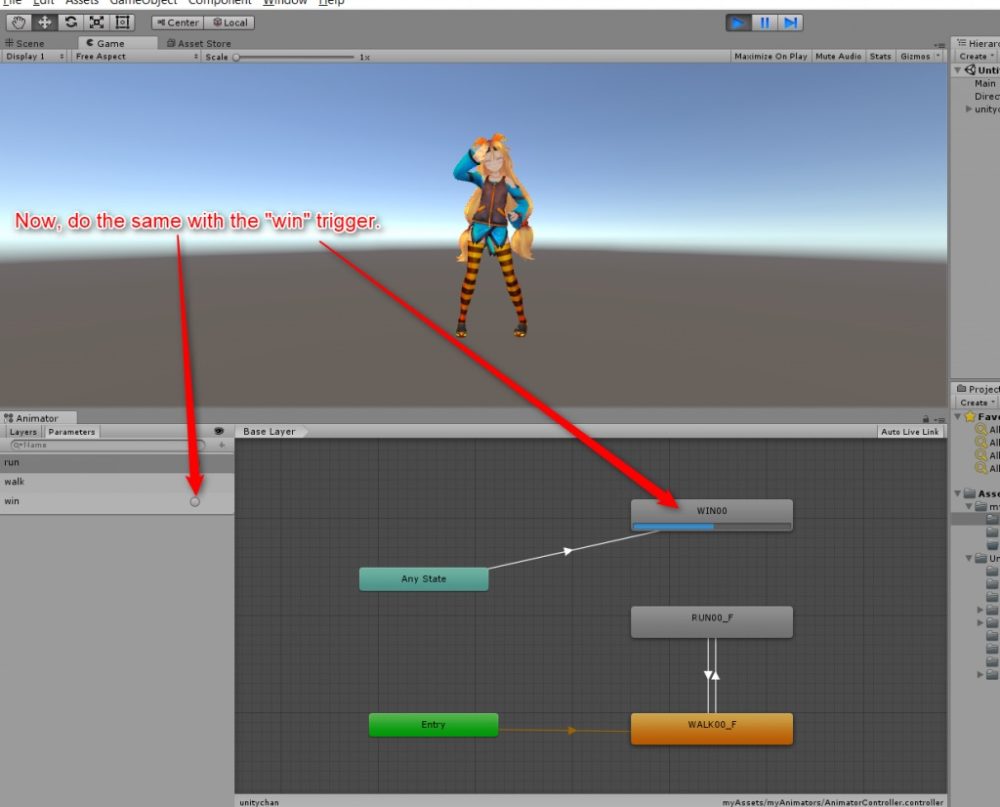
In the same way, try to trigger the ‘win’ animation.
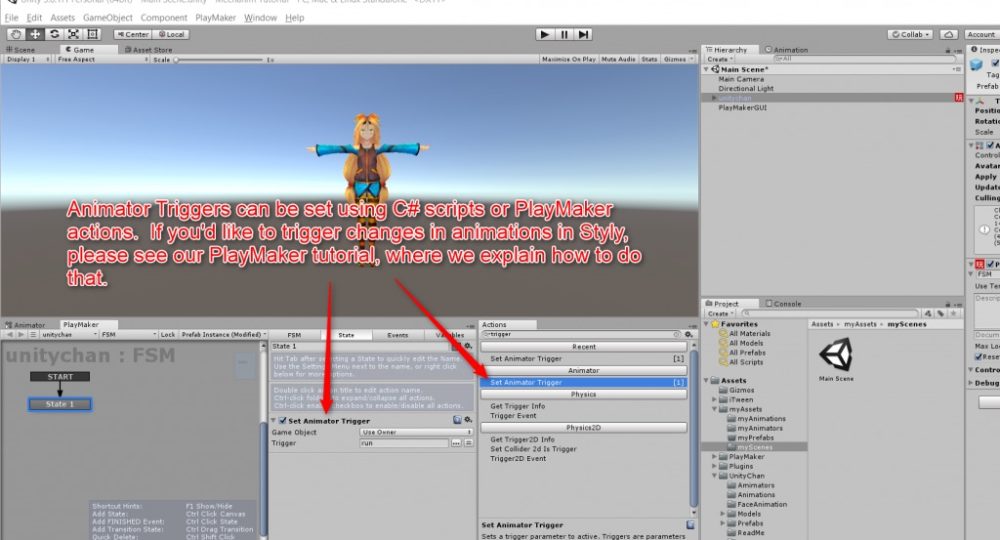
You can use C# script or PlayMaker to set Animation Trigger in Unity, but please refer to the PlayMaker tutorial in this site if you switch the animations on STYLY (Please note that STYLY doesn’t support C# script).
Upload the model with Mecanim to STYLY
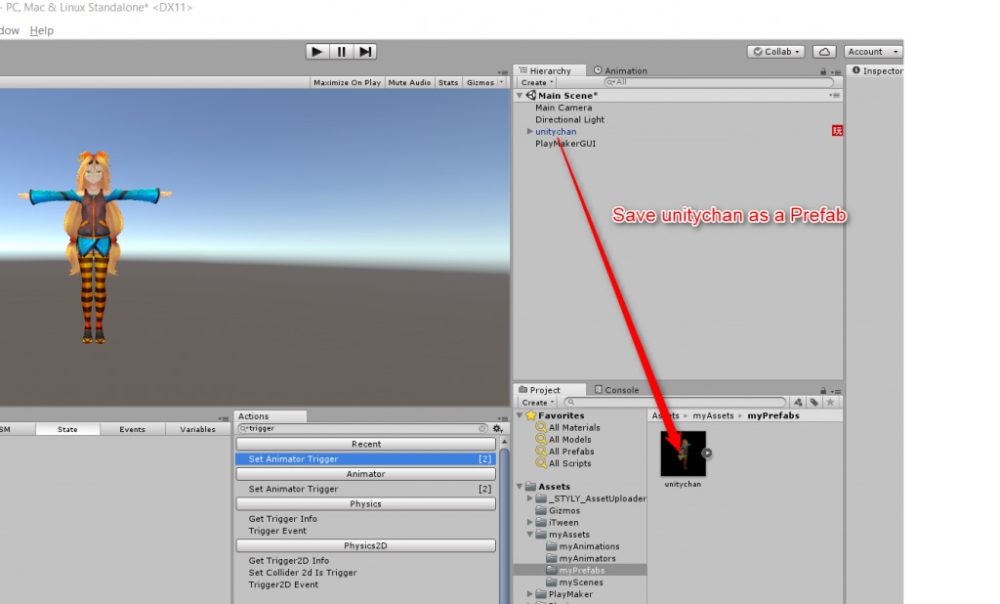
Finally, you can upload Unity-chan with animations to STYLY. Firstly, save Unity-chan as a Prefab.
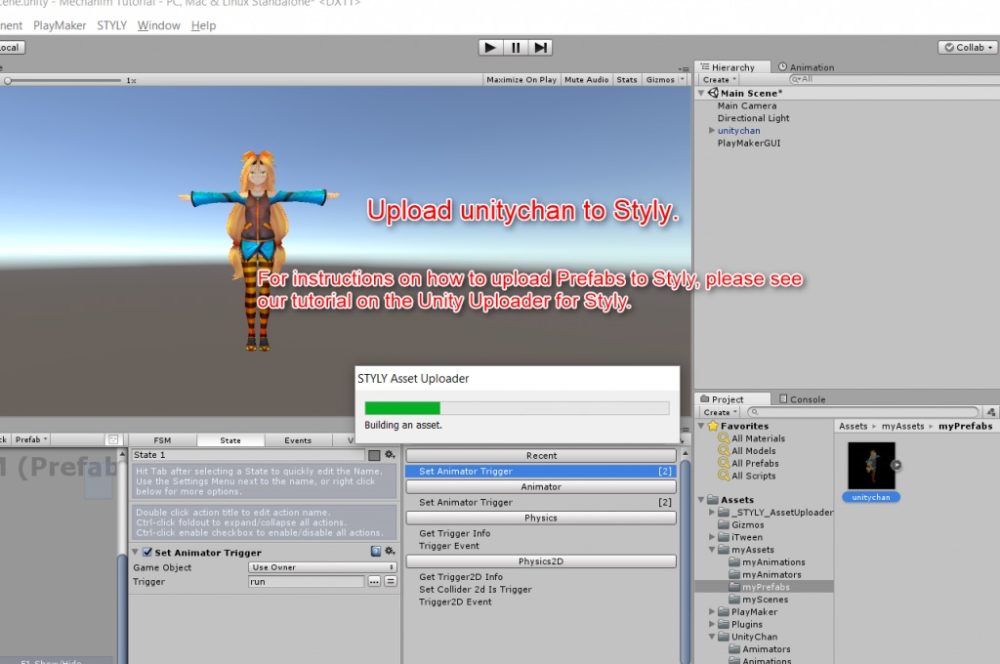
Next, right-click Unity-chan and select ‘SYLY > Build And Upload Prefab Asset’ to upload it to STYLY. For details, please refer to ‘About Unity Uploader’.
All you need now is to import the uploaded asset to STYLY Editor on the web. Then, the animation will start automatically. You can find the uploaded asset by clicking ‘3D Model > My Model’.
