In this article, I introduce how to make a surging wave that splashes when it hit an object, by the Particle System in Unity.
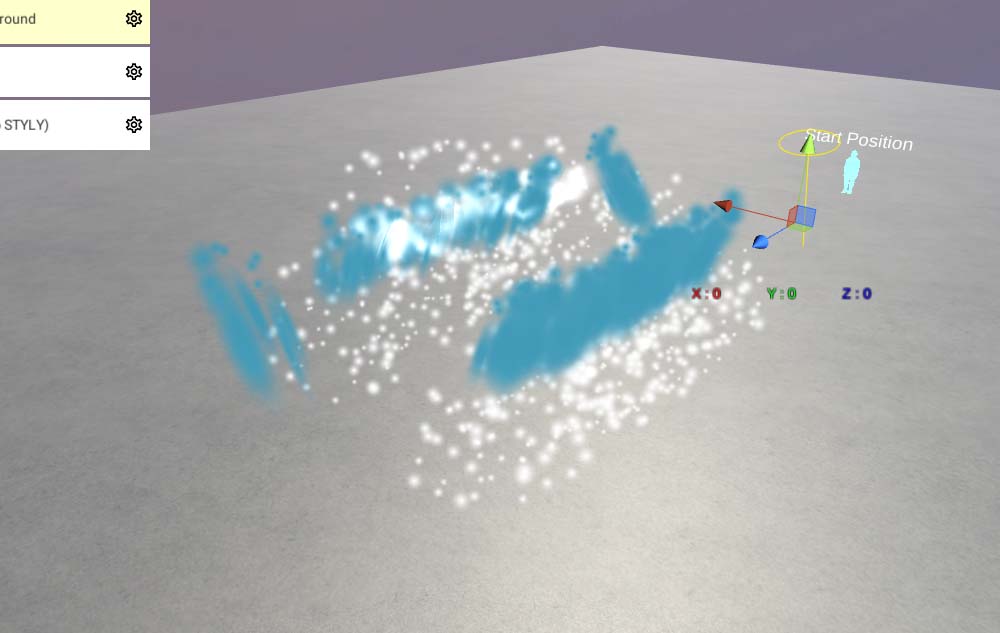
The completed animation
The completed image is shown above.
Samples
You can taste a sample space in STYLY GALLERY.
You can download the Unity project in this article. Wave_Sample
Add Particle System
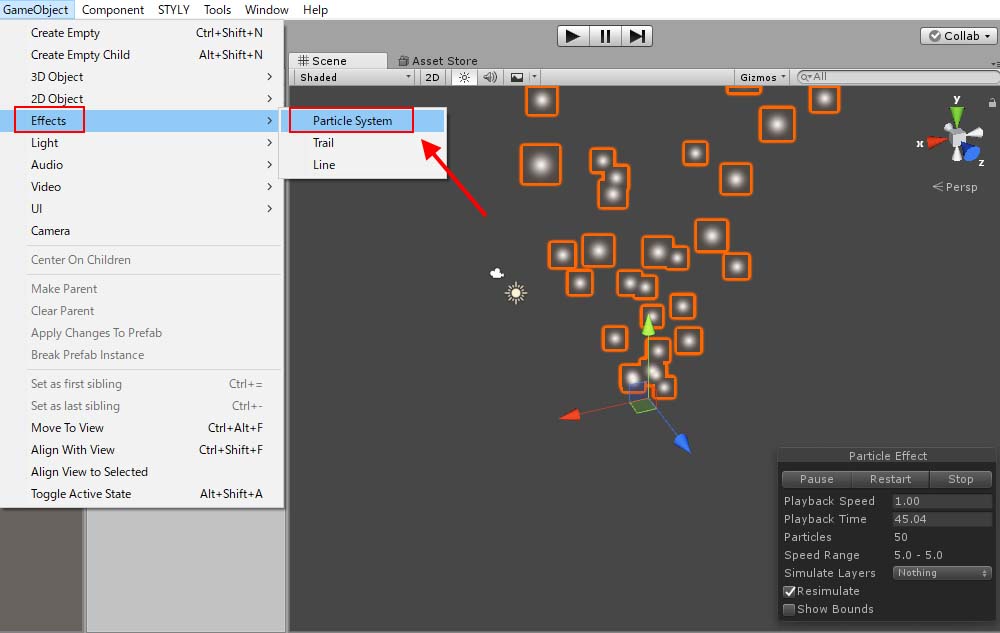
Select GameObject > Effects > Particle System.
Add a Particle System
It created a Particle System.
The setting of the Shape module
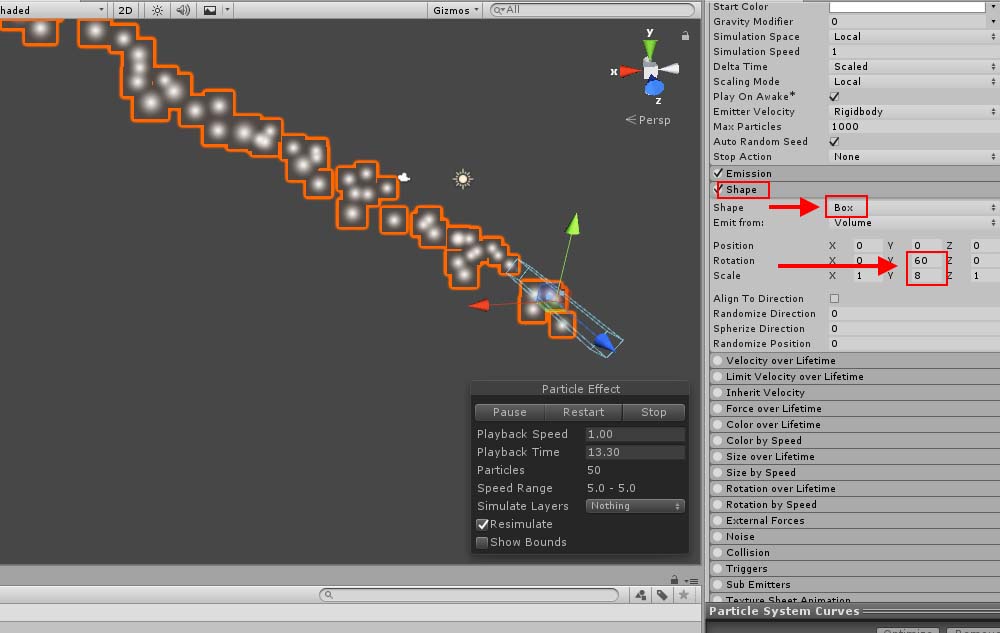
Next, check the box for the Shape module and change the shape and the direction.
The setting of the Shape module
I set Shape to “Box”, Rotation Y to 60 and Scale to 8.
The setting of the Emission module
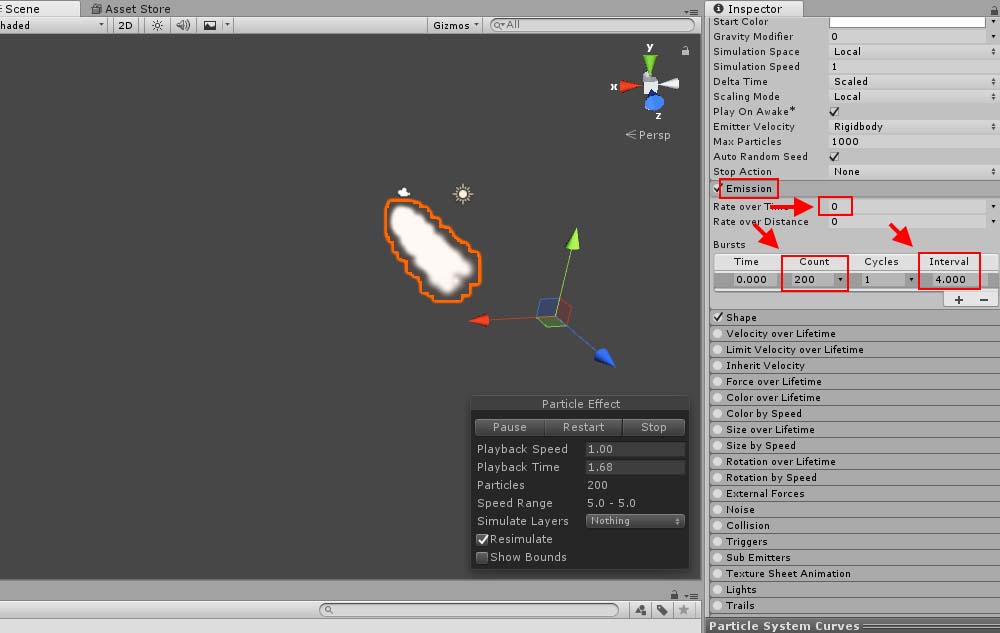
Check the box for Emission module to set the parameters.
The setting of the Emission module
Set “Rate over Time” to zero. Add a Burst with Count and Interval set to 200 and 4 respectively.
The setting of the Trails module
Check the box for Trails module to add a Trail.

Add a Trail.
Set Trail Material to Default-Particle.
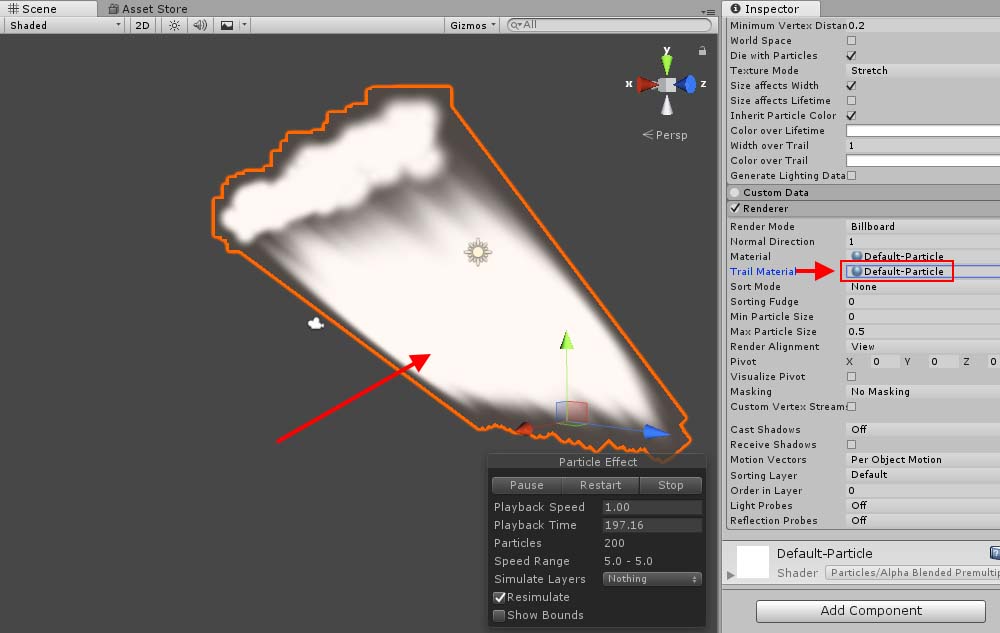
Set Trail material.
It looks neater now as the material is changed. Set Lifetime and “Width over Lifetime” under the Trail section (Set ‘Random Between Two Constant” in the drop-down box for both).
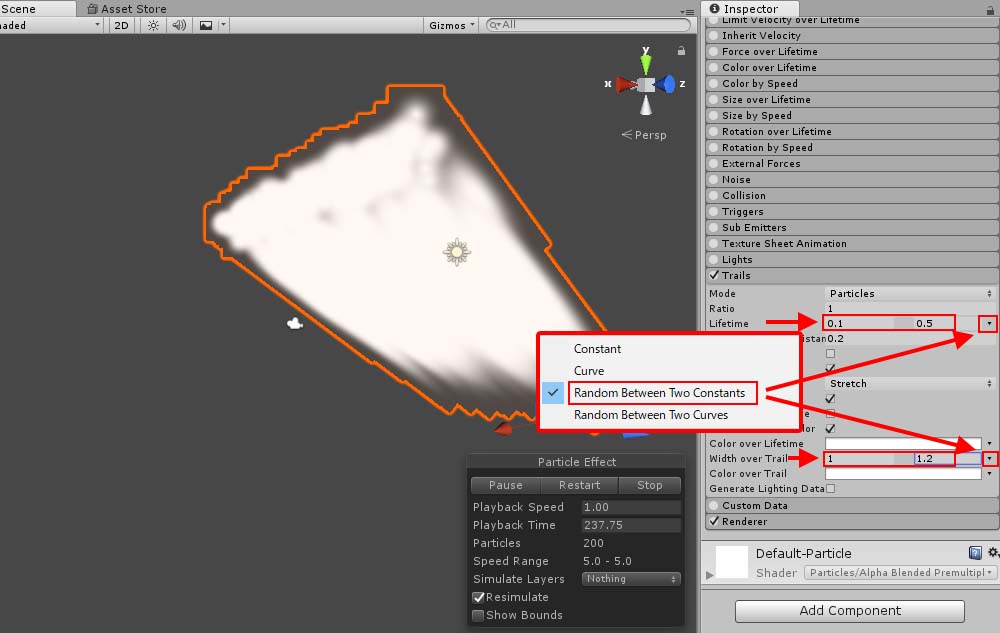
The detail setting of Trails
The setting of the main module
We now adjust the parameters for the main module.
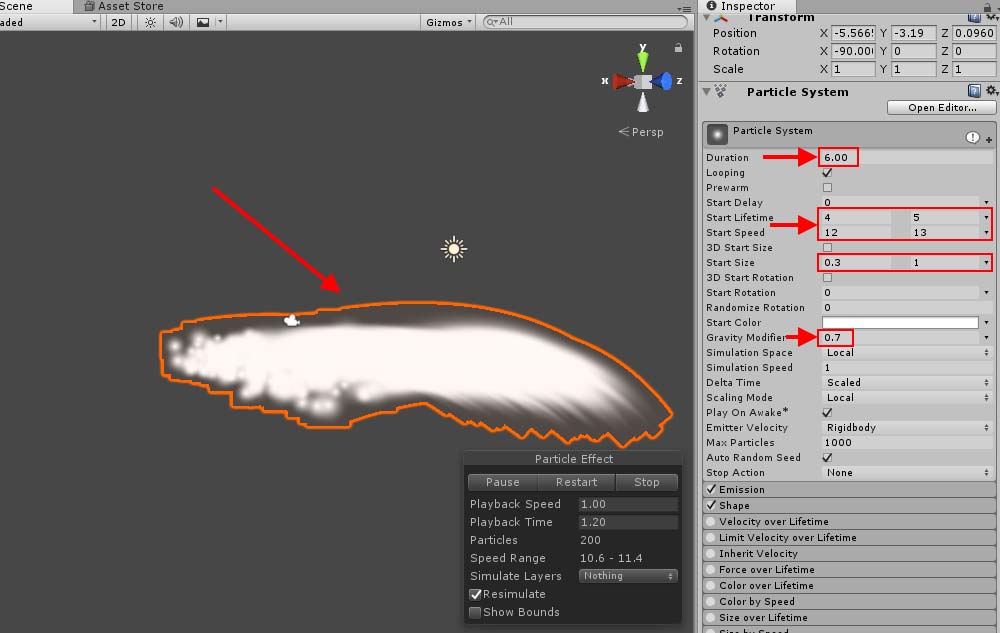
The setting of the main module.
Set the parameters as follows: Duration: 6 Start Lifetime: 4 and 5 with “Random between two constants” selected Start Speed: 12 and 13 with “Random between two constants” selected Gravity: Modifier: 0.7 The shape and the motion are set now.
Colouring by the “Color over Lifetime” module
Let’s colour the wave as the colour is still left white. We now set the gradation in the “Color over Lifetime” module.
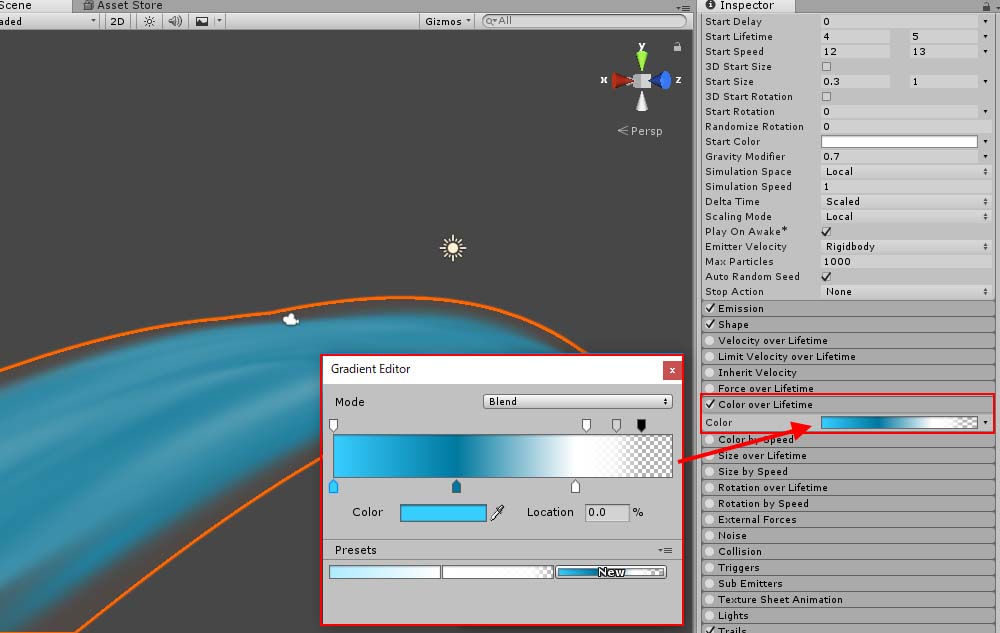
The gradation in the Color module
Set the gradation so that it starts with blue and turns white before it disappears.
Add the Noise module
Add some randomness to the motion by the Noise module.

The setting of the Noise module
Set Strength to 0.1 and 0.3 with “Random between two constants” selected. Set Frequency to 0.4.
Add the Collision module
Add the Collision module to make the particles collide.
Add the Collision module
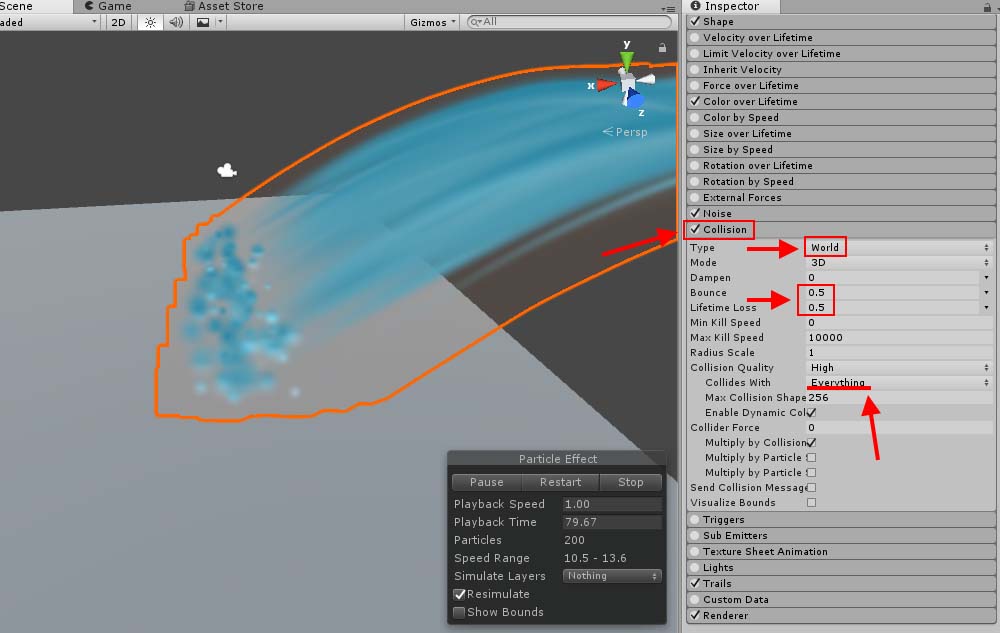
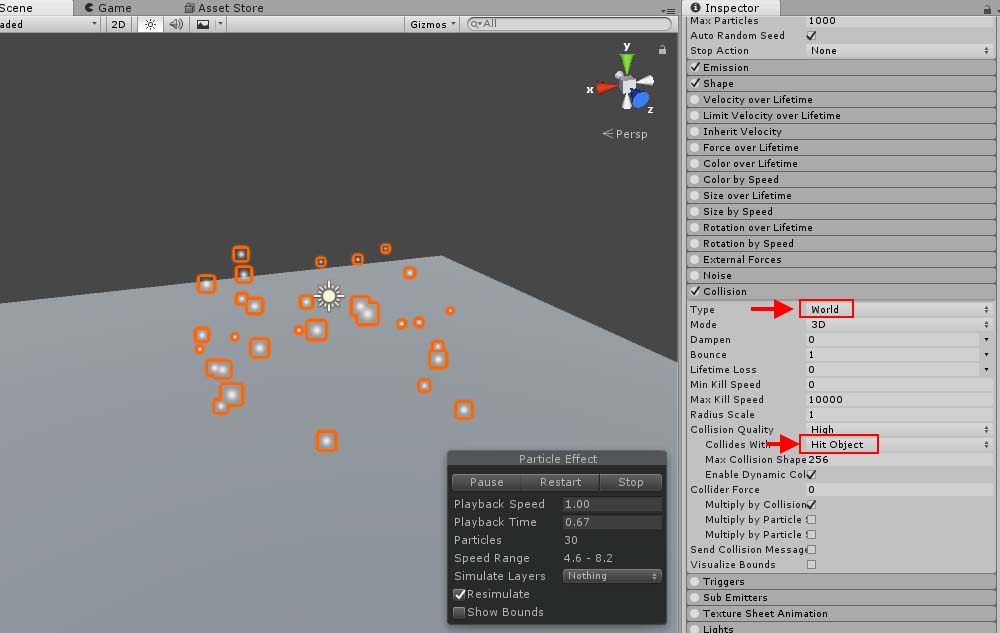
Set the parameter as follows: Type: World Bounce: 0.5 Lifetime Loss: 0.5 You can specify the layer of the object to collide by setting “Collides With”. Create a new layer to collide.
Create a layer.
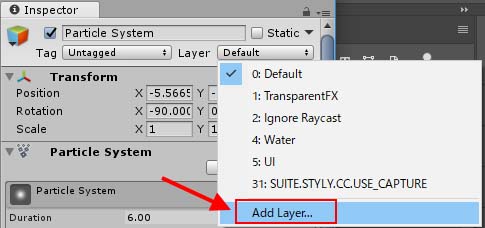
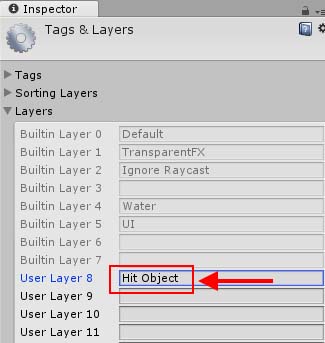
Add a layer by “Add layer” and rename it “Hit Object”.
Add a layer.
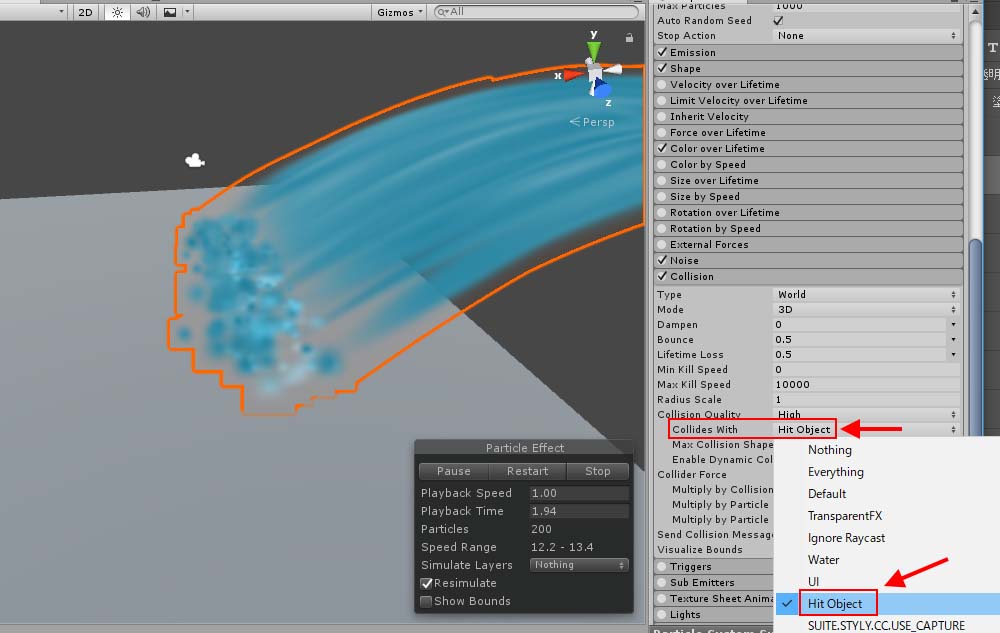
Assign the new layer, “Hit Object”, to Collides With.
Assign the layer to collide.
Now they only collide with the object in “Hit Object” layer. You can also make the plane collide with the particles by changing its layer from “Default” to “Hit Object”. *Please note that you can upload the Default layer only to the current version of STYLY. So leave all objects in the Default layer to upload to STYLY. Leave “Collides With” set to Everything as well.
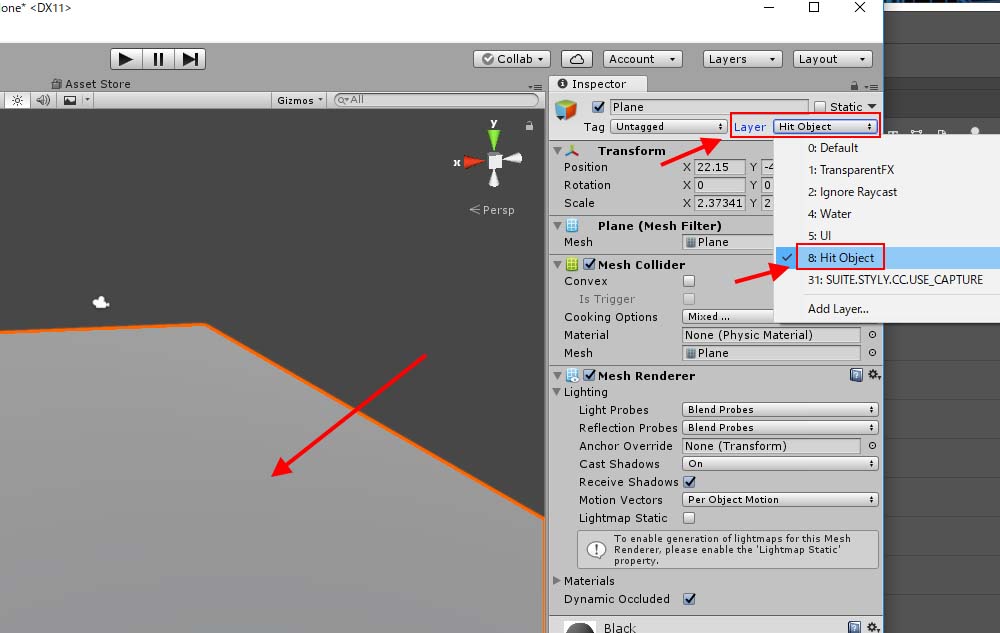
Assign the new layer to the Plane as well.
Assign all objects you want to collide with the particles to the “Collides With” layer.
The particle for splashing water
Let’s make a water-splash effect when the particles collide. Firstly, create a Particle System.

Add a Particle System
The setting of the Shape module
Set Shape to “Sphere” and Radius to 0.1.
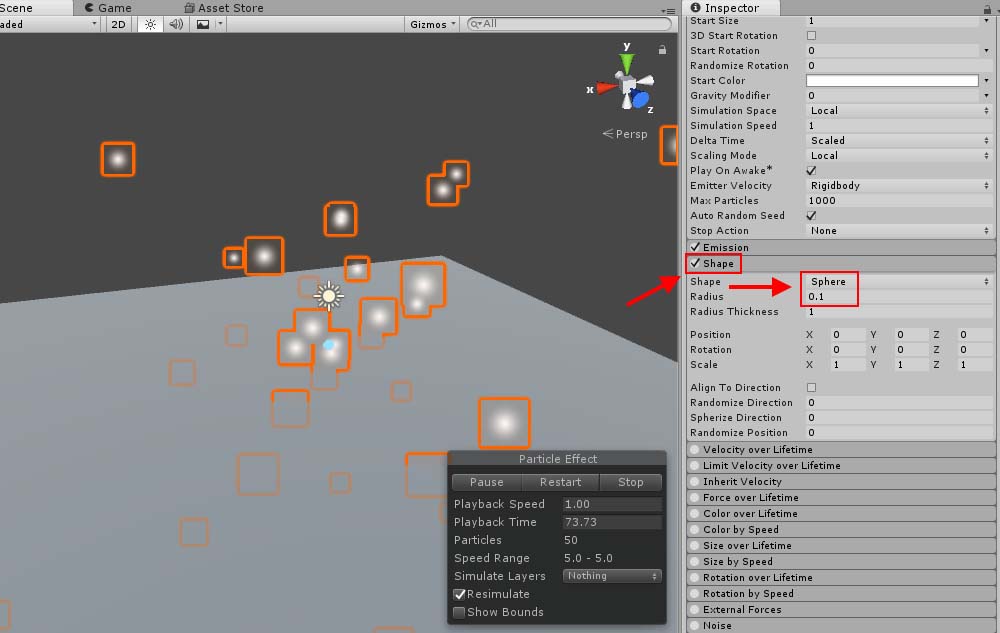
Set the Shape module
The setting of the main module
Set the parameters of the main module.
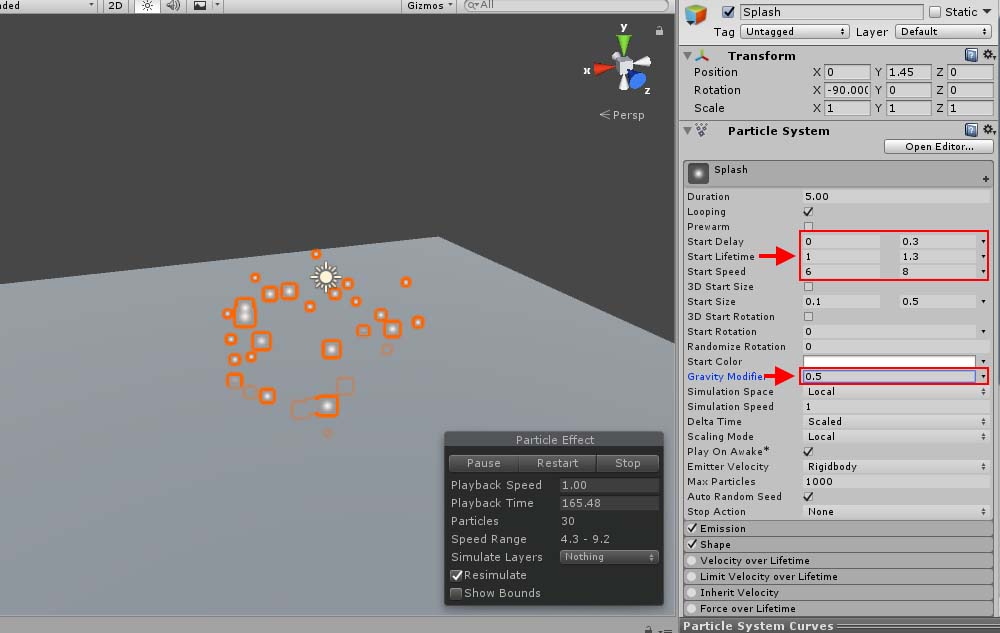
The setting of the main module.
The parameters are set as follows: Start Delay: 0 and 0.3 with “Random between two constants” selected Start Lifetime: 1 and 1.3 with “Random between two constants” selected Start Speed: 6 and 8 with “Random between two constants” selected Gravity Modifier: 0.5
The setting of the Emission module
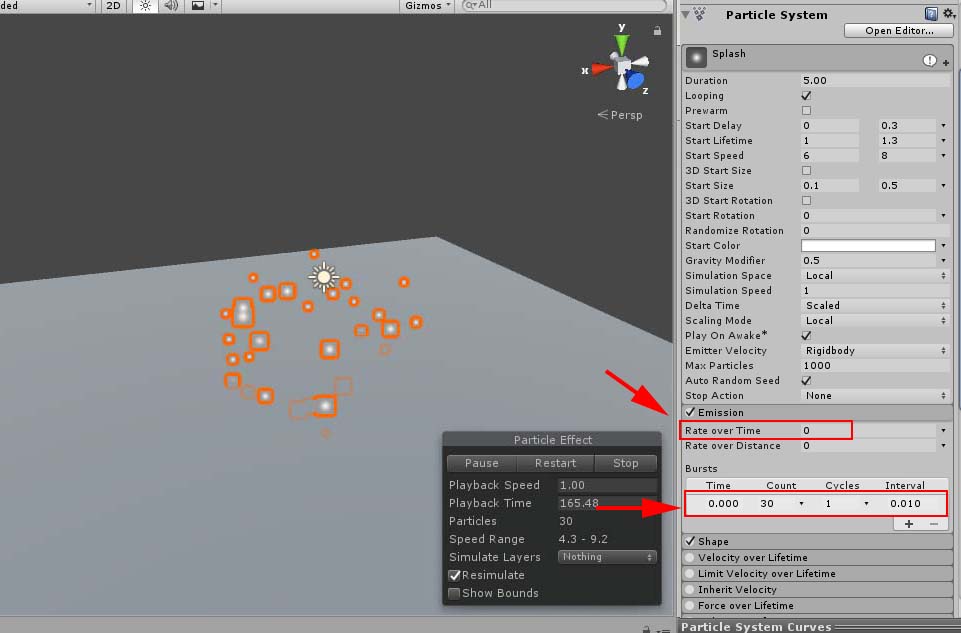
The setting of the Emission module
Set “Rate over Lifetime” to zero. Add a Burst and set Time, Count and Cycle to 0, 30 and 1 respectively.
The setting of the Collision module
Enable the splashing water to collide as well.
The setting of the Collision module
Set Type to “World” and assign the “Hit Object” layer to Collides With. *Please note that you can upload the Default layer only to the current version of STYLY. So leave all objects in the Default layer to upload to STYLY. Leave “Collides With” set to Everything as well.
The setting of the Sub Emitters module
Trigger the water-splashing effect when a big wave collides with the object. Add “Sub Emitters” to the effect of the big wave to make it happen.
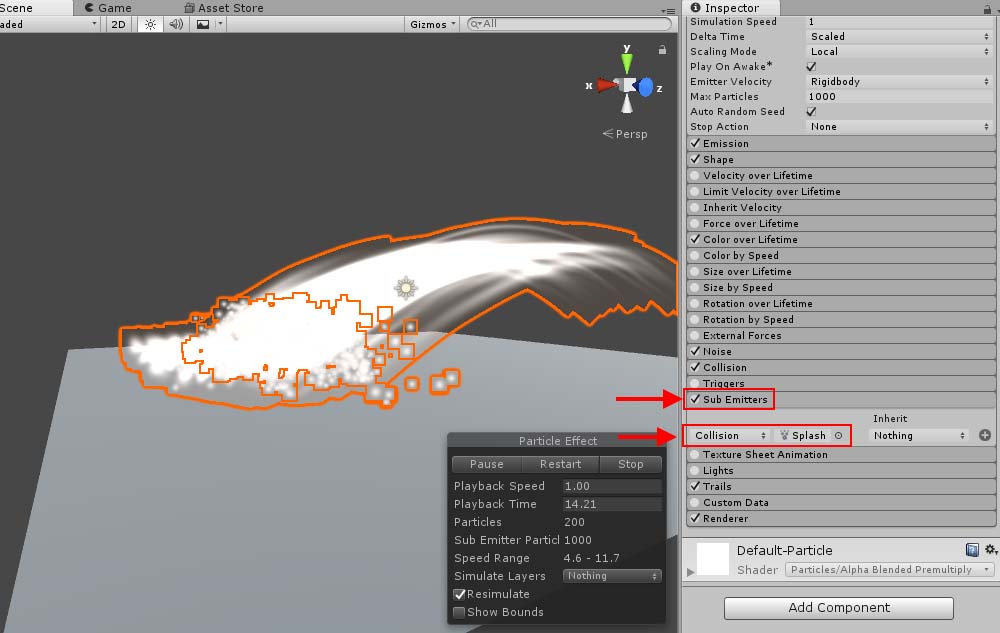
The setting of the Sub Emitters module
Set the trigger to “Collision” and the effect to “Splash”.
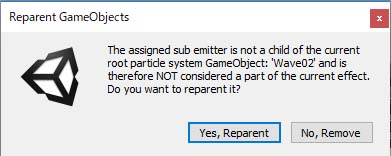
Click “Yes, Reparent”.
Click “Yes, Reparent” when the window shown above pops up. This make a water-splash effect happen when a big wave hits the objects in the “Hit Object” layer.
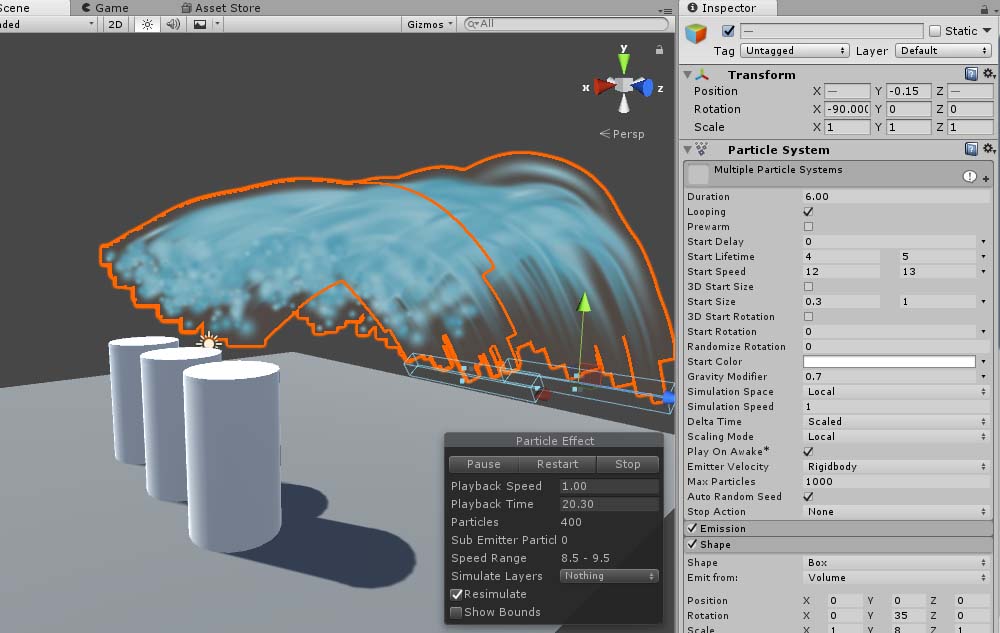
The effect is activated when the wave collides.
I assigned “Cylinder” to the “Hit Object” layer in the example shown below.
The complete animation
An issue for the appearance of the effect in STYLY Editor
When you place the effect we made in STYLY editor, you will find the collision activated too early. This is because STYLE Editor creates and places a BoxCollider automatically when it loads the Assets. It will be solved when you open STYLY Launcher and view it with VR goggles.
How it looks in STYLY Editor
In this article, I introduced how to express a splashing wave by Particle System in Unity. You can make the effect more realistic by making the particles collide with objects. How to upload an Asset from Unity to STYLY. Read the article