本記事では、Unityで中心に対してオブジェクトが回転するアニメーションをPlaymakerを使って実装し、PrefabをSTYLYにアップロードするまでを紹介します。 この記事の流れを理解することができれば、以下のようなアニメーションを作ることが可能になります。

見本GIF
準備
今回は練習として、以下のような簡単なアニメーションを一緒に作っていきましょう。

完成イメージ
Playmaker(有料)をインポートします。
記事執筆時:Playmaker 1.9.0 https://assetstore.unity.com/packages/tools/visual-scripting/playmaker-36
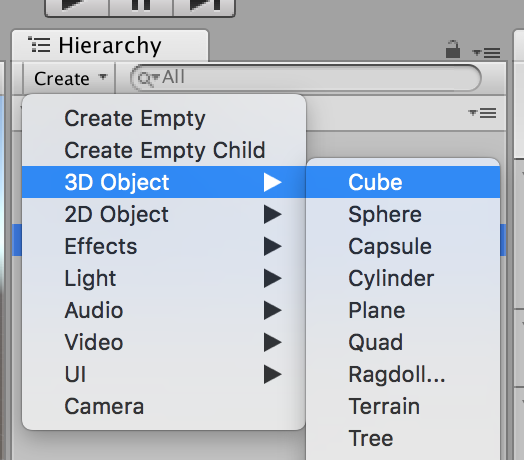
Playmakerをインポート&インストールしたら、HierarchyウィンドウでCreate→3D ObjectからCubeとSphereを作成してください。上のGIFのように、Cubeの周りをSphereが回転するようにしていきます。
準備画面1
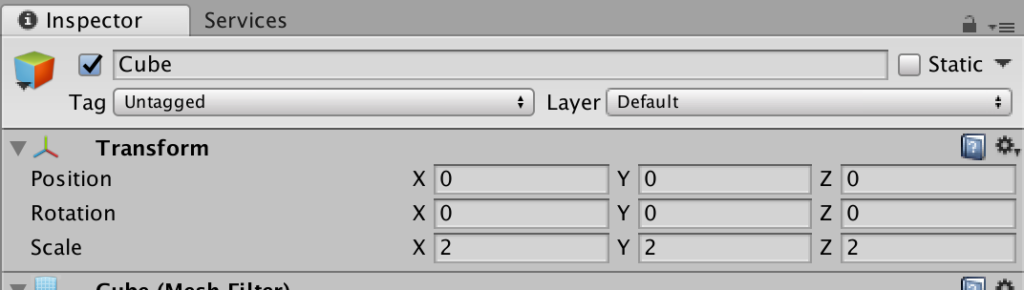
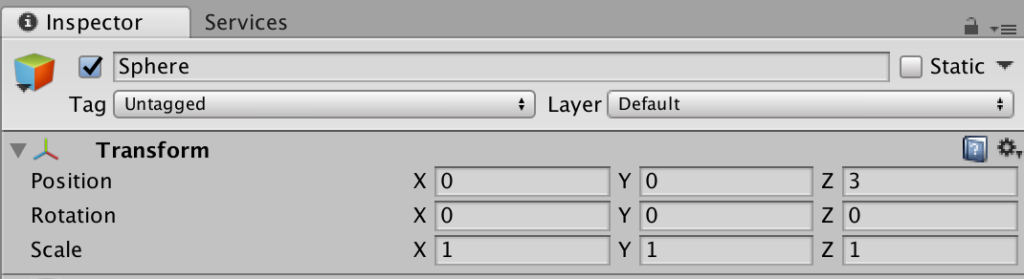
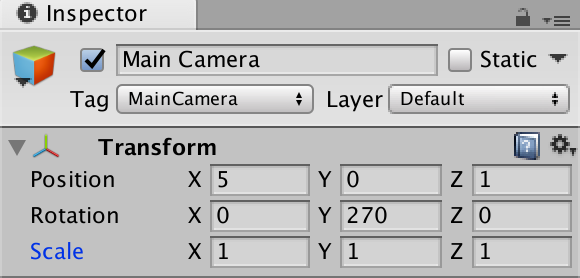
CubeとSphereが作成できたら、Inspectorウィンドウで Cubeの設定を Scale(X, Y, Z) → (2, 2, 2) Sphereの設定を Position(X, Y, Z) → (0, 0, 3) Main Cameraの設定を Position(X, Y, Z) → (5, 0, 1) Rotation(X, Y, Z) → (0, 270, 0) に変更してください。
Cube設定画面
Sphere設定画面
Main Camera設定画面
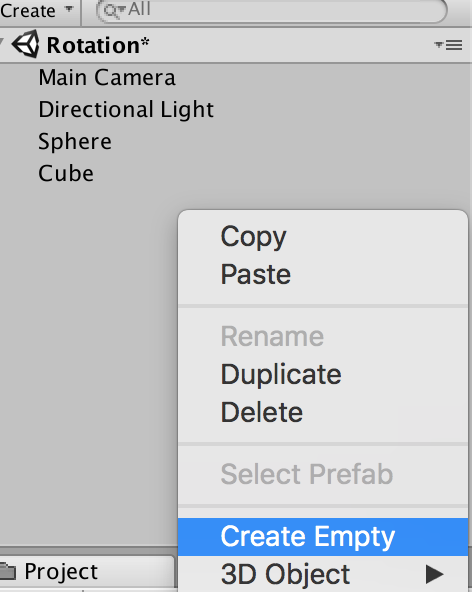
CubeとSphereの設定が完了したら、Hierarchyウィンドウを右クリックしてCreate Emptyを選択してください。
準備画面2
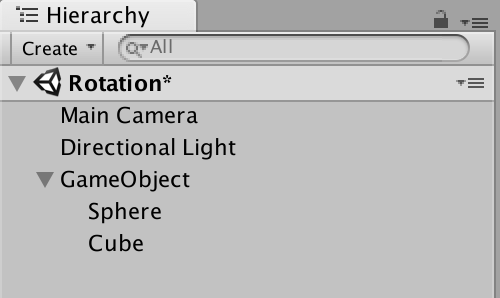
GameObjectが作成されたので、先ほど作成したCubeとSphereを、GameObjectにドラッグ&ドロップして格納します。
準備画面3
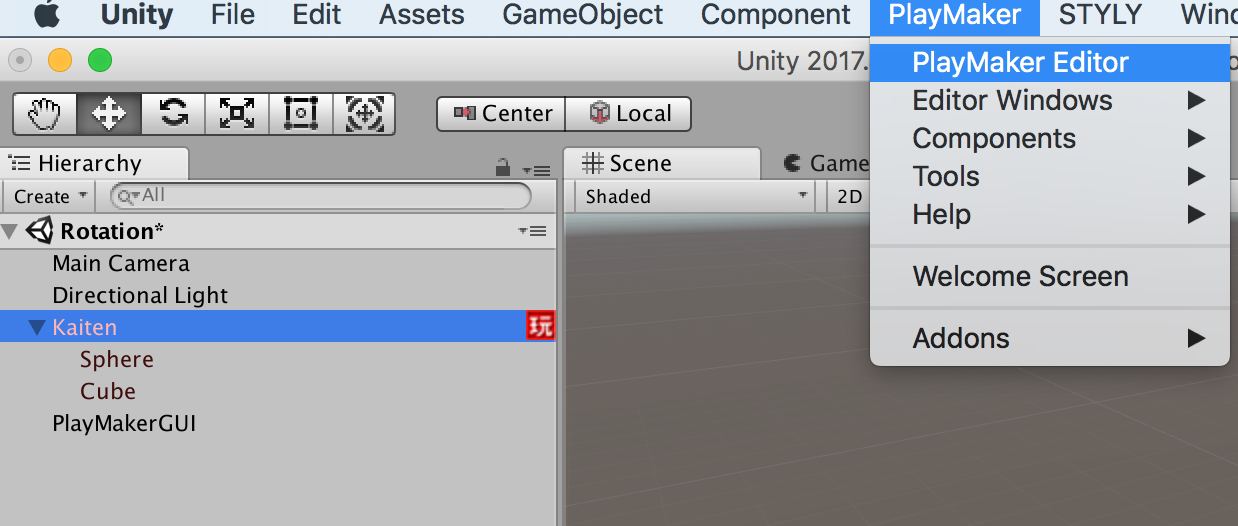
オブジェクト名がGameObjectだとこの先わかりづらく混乱するので、わかりやすい名前にRenameしましょう。 ここでは「kaiten」にします。 CubeとSphereの両方に回転するアニメーションをつけたいので、それら2つを格納しているkaitenを選択した状態でトップメニューの「PlayMaker」→「PlayMaker Editor」でPlaymakerエディタを起動してください。
準備画面4
PlaymakerでRotateアクションを追加する
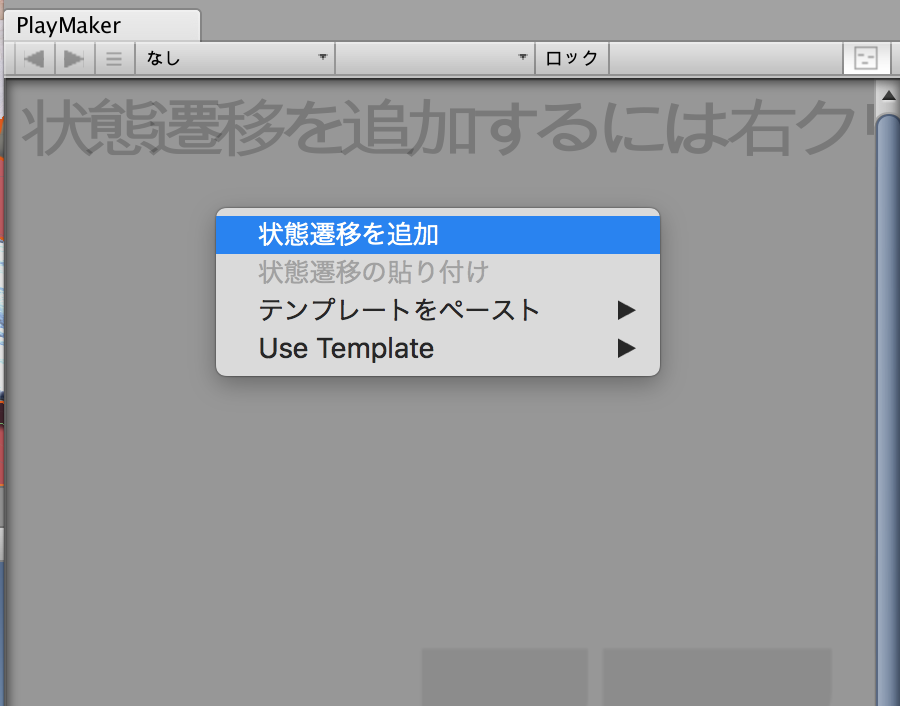
Playmakerエディタを起動したら、この画面で右クリックから「状態遷移を追加」を選択。
状態遷移追加画面
右下の「アクションブラウザ」をクリックして、上の検索窓に「rotate」と打ち込むと候補の一覧が表示されるのでその中から「Rotate」を選択してください。 Rotateは対象のオブジェクトを回転させる効果を持つアクションです。 「Rotate」を選択した状態で「状態にアクションを追加」を選択してください。
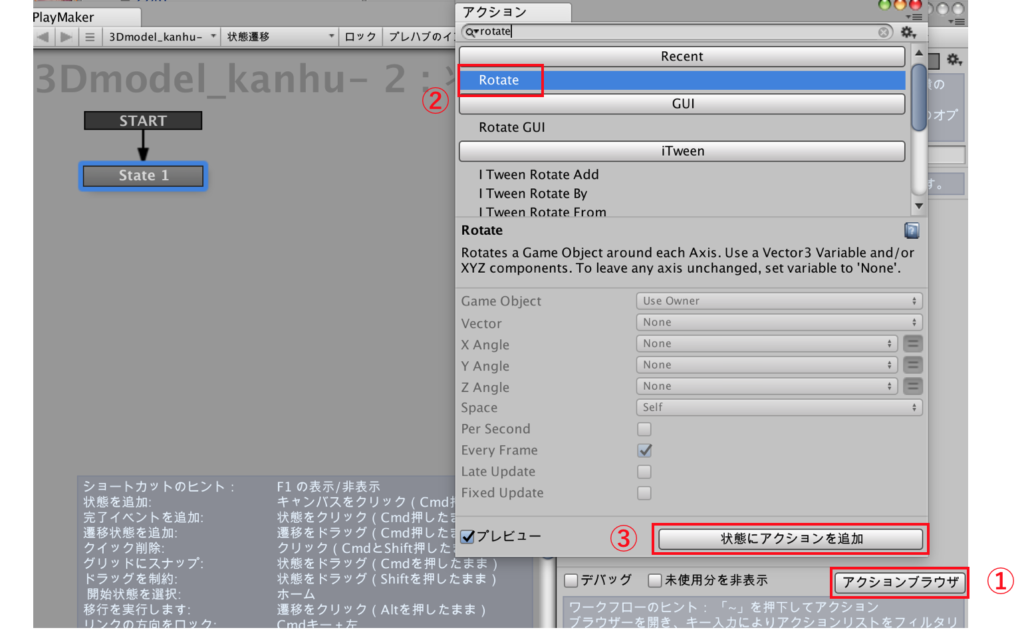
アクション追加画面
Rotateアクションの設定
Playmakerの編集画面から、「Rotate」のGame Objectを「Specify Game Object」にして、アニメーションを追加したいオブジェクトを「None(Game Object)」にドラッグ&ドロップで挿入します。 今Rotateアクションを追加したいのはkaitenなので、kaitenをドラッグ&ドロップで「None(Game Object)」に挿入してください。
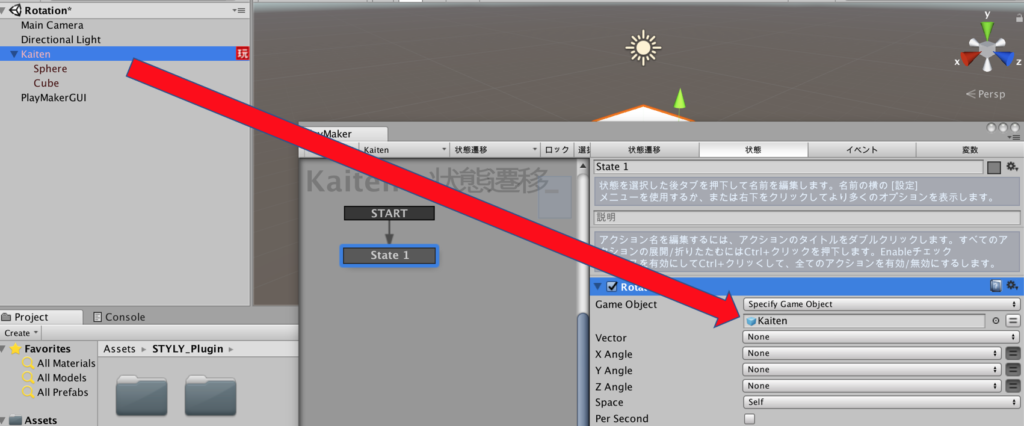
オブジェクト選択画面
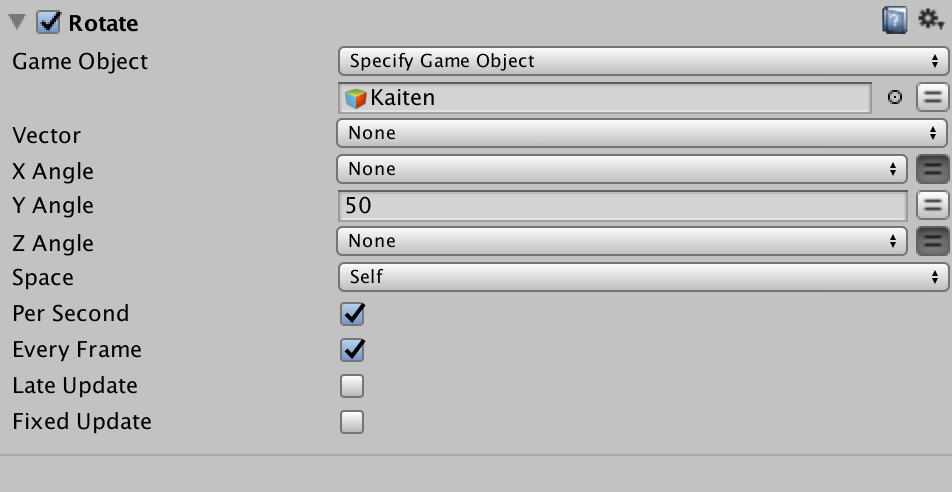
Rotateアクションの設定をします。 今回はCubeをY軸を中心に回転するようにしたいので、「Y Angle」を調整します。「Y Angle」横の二重線ボタンをクリックして数値を入力できるようにしてください。この数値が回転の速度になります。ここでは数値を50とします。 「Per Second」と「Every Frame」にチェックを入れてください。
Rotateアクション設定画面
設定が完了したらUnityの再生ボタンをクリックして動きを確認しましょう。

回転GIF
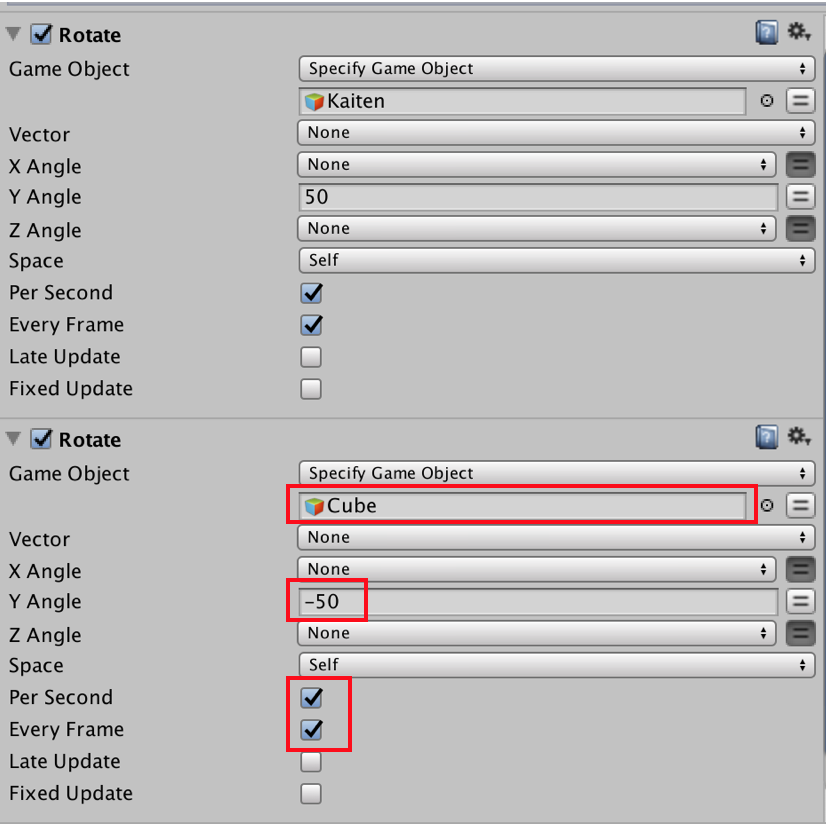
回転はしていますが、中央のCubeが自転しているので、Cubeは動かないようにします。 先ほどY Angleの回転速度を50に設定したので、Cubeのみに-50の回転速度を与えればプラスマイナスゼロで、動きは止まるはずです。 先ほどと同様にkaitenのPlaymakerエディタからアクションブラウザでRotateアクションを追加し、 Game Objectを「Specify Game Object」にして、HierarchyウィンドウのCubeをドラッグ&ドロップでNone(Game Object)に挿入。 Y Angleの数値を-50に設定。 Per SecondとEvery Frameにチェックを入れて設定は完了。
Rotateアクション(Cube)設定画面
以上でPlaymakerの設定は完了です。 Unityを再生して確認してみましょう。
完成イメージ
Cubeの周りをSphereが回転していますか? もし回転していなかったり、Cubeが回転を続けている場合は設定が間違っている可能性があるので、上記の設定画面を見返してみてください!
STYLYにアップロードして配置する
STYLYのDownloadサイトからUnityPluginをダウンロード&インポートしてください。 ※UnityPluginの初期設定はダウンロードサイト参照。 https://styly.cc/download/?lang=en 作成したkaitenオブジェクトをSTYLYにアップロードするには、Prefabにする必要があります。 ProjectビューのCreate→PrefabでPrefabを作成し、そこにHierarchyウィンドウのkaitenオブジェクトをドラッグ&ドロップで挿入してください。 kaiten Prefabを右クリック→STYLY→Upload prefab or scene to STYLYを選択。 しばらくすると、Upload Successポップアップが表示されます。
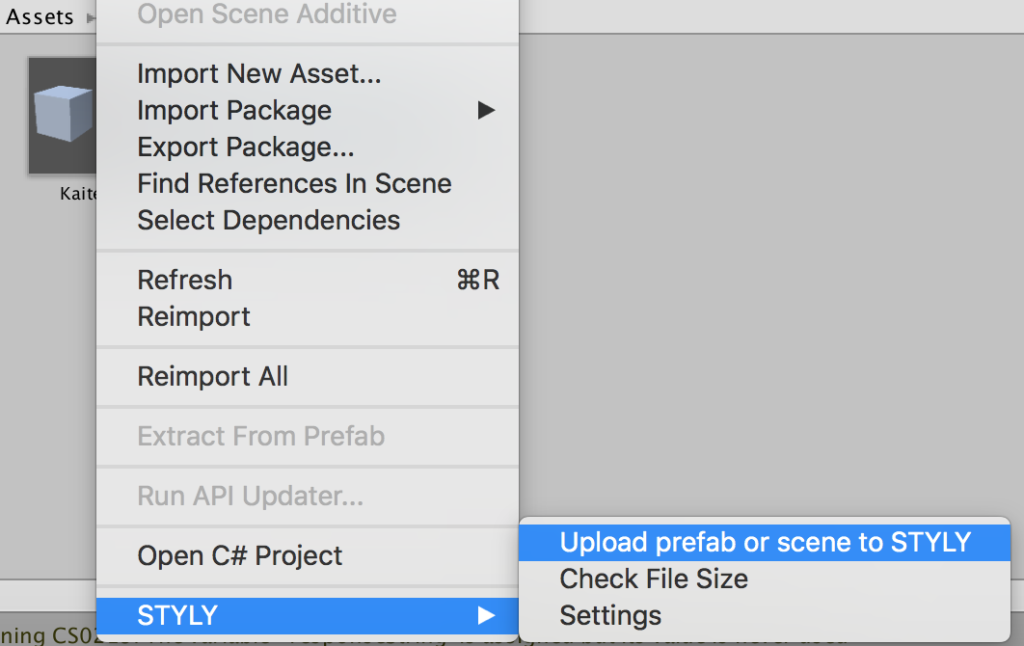
Prefabアップロード画面
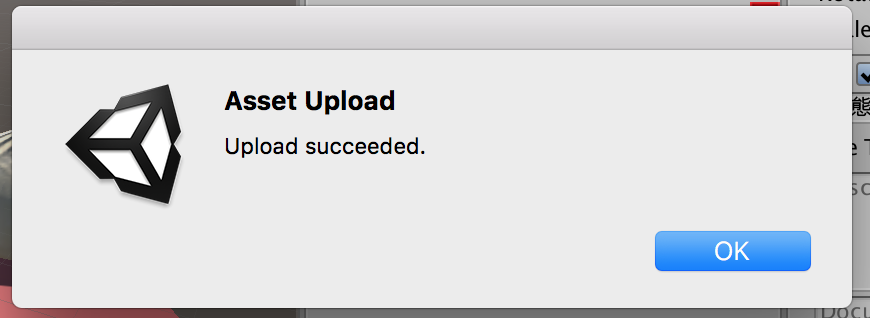
アップロード成功画面
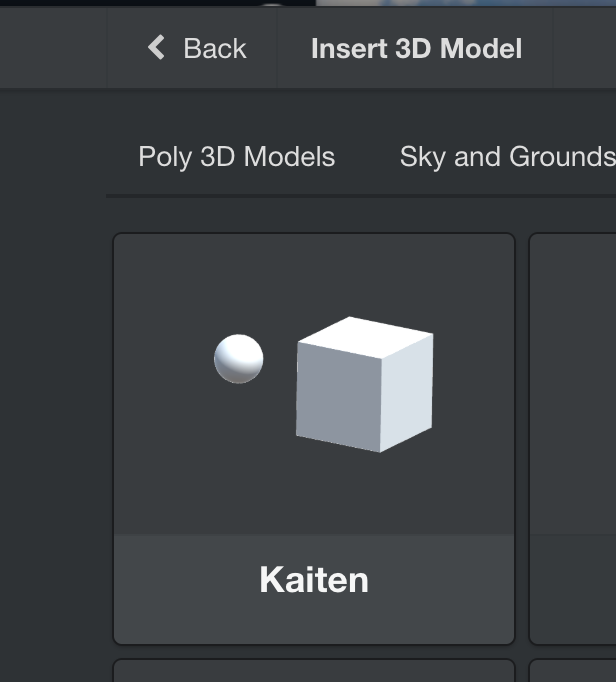
ブラウザでSTYLYエディタを開き、アセット選択で 3D Model > My Modelsタブを開くと、アップロードしたアセットが表示されます。
STYLY WebEditor
クリックしてSceneに配置してください。
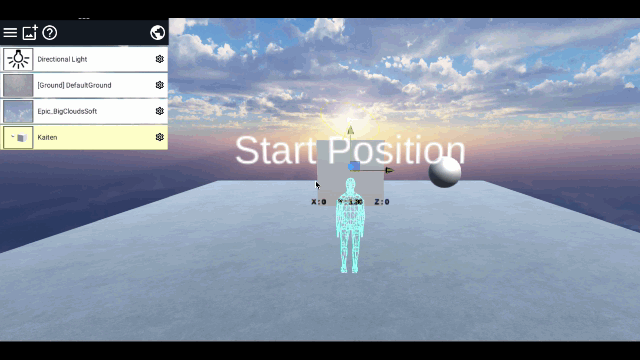
完成GIF
STYLY上で回転していることを確認できました。 おつかれさまでした。 今回はUnity上でPlaymakerのRotateアクションを使って、中心に対してオブジェクトが回転するアニメーションを実装して、そのPrefabをSTYLYにアップロードするまでを紹介しました。