In this article, I will show how to implement an animation of revolving objects around the centre with Playmaker in Unity and how to upload its Prefab to STYLY. If you understood the workflow shown in this tutorial, you could make an animation shown below.

A sample GIF image
Preparations
This time, we make a simple animation shown below as an exercise.

The completion image
Import Playmaker (a paid asset). At the time of writing: Playmaker 1.9.0 https://assetstore.unity.com/packages/tools/visual-scripting/playmaker-36
After importing and installing Playmaker, create a Cube and a Sphere by selecting Create > 3D Object on the Hierarchy window. As seen in the GIF animation above, we make the Sphere revolve around the Cube.
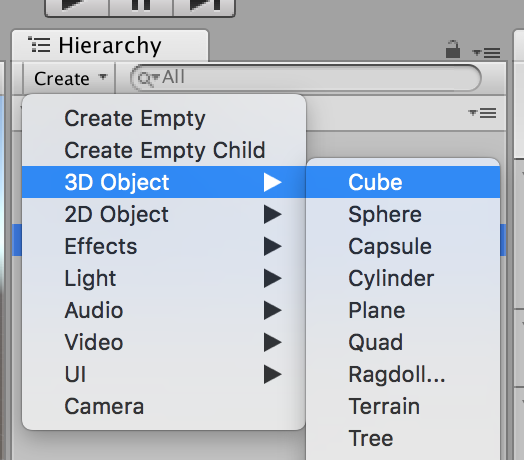
Screenshot – Preparation #1
After creating a Cube and a Sphere, in the Inspector window, For the Cube, Set Scale(X, Y, Z) to (2, 2, 2). For the Sphere, Set Position(X, Y, Z) to (0, 0, 3). For the Main Camera, Set Position(X, Y, Z) to (5, 0, 1). Set Rotation(X, Y, Z) to (0, 270, 0).
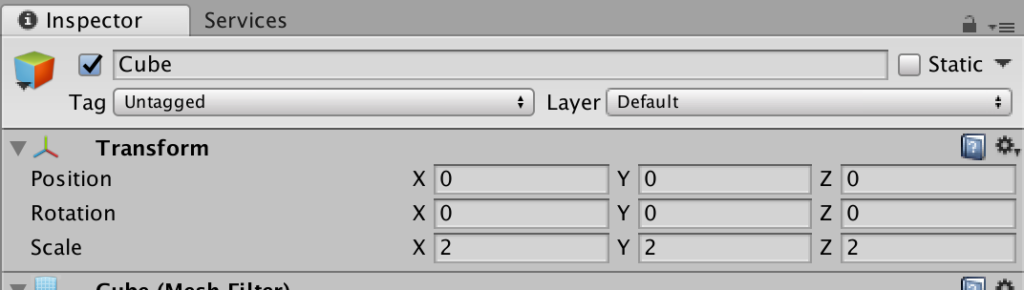
The setting for Cube
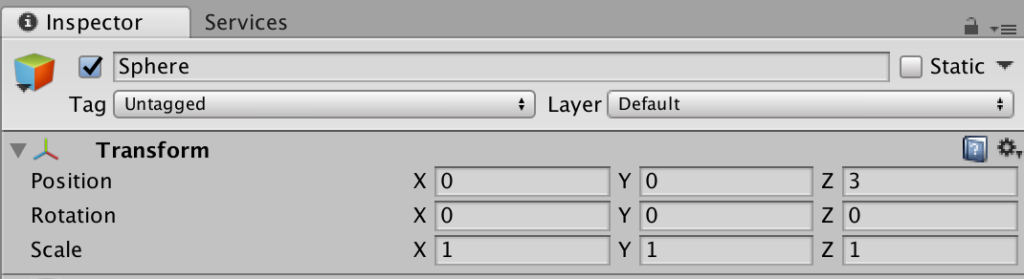
The setting for Sphere
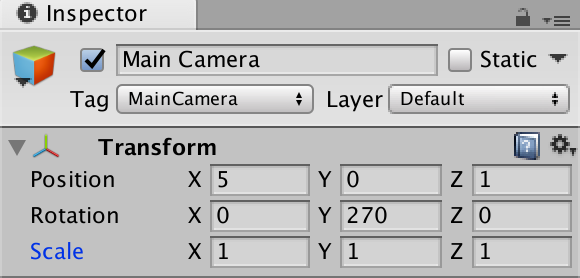
The setting for the Main Camera
After finishing the setting for the Cube and Sphere, right-click on the Hierarchy window and select ‘Create Empty’.
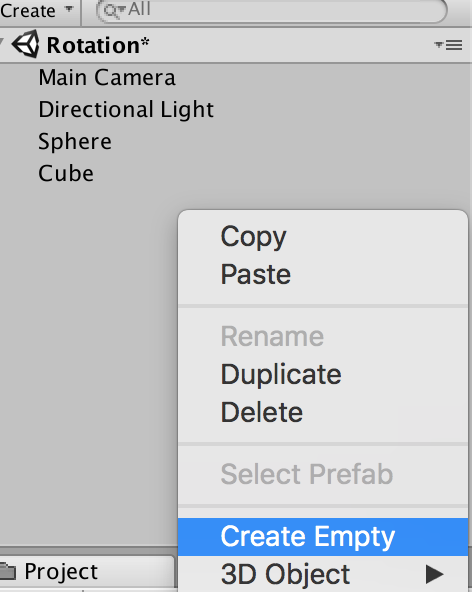
Screenshot – Preparation #2
A GameObject has been created. Drag the Cube and the Sphere created earlier into the GameObject to store them.
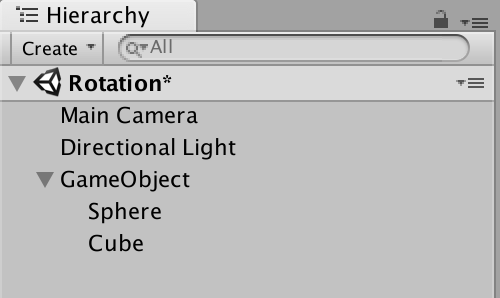
Screenshot – Preparation #3
If the object name is ‘GameObject’ (i.e. the default name), it would cause confusion later on. So rename it a more descriptive name. I renamed it ‘kaiten’* this time. *Japanese equivalent of ‘revolution’ We want to add an animation to both the Cube and the Sphere, so open Playmaker Editor by selecting ‘PlayMaker > PlayMaker Editor’ on the top menu, with kaiten, which stores those two objects, selected.
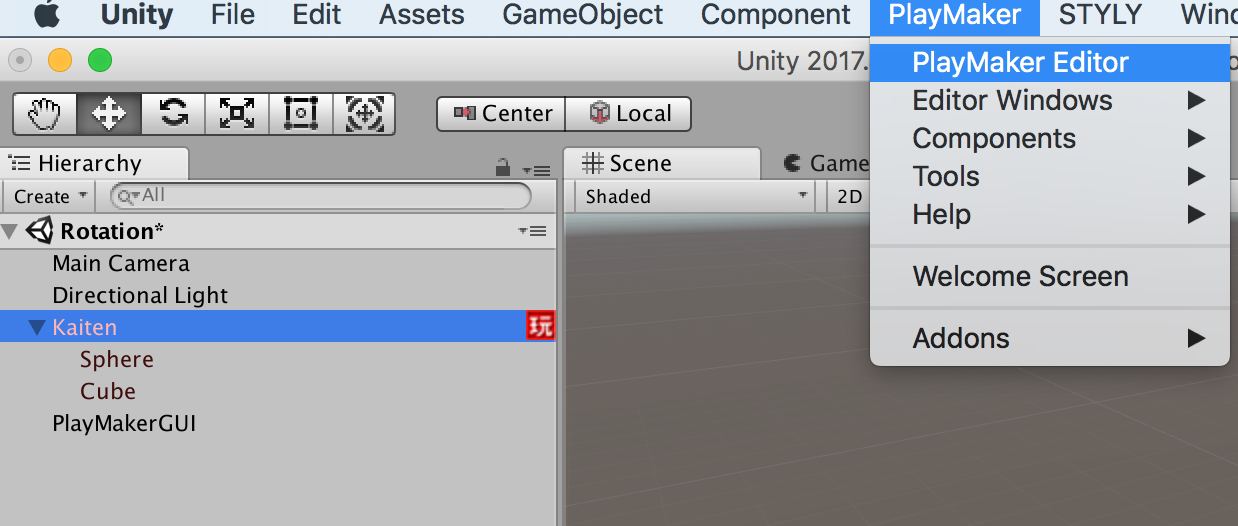
Screenshot – Preparation #4
Add a Rotate action with Playmaker
After launching Playmaker editor, right-click on this screen (Playmaker’s graph view) and select ‘Add Transition’.
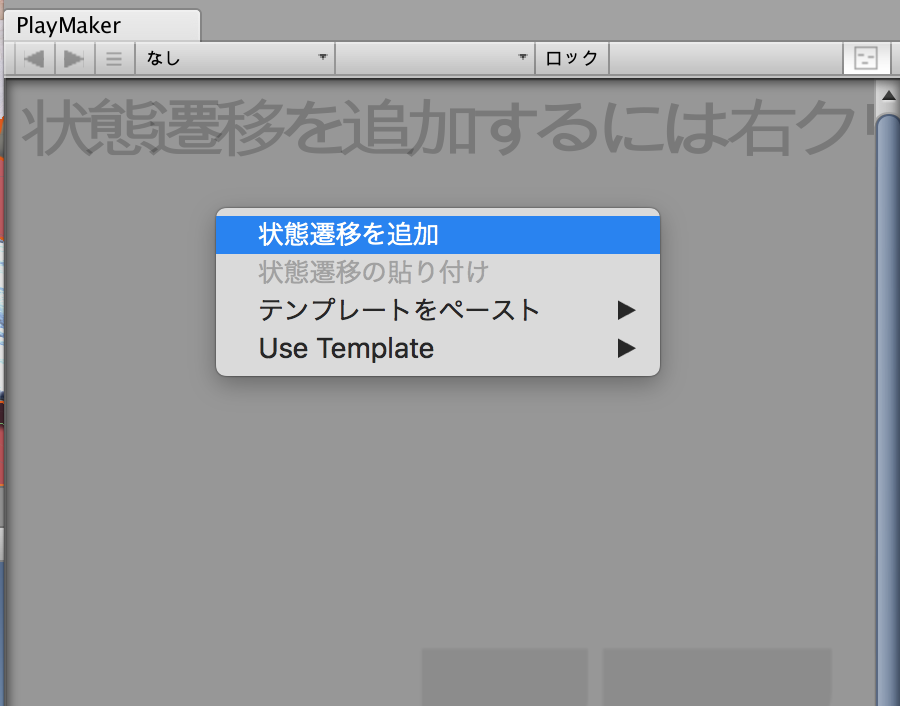
Screenshot – add a transition.
Click ‘Action Browser’ in the bottom-right corner and enter ‘rotate’ in the search box at the top. Select ‘Rotate’ from the search result. Rotate is an action to rotate the target object. With ‘Rotate’ selected, select ‘Add Action To State’.
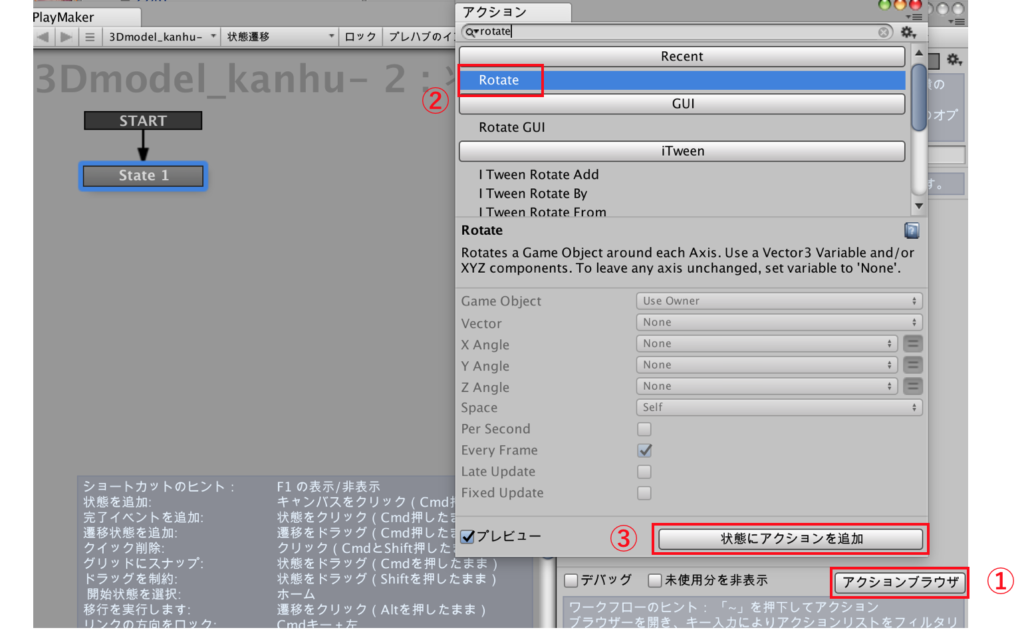
Screenshot – add an action
The setting for Rotate action
On Playmaker’s Edit screen, set ‘Game Object’ of the ‘Rotate’ object to ‘Specify Game Object’ and drag the object to add animation to into the ‘None(Game Object)’ field. In this example, drag ‘kaiten’ into the ‘None(Game Object)’ field since we want to add the ‘Rotate’ action to it.
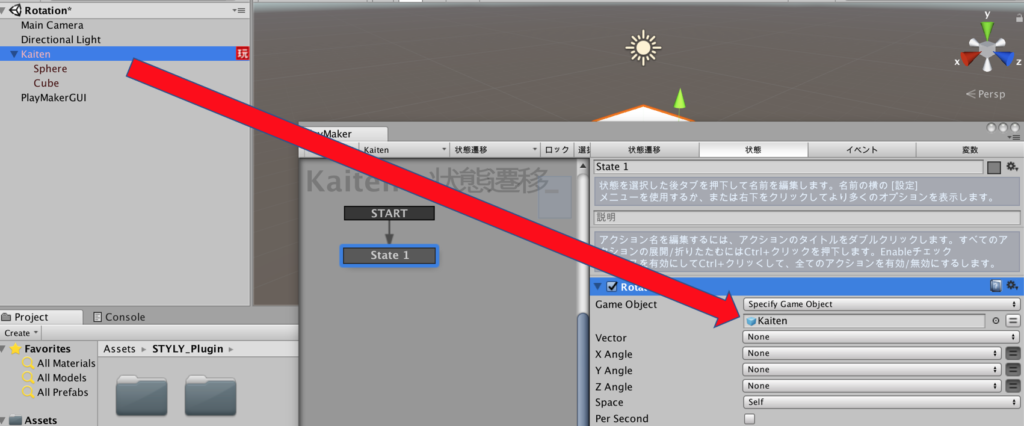
Screenshot – select an object
We set the ‘Rotate’ action. This time, we want to make the Cube rotate on the Y-axis, so adjust ‘Y Angle’. Press the two-line icon at the ‘Y angle’ field to input the value. This value defines the rotational speed. Set it to 50. Check the ‘Per Second’ box and the ‘Every Frame’ box
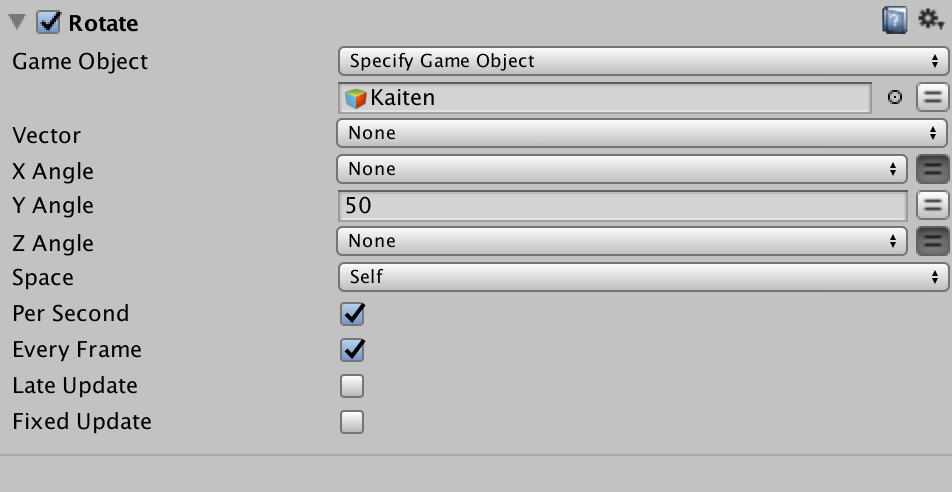
Screenshot – add the ‘Rotate’ action
After finishing the setting, press the Play button on Unity to check the motion.

GIF – revolving movement
The rotation looks OK, but I didn’t intend to make the Cube at the centre rotate. Let’s stop the Cube. Since I set the rotational speed of Y angle to 50 earlier, I can stop the Cube by setting its rotational speed to -50 to cancel out its current speed. In the same way as I did earlier, with ‘kaien’ selected, add a Rotate action by Action Browser on Playmaker Editor. Then set the ‘Game Object’ field to ‘Specify Game Object’ and drag the Cube object in Hierarchy window into the ‘None(Game Object)’ field. Set ‘Y Angle’ to -50. Once you checked the ‘Per Second’ box and the ‘Every Frame’ box, the setting is completed.
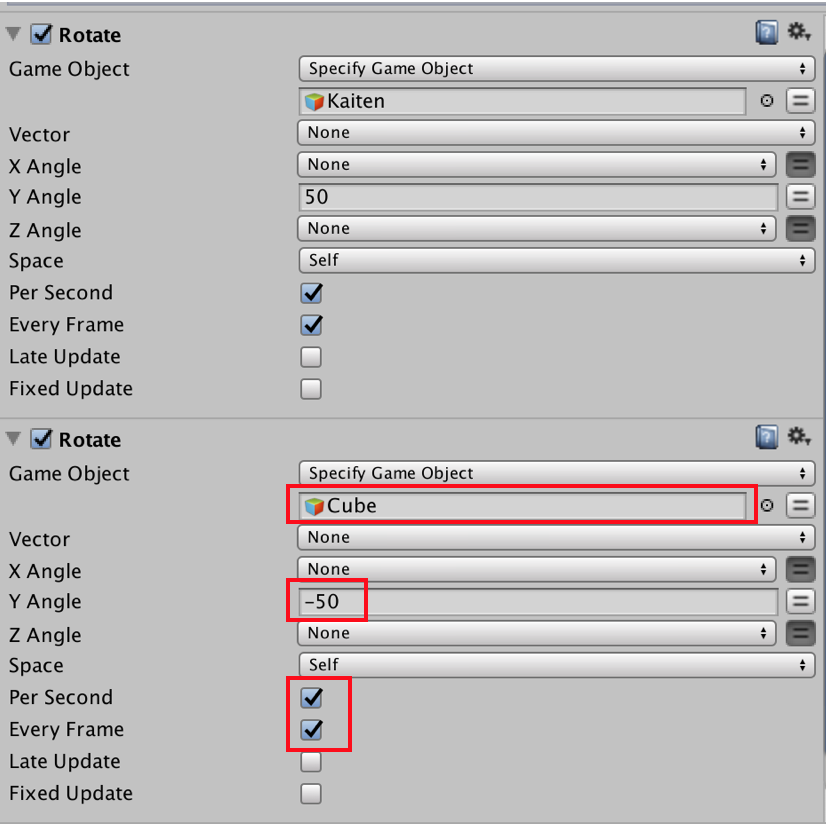
Screenshot – the setting for the Rotate action (Cube)
That’s all for the settings on Playmaker. Play the animation on Unity to check.
The completion image
Can you see the Sphere revolving around the Cube? If they don’t revolve or the cube still rotates, check the settings again since they could be set incorrectly.
Upload it to place in STYLY
Download and import UnityPlugin from STYLY’s Download site. ※Please see the download site to learn about the initial setting for UnityPlugin. https://styly.cc/download/?lang=en To upload the created ‘kaiten’ object to STYLY, you need to convert it to a Prefab. In the Project view, select Create > Prefab to create a Prefab and drag the ‘kaiten’ object in the Hierarchy window into the Prefab created. Right-click the ‘kaiten’ prefab and select ‘STYLY > Upload prefab or scene to STYLY’. After a while, the ‘Upload Successful’ window pops up.
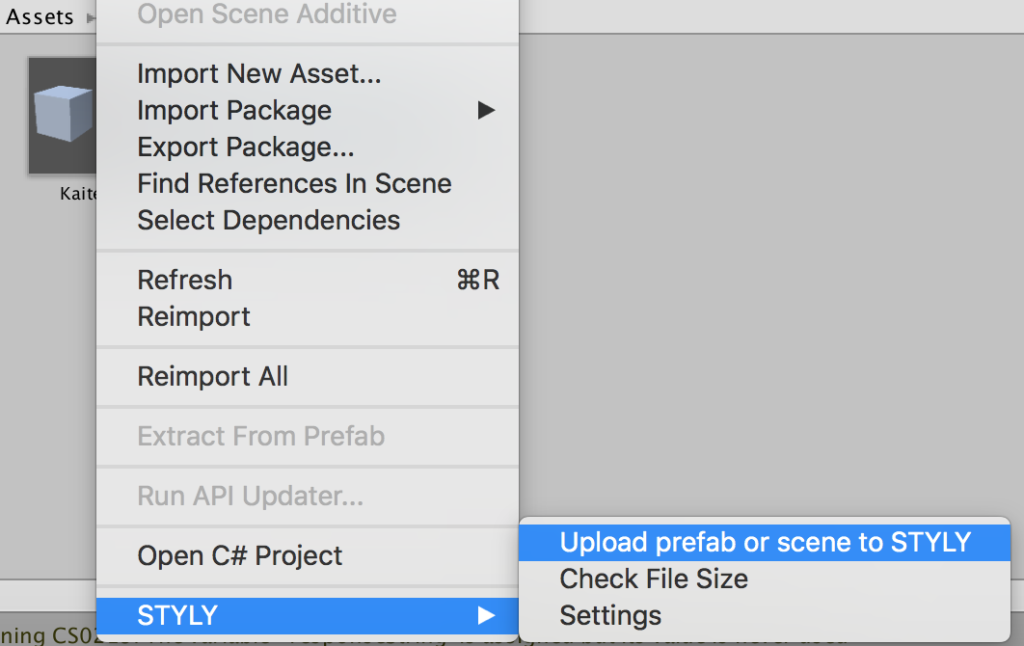
Screenshot – uploading the Prefab
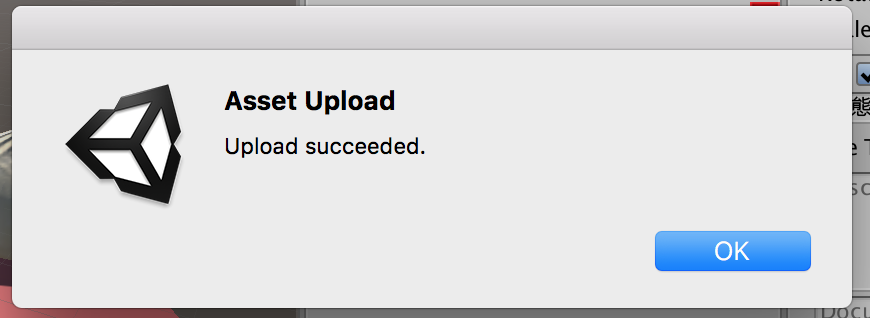
Screenshot – Upload succeeded.
Open STYLY Editor on the web browser, and click the ‘Asset’ icon and select ‘3D Model > My Models’ to display the asset uploaded.
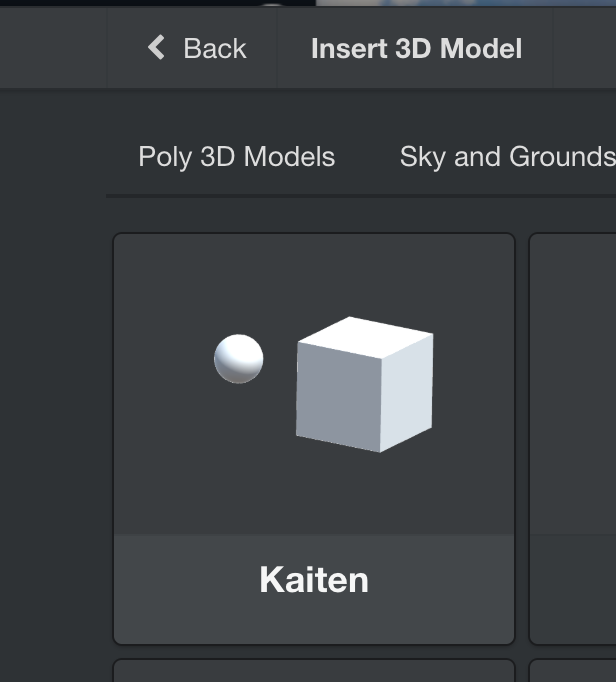
STYLY WebEditor
Click it to place in the Scene.
GIF animation – the completion image
Now you can see the Sphere revolving in STYLY. Congratulations! This time, I showed how to implement an animation of revolving an object around the centre and upload its prefab to STYLY.