In this article, I introduce how to make waves breaking on the shore by Shaderforge in Unity.
The Shader to express waves
It represents waves breaking on the shore and retreating from as shown above. We make a simple one that you can use just by assigning it to a Plane.
Samples
You can taste a sample space in STYLY GALLERY.
You can download the Unity project shown in this article. Wave_Sample
As this project data doesn’t include some plug-in required, install them by yourself. Playmaker SteamVR Plugin
Add a new shader by Shaderforge
There are just two planes for the waves and for the beach. Open Shaderforge and create a new shader by New Shader > Lit(PBR).
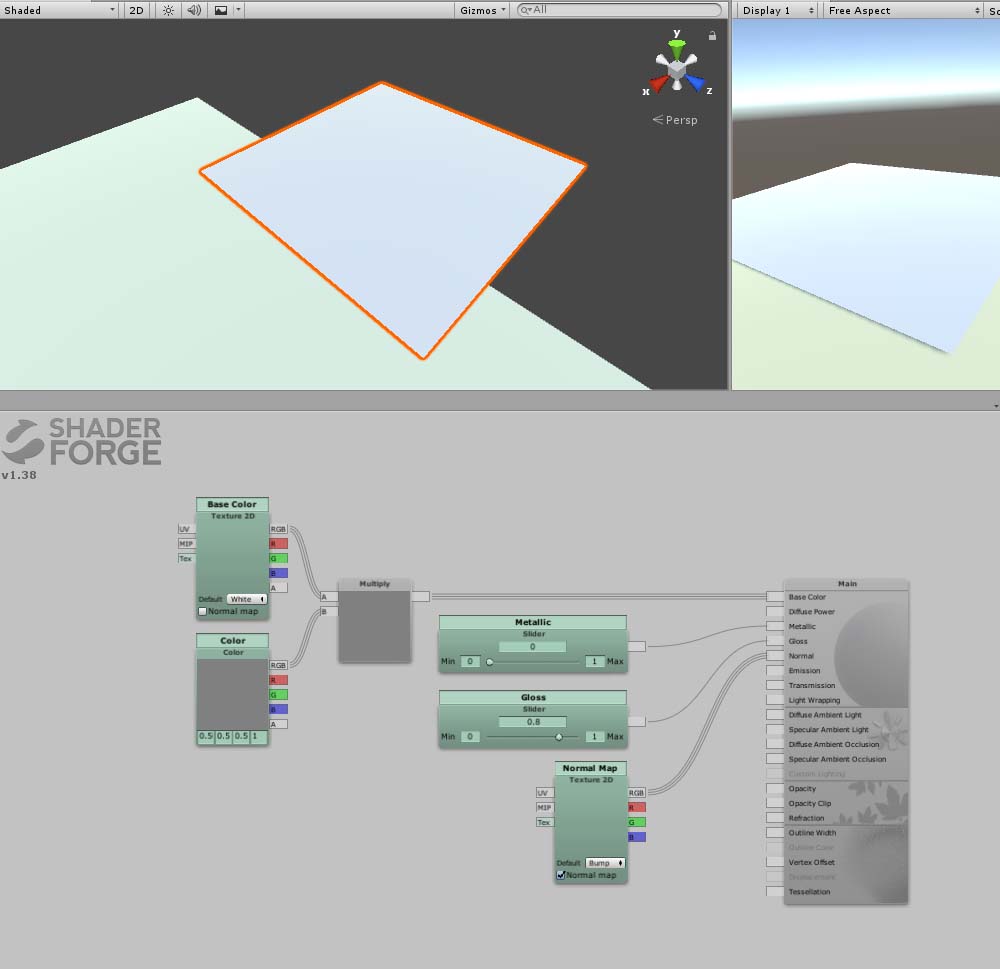
Create a new shader by Shaderforge.
As we adjust transparency, change Blend Mode to “Alpha Blended “.
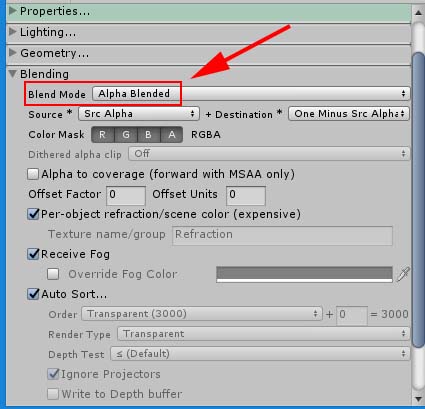
The setting for Blend Mode
Check the box for OpenGL ES3.0 to use in STYLY.
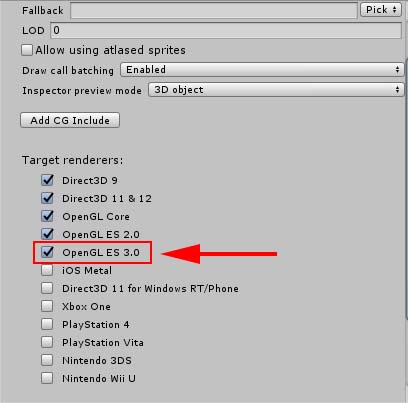
Check the box for OpenGL ES 3.0
Change shape by Heightmap
We actually change the shape of a polygon mesh by applying a grayscale texture on it. You can introduce a realistic expression by changing the shape of an object.
Heightmap for the waves
This texture is made of a cloud-pattern in Photoshop. We use it in Shaderforge. Make a Texure2D node by dragging the texture to the Shader Forge window.
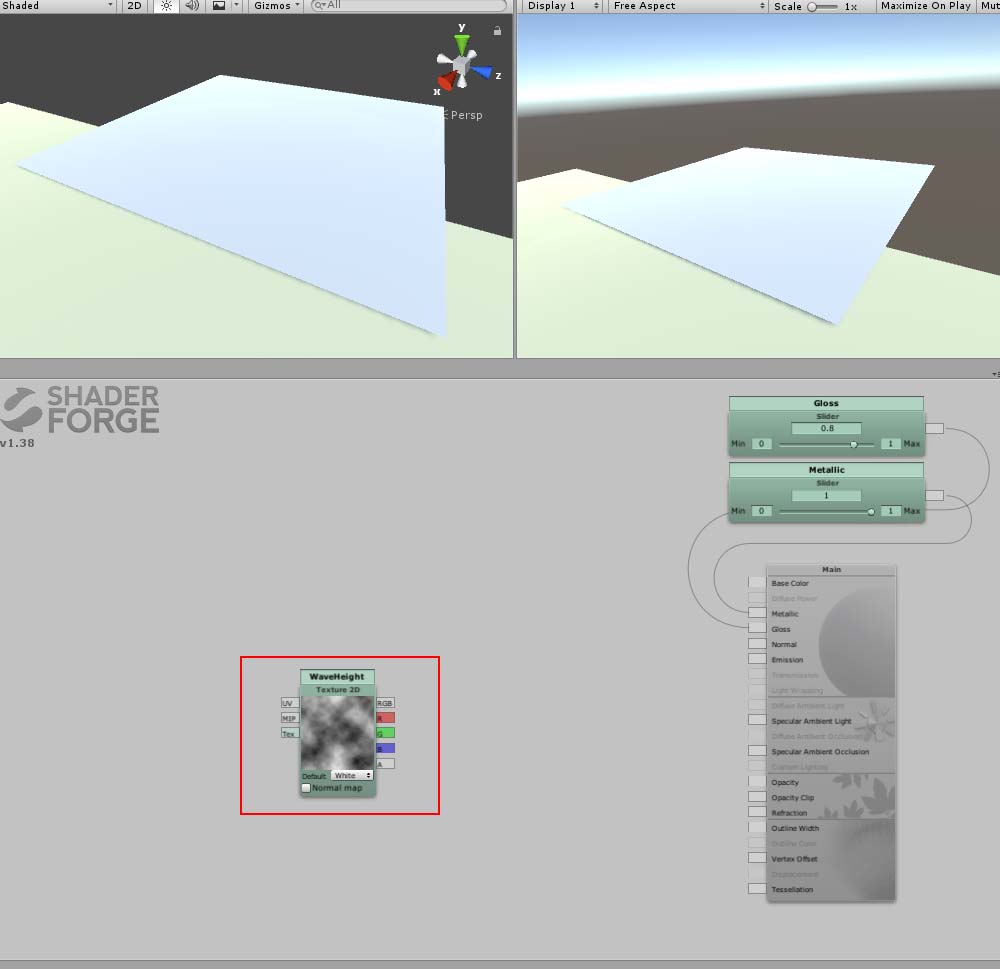
Use a texture.
Make an animation of waves by scrolling UV.
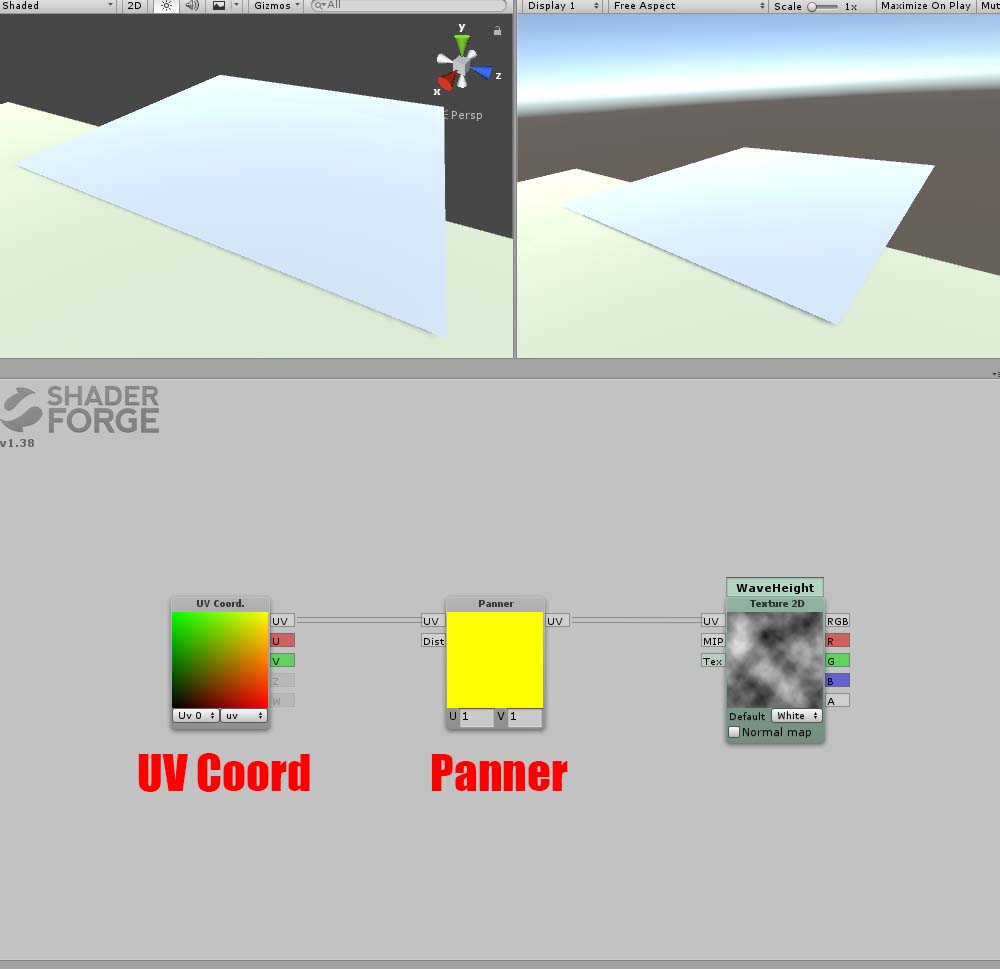
Connect Panner and UV Coord.
Add a Panner node and a UV Coord node, and then, connect them to the texture. In this state, it just scrolls in one direction. So we add a back-and-forth motion.
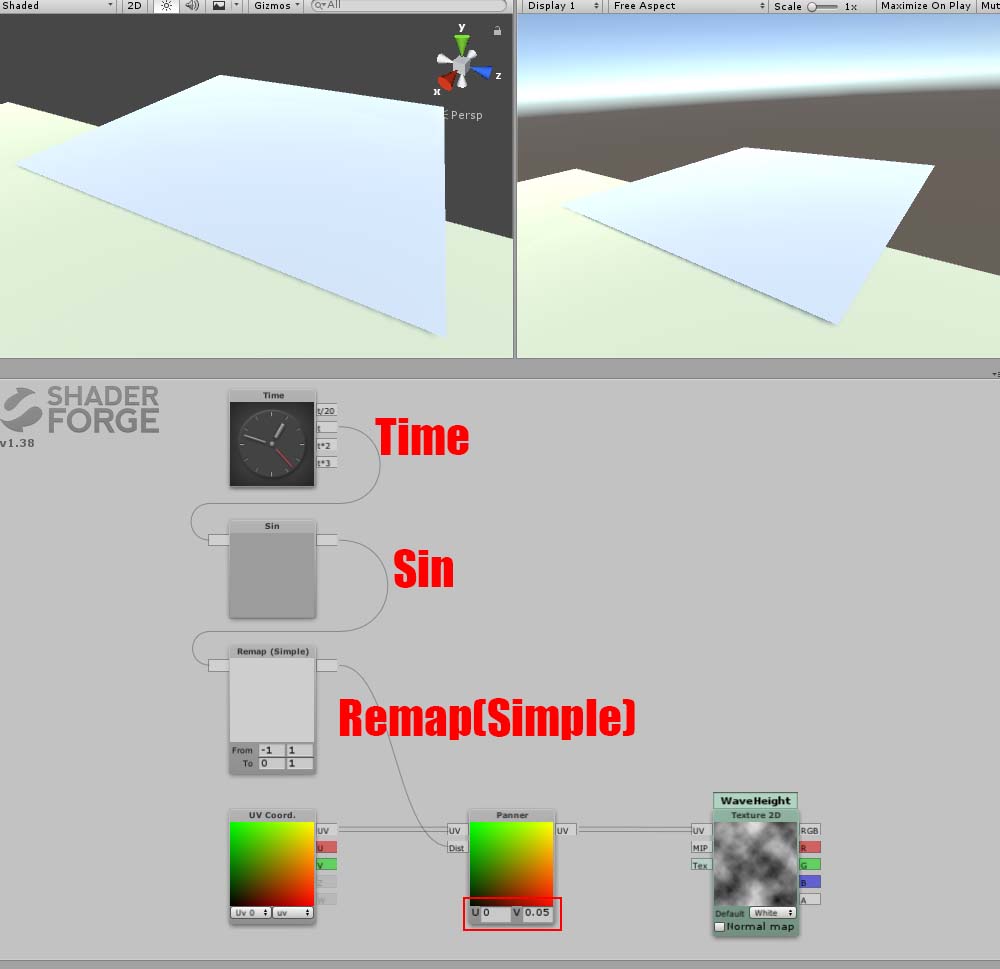
Control it by “Time”
You can make it move back and forth by “Sin”. Set “Time” for the speed of the motion and “Remap” for the range. Acquire the direction of the vertices’ motion by Normal Direction, and combine it with the motion of the texture by a Multiply node. You can now change the shape of the object by connecting it to VertexOffset.
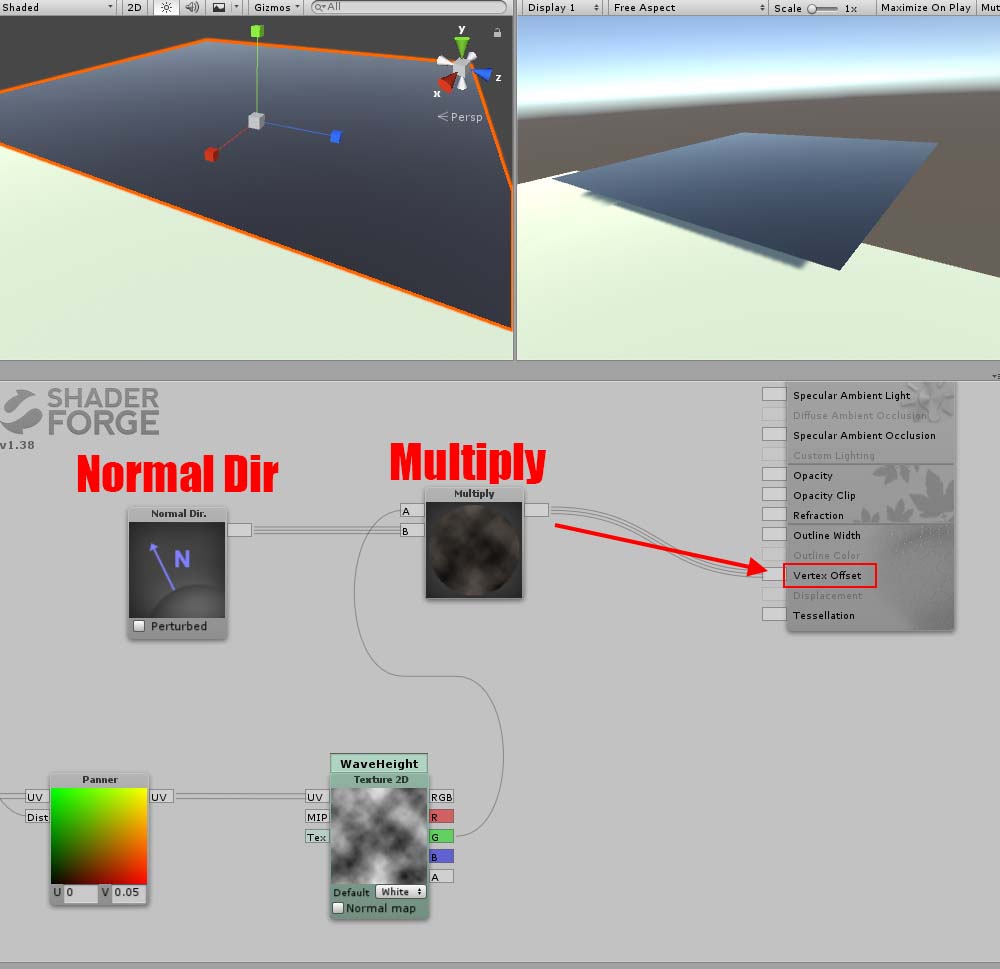
Moving the vertices by Vertex Offset
In the current state, the motion hasn’t been applied to the scene yet. Assign the material with the new shader to the Plane, and specify the texture to apply in the Inspector window.
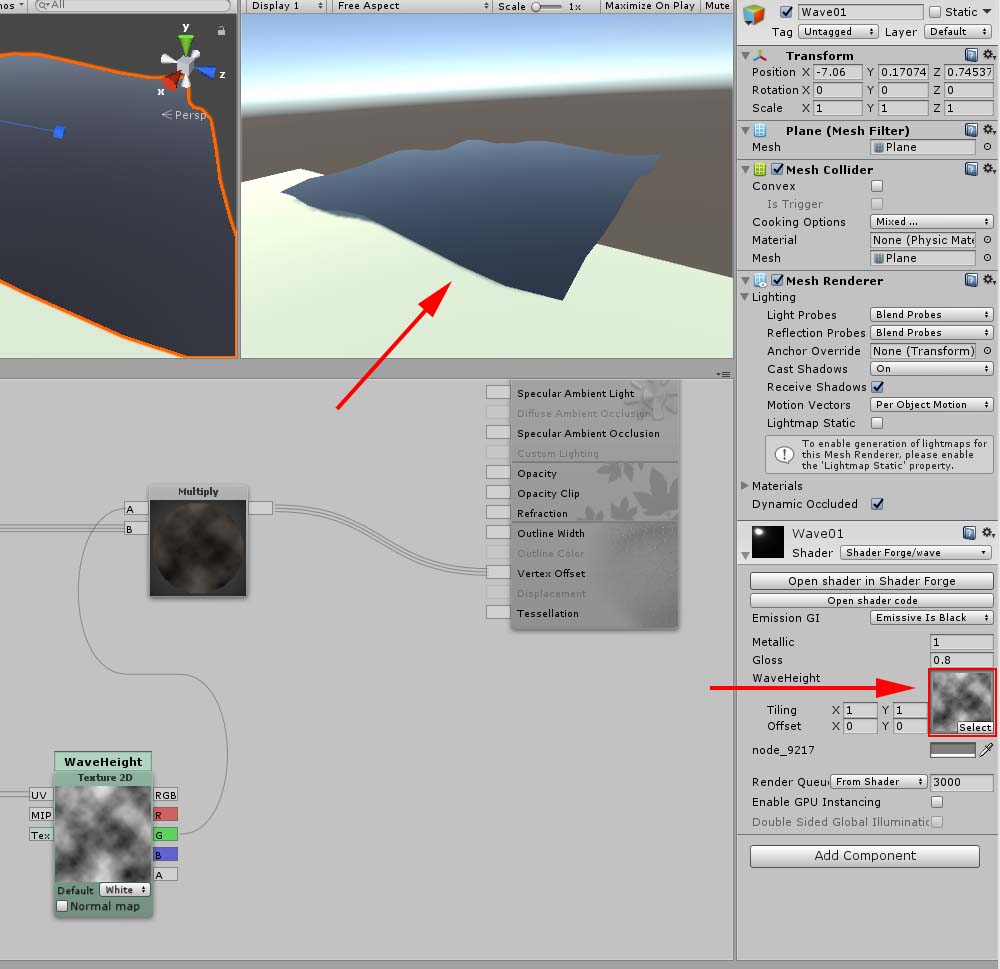
Specify the texture.
It adds some variations to the shape of the Plane. You can see the vertices have been shifted in their normal direction by the greyscale texture.
Adjust the height of waves
Make the motion more dynamic by adding up-and-down motion to the entire wave. Add a slider called “Waveheight” to adjust the height.

The slider to adjust the height of the wave.
In addition, add a slider called “Wavewidth” to adjust the width of the waves surging.
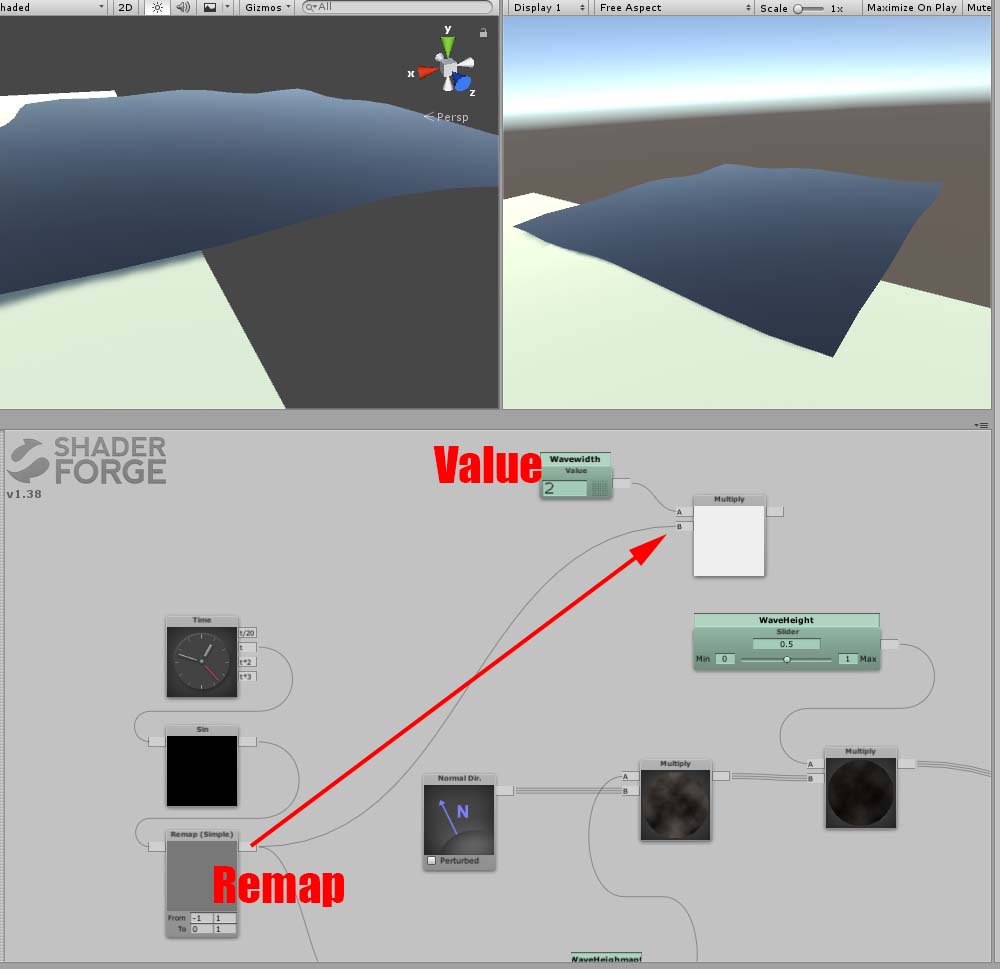
Adjust “Wavewidth”
Specify the direction of the entire wave by a Value called “Wavedirection”.
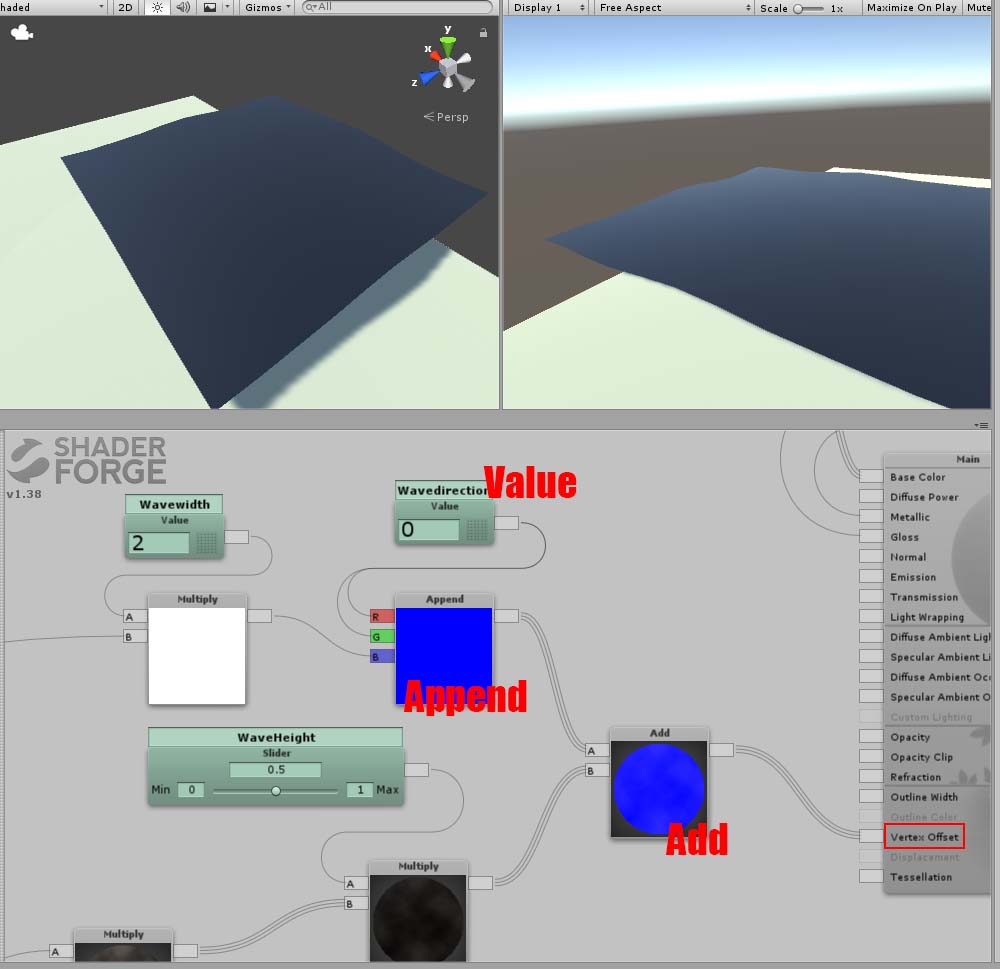
Adjust “Wavedirection”
I set the direction to Z-axis only.
Add Heightmap
Next, add a Heightmap.

Add a Heightmap.
As the white part expresses a rise, scroll it to represent the waves surging periodically.
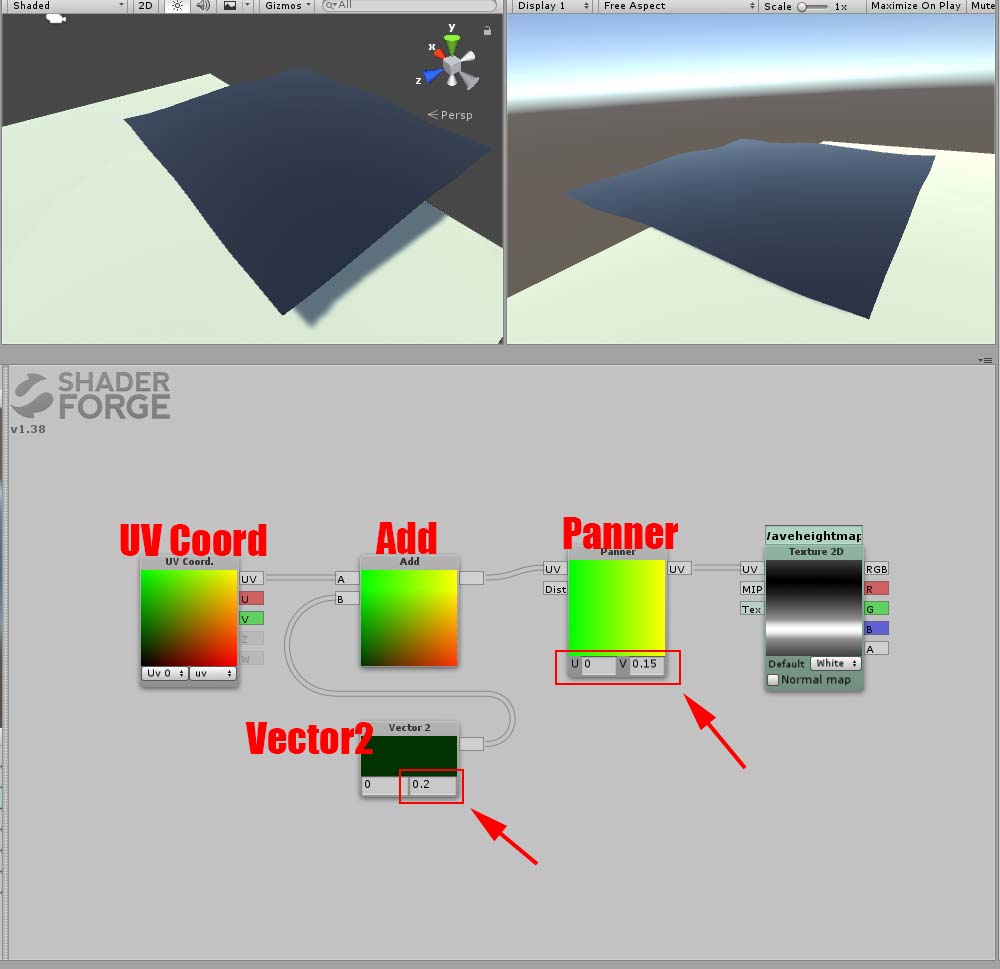
Scroll UV
Impose “Add” between “Panner” and “UV Coord”, and connect “Vector2” to it. Although it moves UV a little, it helps to synchronize it with the entire motion of waves. Put it and the cloud-pattern texture together by “Add”, and connect it to Normal Dir.
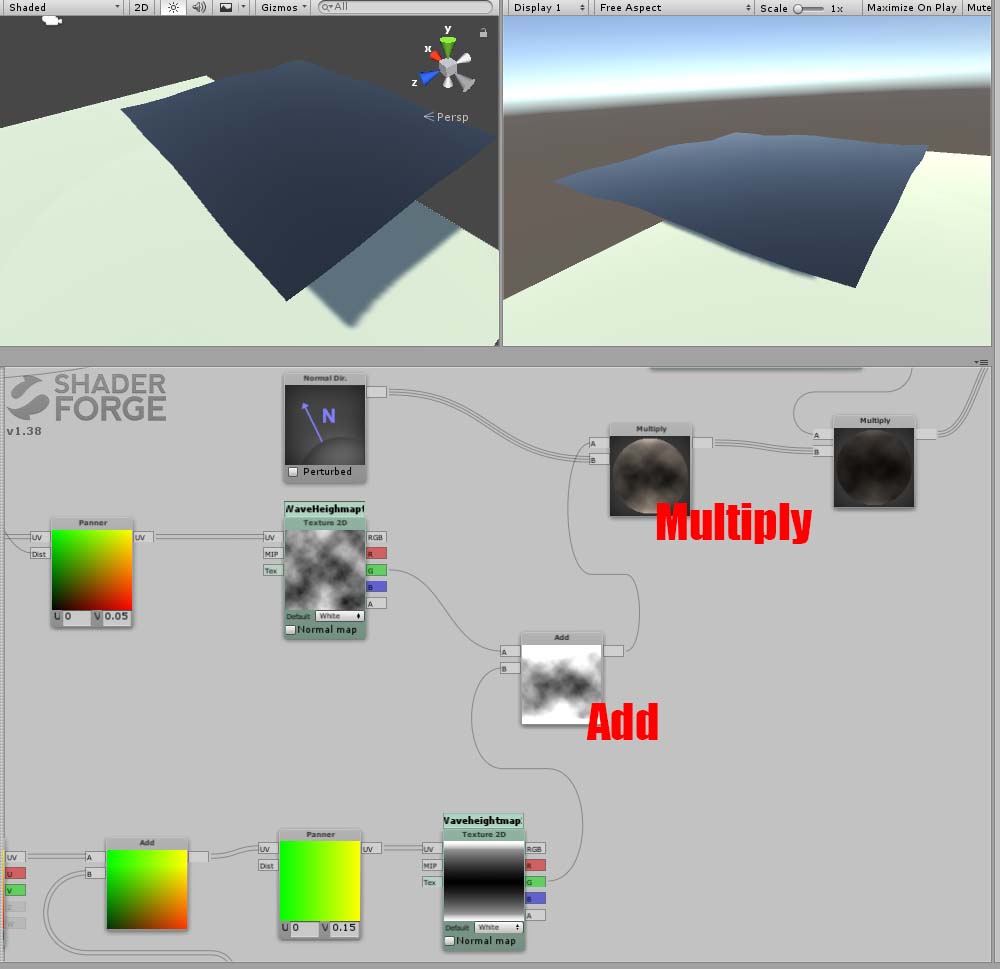
Add it by “Add” node
Once you specify the texture, it will be applied to the Material.
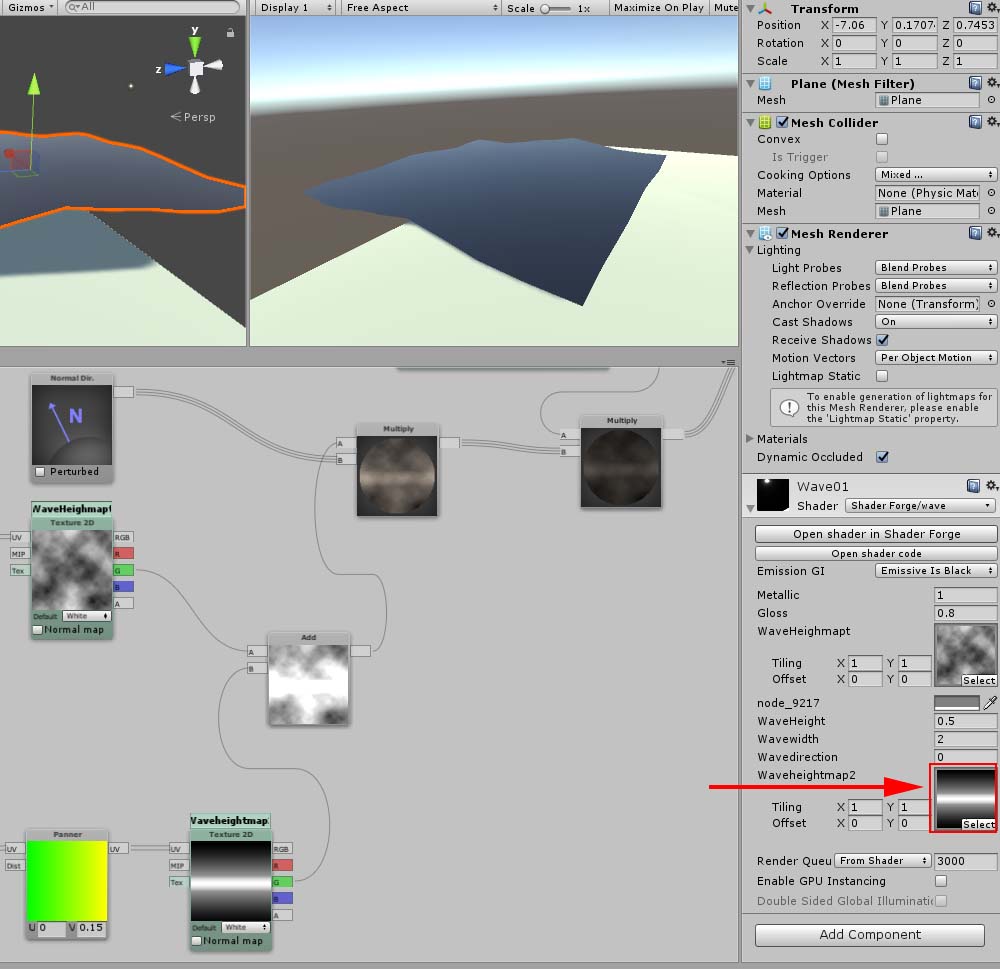
Specify the texture.
Now, you have implemented the motion by the gradation texture.
Add Normalmap
Add a Normalmap for finer details. It’s so easy to fine-tune the detail by Normalmap.
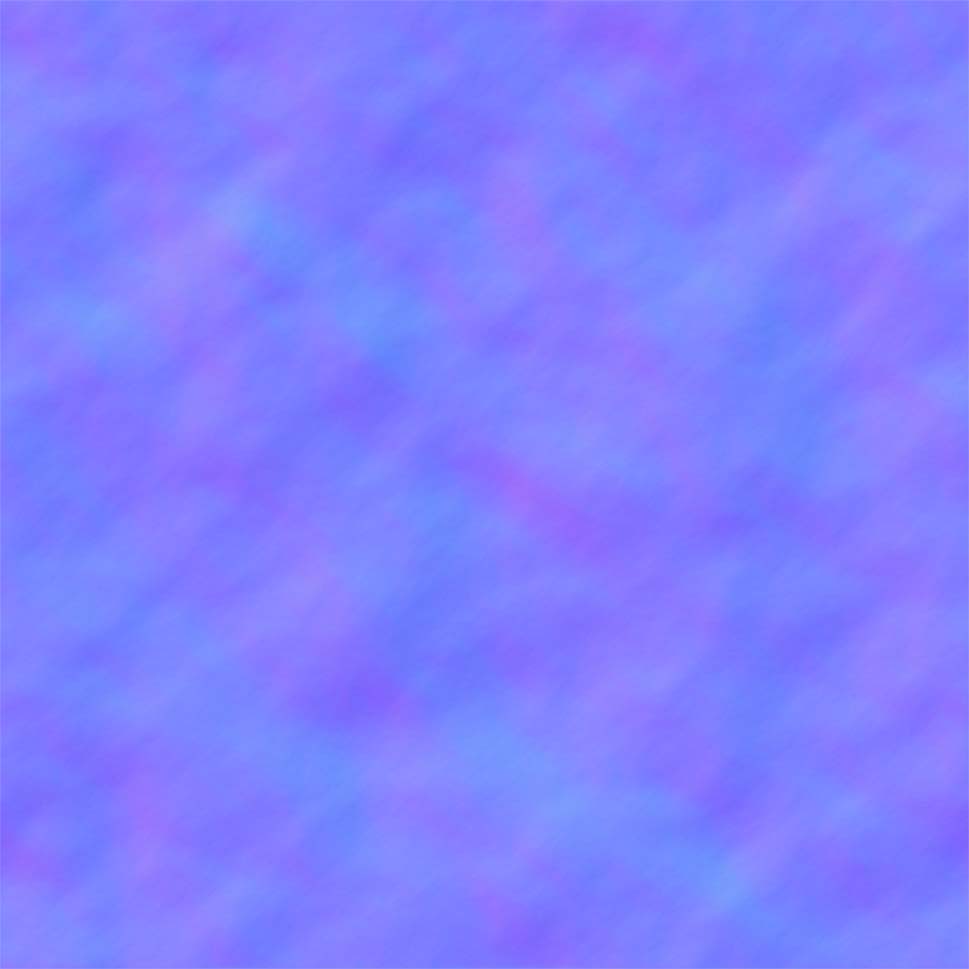
Normalmap for waves
I made this texture by converting a cloud-pattern image into the normal-vector map in Photoshop. Add a motion to Normalmap by scrolling UV as we did earlier.
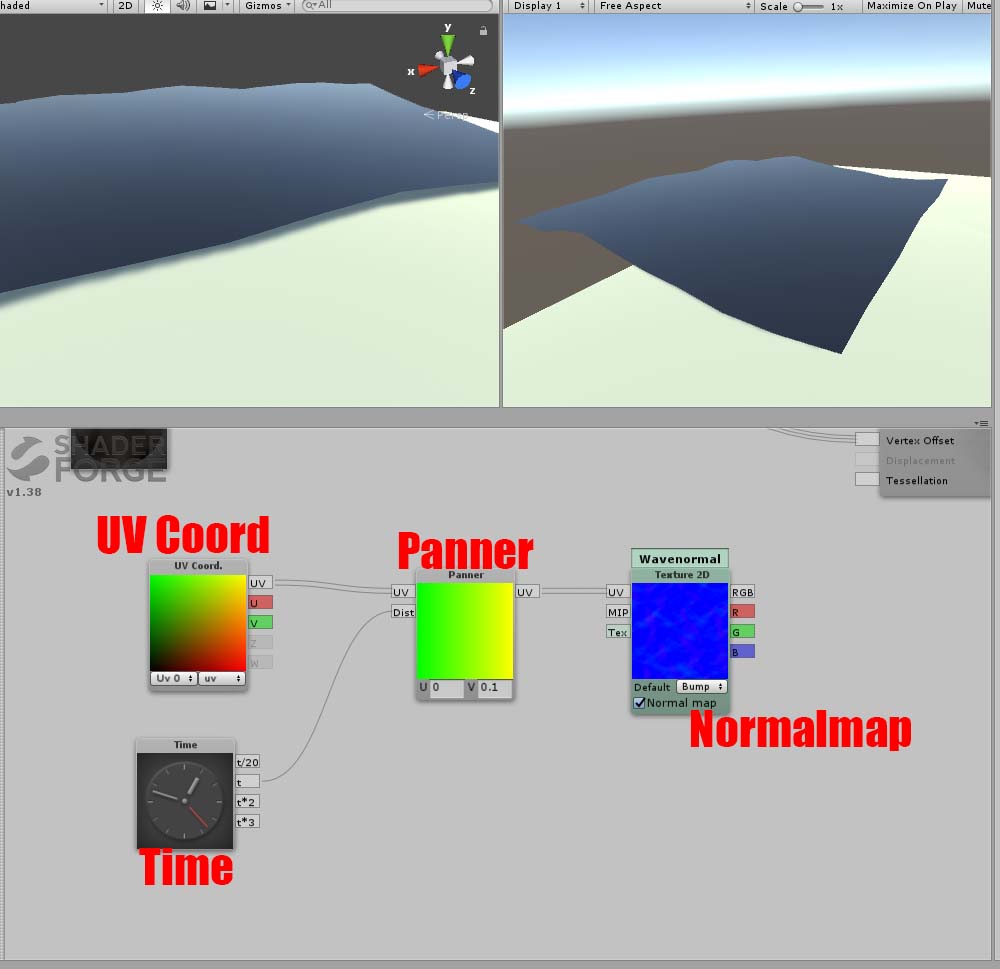
The setting to scroll UV
You can add the Normalmap effect to the surface by assigning the texture in the Inspector window.
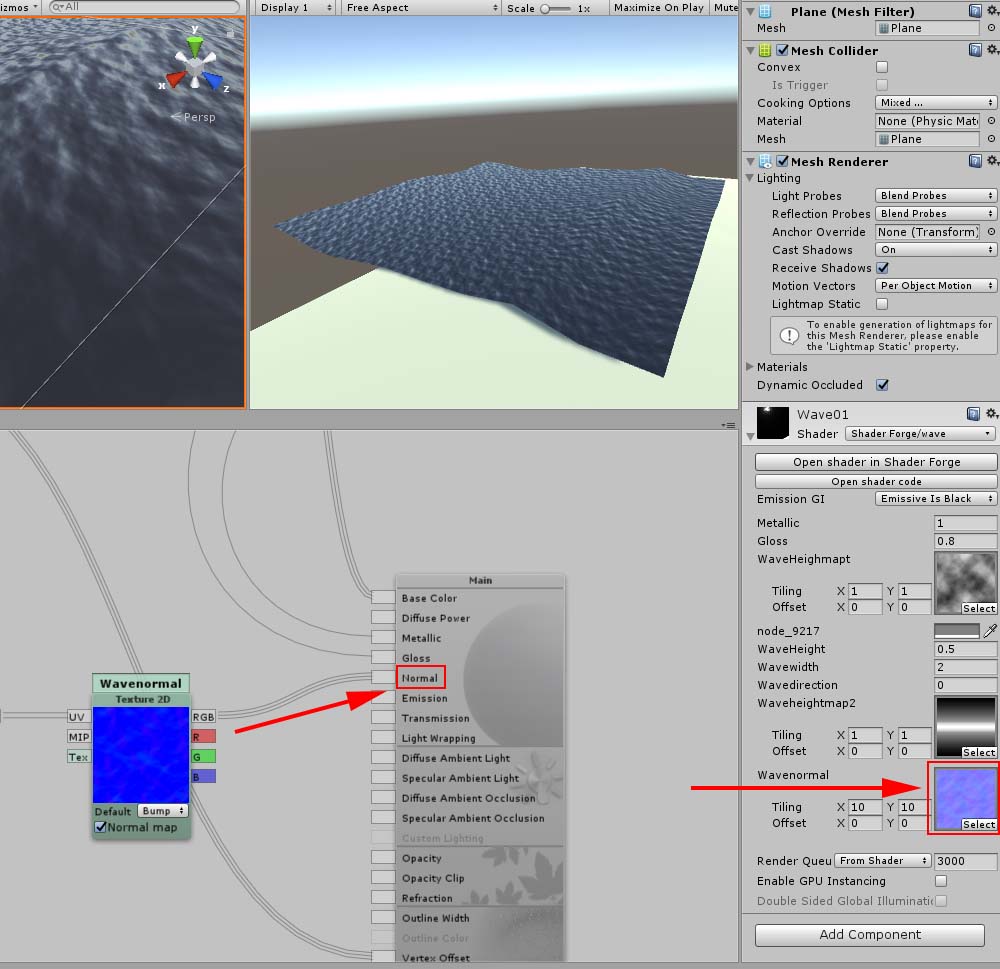
Connect it to Normal.
It looks like the sea now.
Colour the sea
Blend brighter colour and lighter colour to make the colour more realistic for the sea.
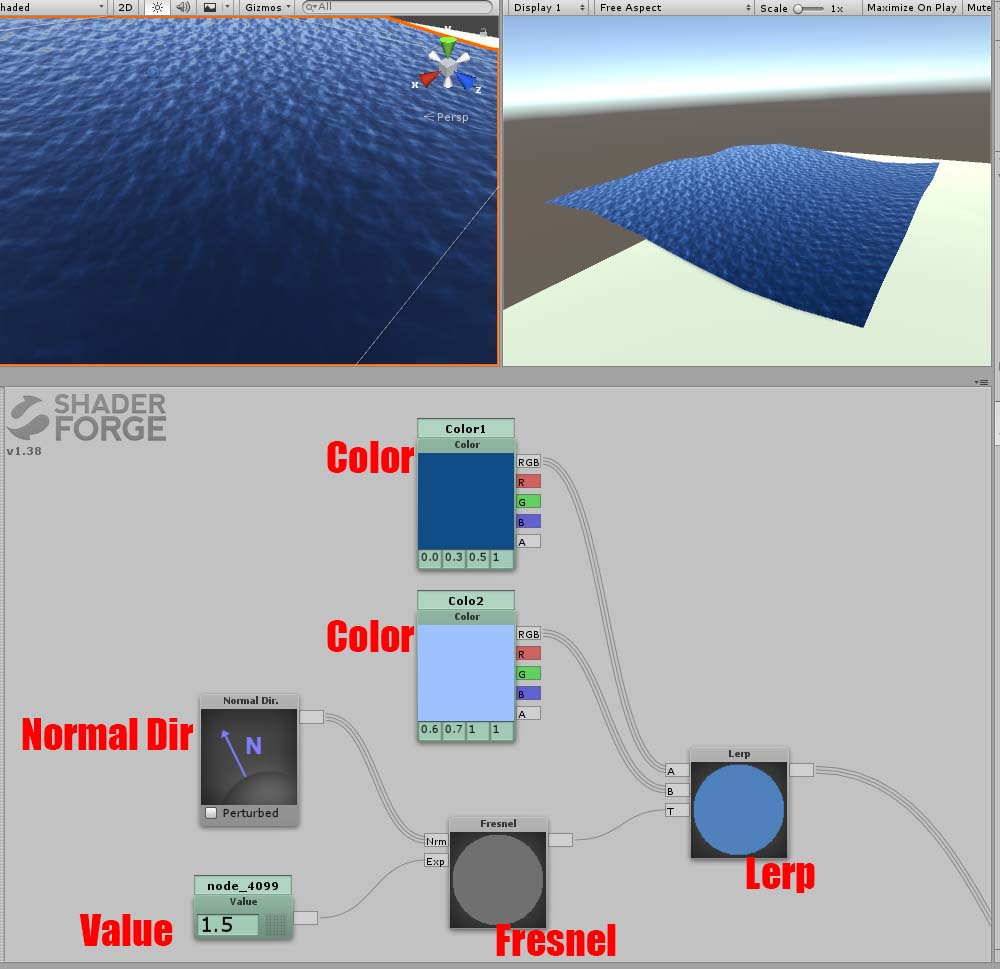
The setting for the colour of the sea
Make the view responsive to the direction of the camera by adding Fresnel. Use the Hightmap with gradation as colour. Overlay the white part as it is to express a splashing wave.
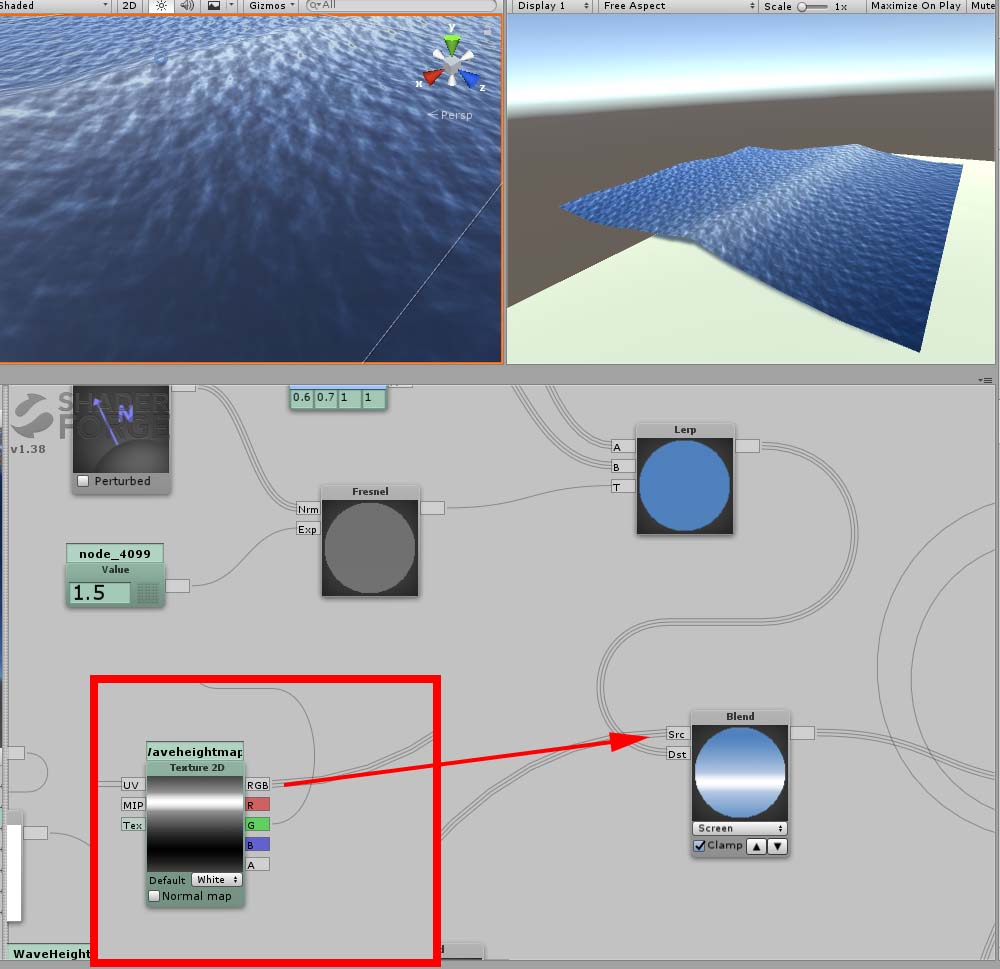
Overlay the white part.
In this example, I imposed a Blend node and connected to “Screen” to overlay.
Use Alphamap
The tip of the waves has been left square. So now make it more wave-like shape. Make the effect by overlaying the wave-shaped texture with transparency.

Alpha map with wave-shaped boundary
Set it to make this white part only visible. Combine the texture and the Value, and connect it to Opacity. You can adjust the transparency by the Value.
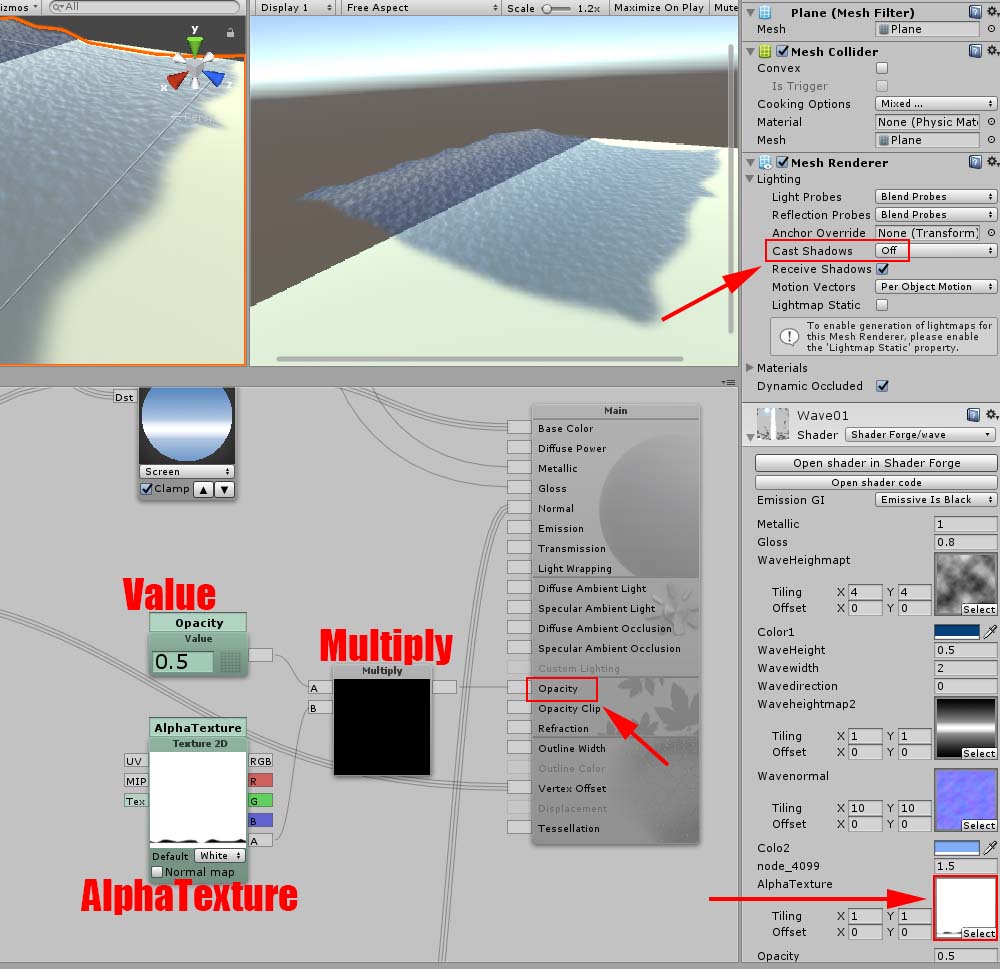
Connect to Opacity.
Switch off “Cast Shadow” as you don’t need the shadow of the Plane. It completes the shader for waves.
The shader for waves
In this article, I introduced how to make a shader for waves by Shaderforge in Unity. You can make various effects by changing the shape of objects with Vertex offset controlled by a texture. You could save your time as it could substitute for some modelling works. How to upload an Asset from Unity to STYLY: Read this article