This time, we will introduce how to record and play back audio within STYLY for Vision Pro.
Place the Microphone
1. Place a Cube in the Hierarchy for the microphone.
2. Add the following components to the Cube:
- AudioSource (Add via Add Component)
- ScriptMachine (Add via Add Component)

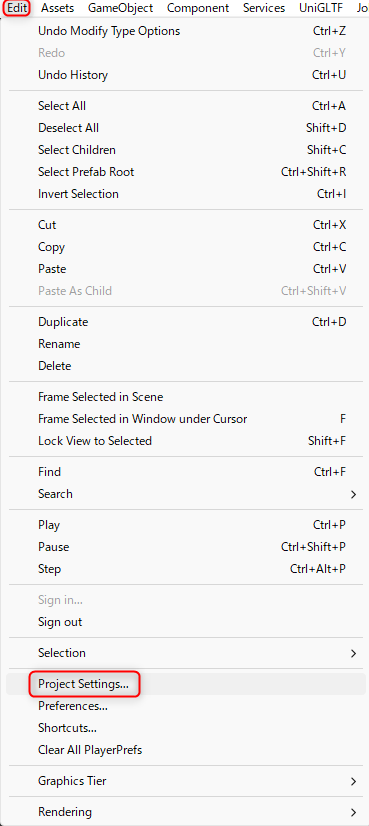
To enable the Visual Scripting nodes used in this tutorial, open Edit → Project Settings.
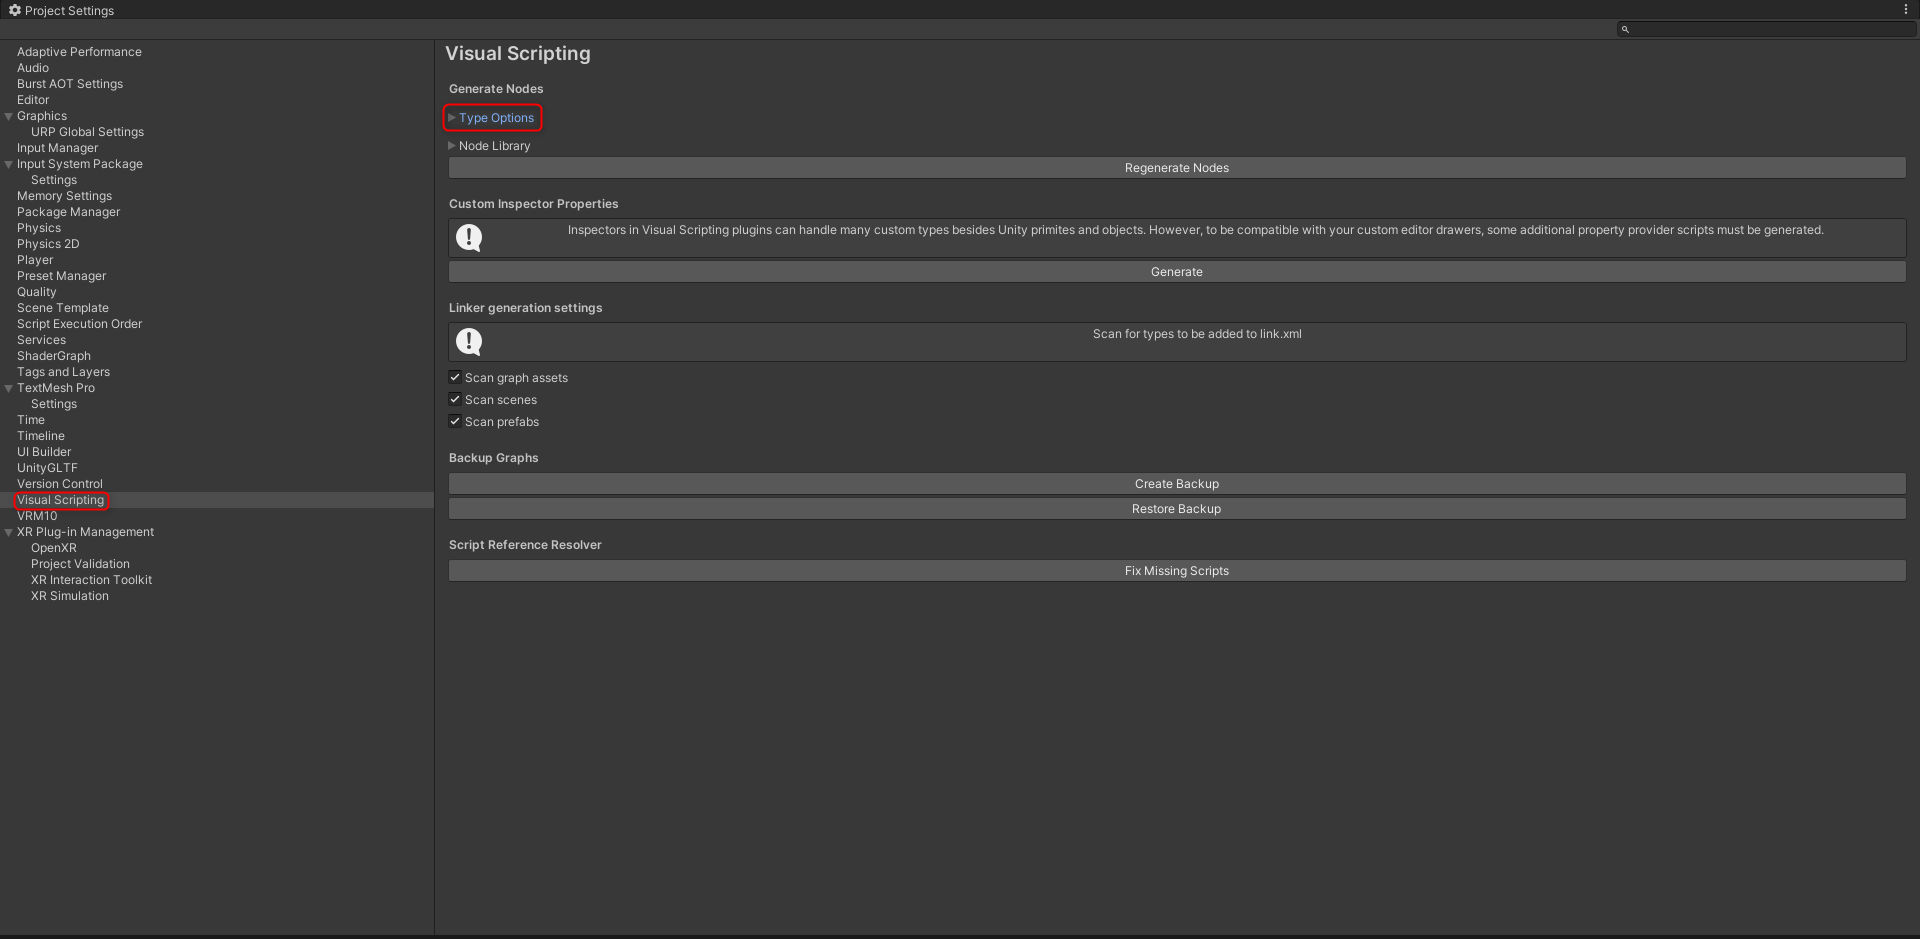
Open TypeOptions under the Visual Scripting tab.
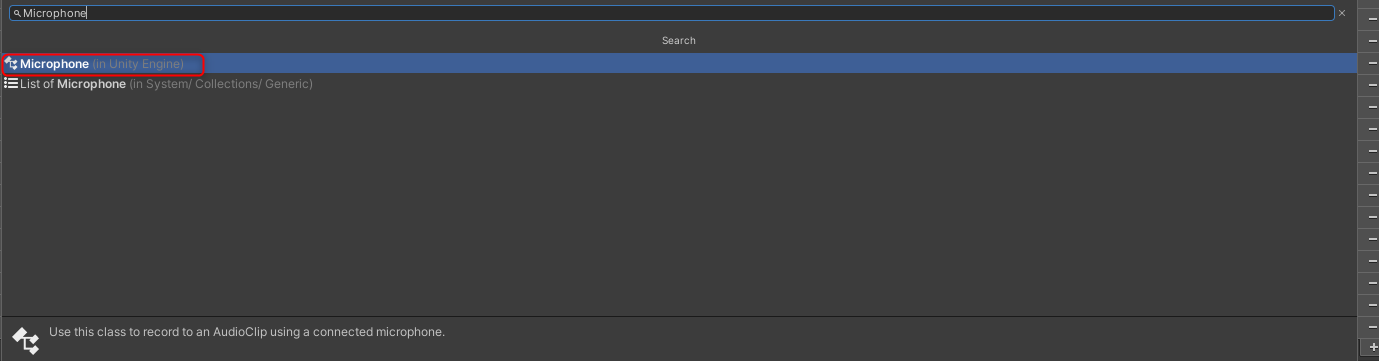
Scroll to the bottom, press the + button, and add a new option.

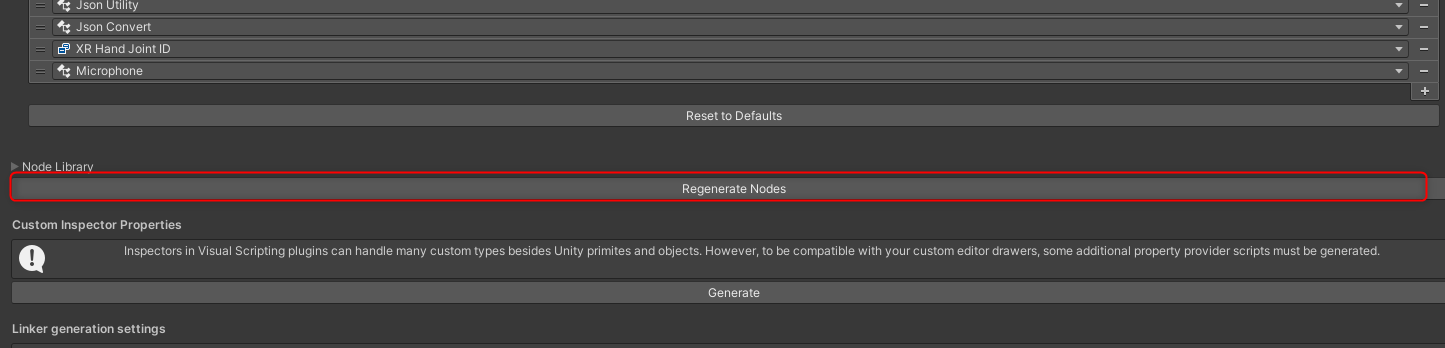
Add Microphone.
Press Regenerate Nodes to rebuild the options.
Preparing for Recording
1. Create a new ScriptGraph in ScriptMachine.
- Example: “Voice Recorder”
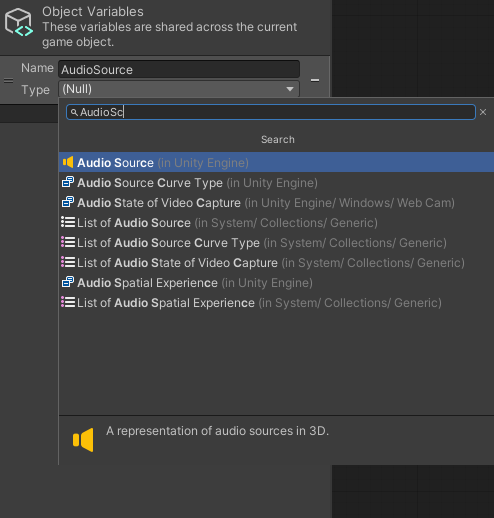
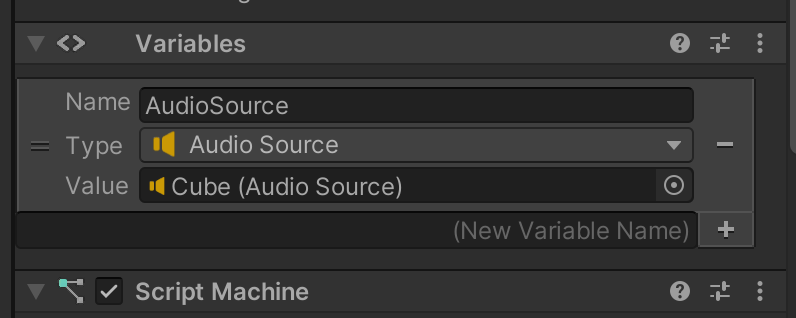
2. Add the following variable to ObjectVariable:
- Name: AudioSource
- Type: “AudioSource”
3. Assign the AudioSource from the Cube in the Hierarchy to the AudioSource variable by dragging and dropping.
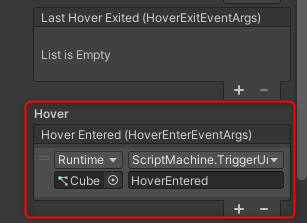
4. Add the following components to the Cube:
- XR Grab Interactable
- XR Poke Filter
- Add settings to the Interactable Filter in XR Grab Interactable’s Hover option.
- For more details, refer to STYLY for Vision Pro: How to Easily Implement Button Operations with the Poke Feature.
Building the ScriptGraph
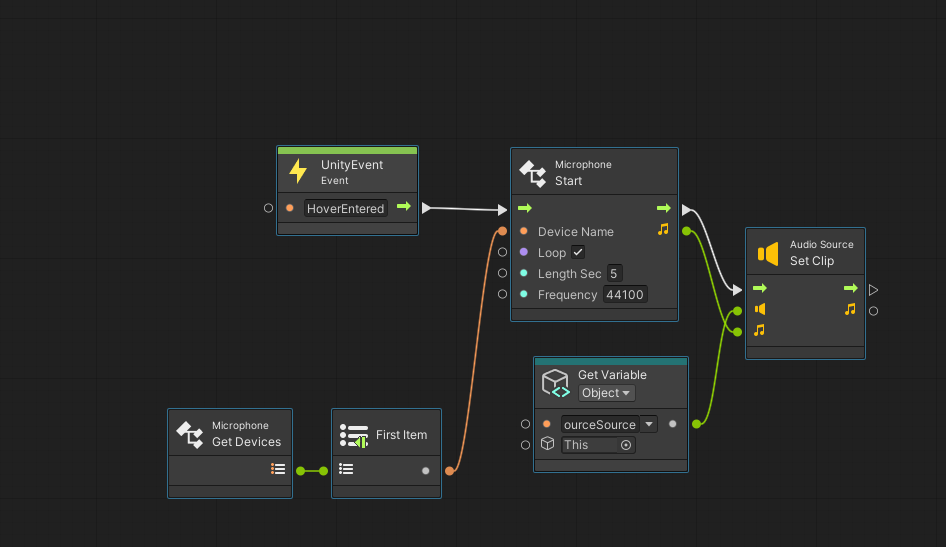
Add and connect the following nodes:
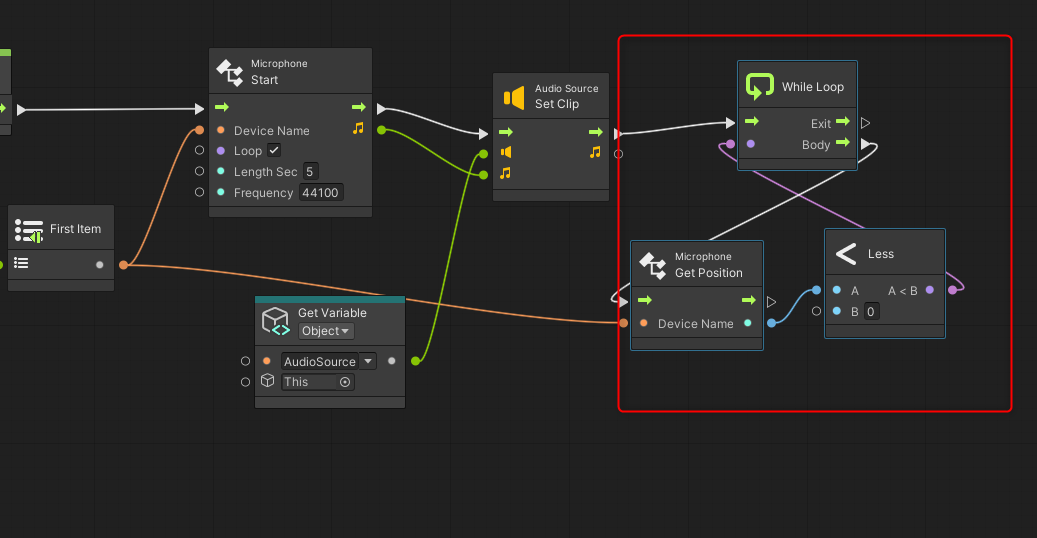
Access Vision Pro’s Microphone
- Use GetDevices and FirstItem nodes to get Vision Pro’s microphone.
- Assign the microphone name to the Device Name field in the Start node.
- Settings for the Start node:
- Length Sec: Recording duration (e.g., 5 seconds)
- Frequency: Sampling rate (e.g., 44100Hz)
Setting Recording Conditions
- Use GetPosition to get the volume level.
- Add a condition to skip recording if the volume is 0 or lower (i.e., no sound is detected).
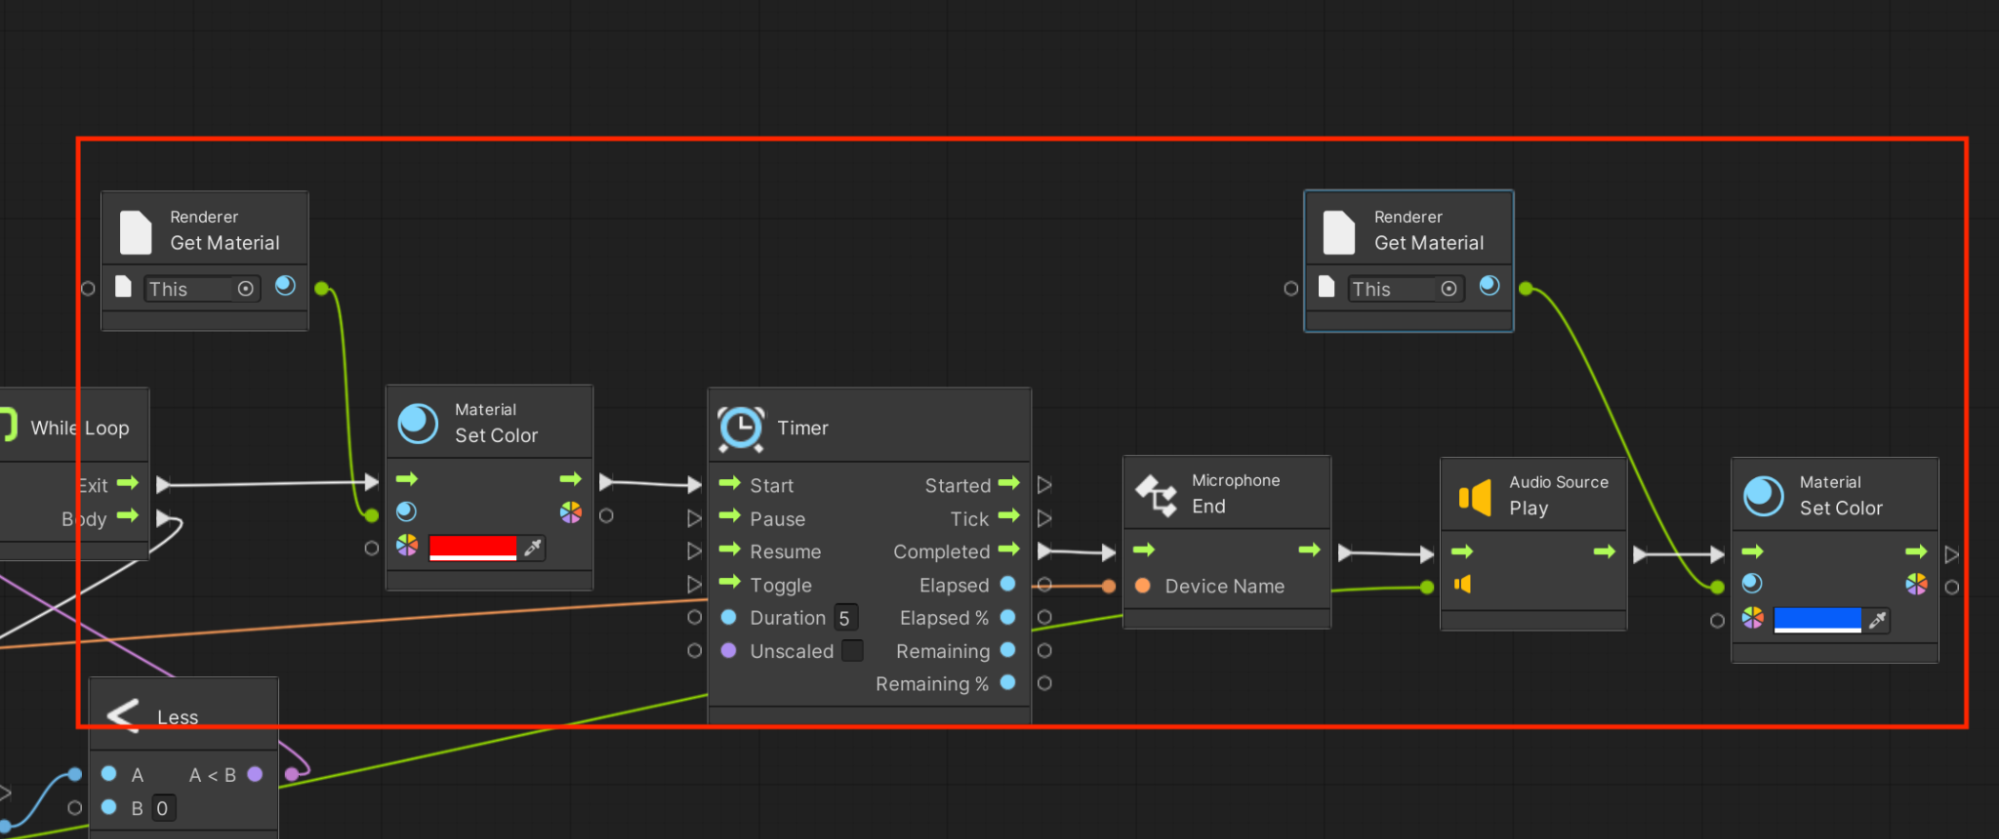
Visual Feedback During Recording
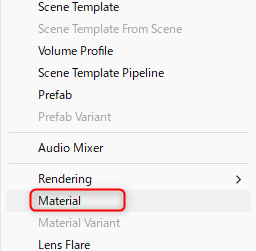
- Create a new Material and attach it to the Cube.
- Use SetColor to indicate recording and playback states:
- Recording: Red
- Playback: Blue
Implementing Recording and Playback
Add and connect the following nodes:
- Use a Timer node to manage the recording time (5 seconds).
- Use an End node to stop recording.
- Use a Play node to play the recorded audio.
Node 1: xxxxx
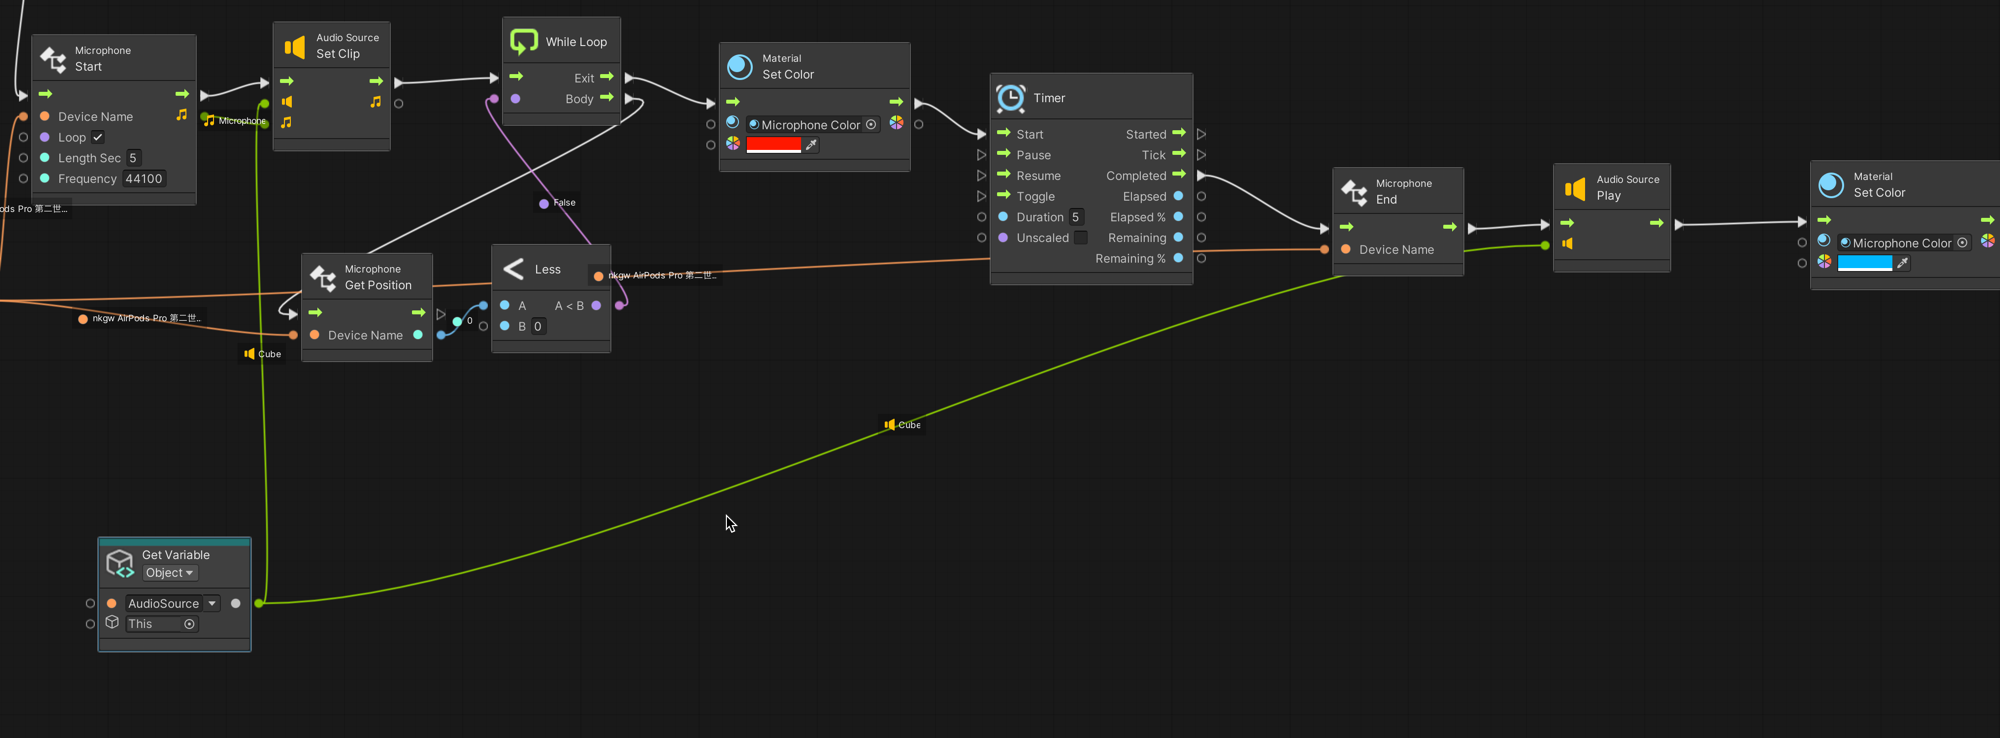
Node 2: Full Graph
Run
You can now successfully record and play back audio.

Watch with audio here: