This article explains the basics of how to use Unity. It provides a detailed guide from creating a Unity ID, installing Unity Hub, setting up a license, creating a new project, placing and manipulating objects, adding components, to checking operation in play mode. Even if you are using Unity for the first time, you can learn the basics through this article and take your first step in content creation.
What is Unity?
Create content for games, 3DCG videos, and VR/AR
Unity is a game engine equipped with functions necessary for game development.
Unity includes features such as animation, camera control, physics simulation, UI creation, and timeline, which are essential for creating games. You can create 3D and 2D games such as action, shooting, RPG, and adventure games.
Thanks to its cross-platform functionality, you can develop games that run on home consoles, PCs, and smartphones. Unity is not only for games but also allows the creation of 3DCG videos and VR (Virtual Reality) / AR (Augmented Reality) content.
Asset Store
In Unity, images and 3D models are called “assets.” Creating all assets from scratch for games or VR/MR/AR content can be very difficult. The Asset Store allows you to easily use assets created by other creators.
The Asset Store contains countless free and paid assets that you can download and install into your Unity project right away.
Unity Asset Store
How to Install Unity
How to Create a Unity ID
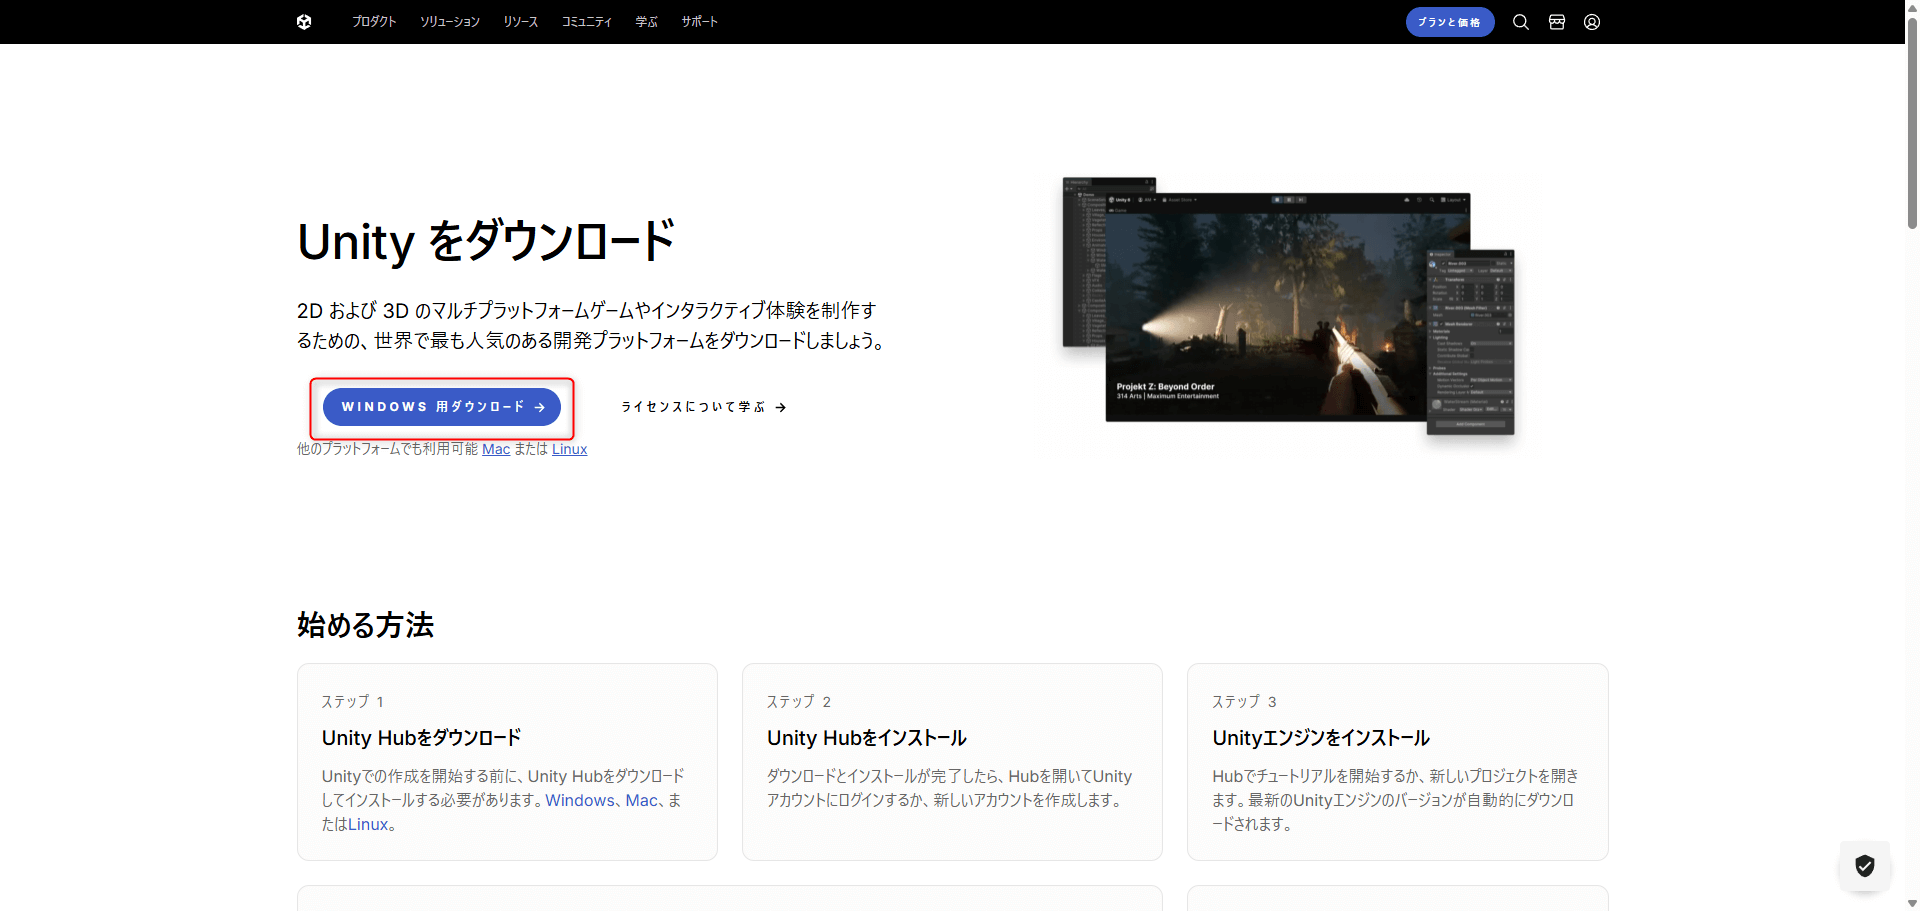
Before installing Unity, let’s create a Unity ID. Go to the Unity website at https://unity.com/.
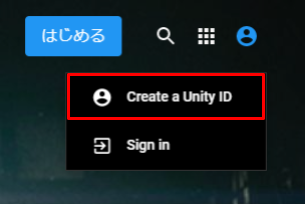
Click the person-shaped icon at the top right.

Click “Create a Unity ID.”
Create an account.
If you already have a Google or Facebook account, you can link it directly with your Unity account.
If you want to use your Google account, click “Continue with Google” to link. If you want to use your Facebook account, click “Continue with Facebook” to link.
If you want to create an account from scratch, please proceed below.
・Enter your email address in “Email.”
This will be used to log in to Unity.
Also, notifications from Unity will be sent to this address. 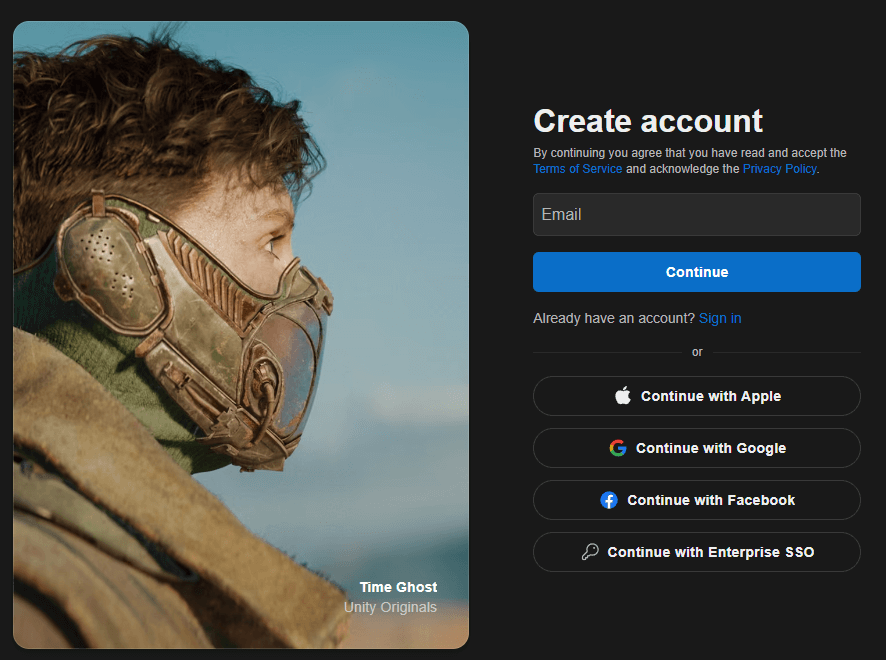
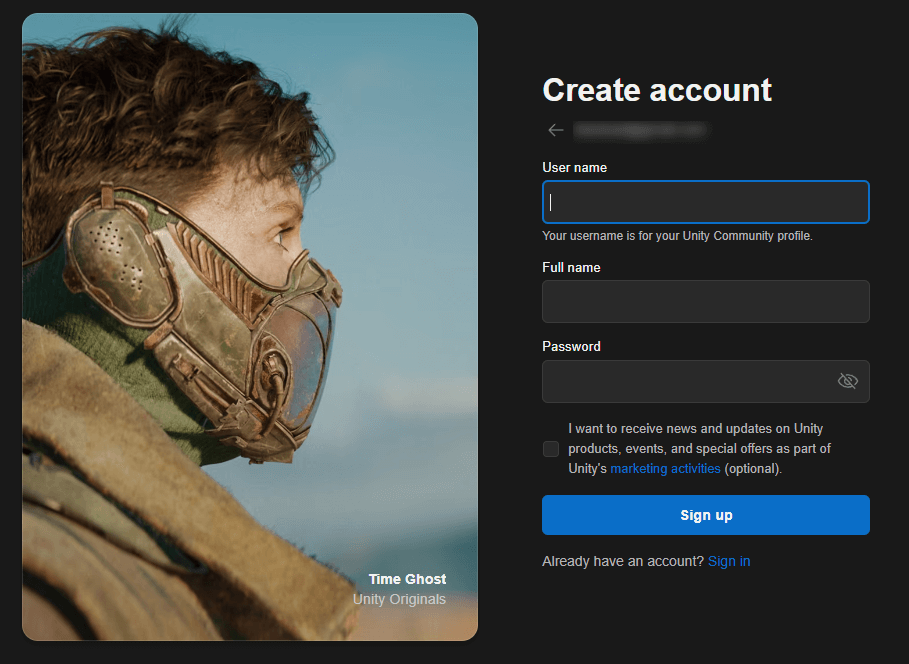
・Enter a password.
Make sure it meets the following conditions:
- At least 8 characters
- At least one uppercase letter
- At least one lowercase letter
- At least one number or special character
- Use only half-width alphanumeric characters
・Enter a username.
This will be displayed in Unity services and the community.
・Full Name
Enter your real name. It will not be visible to others.
Check all three boxes.
□I agree to the Unity Terms of Use and Privacy Policy
→ This asks if you agree to the Unity Terms of Use and Privacy Policy, so please read and agree before checking the box.
□I understand that by checking this box, I am agreeing to receive promotional materials from Unity
→ This asks if you agree to receive promotional emails from Unity. If you agree, please check the box.
Click “Create Unity ID.” You will receive an email from Unity at your registered email address.
Open the email and click “Link to confirm email” to complete the registration.
Downloading and Installing Unity (Using Unity Hub)
Installing Unity Hub
We will use an official Unity tool called Unity Hub to install Unity. Unity Hub is recommended because it allows you to manage multiple Unity versions centrally and offers other convenient features.
Install Unity Hub, which is required to install Unity.
Visit the following page:
Download page
Click “Download Unity Hub” to download the Unity Hub setup file.
Double-click the setup file to launch it. You will be prompted to accept the license agreement and choose an installation location. Set those and click the install button to proceed.
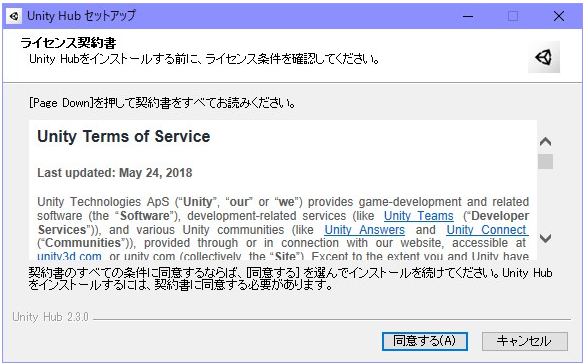
Select “I Agree.”
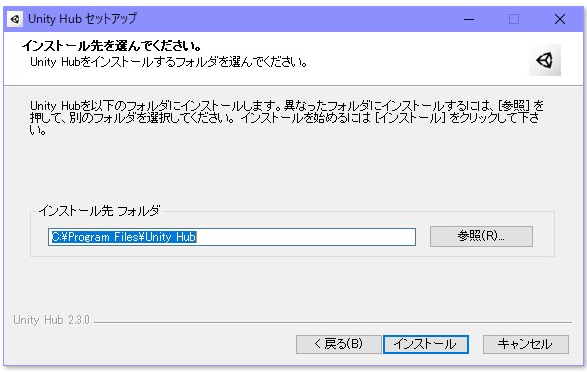
Select “Install”
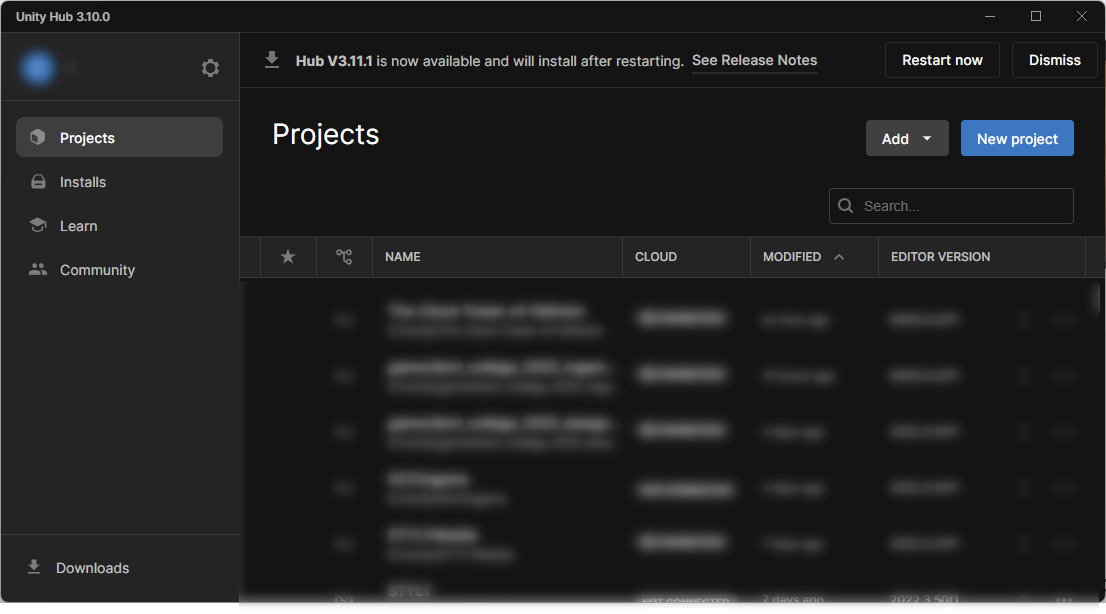
When you launch Unity Hub, you’ll see several sections on the left. In “Projects,” you can view a list of your projects, and in “Learn,” you can access Unity tutorials.
Setting up Unity License
A message saying “You have no valid license” will appear at the bottom of the screen. You need to set up a Unity license.

A license is the usage agreement for Unity. Depending on the type of license, the monthly fee, terms of use, and available services will vary. Here we’ll explain how to set up a Personal license.
For more details about licenses, please see this page.
Before setting the license, sign in with the account you created. This links your Unity account with the license.
Click the account icon at the top left → then click “Sign in.”

On the screen that appears after clicking, if you already have a Unity ID, enter your account information and click “Sign in.” (If you don’t have a Unity ID, you’ll need to create one.)
Once signed in, click the gear icon at the top left.
Click on “License.”
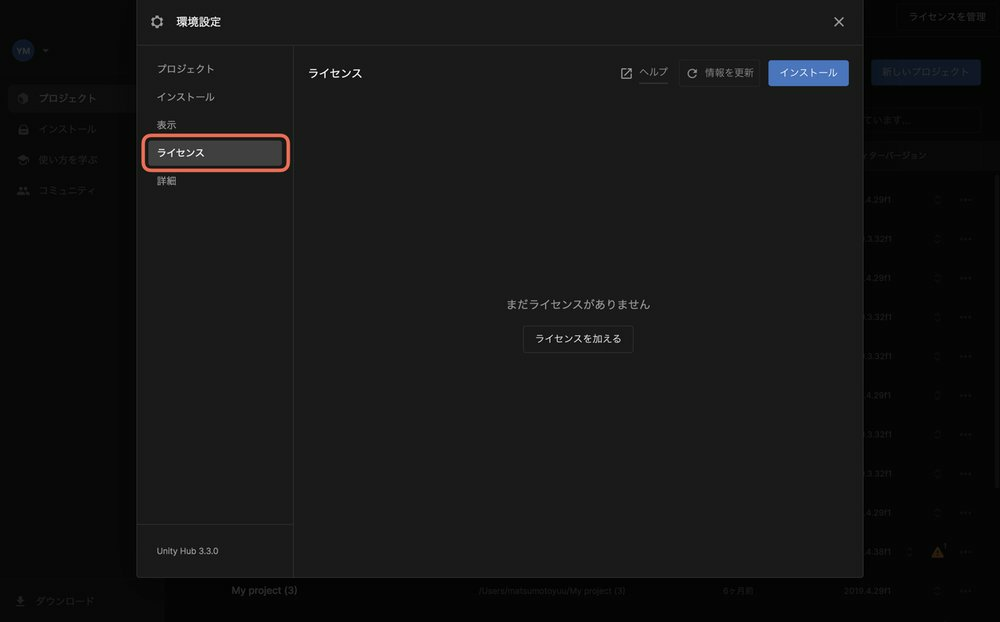
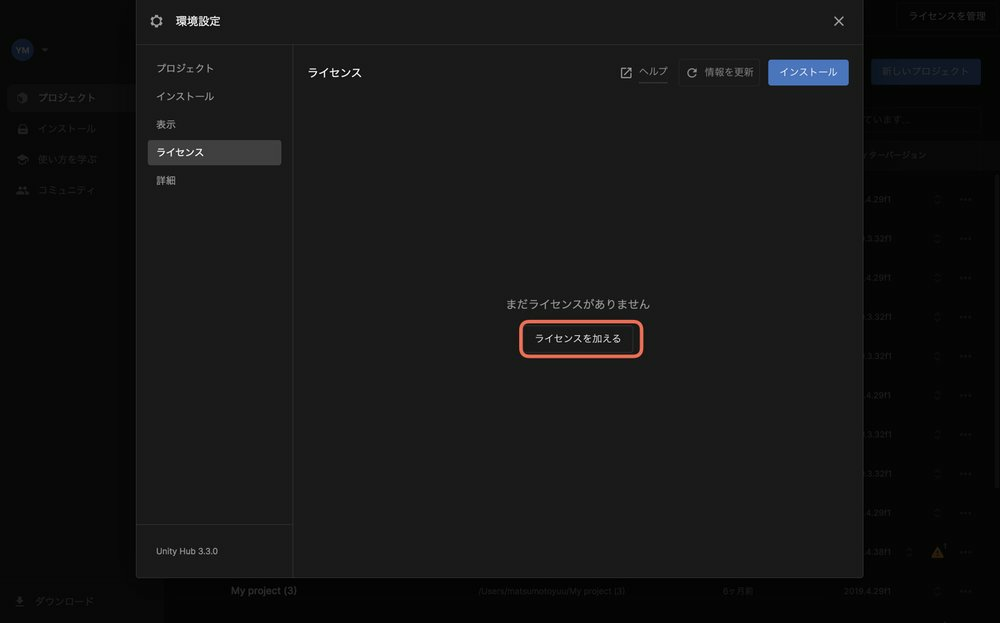
Click “Add license.”
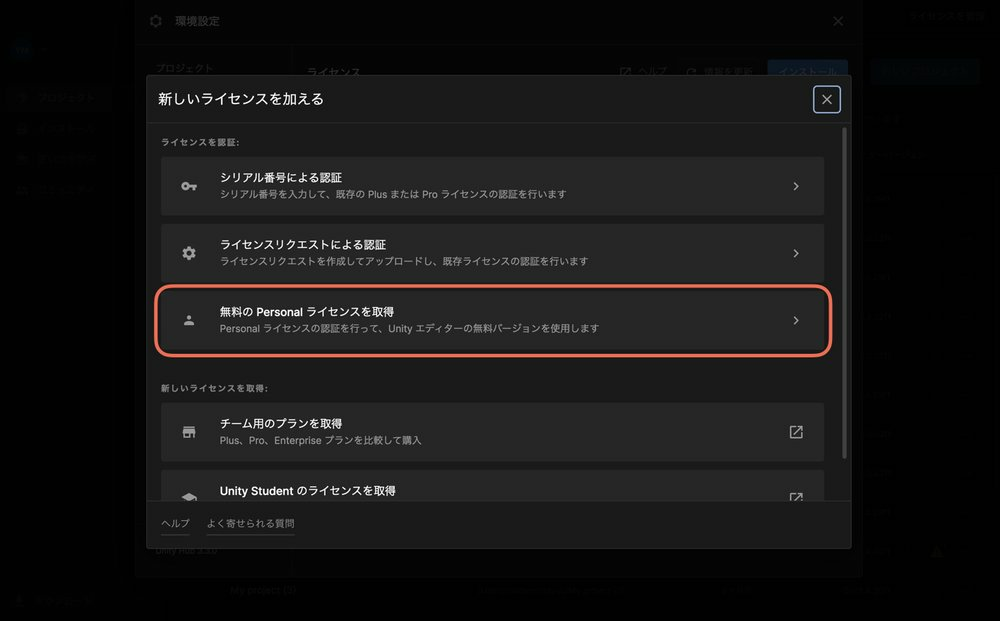
Select “Get a free Personal license.”
(Be sure to read the license details and choose the one that suits your needs.)
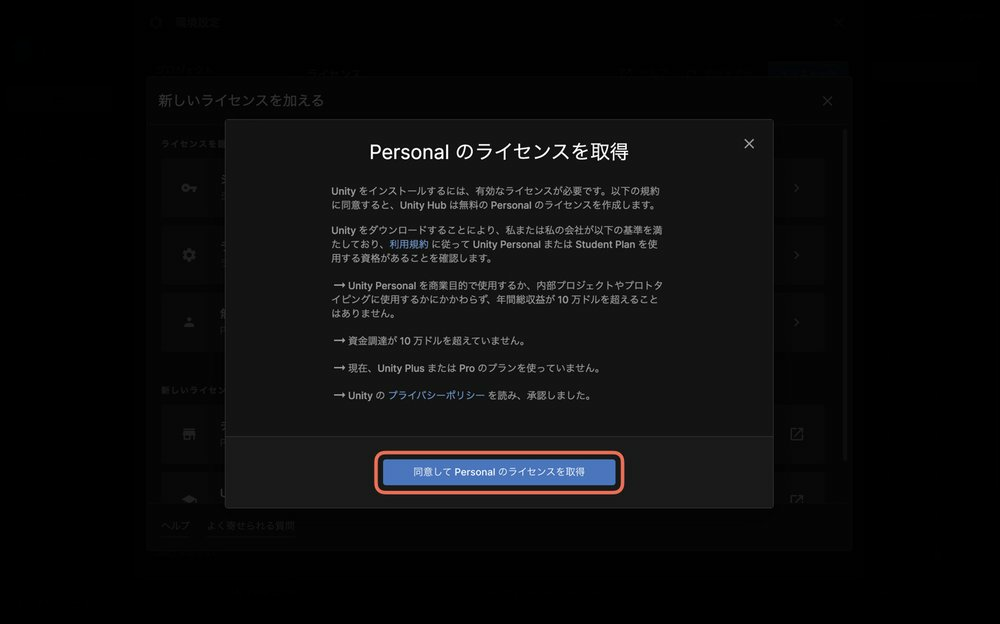
“Agree and get a Personal license”
Once the license is applied, the setup is complete.

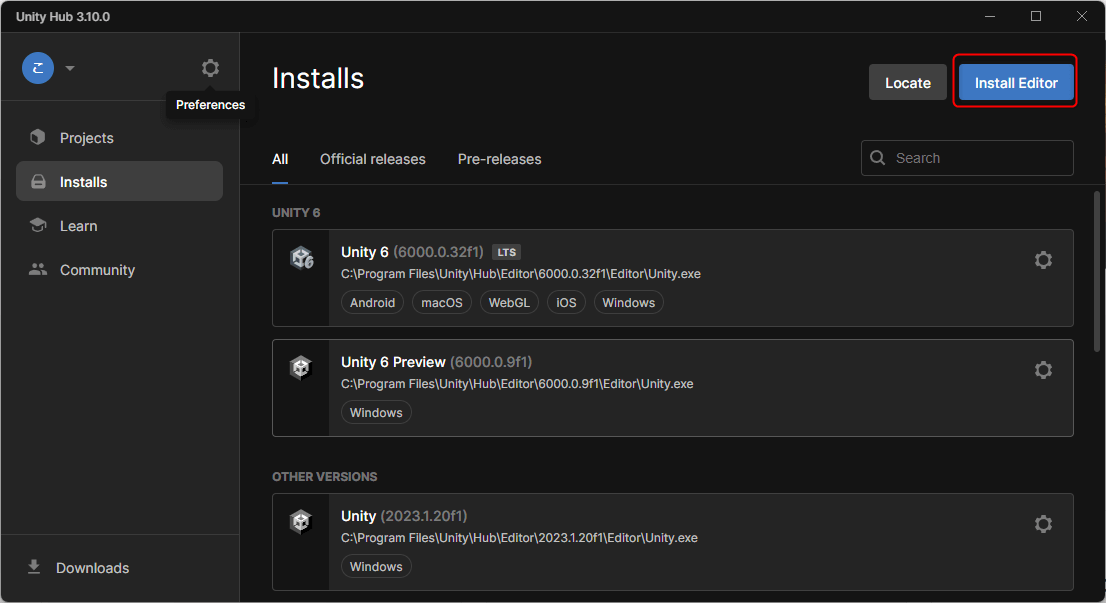
Installing Unity
Next, install Unity. Open the “Installs” section. Here you can manage the installation of the Unity Editor itself.
Normally, when installing Unity via Unity Hub, you can click the “Install” button.
To install the STYLY-recommended version, visit the archive page below.
Please check the supported versions for STYLY at the link below.
STYLY Plugin for Unity DOWNLOAD
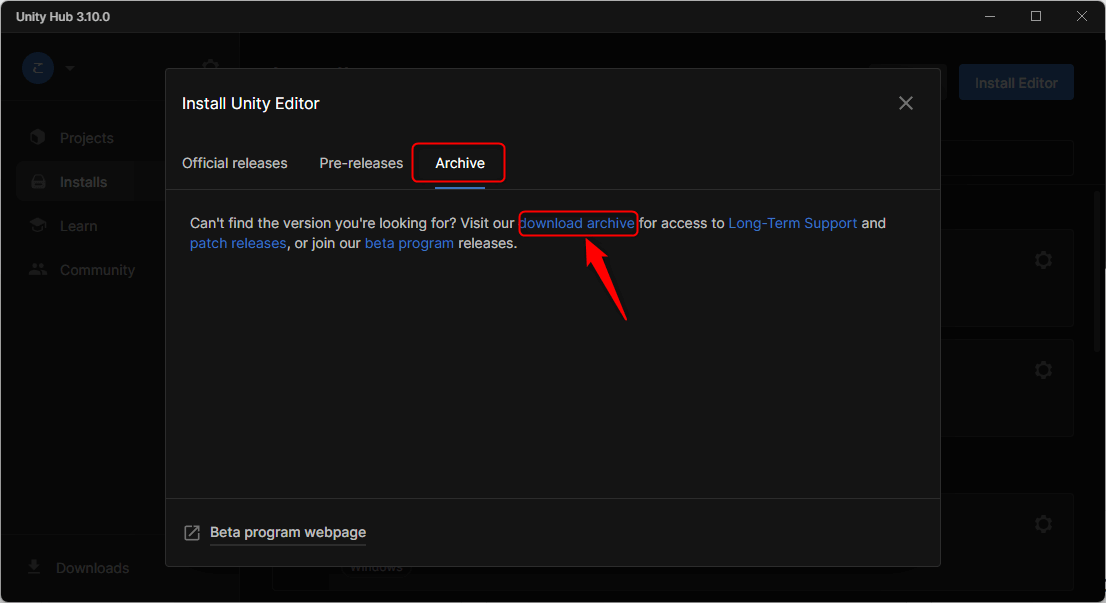
Open the download archive and click the “INSTALL” button. 
This will open Unity Hub and a dialog to download and install the desired version will appear. Follow the steps to proceed.
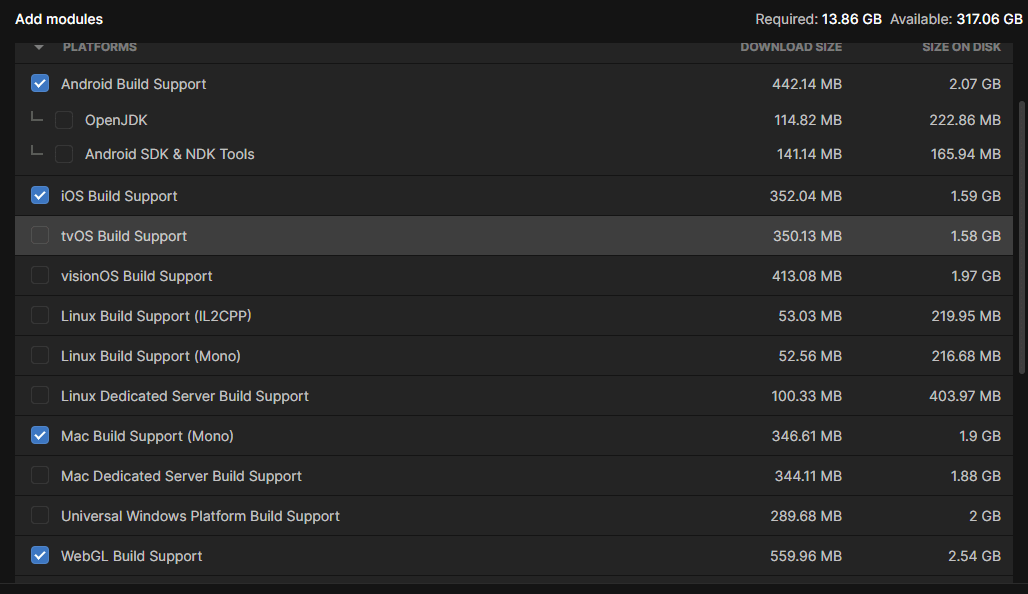
Check the modules required for uploading to STYLY.
- Windows Build Support (If you are using Windows, this is installed by default, so the checkbox will not appear.)
- Mac Build Support (If you are using macOS, this is installed by default, so the checkbox will not appear.)
- Android Build Support
- WebGL Build Support
- iOS Build Support
Using Unity Hub
To upload prefabs or scenes from Unity to STYLY, five modules need to be pre-installed.
Be sure to check them! (Even if you forget to check them here, you can add them later.)
Other modules are not required for using STYLY, so you can uncheck them all. However, it’s also fine to install them if you want.
Click the “INSTALL” button to begin installation.
The selected Unity version will appear in the installs section, along with a progress meter showing the installation status.
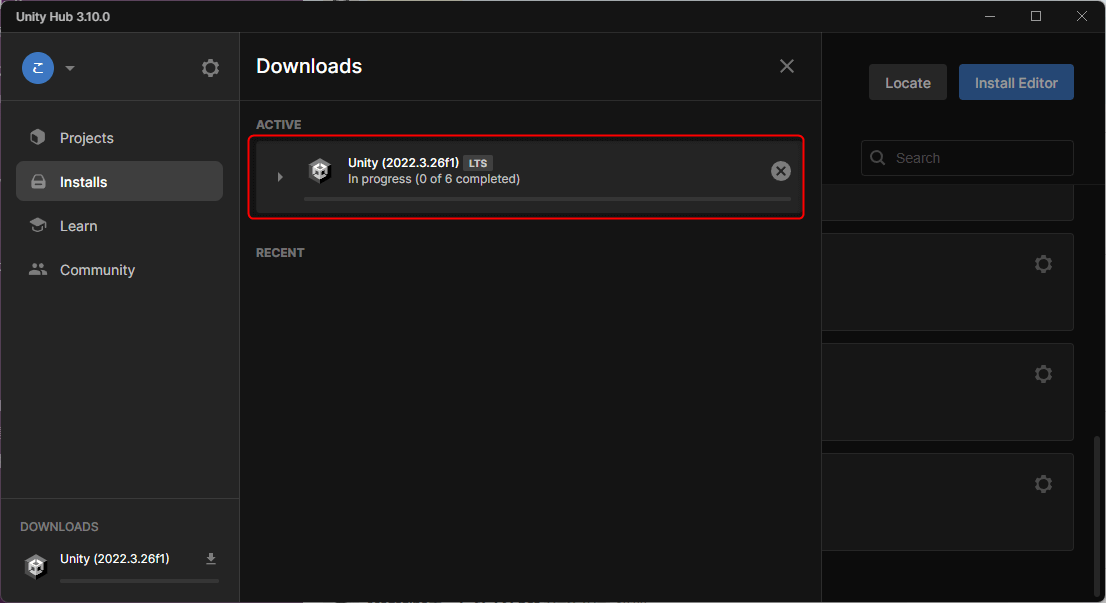
Each module will be downloaded and installed, so it may take some time. Once complete, the progress meter will disappear, and icons for the installed modules should be displayed.
This completes the Unity installation.
How to Use the Unity Editor
Creating a New Project
A project is a unit that manages assets created in Unity, scenes (explained later), and other files related to the project.
Launch Unity Hub.
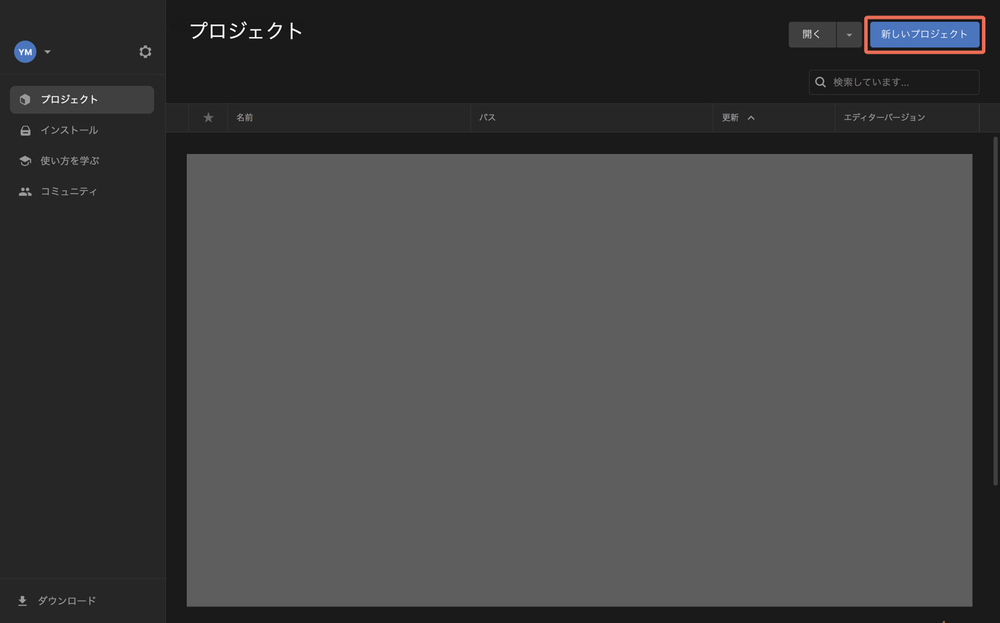
Click “New Project” in the upper right. A window labeled “Create a new project with Unity 2019.4.29f1” will appear.
For Templates, select 3D. (3D is selected by default, so you can leave it as is.)
Project Name is the name of your project. You can rename it to whatever you like. Use half-width alphanumeric characters.
Location is the save location for your project. Set it to your preferred location.
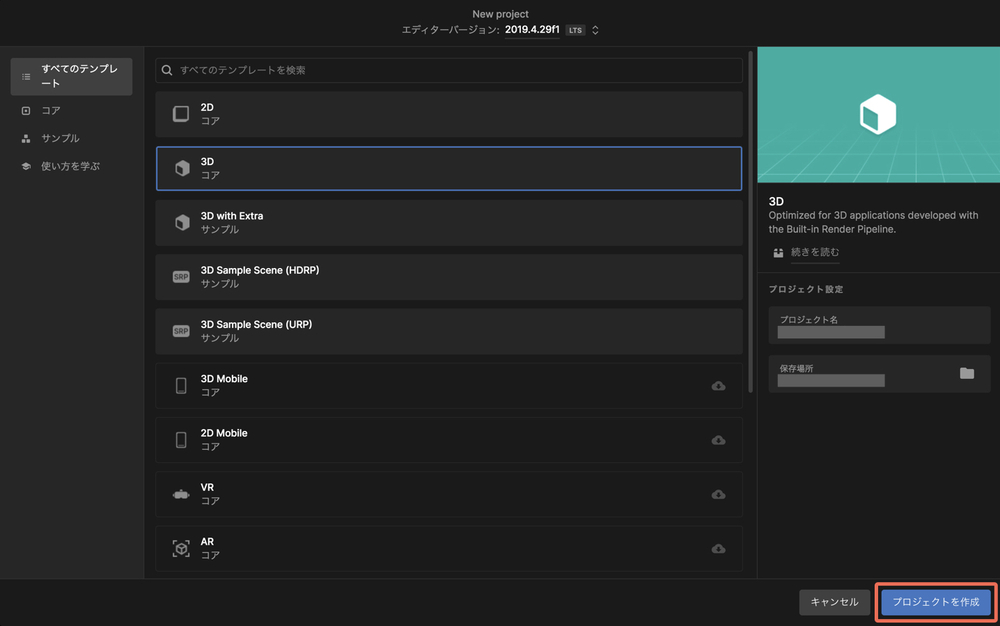
Click CREATE. After a short wait, the Unity project will launch.
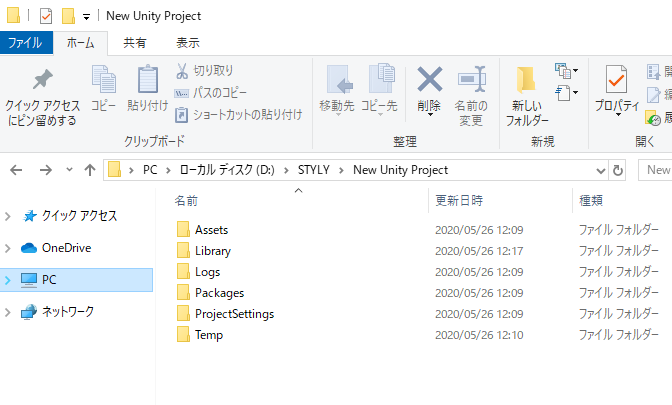
A folder (named after your project) will be created at the save location. This folder contains the data that makes up the Unity project.
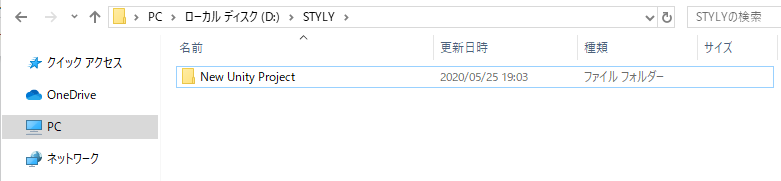
The contents under the project folder (e.g., New Unity Project) are structured as shown. For now, just get familiar with the folder structure.

Recommended Layout
Here’s a recommended screen layout.
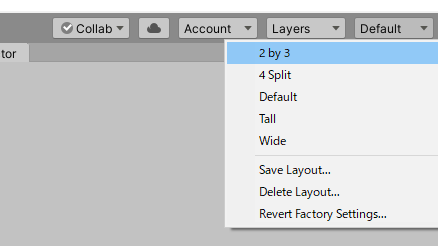
Click “Layout” in the upper right and select “2 by 3.”
The layout will switch to “2 by 3.”
About the Windows
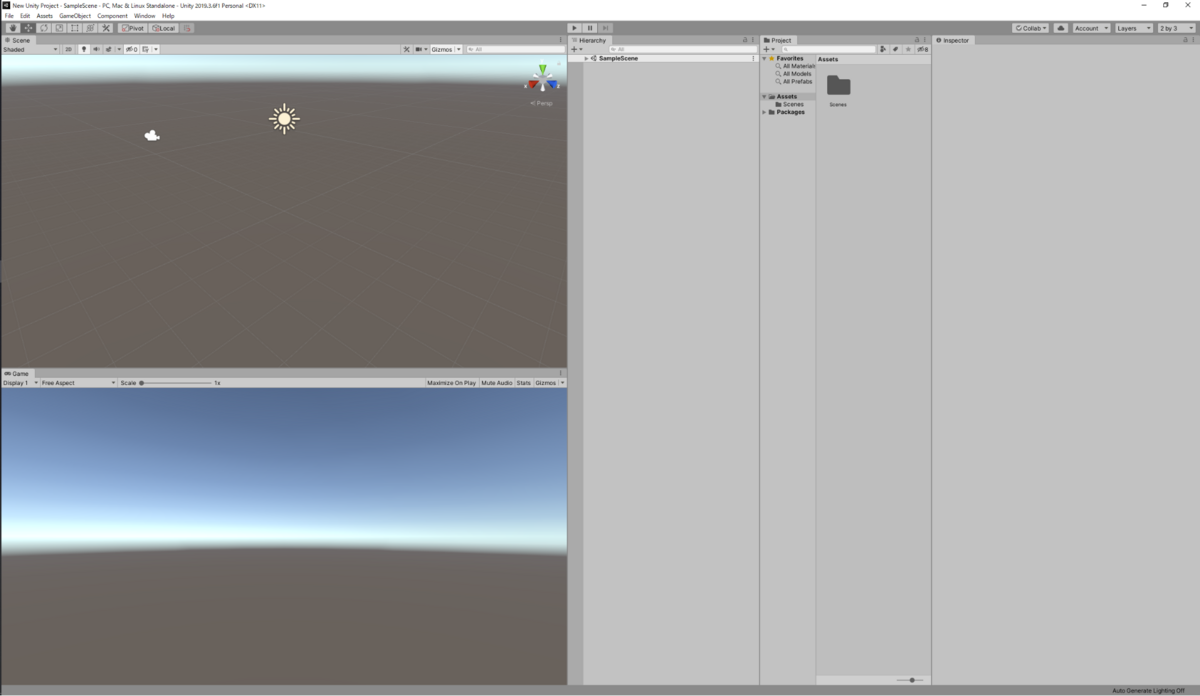
Let’s explain the five main windows.
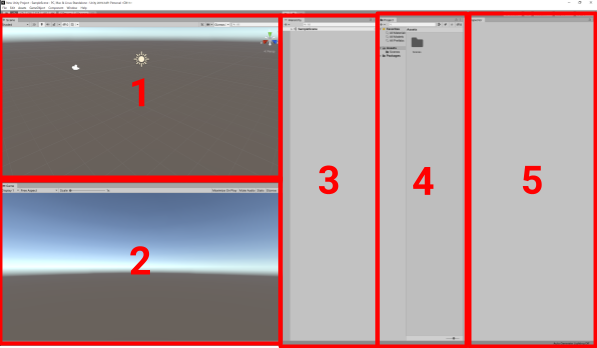
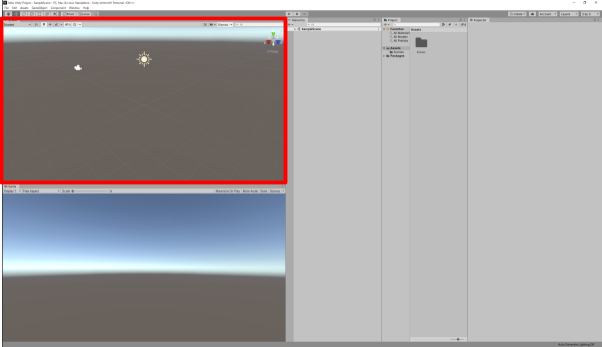
Scene View
In the Scene View, you can place and move objects within the scene. You can also freely change the viewpoint and angle.
A scene is the space in which you create content.
STYLY scenes and Unity scenes are different. However, scenes created in Unity can be uploaded to STYLY and used as they are.
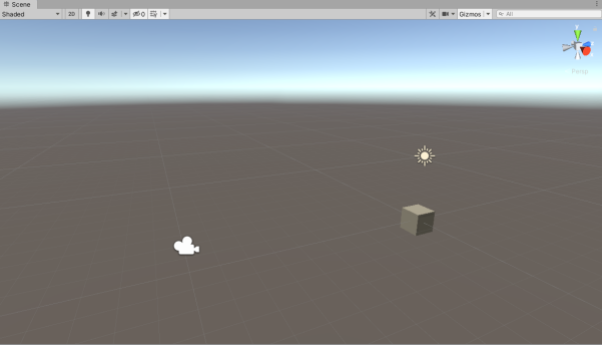
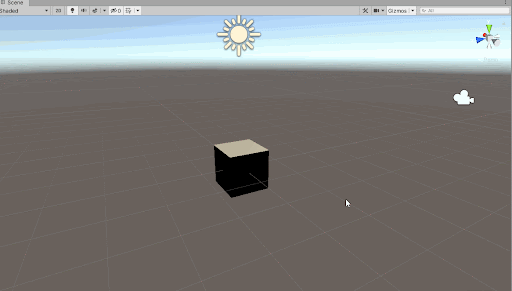
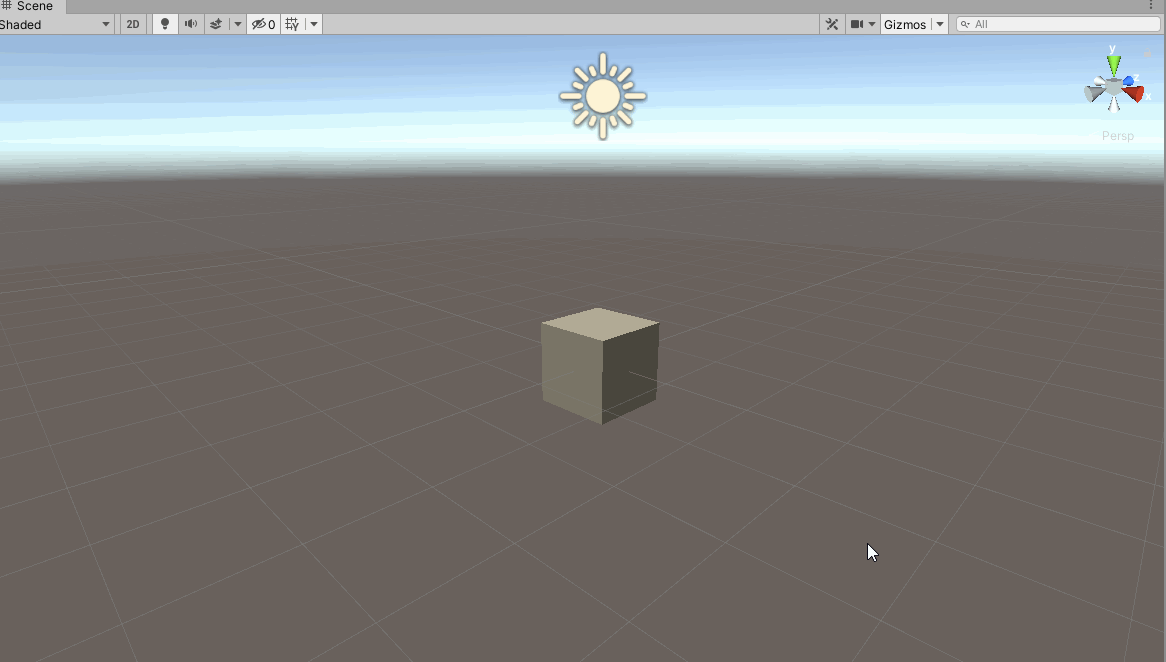
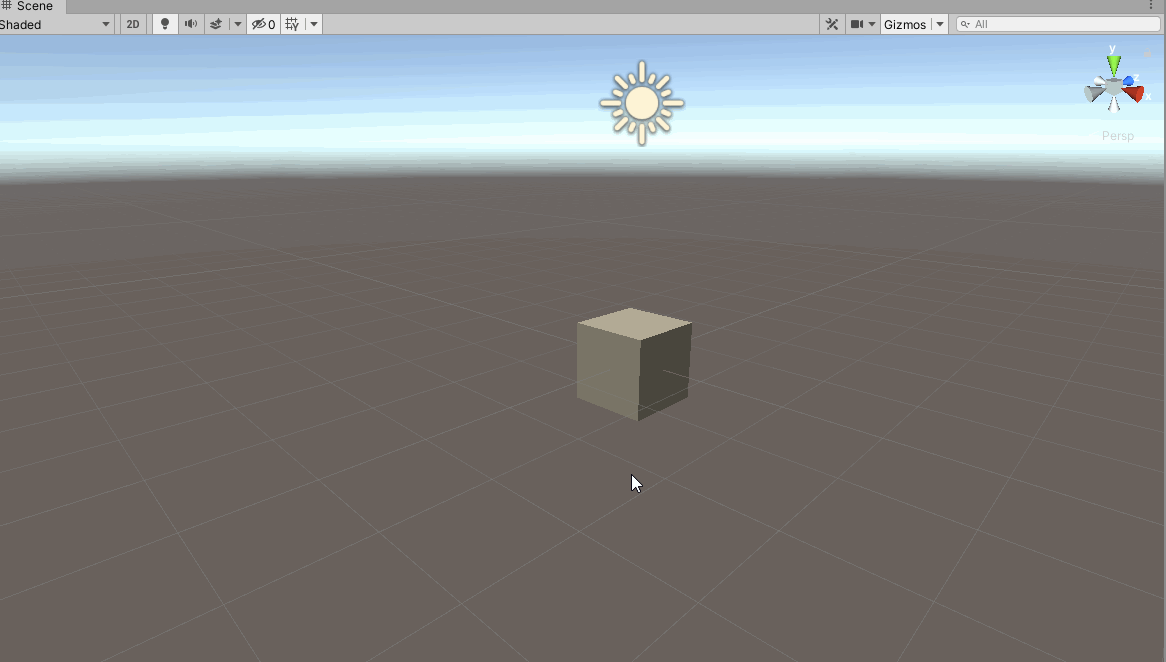
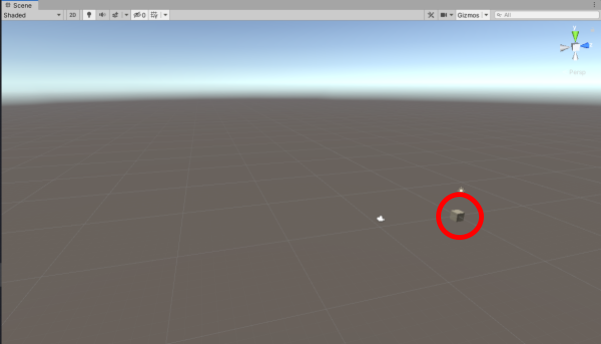
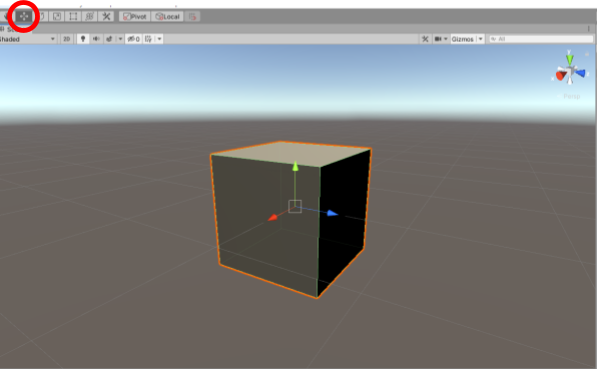
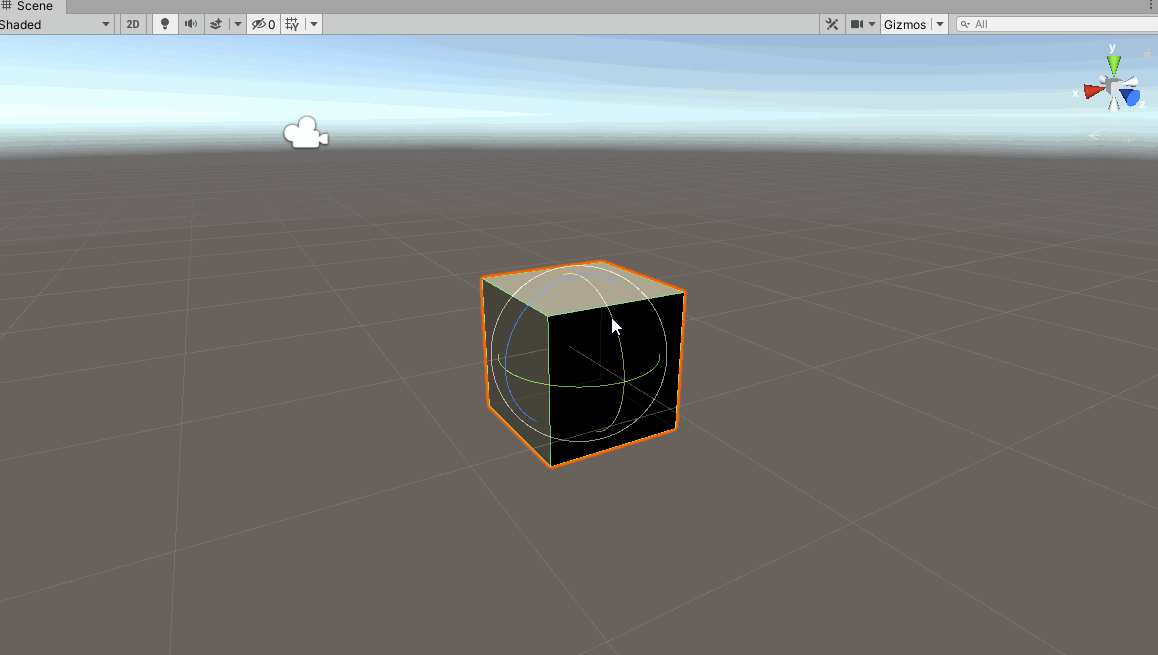
Let’s add a Cube to the scene.
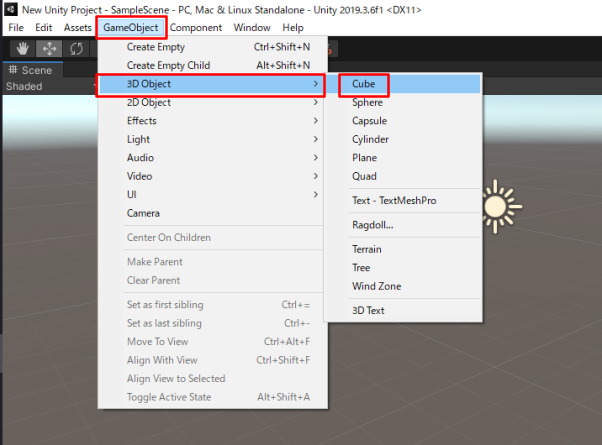
From the top-left menu, click GameObject → 3D Object → Cube.
The Cube (a cube shape) will appear in the Scene View.
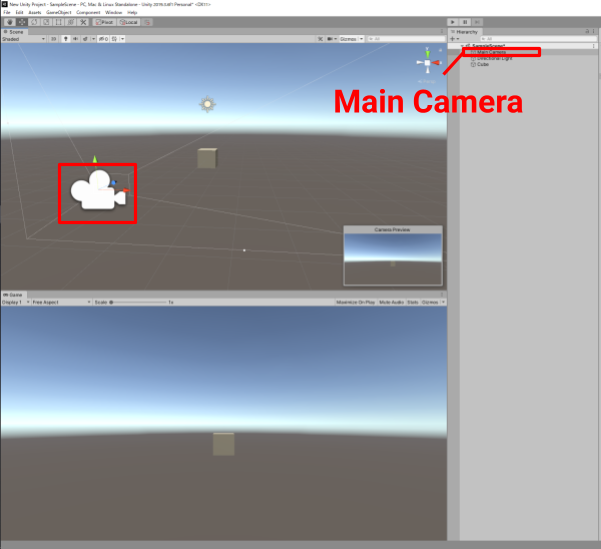
Game View
The Game View displays what the actual game will look like. You cannot move objects inside the Game View. Instead, move them in the Scene View and check them in the Game View — this is the basic Unity workflow.
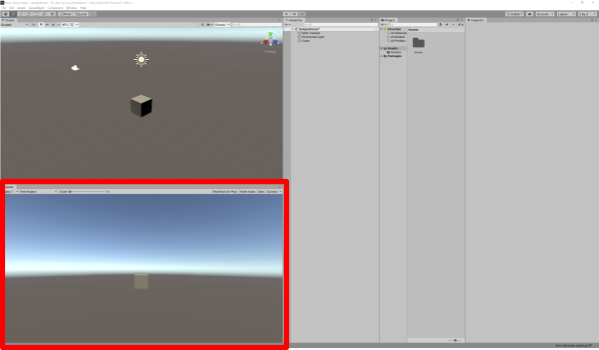
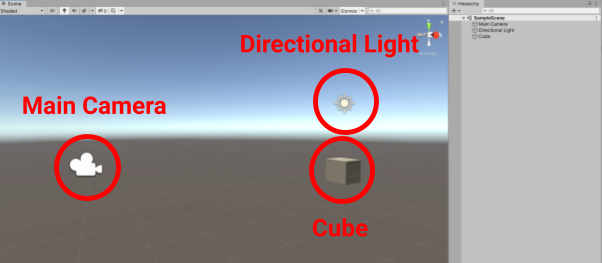
The perspective shown in the Game View is what is visible through the Main Camera placed in the scene.
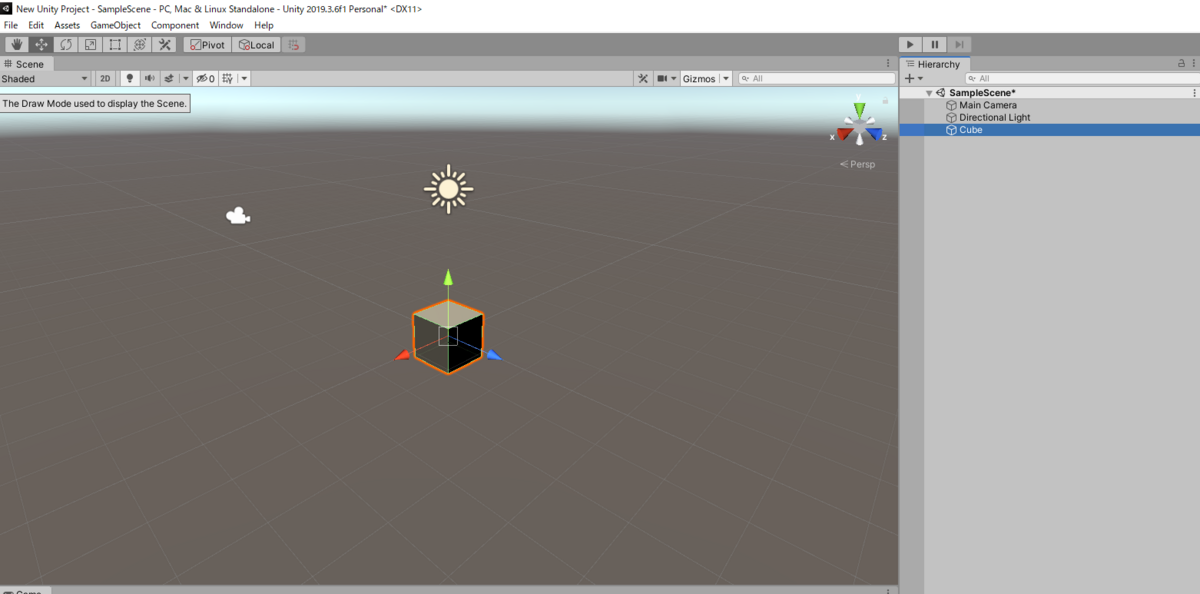
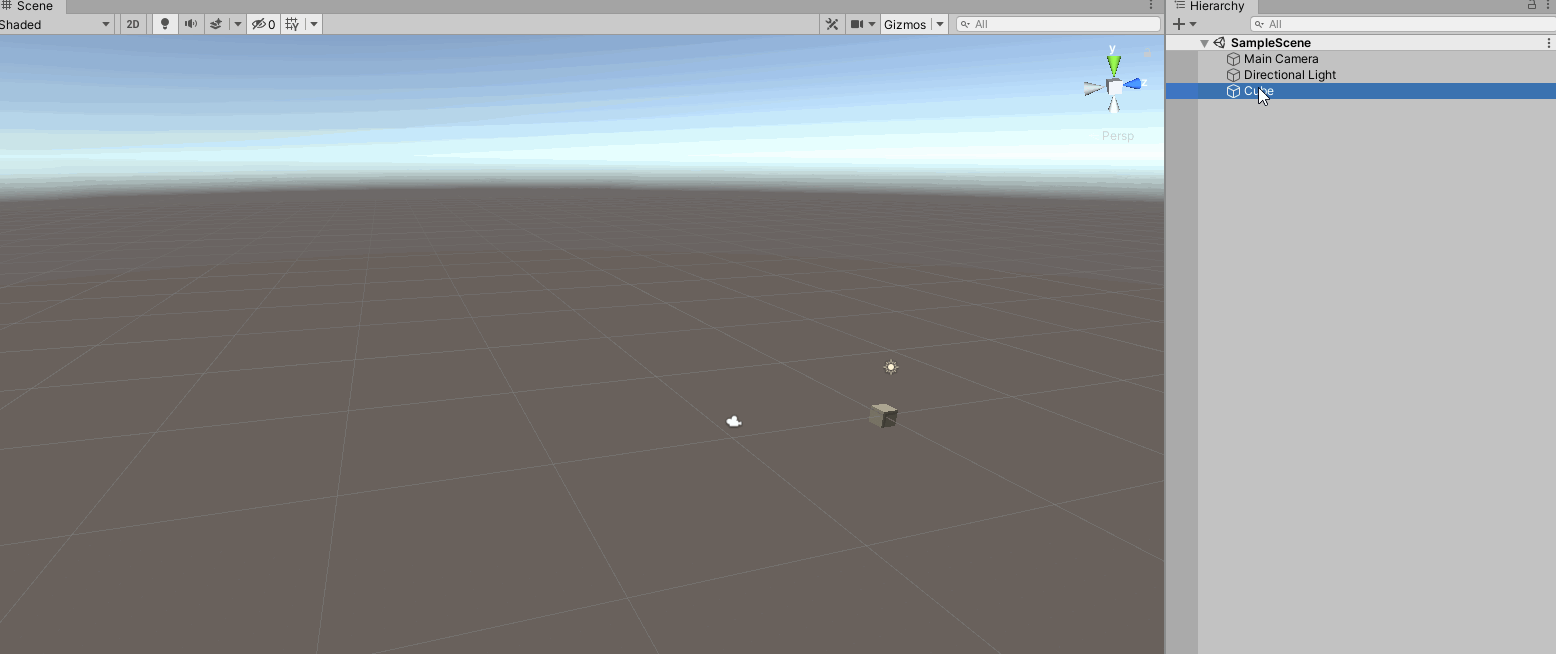
Hierarchy Window
This window shows a list of all objects in the scene.
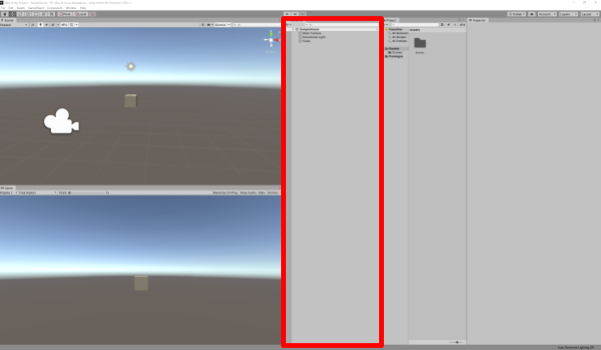
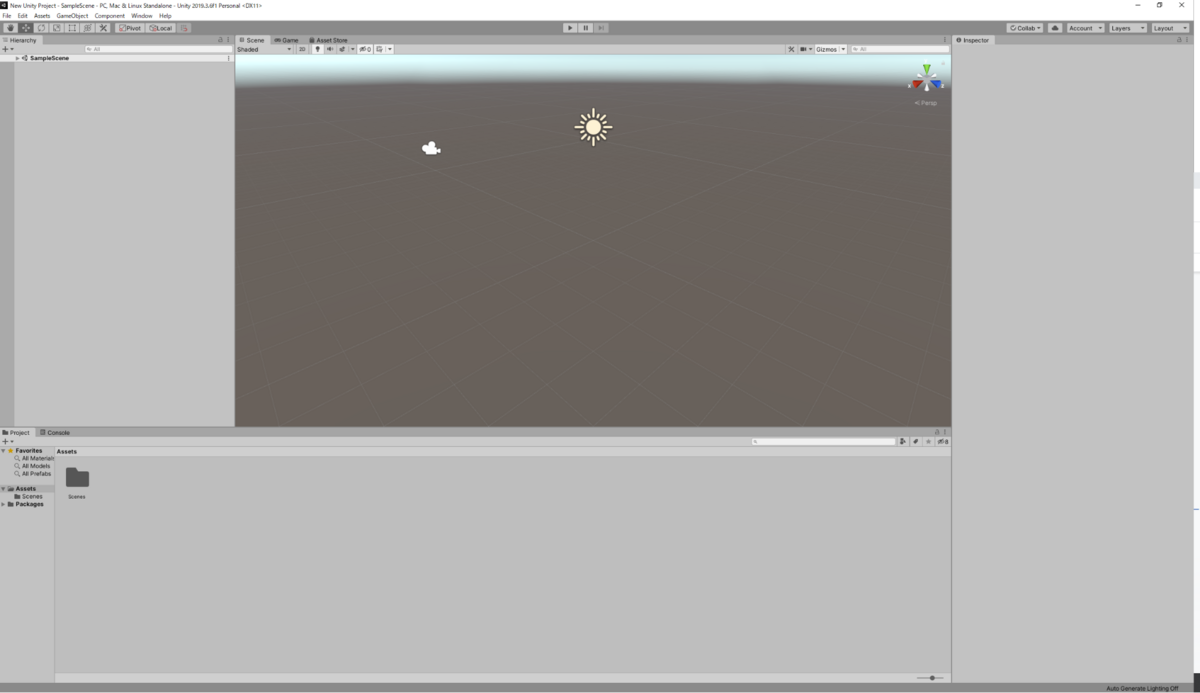
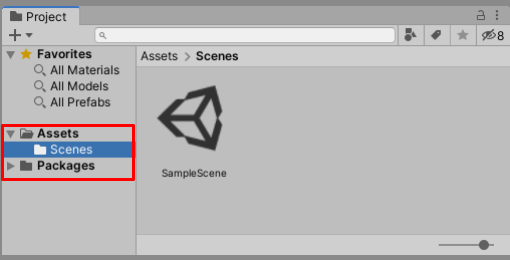
The current scene name is SampleScene. This scene is automatically created when a new project is made. Below that, you’ll see the Cube you created earlier. The Main Camera and Directional Light are included by default.
In the Hierarchy Window (hereafter referred to as Hierarchy), you can copy/paste, rename, and organize objects.
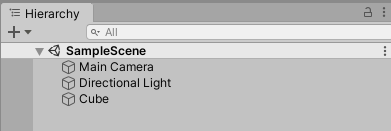
Objects in the Hierarchy can be viewed in the scene.
Project Window
This window stores all the assets needed for your game. As mentioned earlier, in Unity, images and 3D models are referred to as assets.
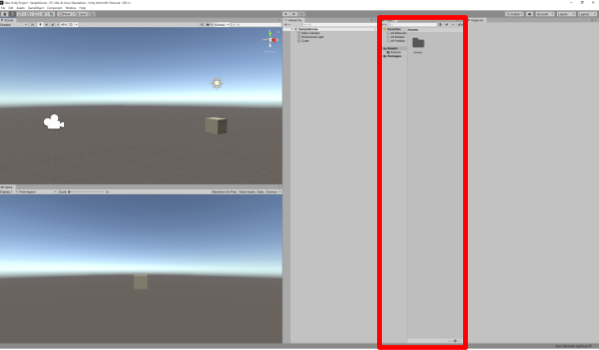
You can import assets such as images from outside Unity and add them to the Hierarchy. At the very bottom, you’ll see the folder structure and file extensions displayed.

The contents of the Project Window and those under “New Unity Project” are the same.
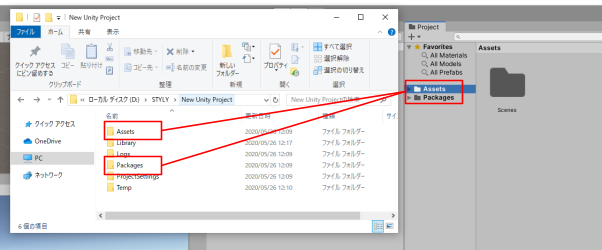
When creating a Unity project, the Assets folder (hereafter, Assets) and Packages folder (hereafter, Packages) are created.
If you want to create folders or add assets, do so under the Assets folder.
Right-click Assets and select “Show in Explorer” (Windows) / “Reveal in Finder” (macOS).
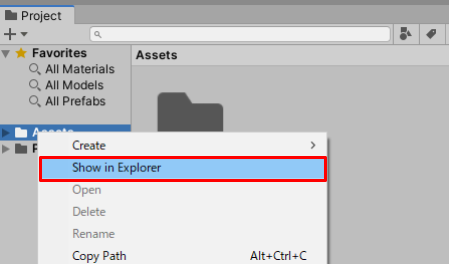
On Windows, it’s “Show in Explorer”
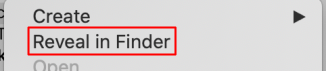
On macOS, it’s “Reveal in Finder”
The contents of the Project Window will be shown in File Explorer (Windows) / Finder (macOS).
In File Explorer (Windows) / Finder (macOS), do not delete, rename, or move files within the project.
If you change something, the project may stop working, so be careful.
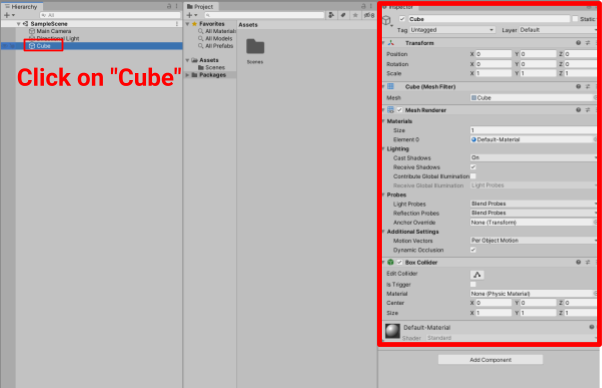
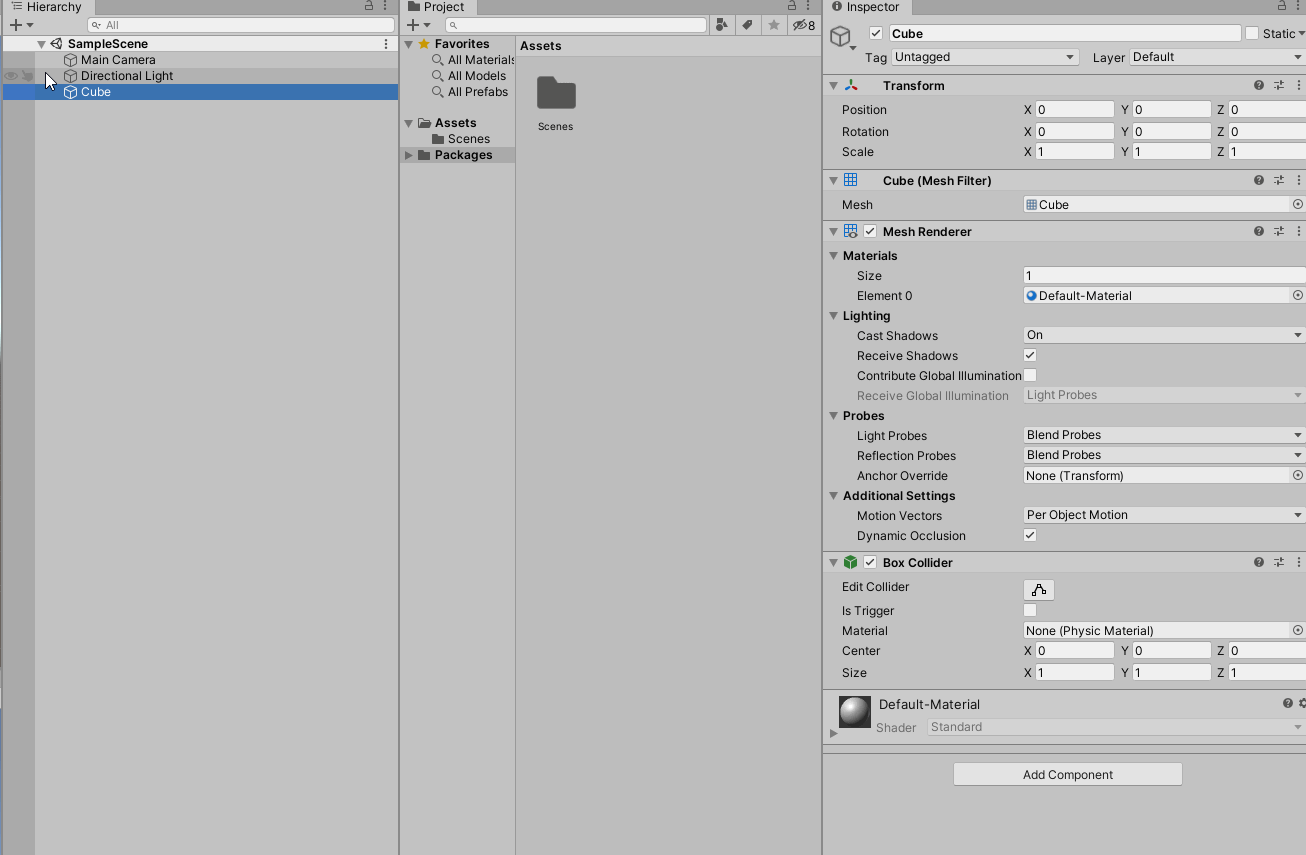
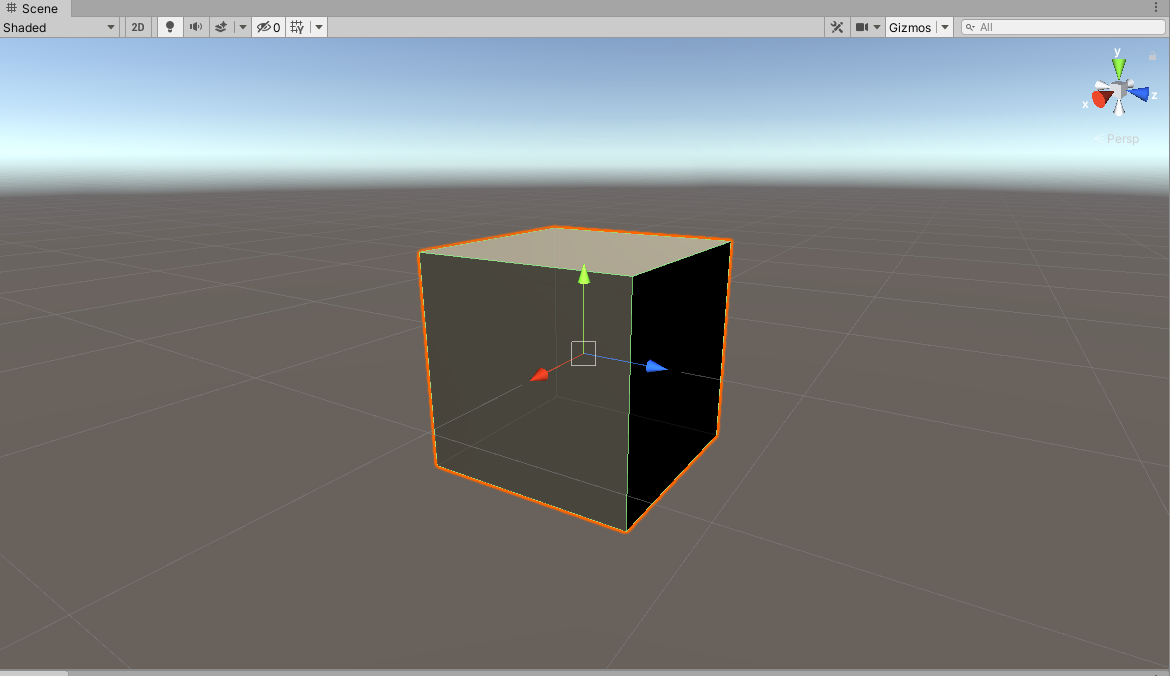
Inspector Window
This window displays detailed information about objects in the Scene or Project windows. You can view and edit attributes such as size, position, collision detection, and physics controls.
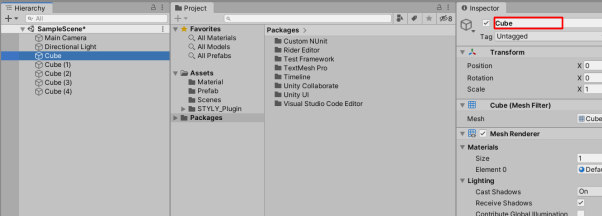
Click the Cube in the Hierarchy. The Inspector Window (hereafter referred to as Inspector) will show information such as the Cube’s size and position.
Try clicking Main Camera and Directional Light in the Hierarchy as well. You’ll see the content in the Inspector change accordingly.
Scene View Camera Controls
When creating a game, you’ll need to view the Scene View from various angles. Use your mouse and keyboard to change the Scene View camera perspective.
If your mouse cursor isn’t over the Scene View, you won’t be able to control the view. Make sure your cursor is over the Scene View when operating it.
Rotation
The view rotates around the center.
How to operate:
- 3-button mouse
- Alt + Left Click + Drag (on macOS, use Option instead of Alt)
- 2-button mouse or trackpad
- Alt + Left Click + Drag (on macOS, use Option instead of Alt)
- 1-button mouse or trackpad on macOS
- Option + Command + Left Click + Drag
Zoom In / Out
Zoom in and out of the view.
How to operate:
- 3-button mouse
- Use scroll wheel or Alt + Right Click + Drag (on macOS, use Option instead of Alt)
- 2-button mouse or trackpad
- Alt + Right Click + Drag (on macOS, use Option instead of Alt)
- 1-button mouse or trackpad on macOS
- Swipe with two fingers to zoom in/out, or Option + Command + Left Click + Drag
Panning
Pans the view.
How to operate:
- 3-button mouse
- Alt + Middle Click + Drag (on macOS, use Option instead of Alt)
- 2-button mouse or trackpad
- Alt + Control + Left Click + Drag (on macOS, use Option instead of Alt)
- 1-button mouse or trackpad on macOS
- Option + Command + Left Click + Drag
Focus
While editing the scene, objects may move far away or disappear from view.
The Focus feature is helpful in such cases.
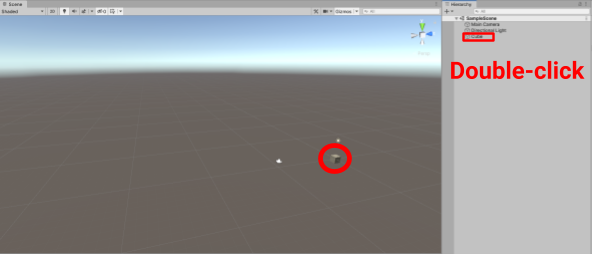
Double-click the Cube in the Hierarchy.
The Cube is now centered in the Scene View.
This is useful when your object disappears while working—remember it!
Summary
There are various ways to change the view, but first, learn these 4 basic operations:
- Rotate
- Alt key (Windows) / Option key (macOS) + Left Click + Drag
- Zoom In/Out
- Scroll the mouse wheel
- Pan
- Press and drag the mouse wheel
- Focus
- Double-click the object
Manipulating GameObjects
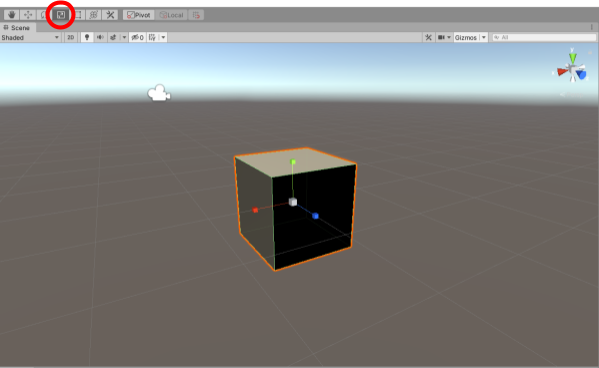
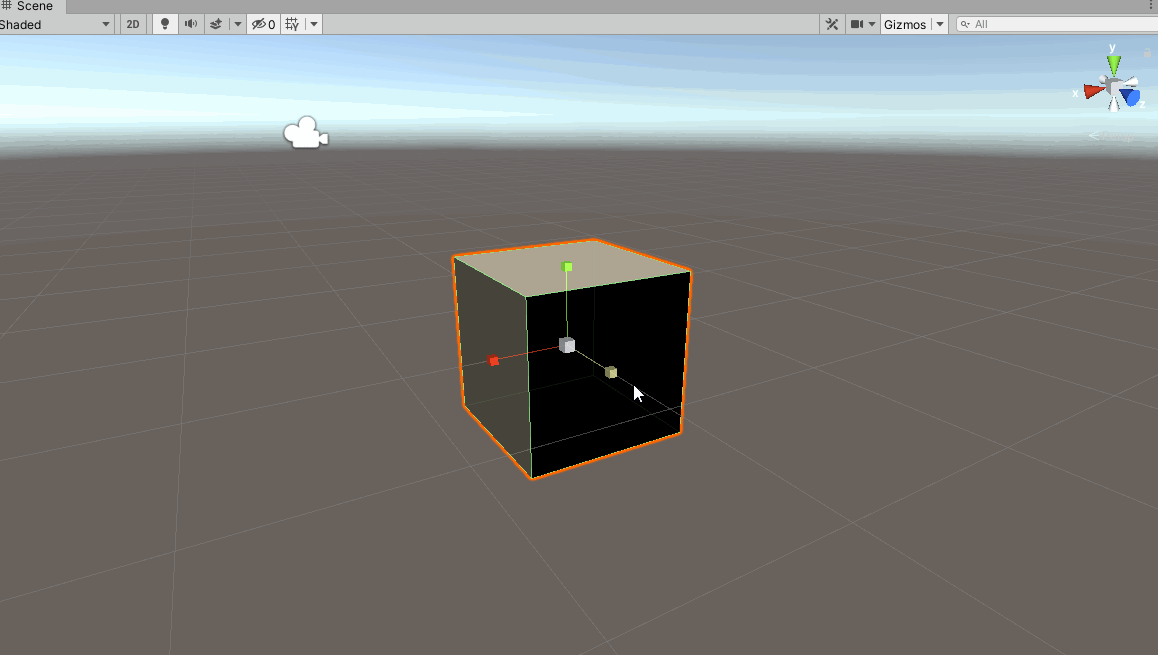
Move Mode
When you select a Cube, red, blue, and yellow arrows appear. These are gizmos used to manipulate the object.
There are three gizmo modes. Switch between them using the toolbar at the top of the Scene View.
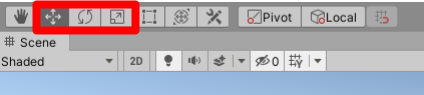
Select the Move Tool from the top-left menu (or press the W key) to enter move mode.
A gizmo with arrows along the X, Y, and Z axes appears.

Click and drag an arrow with the left mouse button to move the object in that direction.
Rotate Mode
Select the Rotate Tool from the top-left menu (or press the E key) to enter rotate mode.
A gizmo with rings around the X, Y, and Z axes appears.

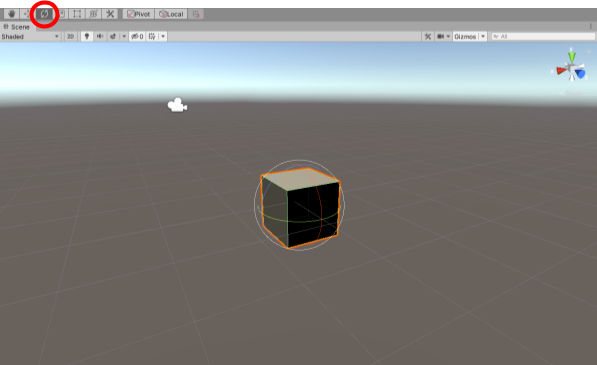
Click and drag a ring with the left mouse button to rotate around that axis.
Scale Mode
Select the Scale Tool from the top-left menu (or press the R key) to enter scale mode.
A gizmo with boxes along the X, Y, and Z axes appears.

Click and drag a box with the left mouse button to scale in that direction.
Using shortcut keys is more convenient than switching modes via the menu, so try to remember them:
- Move
- W key
- Rotate
- E key
- Scale
- R key
Resetting the Transform
If you want to revert your changes to a GameObject, reset its transform.
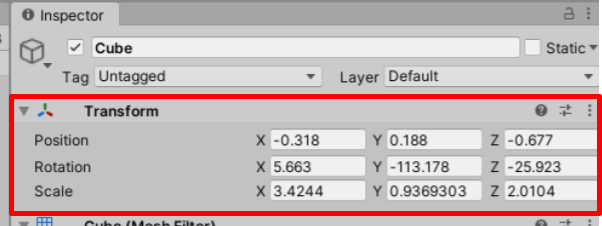
Select the Cube and check the Transform component in the Inspector.
Each element that makes up the Cube is called a component (detailed explanation will come later).
The Transform component defines an object’s position, rotation, and scale. All GameObjects have this basic component.
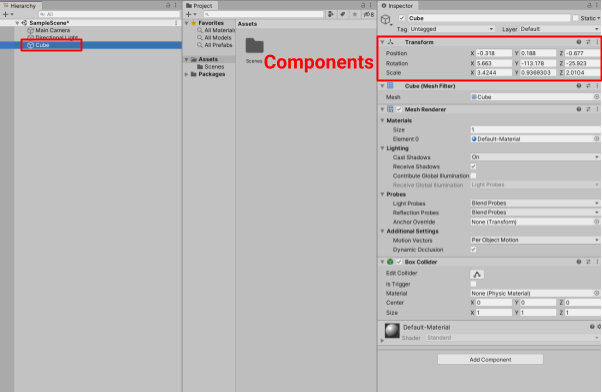
The Position parameter controls location, Rotation controls angle, and Scale controls size.
Each has X, Y, and Z axes.
If the values are messy, reset them.
Open the Transform context menu and click “Reset.”
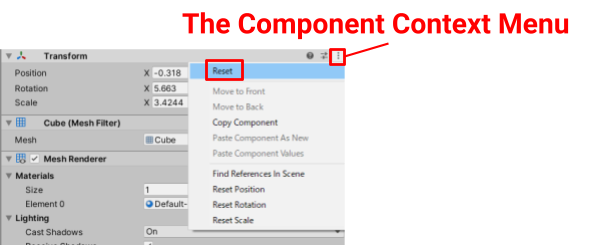
Position, Rotation, and Scale are instantly reset.
The Cube has returned to its default state.
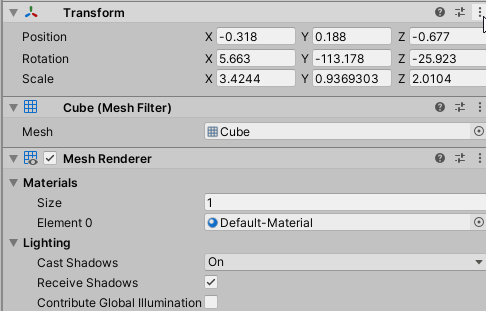
Default Transform values:
|
Transform |
X |
Y |
Z |
|
Position |
0 |
0 |
0 |
|
Rotation |
0 |
0 |
0 |
|
Scale |
1 |
1 |
1 |
Copying and Renaming Objects
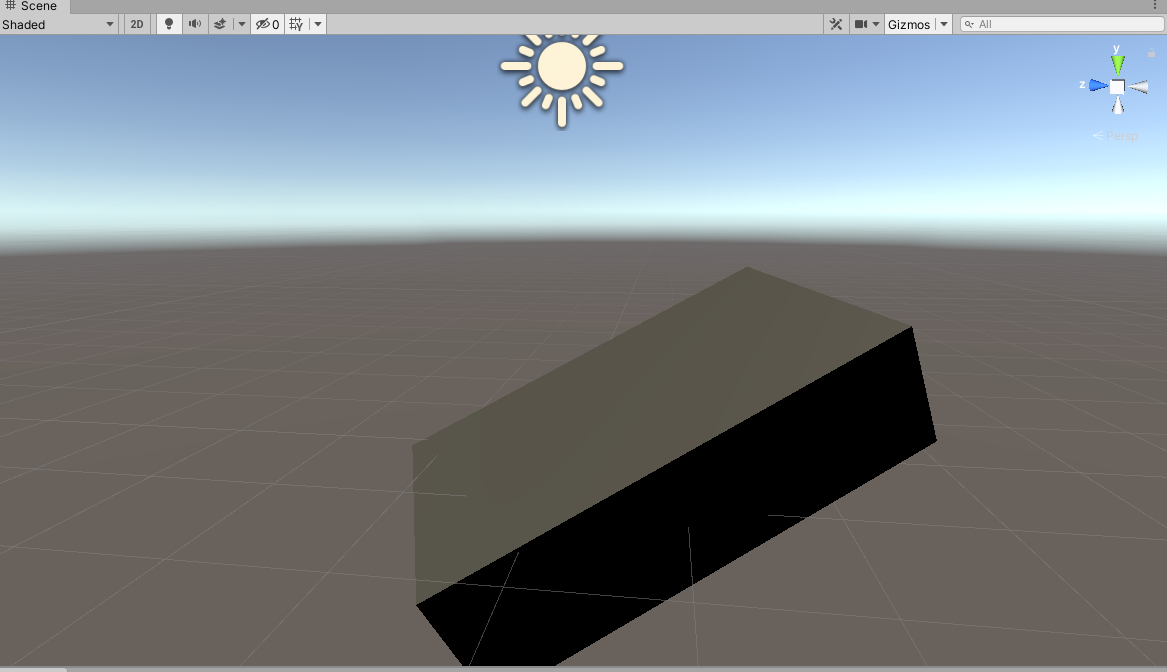
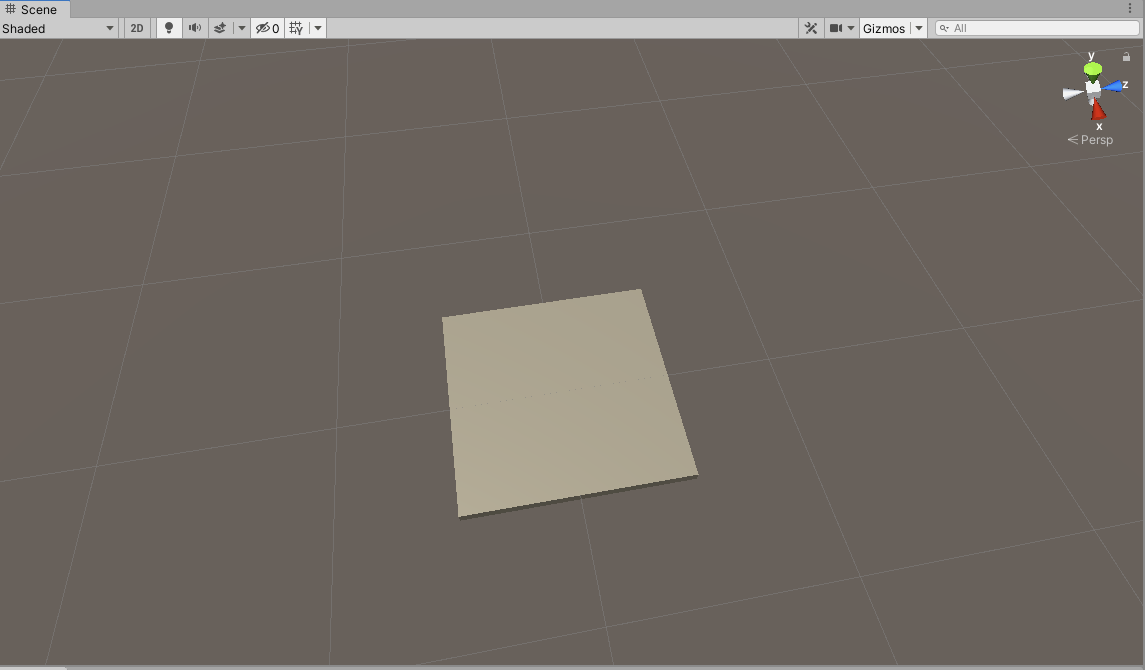
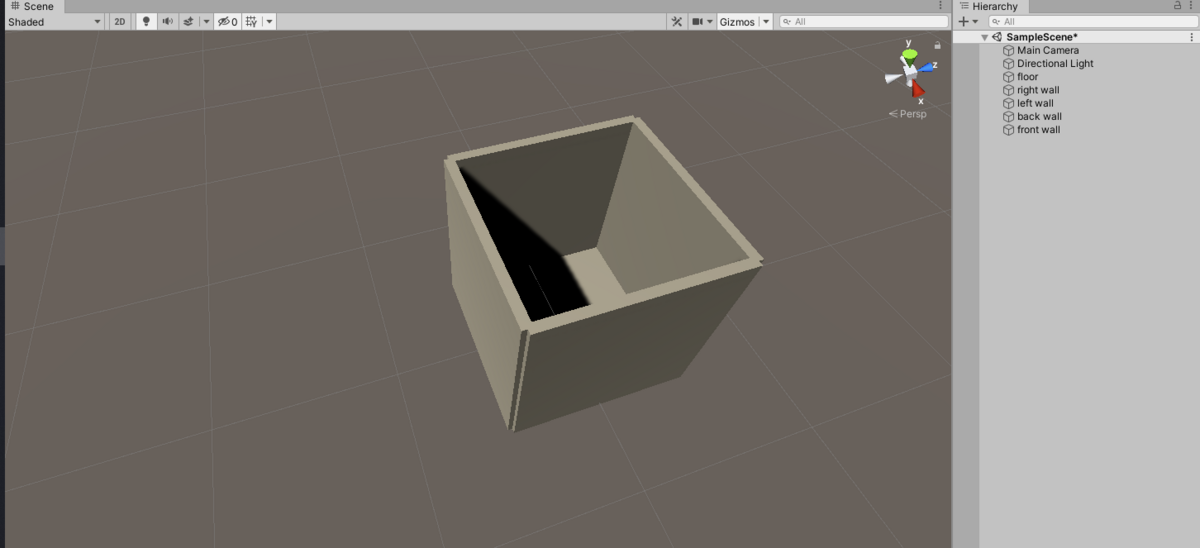
Let’s modify the Cube’s Transform to create a simple box.
Set the Cube’s Scale to ( X , Y , Z ) = ( 1 , 0.05 , 1 )
It now looks like a flat board.
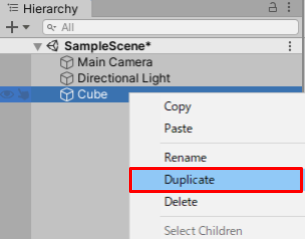
Right-click the Cube in the Hierarchy and select Duplicate to copy the Cube.
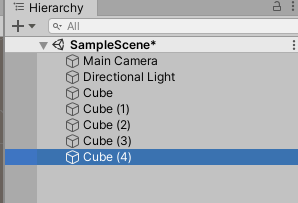
Now copy the Cube three more times.
Alternatively, you can copy and paste using the following commands:
|
OS |
Copy |
Paste |
|
Windows |
Ctrl + C |
Ctrl + V |
|
macOS |
Command + C |
Command + V |
Now you should have Cubes up to Cube(4).
Next, rename each Cube and update their Transform values based on the following table.
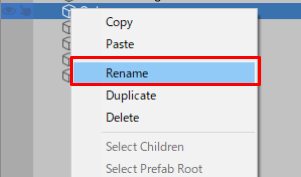
To rename an object, right-click the Cube in the Hierarchy and select Rename.
Or, change the object name directly from the top of the Inspector panel.
You can also use the following shortcut keys to rename:
|
Windows |
Select the object in Hierarchy and press F2 |
|
macOS |
Select the object in Hierarchy and press RETURN |
Now, rename the objects and update their Transform values according to this table:
|
Object Name |
Transform Type |
X |
Y |
Z |
|
Cube → floor |
Position |
0 |
0 |
0 |
|
Rotation |
0 |
0 |
0 |
|
|
Scale |
1 |
0.05 |
1 |
|
|
Cube(1) → right wall |
Position |
0 |
0.5 |
0.5 |
|
Rotation |
90 |
0 |
0 |
|
|
Scale |
1 |
0.05 |
1 |
|
|
Cube(2) → left wall |
Position |
0 |
0.5 |
-0.5 |
|
Rotation |
90 |
0 |
0 |
|
|
Scale |
1 |
0.05 |
1 |
|
|
Cube(3) → back wall |
Position |
-0.5 |
0.5 |
0 |
|
Rotation |
0 |
0 |
90 |
|
|
Scale |
1 |
0.05 |
1 |
|
|
Cube(4) → front wall |
Position |
0.5 |
0.5 |
0 |
|
Rotation |
0 |
0 |
90 |
|
|
Scale |
1 |
0.05 |
1 |
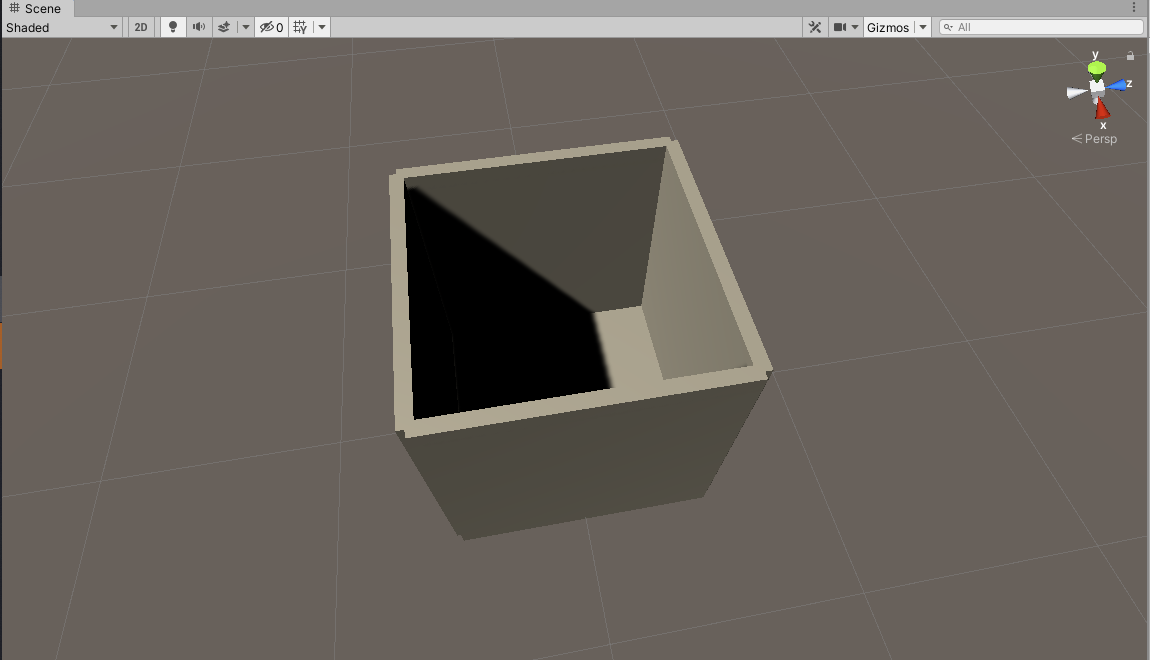
The box is complete once it looks like this.
Deleting Objects
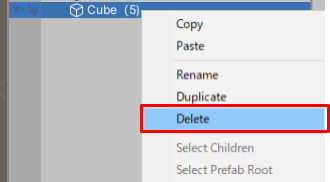
If you accidentally copied too many objects, you can delete them by right-clicking the Cube in the Hierarchy and selecting Delete.
You can also delete using these shortcuts:
|
Windows |
Select the object in the Hierarchy and press Delete |
|
macOS |
Select the object in the Hierarchy and press Command + Delete |
Undoing Actions
Select the floor object in the Hierarchy, switch to scale mode, and change it to any scale you like.
<figure style=”