 ゆるめるモ!VR衣装展示空間の作り方をご紹介します。第2弾は「ナイトハイキング」です。ナイトハイキングはゆるめるモ!のメンバが楽器を使って演奏する空間ですが、メンバ以外はGoogle polyだけで作ってます。Unity使用しないでSTYLY WebEditorのみでこの空間を作成することができます。では、前回と同じようにコンセプト設計~空間のディレクション、空間作成方法についてご紹介していきます。
コンセプト設計~空間ディレクション
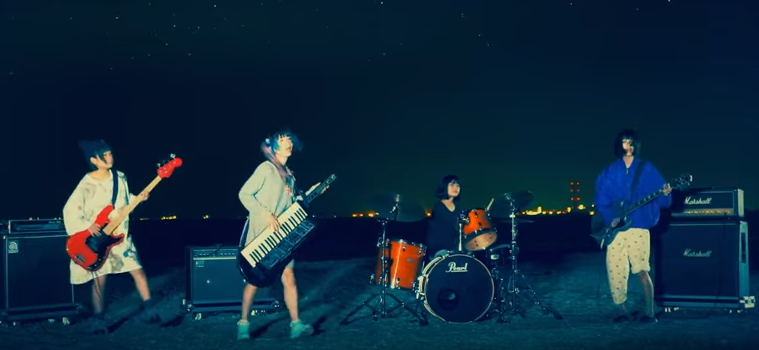
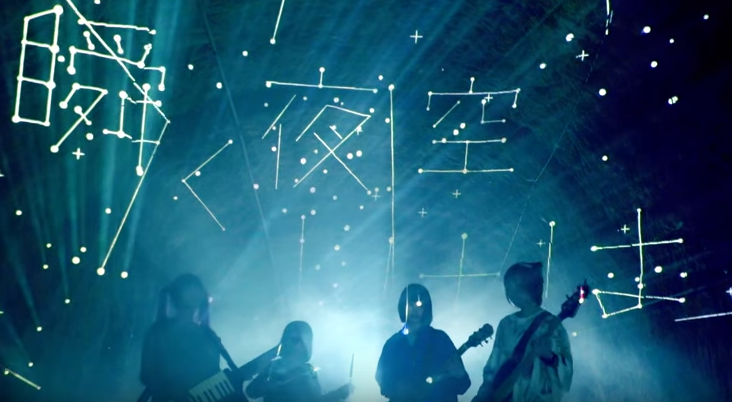
ゆるめるモ!(You’ll Melt More!)『ナイトハイキング』(Official Music Video)
ナイトハイキングのMVをそのままコンセプトにしました。(夏の夜にゆるめるモ!とナイトハイキングしたいのは、僕だけでしょうか。妄想乙)。今までなら妄想乙だったことがSTYLYでは実現できます。
動画1:55
動画3:59
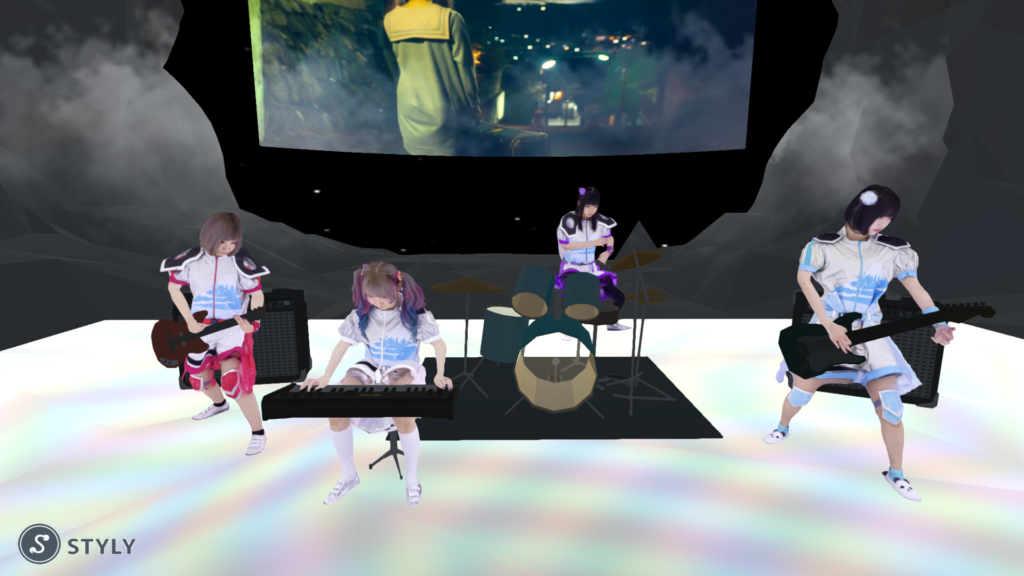
動画1:55のシーンと動画3:59のシーンを切り取り、星座の輝く洞窟の空間でゆるめるモ!が演奏するという空間に決めました。この空間は、ほぼGoogle Polyを使って作っていますのですぐ再現できると思います。では空間の作り方をご紹介します。
空間作成方法
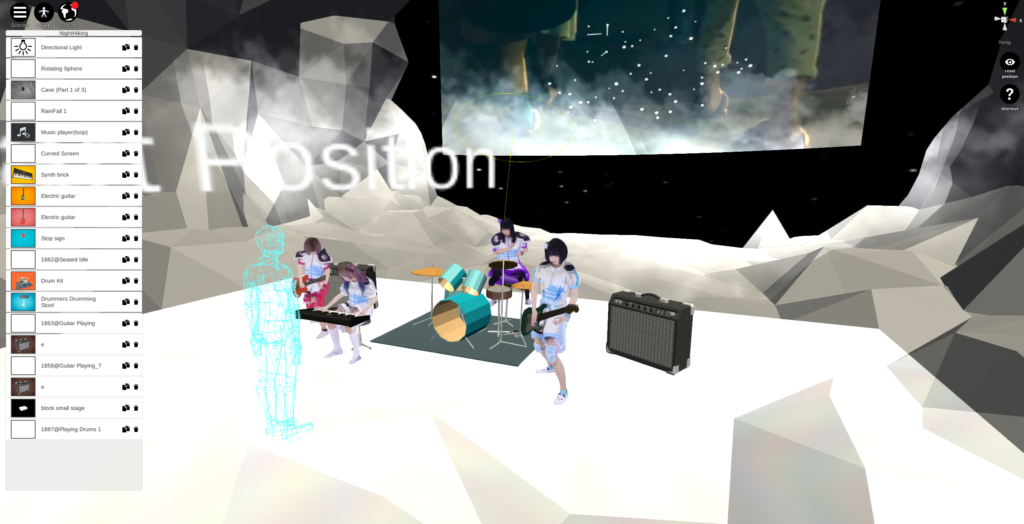
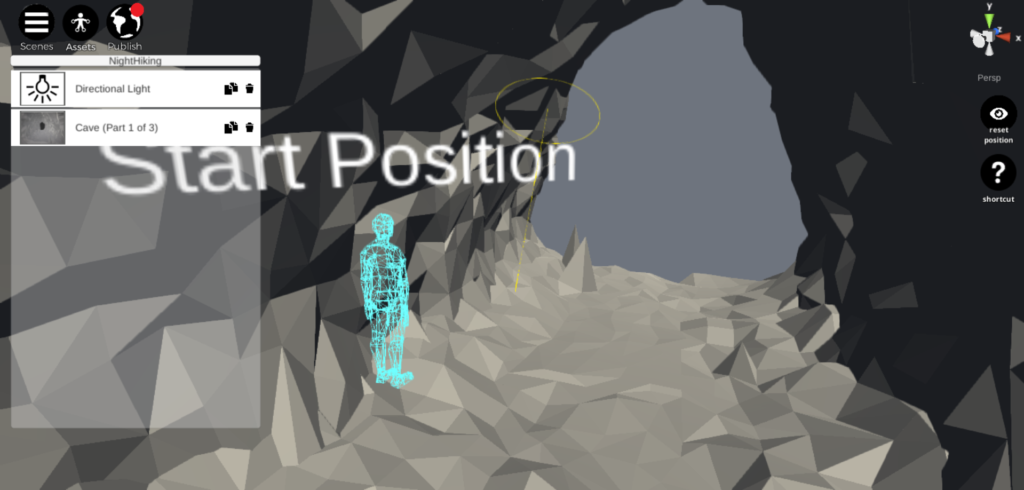
STYLY WebEditor ナイトハイキング 制作画面
この空間の作り方をご紹介します。
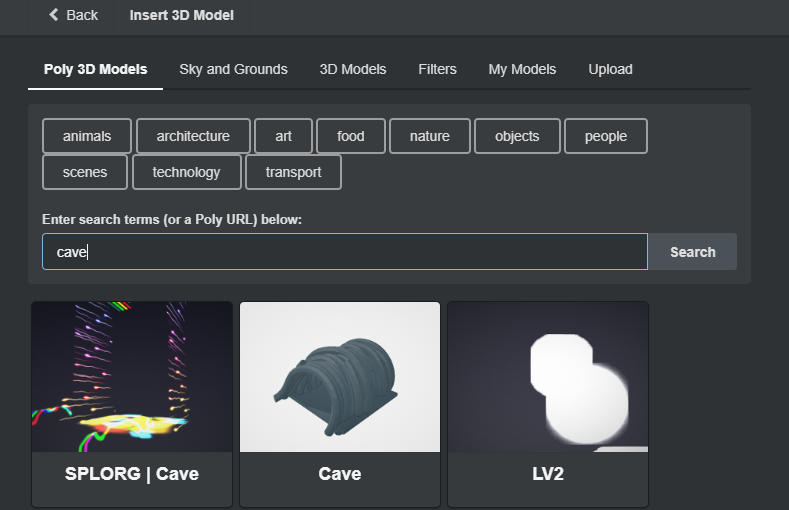
Poly 3D Models画面
Poly 3D Models画面
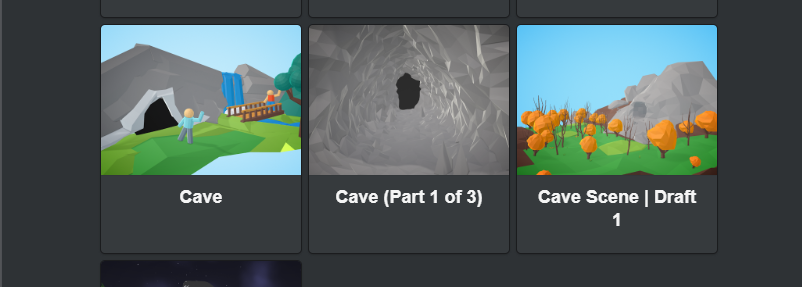
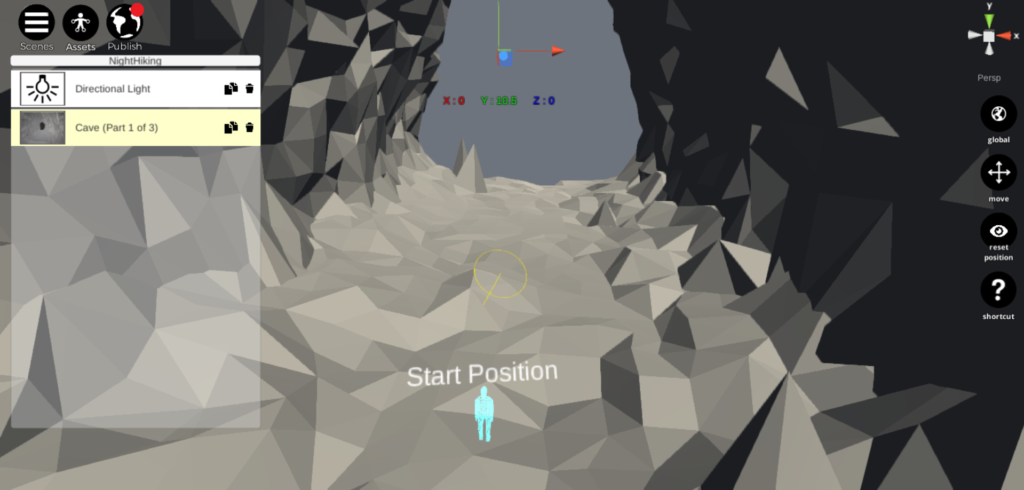
まずこの洞窟をGoogle Polyで検索します。[Assets]ボタン → [3D Model] → Poly 3D Modelsで検索フォーム「cave」(洞窟)を入力して[Search]ボタンをクリックします。Cave(Part 1 of 3)をクリックします。
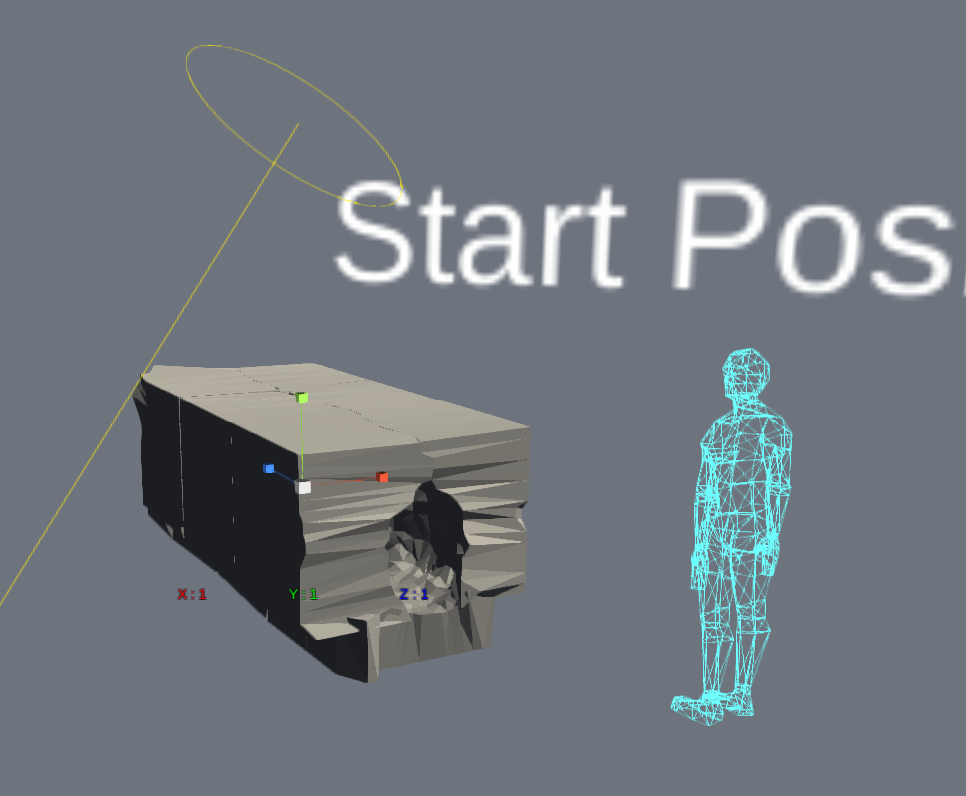
Cave(Part 1 of 3)
Sceneに洞窟が出現しました。しかし、とても小さいので大きくします。数値の部分をクリックして直接入力して、X:20、Y:20、Z:20に変更します。
Cave(Part 1 of 3) サイズX:20 Y:20 Z:20に変更後
Cave(Part 1 of 3) 移動X:0 Y:10.5 Z:0に変更後
サイズが大きくなり、洞窟の完成です。Start Positionの足の位置と洞窟の地面の高さを合わせます。洞窟を移動(move)モードにして、X:0、Y:10.5、Z:0に変更します。次は、回る星座を作ります。
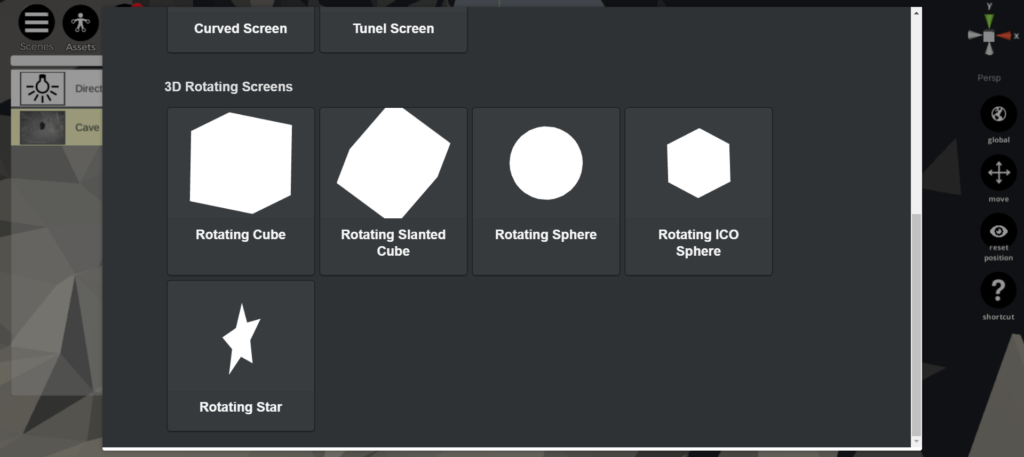
Imageの「Rotating Sphere」をクリック
Assetsメニューから[Image]をクリックします。次に、星座の画像をアップロードします。そして3D Rotating Screensの「Rotating Sphere」をクリックします。
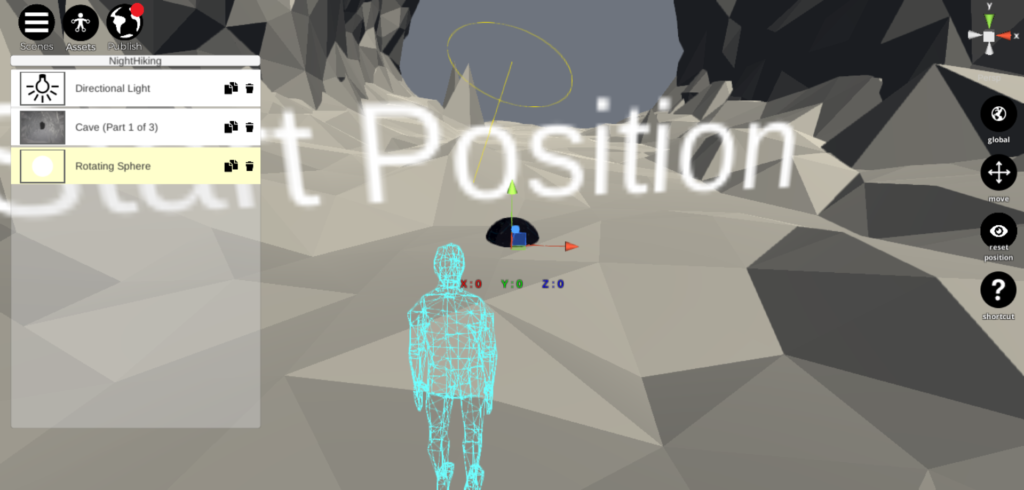
Rotating Sphere 表示
そうすると、回転する天球画像が空間に出現します。しかし、これではサイズが小さいので、大きくします。X:40、Y:40、Z:40
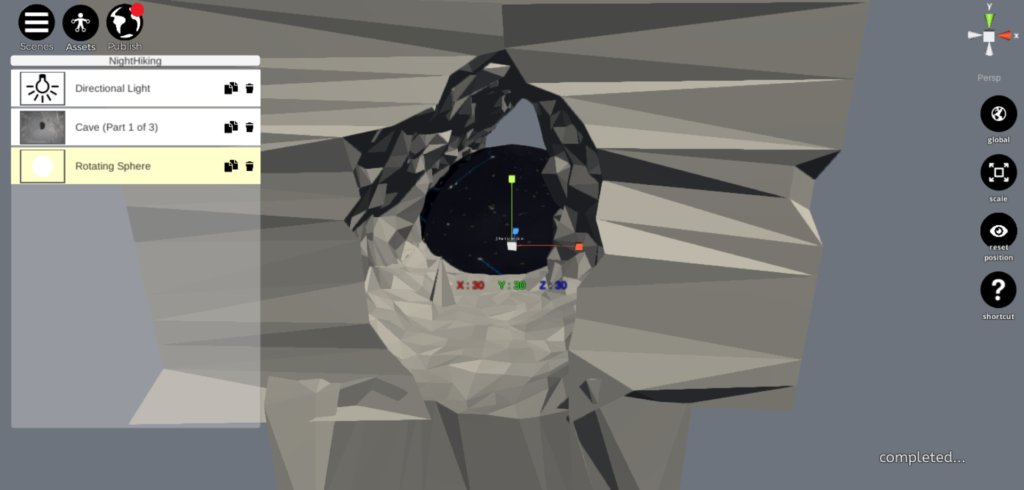
Rotating Sphere 外側から見た場合
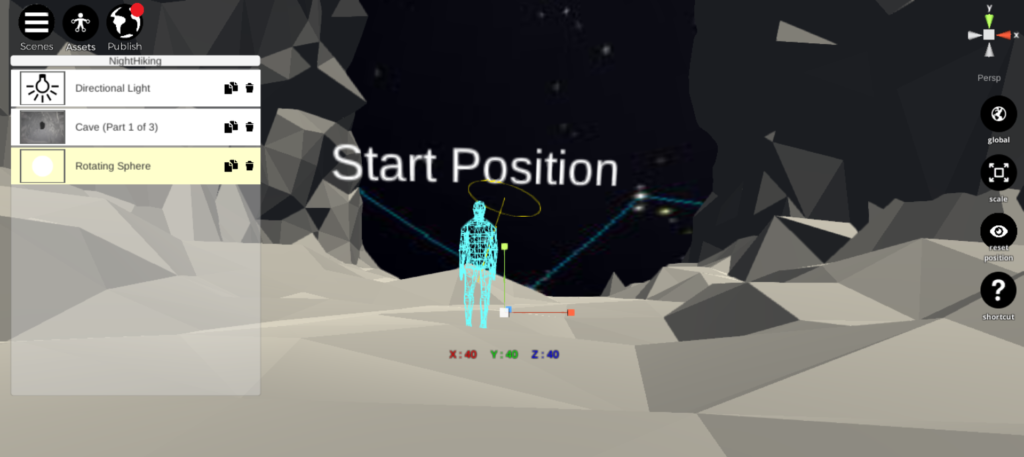
Rotating Sphere 内側から見た場合
これで洞窟内に、星座を映し出す(回転する)空間を作ることができました。あとはこの空間にステージ、各メンバが使う楽器を置いて、ゆるめるモ!を配置したら完成です。ちょっとした工夫(サイズ変更、imageに動きを付ける)をすることによって、思い描いた空間を作ることができます。どうやったら実現できるか、色々試してみてください。考えて試行錯誤するのもSTYLYでVR空間を作成する醍醐味の一つです。