本記事では、Mayaでモデリングした3Dオブジェクトを「STYLY」にインポートする方法をご紹介します。 今回、使用する3Dオブジェクトは実際に私がモデリングしたテレビを使用したいと思います。
STYLYとは
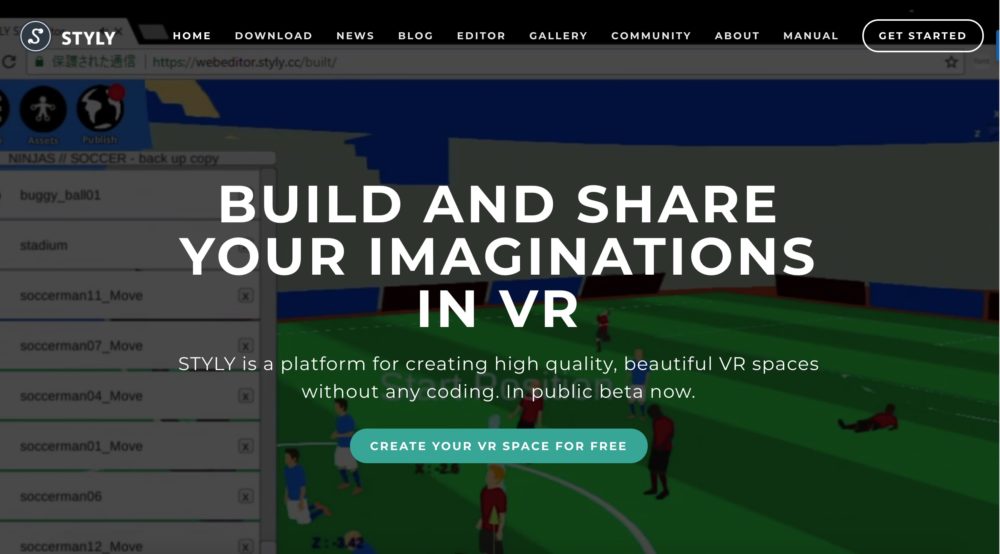
STYLYとは、VR空間を駆使し、新たな表現・体験を生み出せるクリエイティブプラットフォームです。 使ってみた感覚でいうと、STYLYはUIもとてもシンプルで3D/VR初心者でも簡単に世界を作ることができます。ちなみに、STYLYを使用するにあたっては無料登録が必要です。 STYLYサイトにアクセスして頂いて、画面右上にある”GET STARTED”から登録できます。
Mayaでのオブジェクト書き出し方法
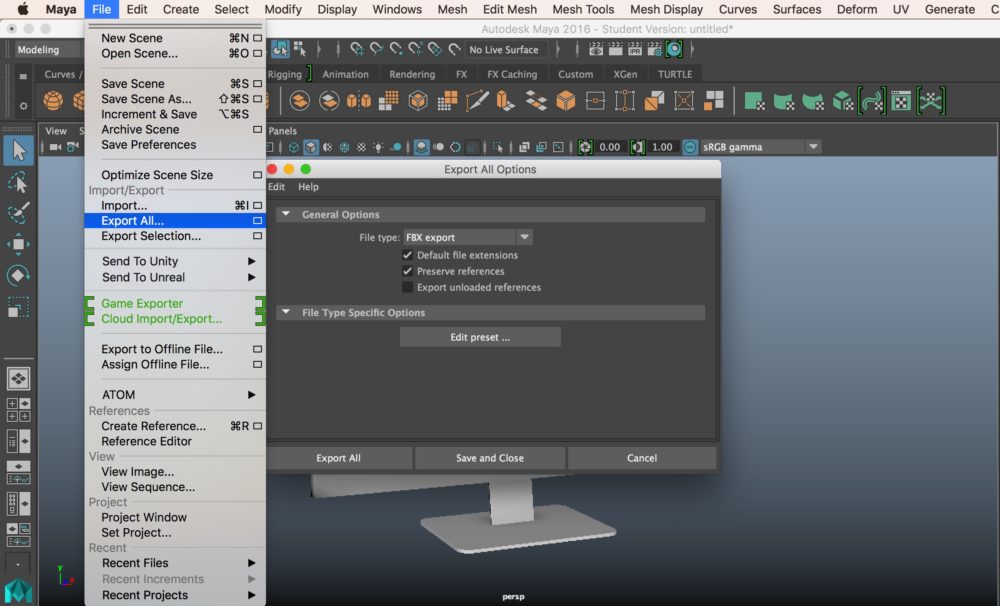 Mayaで書き出したい、任意の3Dオブジェクトを選択します。 File>Export All Option Export All Optionウィンドウで適宜、書き出すフォーマットを選択します。今回はFBXファイルで書き出してみたいと思います。そうしたら、Export Allを実行します。 Mayaで3Dオブジェクトを書き出すにあたって全く難しいことはないので、書き出しフォーマットだけ覚えておくと良いと思います。 3Dファイルフォーマットですが、いくつか種類があります、その中でもOBJ、FBXファイルは主に使用されるファイルフォーマットですので、覚えておくと便利かもしれないです。
3DオブジェクトをSTYLYにインポートする方法
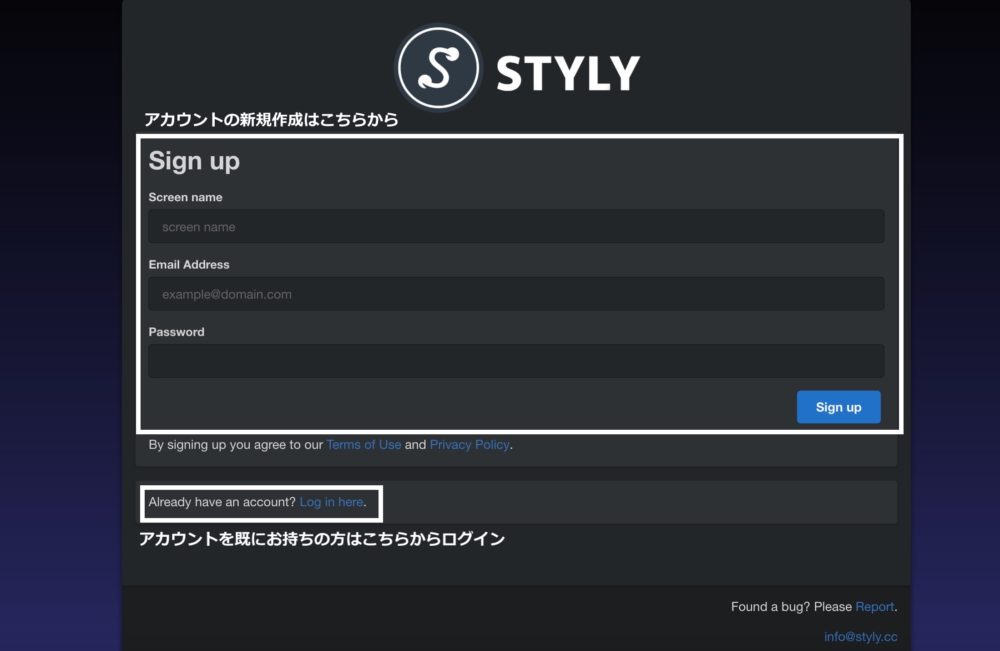 Sign up欄では、アカウントの新規作成が可能です。 アカウント未作成の場合はSign up欄から必要事項を入力の上、青ボタンを押してください。おそらくSTYLYからメールが届くはずなので、確認しておきましょう。 また、既にアカウントをお持ちの方は、下のLog in hereよりログインをお願いします。 STYLYにログインしたら、シーンに名前をつけます。今回は、sampleという名前に設定しました。 Createボタンを押すと、下の写真のようにsampleというシーンが開きます。
 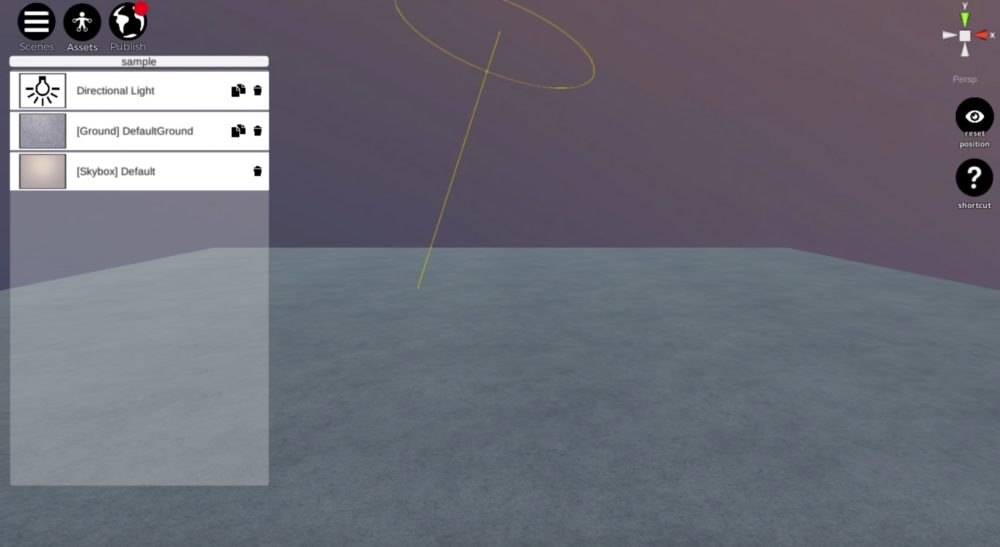 このシーンに3Dオブジェクトをインポートしていきます。
 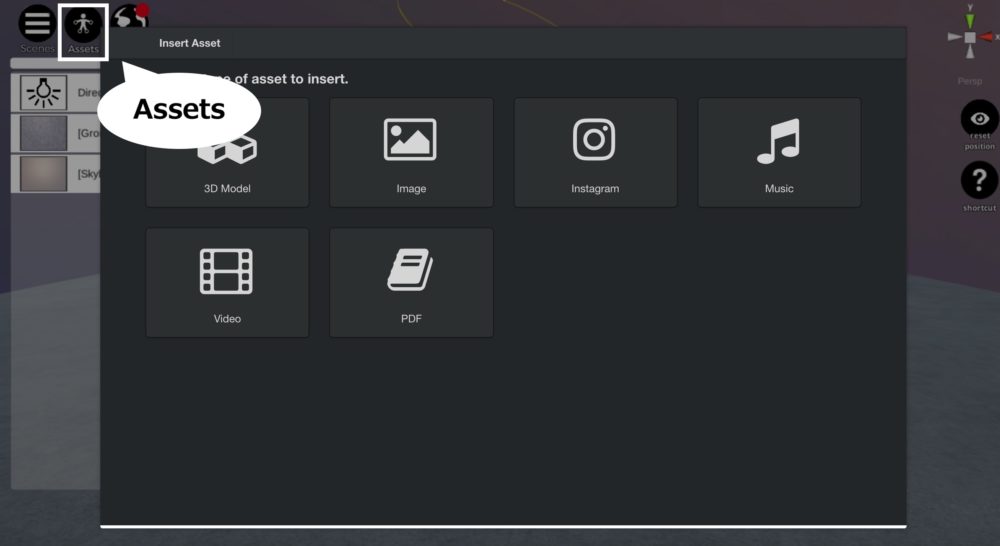 STYLY画面上部にある、Assetsボタンをクリックします。 次に、3D Modelと大きく表示されてる、ボタンをクリックします。上の写真でいうとちょうど吹き出しと被っているボタンですね。
 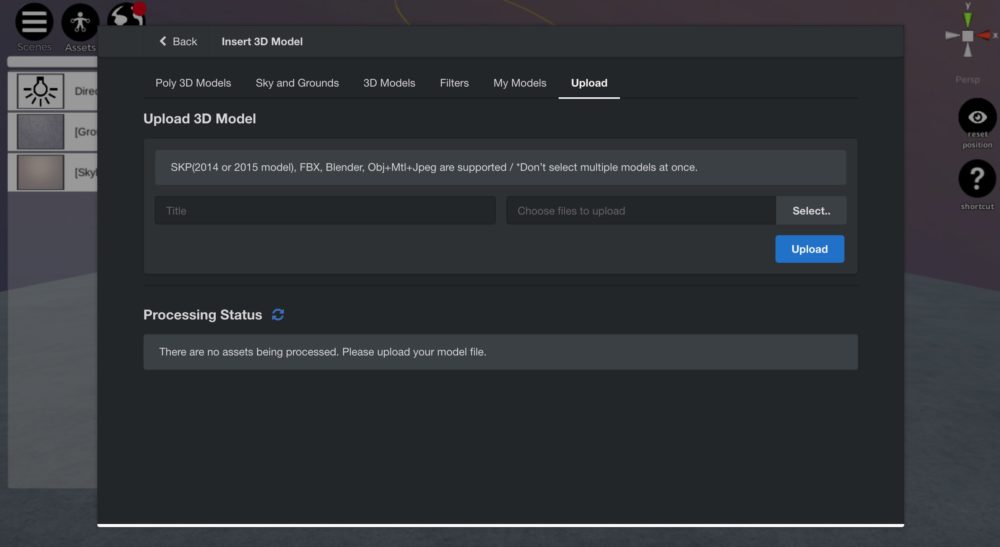 一番右側にある、Uploadタブに移動します。 ここで、任意の3Dオブジェクトをアップロードできます。
 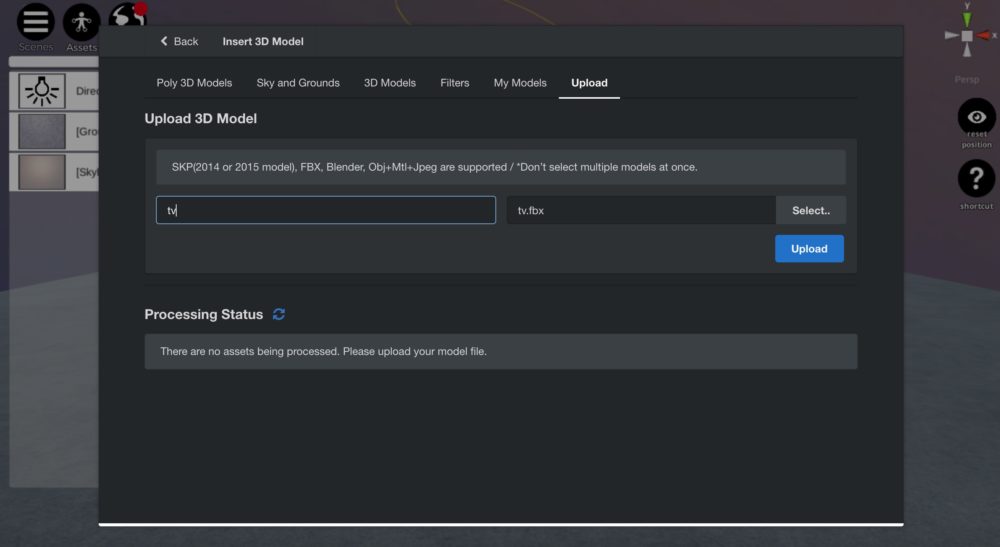 Uploadボタンの上にあるSelectボタンから、3Dオブジェクトを選択します。左のTitleにはアップロードしたときに表示される名前を入力します。 どちらも入力、選択したら、Uploadボタンを押します。
 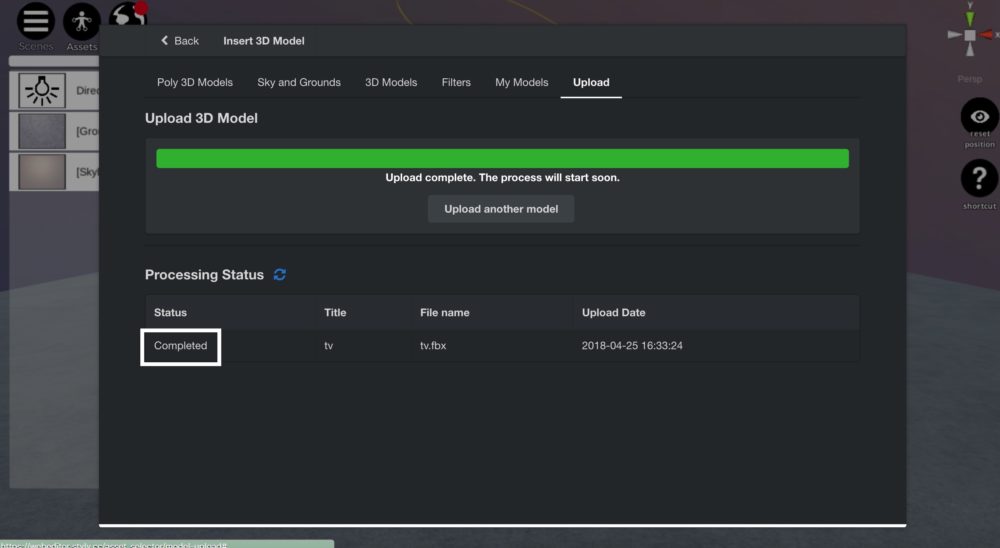 Statusが、Completedになれば3DオブジェクトがSTYLY内に取り込み完了ということになります。 ちなみに、Completedになるまでに数分程度かかります。
 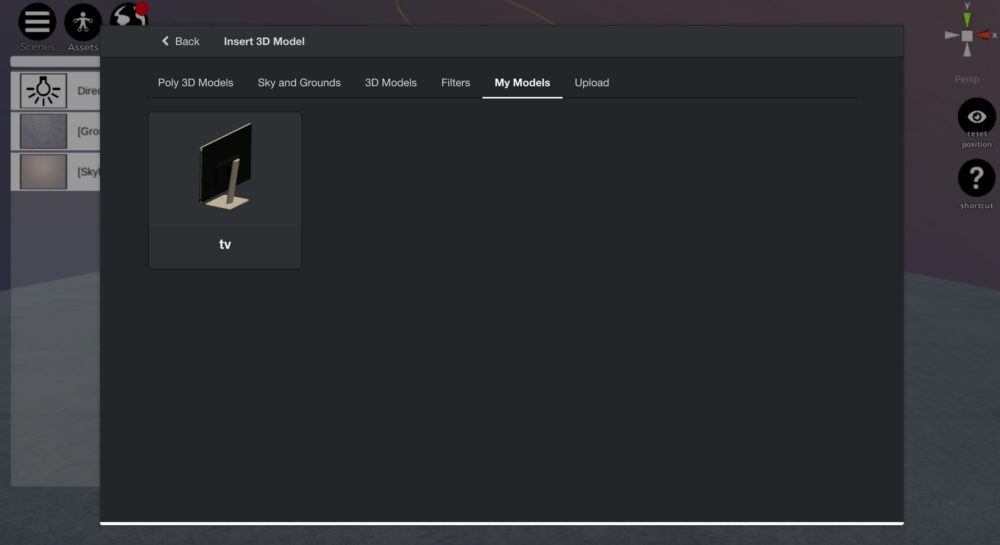 Statusが、Completedになったら、UploadタブからMy Modelsに移動します。 上の写真のように、モデリングデータが表示されています。
 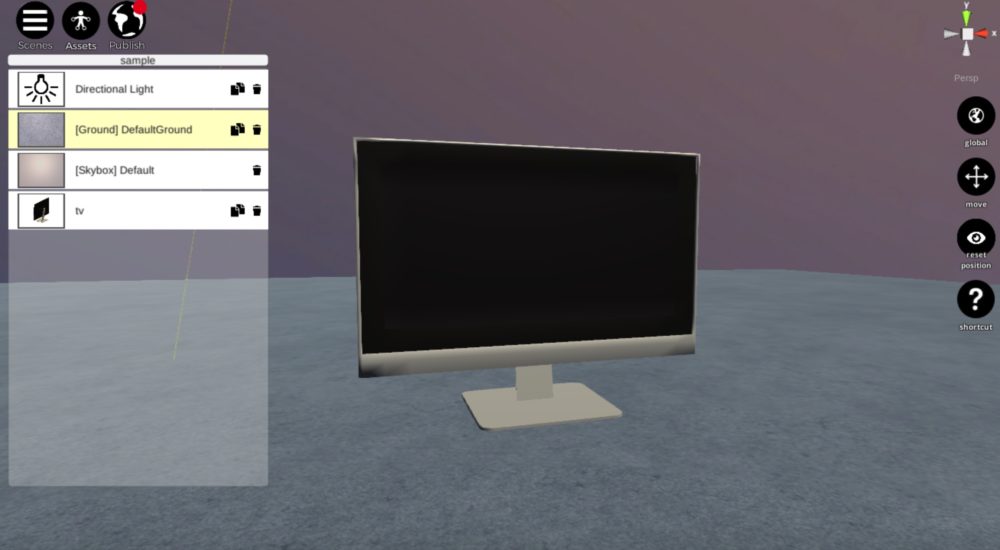 こんな感じで、STYLYにtvオブジェクトをインポートできました。 実際のシーンはこちらから インポートしてみて、細かい反省点があったので共有します。
 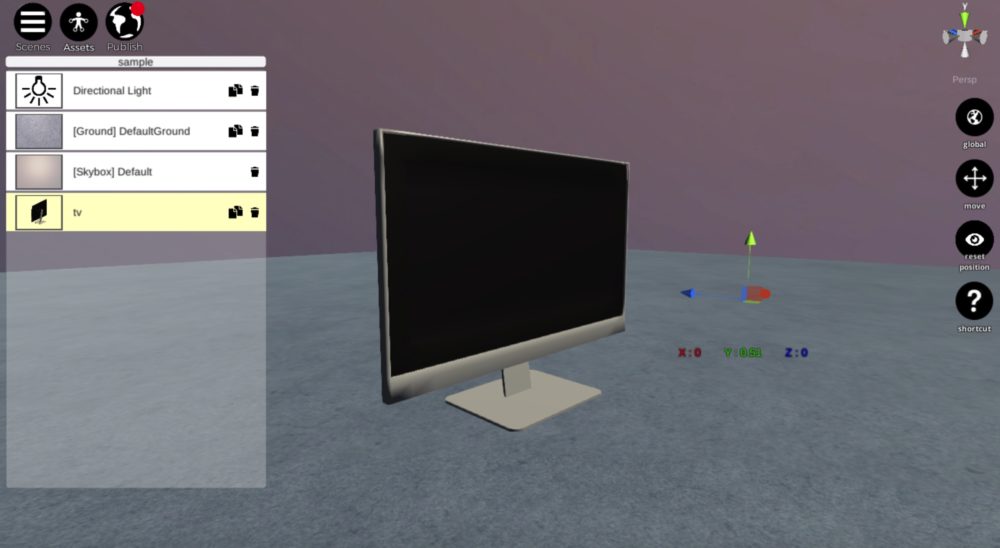 オブジェクトを書き出す前に、ピボットを中心に設定するのを忘れてました!凡ミスですね。 3Dオブジェクトをインポートしたときにピボット情報も一緒にインポートされるようで、事前に中心にしておかないとかなり不便です。小さいことですが、最後にピボットの位置を確認しておくと良いですね。 Maya2016だと、 オブジェクトを全選択>Modify>Center Pivot でピボットをオブジェクトの中心に設定できます。 STYLYにはデフォルトでたくさんのアセットが用意されているのですが、ご自身のモデリングデータを読み込むとシーンに愛着が湧くのでおすすめです。 (参考:AREA JAPAN Maya Learning Channel)