In this two-part article, we will show you how to reproduce the photographic technique called “Solarization” in a 3DCG space.
The images below were composed using the “Grading Curves” function.
“Grading Curves” are located under the “Color Grading” settings in “Post Processing.” Reproducing the solarization effect is very simple, so let’s quickly expand our range of expression through this article. Part 2 explains how this works in further detail.

Sample Image
Sample Scene
Below is a sample scene for this article in STYLY GALLERY.
Preparation
The “Grading Curves” that we will use are in the “Color Grading” settings, which is one of several items in “Post processing.”
Therefore, I highly recommend reading the following two articles to better understand this.
- An introductory article to post processing.
![[Unity]Understanding the Basics of Post Processing](https://styly.cc/wp-content/uploads/2020/07/EYECATCH-1-160x160.png)
- An article about Color Grading, which explains various settings other than “Grading Curves” (which this article discusses).
![[Unity / Post Processing] Understanding Color Grading](https://styly.cc/wp-content/uploads/2021/10/カラグレサムネ-160x160.png)
What is Solarization?
Solarization is a type of photosensitive effect observed in film photography.
Historically, the solarization technique was popular for Dadaist/Surrealist Man Ray (1890-1976), whose work includes many paintings and objects.
Solarization occurs due to a certain process in film photography. Film photography requires significant preparation to use various chemicals, photographic paper, and a darkroom, as well as processes such as exposure, development, and washing with water.
If film is exposed to excessive light during exposure, tone reversal can occur in part of the image.
Normally, exposing film to light makes an area black, but exposing the film to more light than necessary causes the blackness to go in the opposite direction. In other words, solarization is caused by a physical paradoxical effect.
Preparing to use “Grading Curves”
First, let’s import “Post Processing Stack v2” into your project.
Select “Package Manager” from the Window tab located at the top of Unity.
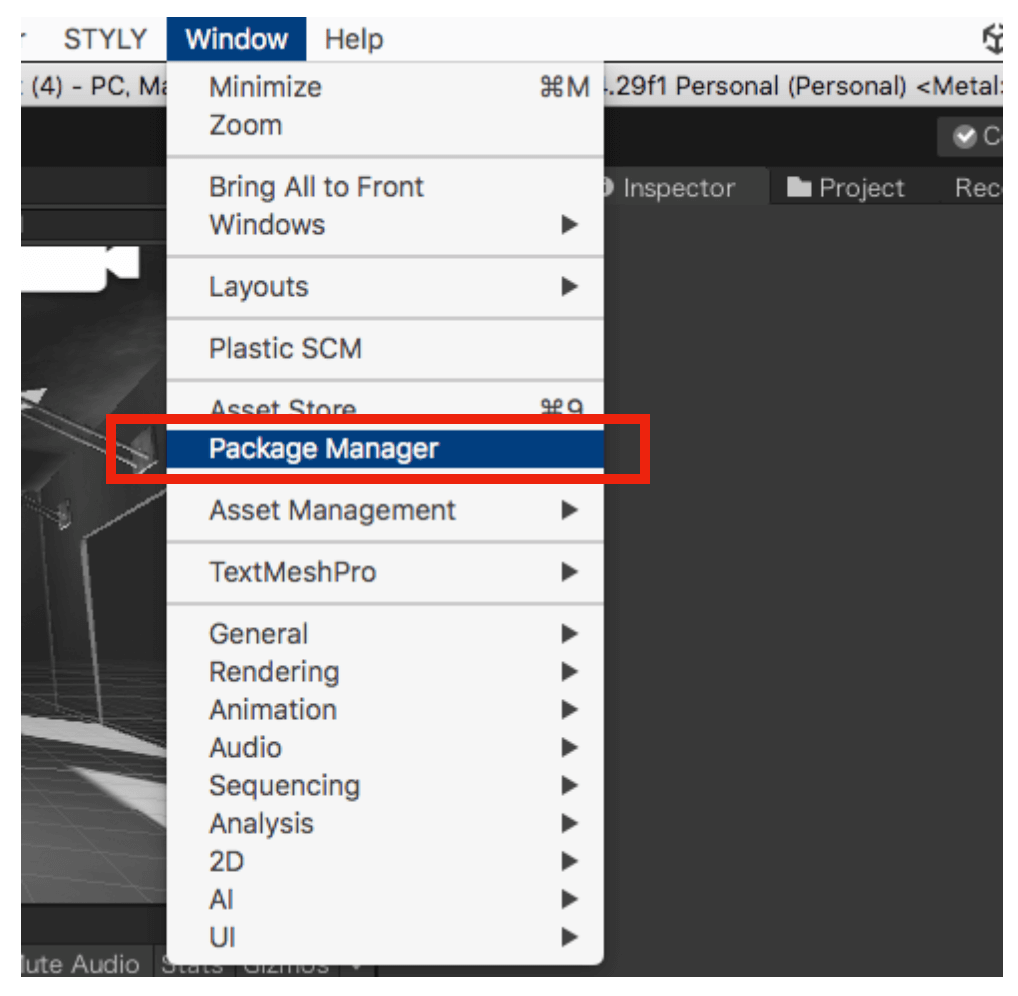
Select “Package Manager”
After opening the Package Manager, type “Post” into the search bar in the upper right corner to bring up Post Processing. Select “Install” at the bottom right to install the software.
This completes importing the project.

Import “Post Processing”
Let’s try using Post Processing Stack v2 in your scene.
Select “MainCamera” in the Hierarchy window.
Click Layer at the top of the MainCamera inspector window and select “Default” if not already selected (it should be selected by default).
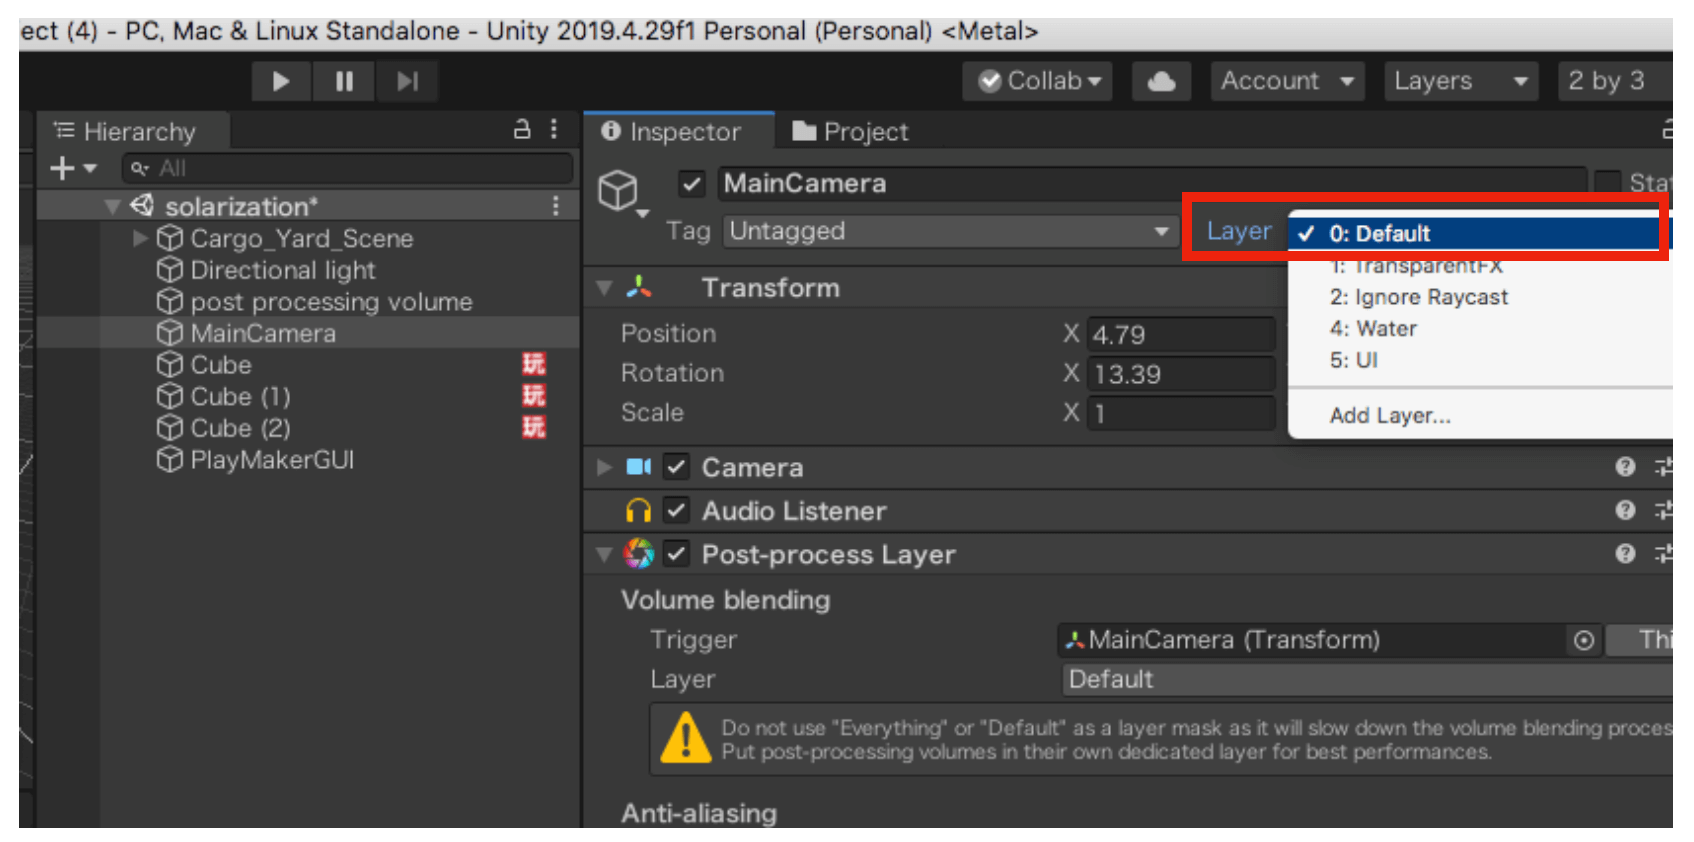
Select “Default”
Post Process Layer
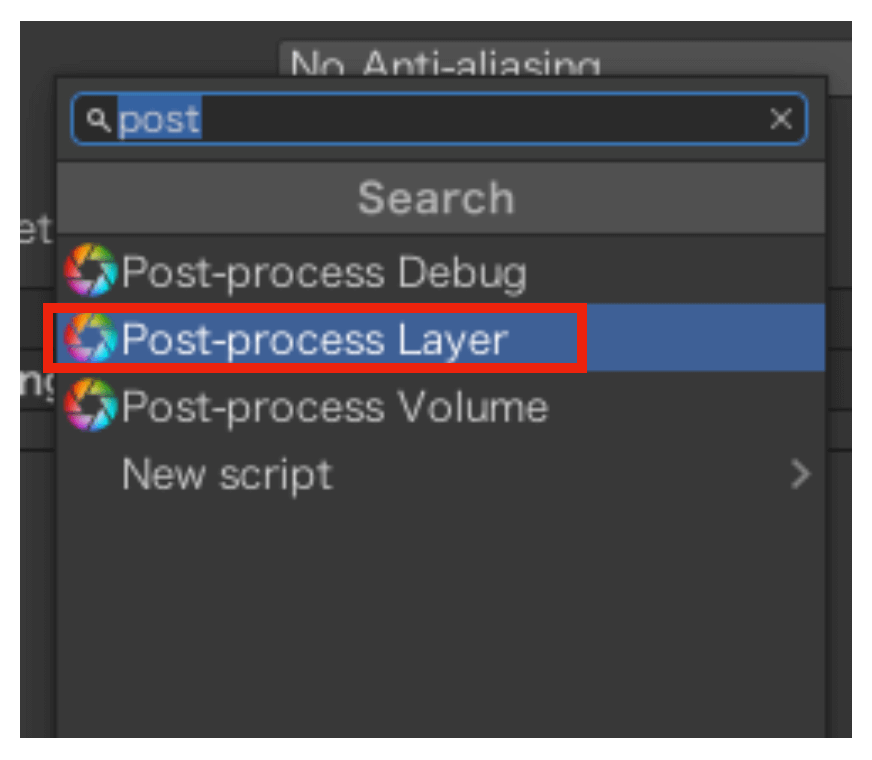
Return to the MainCamera inspector and click on “Add Component” at the bottom, then type “Post” in the search bar and select “Post-process Layer.”
Now, the post-process layer component should have been to the inspector.
Next, change the Layer to “Default.”
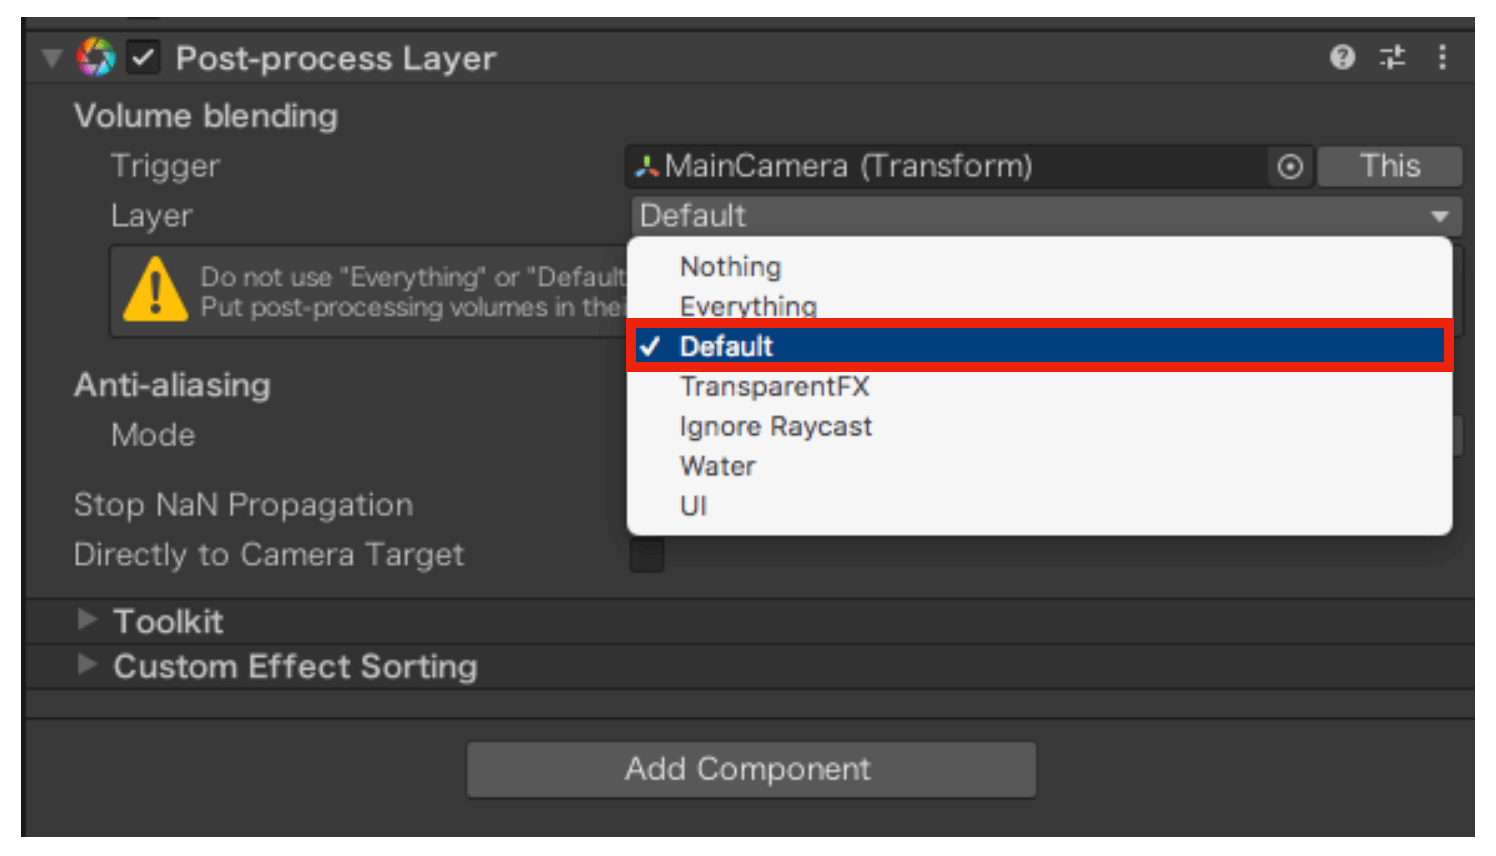
In the post-process layer, change the layer to “Default”
Next, let’s create an object to manage the post-process screen effects.
Create a new GameObject by right-clicking on the hierarchy and Create Empty.
Click on “Add Component” at the bottom of the inspector of the created GameObject.
Type “Post” in the search bar and then add the “Post-process Volume” component.
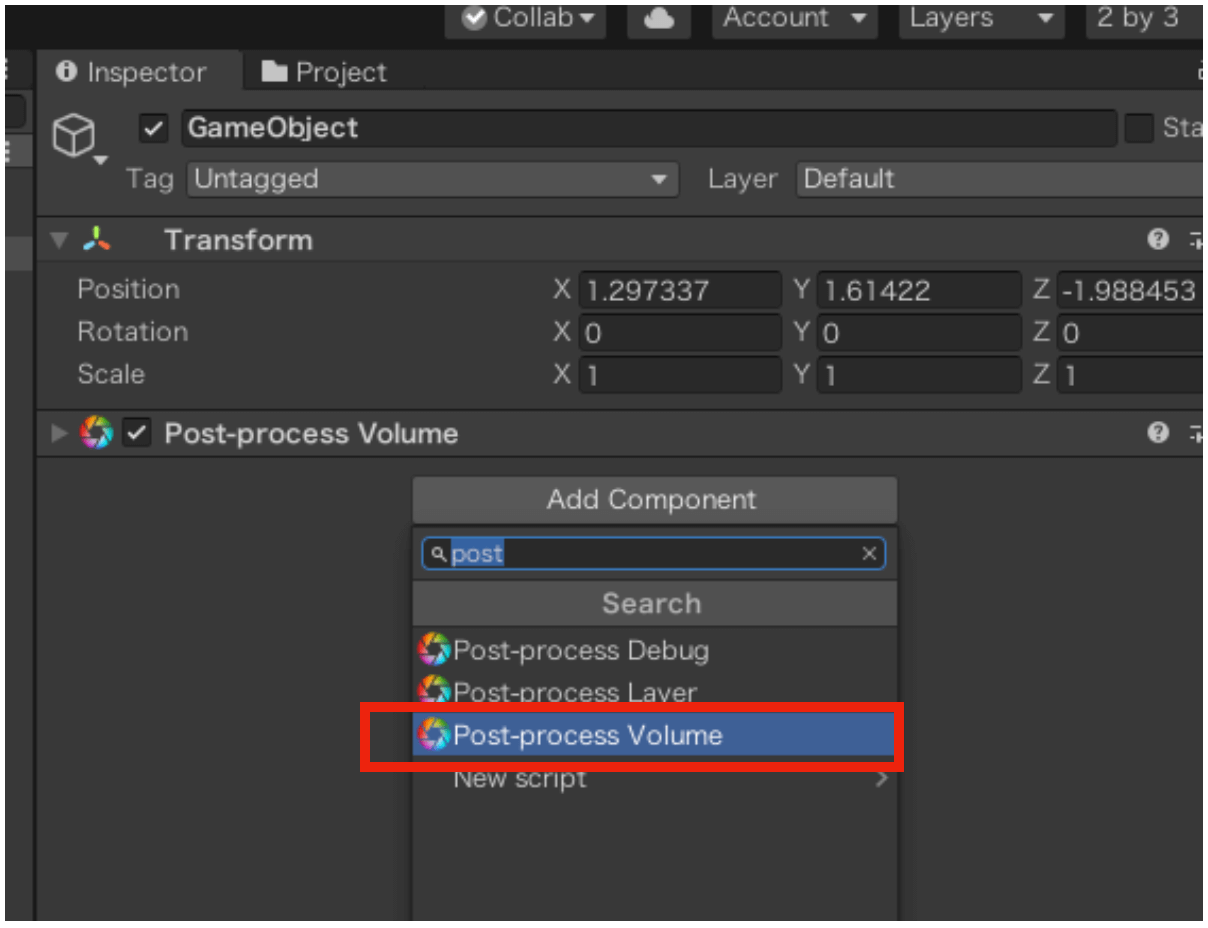
Add the “Post-process Volume” component
Check the “Is Global” checkbox for the Post-process Volume and click “New” for the Profile.
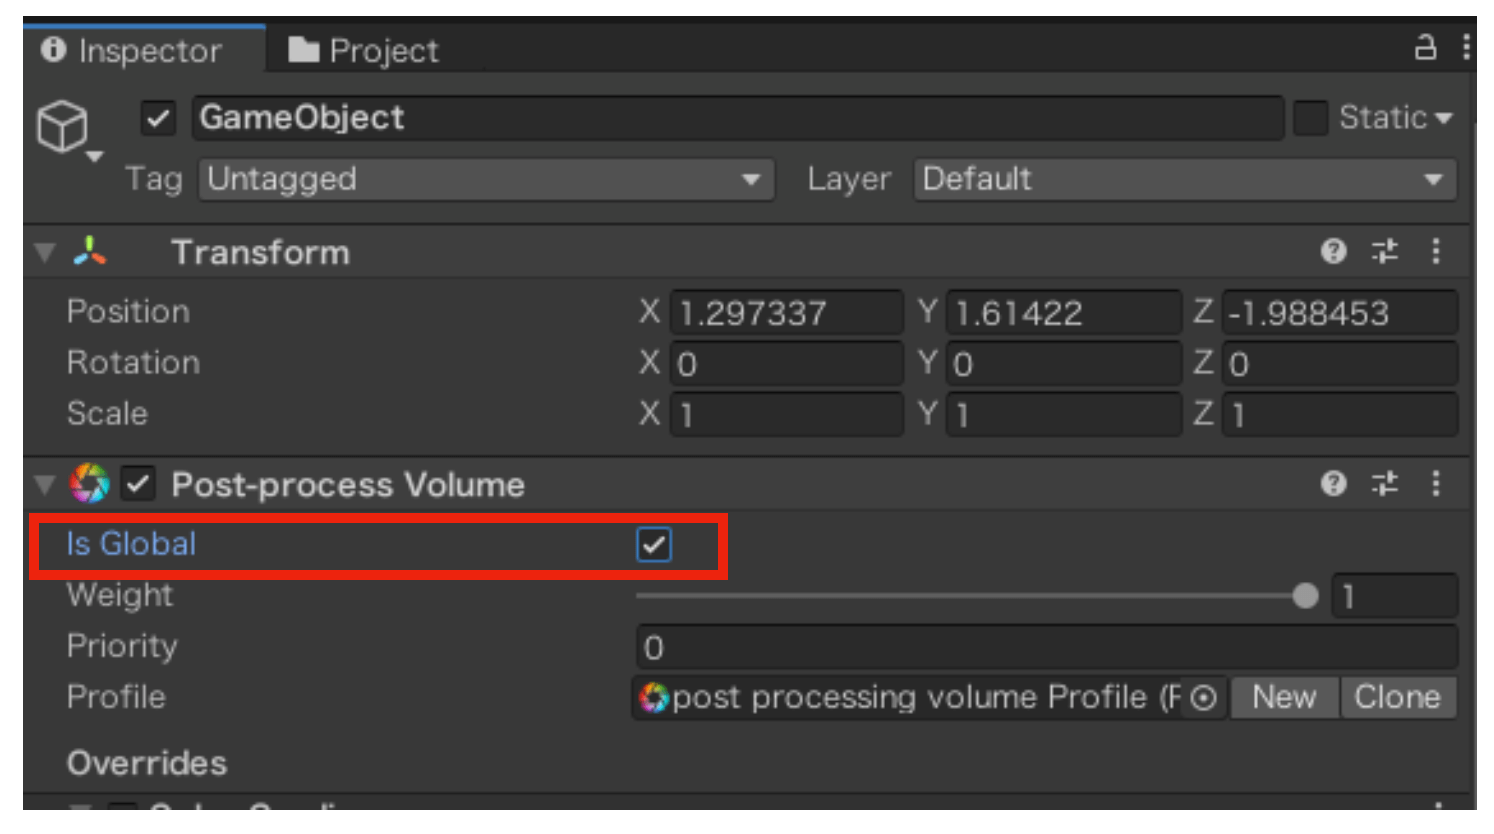
Select “Is Global”
That’s it!
We are now ready to use the Color Grading effect.
Using “Grading Curves”
In the post-process volume component, click the “Add effect…” button and select Unity > Color Grading.
!["[Unity]](https://styly.cc/wp-content/uploads/2022/05/スクリーンショット-2022-05-23-16.16.08.png)
Select Unity > Color Grading
For the Mode, select “Low Definition Range”.
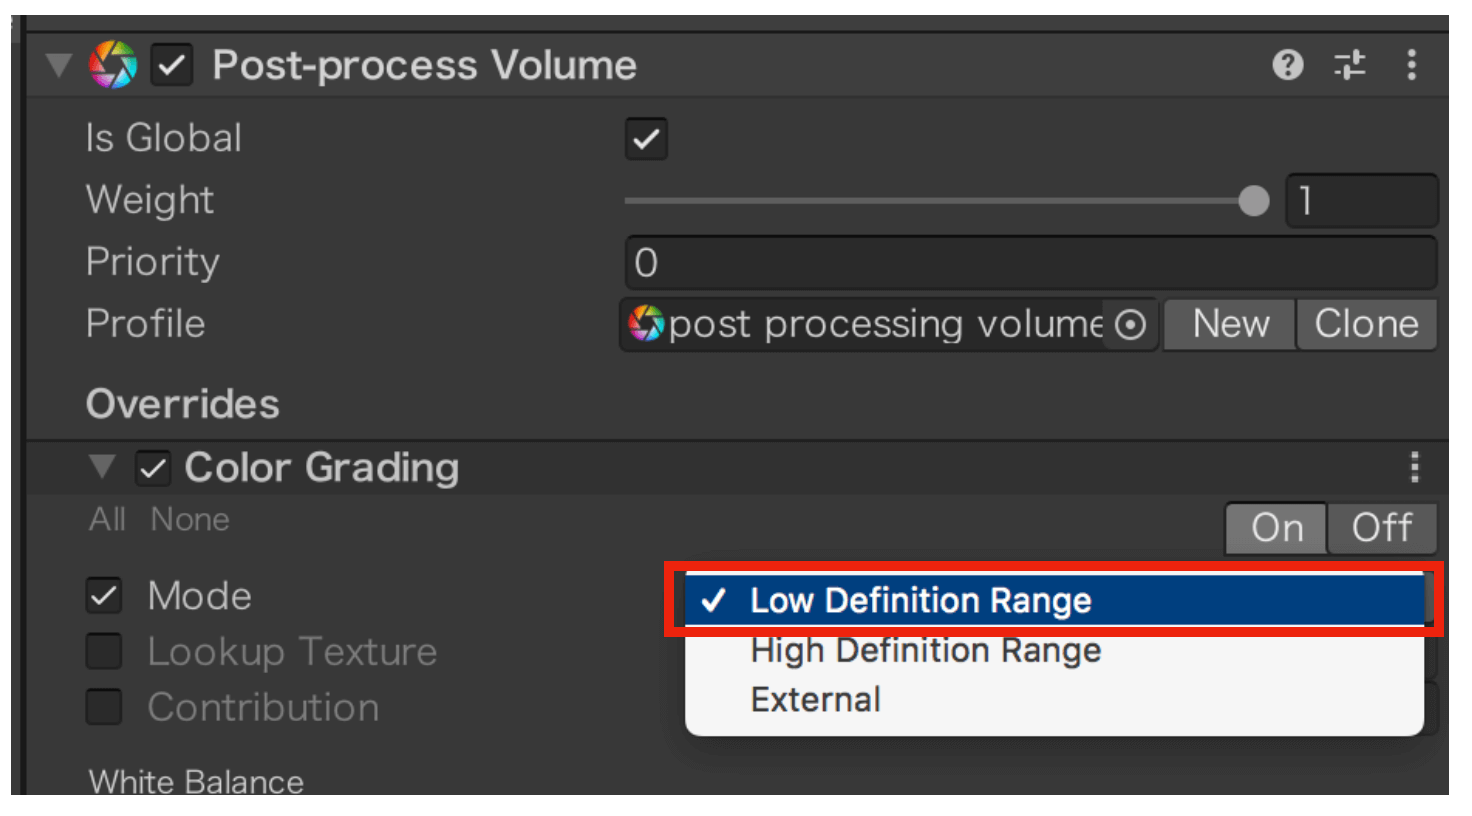
Low Definition Range
Click “Hue Vs Hue” and choose “Master”.
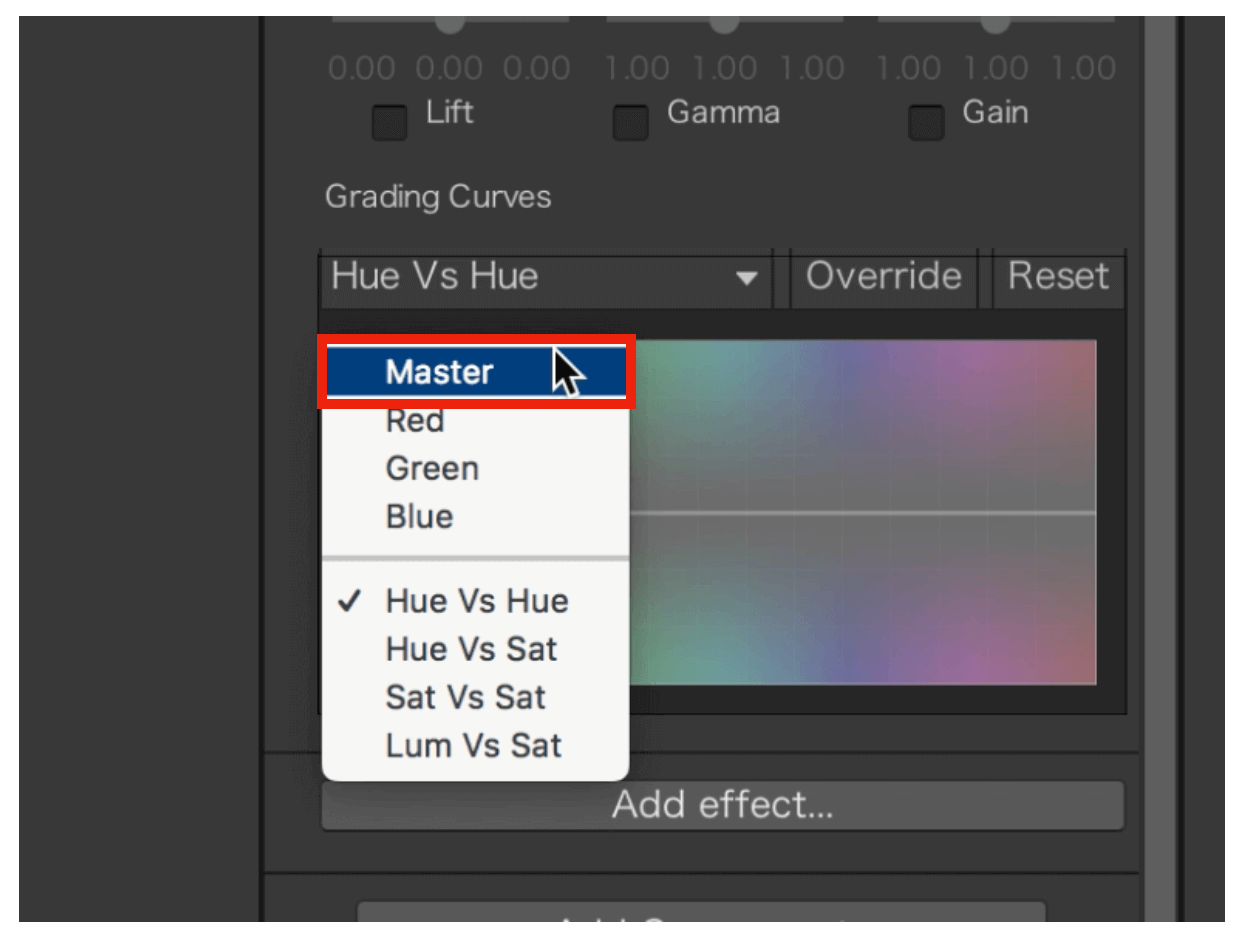
Choose “Master”
Click “Override” next to “Master” to adjust the tone curve.
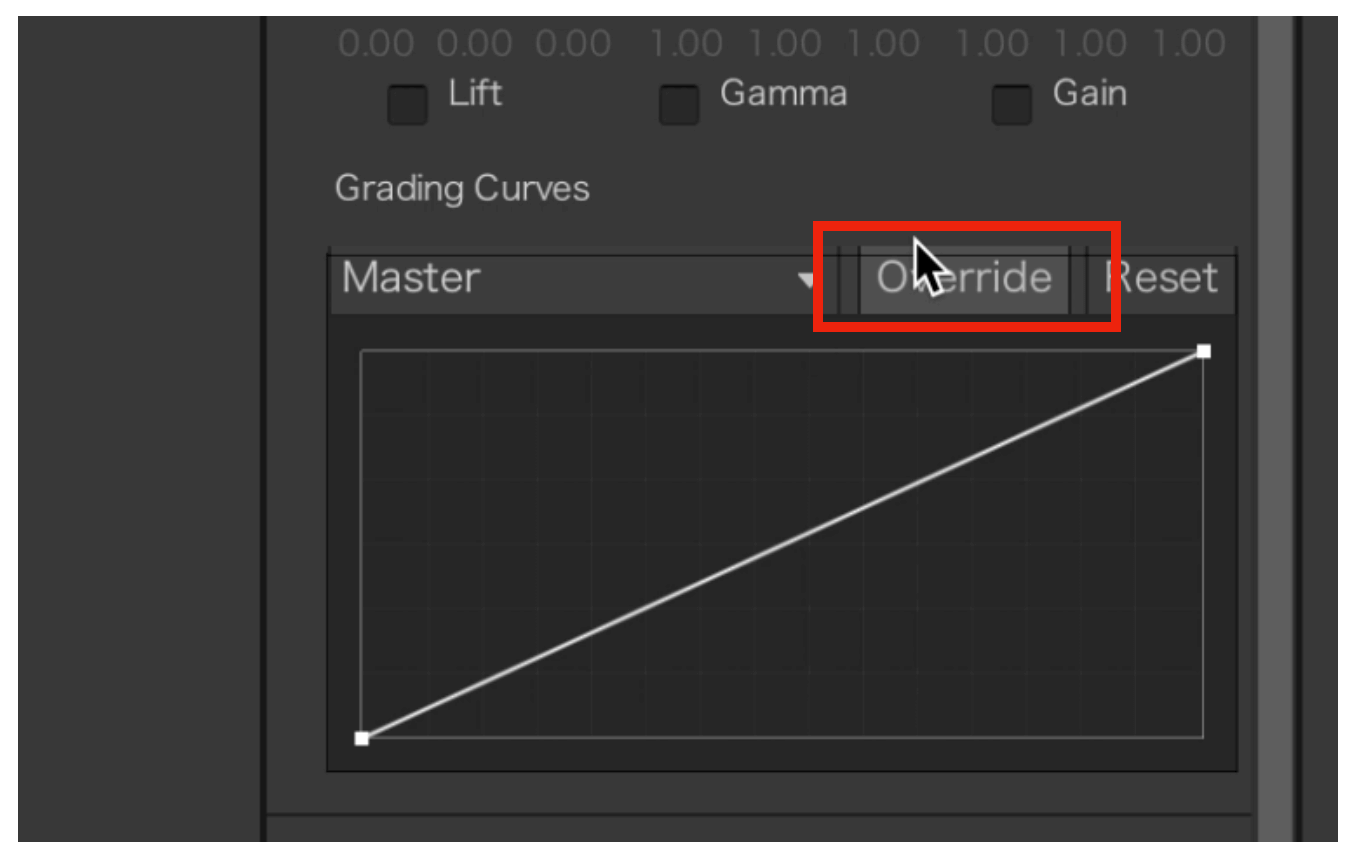
Click “Override”
Right-click in the area to bring up the “Add Key” indicator, and choose “Add Key At Position” to add a key to the tone curve.

Right-click and select “Add Key At Position”
You can add as many keys as you want; move them around within the frame to create a tone curve.
Creating the solarization effect requires creating a downward curve in the tone curve.
Putting a downward curve in the tone curve creates a solarization effect
This is the end of Part 1, where I explain how to set up the tone curve for a solarization effect.
Please also check out Part 2, where I give a simplified explanation of why these tone curve settings apply the solarized effect to an image.
![[Unity / Post Processing] Reproducing Solarization Part 2: How Solarization Works](https://styly.cc/wp-content/uploads/2022/05/スクリーンショット-2022-05-11-19-160x160.png)
For questions about STYLY, bug reports, or improvement requests, please contact the STYLY FORUM:
https://en.forum.styly.cc/support/discussions
Certified by:Shota Yoshizawa
Edited by:SASAnishiki
Translated by:cpnnn