Introduction
When you add accessories or change the pose of a VRM file using Blender, then you export the file as a VRM, the changes will not be applied.
So, even if you want to use that avatar as a VRM file, you need to export the file as a different type, such as FBX, and edit the file in Unity to change it into VRM.
There are two ways to do this. ① Export as a FBX, and edit it in Unity, or ② Do not export the object and import the .blender file with the edited VRM file, and use it as a model.
When you import a .blender file to Unity, you can use it as an object just like a FBX file, but if you edit it, the changes will be directly applied to Unity too. (This may not be true If you are using old versions.)
My personal opinion is that if you use method ①, it may be troublesome when there are any changes and you have to re-export the file from Blender, and import it to Unity again.
In this article, I will go through the steps for method ②, how to link the VRM file with Unity and how to bring the file to STYLY?
Related Articles
Please refer to the article below to learn how to export a FBX file and import to Unity.↓↓↓
This article explains how to add accessories to a VRM file↓↓
![[Blender] Add Accessories to VRM Avatar](https://styly.cc/wp-content/uploads/2019/05/2-3-160x160.png)
How to Link with Unity
In this tutorial, I am going to edit my cute character with this panda hairband.
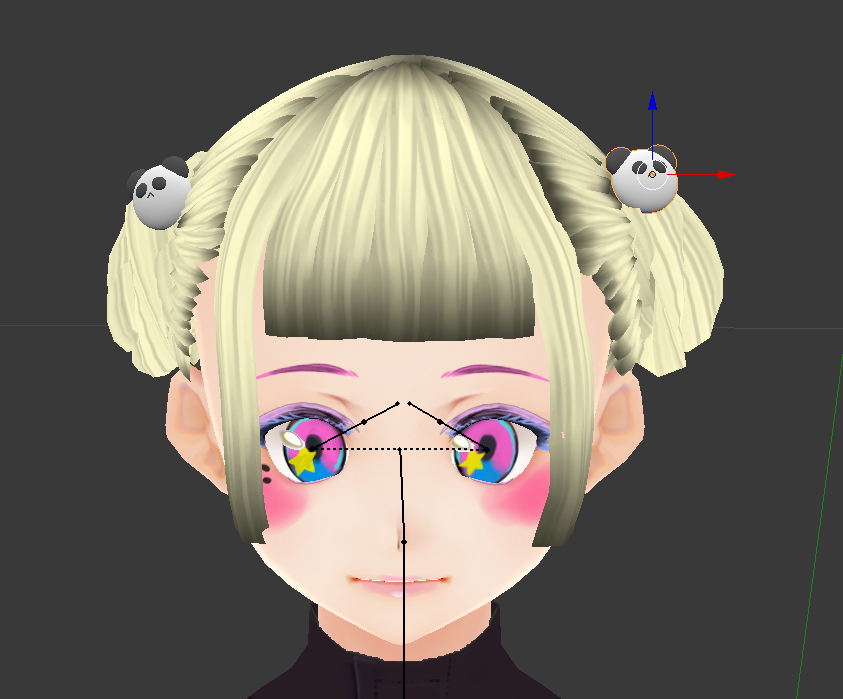
She is so cute….
First, open Unity. If you are planning to upload to STYLY, please use Unity version 2017.4.x.
Please close Blender for now.
Enabling UniVRM
In order to use VRM files with Unity, first import UniVRM.
Even when linking with Blender, material files change shaders so we need to create a new material file and set the texture.
That is troublesome, so I am going to use the original VRM file and use the material file of it.
That is the reason to use UniVRM. We will also use it to change the file to a VRM.
Please download the latest UniVRM .unitypackage from the URL below.
https://github.com/vrm-c/UniVRM/releases
When you open the URL, a window will appear like then one shown below. The one squared in red should be downloaded. NOTE: please use the latest version.
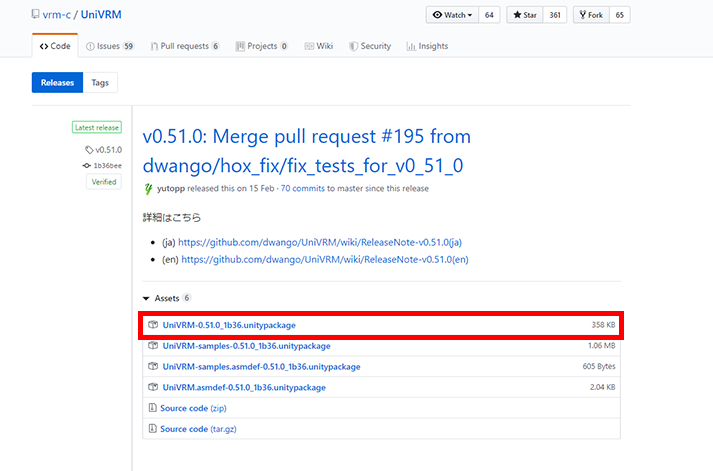
Downloading UniVRM
Once the download is complete, please create a new project in Unity.
Double click the UniVRM unitypackage you just downloaded, and select all then click Import when a window appears, as in the image below.
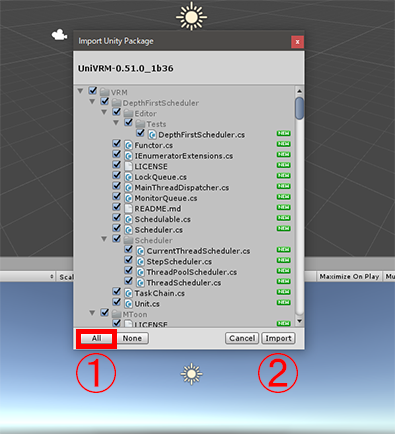
Importing UniVRM
We can now use VRM files with Unity.
Importing Files
Next, let’s import the .blender file with the accessory added and the original character file to Unity.
If you want to keep things tidy in the Unity project, then I advise you to create a folder under Assets and place the VRM file inside it.
You can add files to Unity by the drag and drop method.
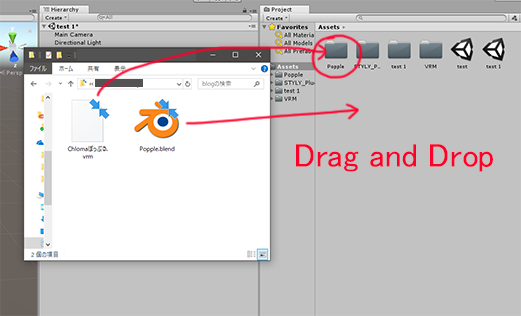
Drag and drop
If you have texture files for the accessory you added to the VRM file, please add the file to Unity also.
Link Settings
We already imported the .blender file. In other words, Unity and Blender are already linked.
The .blender file under Assets will look like the image below when you put in the FBX file.
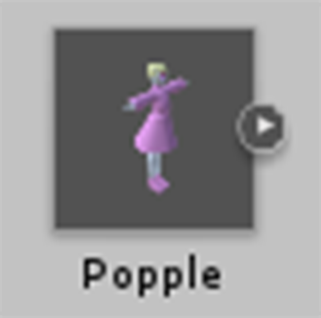
Looks like an object
We can use the file as an object also. Drag and drop the file to the hierarchy window. Files will be displayed as normal objects. All the objects in Blender should be displayed.

Objects within Blender will be displayed
Please select the files in the hierarchy window and click Open in the inspector window.
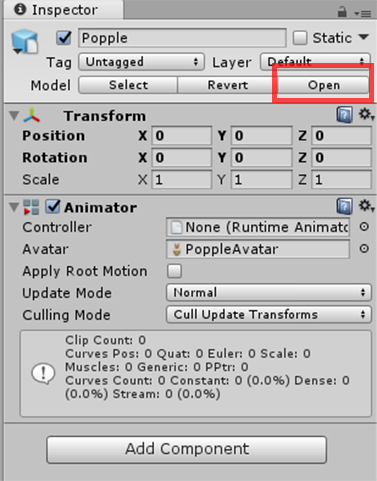
Click Open
This is the link setting with Blender. When you click Open, Blender will open up. This is the main goal for this tutorial.
If you click Open, then edit files within Blender, the file in Unity will directly change also. Try to add some objects within Blender.
I bet you are saying, “this is very useful, why didn’t you tell this to me earlier”. You don’t need to export files as FBX, then import to Unity each time you edit objects in Blender from now on.
One thing to note is that the .blender file in the Unity project folder is a copied file of the original, and when you click Open, the file you are opening is the copied one.
I was really thrilled when I learned how to do this!
So, if you want to change or edit the accessory files you added in Blender, you can use Blender to change the settings.
Bone Settings
Next, let’s edit the bone settings.
Select the FBX file and go to the Inspector window, choose the Rig tab and change the Animation Type to Humanoid, click Apply.
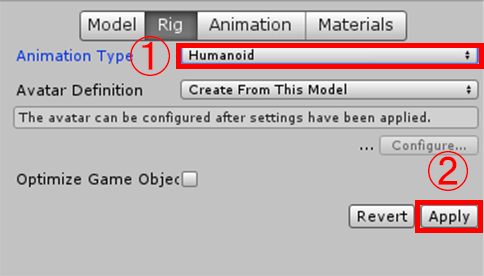
Select Humanoid
Once you click Apply, you will become able to click the Configure…. button above it, so please click it. You will jump to another scene.
We need to check the bones in this scene. If they are all green, we are set, so please click done.
We are using a file that was originally a VRM, so normally there will be no errors here.
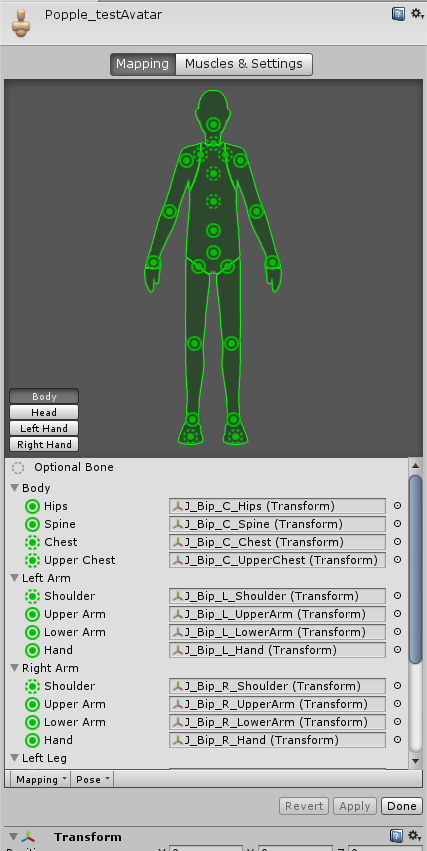
Bone settings
Material Settings
Next, let’s edit the material settings.
Go to the Hierarchy window and you will be able to find Body, Face, Hair, Skeleton inside the object. Check the inspector of Body, Face, and Hair, and you will find Materials are applied within Skinned Mesh Renderer.
Change the material files here to those of the original VRM file.
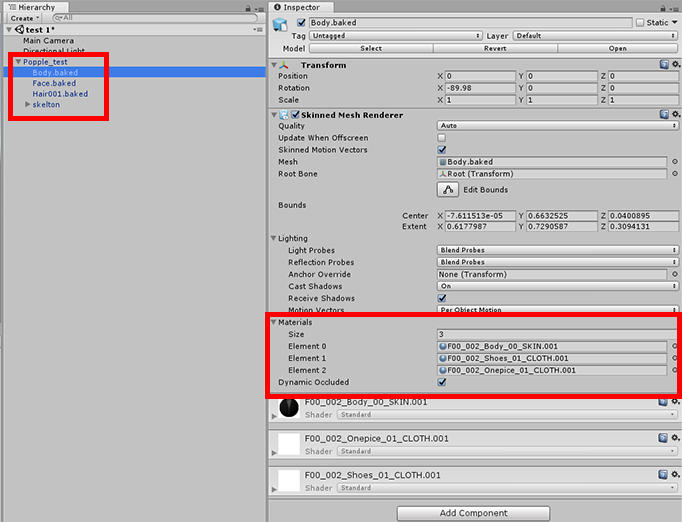
Material files are applied
Look at the VRM file in the Project window. There should be a Materials file within the many files. Please open this.
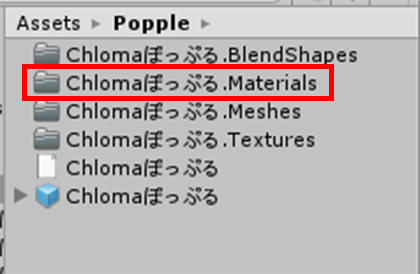
Material files
There should be material files for Body, Face, and Hair, so swap these files with that of the FBX file. You can just drag and drop again.
Applying materials
We are done with the avatar material settings now. Next, we check the accessory material settings.
Right click inside the project window, and Create > Material to create a material file.
If you have any texture files, set them to the red squared place. You can drag and drop or click the square and select the file from the popup window.
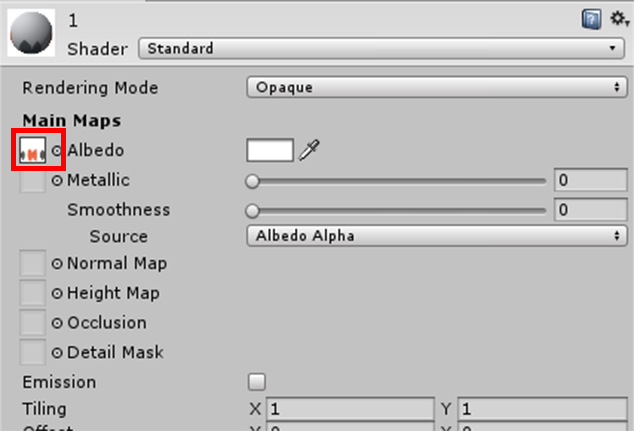
Texture settings
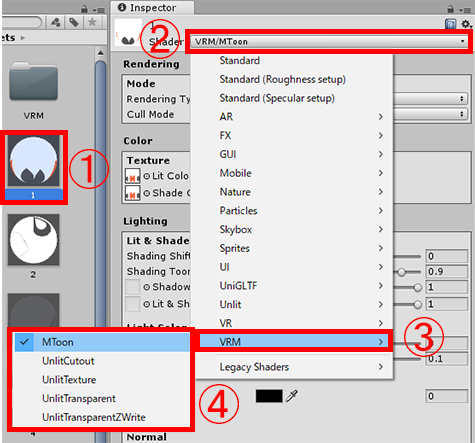
Next, we need to set material shaders. Click ① Material , then click ②, ③ move the cursor to VRM, and select from ④.
It will be better if it matches the material files you just used. If there are any texture files, it is probably UnlitTexture.
If there are any transparent parts in the texture, you should use UnlitCutout or UnlitTransparent options.
If there are no textures and just colors, go to ③ and select Color from Unlit.
By the way, Unlit means that it is not affected by lights, but if you select MToon in ④, it will be affected by lights and look like a cartoon, so you can change the hair and body shaders according to your preference.
Shader options
You can drag and drop materials to objects within the scene to apply them also.
Applying Materials
That is all for preparation!
Exporting as VRM and Uploading to STYLY
Let’s upload it to STYLY and then Export the file as a VRM.
Please refer to the article below for how to export the file as a VRM and upload to STYLY. Go through the steps after Other Settings.
Select the .blender file in the hierarchy window which should look like an object.
![[Unity] Convert Humanoid FBX File into VRM](https://styly.cc/wp-content/uploads/2019/05/8-1-160x160.png)
That’s all for this tutorial! Thank you!