Hi! SensitiveCube is here. I’ll explain the procedure from Cinema4D to STYLY with Unity. Also this entry describes basics of ShaderForge, Playmaker and Unity plugin for STYLY. Enjoy 😀
First section is preparation before unity such as models and textures in short. Secondly, We move to unity3D and create simple shader with ShaderForge. Next two sections will show you adding simple animation and function of changing color with Playmaker. Moreover, I’ll give you a idea in advance. Lastly, check the package in STYLY.
Version information
Unity 20174.2f2, ShaderForge 1.38 ,Playmaker 1.8.9
01.Preparetion in Cinema4d, Photoshop and Aftereffects.
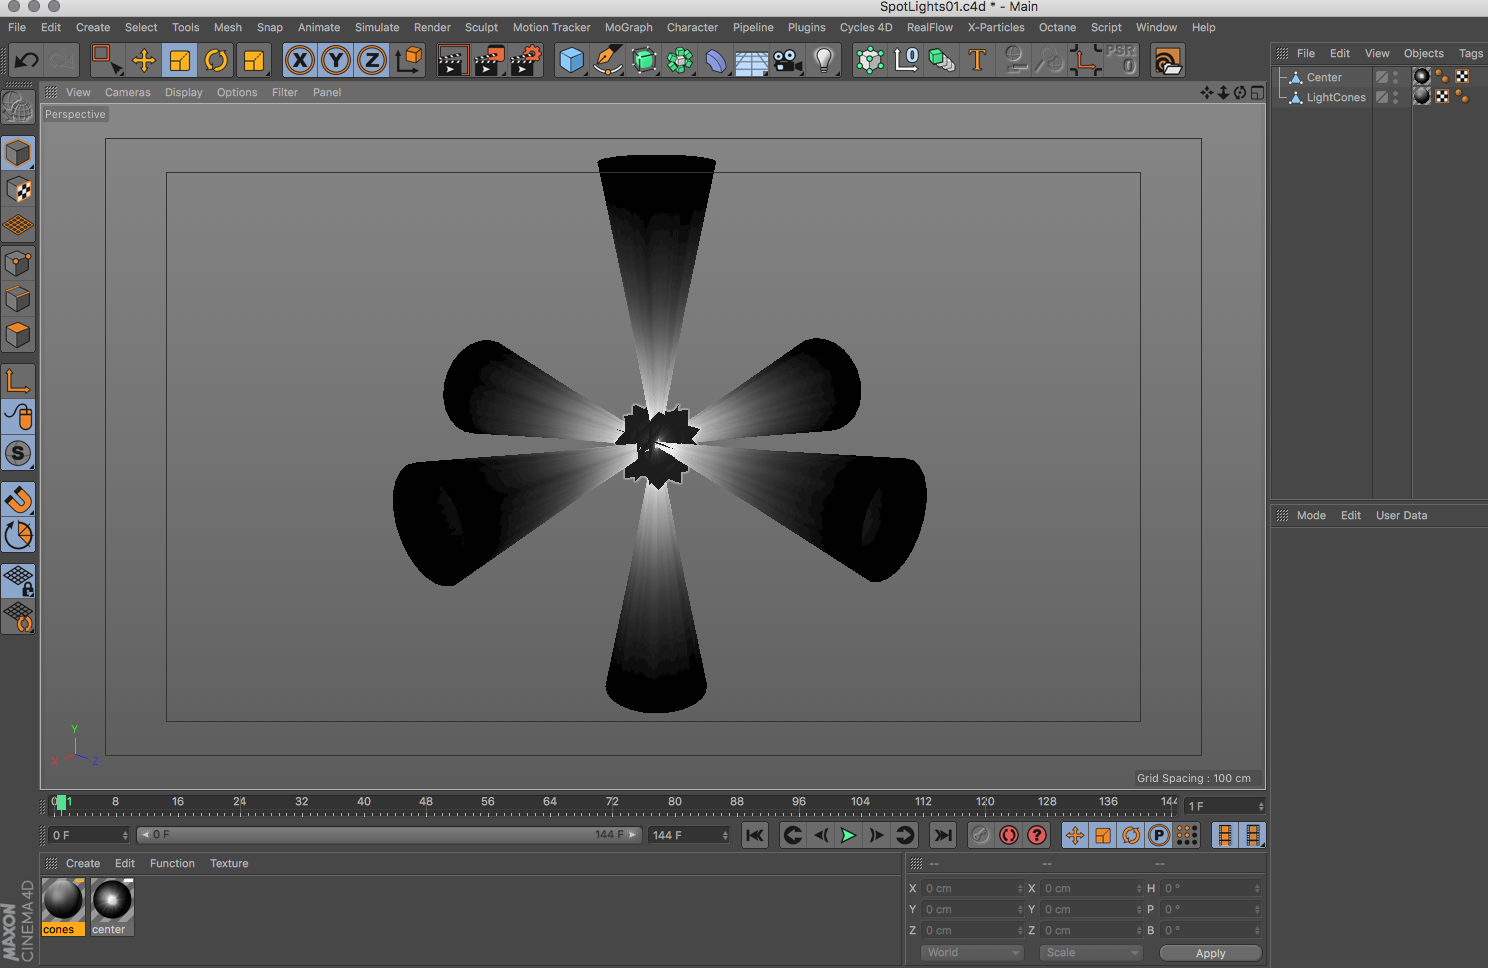
What’s necessary for this project are two FBX models and two image textures. I used Cinema4d for models. 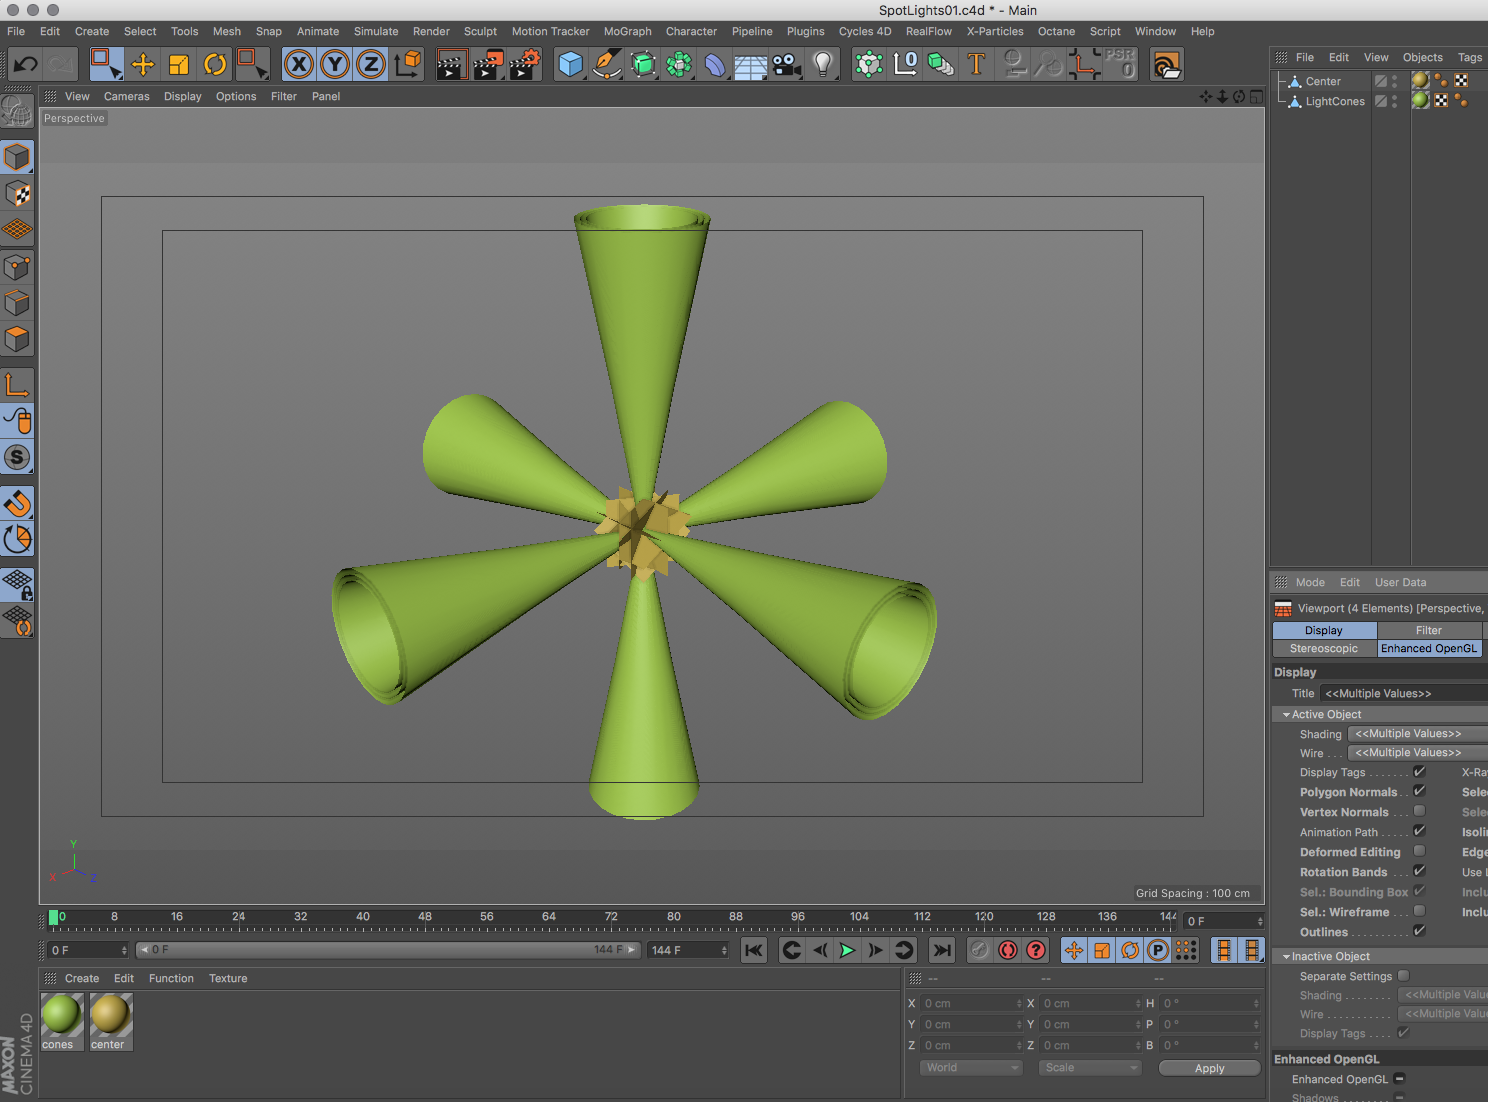 Before exporting, make sure there are only two objects and materials each. You can export FBX File menu > Export… > FBX(.fbx). In Export Setting window, turn off all General checkbox and turn on Textures and Materials in Additional. Type ‘SpotLights01.fbx’ and save it.
Before exporting, make sure there are only two objects and materials each. You can export FBX File menu > Export… > FBX(.fbx). In Export Setting window, turn off all General checkbox and turn on Textures and Materials in Additional. Type ‘SpotLights01.fbx’ and save it.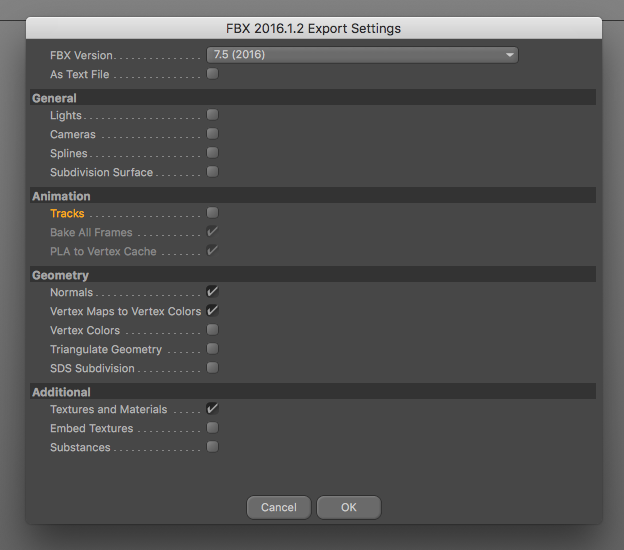
If you are member of cinevercity, I recommend to use cv-smartexport instead.
The textures are basically circular and vertical gradient. Circular for center object, vertical* for cones object. I’ll give you screenshots of aftereffects and photoshop.
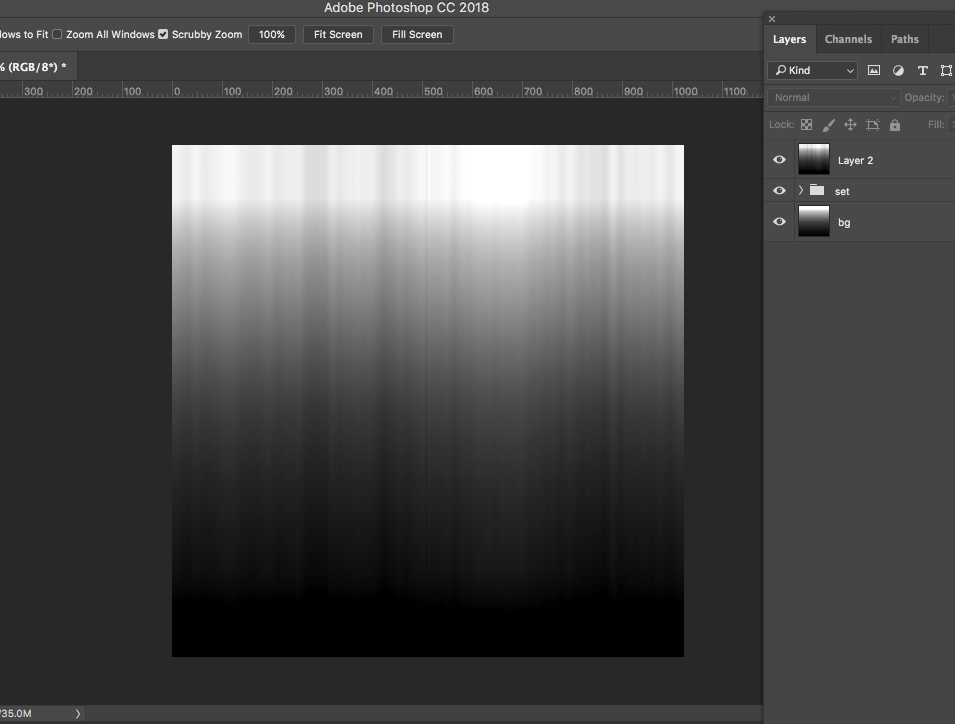
* It’s depend on uv of cone object.
02.Shader and Material with shader forge
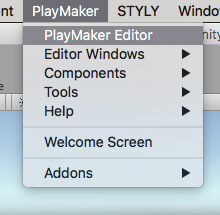
Let’s move to unity. First thing first, import assets(ShaderForge, Playmaker and Unity plugin for STYLY)*, models and textures. I usually create ‘_myAsset’ folder and import assets I created there.
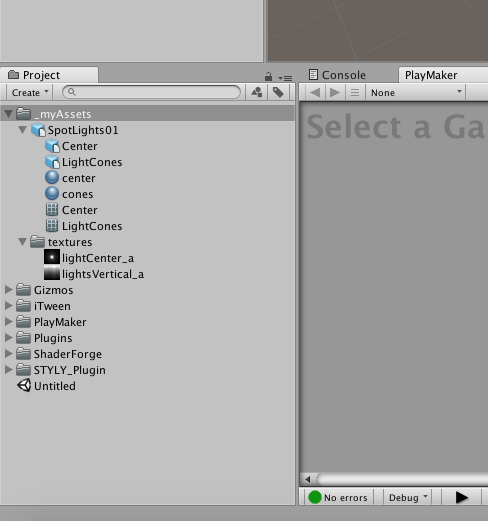
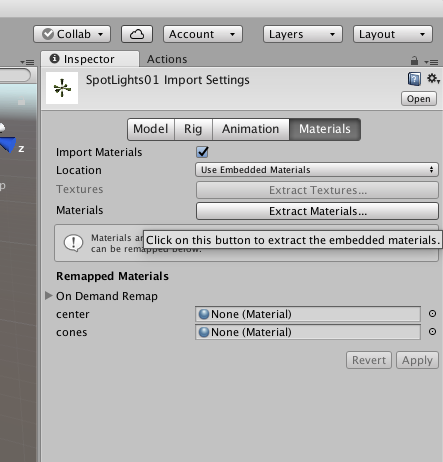
After importing, set up the FBX. Click the SpotLights01 in Project panel and see the inspector panel. Hit Materials button and Extract Materials… button. Now we can edit materials.
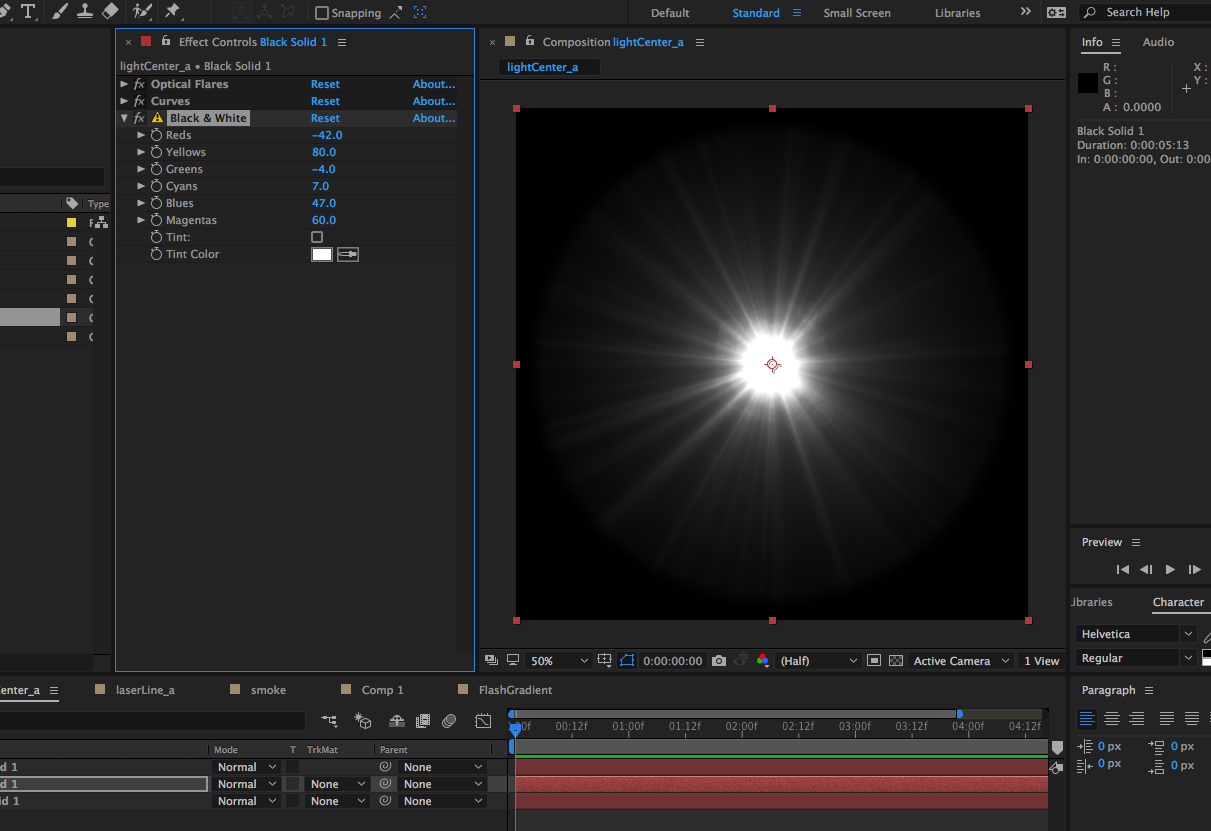
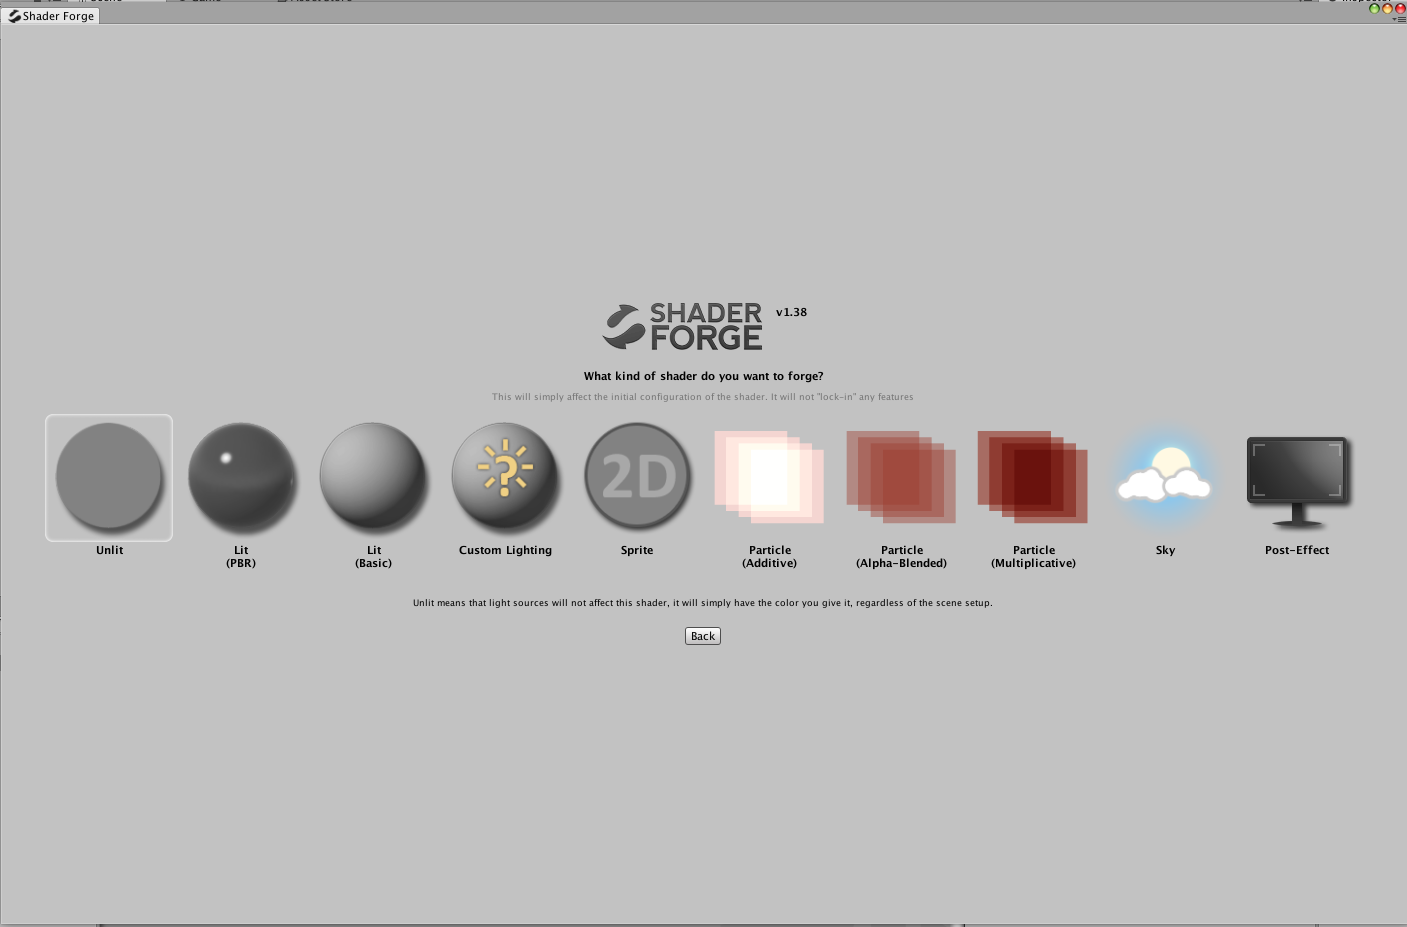
Next step, create new shader for the materials. Open ShaderForge window (Window menu > Shader Forge) and click New Shader. This time select Unlit on the left end and name it ’spotLights.shader’.
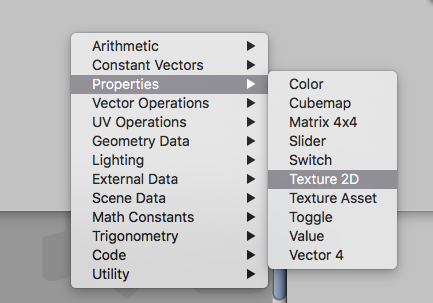
Node editor will opened. Add Texture 2D (Right click > Properties > Texture 2D) and connect R to Opacity.
A Yellow triangle will appear in Console area in left. So, click it. Blend mode will change from Opaque to Alpha Blended.
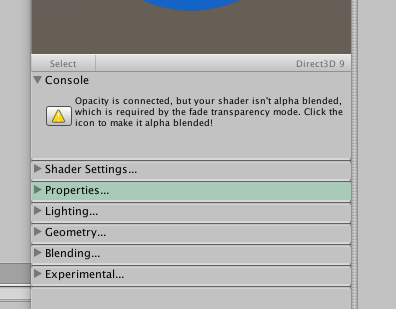

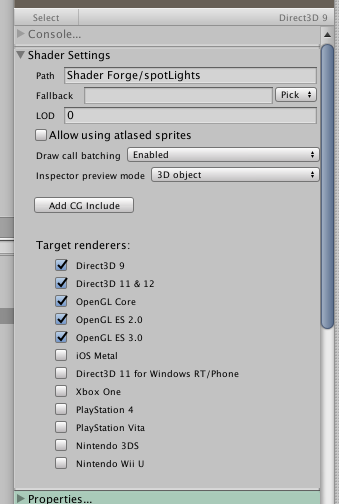
Check Shader settings area and turn on OpenGL ES 3.0.
The shader is done!
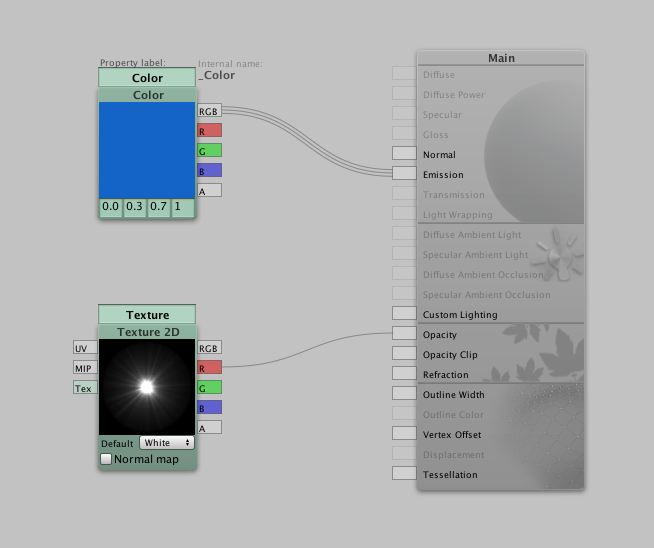
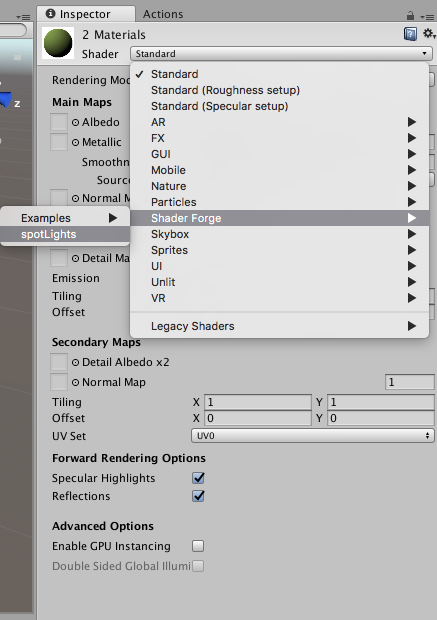
Let’s assign this to materials. Select center material in Project and see Inspector panel. click Shader rollout on top and select ’spotLights’ in shaderForge.
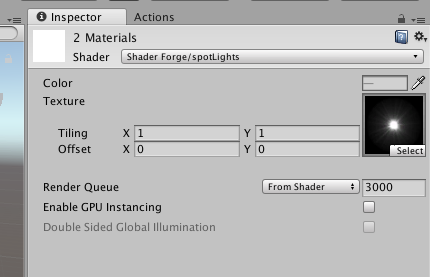
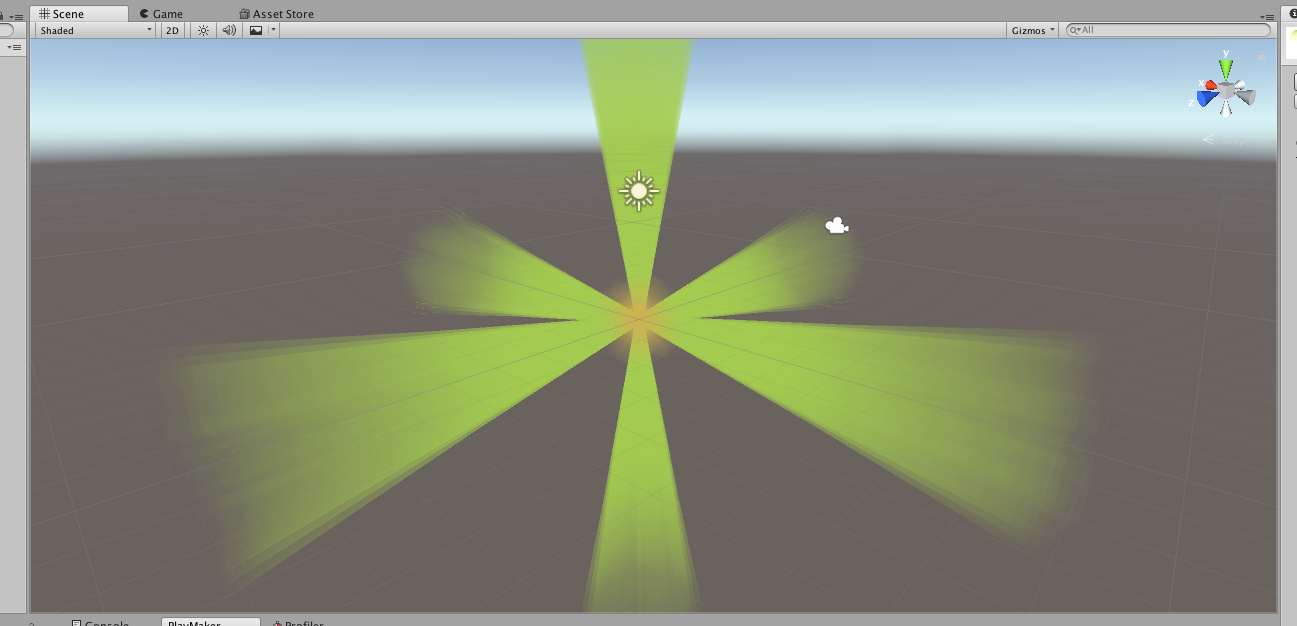
Inspector panel will change. Add the circular gradient texture and change color. the center object will brighter in Scene view. Edit Cones material too.
*more information of assets are below.
03.Add simple animation with Playmaker
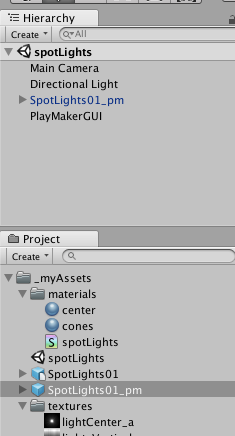
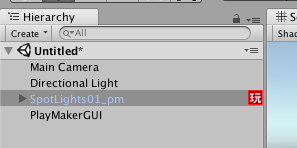
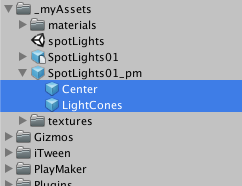
Next step, need to make a prefab. Select SpotLights01 in Project and drag to Hierarchy. change the name to ’SopotLights01_pm’ and drag to Project. At this time, ’SopotLights01_pm’ can be find in both Hierarchy panel and Project panel.
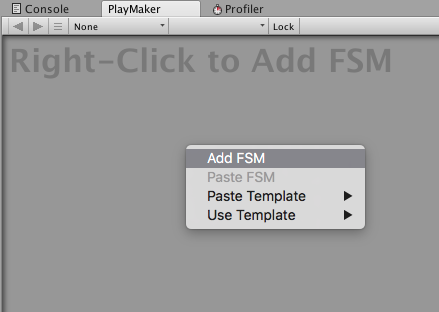
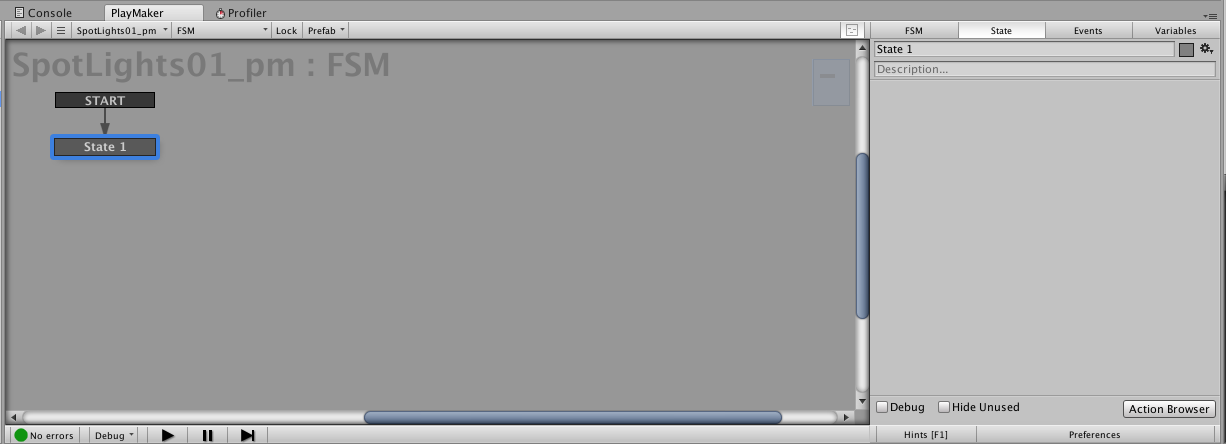
Select the prefab in Project panel and Open PlayMaker editor. In the editor, left click and select ‘Add State’. ‘START’ and ‘State 1’ will appear in the editor.
Also you can find red icon right side of ’SopotLights01_pm’ in Hierarchy panel. Hit State tab right side of Playmaker editor and click Action Browser button in right side of corner. Action Browser will appear.
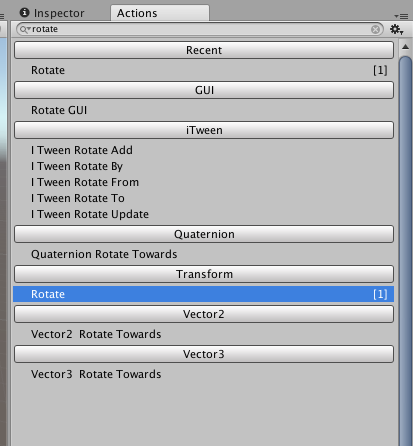
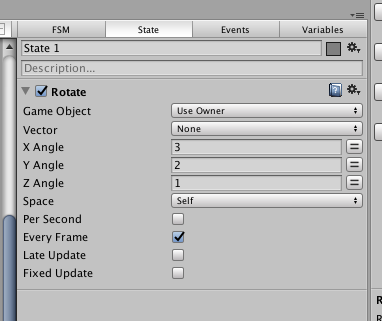
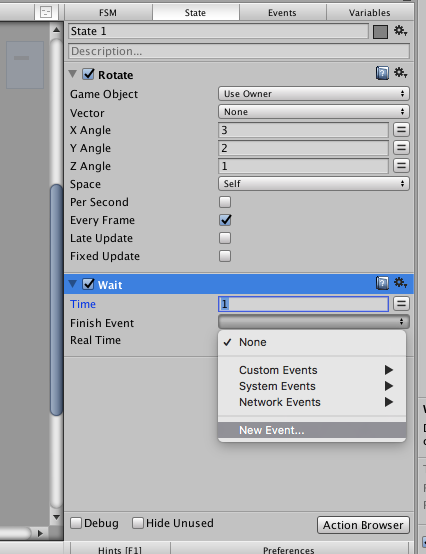
Type ‘rotate’ in search box and find ‘Rotate’ in Transform. select it and hit enter. The Rotate action will added to State 1. How to use this action in simple way is add some number to X,Y,Z Angle. Make sure ‘=‘ icons are white. If not, click the icon. After that, enter some numbers like 1 or 2.5 to each text box. Turn on the Every Frame if it’s off.
Hit the Unity Play button and check the animation.
04.Change color with Playmaker
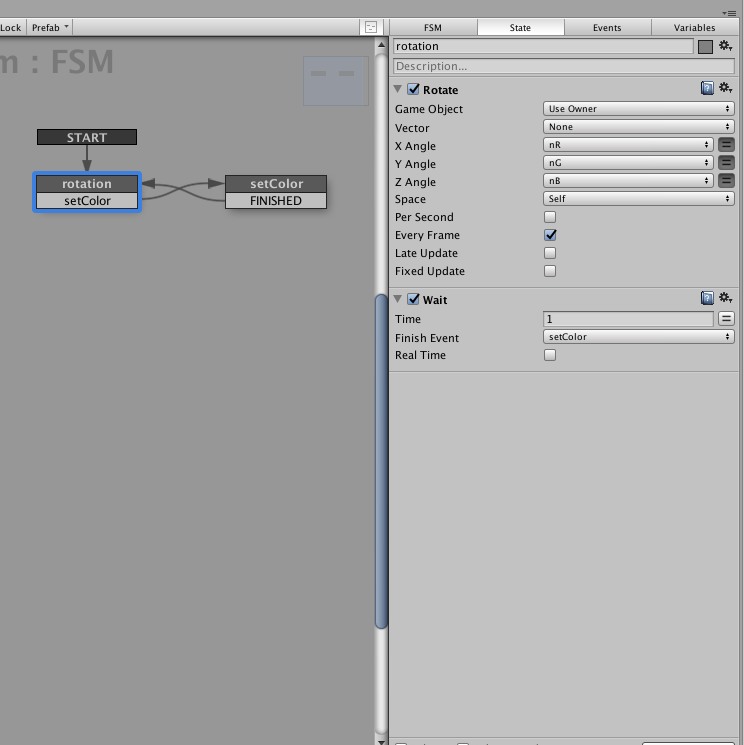
In this section, add a function which change color randomly each 1 second. For this function, two states are needed. in the first state, it wait for a second while rotating. In the second state, select random color and set the color to materials.
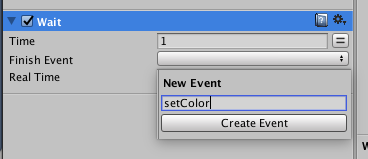
Firstly, add Wait action under the Rotation action in State 1. Click Finish Event dropdown and select New Event. Name the event ‘setColor’ and hit Create Event.
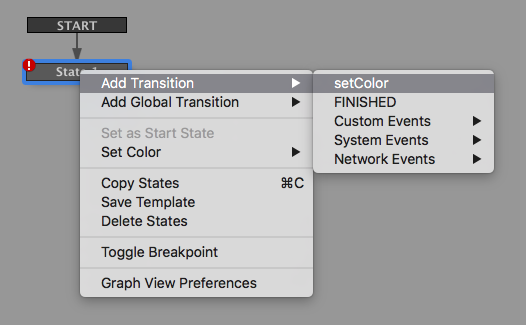
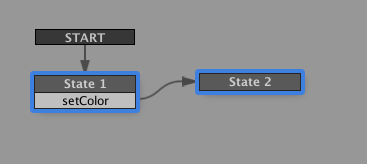
Red caution icon shows up on ’State 1’. Right click the ‘State 1’ icon and select setColor event(Add Transition > setColor). The setColor will appear under the ’State 1’. Next, add new state(right click empty area and hit Add State). ‘State 2’ will Came out. Drag setColor to ‘State 2’,
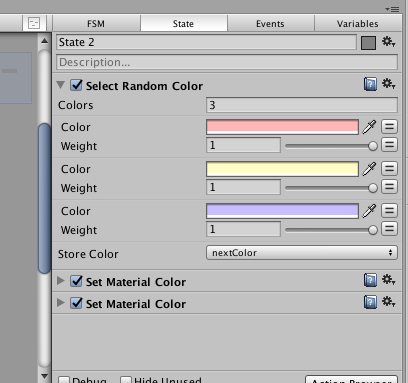
At this moment, change ‘State 1’ to ’State 2’ after Wait action( in other word, i second). Move to ’State 2’. Select ‘State 2’ and add two Set Material Color action. Red caution icon shows up on ’State 2’. So, check the Set Material Color action.
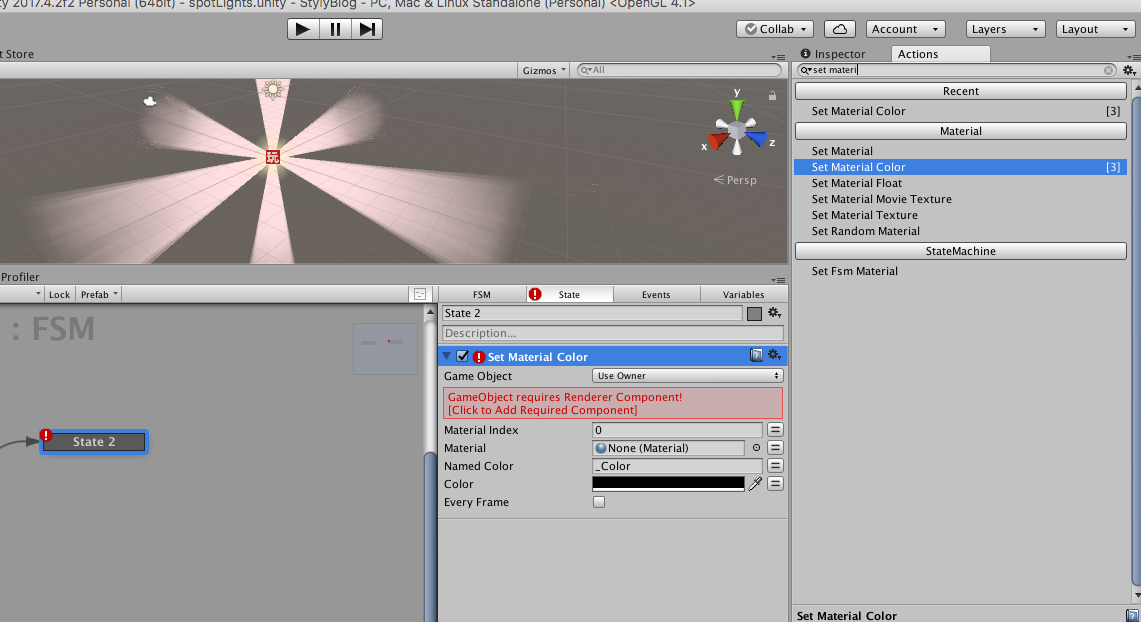

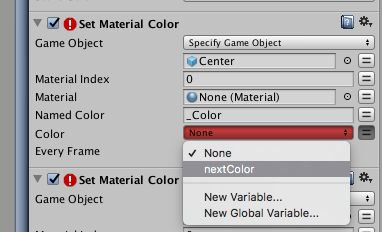
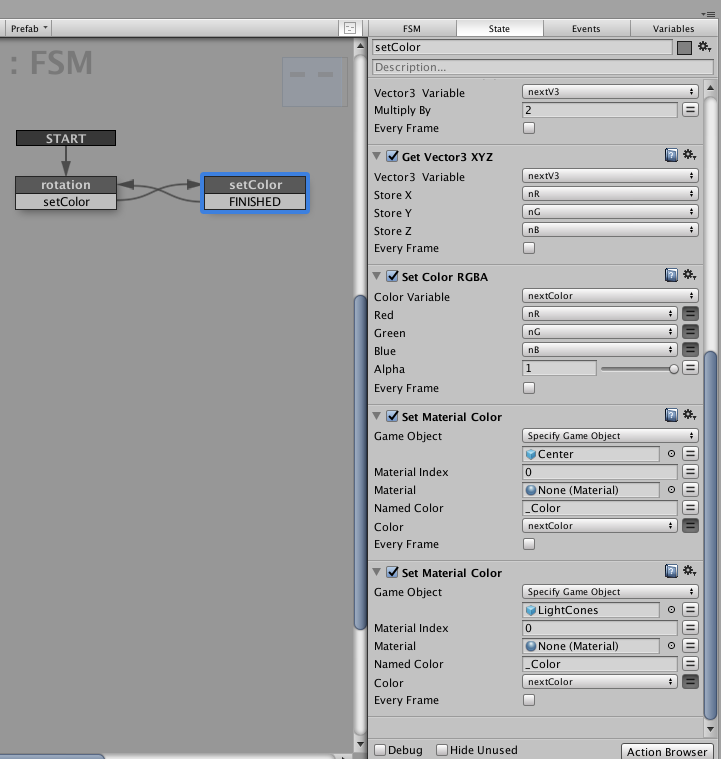
Change Game Object dropdown to ’Specify Game Object’ and drag and drop Center and LightCones objects from Project panel to the box under the dropdown. and DO NOT add any materials the Material box. When hit the Unity Play button, the prefab became black after a second.
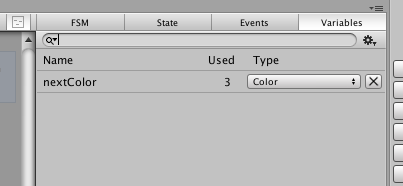
We need more actions. Add Select Random Color above Set Material Color. Set colors to each color box and hit Store Color dropdown. Select new Variables and create ‘nextColor’. back to Set Material Color. Click ‘=’ icon right side of color box. The color box will change dropdown menu. This means use variables insted. Change the menu to ‘nextColor’.
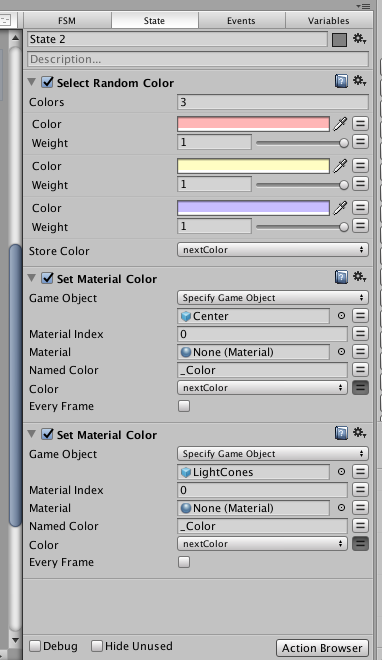
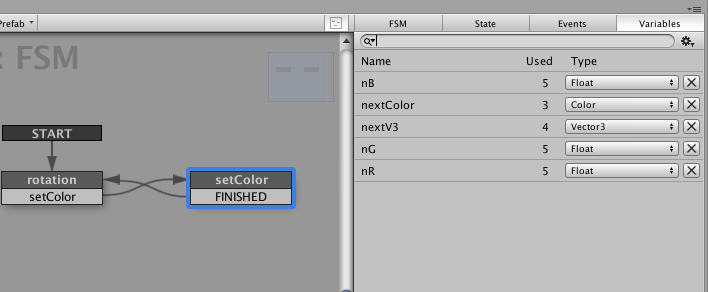
If you want to see list of variables, hit the Variables tab.
At this time, change color randomly but only once and stop animation. Why this happen is the object stay in ’State 2’ after changing color. In other word, need to back to the ’State 1’.
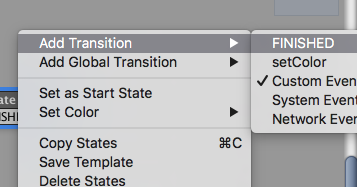
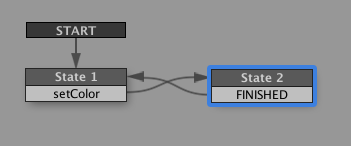
Make sure all Every Frame check box in actions in ’State 2’ are off. Select ’State 2’ and Add transition > ‘FINISHED’. Drag FINISHED event to State 1. Finally, the animation is continuous with changing color.
05.An idea of change color with Playmaker
This section shows an idea of changing color with Random Float action instead. I omit a detailed explanation but all screenshots are here.
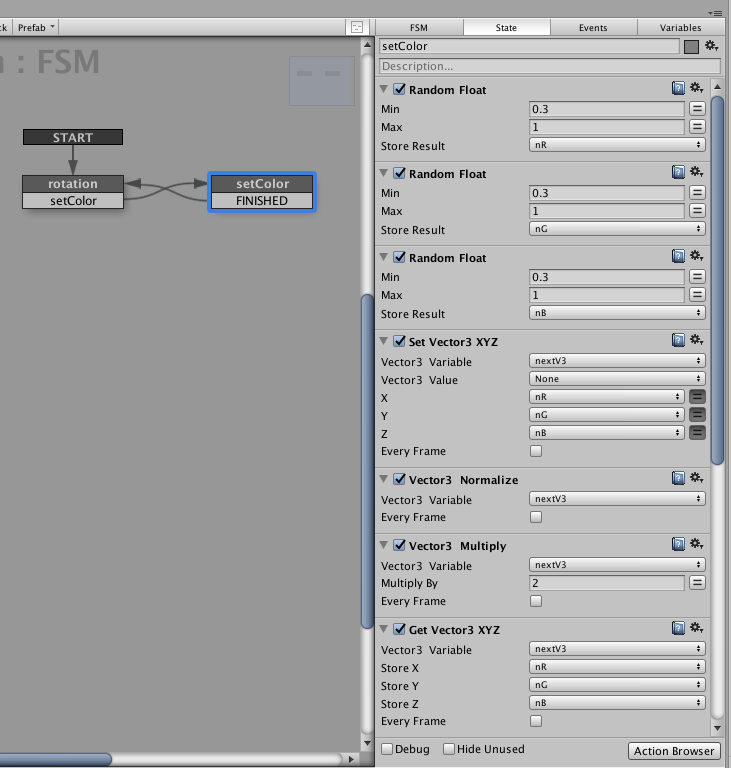
Make tree float variables and add values randomly. set these float to both Rotate action and Set Material Color actions. Again, Make sure all Every Frame check box in actions in ’State 2’(or setColor state) are off. Because, ‘FINISHED’ event doesn’t work when Every Frame check box is on.
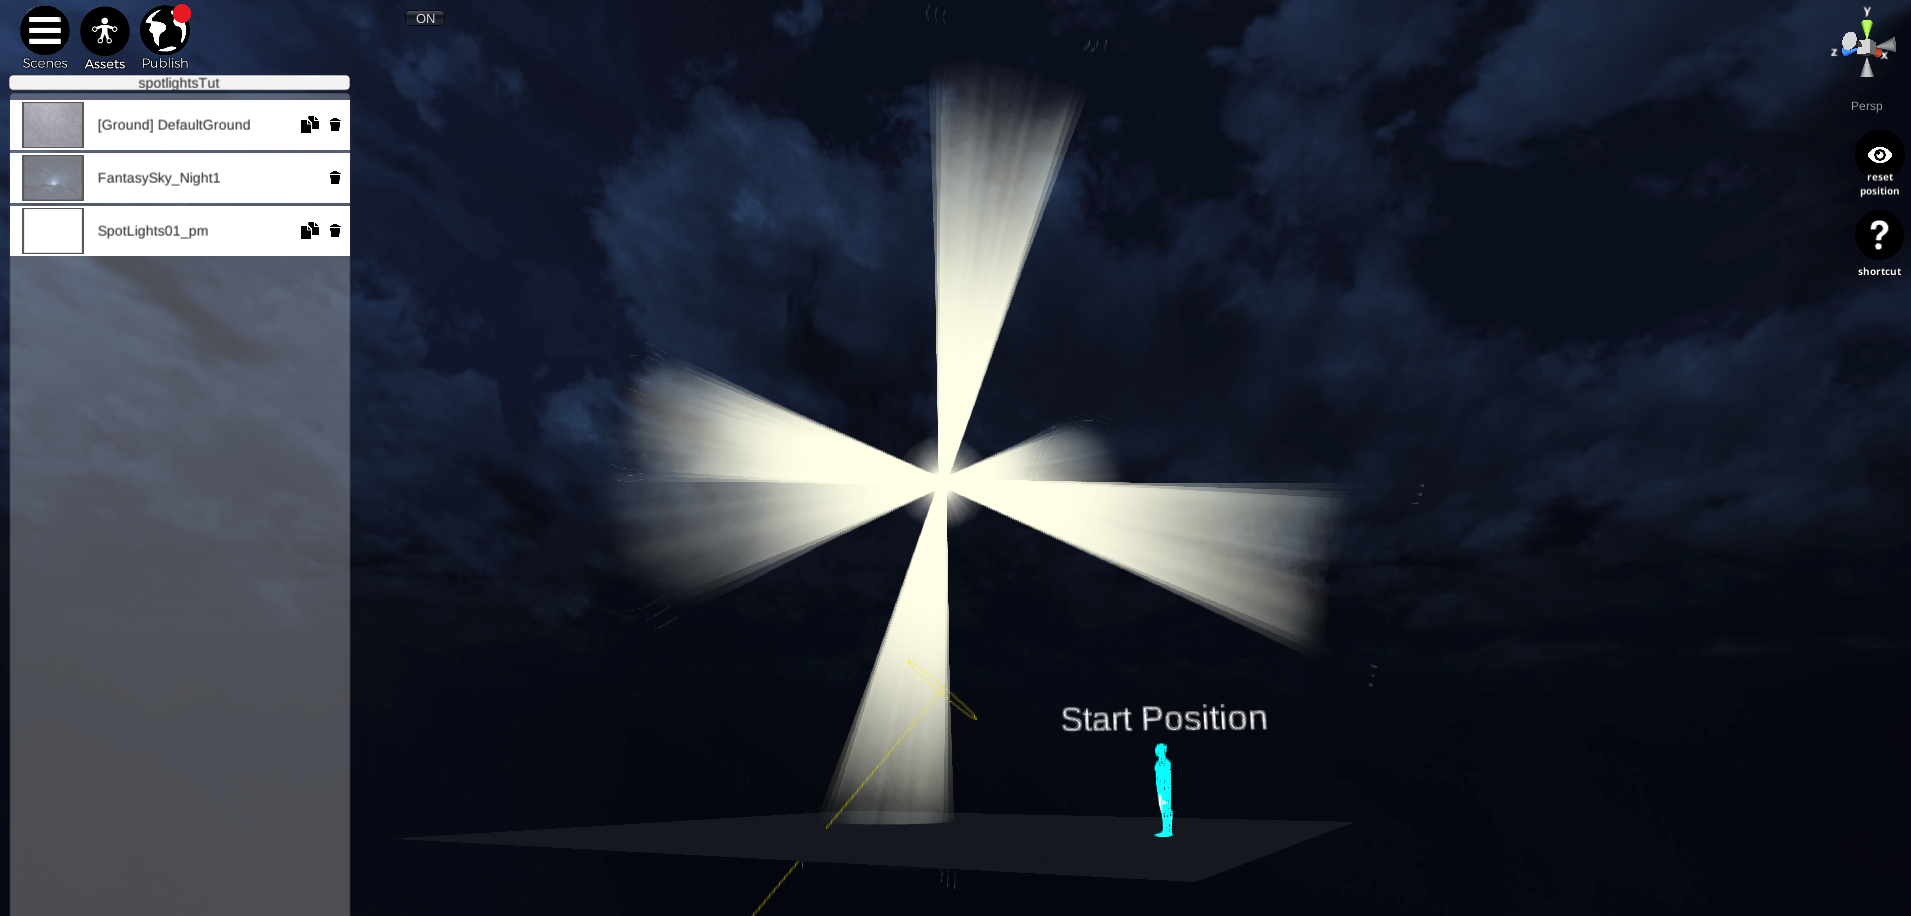
06.Check in STYLY.
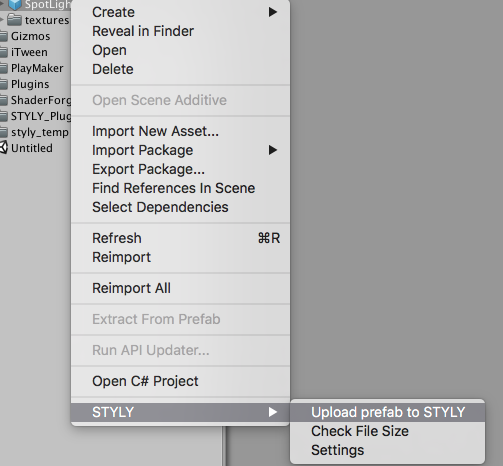
Let’s Upload to STYLY. Right click ‘SopotLights01_pm’ prefab in Project panel and hit the ‘Upload prefab to STYLY’.
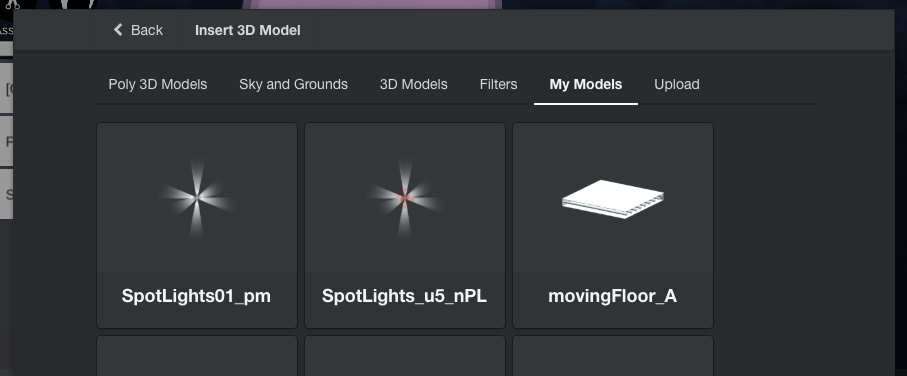
After while, move to online STYLY editor. You will find the prefab in ‘My Models’(Asset > 3D Models > My Models).
Eventually, we can enjoy this asset in VR!