Particle systems is a Unity function designed to create effects such as sparks and flames in a scene.
By using 3D models, landscapes, and animations, creators can design almost anything with Unity. However, by using particle systems, creators can express their creativity even further.
In this article, I am going to introduce the basics of the particle system and also provide a tutorial on how to install a particle package and use it.
Add a Particle System
Select 「Game Object」→「Effects」→「Particle System」 from the menu bar.
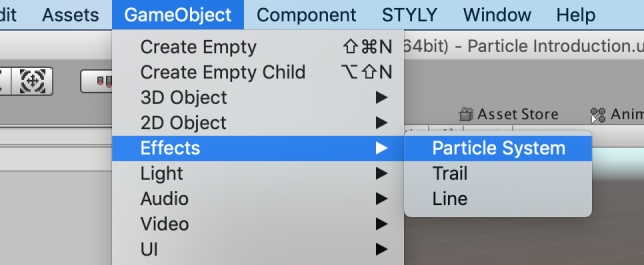
Adding a particle system
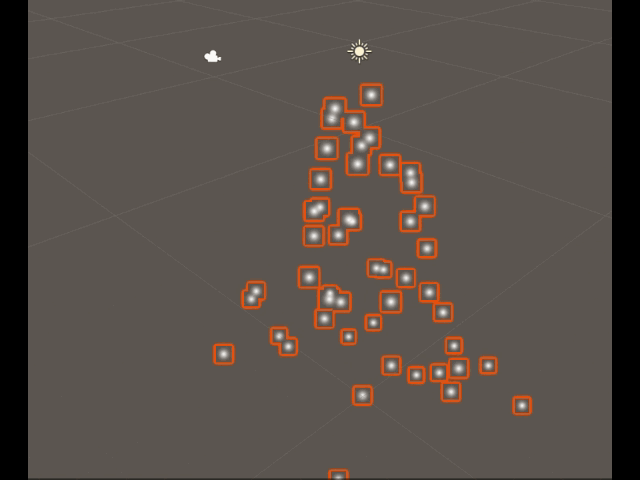
An animation like these white spheres can be added to a scene. This is an example of a particle system.

Check the scene
Preview Panel
Select Particle System in the Hierarchy window. A window named ‘Particle Effect’ will appear at the bottom right of the scene. This is called a preview panel.
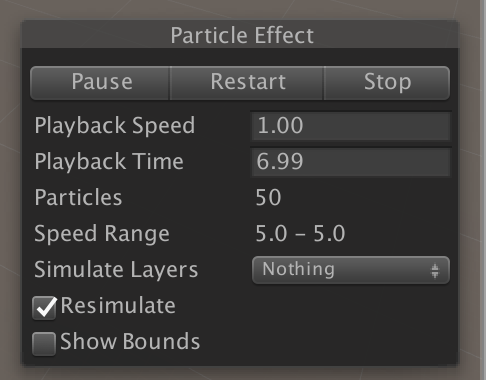
Preview Panel
Details about the particle is shown in the preview panel.
| Pause | The animation will pause by clicking this. |
| Restart | The animation will restart by clicking this. |
| Stop | The animation will disappear by clicking this. |
| Playback Speed | This is the playback speed of the animation. You can edit it by changing the number, or by moving the arrow on the right. |
| Playback Time | This shows how much time has passed from the start of the animation. |
The other information listed isn’t important right now, so you can put this information aside.
Particle Transform
You can move, rotate, and zoom in and out these particles just like 3D models.
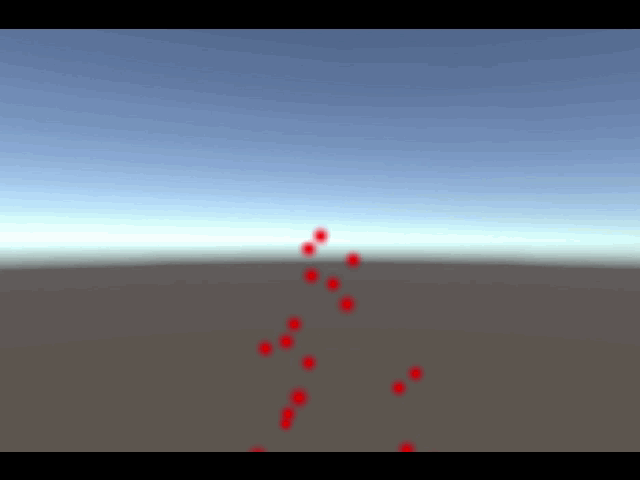
You can also set where the spheres appear and you can change the effect so that the sphere drops from the sky, as shown in the image.
Fall from above effect
Change Settings in the Particle Inspector
There is an Inspector window for particles, just like with 3D models, where you can edit settings.
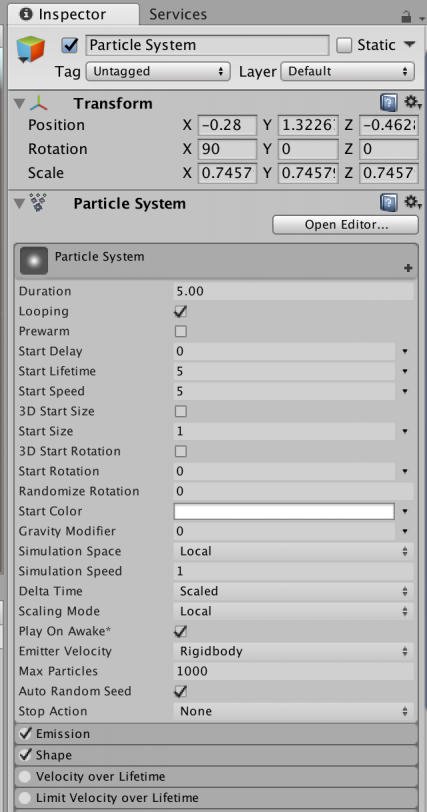
Particle system Inspector
The items vary according to the particle type, but I will introduce important items as well as other more common items.
Duration
Sets the time that the particle is visible.
If you set the looping to OFF, the animation will end after the duration time passes.
If you check the loop option, the duration will become the time for 1 cycle of the animation.
Looping
This is the setting for whether the animation loops or not. If you set this option, then the animation will loop over again.
Prewarm
If you select this option, the animation starts immediately.
Start Delay
This is the time until the animation starts. If you set this option, the animation will start after the delay time.
※This cannot be activated if Prewarm is checked.
Start Lifetime
This sets how long the particle will be visible.
If you set the number larger, each particle will be displayed for a longer period of time.
Start Speed
This sets the display speed of the particle.
Start Size
This changes the size of each particle. If you set the number larger the particles will become larger.
Start Rotation
This sets the direction of the particle when it appears.
The example particle is a sphere, so this option doesn’t matter, but you may use this option when you are dealing with a particle that has a different shape or when applying materials.
Start Color
Sets the particle color. If you click the white long rectangle, the color palette will appear, and if you select a color, the particle will change to that color.
Changing the Start Color to red
Gravity Multiplier
Applies gravity to the particle.
The default is 0, but as you set the number larger, the gravity applied will become larger.
Max Particles
Sets the max number of particles that appears within the screen.
If the number of the particles reaches this number, then no additional particles will appear.
If the number of particles decreases, then new particles will be created.
Particle Number Transform Equation
There are many items where you can change the number to adjust appearance, such as speed or size, but the number is fixed by default.
However, you can change this. For example, the particle speed can be gradually increased.
If you click the ▼ mark to the right of the number, then a menu will appear as shown in the image below.
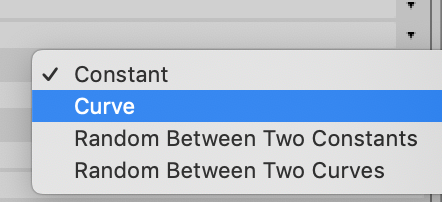
Particle number transform equation
Each element is explained below.
| Constant | The default setting is a fixed number. |
| Curve | You can draw a graph and the number changes according to the graph. |
| Random Between Two Constants | You select 2 numbers and a random number between those 2 numbers will be selected. |
| Random Between Two Curves | You draw 2 graphs and a number between the 2 graphs will be selected randomly |
How to Create a Curve Graph
If you select Curve or Random Between Two Curves, then a graph will appear as shown below.
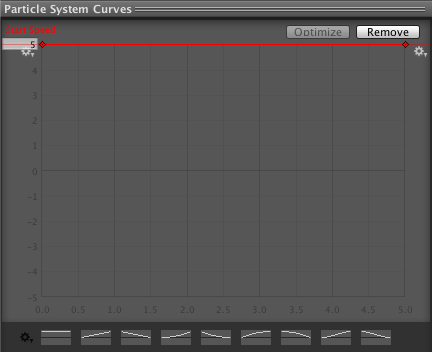
Particle System Curves
The left edge of the red line is the start position and the right edge is the end position.
You can click, drag, and drop a point on the red line and move the line to form a graph.
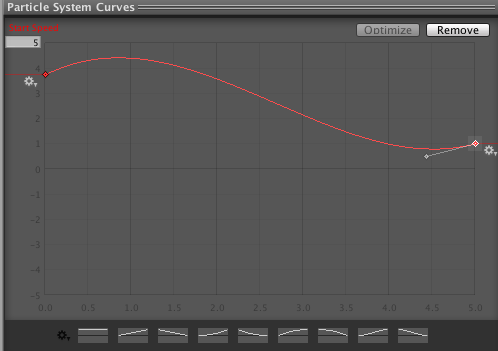
Creating a curve
There are many sample curves shown below the graph and if you click one, then the curve will become applied to the graph.
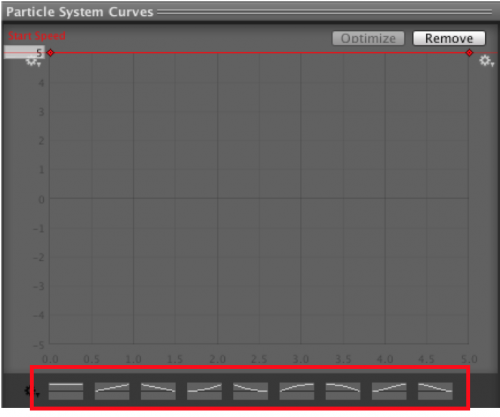
Default curves
That’s all for the basic settings for particles.
Particle Package
So, we have learned how to set particles, but it is difficult to create an animation we like just from creating a sphere.
There are many particles in Unity that we can use.
Let’s import a particle package and create a particle system for our scene.
Select 「Assets」→「Import Package」→「ParticleSystems」from the menu bar.
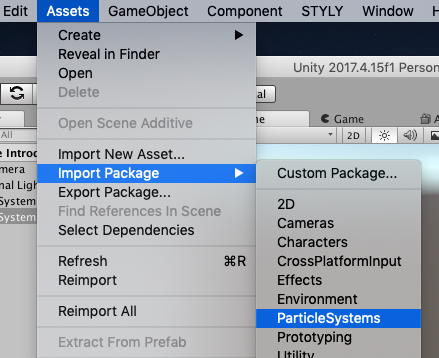
Select「ParticleSystems」
A package with a list of particles will appear, please import this.
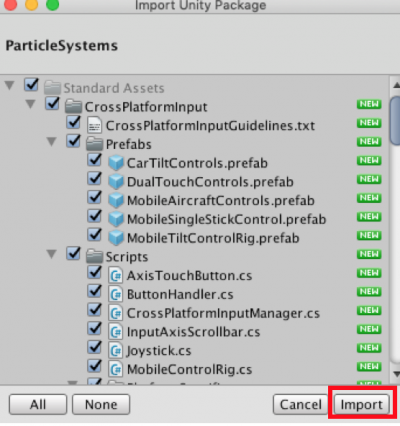
Importing a Particle package
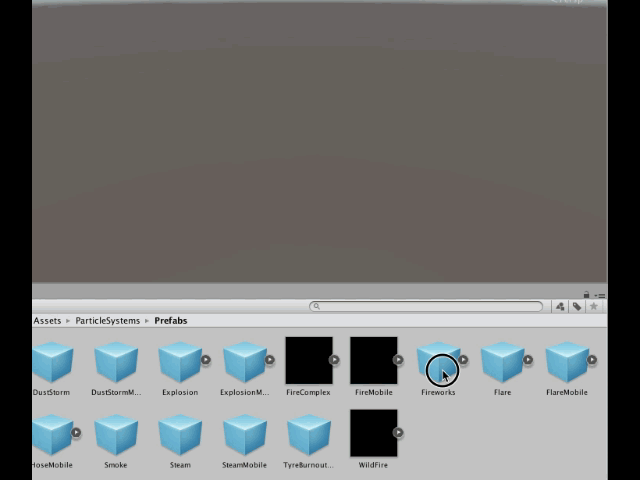
Open 「Standard Assets」→「ParticleSystems」→「Prefabs」 from the Assets folder and you will find a list of the imported prefabs.
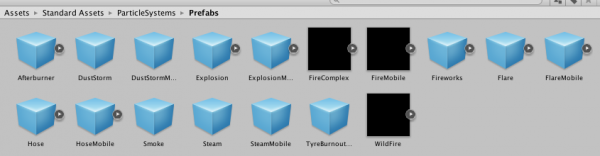
Particle list
You can use a Prefab by dragging and dropping it into a Scene.
Adding a Prefab to a Scene
Please try out some of these prefabs and play the scene.
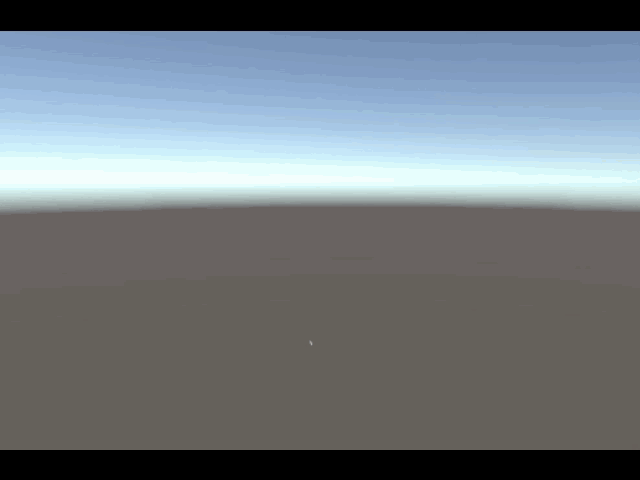
Fire Particle
In the above example, we have successfully added a fire particle to a scene.
In this tutorial, we introduced using a particle package. Creators can easily add animations of their choice to a scene. I hope you try out different animations for your next scene.