I explain how to create rain with Unity and upload it to STYLY.
※You can access the sample project from https://github.com/styly-dev/STYLY-Unity-Examples/tree/master/Assets/STYLY_Examples/Rain
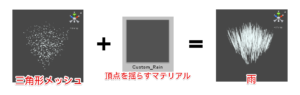
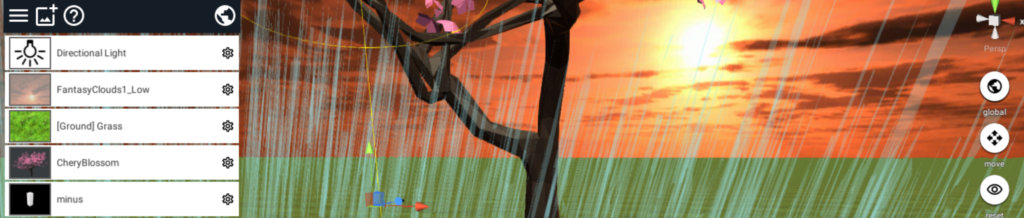
A sample of rain by Vertex Shader in Unity
How to create rain
Before creating rain, I give an overview of how to create it.
It requires 3 STEPS as shown below.
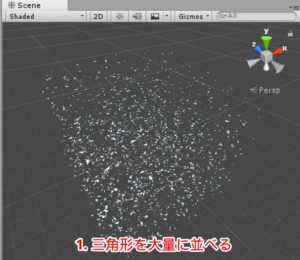
- Create a lot of triangular meshes.
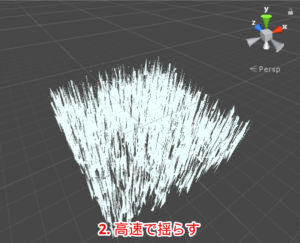
- Shake the triangular meshes arranged at high speed.
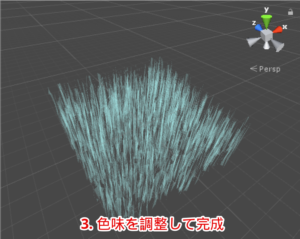
- Adjust the colour to make them look like rain (Completion).
Create a lot of triangular meshes
Create triangular meshes by a program
I arranged a lot of fine triangular meshes so that they fill a cube.
Shake the triangular meshes at high speed
Shake the triangular meshes by Vertex Shader
Shake the vertices by Vertex Shader
Adjust the colour to make them look like rain (completion)
Adjust the colour to make them look like rain. It completes the modelling.
Colour the meshes in translucent light blue to make them look like rain. It completes modelling rain.
Create meshes
From now, I explain the actual steps to model rain.
Firstly, we create meshes.
Create a lot of triangular meshes by a program
Preparations
This time, we use two C# scripts to create triangular meshes.
I explain how to add two C# scripts here.
Script 1: Create RandomMesh.cs
Firstly, right-click in the Project window to create a C# script.
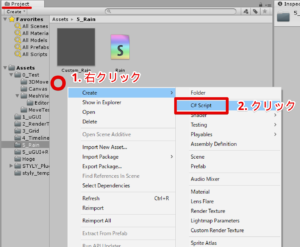
Create a C# script
Rename it RandomMesh.
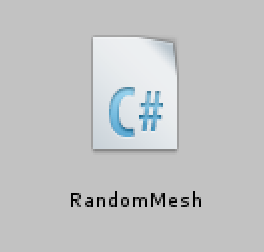
Check the script created.
Open the script, RandomMesh, and edit it as shown below.
using UnityEngine;
using System.Collections.Generic;

[RequireComponent(typeof(MeshRenderer))]
[RequireComponent(typeof(MeshFilter))]
public class RandomMesh : MonoBehaviour
{
    const string k_MeshName = "[Generated]RainMesh"; // Mesh Name
    [SerializeField, Header("The number of raindrops")] int m_TriangleCount = 1500; // The number of triangular meshes
    [SerializeField, Header("The size of raindrop")] float m_TriangleScale = 0.3f; // The size of triangular meshes
    [SerializeField, Header("The randomness of rain")] Vector3 m_TriangleRange = new Vector3(4f, 4f, 4f); // The randomness of rain
    [SerializeField, HideInInspector] string m_OnCreateText = "No mesh information\n Update Mesh";

    public int TriangleCount { get { return m_TriangleCount; } }
    public float TriangleScale { get { return m_TriangleScale; } }
    public Vector3 TriangleRange { get { return m_TriangleRange; } }
    public string OnCreateText { get { return m_OnCreateText; } set { m_OnCreateText = value; } }

    /// <summary>
    /// Craete a new mesh
    /// </summary>
    public Mesh CreateNewMesh()
    {
        Vector3[] vertices = new Vector3[m_TriangleCount * 3]; // The coordinates of vertex
        int[] triangles = new int[m_TriangleCount * 3]; // The index of vertex
        Vector3[] normals = new Vector3[vertices.Length];
        int pos = 0;
        for (int i = 0; i < m_TriangleCount; i++)
        {
            var v1 = Vector3.Scale(new Vector3(Random.value, Random.value, Random.value) - Vector3.one * 0.5f, m_TriangleRange);
            var v2 = v1 + new Vector3(Random.value - 0.5f, 0f, Random.value - 0.5f) * m_TriangleScale;
            var v3 = v1 + new Vector3(Random.value - 0.5f, 0f, Random.value - 0.5f) * m_TriangleScale;

            vertices[pos + 0] = v1;
            vertices[pos + 1] = v2;
            vertices[pos + 2] = v3;
            pos += 3;
        }

        for (int i = 0; i < triangles.Length; i++)
        {
            triangles[i] = i;
        }

        for (int i = 0; i < normals.Length; i++)
        {
            normals[i] = new Vector3(0f, 1f, 0f);
        }

        //Create a mesh
        var mesh = new Mesh();
        mesh.vertices = vertices;
        mesh.triangles = triangles;
        mesh.normals = normals;

        return mesh;
    }

}
It completes the RandomMesh script.
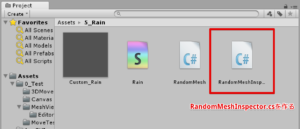
Script2: Create RandomMeshInspector.cs
In the same way, create a script, RandomMeshInspector, as well.
Open the script.
Edit the content of the RandomMeshInspector script as shown below.
using UnityEngine;
using UnityEditor;
using UnityEditor.SceneManagement;
using System.IO;

// Customize Editor
[CustomEditor(typeof(RandomMesh))]
public class RandomMeshInspector : Editor
{
    const string k_ExportMeshName = "[Generated]RainMesh"; // The name of the mesh to save
    static readonly Color k_ButtonColor = Color.yellow;
    static readonly Color k_ButtonTextColor = Color.white;

    /// <summary>
    /// Drawing the Inspector
    /// </summary>
    public override void OnInspectorGUI()
    {
        if (PrefabUtility.GetPrefabType(target) != PrefabType.Prefab)
        {
            EditorGUILayout.HelpBox("You must edit settings via Prefab.", MessageType.Info);
            return;
        }

        var defaultColor = GUI.color;
        var defaultContentColor = GUI.contentColor;

        var randomMesh = target as RandomMesh;

        // Display mesh inforamtion
        EditorGUILayout.BeginVertical("Box");
        EditorGUILayout.LabelField(randomMesh.OnCreateText, GUILayout.Height(54f));
        EditorGUILayout.EndVertical();

        // Change colour
        GUI.color = k_ButtonColor;
        GUI.contentColor = k_ButtonTextColor;

        if (PrefabUtility.GetPrefabType(target) == PrefabType.Prefab)
        {
            if (GUILayout.Button("Update Mesh"))
            {
                EditorCreateMesh();
            }
        }

        // Undo
        GUI.color = defaultColor;
        GUI.contentColor = defaultContentColor;

        base.DrawDefaultInspector();
    }

    /// <summary>
    /// Create and save mesh
    /// </summary>
    [ContextMenu("Create Mesh")]
    void EditorCreateMesh()
    {
        var randomMesh = target as RandomMesh;
        var meshFilter = randomMesh.GetComponent<MeshFilter>();

        // Delete the old mesh installed
        var meshAssets = AssetDatabase.LoadAllAssetsAtPath(AssetDatabase.GetAssetPath(randomMesh));
        foreach (var meshAsset in meshAssets)
        {
            if (meshAsset is Mesh)
            {
                Object.DestroyImmediate(meshAsset, true);
            }
        }

        // Create mesh
        var newMesh = randomMesh.CreateNewMesh();
        newMesh.name = k_ExportMeshName;
        meshFilter.sharedMesh = newMesh;

        // Install new mesh
        AssetDatabase.AddObjectToAsset(newMesh, randomMesh);

        randomMesh.OnCreateText = string.Format(
            "Mesh Information\n・The number of raindrops:{0}\n・The size of raindrops:{1}\n・The size of whole rain: {2}",
            randomMesh.TriangleCount,
            randomMesh.TriangleScale,
            randomMesh.TriangleRange
        );

        // Save
        AssetDatabase.SaveAssets();
        AssetDatabase.Refresh();
    }


    /// <summary>
    /// Generate the path to save mesh(at the same level as Prefab)
    /// </summary>
    string GenerateMeshPath()
    {
        var path = AssetDatabase.GetAssetPath(target);
        var parentFullPath = Directory.GetParent(path).FullName;
        var parentPath = "Assets" + parentFullPath.Substring(Application.dataPath.Length);
        var assetPath = parentPath + Path.DirectorySeparatorChar + k_ExportMeshName; // The path to save the asset
        return assetPath;
    }
}
The two C# scripts required are ready now.
Create Meshes
Next, we actually create triangular meshes.
Triangular meshes
Create a Rain object
Create a GameObject on the Hierarchy window.
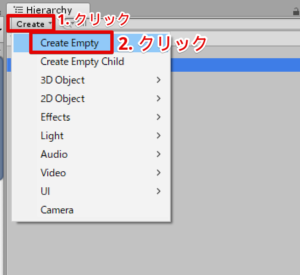
Create an Empty object
Rename the object ‘Rain‘.

Rename the object.
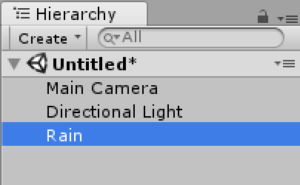
The object renamed.
Add the RandomMesh component
Add the RandomMesh component to the Rain object.
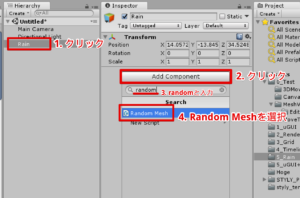
Add the RandomMesh component
The Inspector looks the shown below after adding the component.
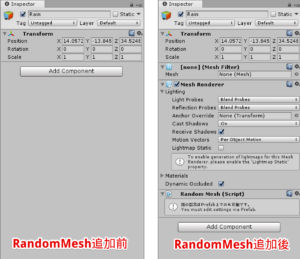
How the inspector looks before and after adding the component.
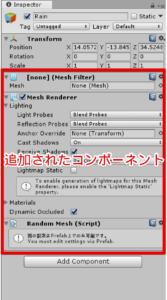
Check the component added.
Convert the Rain object into Prefab
Next, convert the Rain object into a Prefab.
Drag the Rain object in the Hierarchy window onto the Project window.

Create a Prefab by dragging the object onto the Project window.
A Prefab has been created.
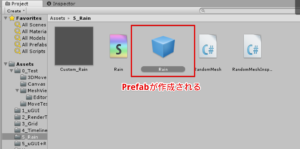
A Prefab created
Create meshes
With the Rain prefab selected, click the ‘Update Mesh’ button on the Inspector window.
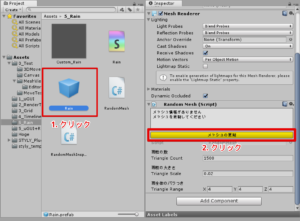
Click the button to update the mesh
A lot of triangular meshes are displayed.
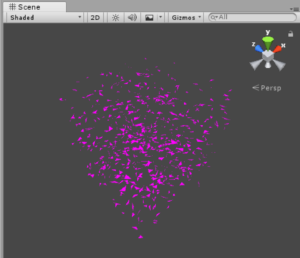
Thw meshes created
Why are the meshes coloured in pink?
You can see meshes coloured in pink. That is because no material has been assigned to the MeshRenderer of the Rain object.
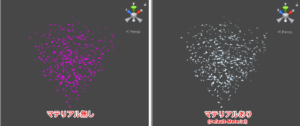
How they look with and without Material
Once a material is assigned, you can adjust the colour.
Assign a material to MeshRender
I will show how to assign a material to the MeshRenderer.
Expand the Materials section of the MeshRenderer.
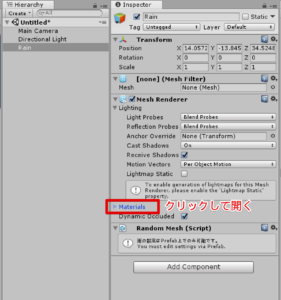
Open ‘Materials’ by clicking the label.
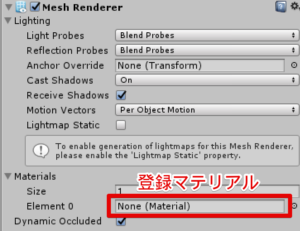
Where to assign the material
Click the circular button on the Materials section to bring up the material-list window. Select the material you want to assign.
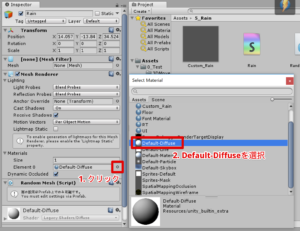
Assign the ‘Default-Diffuse’ material
Select ‘Default-Diffuse’ to assign the Default-Diffuse material to the MeshRenderer.
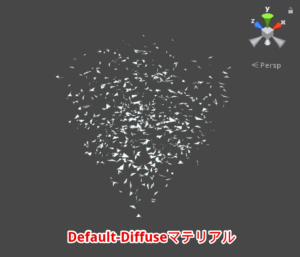
How the triangular meshes look after assigning the material
If assigned the Default-Diffuse material, they would be coloured in white.
Add motion to triangular meshes
Next, we add motion to the meshes to make them look like rain.
I explain how to add motion to the triangular meshes here.
Create a motion by Custom Shader
This time, we use ‘Custom Shader’ to move vertices like rain.
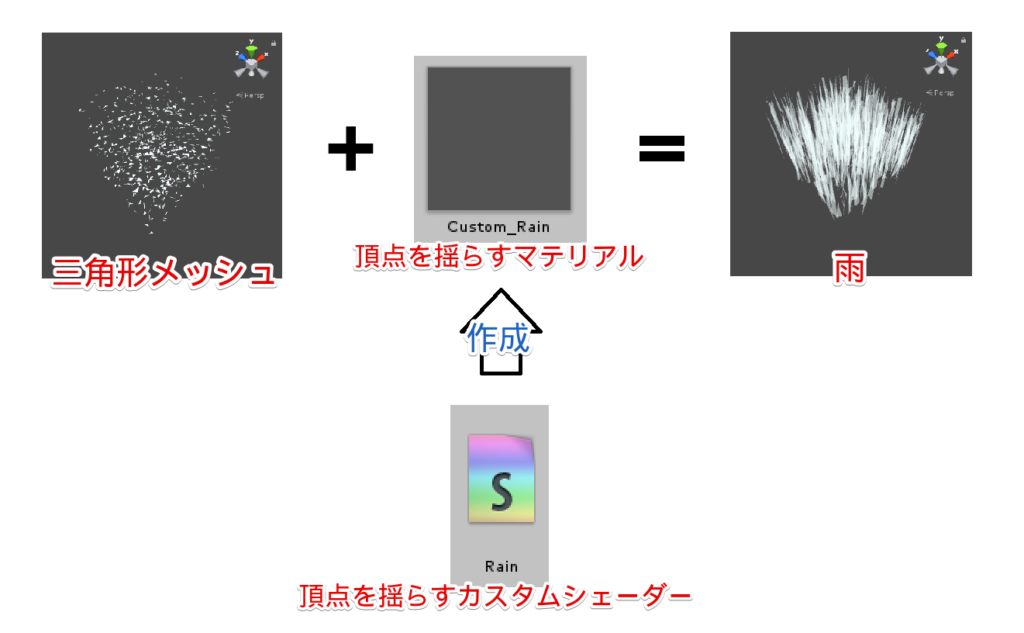
Combining the triangular meshes with a custom shader to render rain
Create Custom Shader
I explain how to create a custom shader here.

the Rain shader
Firstly, click ‘Create’ on the Project window (Alternatively, right-click on the Project window).
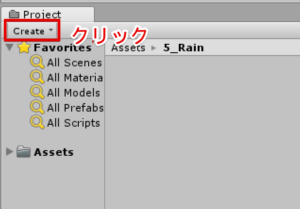
Click ‘Create’.
Select ‘Shader/Standard Surface Shader‘.
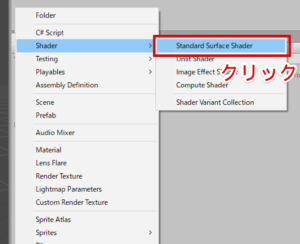
Select ‘Standard Surface Shader’.
A shader is created. Rename it ‘Rain‘.
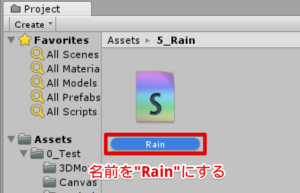
Rename the shader ‘Rain’.
Edit the shader file
Open the Rain shader.
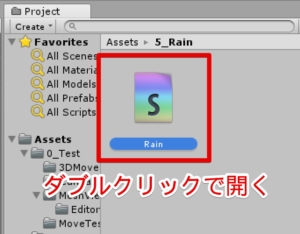
Double-click the Rain shader.
Edit Rain.shader as shown below.
Shader "Custom/Rain" {
    Properties {
        _MainTex ("Base (RGB)", 2D) = "white" {}
        _Speed ("[VS]Rain Speed", Float) = 6.0
        _Scale ("[VS]Rain Height", Float) = 4.0
		_Remap("[VS]Remap", Range(0.0, 1.0)) = 0.7
        [Space]
        _Albedo ("[FS]Rain Colour", Color) = (1.0, 1.0, 1.0, 0.5)
        _Emission ("[FS]Rain Emission Colour", Color) = (0.0, 0.0, 0.0, 0.0)
        _Specular ("[FS]Rain Specular Power", Range(0.0, 1.0)) = 0.5
        _Gloss ("[FS]Rain Specular Intensity", Range(0.0, 1.0)) = 0.5
	}

    SubShader {
        Tags {
            "Queue" = "Transparent"
            "RenderType" = "Transparent"
        }
        CGPROGRAM
        #pragma surface surf Lambert alpha
        #pragma vertex vert

        sampler2D _MainTex;

        // Function to generate random value from [0;1]
        float nhash11(float n){
            return frac(sin(n) * 43758.5453);
        }

        // Convert the range [a;b] into [0;1]
        float remap(float t, float a, float b){
            return clamp((t-a)/(b-a), 0, 1);
        }
        // Vertex Shader
        half _Speed;
		half _Scale;
		half _Range;
		fixed _Remap;

        // Colour
        half4 _Albedo;
        half4 _Emission;
        fixed _Specular;
        fixed _Gloss;


        // Vertex Shader Function
        void vert(inout appdata_full v) {
            fixed rnd = nhash11(fmod(v.vertex.z, 512.0)); // Random value
			//float timer = _Time.w * _Speed * remap(0.7, 1.0, rnd);
			float timer = _Time.w * _Speed * remap(_Remap, 1.0, rnd); // Convert the range [_Remap, 1.0] -> [0;1]
            v.vertex.y -= fmod(-v.vertex.y + timer, _Scale) + v.vertex.y - _Scale * 0.5;
            // v.vertex.y -= fmod(-v.vertex.y + timer, 4.0 / _Range) + v.vertex.y - _Scale * 0.5;
        }

        struct Input {
            float2 uv_MainTex;
        };

        // Surface Shader Function
        void surf(Input IN, inout SurfaceOutput o) {
            half4 c = tex2D(_MainTex, IN.uv_MainTex);
            o.Albedo = c.rgb * _Albedo.rgb;
            o.Emission = _Emission;
            o.Specular = _Specular;
            o.Gloss = _Gloss;
            o.Alpha = _Albedo.a;
        }
        ENDCG
    }
}
It completes editing the shader.
Additional Note: About the filename of Shader
The shader name is ‘Rain‘ on Unity, but the actual filename is ‘Rain.shader‘.
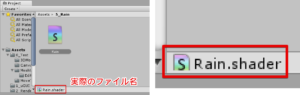
Check the filename of the shader
You can check the filename at the bottom of the Project window.
Create Material
Next, I explain how to create a material.
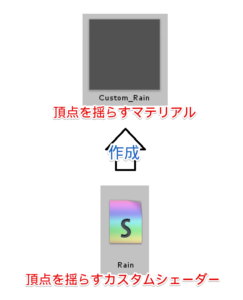
Create a material from the shader
Right-click the Rain shader and select ‘Create/Material‘.
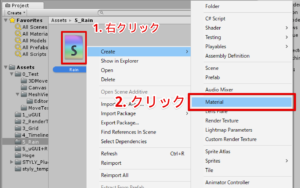
Create a material.
A material, ‘Custom_Rain’, has been created.
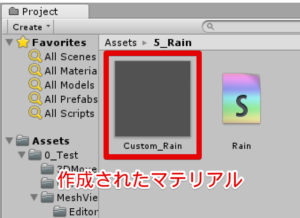
Check the material created.
It finishes creating a material to shake the vertices.
Test the material
Assign the Custom_Rain material created to a 3D model in the Scene.
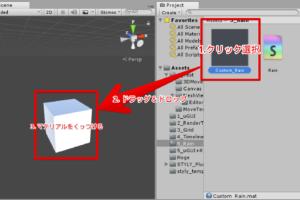
Drag the material onto an object.
When you assign the material to a 3D model, the model moves as shown below.
The model motion after adding the material
The Custom_Rain material moves the vertices of the model so that it gives a wavy motion like this.
Check the setting of the material
Click the material to show the setting in the Inspector window.
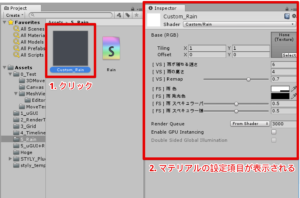
The setting items of the material
By adjusting those values, you can change the behaviour of the material.
Add motion to rain
By combining the Custom_Rain material with the Rain object, you can make a rain-like motion.
Combining the triangular meshes and the material to render rain
I explain how to add motion to triangular meshes by assigning the material to it.
Firstly, select the Rain prefab and click the circular button on the right side of the Materials section.

Assign the material to the Rain prefab.
Select the Custom_Rain material created earlier from the material list.
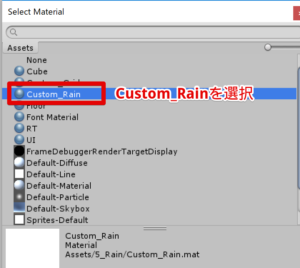
Select the Custom_Rain material.
Once the Custom_Rain material is set, the motion is added then the objects move like rain.
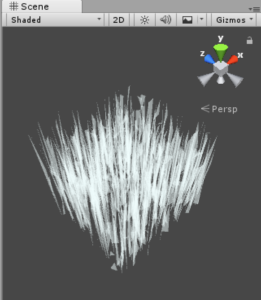
The triangular mesh after assigning the material.
Adjust the appearance of the rain
Adjust the size and colour of the rain to make it look like realistic rain more.
Firstly, select the Custom_Rain material and click the clour-property box.

Click the colour-property box for the material.
It brings up the Color Picker window.
Set it to translucent blue-ish colour as shown below.
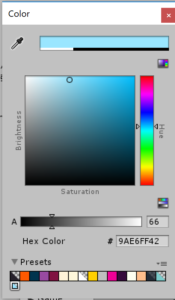
Set it to light blue.
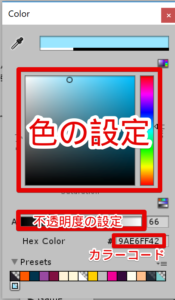
The Color Picker window
When you set the colour, the rain object looks as shown below.
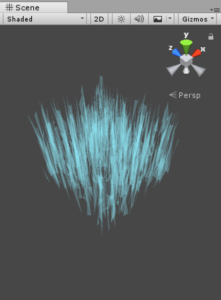
How the rain looks after changing the colour.
Modify the shape (The size and number of raindrops)
By adjusting the setting of the Rain prefab, you can change the size and the number of the raindrops.
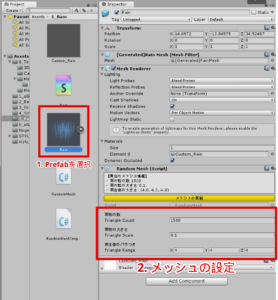
The setting of the Rain prefab
Reduce the size of raindrops
By changing the ‘Raindrop Size’ value, you can change the size of the raindrops.
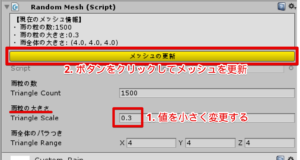
Modify the size of raindrops.
If you set the size to 0.1, the rain will look as shown below.
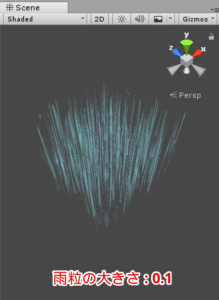
After changing the size of raindrops.
Increase the number of raindrops
You can render heavy rain by increasing the number of raindrops.
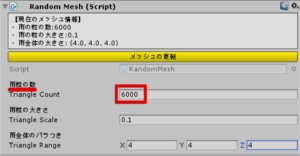
Change the number of raindrops.
By setting the number of raindrops to 6000, the rain looks as shown below.
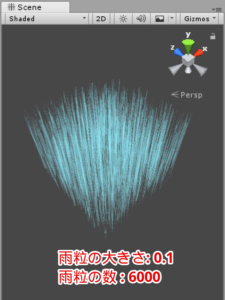
After changing the number of raindrops
Add some randomness to the rain
You can add some randomness to the rain by increasing ‘the randomness of rain’ value.
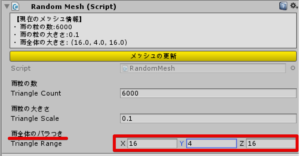
雨全体のバラつきの変更
The shown below is the rain with the randomness set to (16,4,16).
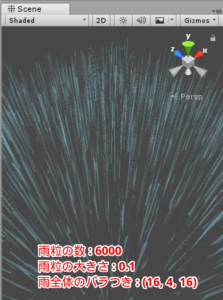
How the rain looks after changing the randomness of raindrops
Upload to STYLY
Right-click the Rain prefab and select ‘Upload prefab to STYLY’.
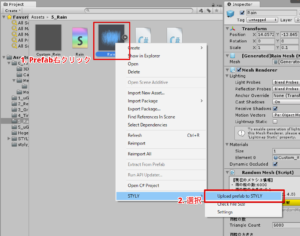
Upload the prefab to STYLY
It starts uploading. Wait patiently.
When you see the ‘Upload Succeeded’ window, the upload is completed.
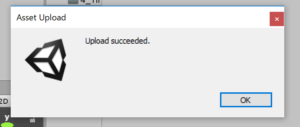
The window pops up when the upload is completed.
See ‘My Models’ in STYLY. You will find the Rain asset uploaded there.
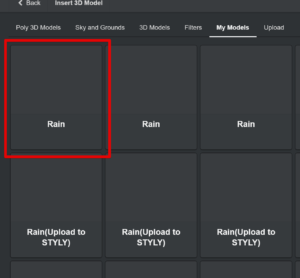
The prefab uploaded.
Now it’s time to make it rain on STYLY.
Place the Rain asset in STYLY.
※You can access the sample project from https://github.com/styly-dev/STYLY-Unity-Examples/tree/master/Assets/STYLY_Examples/Rain