STYLY Studio camera function
STYLY has a Studio camera function. There are two types of STYLY Studio camera functions: manual mode shooting and automatic mode shooting. Using this function, you can shoot scenes in STYLY Studio. By converting the created scene into a movie, you can make it look more attractive. In this article, I will introduce how to use the STYLY Studio camera function.
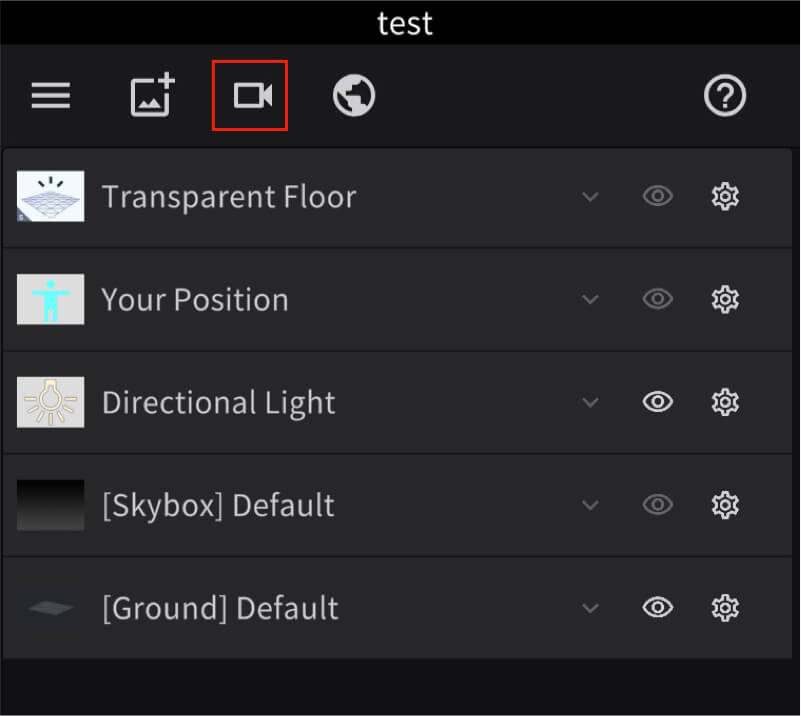
When you start STYLY Studio, there is Play mode on the top button.
You can use the Studio camera function here, so click it.
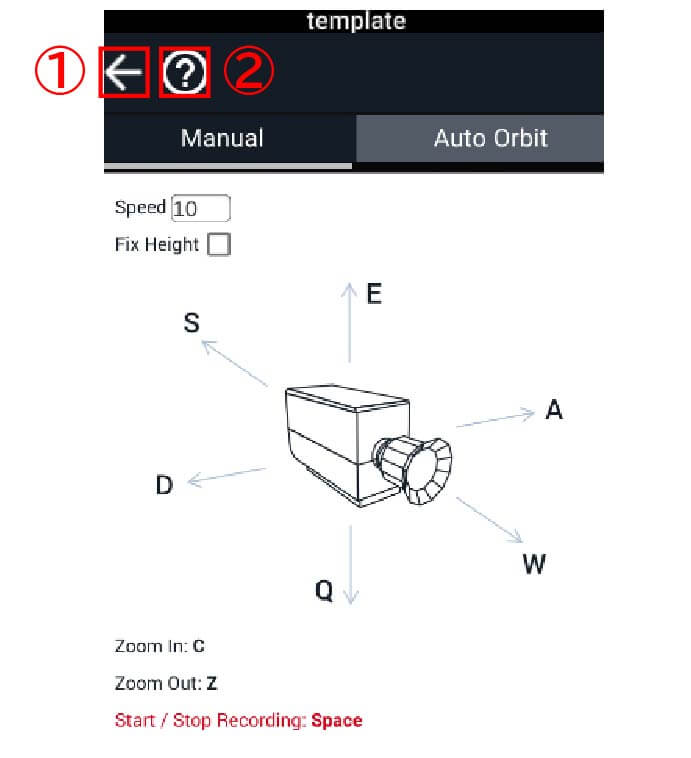
A description of the STYLY Studio camera screen. ① Edit button: Returns to edit mode. ② Help button: This manual opens in a new tab. You can switch between manual mode and automatic mode by clicking “Manual” and “Auto Orbit”.
How to shoot in manual mode
In manual mode, you can shoot a scene while moving the camera as shown in the video below. https://youtu.be/IahbD3HL1UA
Start and end of shooting
If you press the Space key on the manual mode screen, shooting will start from that screen. Press the Spacebar to finish shooting.
Camera movement
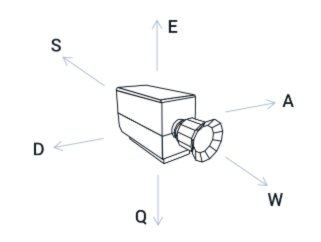
Camera movement direction and key
The key pointed by the arrow on the manual mode screen is the key to move the camera in that direction during shooting. Left: A Right: D Before: W After: S Top: E Bottom: Q
Zoom in & Zoom out
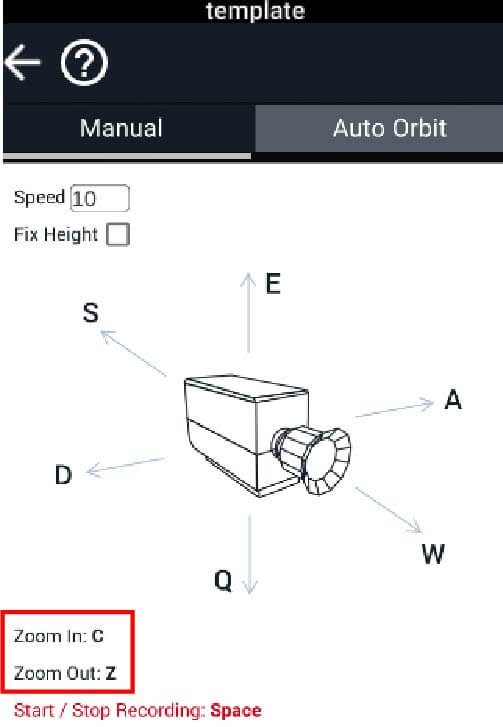
Zoom in: C Zoom out: Z

Zoom in
You can zoom in while holding down the C key. Release the C key to return to the original scale.

Zoom out
You can zoom out while holding down the Z key. Release the Z key to return to the original scale.
Change camera speed
The speed of camera movement is adjusted by the “Speed” value on the upper left. The speed set here is applied for both movement and zoom.
There are two types of numerical change settings.
① Enter the numerical value directly
② Place the cursor on “Speed” and slide while clicking left or right.
Slide the arrow to the right to increase speed, slide the arrow to the left to decrease speed
Fix Height mode
If you check Fix Height, even if you change the camera angle up and down, it will move in the direction of the camera when Fix Height is checked.
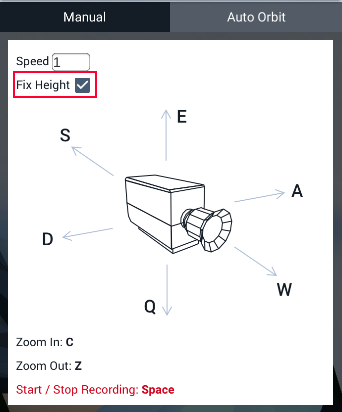
Fix Height mode
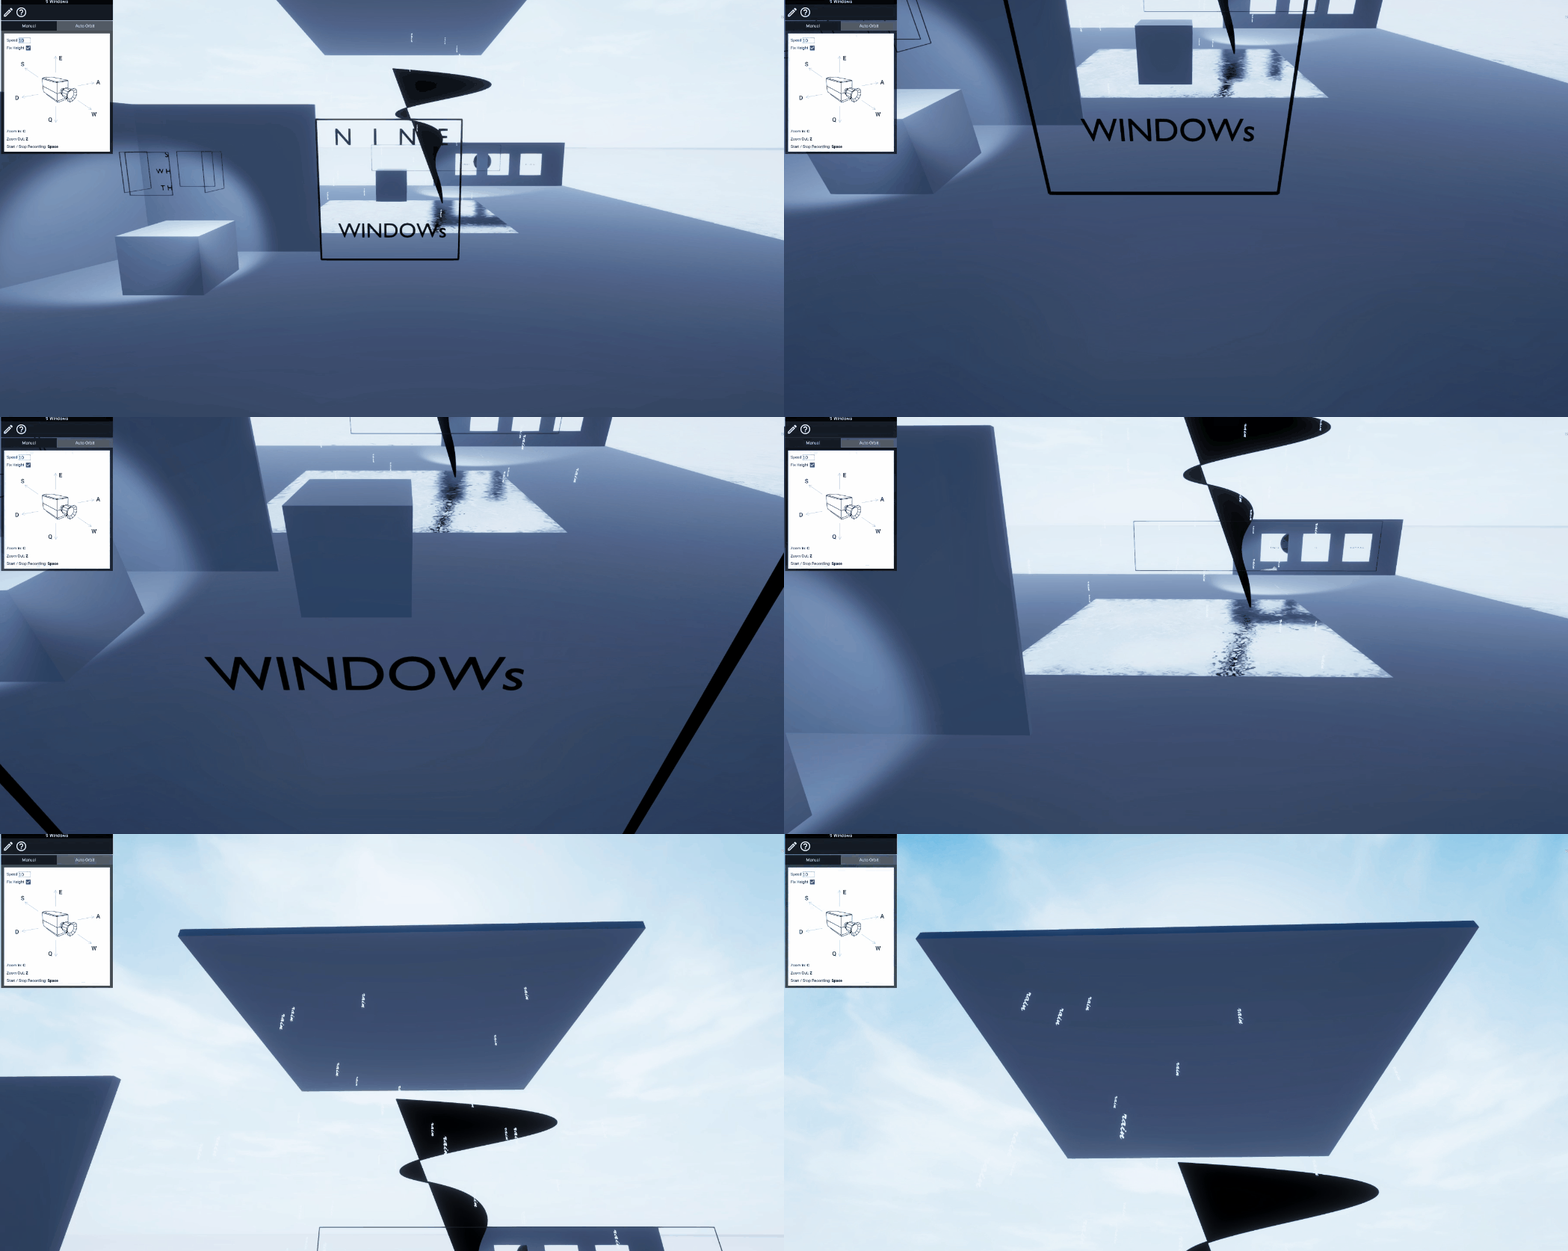
Fix Height Checked Move camera

Fix Height Unchecked Camera move
Shooting method in automatic mode
In automatic mode, you can shoot a video that rotates around an axis as shown below.
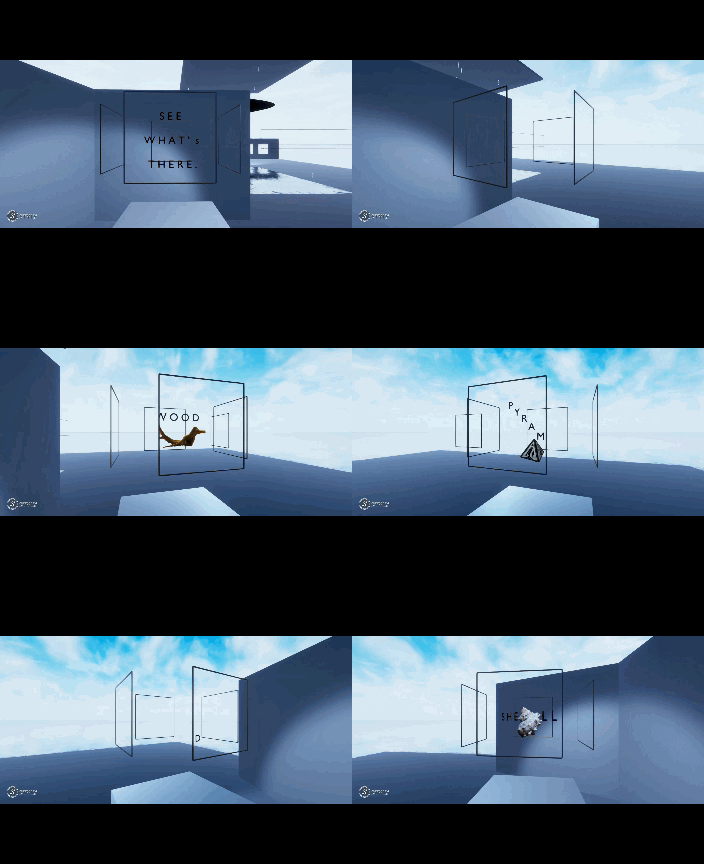
Taken in automatic mode
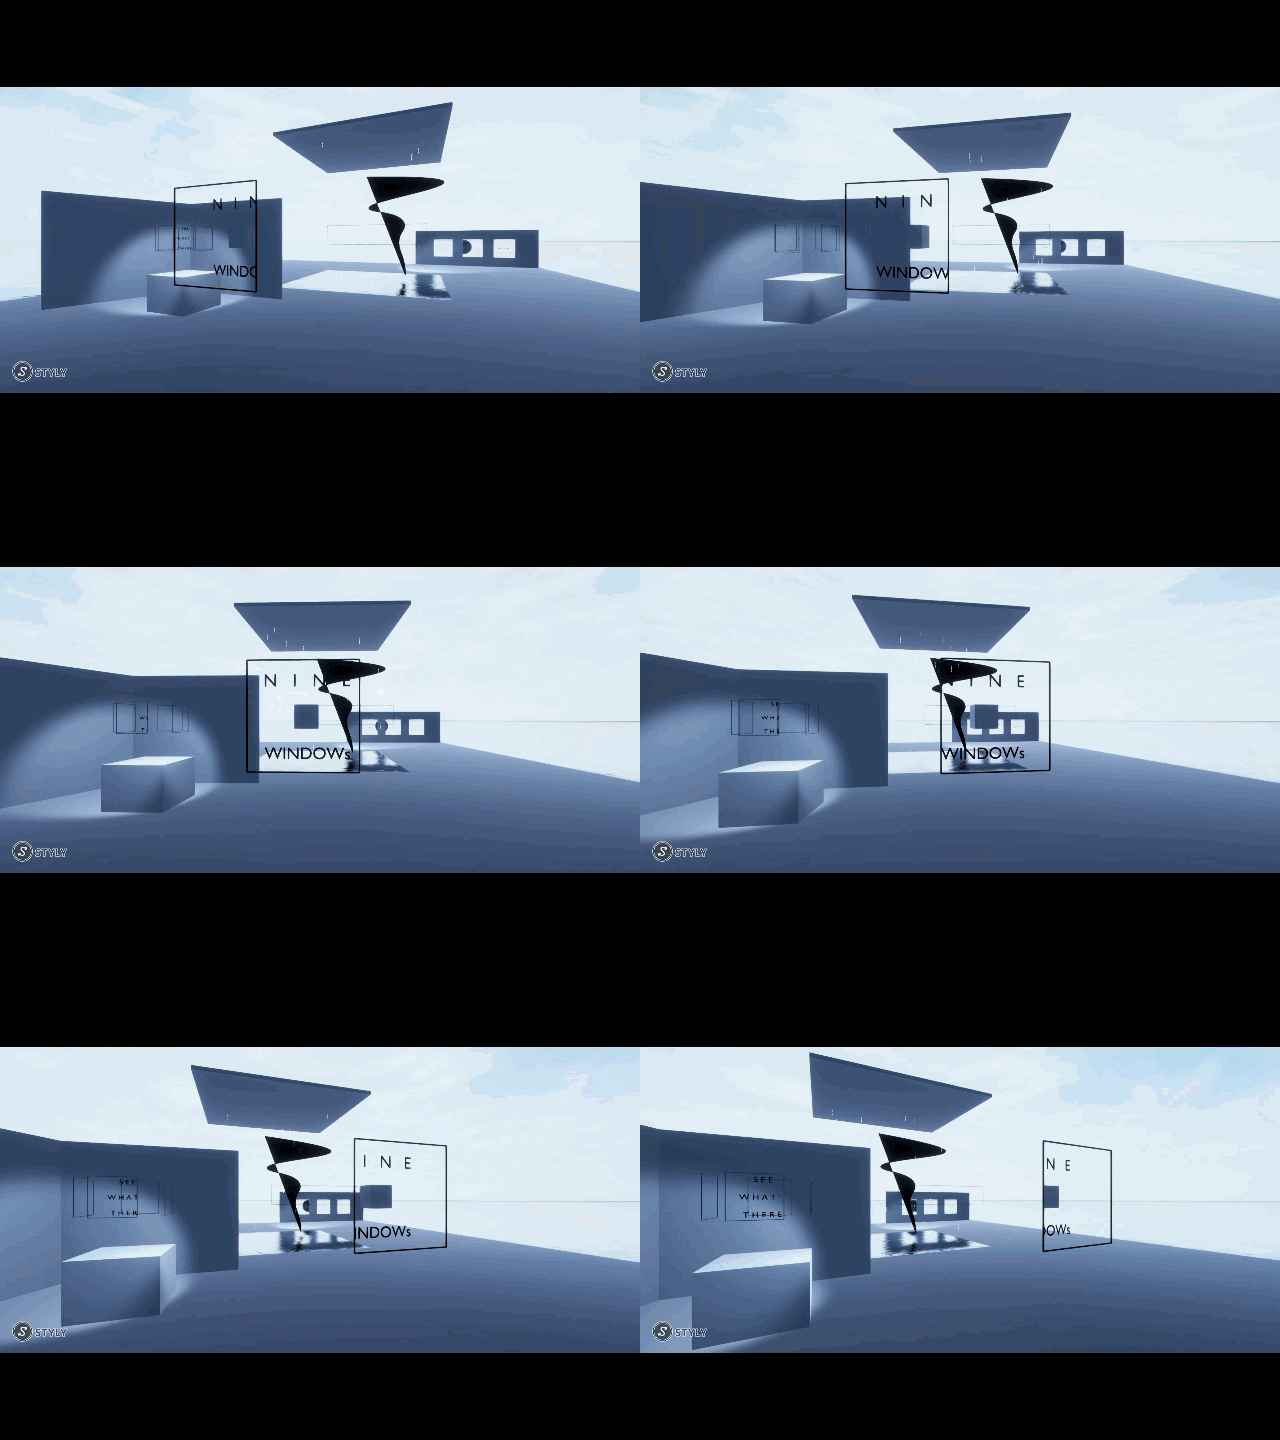
From another angle
* Speed adjustment in automatic mode and start / end of shooting are the same as in manual mode, so explanations are omitted.
Axis settings
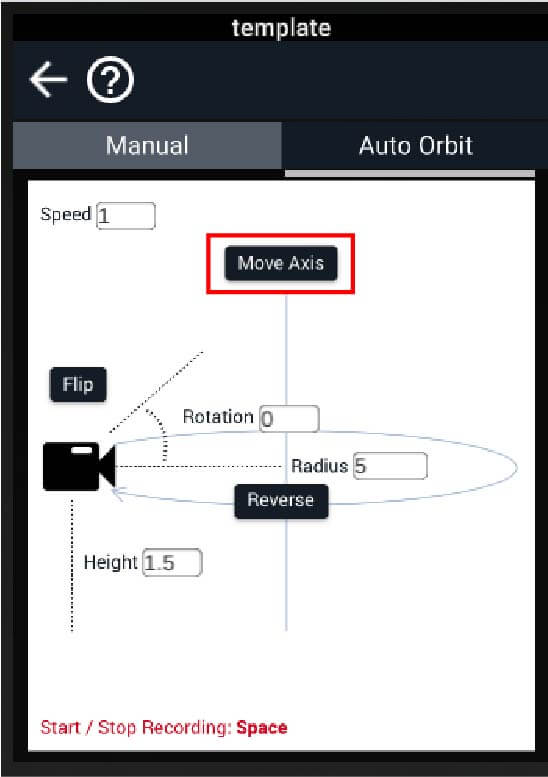
You can adjust the position of the axis that is the center of rotation by clicking “Move Axis” on the automatic mode screen.
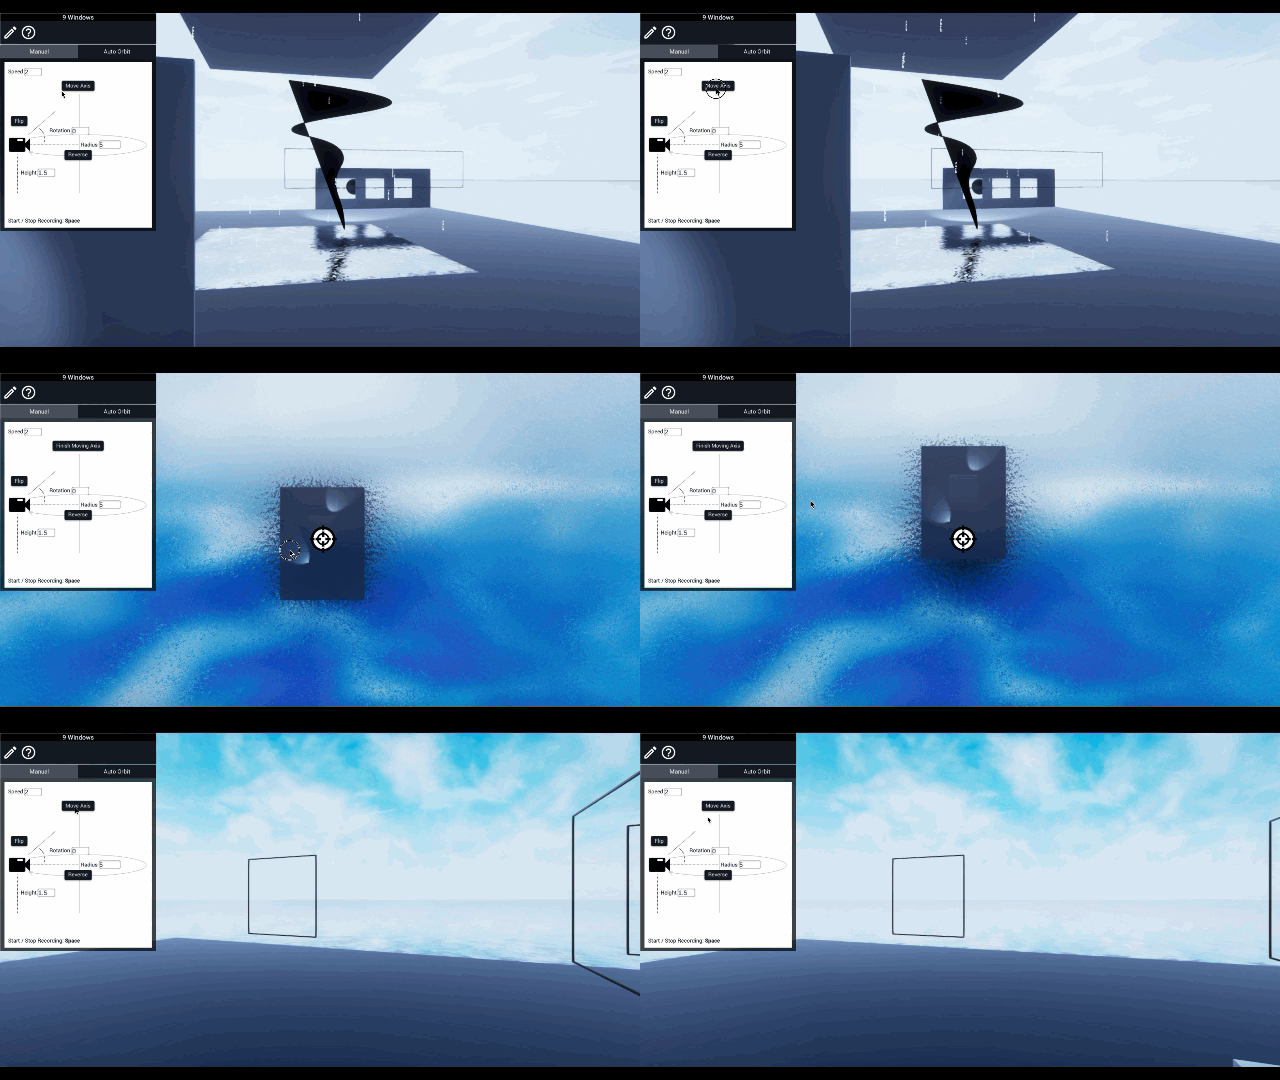
Adjustment of rotation axis
The black and white circle mark in the center of the screen is the axis. Repeat “Move Axis” → Adjust Axis Position → “Finish Moving Axis” to determine the desired axis position.
Radius setting
You can set the radius of rotation by adjusting the value of the “Radius” button.
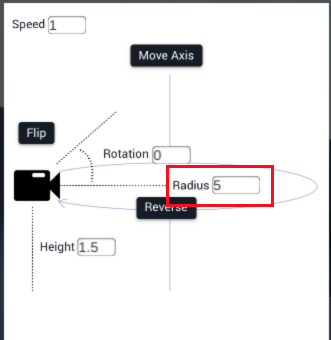
Radius setting
As with speed adjustment, you can also adjust the radius by grabbing the arrow and pulling it left or right in addition to entering the numerical value.
Camera angle setting
You can set the angle of the camera by adjusting the value of the “Rotation” button.
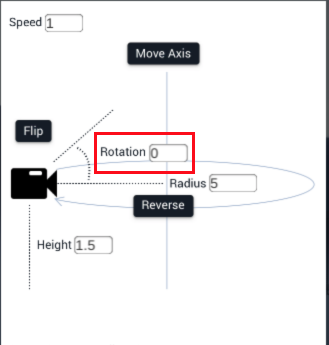
Rotation button
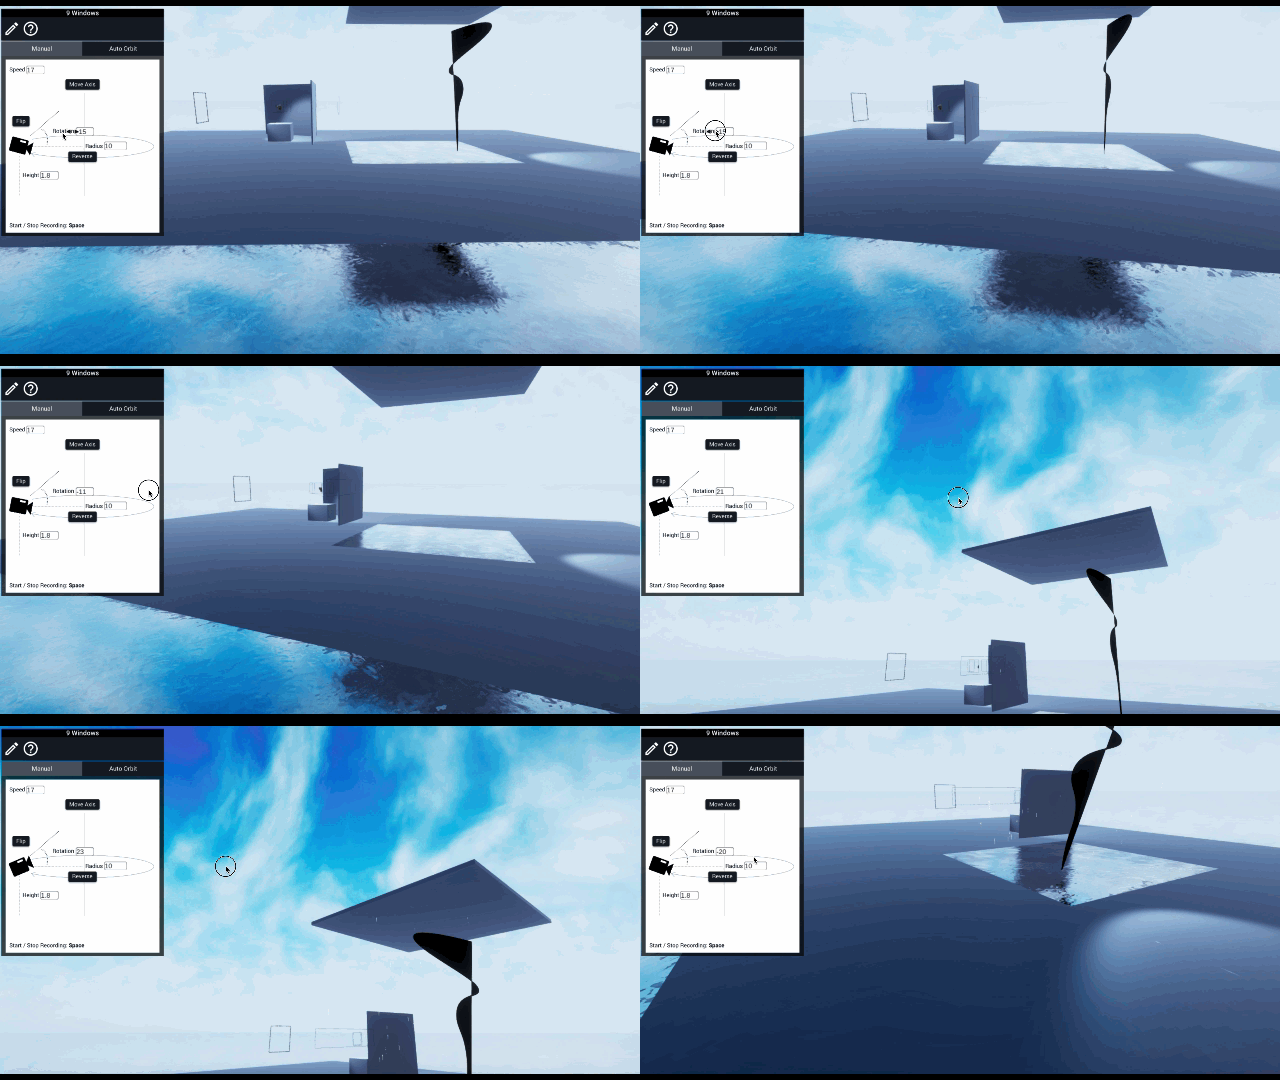
Camera angle adjustment
The angle is 180 for half a turn and 360 for one turn, so use this as a guide. As with speed adjustment, you can also adjust the camera angle by grabbing the arrow and pulling it left or right in addition to entering numerical values.
Camera flip
You can flip the camera by clicking the “Flip” button. It has the same effect as setting the “Rotation” value to 180.
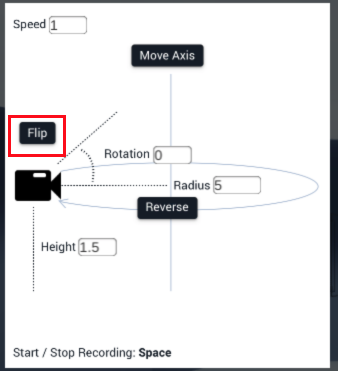
Flip button
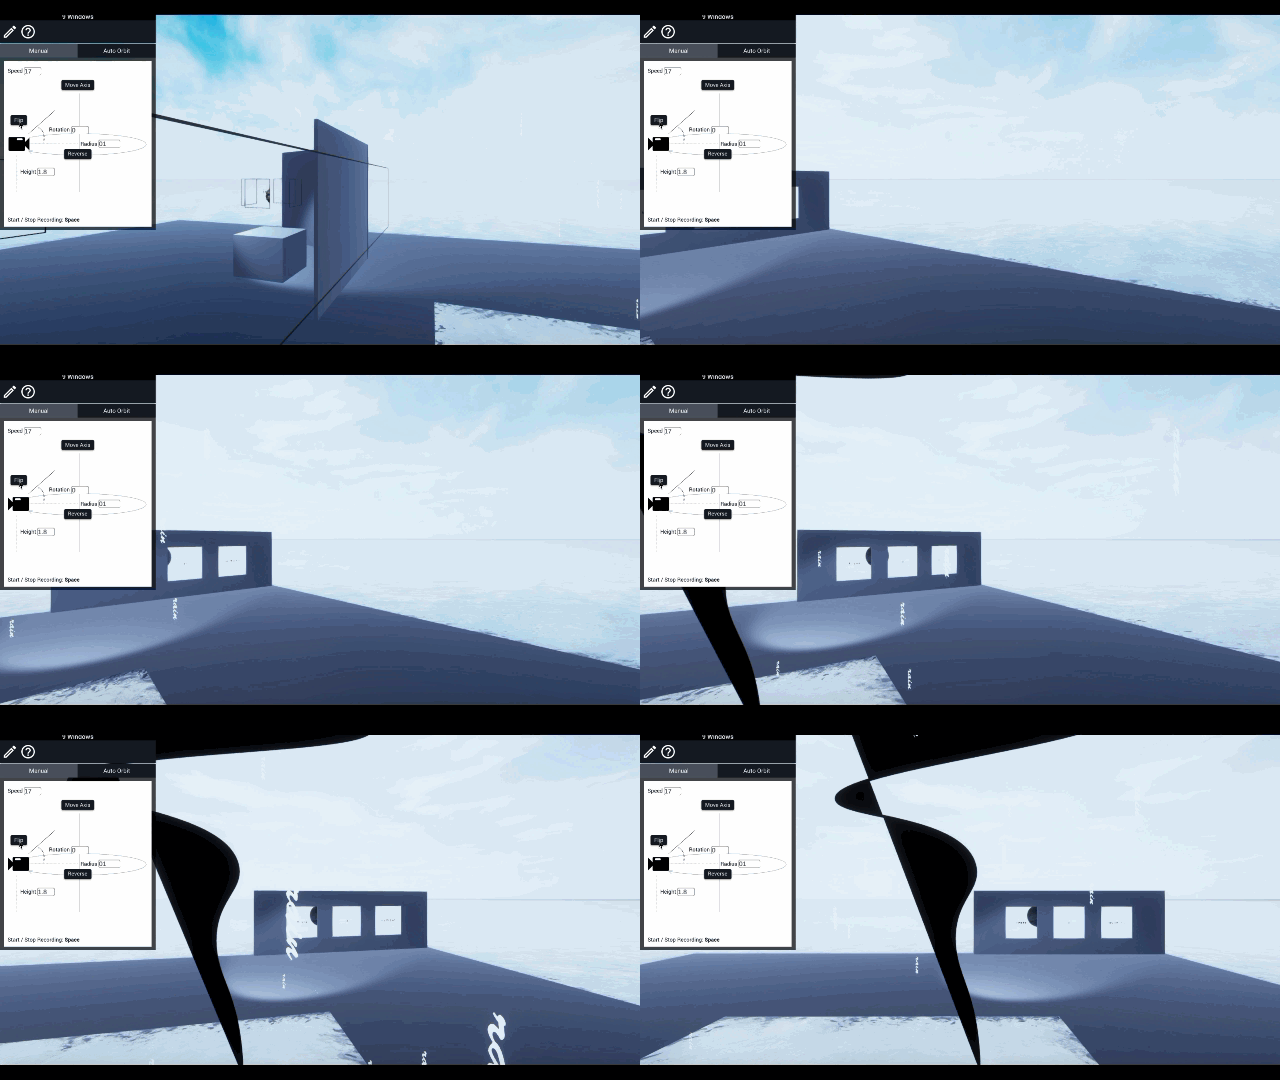
Camera reversal
Change of direction of rotation
You can reverse the direction of rotation by clicking “Reverse” on the automatic mode screen.
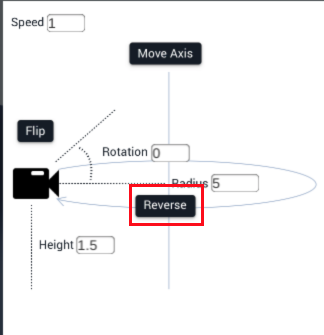
Reverse button

Change of direction of rotation
Adjust the height of the camera
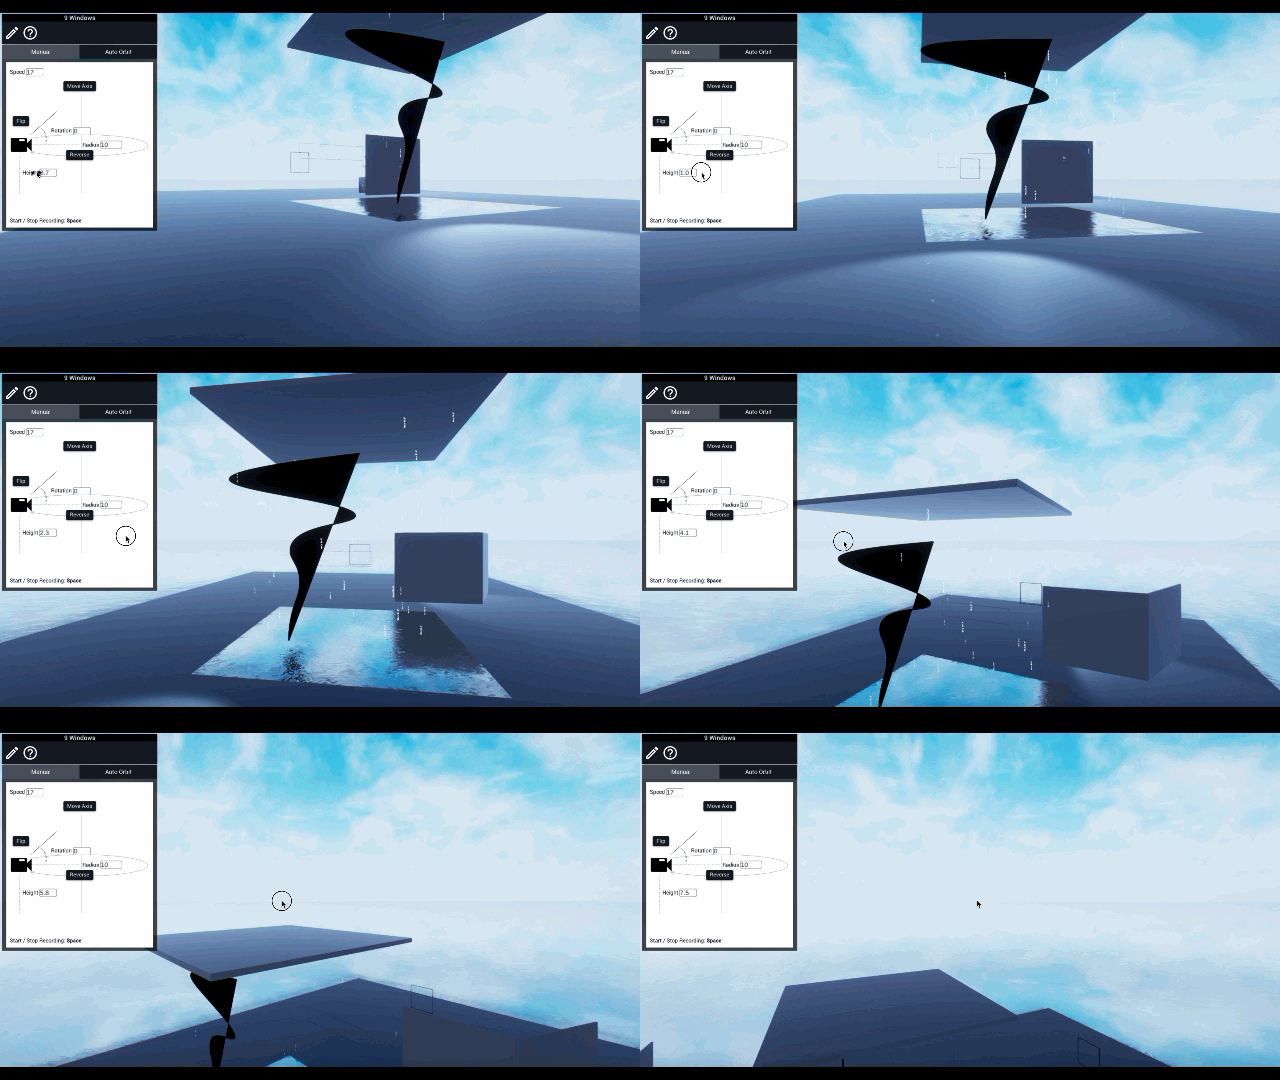
Adjust the height of the camera
You can change the position of the camera by adjusting the value of “Height”. As with speed adjustment, you can also adjust the height of the camera by grabbing the arrow and pulling it left or right in addition to entering numerical values.
How to convert WebM format video to MP4
The recorded video is automatically saved in WebM format. WebM format videos have the advantage that you can quickly play and check the videos by dragging and dropping them on Google chome, but since they are not compatible with mobile devices and players, they are converted to highly compatible MP4.
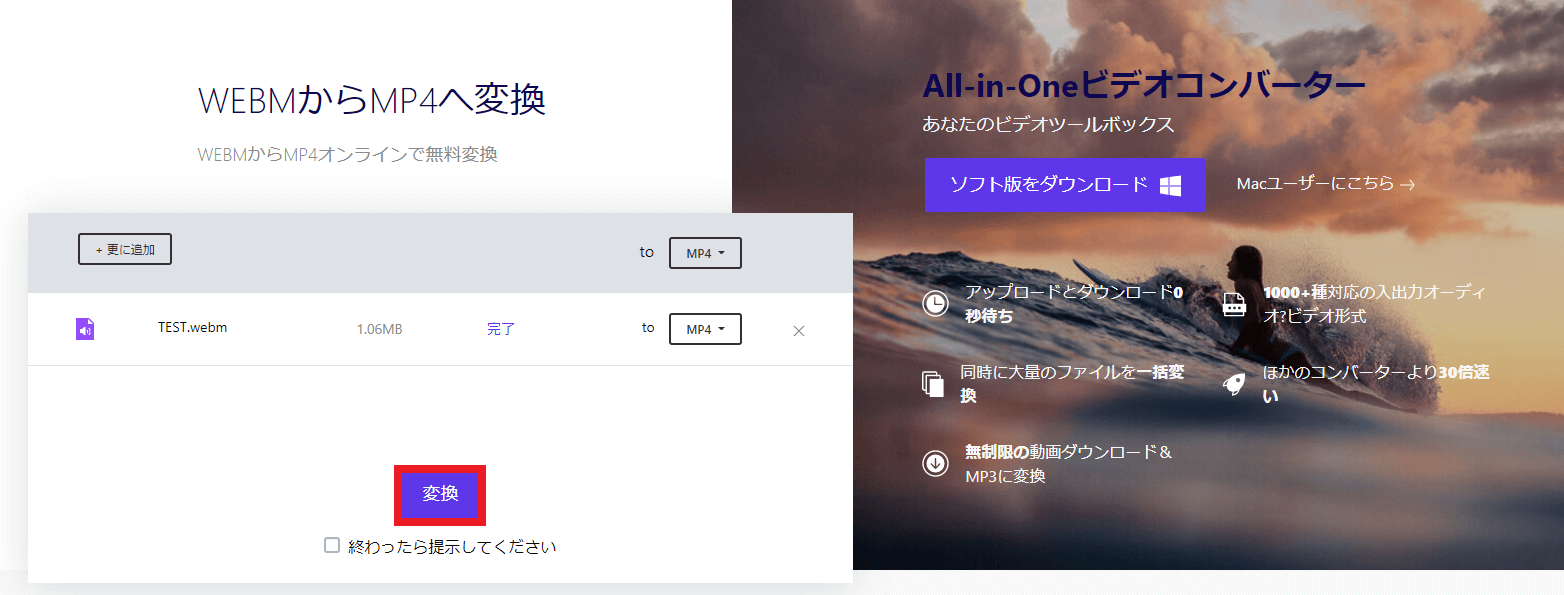
Access the free conversion software media.io(https://www.media.io/jp/convert/webm-to-mp4.html)
Click Add File or drag and drop to select the saved WebM file.
Click Convert.
When the conversion is completed, the above screen will appear. Select “Download” and it will be downloaded as an MP4 file.
If you select “Download all”, it will be downloaded as a zip file, so you can check the MP4 file by unzipping it.
If you have an MP4 file, you can upload it to various SNS such as Twitter and Instagram in addition to YouTube.
Thank you for your hard work. This is the end of the introduction of the STYLY Studio camera function.
