In this article, I will introduce a Unity asset that allows you to express moving clouds and changes both in day and night.
I will introduce the “AIO Dynamic Sky” asset and provide an overview of the asset and how to import it into Unity.
Sample Scene
You can experience a sample space with this asset from the STYLY GALLERY.
The sample space is set to switch between day and night every five minutes.
How to incorporate this into your Unity project
Buy at Unity Asset Store
Available at the Unity Asset Store.
Asset Price $19.98
Supported Unity version: 5.6.3 or higher
These assets may also be discounted at sale events such as Summer Sale and Black Friday Sale.
Importing to Unity
After completing your purchase, you can import it into your project from the AIO Dynamic Sky store page or the My Assets list.
Make sure that all files are checked when importing, as everything required for operation is included in the package.
How to use the program
Changing the Skybox
To use the AIO Dynamic Sky, we first need to change the skybox in the scene.
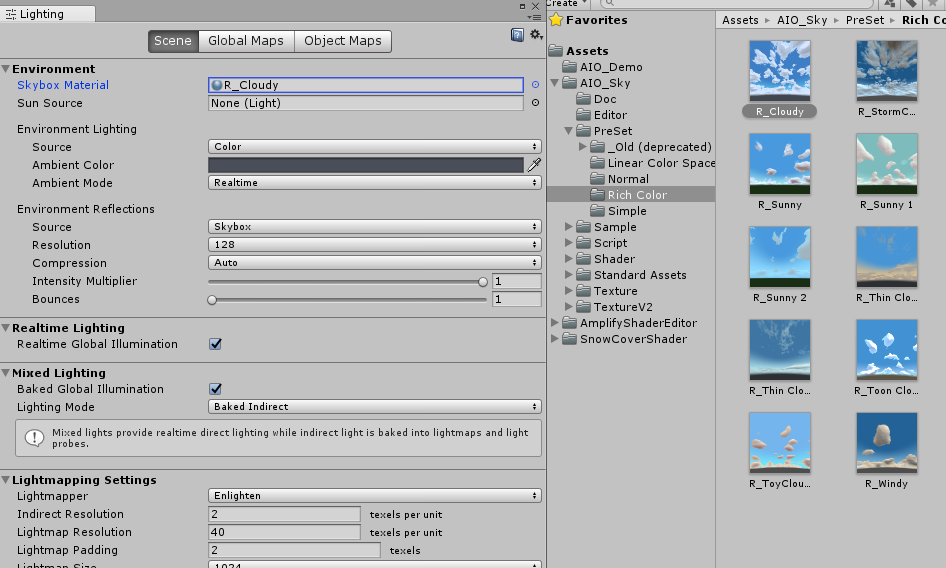
Open the Lighting window by selecting Lighting→Settings in the Window menu at the top of the Unity screen.
When you create a new project, the Default Skybox is selected. However, you need to change it to the sample material that comes with the AIO Dynamic Sky asset. In this case, I used Preset, Rich Color, and R_Cloudy.
The Preset folder contains a large number of samples, so you should first select one that is close to the scene you want to express and then adjust the parameters of the material to make it smoother.
Once you have made changes to the skybox, it’s important to check if it works properly.
Select the picture symbol in the Scene window and check Animated Materials to see how the material behaves in motion without having to play (or run) the scene.
Were you able to confirm that it works properly?
You are currently using the default setting. By adjusting the material parameters, you can fine-tune the amount, thickness, and color of clouds, as well as their speed and shading.
Switching between day and night
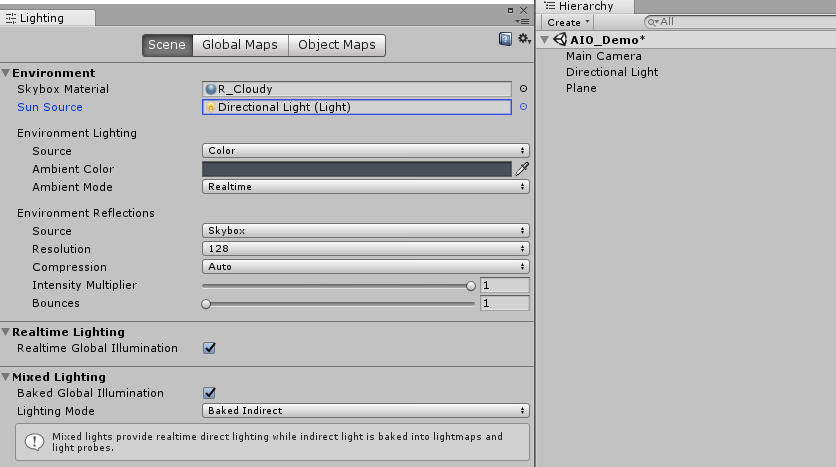
In the AIO Dynamic Sky, we can change the directional light’s Rotation value and rotate the light to switch between day and night. If you don’t have a Directional Light in your scene, right-click the Hierarchy window and choose Light→Directional Light to create a new Directional Light.
When you’re ready for the next step, open the Lighting window again and apply the Directional Light of your choice in the Sun Source column.
By changing the Rotation of the Directional Light in this state, you can switch between day and night in the scene.
We’re currently moving the lights manually, but we can create an animation that rotates the lights over time and apply it to the specified Directional Light to create a representation that switches between day and night according to the time spent in the world.
You can also adjust the material parameters and the clouds themselves to change the color of the sky, the timing of the day-night transition, and the size of the moon and the sun.
Upload to STYLY
In order to upload your sky to STYLY, use the Scene Upload function.
Normally, you can upload assets from Unity to STYLY by themselves. However, with AIO Dynamic Sky, you can only use the scene upload function.
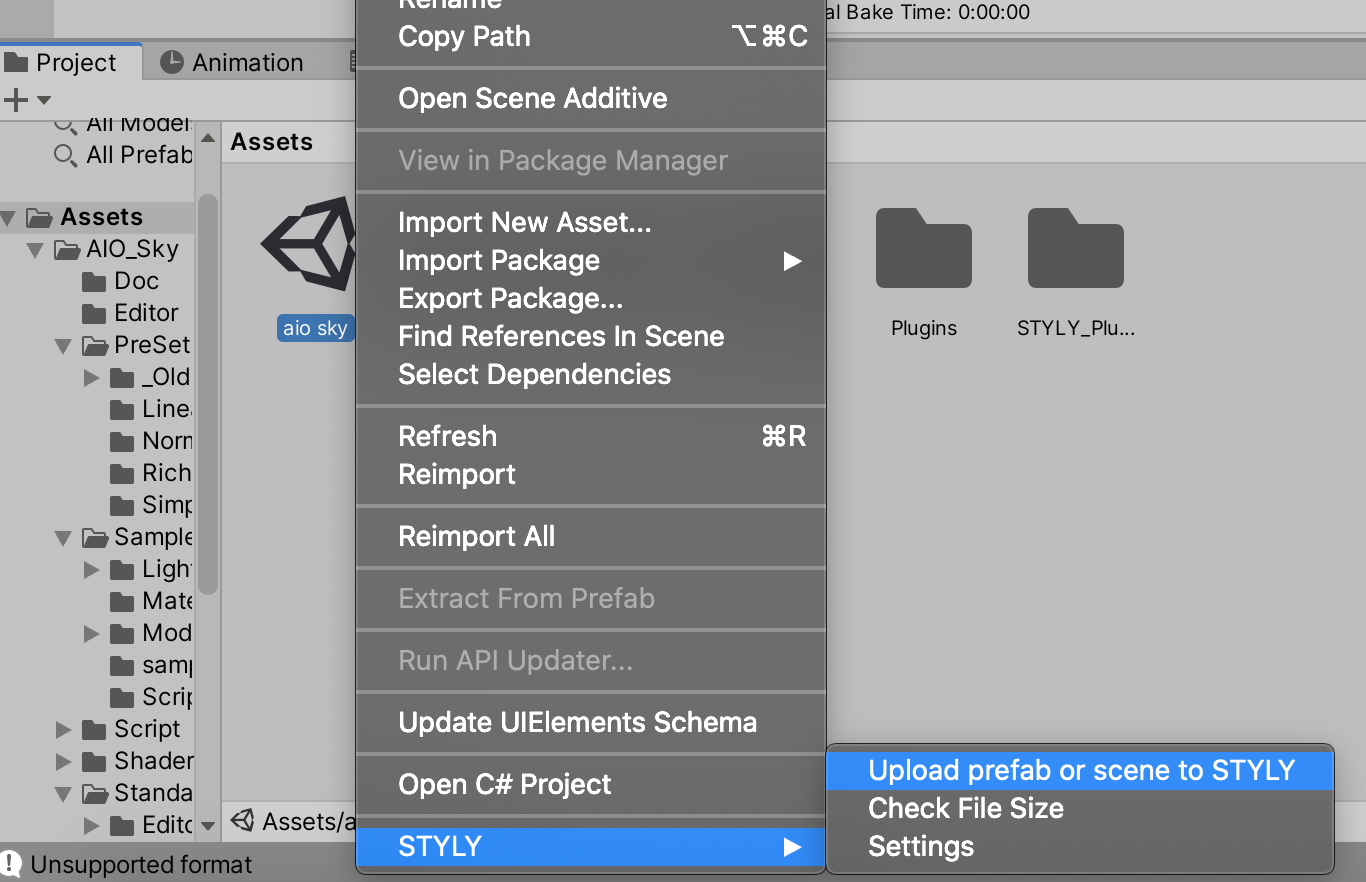
Install the STYLY Unity plug-in, save the scene, right-click on the scene in the Assets folder, and then click [STYLY] > [Upload prefab or scene to STYLY].
You’re now ready to upload to STYLY.
If you don’t know how to use the STYLY scene uploader, please refer to this manual article.
In this article, I have shown you how to use AIO Dynamic Sky to create moving clouds and changes in both day and night.
By adjusting material parameters and taking advantage of animations, this single asset gives you the ability to create a variety of skies.


