I made a 3D model from the photos I took and uploaded it to STYLY with ‘Autodesk Recap Photo’ (hereafter, called ‘Recap Photo’), software to convert images to 3D model.
Recap Photo has a paid version, but the free version can also generate 3D model and upload it to STYLY, so I use the free one in this tutorial.
※ Recap Photo is available for Windows only. It doesn’t support MacOS.
Create an Autodesk account
Firstly, create your Autodesk account. Access
Next, enter your name, e-mail address and password. Check ‘I agree to terms’ checkbox then create an account.
It sent a confirmation e-mail to the registered address, so click the verification link in it.
It completes the user registration to Autodesk.
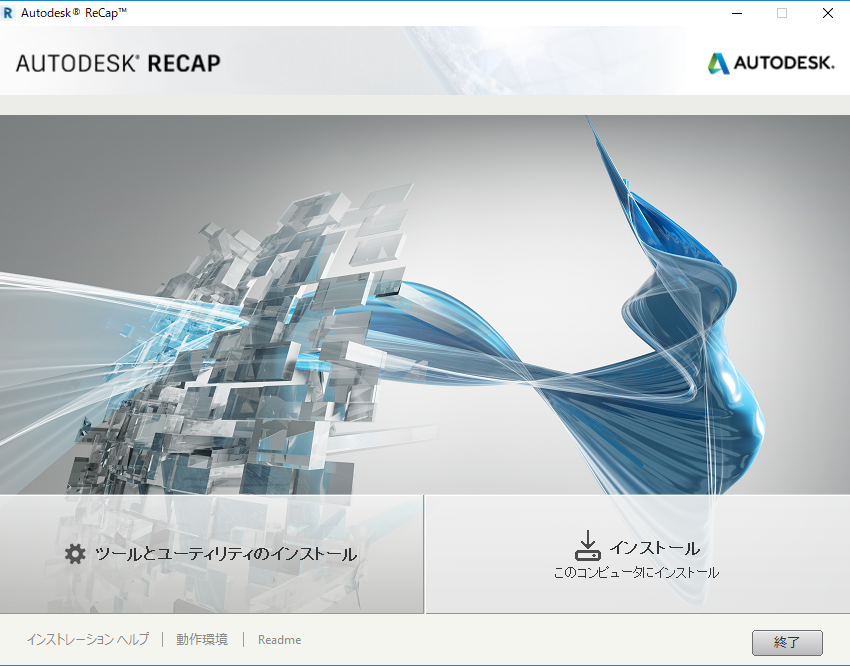
Install Autodesk Recap Photo
Access https://www.autodesk.co.jp/products/recap/overview.
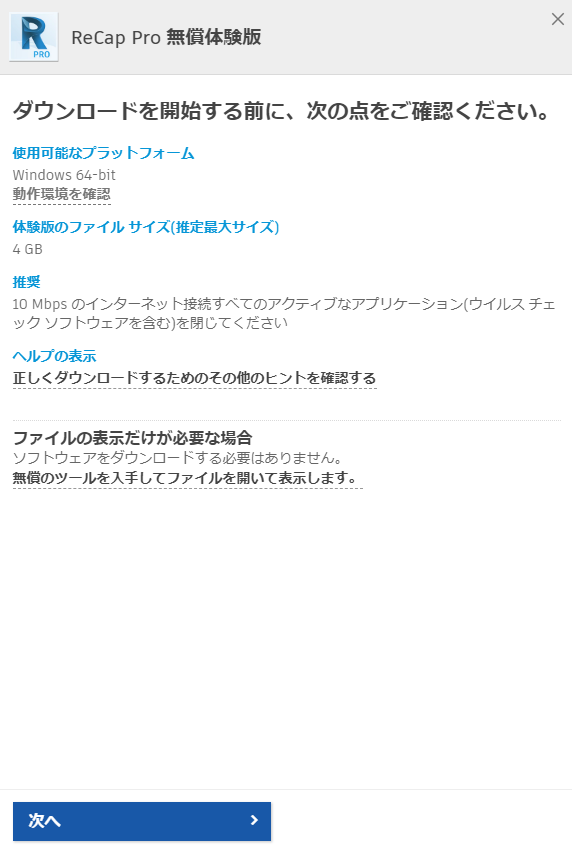
Registration screen #1
Click ‘DOWNLOAD FREE TRIAL” in the bottom-left corner.
Registration screen #2
Check if your PC meets the system requirement, and press ‘NEXT’ if it does.
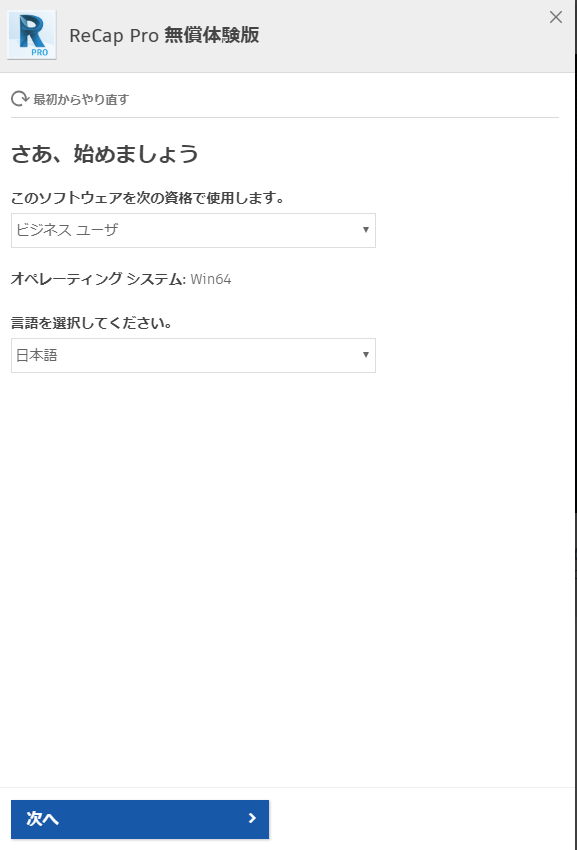
Registration screen #3
Choose ‘A business user’ or ‘A student or teacher’. Either of them is ok.
After choosing your language, press ‘NEXT’.
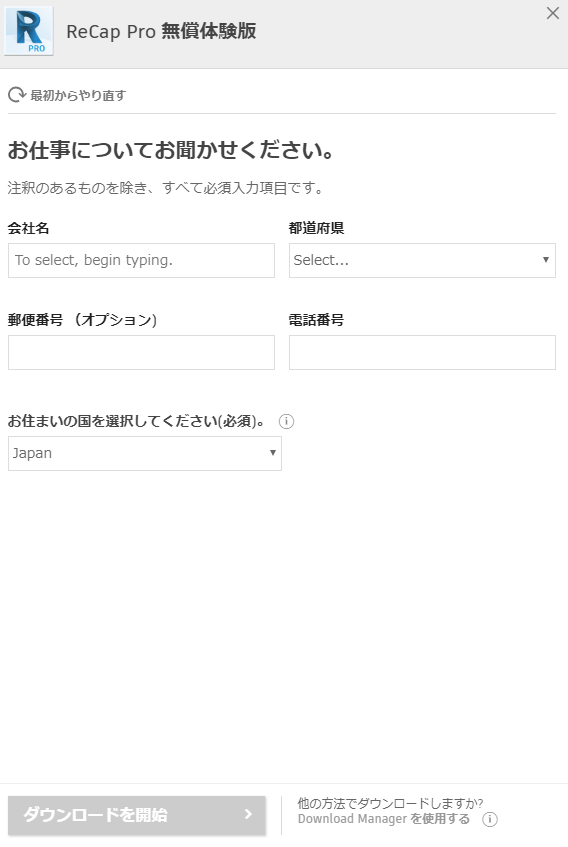
Registration screen #4
Enter the name, address, telephone, country of your company. After filling all required fields, start downloading.
Registration screen #5
When the download is completed, the screen shown above should be brought up.
Press the Install button on the right.
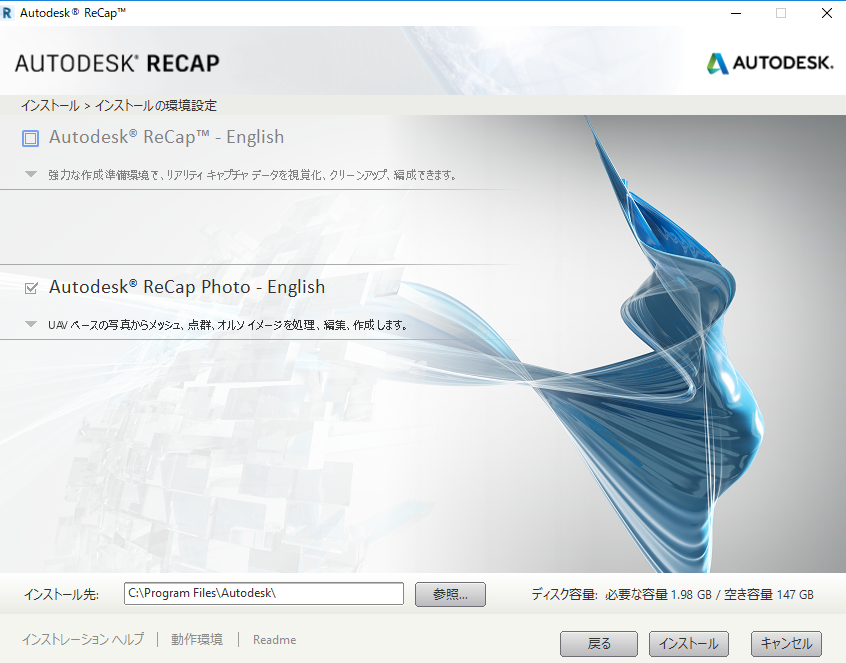
Registration screen #6
You will be asked to agree to the terms about product information and so on, twice. After you agree to them, press ‘NEXT’ to brings up the screen shown above.
In this tutorial, we need Recap Photo only. Uncheck the ‘Autodesk Recap’ box on the upper side and start the installation.
That’s all for the installation of Recap Photo.
※ The installation may take a while.
Take photos to make the model
Take the photos of the object you want to make 3D model from.
In this tutorial, I use my bag as an example.
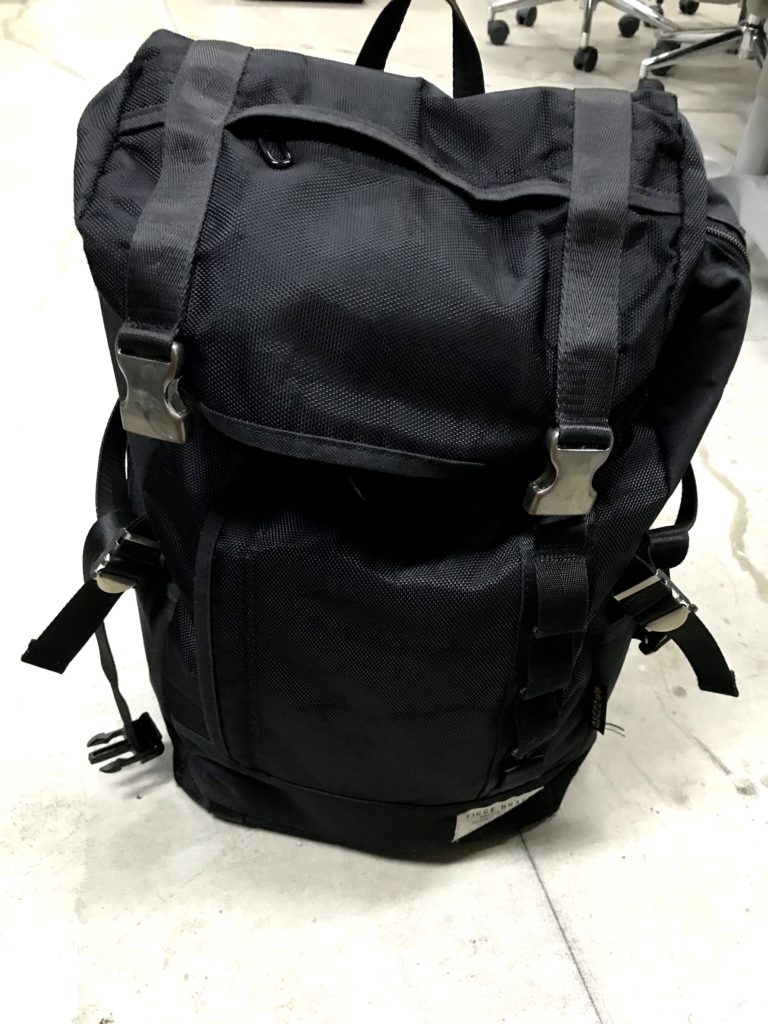
An object
Since you need photos from all directions around the object, take photos while moving around it slowly.
You need to take at least 20 photos.
When taking photos, do not take any other large objects in the camera view, and put away anything around the object as possible.
Convert into 3D model by Recap Photo
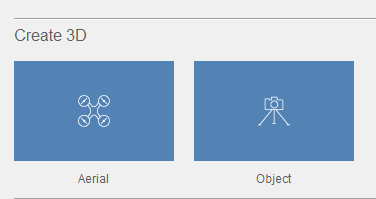
Modelling #1
Launch Recap Photo installed earlier.
Select ‘Create 3D > Object’.
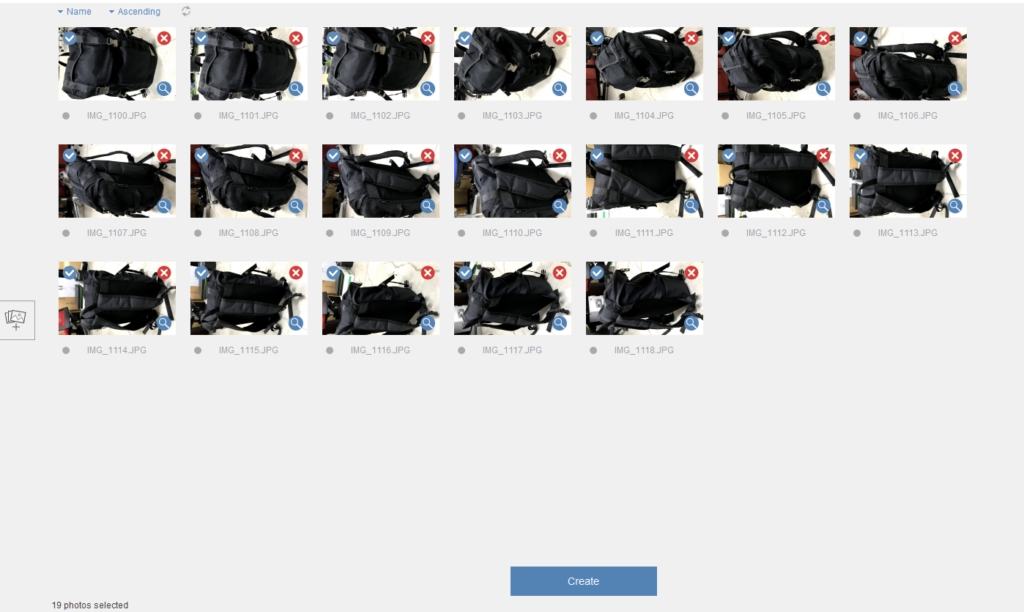
Modelling screen #2
Select all the photos taken by clicking them on the screen.
Click ‘Create’ if you don’t see any problem with them.
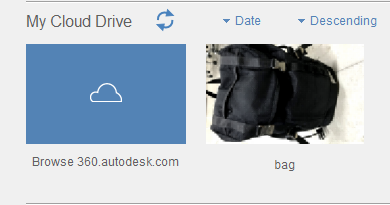
Modelling #3
You can find the photos uploaded just now in ‘My Cloud Drive’. It shows that the conversion from the photos into 3D model is in progress on the cloud drive.
After the model is created, hover the mouse cursor on the photo to bring up the download icon (a down arrow) in the bottom-right corner of the photo. Press it to download the 3D model.
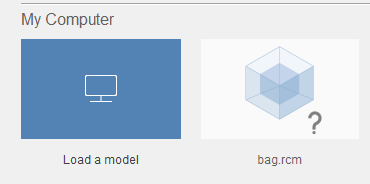
Modelling #4
When the download is completed, the 3D model of the object is stored in ‘My Computer’. Click it to check.
Modelling #5
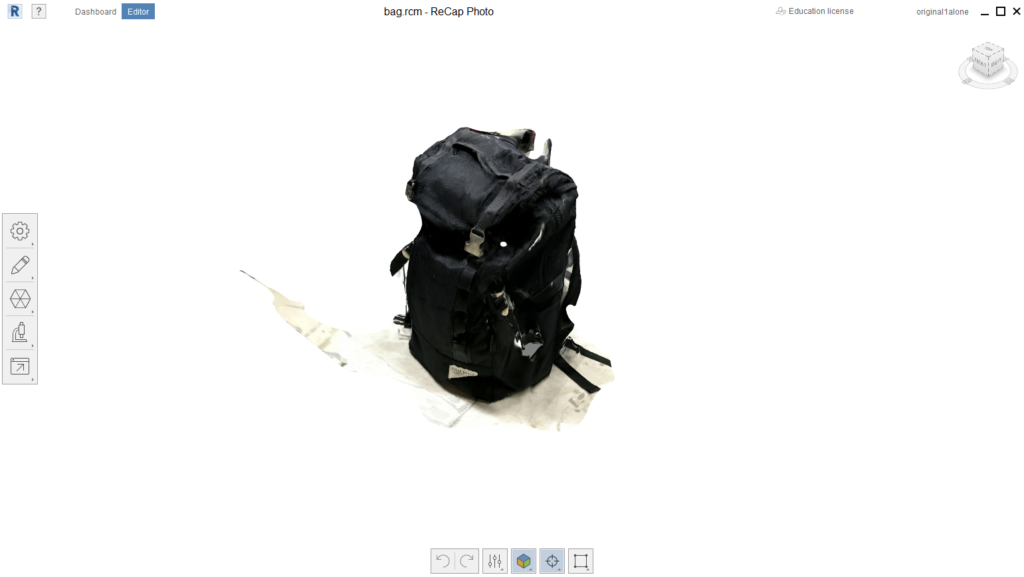
Does it look like a 3d model now? If so, the conversion is successfully completed.
If the model contained other objects or a part of the target object was missing, take more photos or adjust the angle of the camera.
(I will post another article to show the tips when taking photos).
Modelling #6
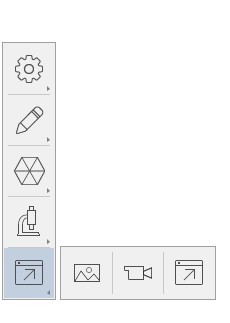
Download the 3D model.
Click the Export button on the toolbar on the left of the screen. Select the right-most ‘Export’ icon.
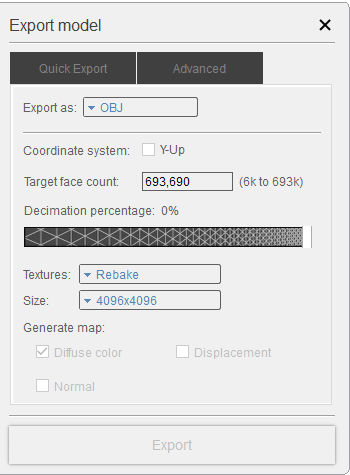
Modelling #7
Set ‘Export as’ to OBJ.
Leave the other settings as they are.
Press ‘Export’ and specify where to save the folder.
Upload to STYLY
You will find the following three file types in the folder downloaded.
・ mtl
・ obj
・ jpg
You need all of them to upload the model to STYLY, so select them all together when uploading.
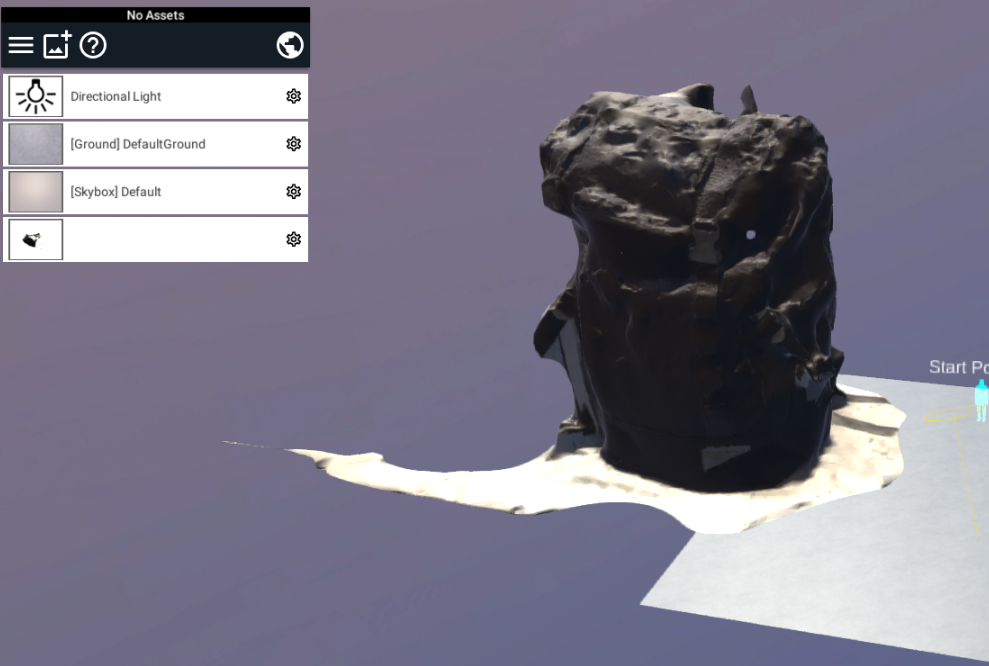
The completion image
You have successfully uploaded the model now.
Congratulations. That’s all you need to make a 3D model from your photos with Autodesk Recap Photo.
You can now convert any objects around you into a 3D model, so please make your favourite one into a 3D model and upload it to STYLY.