This article explains the PlayMaker-based scene “dot.line-”.
- 1 Introduction
- 2 Preparation
- 3 Physics Settings for Balls and Invisible Walls
- 4 Use PlayMaker to Instantiate 50 Balls and Give Initial Velocity
- 5 Use PlayMaker to Generate 50 Connecting Cubes
- 6 Use PlayMaker to Adjust Cube Transform Between Two Balls
- 7 Switch Between Black and White Colors Using PlayMaker
- 8 How to Create dot.man
- 9 Upload and Place in STYLY
- 10 Conclusion
Introduction
“dot.line-” is a simple VR space composed only of black and white, dots and lines. The random movement patterns allow you to experience a different visual environment each time. This article mainly explains the PlayMaker implementation used in this scene. The Unity Project is available on GitHub. Please refer to it together.
https://github.com/styly-dev/STYLY-Unity-Examples/tree/master/Assets/STYLY_Examples/dotline
To upload to STYLY, check and install the recommended version.
STYLY Plugin for Unity DOWNLOAD
The Unity version used during setup is 2019.3.x, but since the recommended version has changed, follow the instructions below using the latest recommended version.
Preparation
First, clone or download the STYLY-Unity-Examples repository from GitHub as a zip file.
https://github.com/styly-dev/STYLY-Unity-Examples
Open the obtained project in Unity 2019.3.x and import PlayMaker (paid). At the time of writing: PlayMaker 1.9.0
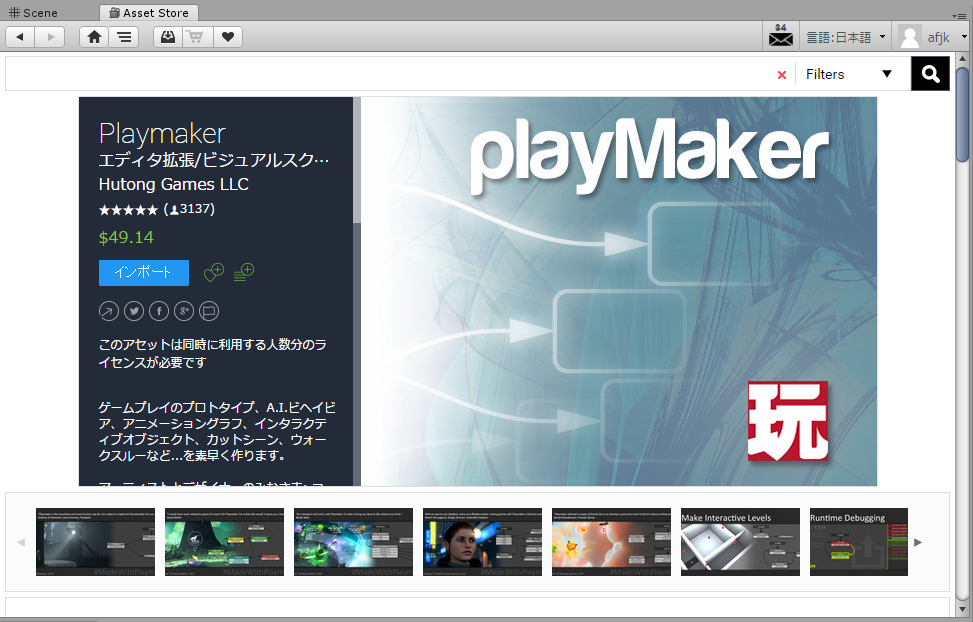
After importing and installing PlayMaker, open the scene located at Assets>STYLY_Examples>dotline>dotline, and run Unity.
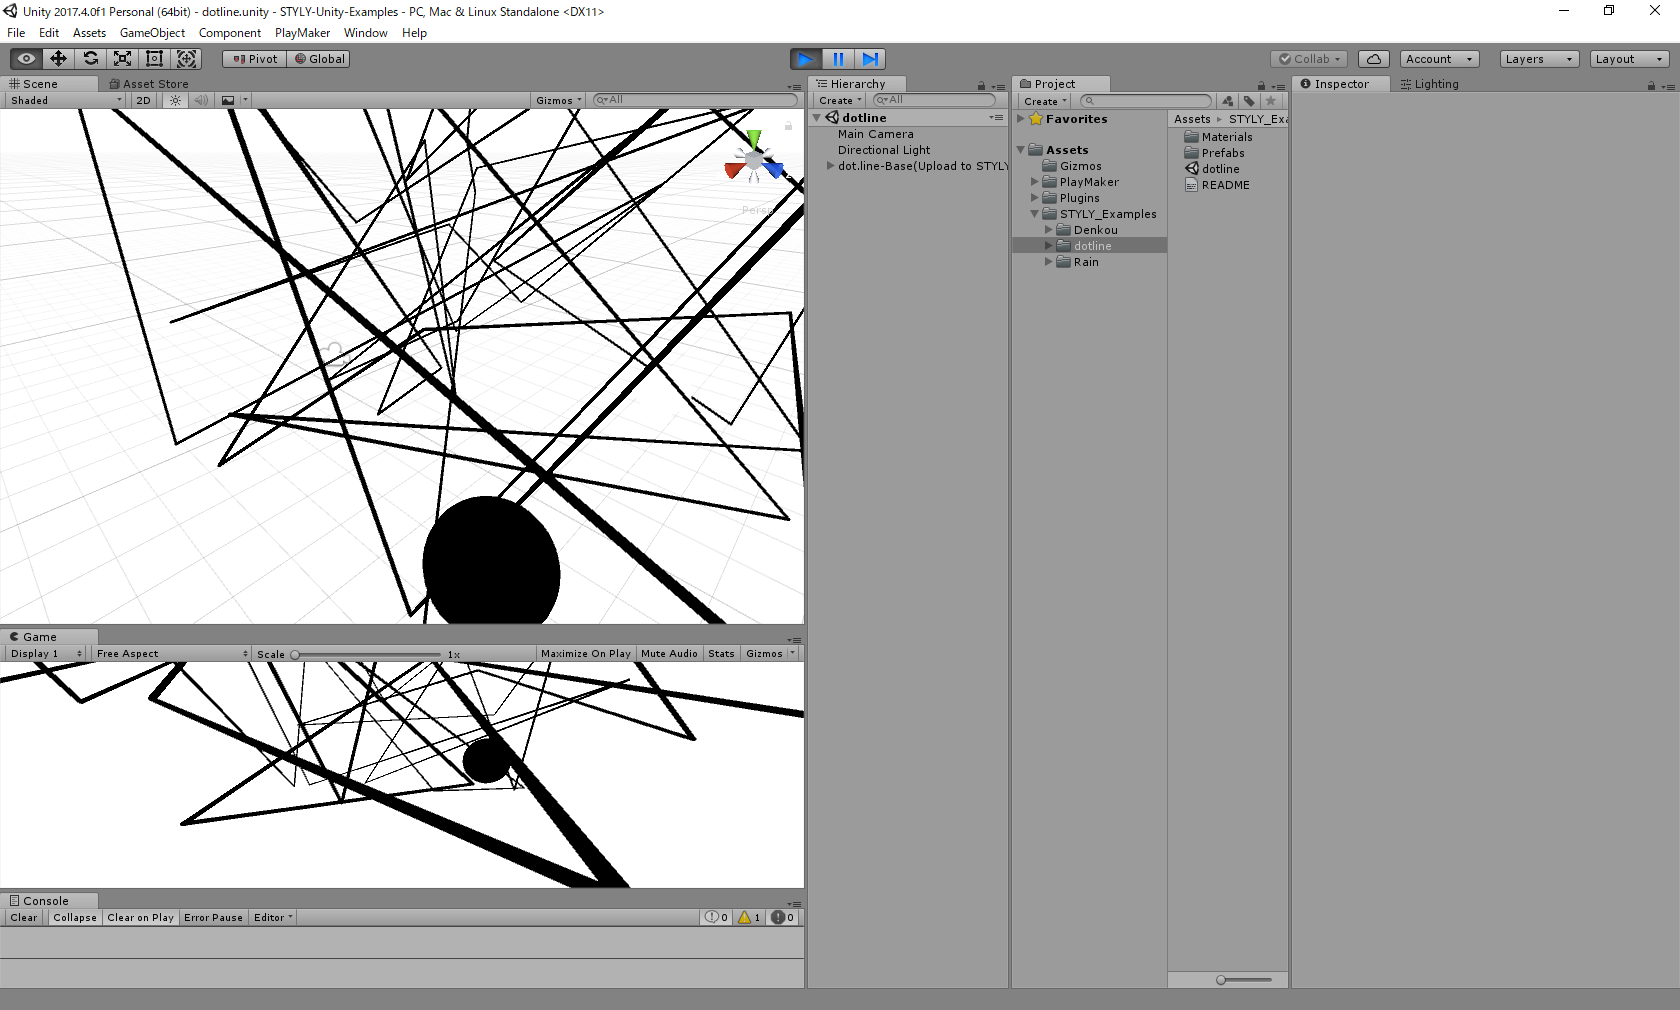
The dot.line- space will run. *dot.man is not included in this Unity Project.
Physics Settings for Balls and Invisible Walls
The bouncing balls are enclosed in an invisible box, flying randomly in zero gravity.
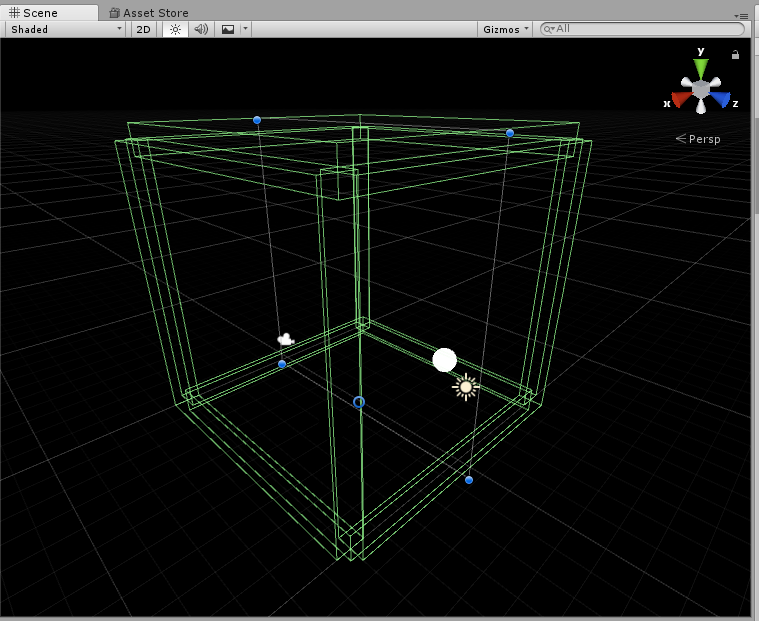
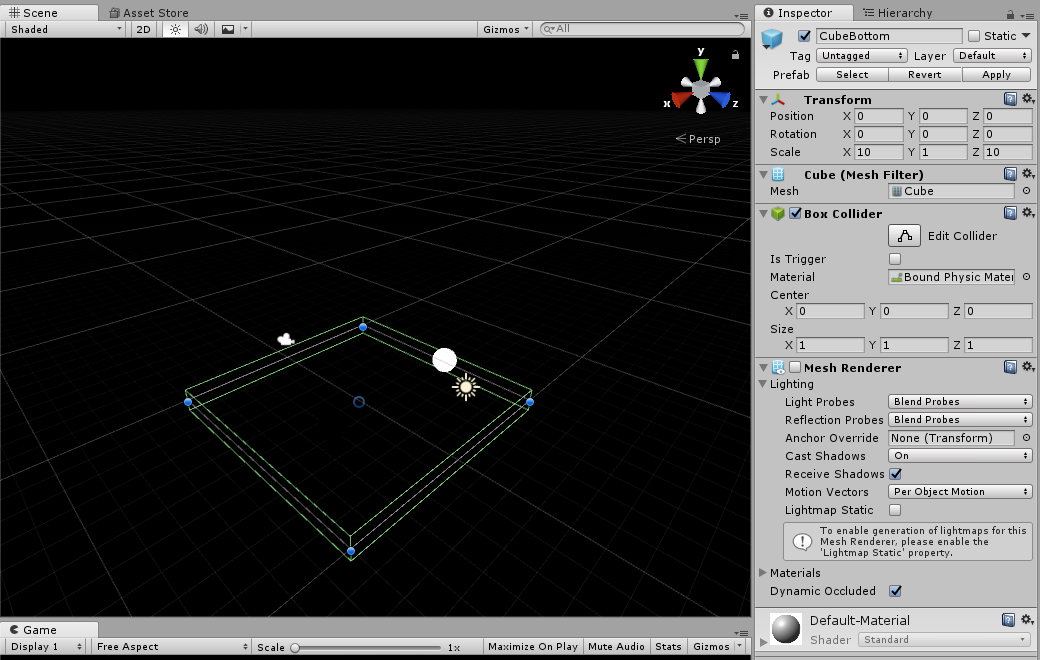
Enclose the Space with Cubes to Define Movement Range
Place Cube objects with BoxCollider in a box shape (10 units per side, 1 unit thick). Disable MeshRenderer to make them invisible.
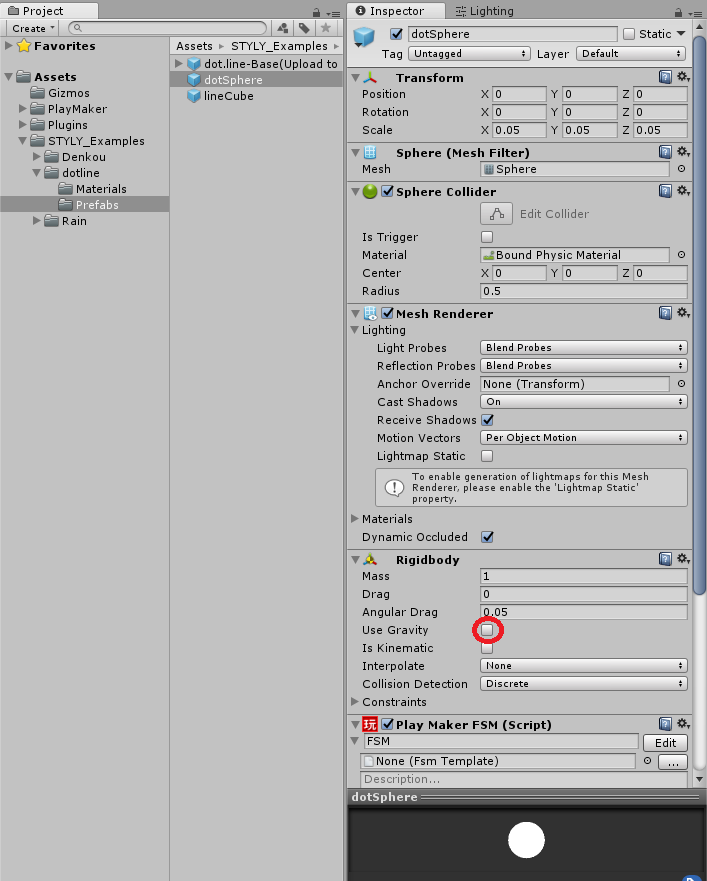
Create the Balls
Create a Sphere prefab and configure it as follows: Add SphereCollider and Rigidbody. Turn off UseGravity to simulate zero gravity.
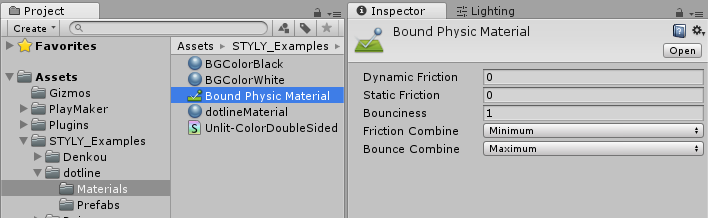
Use PhysicsMaterial to Set Collision Behavior
Create a PhysicsMaterial with zero friction and a bounce value of 1 so that speed does not decrease upon collision. Apply it to the colliders of both the ball and the enclosure.
Use PlayMaker to Instantiate 50 Balls and Give Initial Velocity
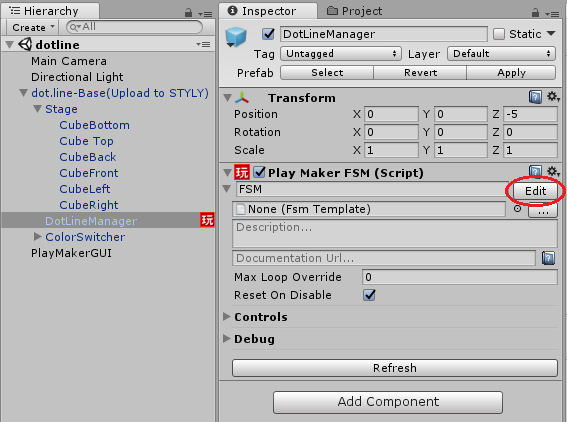
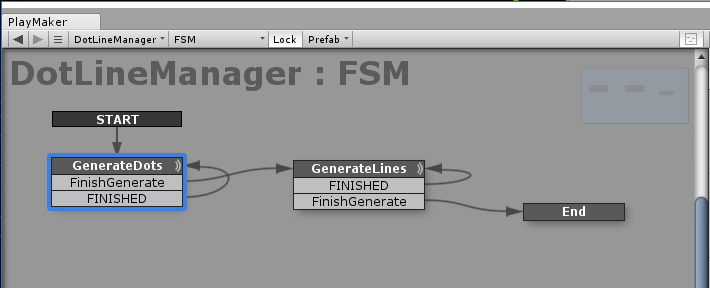
Ball generation and control during scene execution is handled in the DotLineManager’s PlayMaker FSM. Open it with the PlayMaker Editor to view the details.
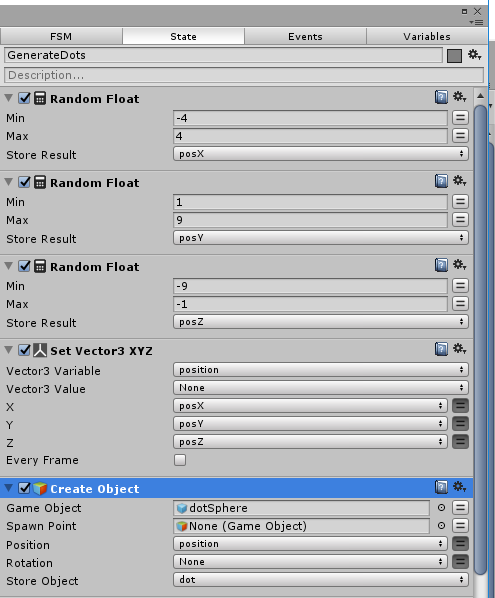
In the GenerateDots state, 50 balls are generated, positioned, and given initial velocities.
Randomly Position the Balls
Generate a dotSphere prefab and use the Random Float action to assign random positions within the enclosure.
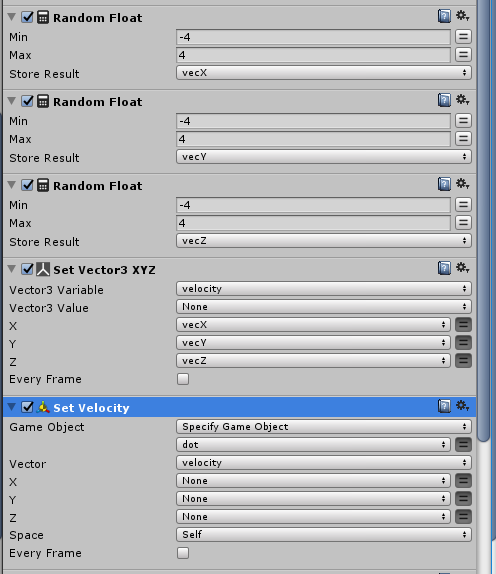
Set Initial Velocity for the Balls
Generate a random vector between -4 and 4 and apply it using SetVelocity.
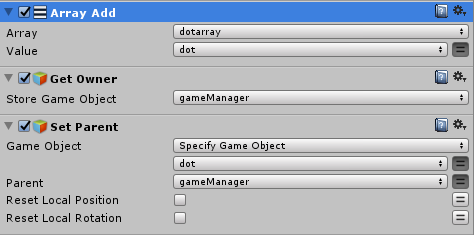
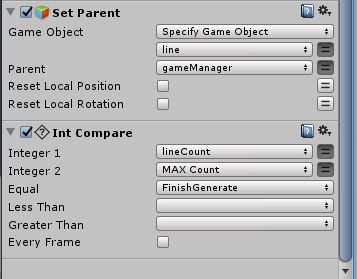
Store generated GameObjects in an array called “dotarray” for later reference. Also, make them children of DotLineManager using SetParent, so they get removed when the scene ends.
Repeat to Generate 50 Balls
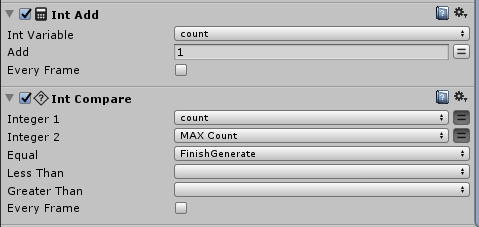
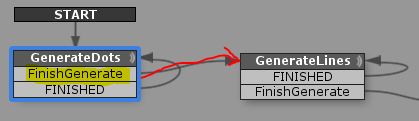
The GenerateDots state loops on the FINISHED event to repeat the generation process. Increment the count variable each time, and when it reaches MAX_Count (50), trigger the FinishGenerate event and transition to the next state “GenerateLines”.
Use PlayMaker to Generate 50 Connecting Cubes
Lines connecting the balls are created by placing Cubes between two balls and adjusting their transforms. In the GenerateLines state, 50 line Cubes are generated.
Create the Cubes
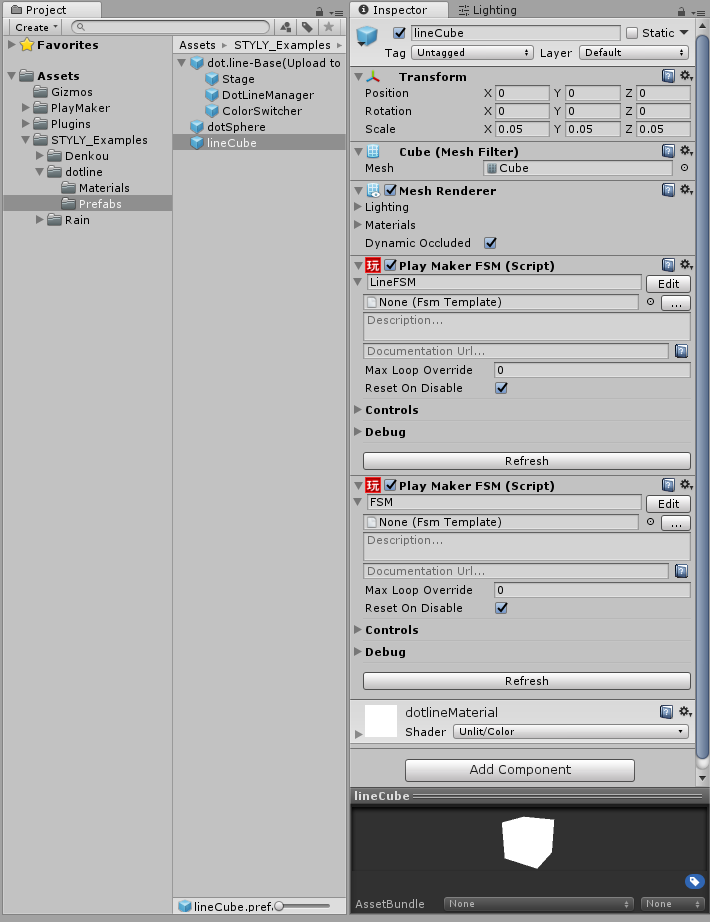
The connecting line Cube is the prefab located at Prefabs>lineCube.
The action for generating LineCubes and adding them to the “linearray” is shown below. It also assigns two balls from the “dotarray” to each lineCube’s lineFSM component.
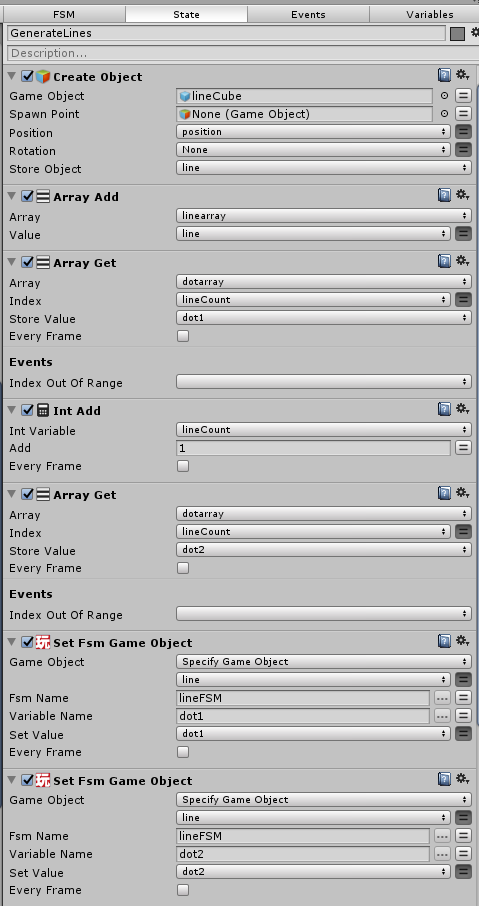
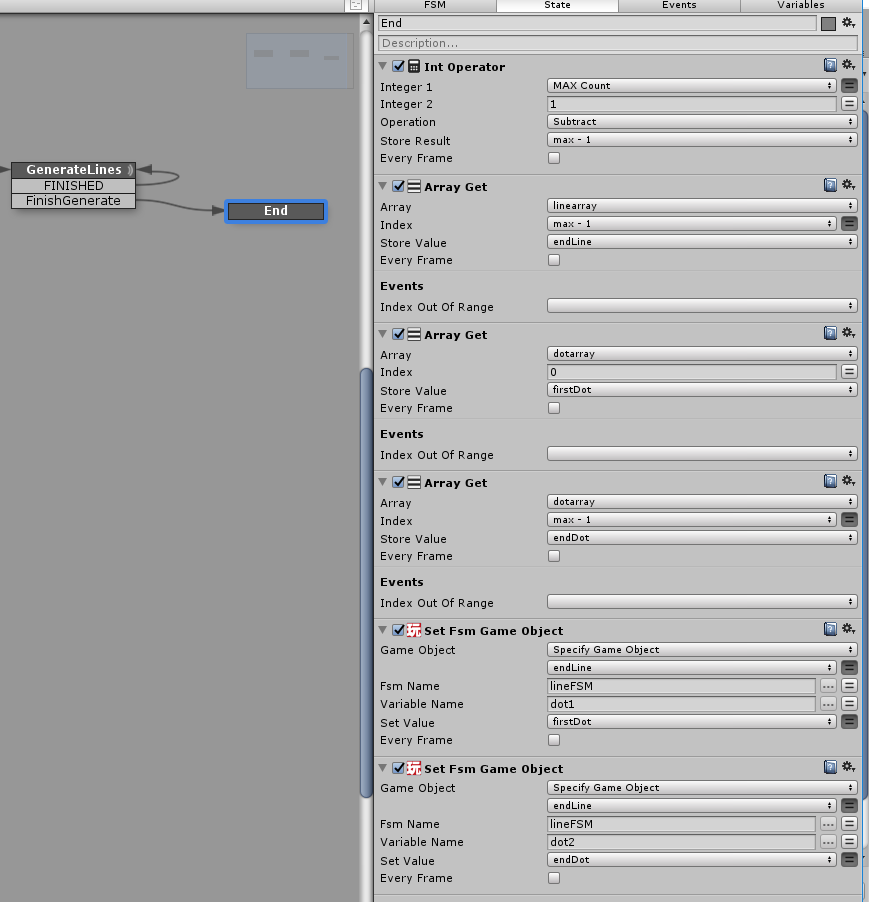
The generation process repeats until 50 lineCubes are created. After that, it transitions to the End state (repeat logic and finish detection are the same as GenerateDots).
In the End state, the last lineCube connects the first and last balls from dotarray to form a continuous loop.
Use PlayMaker to Adjust Cube Transform Between Two Balls
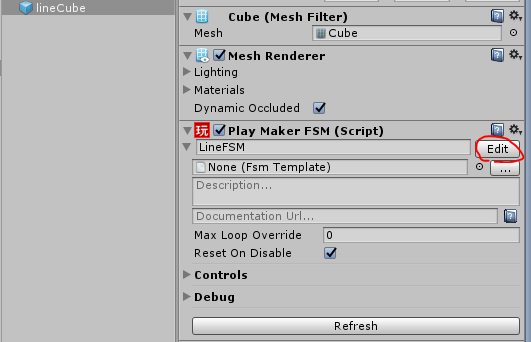
Each lineCube’s LineFSM changes its transform every frame to connect the given dot1 and dot2. Open LineFSM in the lineCube.
State transition diagram of LineFSM
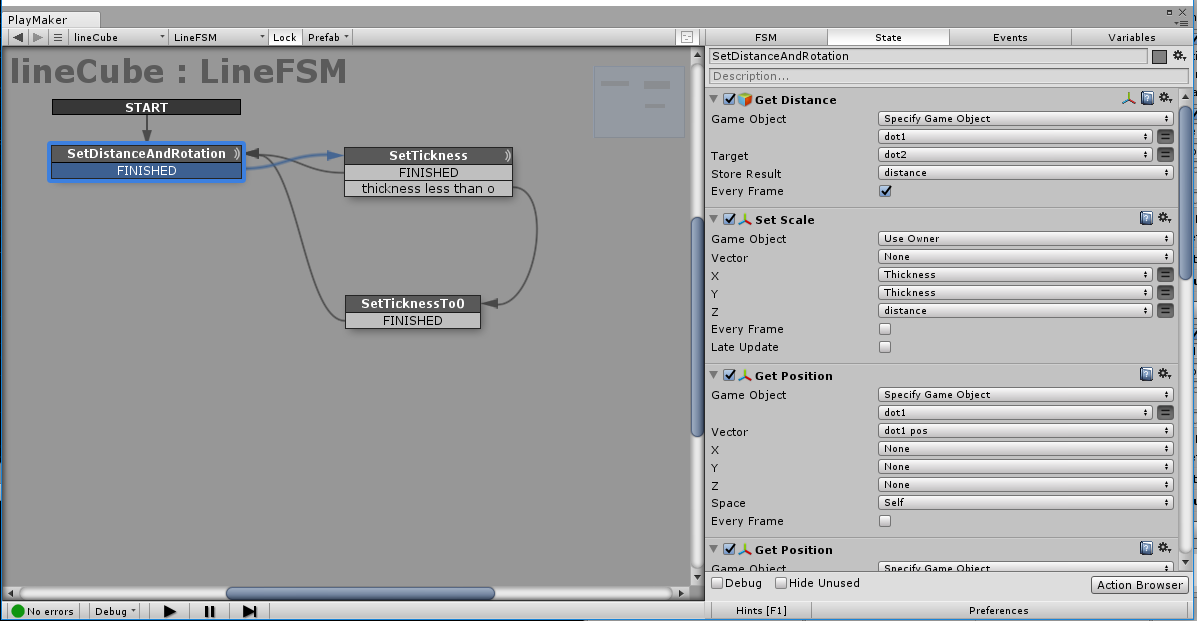
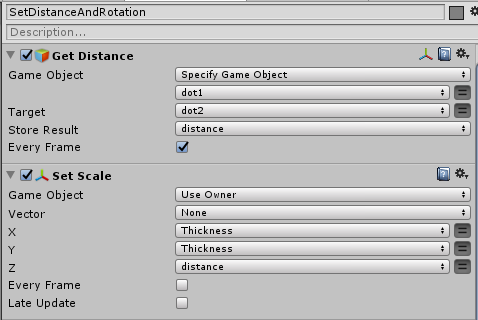
In the SetDistanceAndRotation state, set the transform so the LineCube connects the two balls. Distance between dot1 and dot2 is retrieved using GetDistance and applied to Scale as: Scale = (thickness, thickness, distance)
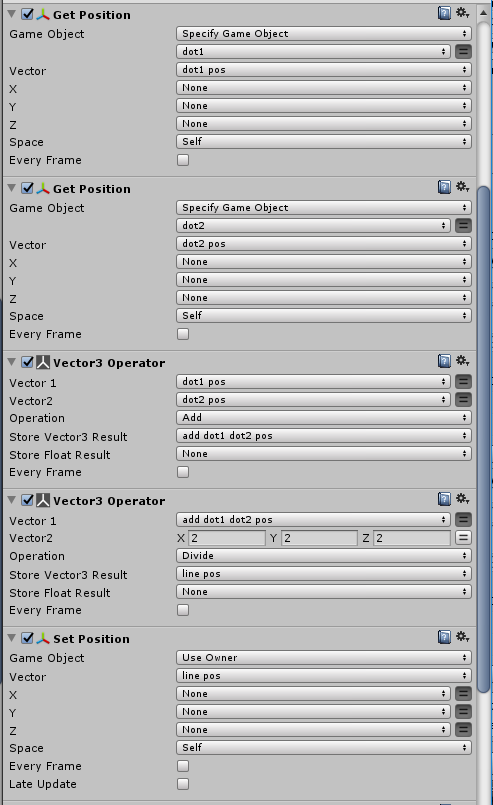
For Position, retrieve both dot positions as Vector3, use Vector3 Operator (Add) and (Divide by 2) to find the center, and set it.
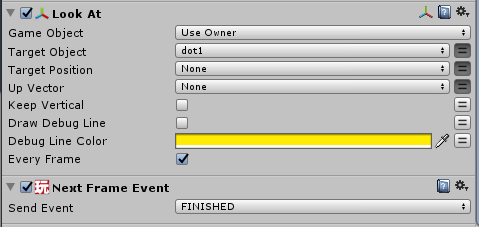
For Rotation, use LookAt to make the cube face dot1.
Change Cube Thickness Over Time
The thickness changes in a waveform resembling a quarter-shifted sine wave, where negative values are clamped to zero.
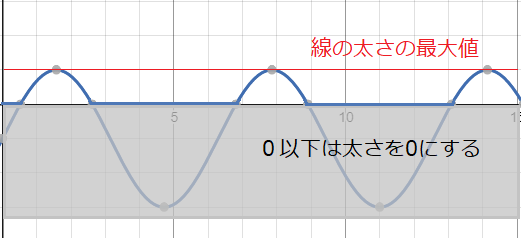
The formula for thickness is: thickness = sin(lifetime / FPS) * LINE_THICKNESS * 2 – LINE_THICKNESS if (thickness < 0) then thickness = 0 The sample uses a 4-second cycle with the following parameters:
- lifetime: elapsed time (increased by LIFETIME_STEP = π/2 per frame)
- FPS: Frames Per Second, assuming 60 FPS
- LINE_THICKNESS: maximum line thickness
You can adjust these parameters as desired. Implement this logic in PlayMaker like the screenshot below.
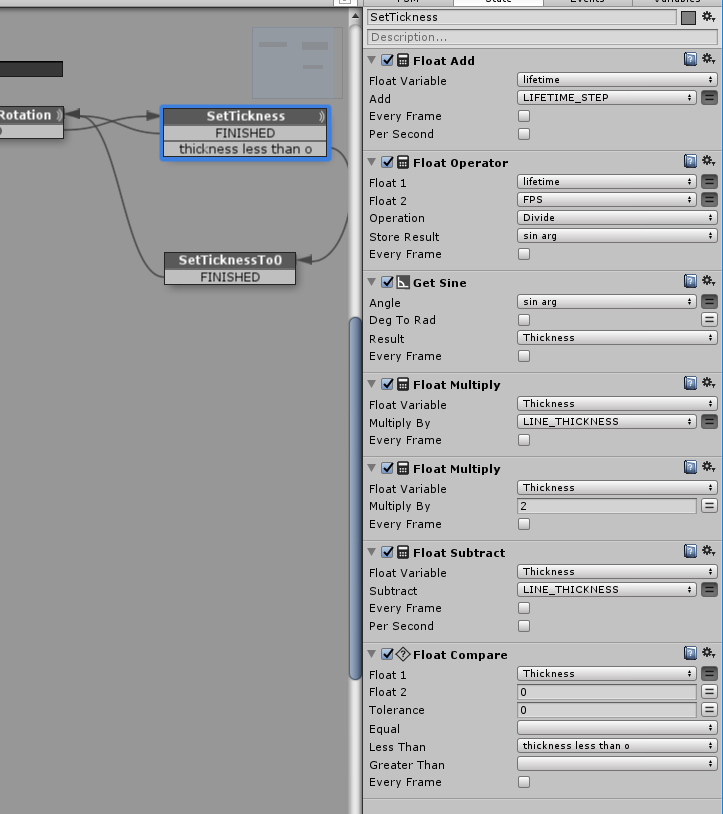
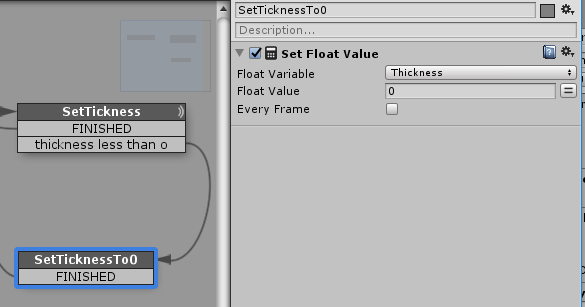
If thickness is below 0, transition to the SetTicknessTo0 state and set it to 0.
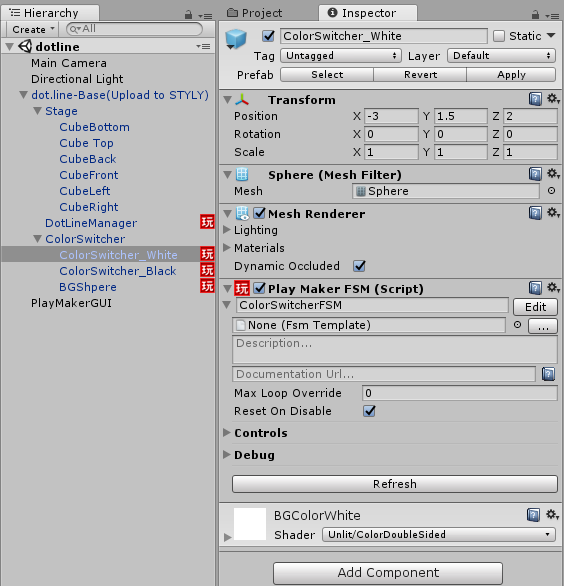
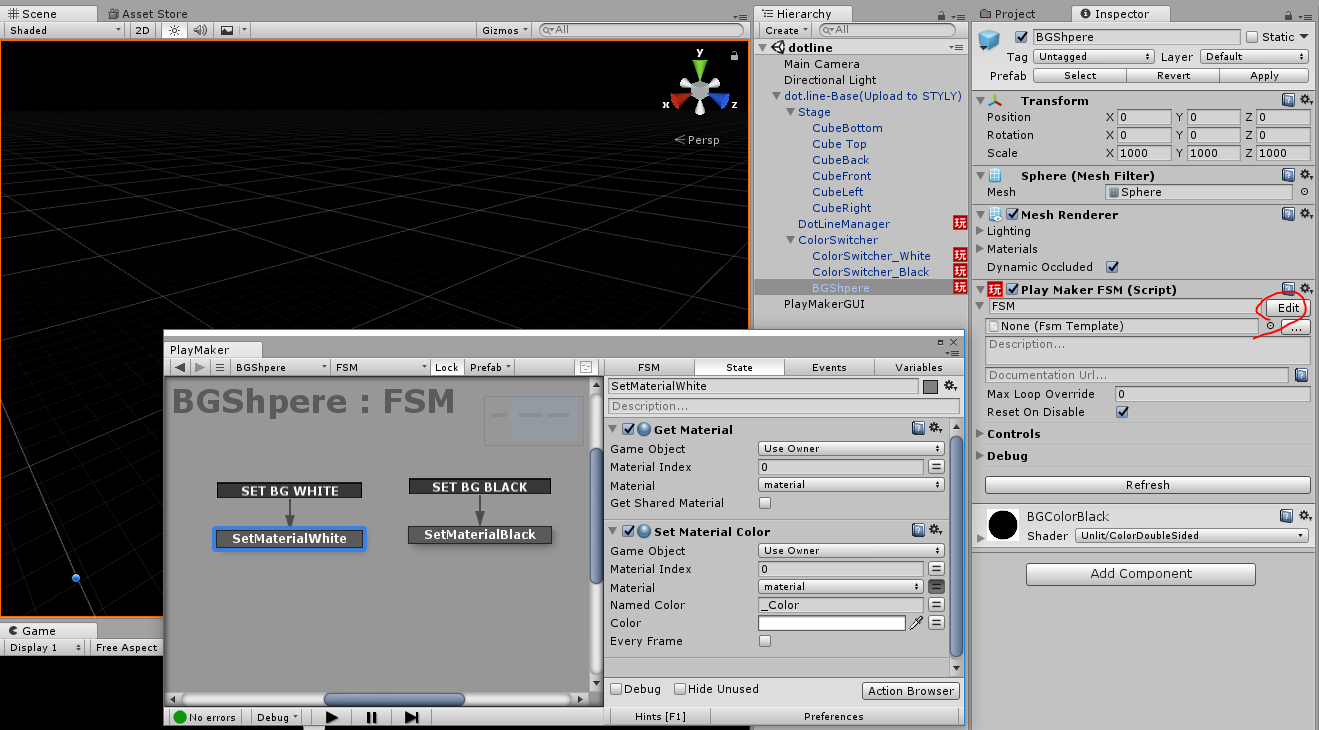
Switch Between Black and White Colors Using PlayMaker
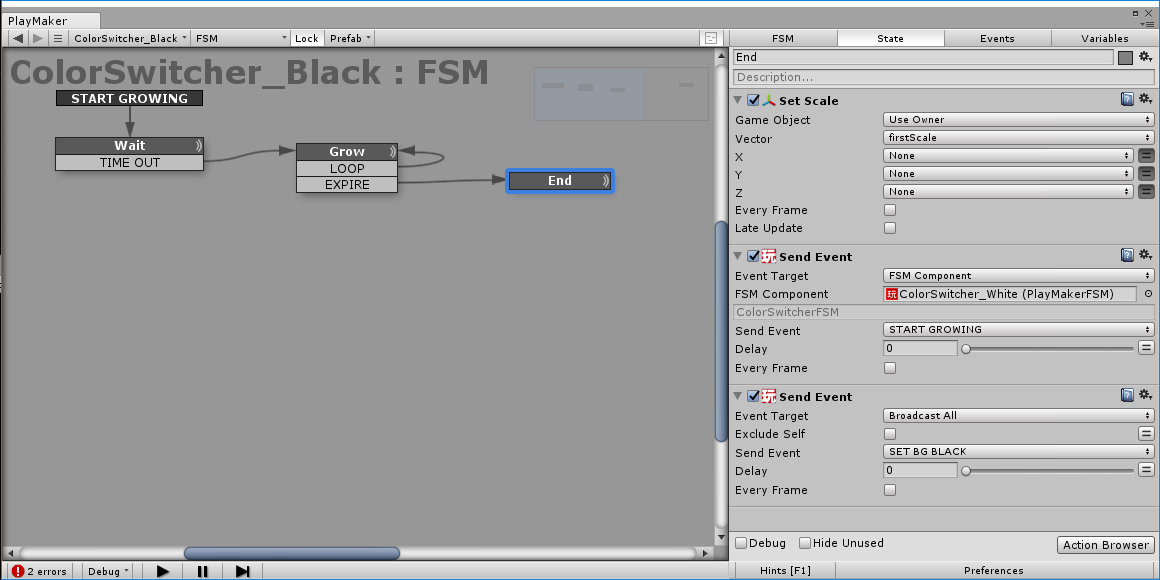
The background alternates between black and white periodically. The ColorSwitcher expands black or white spheres until they fill the screen, then flips the color. The FSM of ColorSwitcher is shown below.
At runtime, it starts with a black background. After 4 seconds, the white ColorSwitcher begins expanding.
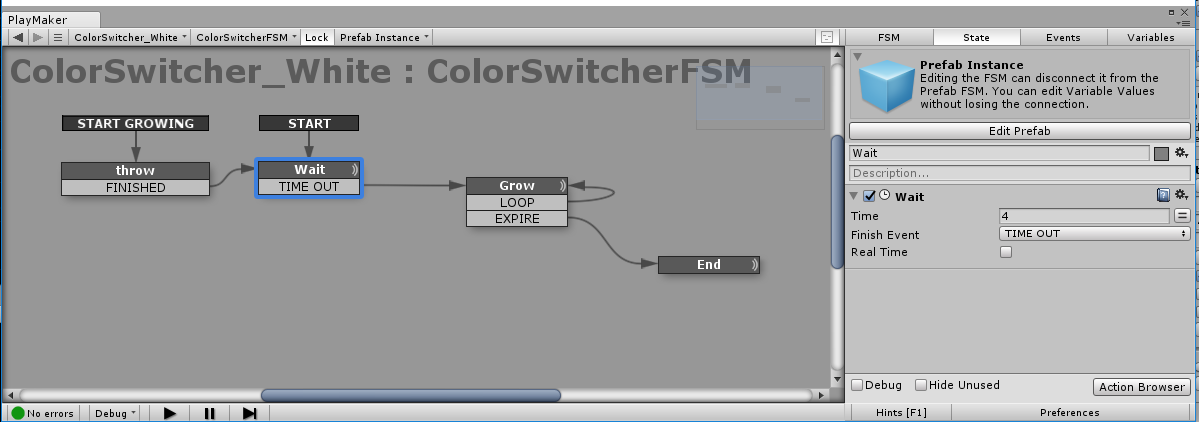
When it enters the Grow state, it increases ColorSwitcher_White’s scale each frame. When scale exceeds 10, it triggers the EXPIRE event and transitions to End state.
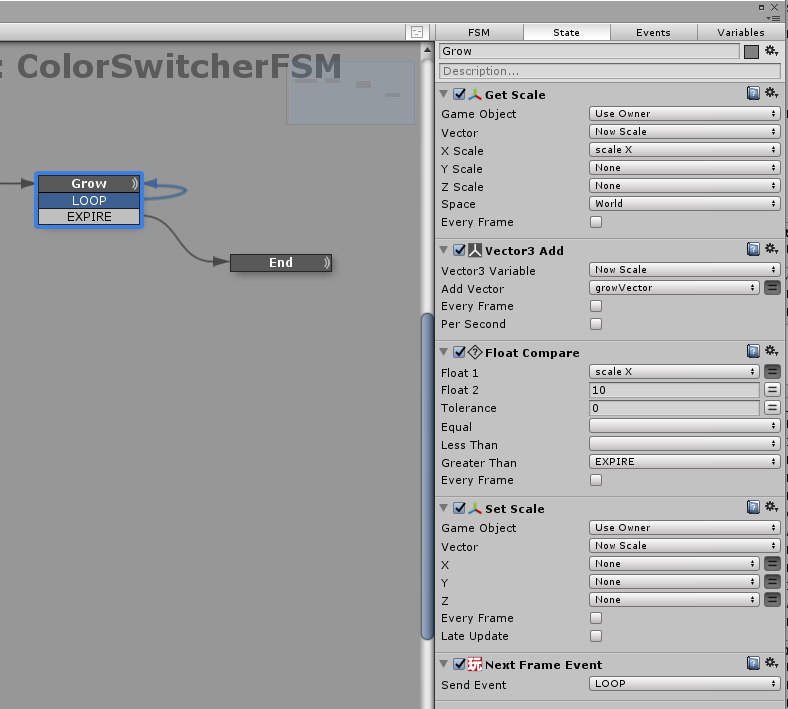
In the End state, it sends the START GROWING event to the black ColorSwitcher, and broadcasts SET BG WHITE to all FSMs to switch background color.
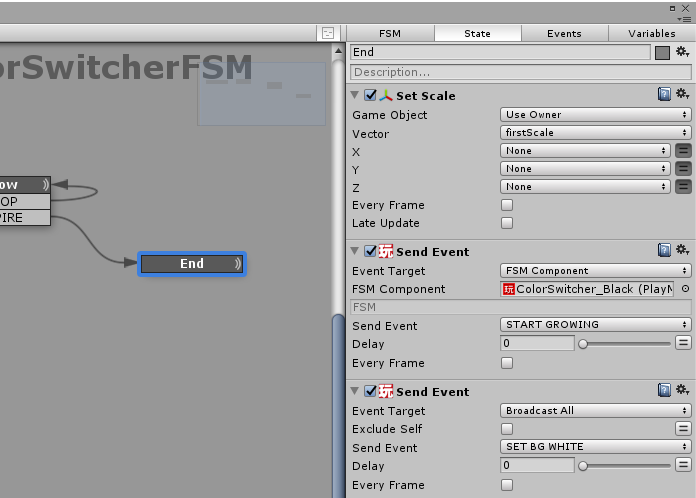
ColorSwitcher_Black then transitions to Wait and follows the same behavior. When finished, it broadcasts SET BG BLACK and notifies white ColorSwitcher to begin.
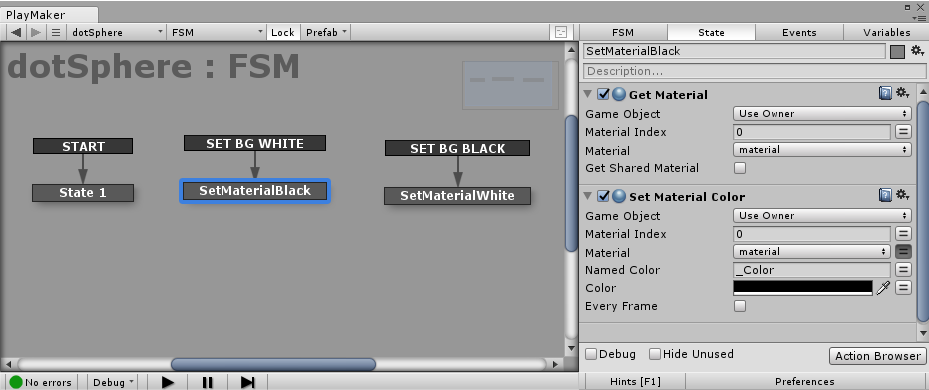
dotSphere, lineCube, and BGSphere have FSMs that receive SET BG WHITE/BLACK events. These FSMs retrieve their Material and use SetMaterialColor to change color.
How to Create dot.man
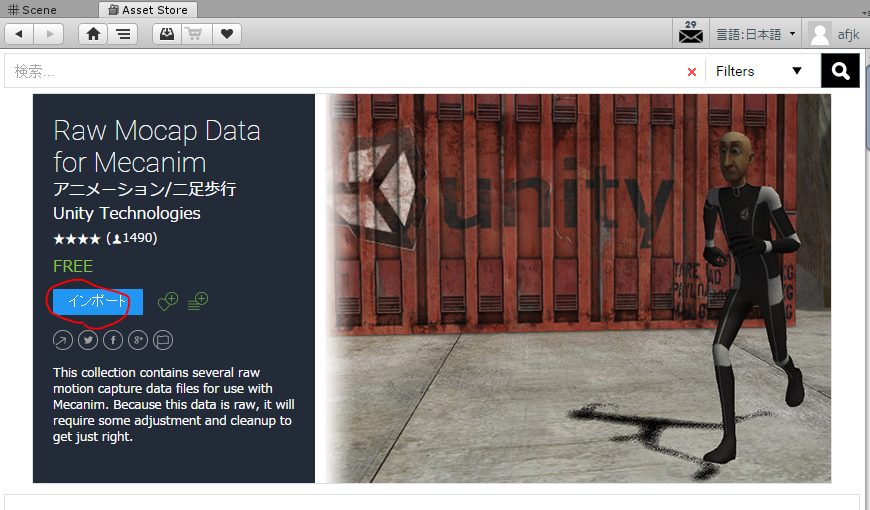
Finally, let’s explain how to create dot.man. This part does not use PlayMaker — animation is used instead. Get the “Raw Mocap Data for Mecanim” asset from the Unity Asset Store: https://assetstore.unity.com/packages/3d/animations/raw-mocap-data-for-mecanim-5330
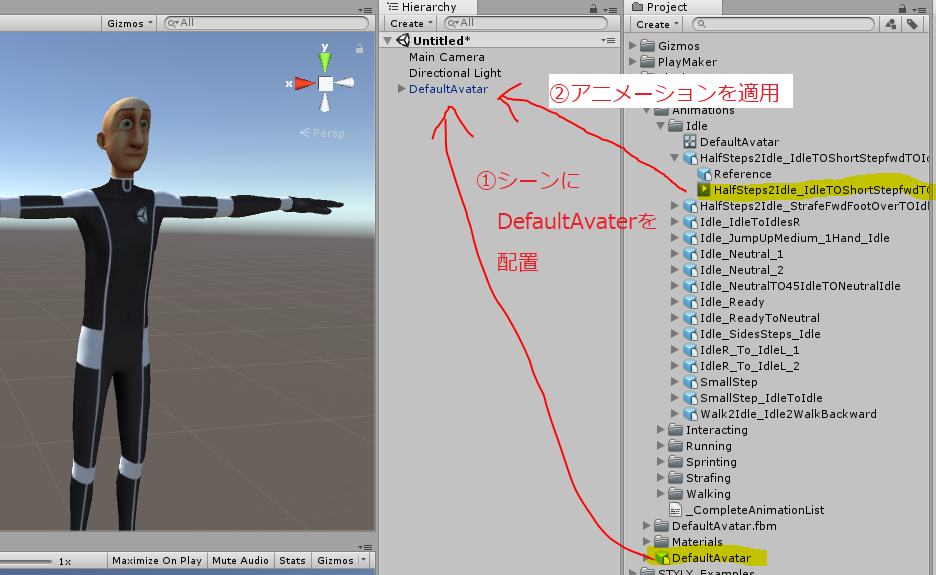
Place the DefaultAvatar model into the Hierarchy and drag & drop any animation from the Animations folder to apply it.
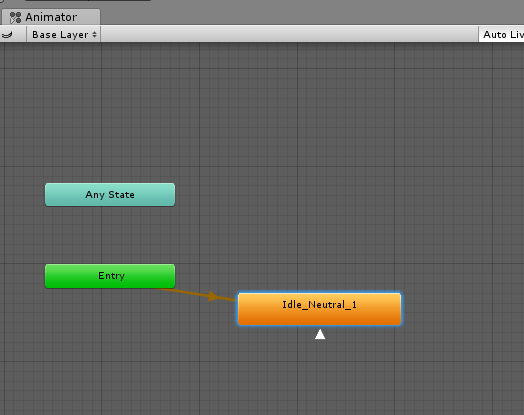
To make the animation loop, edit the Animator Controller: 1. Double-click the Animation Controller to open the Animator window. 2. Right-click the added Animation (e.g., Idle_Naturel_1) and select Make Transition.
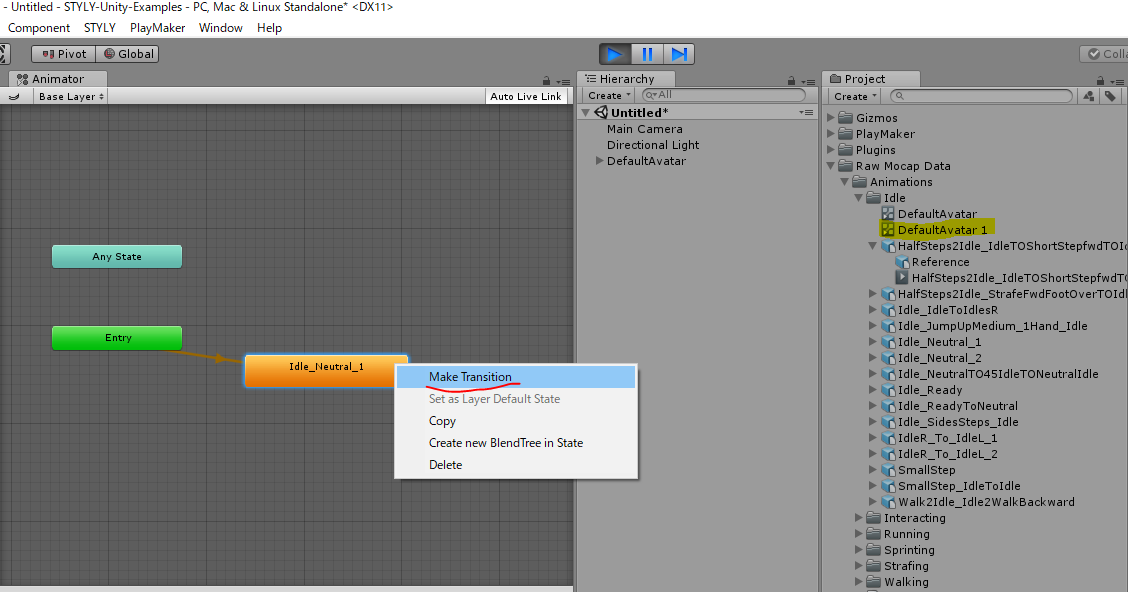
3. Set the transition destination to the same state (Idle_Naturel_1). Run the scene to confirm the animation loops.
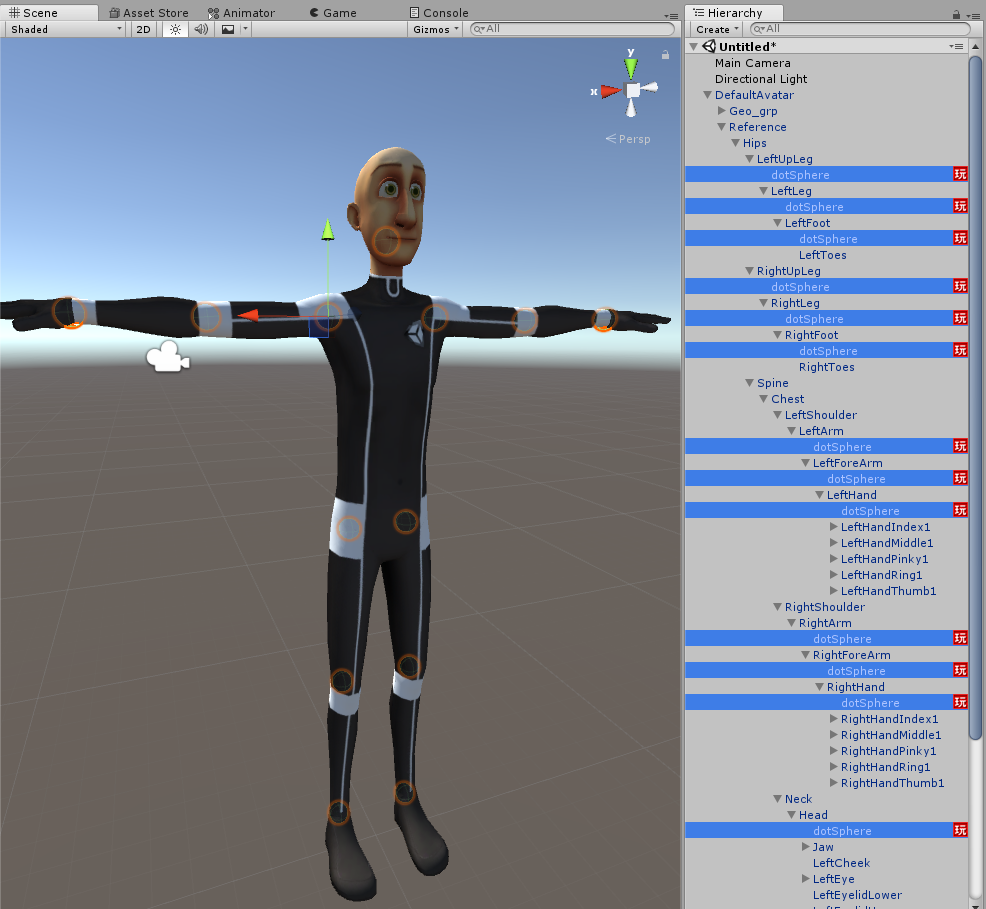
Once the animation is set, attach dotSpheres as child objects to each joint of the DefaultAvatar model.
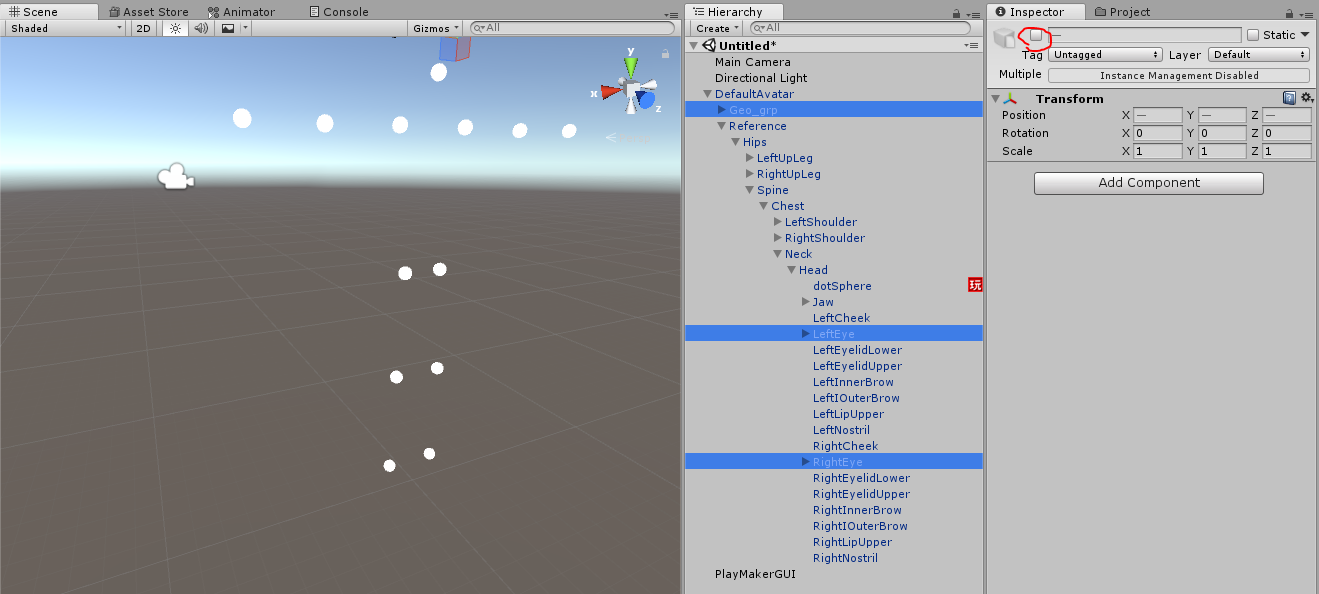
Finally, deactivate the Geo_grp, LeftEye, and RightEye GameObjects to complete dot.man.
Try experimenting with different animations!
Upload and Place in STYLY
Download and import the UnityPlugin from the STYLY download site.
* See the download page for initial setup instructions.
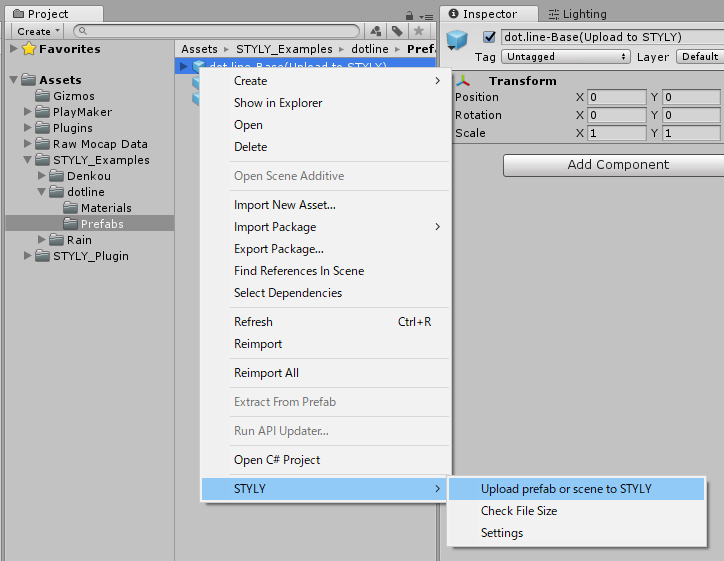
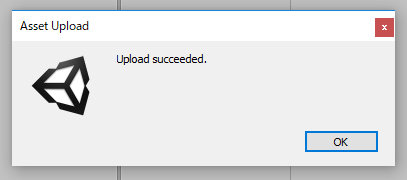
https://styly.cc/download/?lang=ja Right-click the dot.line-Base (Upload to STYLY) prefab → STYLY → Upload prefab or scene to STYLY. After a moment, an “Upload Success” popup will appear.
Open the STYLY Editor in your browser. Under asset selection, go to 3D Model → My Models tab to see your uploaded assets.
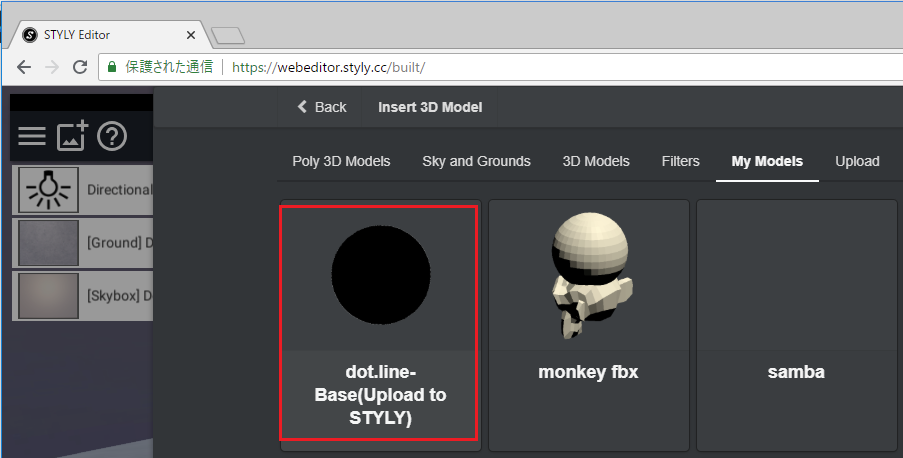
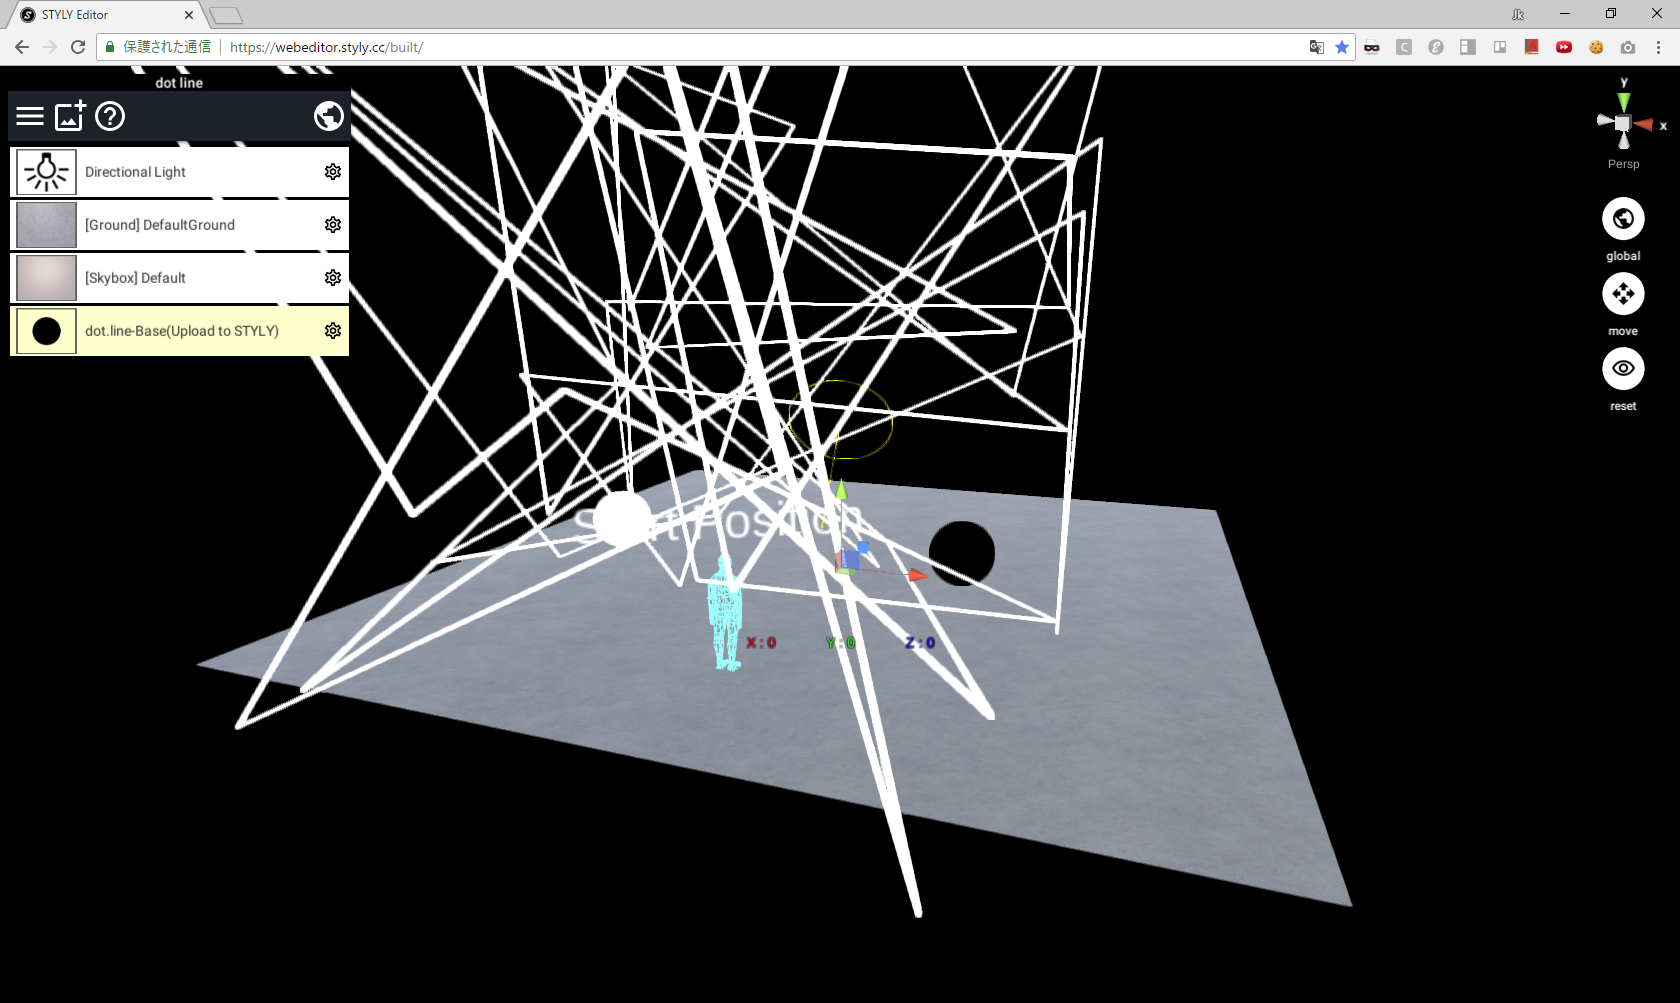
Click to place it in your scene.
Follow the same procedure to convert dot.man into a prefab and upload it.
Conclusion
That concludes the explanation of dot.line-. With PlayMaker in STYLY, you can implement a variety of logic and expand your expressive possibilities.
You can experience the dot.line- space on STYLY at the following URL:
http://gallery.styly.cc/afjk/515f798a-7126-11e8-b34d-4783bb2170d0
It’s also available as a 360° video on YouTube — check it out!
Sample project available here: https://github.com/styly-dev/STYLY-Unity-Examples/tree/master/Assets/STYLY_Examples/dotline