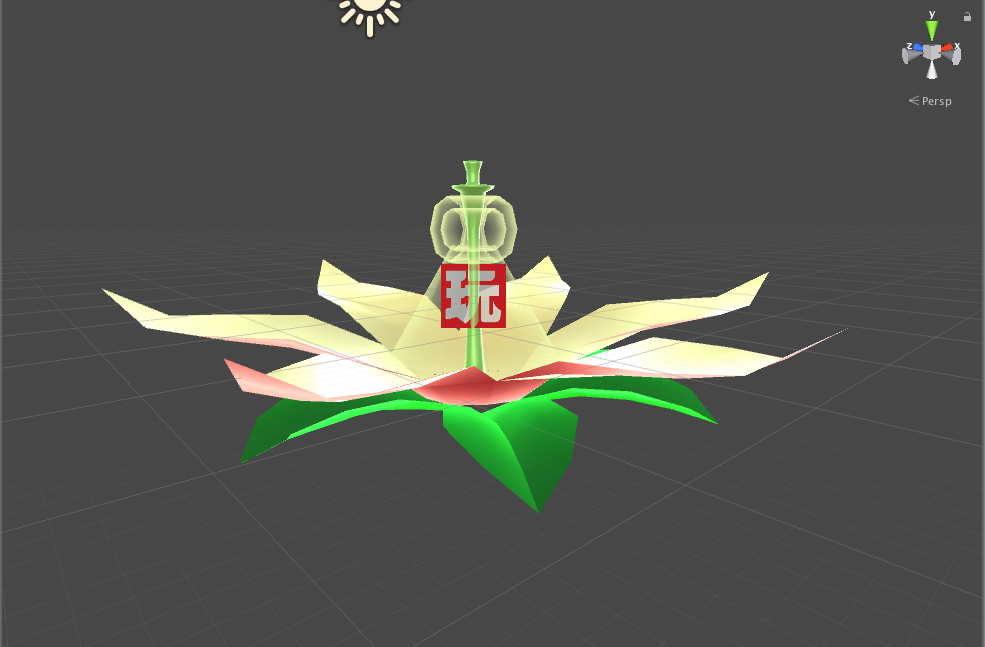
Hi, SenstiveCube here! Todays tutorial is how to make ‘Fruit Lamp’ with Cinema4d, Unity and STYLY.
This tutorial is continuing from the previous session. I’ll show you how to create the scene for STYLY with Unity , playmaker and STYLY.
In unity, we create materials, shaders with ShaderForge and interaction with playmaker.
Set FBX file.
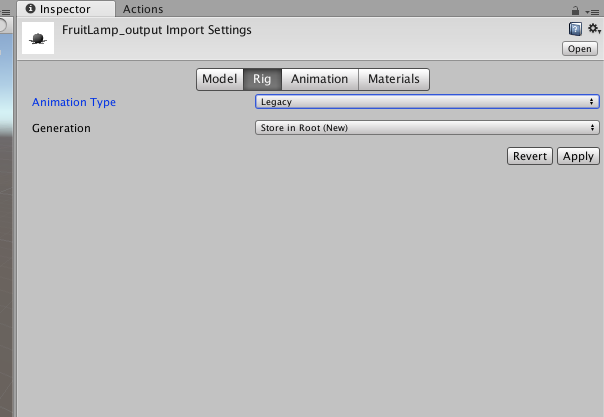
So, let’s launch the unity2019. (Styly corresponds to Unity2019 for now). Drag and drop the Fbx file which was created previous tutorial to Project window. Hit the Rig tab and change Animation Type to Legacy. Why to do this is for some playmaker’s action.
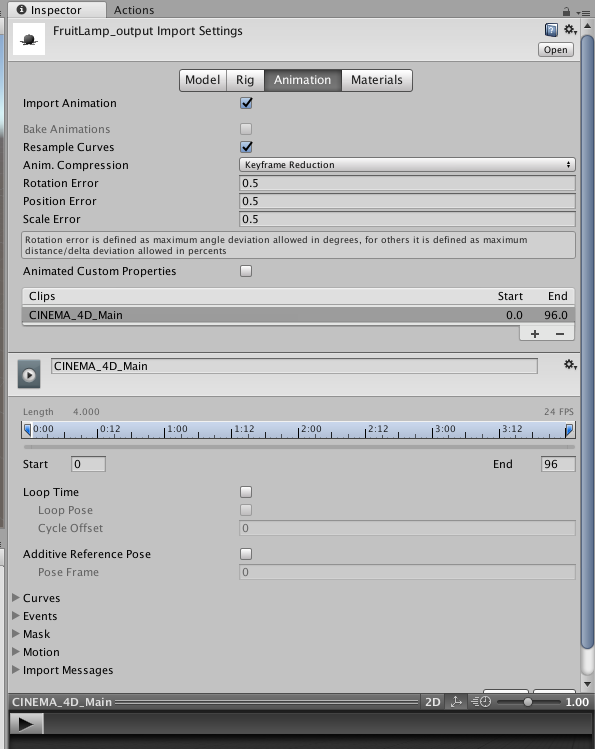
Goto Animation tab. Click the ‘+’ button in Clips area twice and change name to ‘Open’ and ‘Close’. Select open and check length. Now, the Start is 0 flame and End is 96 flame. In other word, this clip is entire animation which make in Cinema4d. When hit the Play button in Preview window, the object will repeat the open and close.
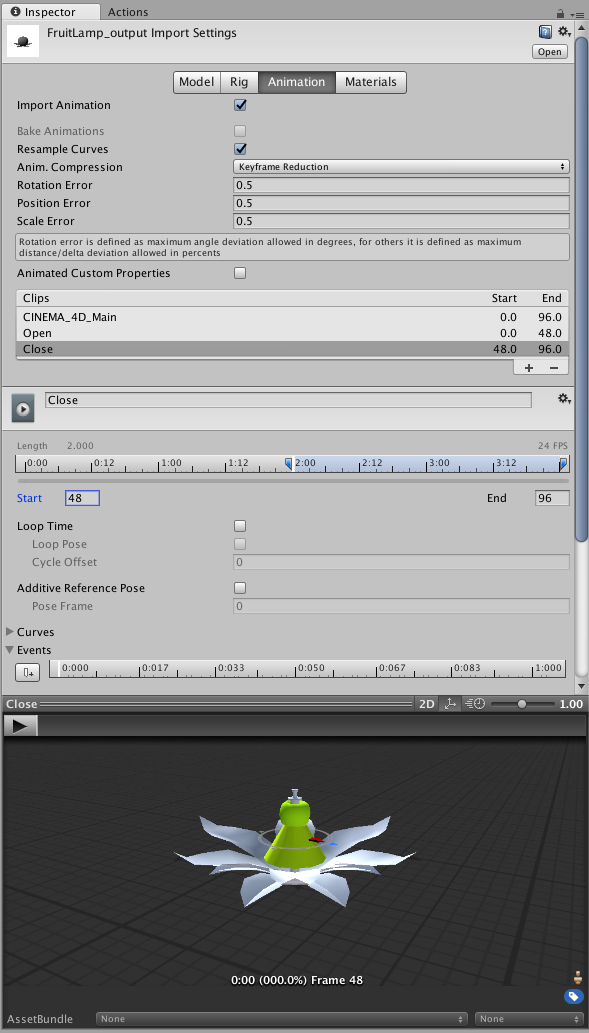
I want to separate this. Change End to 48 and hit Play button again. the object repeat open animation only. Select ‘Close’ clip. change Start to 48. this clip will be animation of close only.
Go to Materials tab and hit extract Materials. materials will be editable.Don’t forget hit the Apply button.
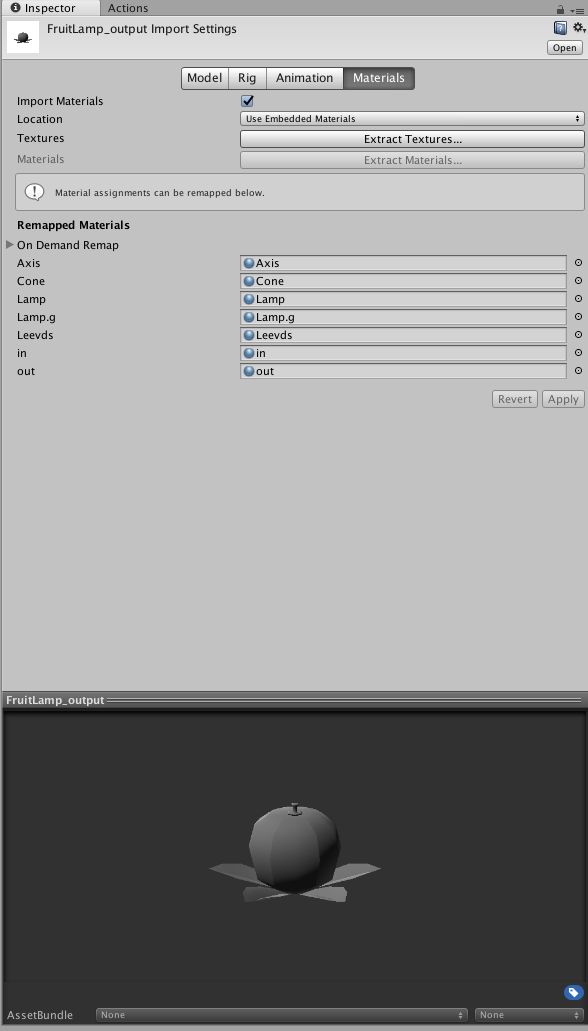
Create shaders and materials.
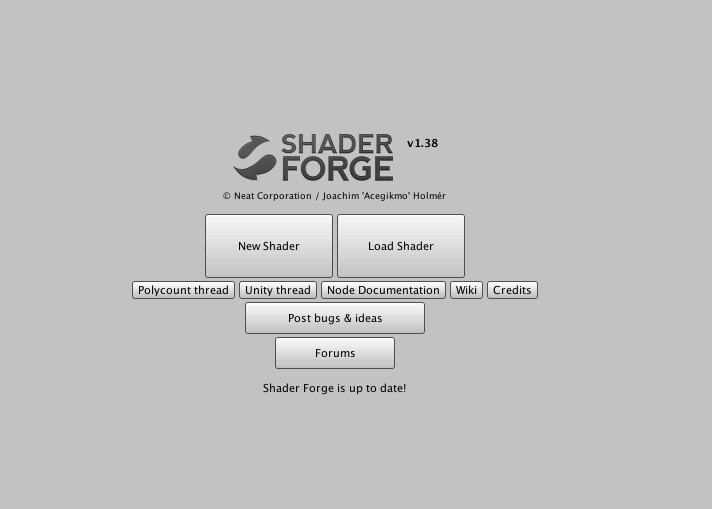
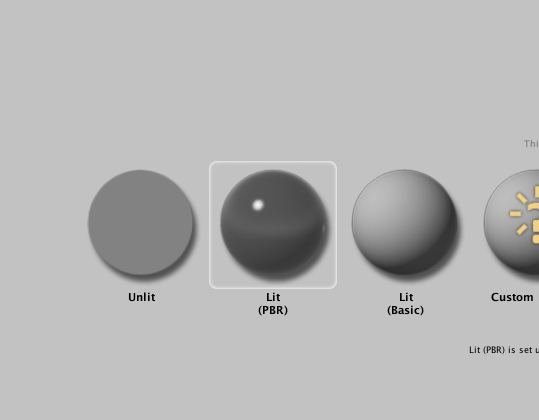
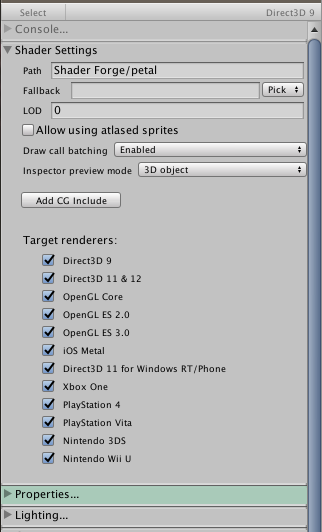
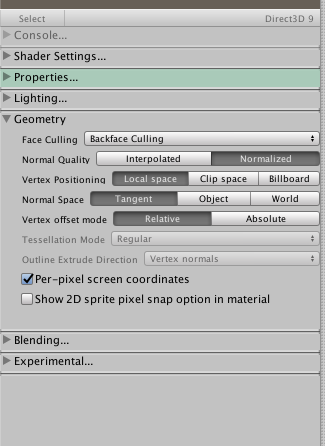
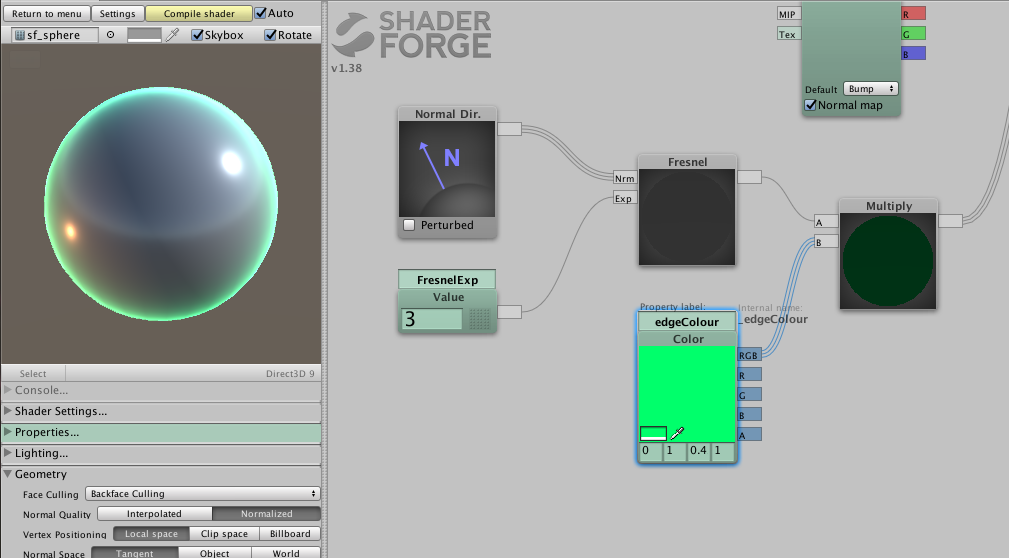
At first, create a shader for outside and inside of petals. Open the Shaderforge window(window > shaderForge) and hit New shader. Select Lit(PBR) and save as petal.shader. The node editor will open. Goto Shader setting rollout in left side of window. Turn on all Target Renderes. Click the Geometry rollout next. Make sure the Face culling is Backface culling.
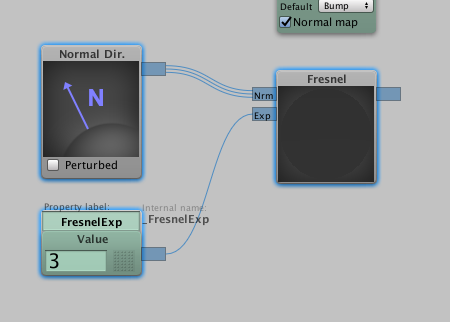
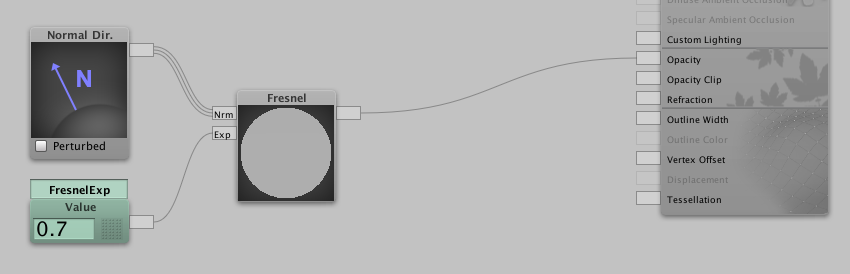
Let’s add some nodes. Add Normal Direction , Fresnel and Value Property node. Change Name of Value node to ‘FresnelExp’ and set value to 2.Connect the nodes as figure below.
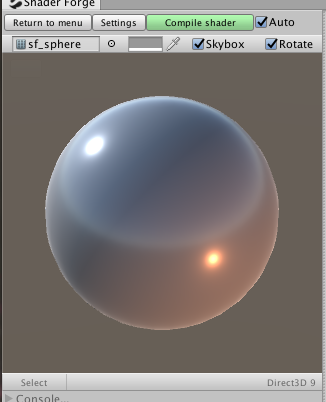
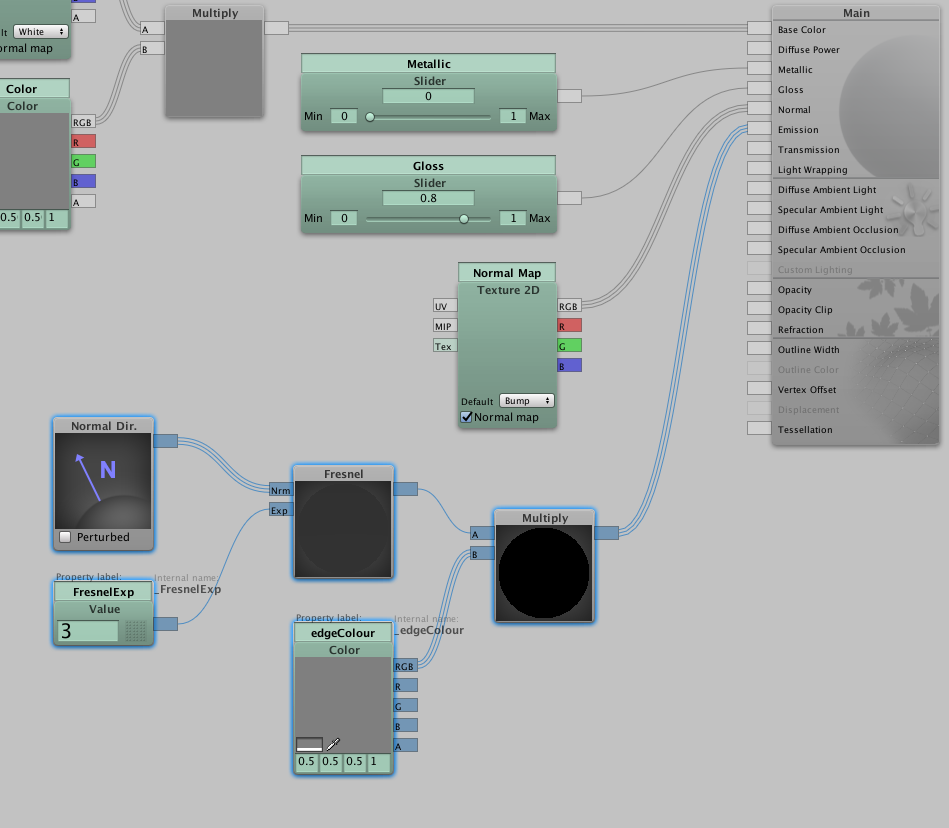
Concect Fresnel node to Emisstion of Main node. If connected, the edge of preview object will be brighter. It’s looks nice, but I want to change the colour. Add multiply node and Color property node. Change name of Color node to ‘edgeColour’. Connect the nodes as figure below and change the ‘edgeColour’. The preview will change.

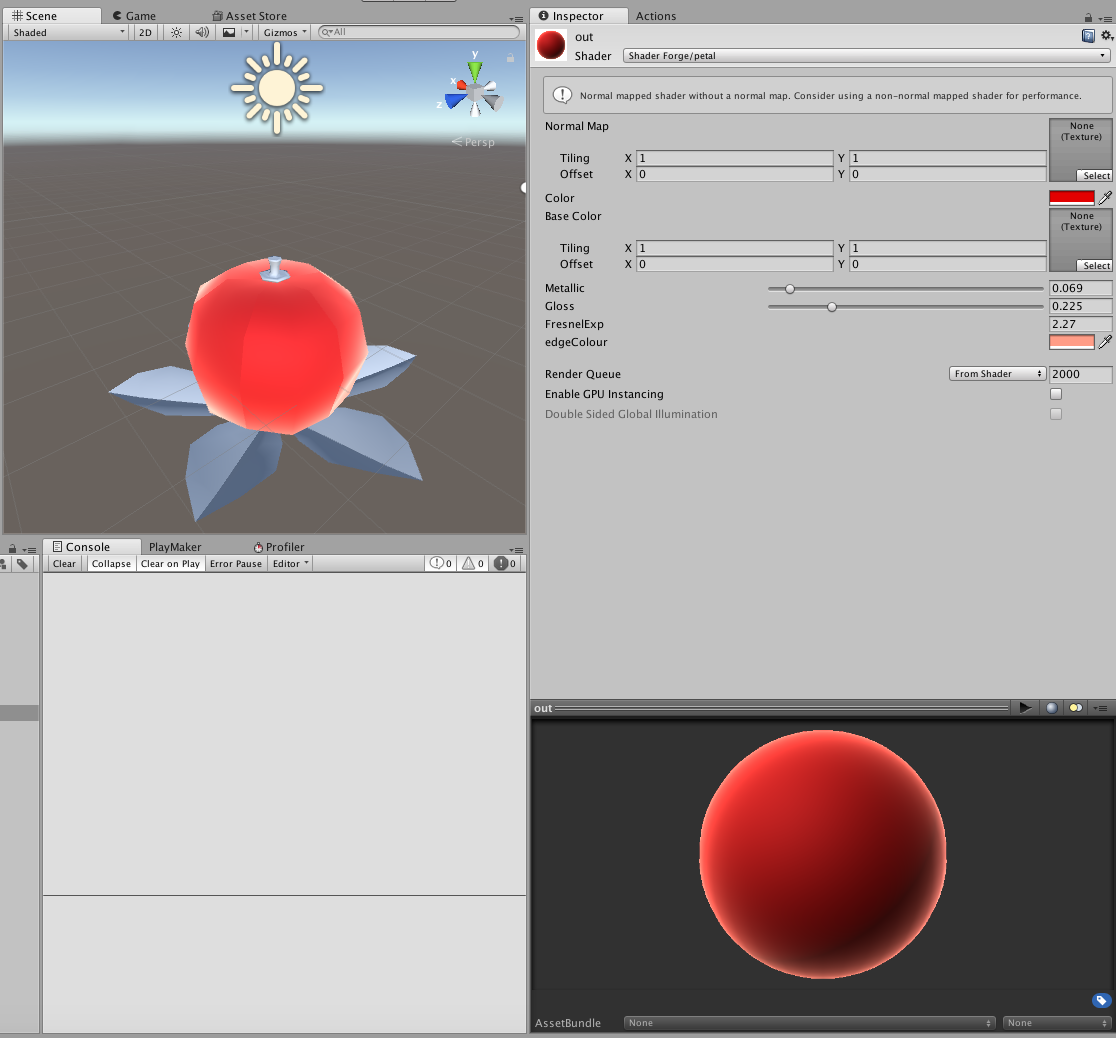
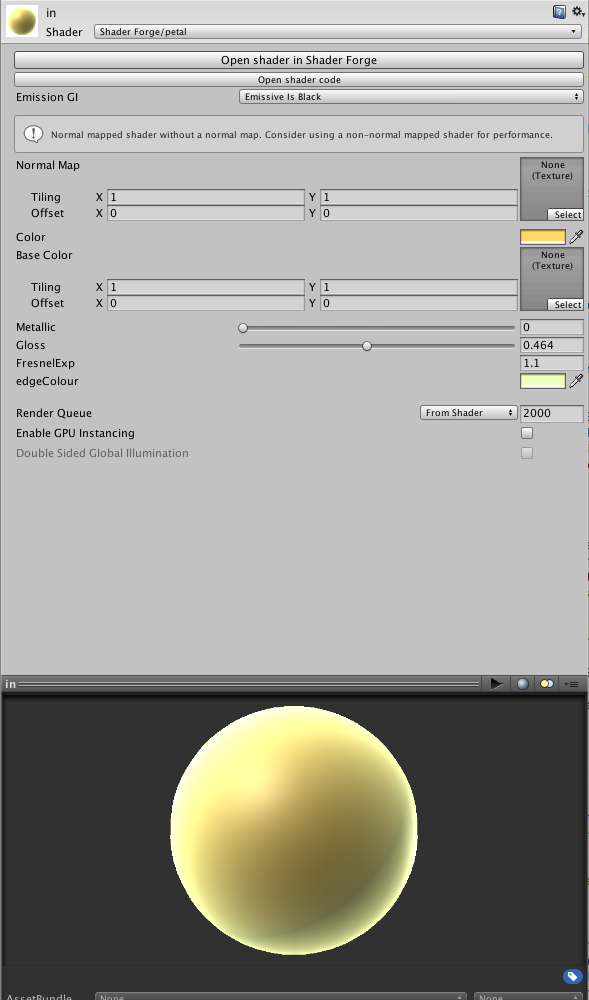
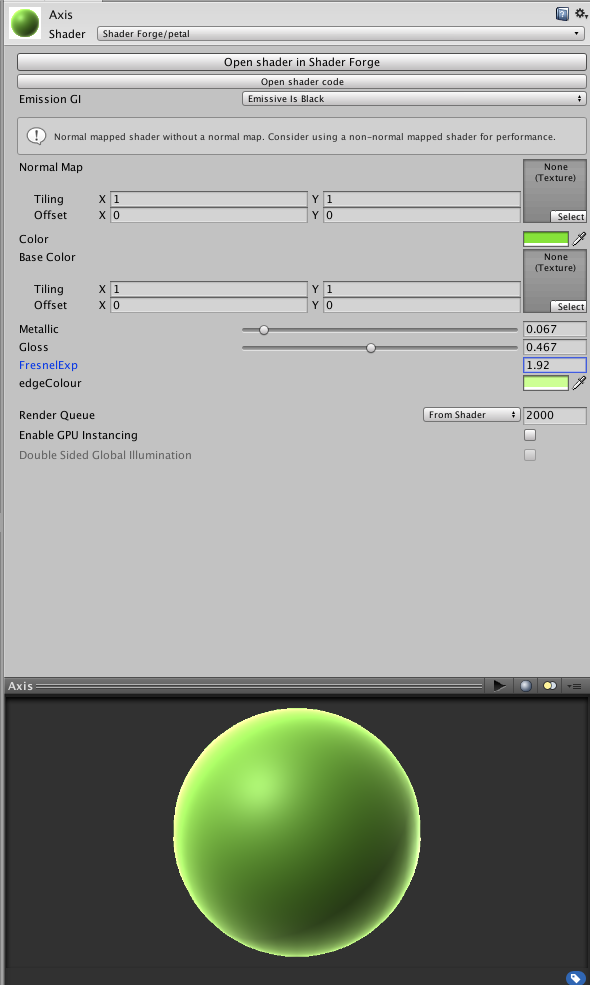
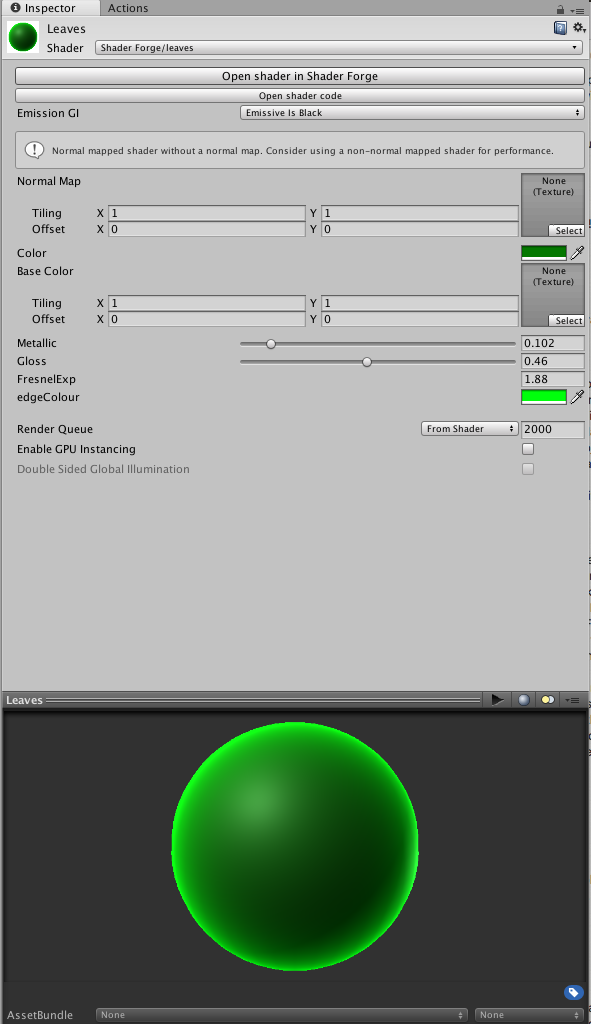
Hit the Compile Shader button and close the window. Select Out material in Project window and goto Inspector window. Change the Shader to Petal. Now the new shader is added to this material. Let’s tweak this material. If it will looks ok, move to next step. Select In material and change shader to Petal. Tweak this again. Axis Material is as same as these.
Create new Lit(PBR) shader and save as ’Leaves’. the Leaves shader and Petal shader are the same except for Face culling setting. I want to render both side of Leaves. so set the parameter to Double side. Select Leaves material and add the Leaves shader, and change parameter of course.

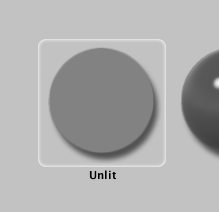
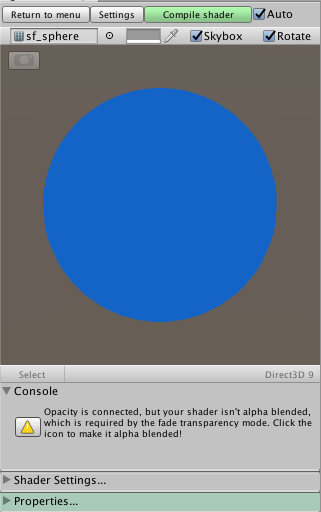
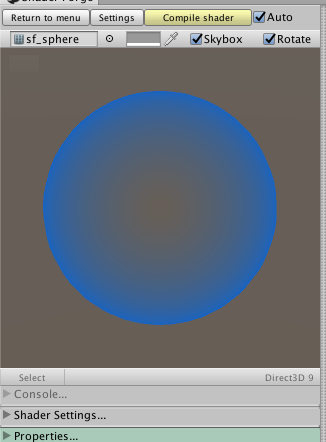
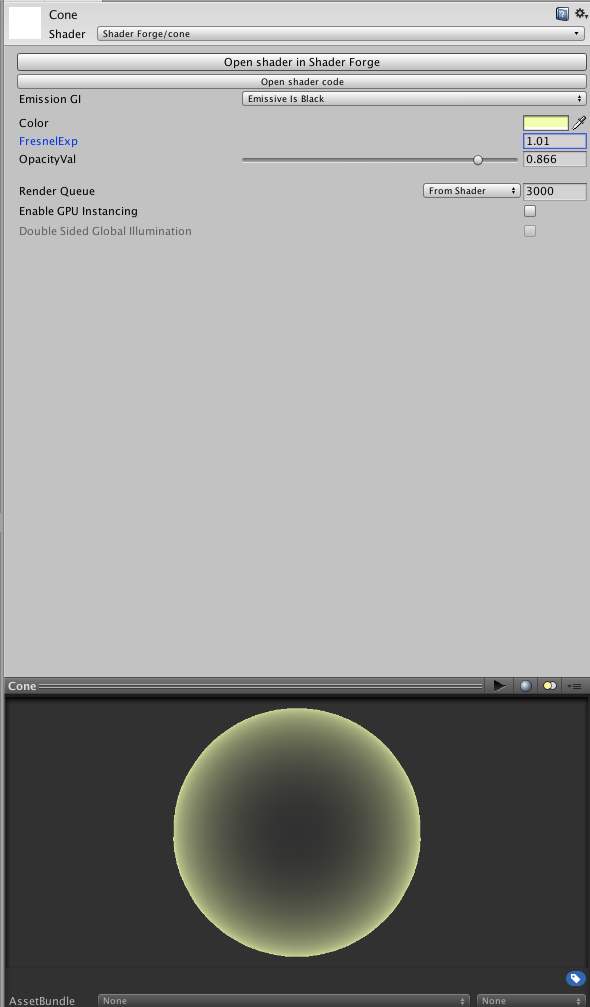
The last shader is a shader for Light Cone object. Create new shader and select unlit this time. Save as ‘Cone’. Add Normal Direction , Fresnel and Value Property node. Change Name of Value node to ‘FresnelExp’ and set value to 0.7. Connect the nodes as figure below. Yellow triangle icon will appaper in left side of the window. Click the icon. the Preview will change. Middle of preview object becomes transparent. Add more nodes, Multiply and Slider Property node. Change name of Slider to ‘OpacityVal’. Connect the nodes as figure below. The opacity will be editable. Also, Don’t forget turn on the Target Renderers. Select Cone material and set this shader.

So, Materials and Shaders are done!
Before Playmaker
Before explaining the operation, I will explain the logic made with Playmaker.
A. define player and fruitLamp object.
B. waiting for the player to close to the fruitLamp object.
C. run Open animation.
D. waiting for the player to leave the object.
E. run Close Animation. goto B
What we need for ‘A’ and ’B’ is player’s and the object’s position’s.
The player in STYLY is as same as Main camera.
‘Open’ and ’Close’ animations have already been set up in previous chapter.
Set interaction with Playmaker
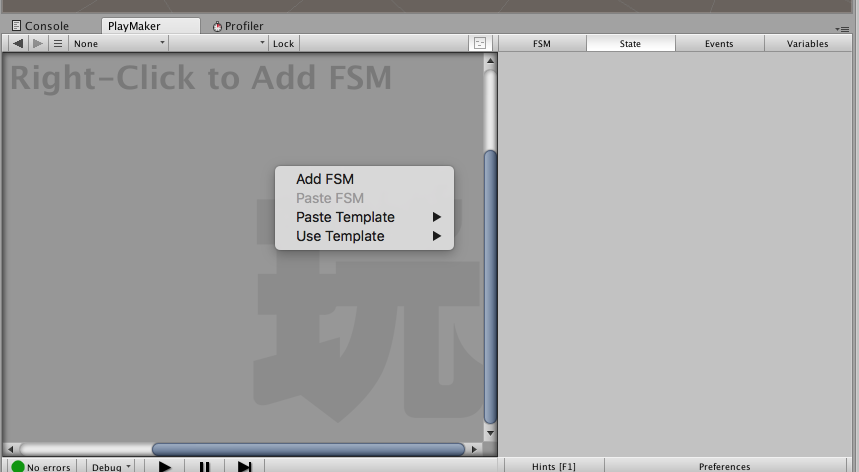
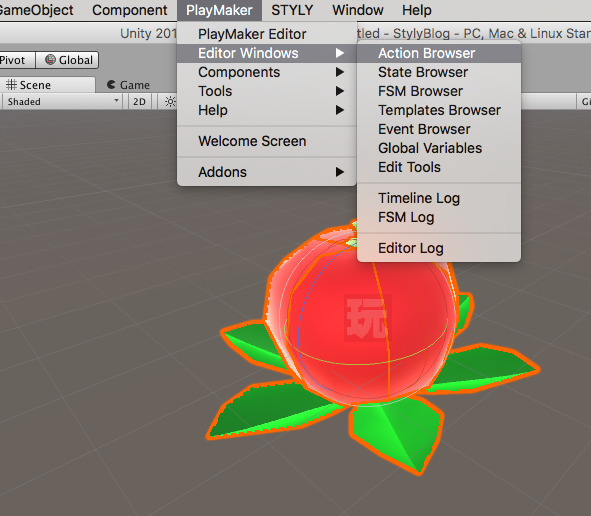
Let’s create new unity scene and launch the Playmaker Editor (PlayMaker > PlayMaker editor). Add the FBX file to Hierarchy panel.
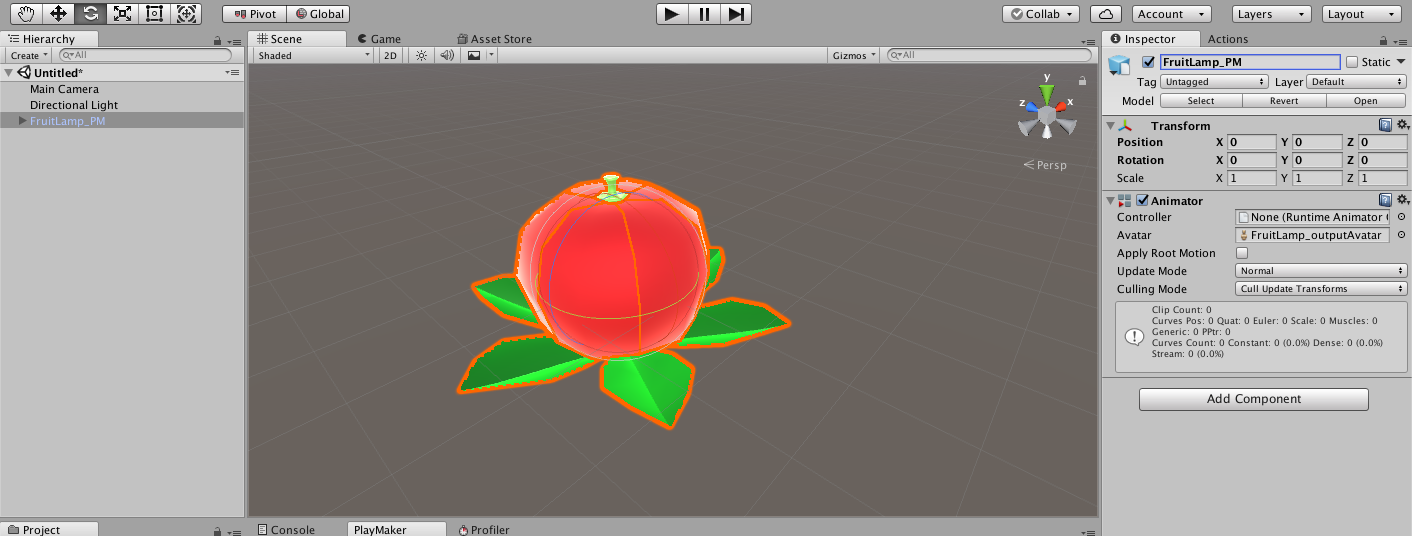
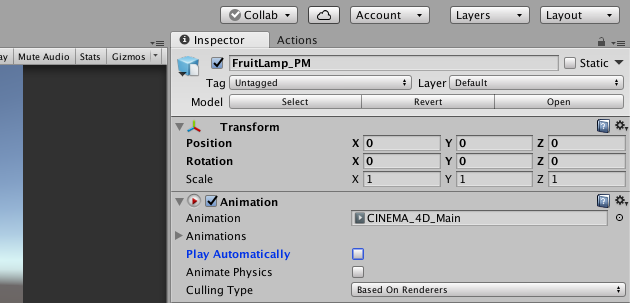
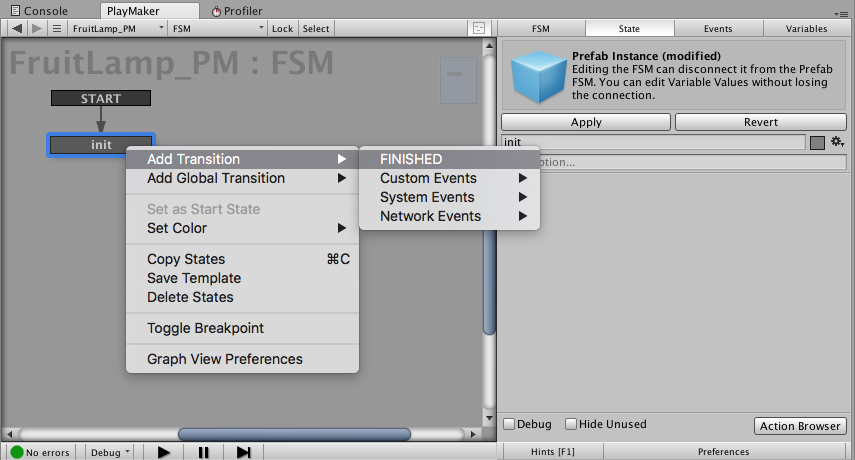
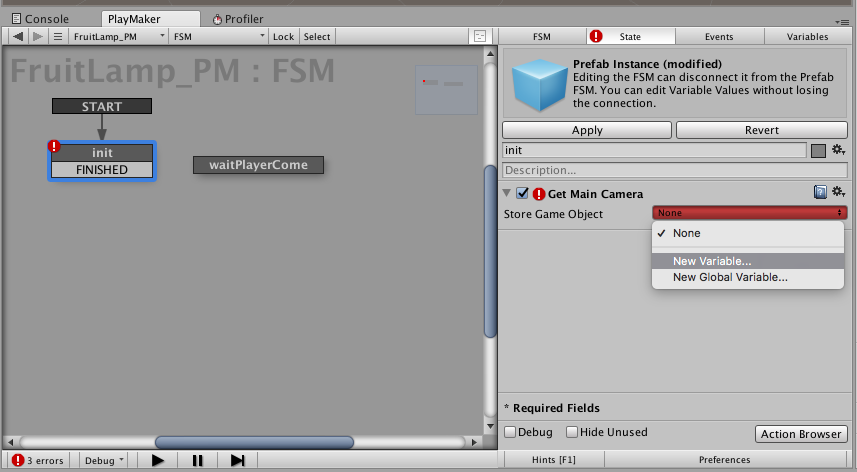
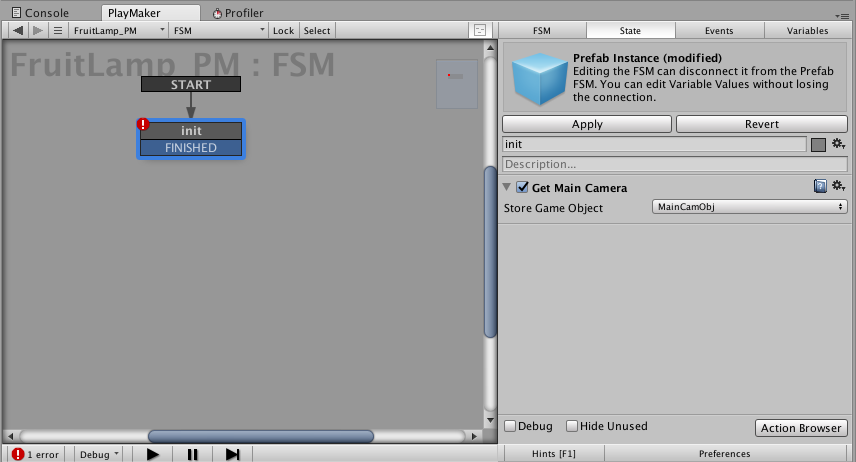
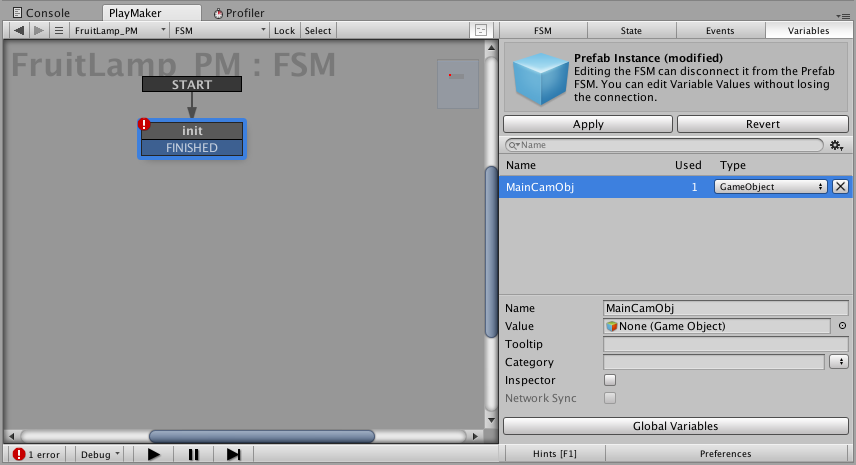
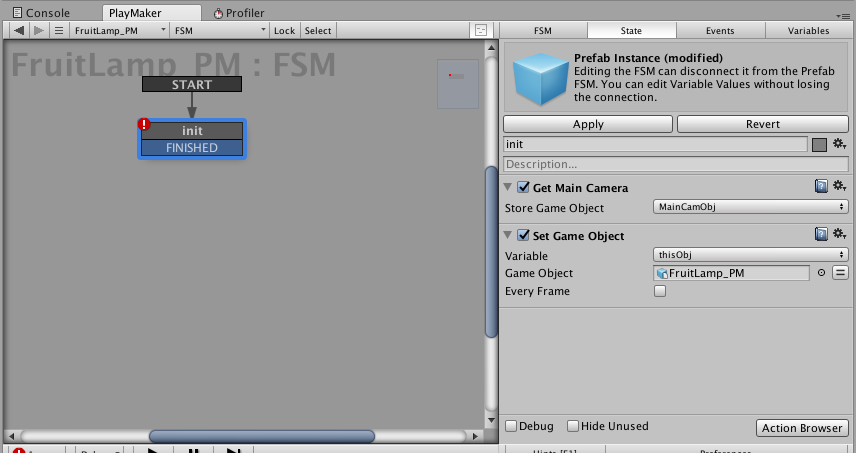
Select the FBX in Hierarchy panel and change name to ‘FruitLamp_PM’. Goto inspector and turn off the Play Automatically. In PlayMaker editor, Hit the state tab and add new FSM. Select State 1 and change name to ‘init’. Left click the ‘init’ and add ‘FINISHED’ transition. Open Action browser and add ‘Get Main Camera’ action. Select Store Game Object rollout and hit new variable. Type ‘MainCamObj’ and hit create variable. Goto Variables tab and you will find the variable named MainCamObj. Back to state tab and add Set Game Object action. Select Variable rollout and create new variables named ‘thisObj’. Drag and drop ‘FruitLamp_pm’ from Hierarchy panel to Game Object area. Do not turn on Every Flame.
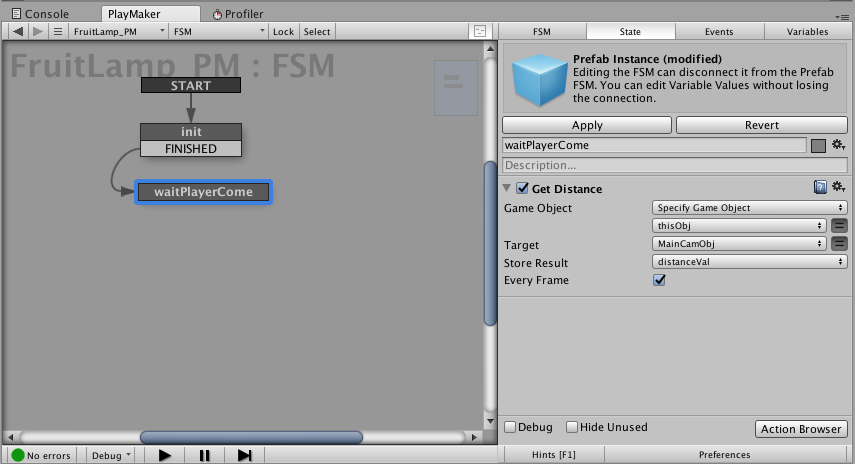
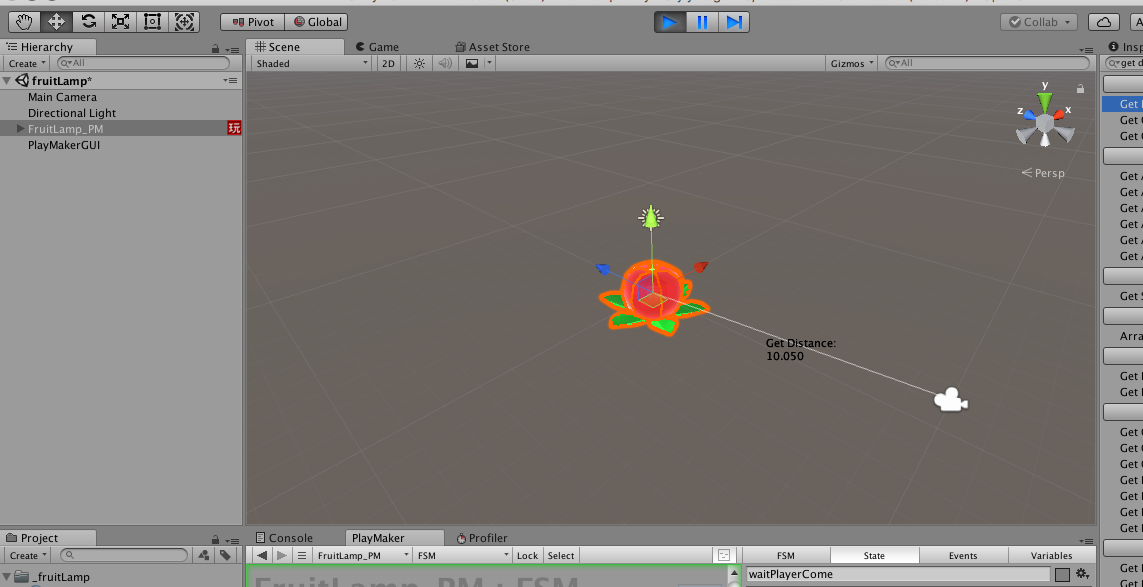
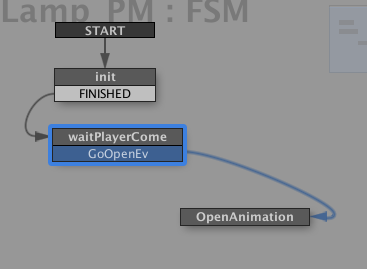
Add new FSM and name it ‘waitPlayerCome’. In this area(FSM) , check the distance between ‘MainCamObj’ and ’thisObj’. If the distance is short, it move to next FSM. Add Get Distance action. Change Game Object to Specify Game Object and click ‘=’ icon. change none to thisObj variable we created before. Click the ‘=’ icon in target area and set MainCamObj. Create new variables named ‘distanceVal’ in Store Result area. At last, turn on the Every Frame this time. Connect FINISHED to waitPlayerCome in left side ob editor. Let’s check this. hit the unity Play button and goto Scene view instead of Game View. You will find the ‘GetDistance: NUMBER’. If move the camera or the object, the number will change. If doesn’t work, some thing wrong. Check the acton’s parameter such as variables name and Every Flame check boxes.

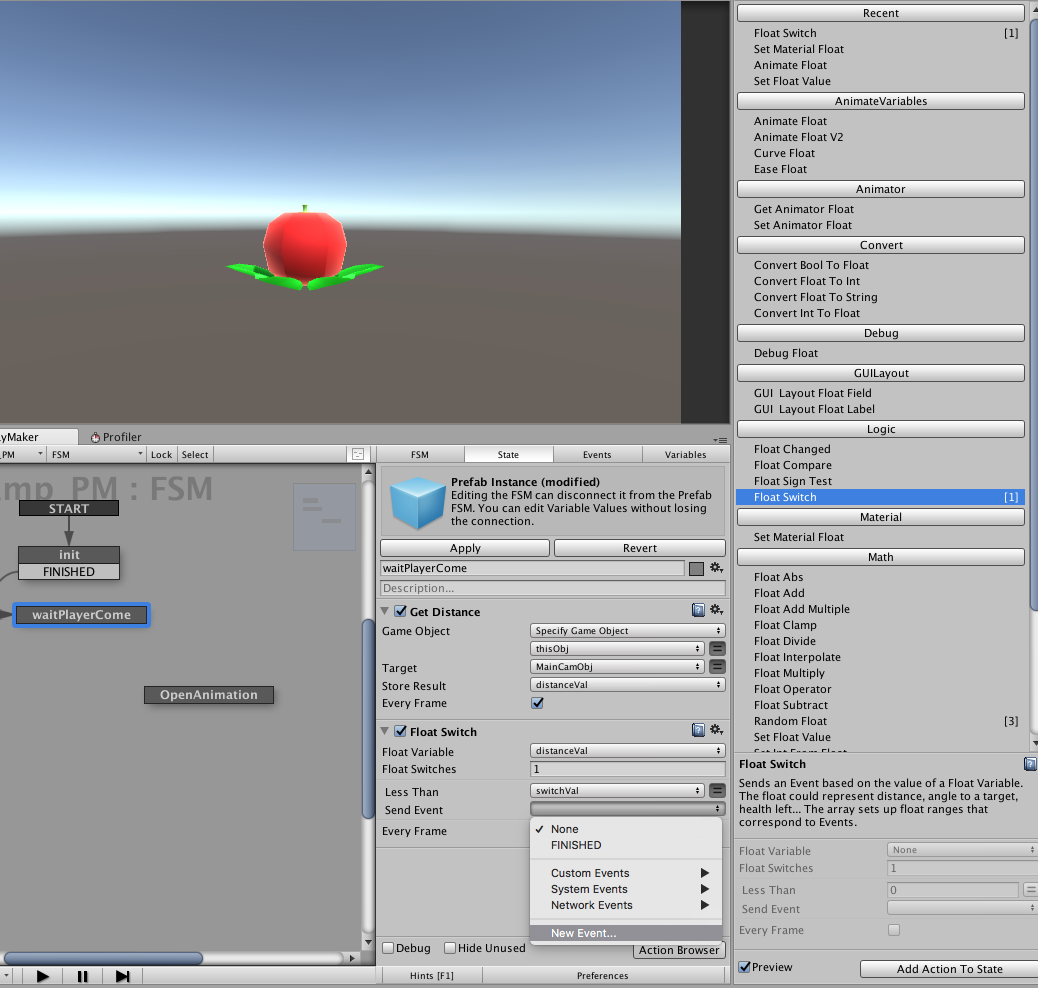
Turn off the play button and add Float Switch action. Set Float Variable to distanceVal, Less Than to new variables as swithVal, Send Event to new Event as ‘GoOpenEv’ and turn on the Every Flame. Red ‘!’ icon will appear on ‘waitPlayerCome’ FSM. Left click the Fam and add ‘GoOpenEv’.
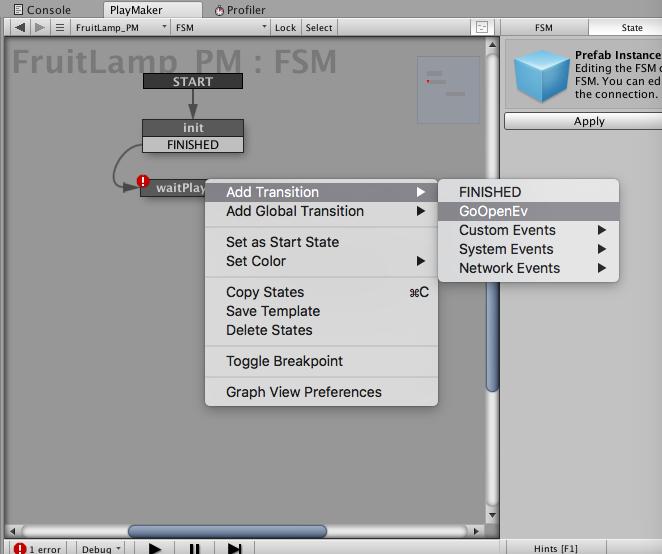
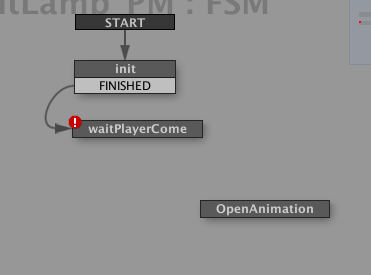
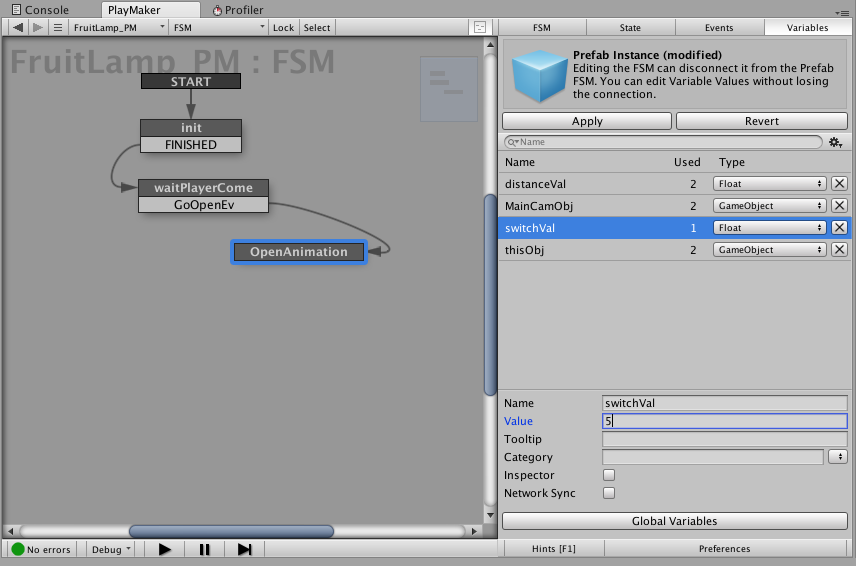
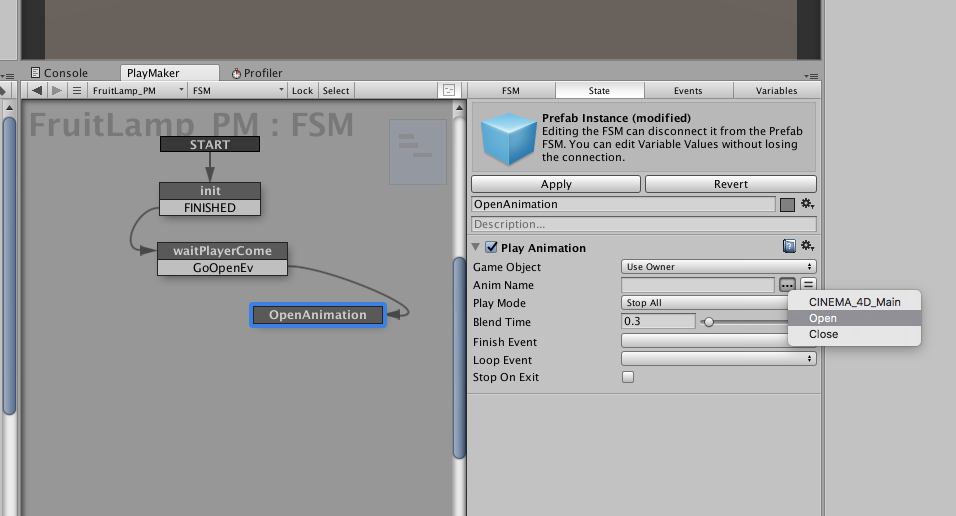
Create new FSM as ‘OpenAnimation’ and connect these. The icon will be removed. Goto Variables tab and select the ‘swithVal’. Change value to 5. Back to State tab and select ‘OpenAnimation’ FSM. Add Play Animation Action. Click ’…’ icon in Animation Name area and select Open.
 Let’s check this step. Hit thePlay button and goto Scene View. If move the camera get close to FruitLamp_PM, the Open Animation will play. Turn off the Play and back to the PlayMakerEditor.
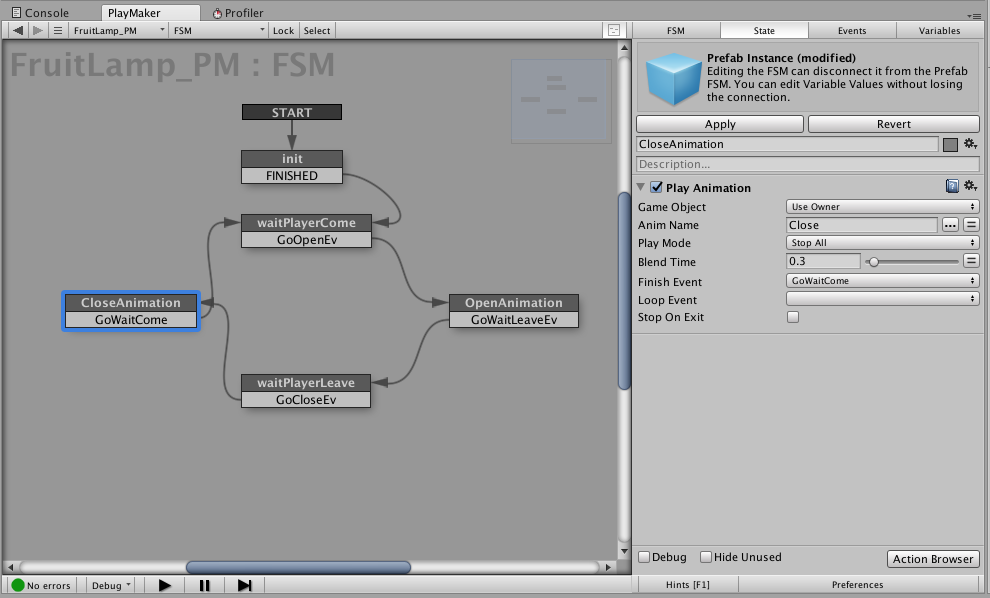
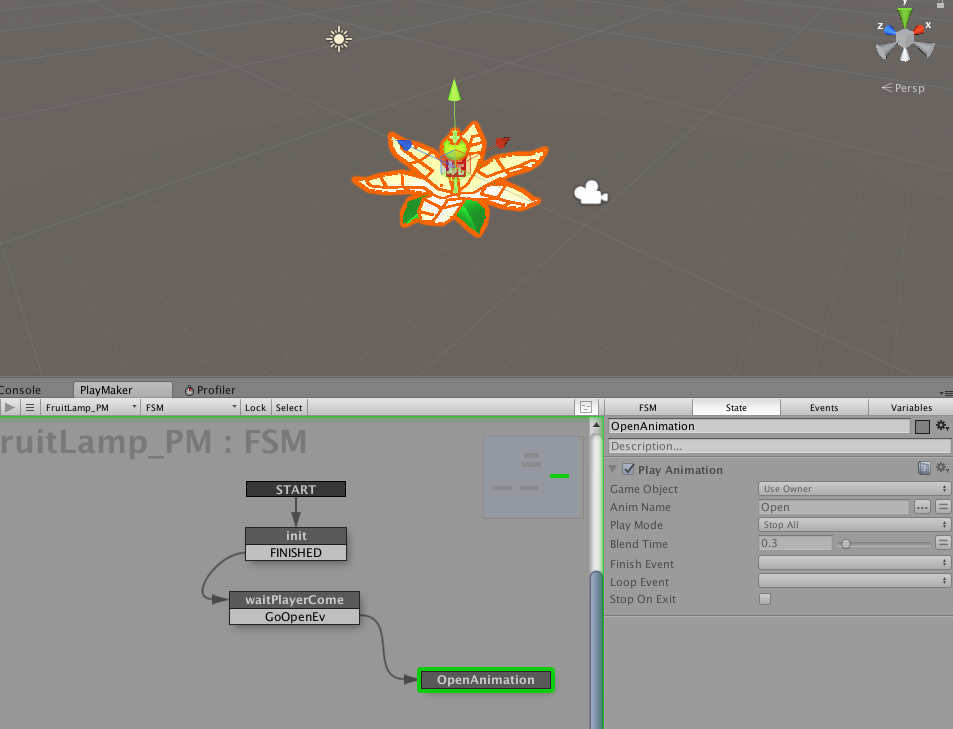 Add new event as ‘GoWaitLeaveEv’ to Finish Event in Play Animation action. Add this event to the FSM and create new FSMs as ‘waitPlayerLeave’ and ‘CloseAnimation’. Set parameters like a figure below. Hit the Play button and goto scene view. If camera move close to the object, Open animation will play. If leave, run Close animation.
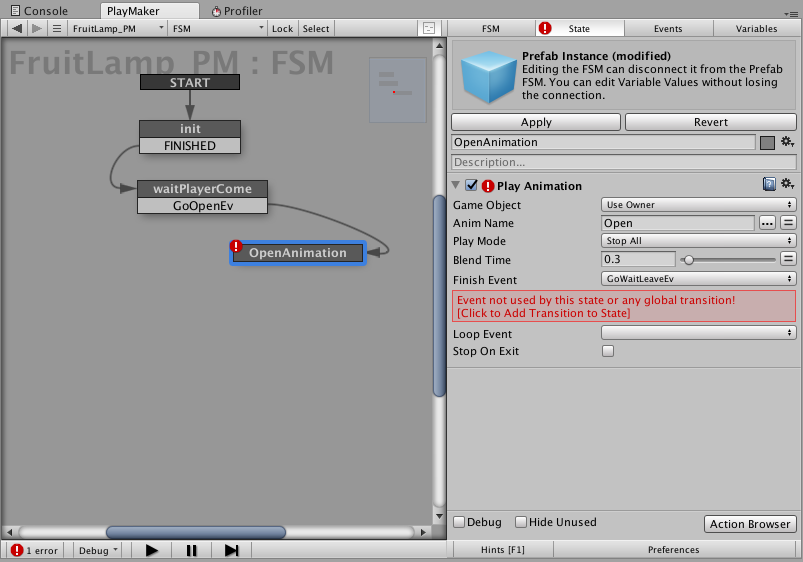

So’ it all!
Check In VR in STYLY.
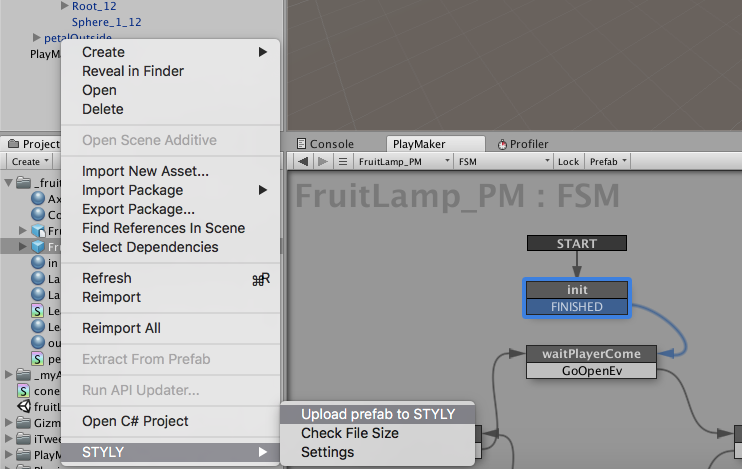
Drag the ‘FruitLamp_PM’ to Project window. the object will be a prefab. Left click the prefab in Project window and upload to STYLY. Launchy the Chrome browser and go to STYLY web editor. You will find the object in Asset > 3D Models > ‘My Models’. Let’s move camera and check the object. If doesn’t work the animations, back to the Unity and investigate further.
 https://youtu.be/yqdoeGFiGdw
If it work, We made it!