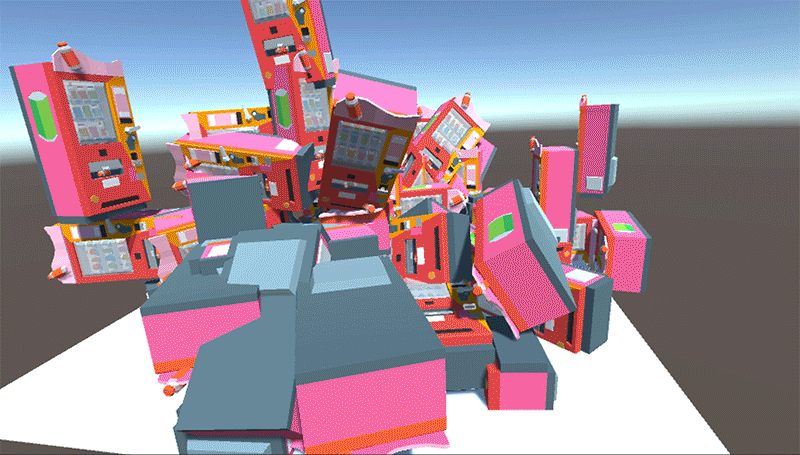
この記事では物体が定期的に空中に現れて落下し、山積みになっていく表現の実装方法を紹介します。
主にUnityのPlayMakerを使って作っていきます。
サンプル
事前準備
Google PolyからFBXファイルをダウンロードする
Google PolyからFBXファイルをダウンロードしてきます。ここでは自販機のFBXファイルをダウンロードします。
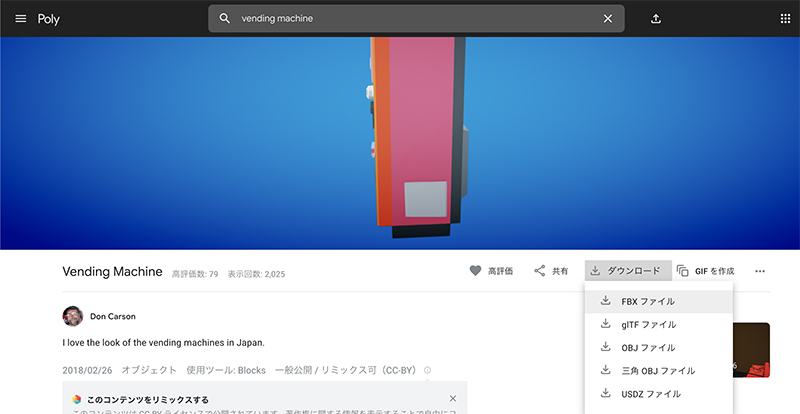
Google PolyからFBXファイルをダウンロードする
ダウンロードしたFBXファイルをUnityにインポートする。
ダウンロードしてきたFBXファイルをUnityにインポートします。
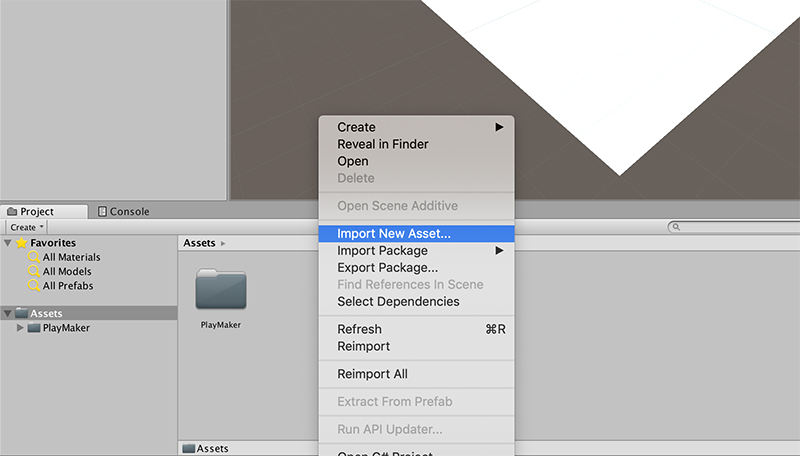
ダウンロードしたFBXファイルをインポートする
床を作る
物体が落ちるための床を作成します。
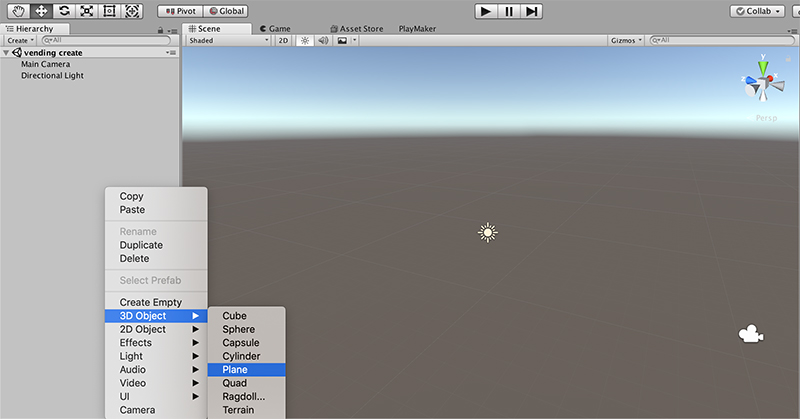
床を作る
物体を落下させる動きをつけるオブジェクトを作る
先ほどダウンロードしてきた自販機を落下させていきます。自販機を落下させるには、落下させる動きを制御する監督の役割をするものが必要です。
その監督を作っていきます。
Create Emptyでオブジェクトを作成し、名前をvending createとします。このvending createが監督のように動きを制御します。
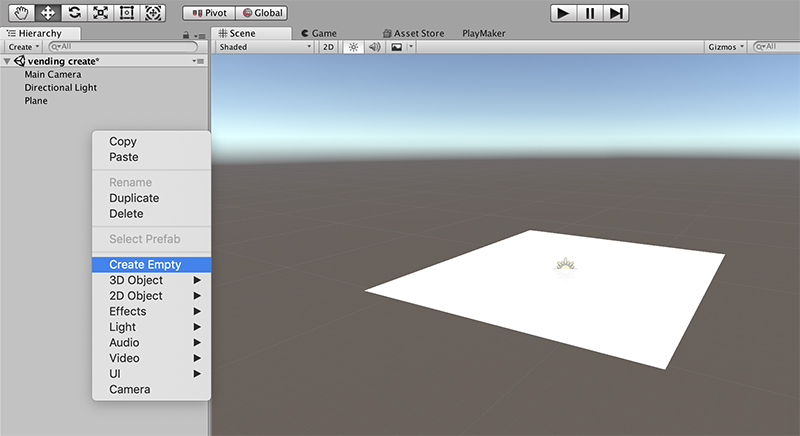
Create Emptyをクリックする
自販機を生成してみる
自販機をプレハブ化する
なにはともあれ自販機を生成してみましょう。まず自販機をプレハブ化します。
自販機(model)を一度Hierarchyにドラッグ&ドロップしていって再度Projectタブに持って行ってください。
プレハブ化
この時自販機(model)の名前を「vending_machine」に変更します。
この時インポートしてきた自販機(model)は消さないようにしてください。これがないと動かなくなります。
最終的に以下の画像のようになります。
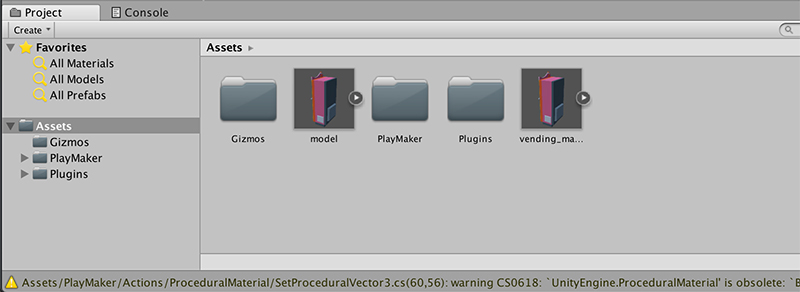
最終的なProjectビュー
PlayMakerでイベントを作る
vending_createを選択した状態でPlayMakerウィンドウでadd stateを押します。
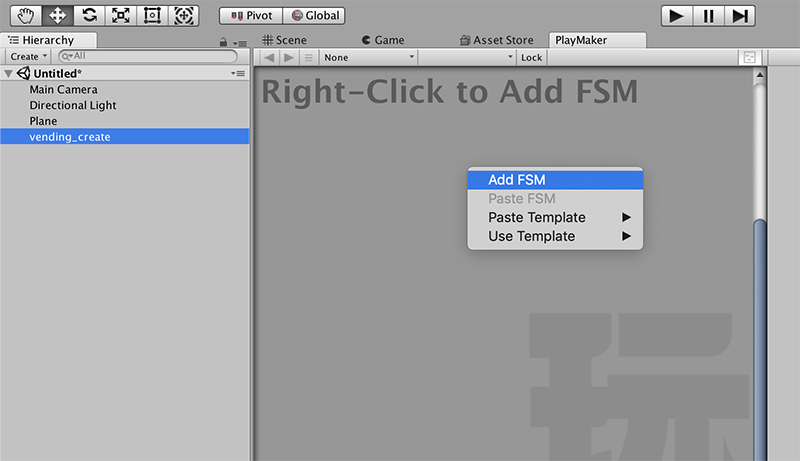
Stateを追加する
add stateをすると以下のような画面になります。そしてEventsタブを選んで「自販機生成」イベントを作成します。
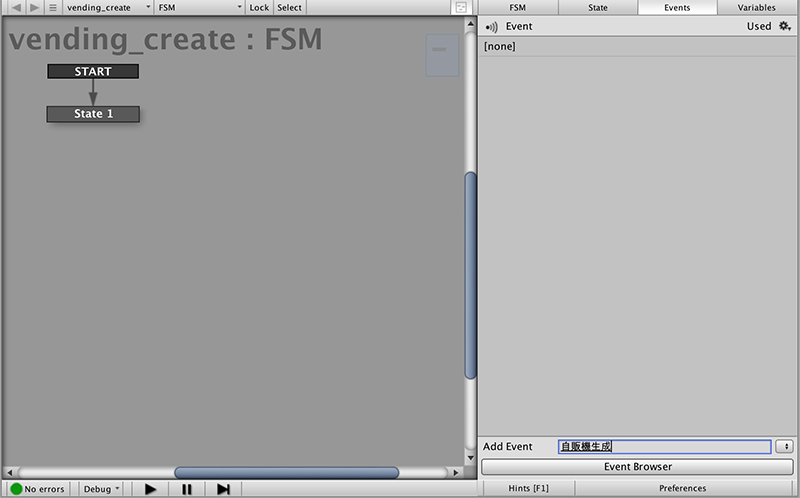
自販機生成イベントを作成する
Create Objectアクションを追加します。
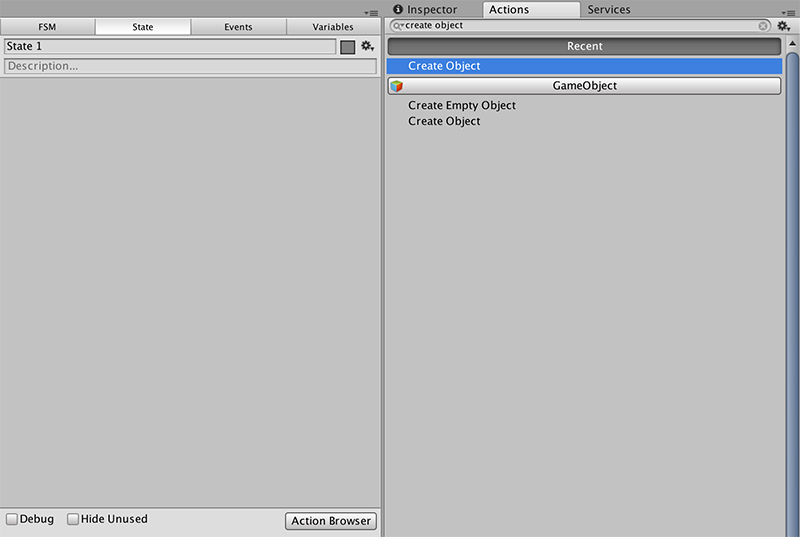
Create Objectアクションを追加する
その後Create Objectアクションに先ほど作成した自販機のプレハブ(vending_machine)を追加します。
vending_machineをGame Objectの欄にドラッグ&ドロップしてください。
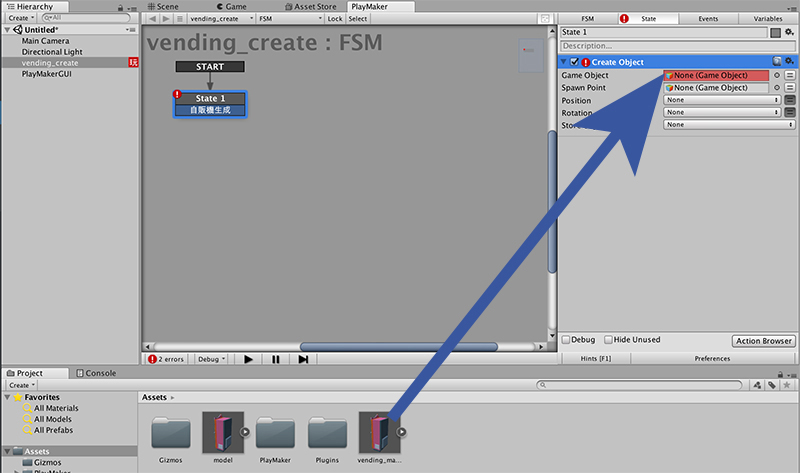
vending_machineをGame Objectに追加する
床の少し上に自販機を出現させたいのでPositionを(0, 2, 0)にします。
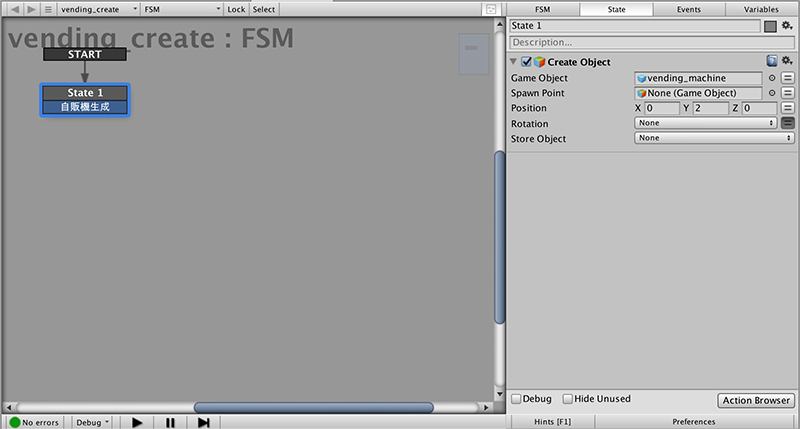
Create ObjectのPositionを変更する
そして再生ボタンを押してみると床の上に浮かんだ自販機が出現します。
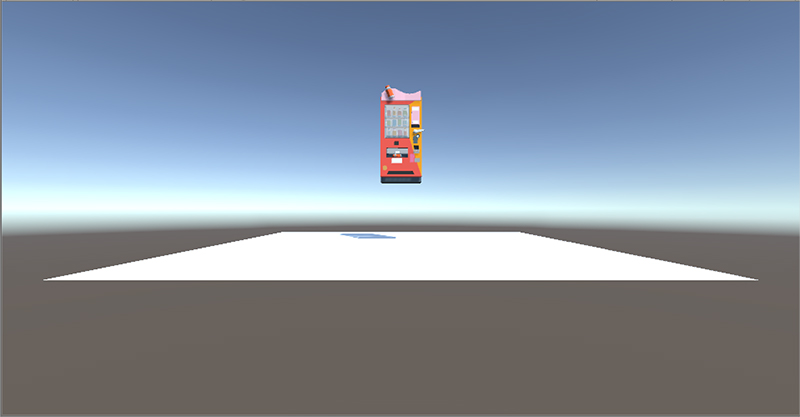
自販機が生成されるか確認
物体を落下させてみる
先ほどまでで自販機を空中に出現させることができました。
しかしこのままでは空中に浮いたままなので、自販機を落下させる作業をしていきます。
vending_machineをクリックしてInspectorタブのAdd ComponentからRididbodyコンポーネントを自販機プレハブにつけてみましょう。
再生ボタンを押すと自販機が落下します。
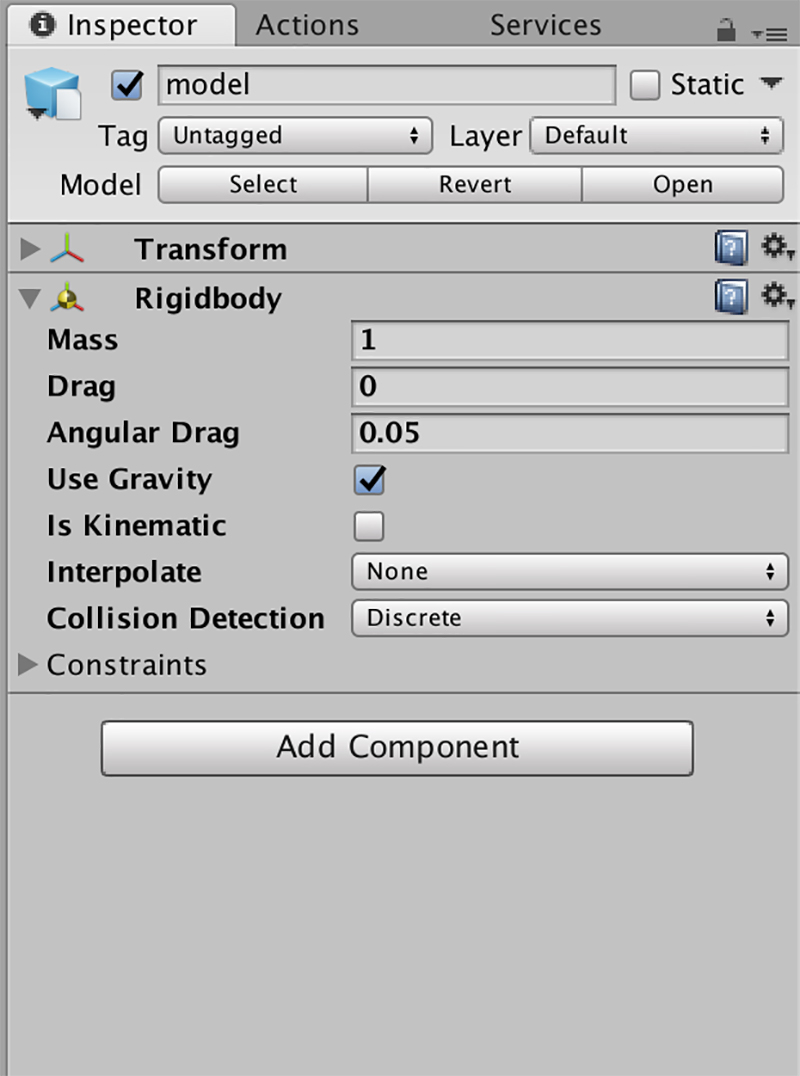
Rididbodyコンポーネントを追加する
落下させる処理を繰り返す
あとはこの自販機落下の動きを繰り返せばいいだけです。
今回は2秒ごとに自販機が現れるという処理を作っていきます。
自販機生成イベントを繰り返すために、State1から矢印を伸ばして以下の画像のようにState1自体に向けます。
その後Waitアクションを作り、Timeを2に設定します。さらにFinish Eventを「自販機生成」と設定します。
これは2秒ごとに自販機生成イベントを繰り返すという意味です。
これで2秒ごとに自販機が空中に現れ落下していくようになりました。
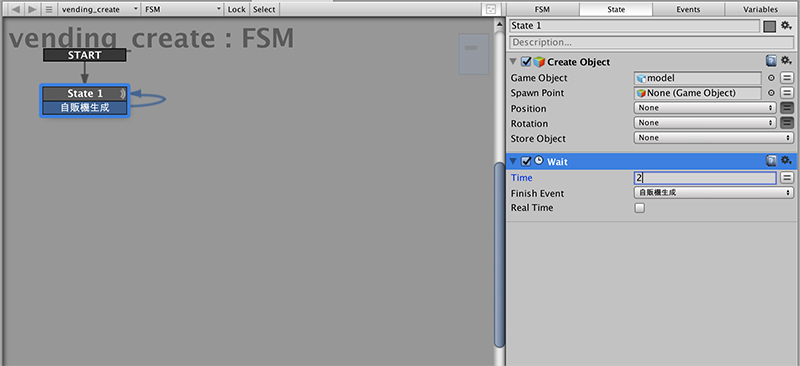
Waitアクションを追加する
生成位置をランダムにする
自販機の生成位置が同じで、このままだとタワーのように積み上がっていってしまうので、生成位置をRandom FloatとSet Vector3 XYZを使ってランダムにしていきます。
Random FloatとSet Vector3 XYZを作って、それぞれ次の値を設定します。
Random Floatは-2から2の間のランダムな値を生成して、それを「random_pos」変数に入れるという意味です。
Set Vector3 XYZはX座標、Y座標、Z座標をセットするものです。
以下の画像ではXにrandom_posの値を、Yには5を、Zにもrandom_posの値を入れ込んでいます。入れ込んだXYZ座標は変数posに格納されるようにしています。
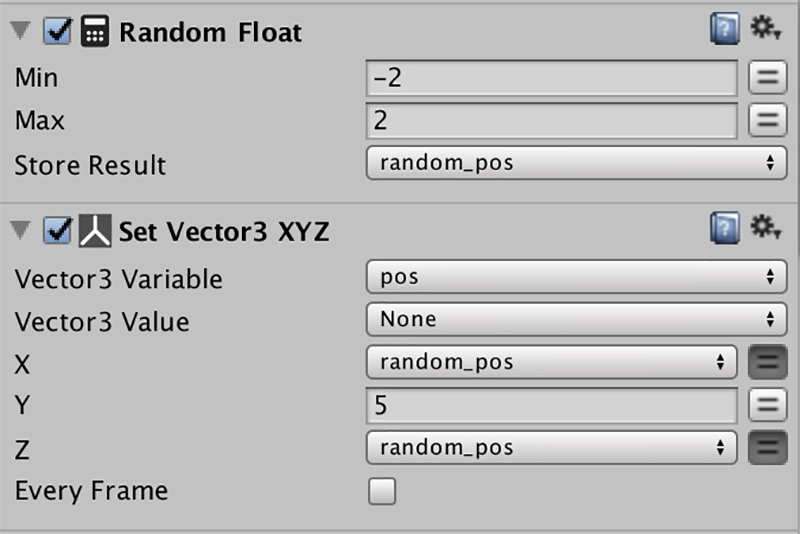
Random FloatとSet Vector3 XYZアクションを追加する
これで自販機がランダムな位置に生成されるようになりました。
自販機が床をすり抜けないようにする
今のままでは生成された自販機が床をすり抜けていくので、Physic Materialを使ってすり抜けないようにしていきます。
まずはPhysic Materialを作成します。名前は「plane_physic_material」とします。
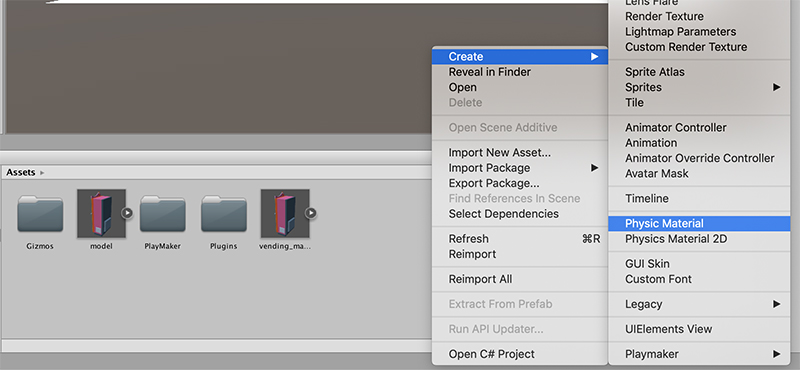
Physic Materialを作成する
数値は以下の画像のようにします。
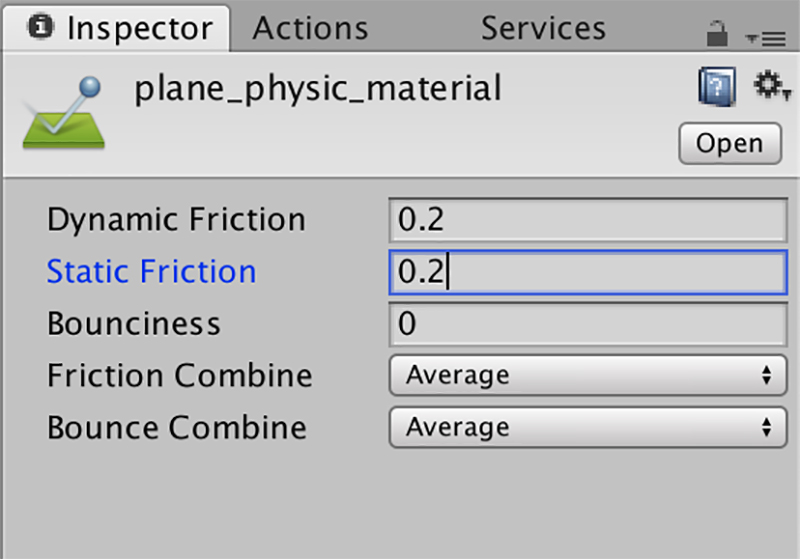
Physic MaterialのInspector数値の変更
そしてPlaneのMesh ColliderのMaterialにつけます。
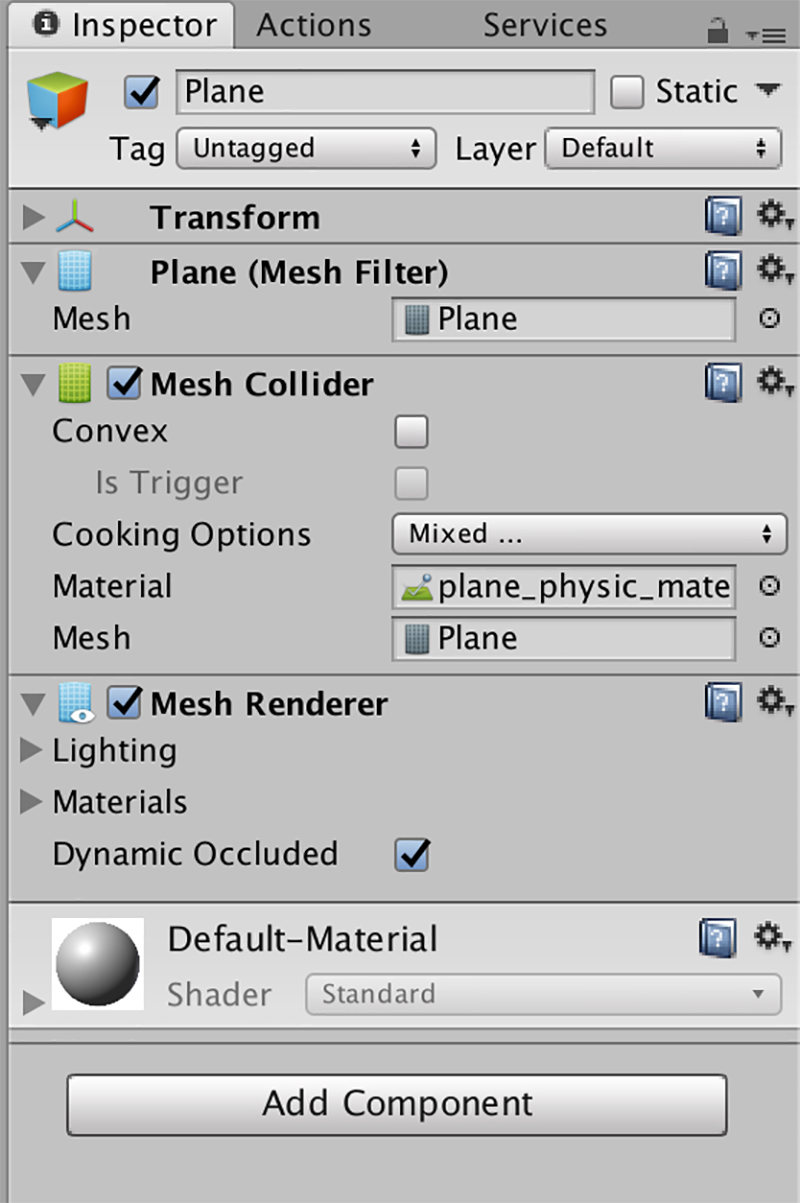
Planeにplane_physic_materialを追加する
その後vending_machineにBox Colliderコンポーネントを追加し、Box ColliderのMaterialにもplane_physic_materialをつけます。
これで落下していく自販機がすり抜けていかないようになりました。
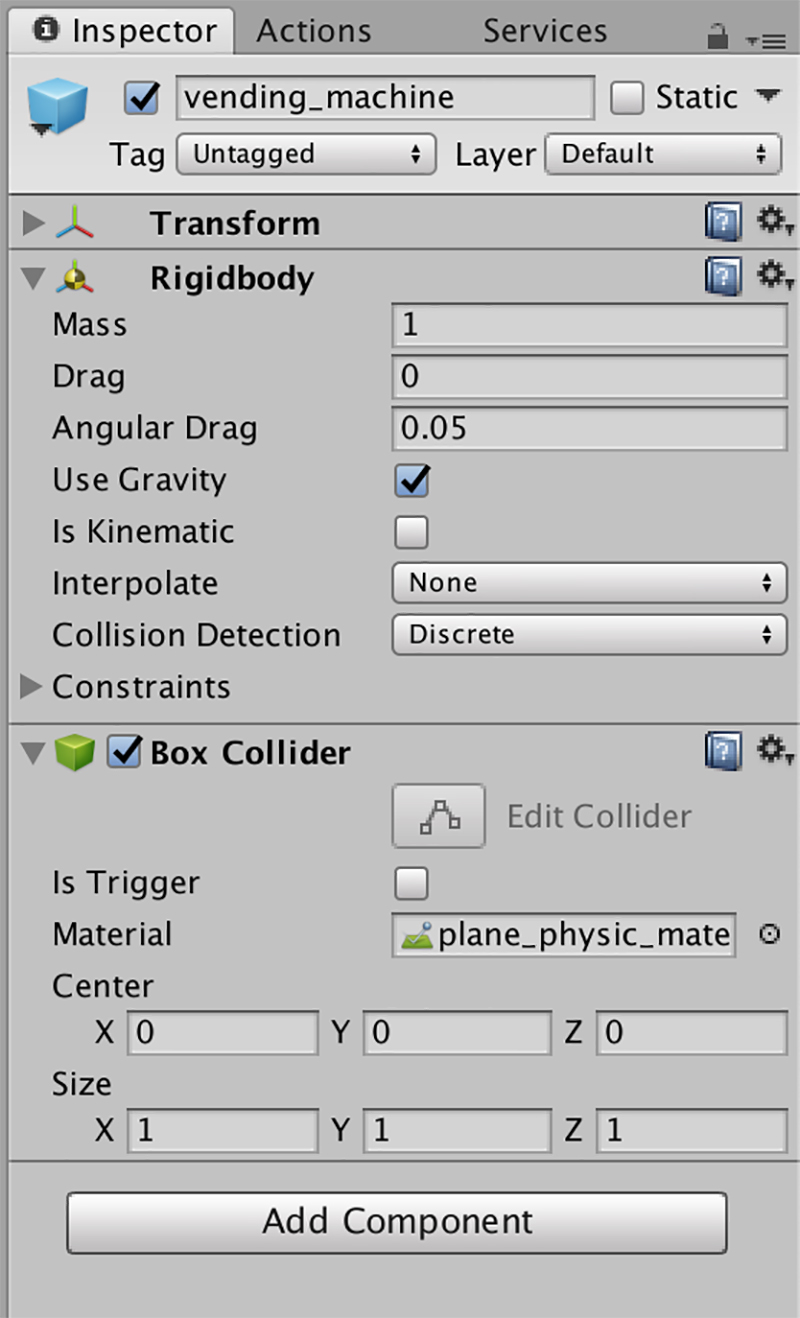
Box Colliderにplane_physic_materialを追加する
自販機の親を設定する
Hierarchy直下に生成した自販機がを増え続けるのは見苦しいので、Set Parentアクションを使って親を設定します。
こうすることで生成される自販機がvending_createの配下に入り、スッキリします。
Create Objectアクションの下にSet Parentアクションを作成します。
以下の画像のように数値を設定します。
Create Objectで生成したオブジェクトを「created_obj」変数に入れます。
その変数をSet Parentで使います。
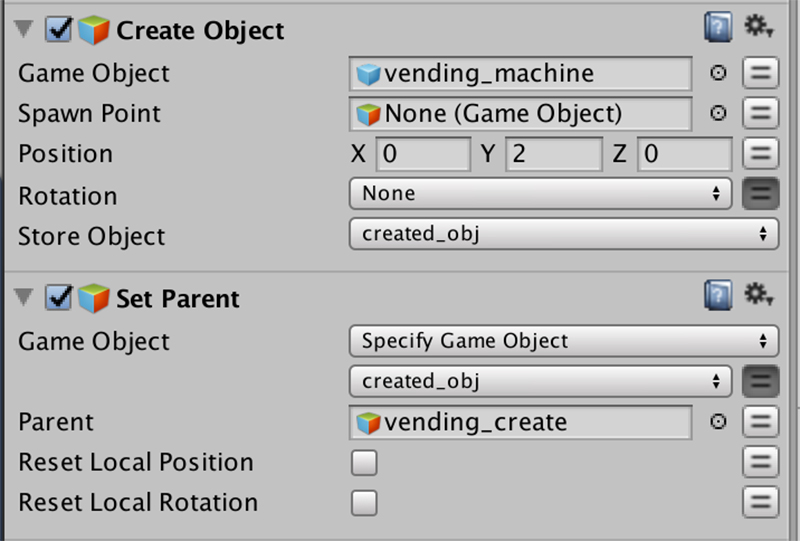
Set Parentアクションを追加する
再生ボタンを押すと生成された自販機がvending_createの配下に入っていっているのがわかります。

Set Parentの動作確認
STYLYへのアップロード
UnityからSTYLYにアセットをアップロードする方法

今回は落下する物体が山積みになっていく表現を作っていきました。
落下する物体自体を変えたり、落下する物体の数を変えたり、落下する物体が現れる時間を変化させたりすることで表現の幅が広がると思います。
ぜひ色々と試してみてください。