In this article, you will learn the basics of implementing interactions using Unity, first, the basics of implementing interactions through the Unity event system, and second, how to create interactions using the STYLY Interaction SDK.
- 1 Implementing Interaction with the Unity Event System
- 1.1 Unity Event System Overview
- 1.2 Implementing Interaction with the Unity Event System
- 1.3 Preparing the Event System
- 1.4 Add an Event Trigger to the object you want to receive user input
- 1.5 Add an Event Type
- 1.6 Register game objects and functions that handle Events
- 1.7 Checking the Interaction Behavior
- 1.8 Notes for uploading the event system to STYLY
- 1.9 Upload the Event System to STYLY
- 2 Interaction implementation using STYLY Interaction SDK
- 2.1 STYLY Interaction SDK Overview
- 2.2 Implementing object dragging interactions
- 2.3 Implement interactions that generate objects when tapped.
- 2.4 Preparation
- 2.5 Add an Event Trigger component to the game object that you want to receive user input.
- 2.6 Adding an Event Type
- 2.7 Register the game object that handles the Event and its function
- 2.8 Interaction SDK Component Settings
- 2.9 Checking the Interaction Behavior
- 2.10 Upload to STYLY
Implementing Interaction with the Unity Event System
Unity Event System Overview
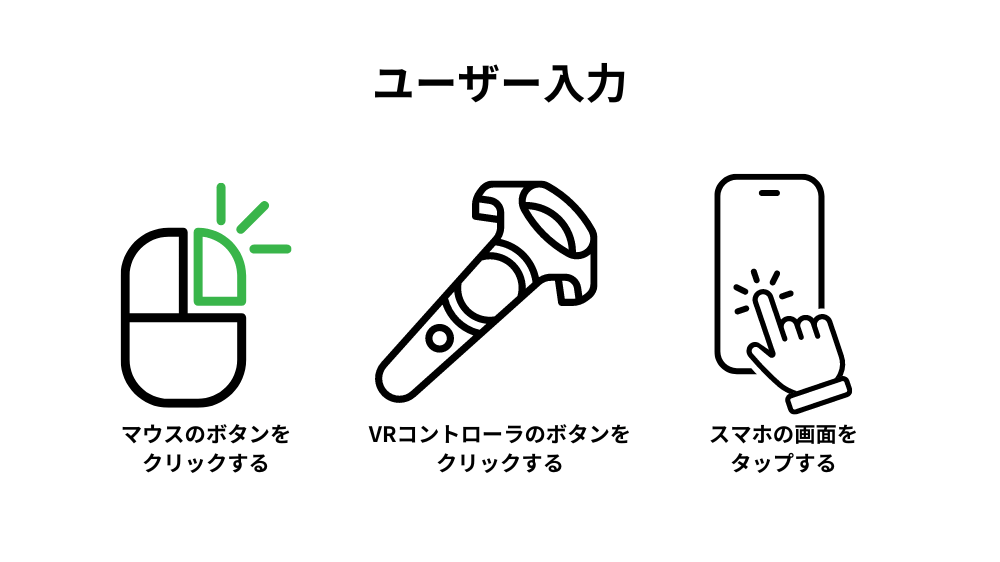
From the system’s point of view, user input is when a user performs some operation on a device.
For example, clicking a mouse button, tapping a smartphone screen, or clicking a button on a VR controller.
When user input occurs, Unity handles it between game objects in the form of events.
The event system is the entire Unity mechanism for handling these events.
It is also the name of the components that are essential to realize the event system.
Implementing Interaction with the Unity Event System
Let’s create an event system using one of Unity’s components, EventTrigger.
We assume that we want to create an event on a STYLY mobile app that will trigger an interaction with a screen tap operation.
EventTrigger is one of Unity’s components, it can receive events from the event system and call the functions registered for each event.
The flow of creating interactions using the event system is as follows.
(1) Event System Preparation
- Add an Event System object to the scene.
- Add a Physics Raycaster component to the Main Camera
Add an Event Trigger component to the game object that is to receive user input.
(3) Add Event Type.
(4) Register the game object that handles the Event and its function.
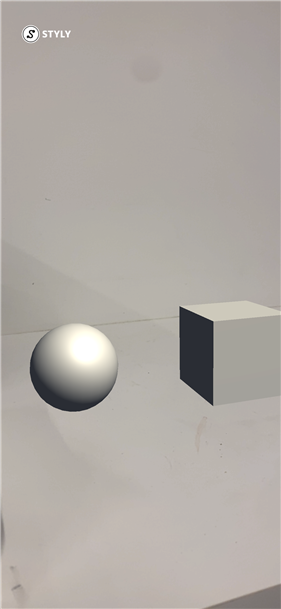
In this case, we would like to create a simple interaction, such as “When you tap the Cube, a Sphere will appear.
The relationship between the game objects to be interacted with is as follows.
Game object that receives user input: Cube
Game object that processes Event: Sphere
Function to be processed: Self (Sphere) appears (= makes self Active)
Preparing the Event System
Let’s create an interaction using the event system.
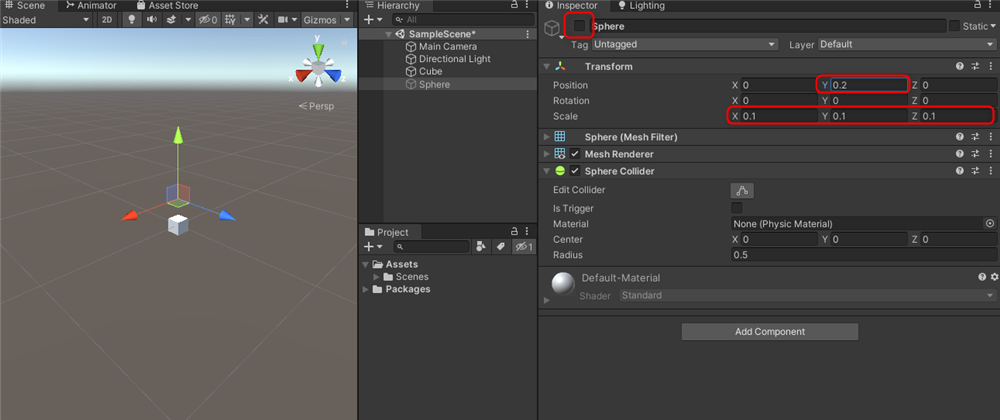
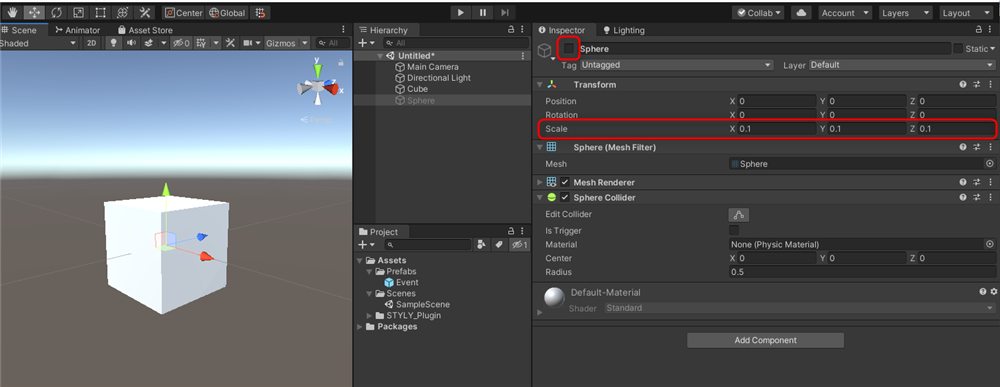
Place a Cube and a Sphere in the scene, and leave the Sphere in a non-Active state.
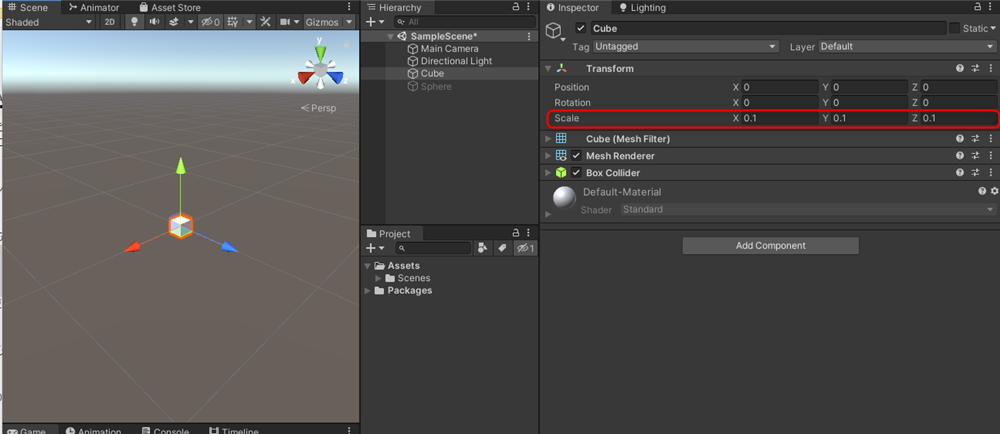
Set x, y, z of Scale to 0.1 (10cm) for both Cube and Sphere, and y of Position to 0.2 for Sphere, in consideration of when they are displayed in reality using AR.
Cube settings
・Scale x, y, z all 0.1
Set up Sphere
・Scale X, Y, and Z are all 0.1
・Position y is 0.2
Make it non-Active (uncheck the checkbox next to the game object’s name)
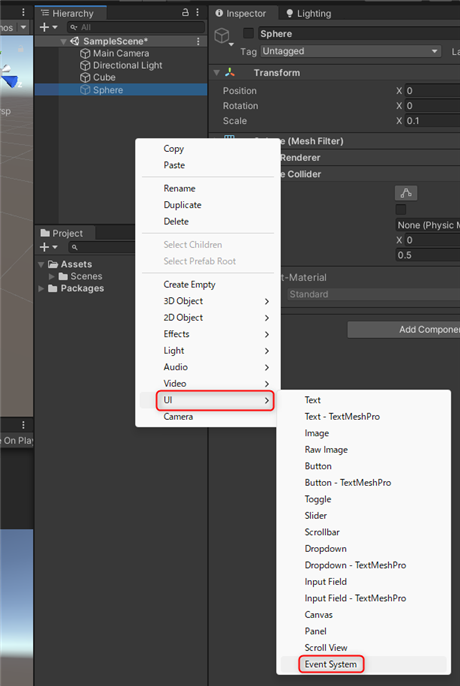
Place an Event System object in the scene by right clicking on the Hierarchy > UI > Event Sysyem.
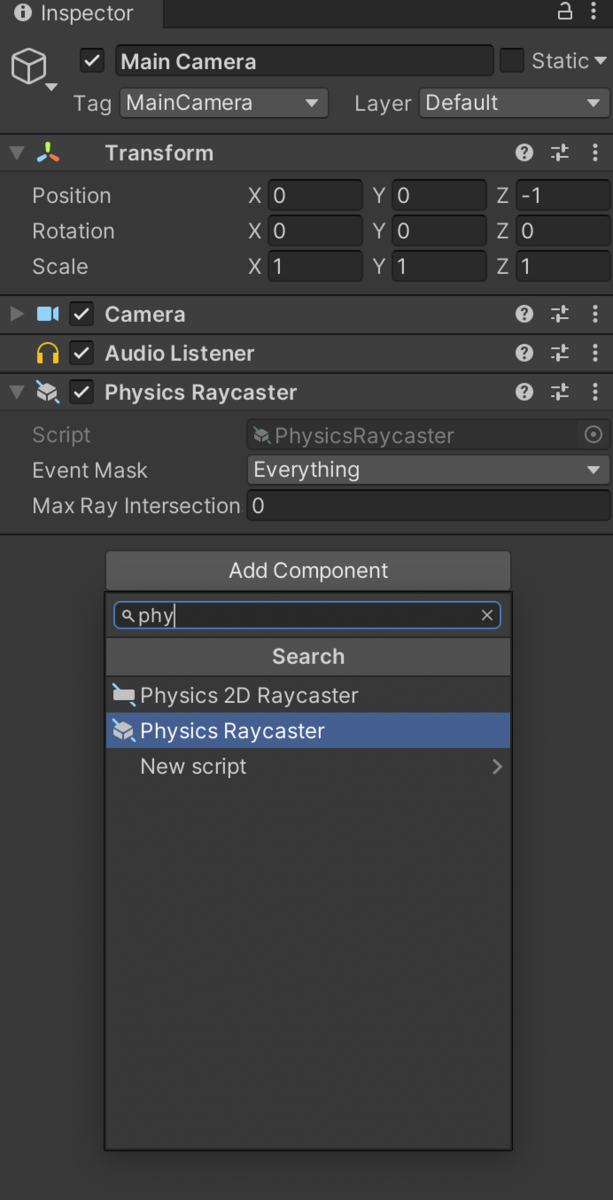
Add a Physics Raycaster component to the Main Camera.
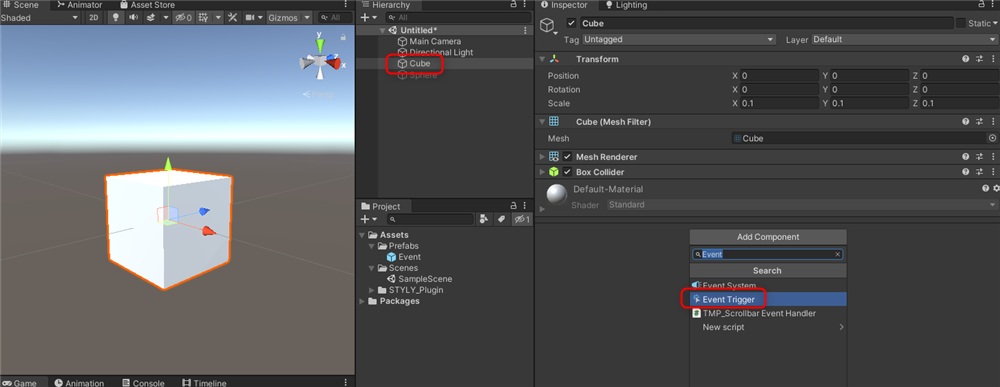
Add an Event Trigger to the object you want to receive user input
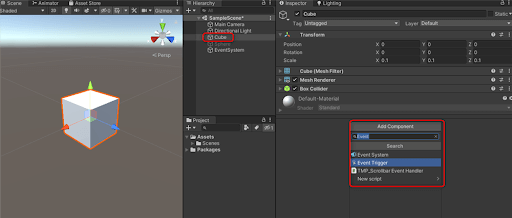
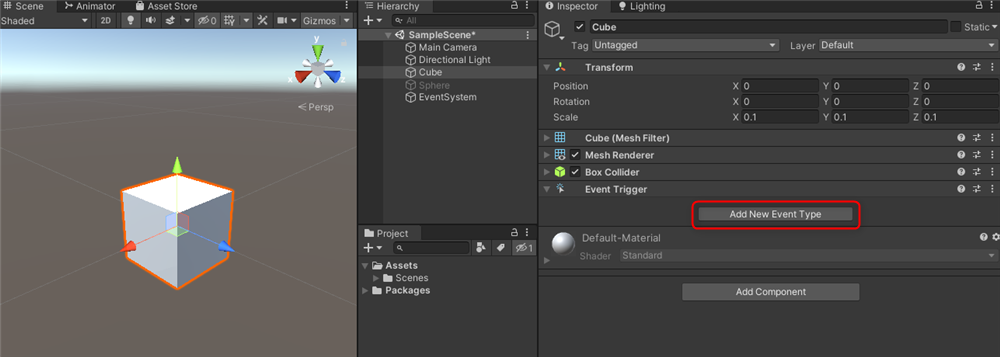
Add an Event Trigger component to the Cube.
Add an Event Type
Click the Add New Event Type button in the Cube’s Event Trigger component to add an Event Type.
Select Pointer Down as the Event Type to be added.
An Event Type is a type of Event defined in Unity.
Pointer Down corresponds to the following operations (user input).
Mouse: When the mouse button is pressed down (Pointer Up when the button is released)
For a smartphone screen: When the screen is tapped.

Register game objects and functions that handle Events
Immediately after adding an Event Type, “List is Empty” will be displayed.
Press the [+] button in the lower right corner of this Event Type area to register the functions to be handled by this Event.
The figure below appears when the [+] button is pressed.
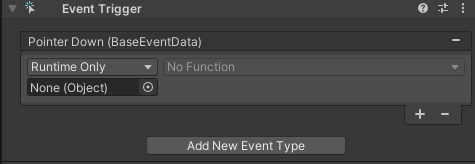
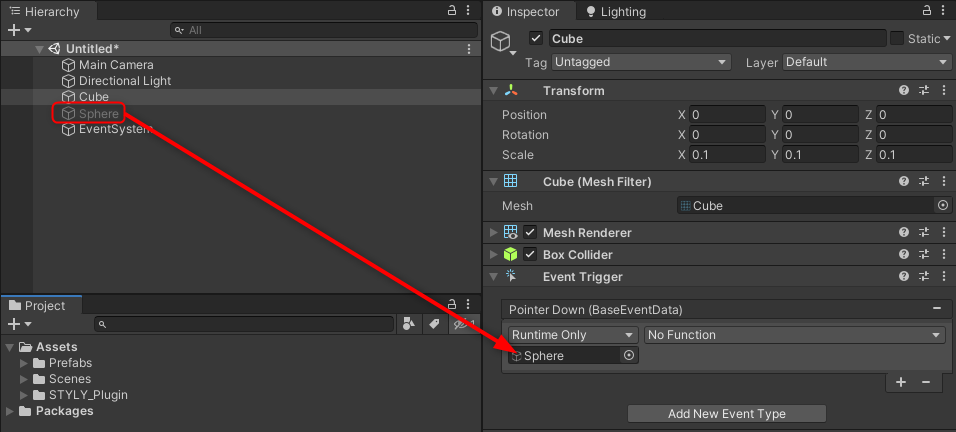
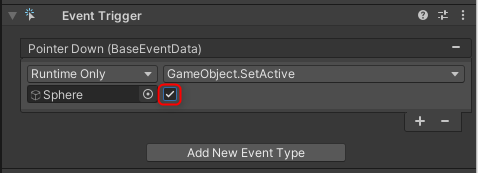
Set the game object Sphere that will process the Event in the None (Object) area.
Drag and drop the Sphere in the Hierarchy to the None (Object) location.
Click the pull-down menu in the No Function area to select the functions that the Sphere has, and select SetActive (bool) in the GameObject category.
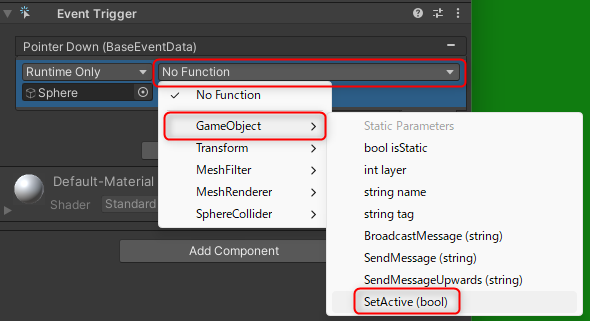
Then a check box will appear.
The meanings of the checkboxes are as follows
- Check box OFF: Make the set game object (Sphere) non-Active
- Check box ON: Make the set game object (Sphere) Active.
Here, we want the Sphere to be Active and appear, so we turn the check box ON.
Now you have registered the function you want to handle.
Checking the Interaction Behavior
Let’s check the behavior of the interaction we have created.
This time, we are assuming a tap operation on the STYLY app on a smartphone, but before uploading to STYLY and checking, we will play the scene on Unity to check the operation.
The procedure for checking the operation is as follows.
(1) Play the scene (set to playback mode)
(2) Operate on the desired game object in the game view.
(1) Play the scene (in playback mode) (2) Operate on the desired game object on the game view,
Set MainCamera’s Position to about (x, y, z) = (0, 0, -0.5) to bring it closer.
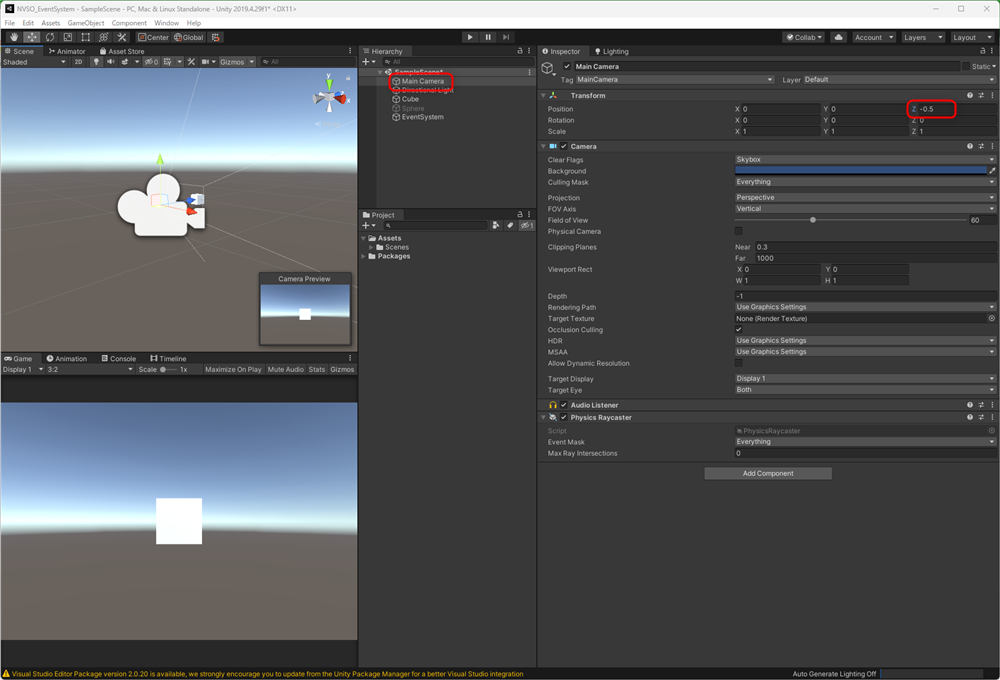
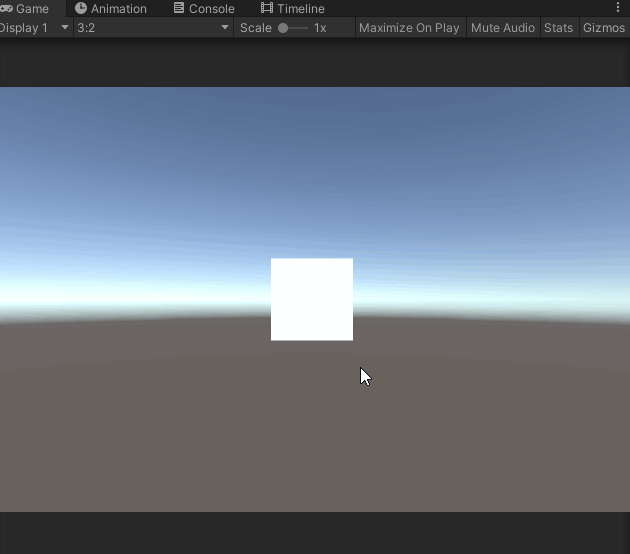
Play the scene.
When it plays, click on the Cube in the game view.
Did it work as expected?
By the way, you can register multiple functions for one Event.
Notes for uploading the event system to STYLY
To run the event system in STYLY, you need to upload the EventSystem object as well.
Physics Raycaster is embedded in MainCamera on the STYLY side, so there is no need to upload MainCamera.
When prefabricating, include the EventSystem object in the prefab together.
In other words, the following game objects must be prefabricated together.
- EventSystem object
- Game objects that want to receive Events (game objects to which the Event Trigger component has been added)
- Game objects that have functions called by Event Trigger
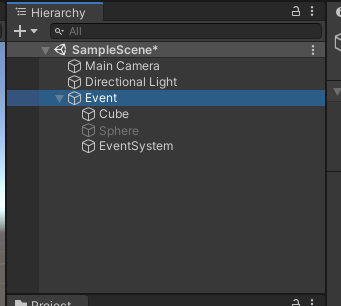
In this case, the Empty object is placed in the hierarchy and the object name is changed to Event.
Place the EventSystem, Cube (game object that wants to receive Events) and Sphere (game object that has a function called by Event Trigger) under the Event object.
Upload the Event System to STYLY
Prefabricate the Event object.
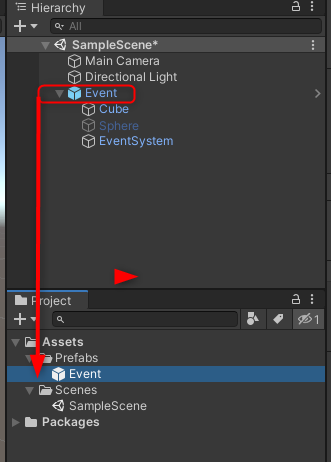
Upload the prefab to STYLY.
Place the uploaded prefab (Event) in STYLY Studio.
Pointer Down does not work on STYLY Studio, so it will not move when clicked.
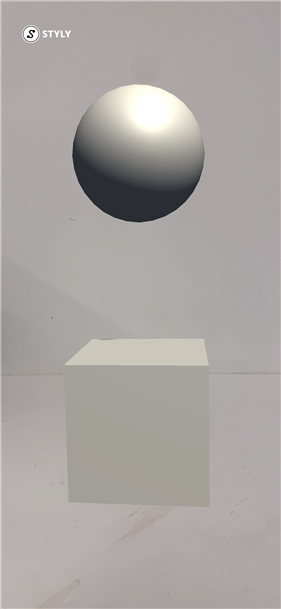
Publish the scene and check the behavior on the mobile app.
If you tap the Cube and the Sphere appears, you have succeeded.
Interaction implementation using STYLY Interaction SDK
STYLY Interaction SDK Overview
This is a series of system that provides an easy way to implement user interactions in STYLY works.
It is provided as components for major interactions.
The components provided include those that give attributes such as “can drag objects” and those that give actions such as “create objects”.
The STYLY Interaction SDK was developed with the assumption that it was intended for STYLY apps for VR HMDs, but it basically works on STYLY mobile apps as well.
Implementing object dragging interactions
Import the STYLY Interaction SDK into your Unity project.
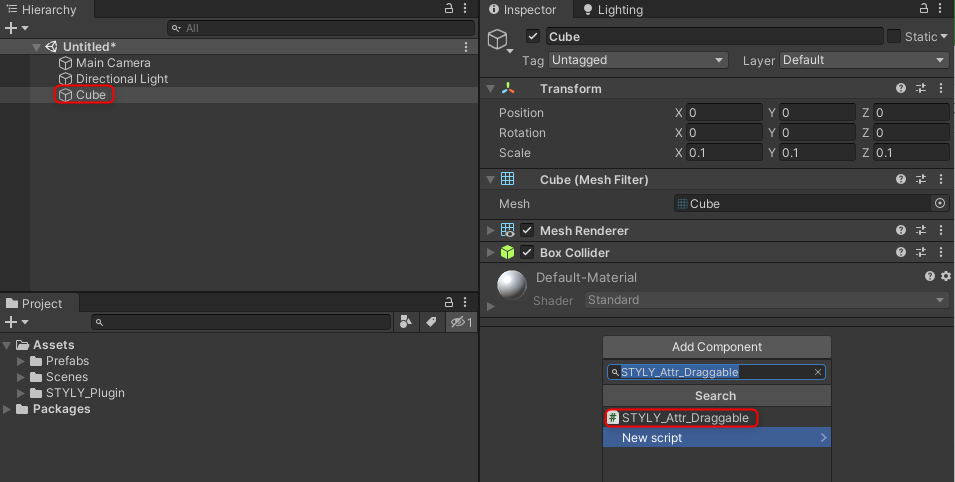
Let’s use STYLY_Attr_Draggable, which will allow you to drag objects.
Simply add the STYLY_Attr_Draggable component to a game object as an Add Component to make that game object draggable.
Place a Cube in the hierarchy and add the STYLY_Attr_Draggable component to the Cube.
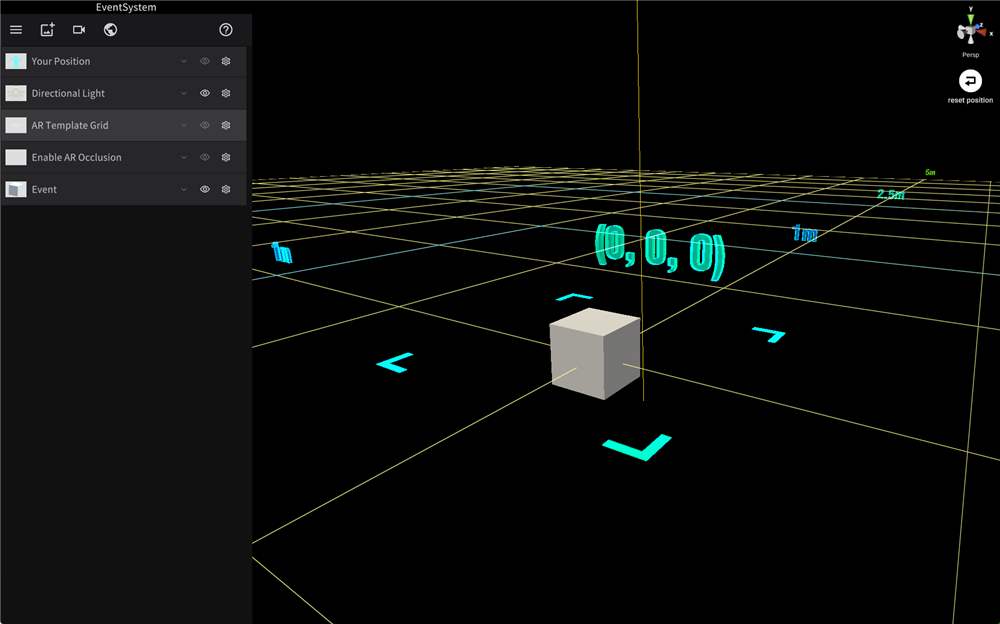
Let’s check the behavior of the interaction you created.
Play the scene.
If there is a game object in the hierarchy to which the Interaction SDK component has been added, STYLY_Simulator will be placed automatically during playback and the STYLY simulator will run in the Game view.
You can use WASD on the keyboard in Game view to move around in the scene.
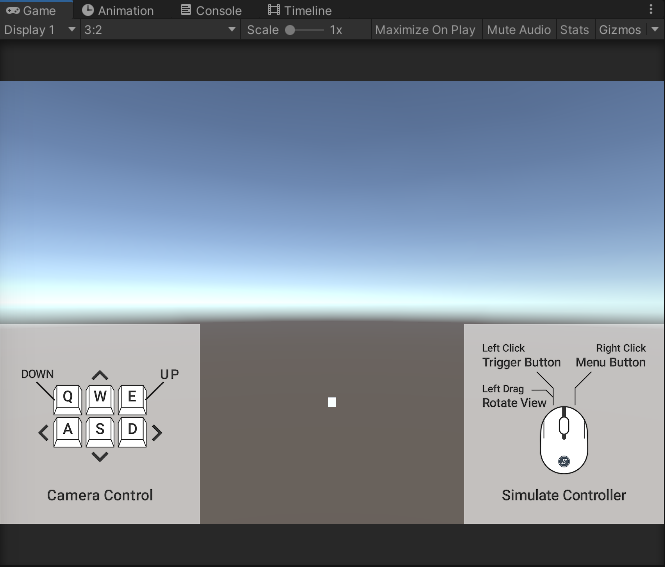
Use the WASD keys to get close to the CUBE and then drag the Cube.
Implement interactions that generate objects when tapped.
Let’s implement an interaction that creates an object when tapped by combining the action component of the STYLY Interaction SDK and Unity’s event system.
This time we will use STYLY_Action_Spawner, STYLY_Action_Spawner is a component that gives the ability to generate a game object based on a prefab (or game object).
Using this, we would like to create a simple interaction where tapping on the Cube will generate a Sphere.
The relationship between the game objects to be interacted with is as follows.
(1) Game object to receive user input: Cube
(2) Game object that processes events: Cube
(3) Function to be processed: Generate Sphere (i.e., execute Spawn of Cube)
Preparation
Place the Cube and Sphere in the scene and leave the Sphere in a non-Active state.
Set x, y and z of Scale to 0.1 (10cm) for both Cube and Sphere in consideration of when they are displayed in reality using AR.
Settings for Cube
・Scale x, y, and z all set to 0.1
Sphere settings
・Scale X, Y, and Z are all set to 0.1
Make the game object inactive (uncheck the checkbox next to the game object’s name)
Add an Event Trigger component to the game object that you want to receive user input.
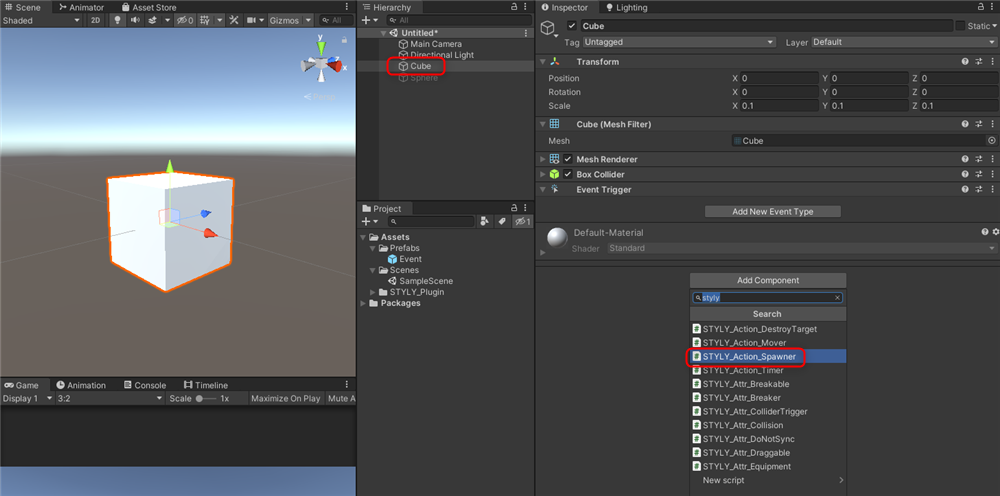
Click on the Add Component button on the Cube and add the Event Trigger component.
Also add the STYLY_Action_Spawner component, this time to the Cube.
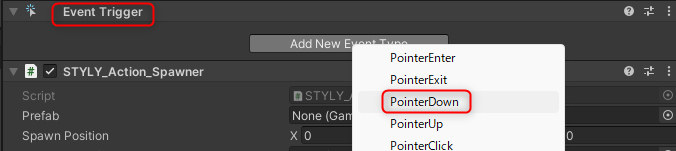
Adding an Event Type
Click the Add New Event Type button in the Cube’s Event Trigger component to add an Event Type.
Select Pointer Down as the Event Type to be added.
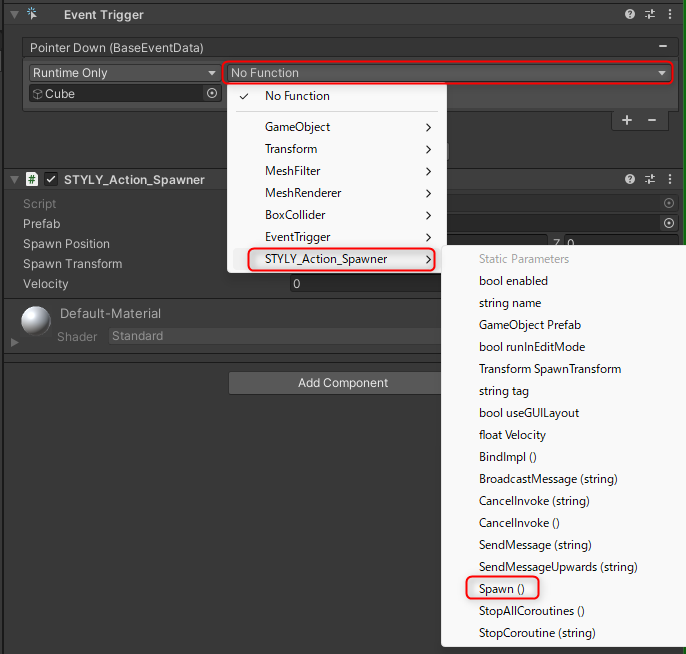
Register the game object that handles the Event and its function
The game object that handles the Event is a Cube, so set itself up.
Press the [+] button in the lower right corner of the Event Type area,
For the function, select “Spawn” of the “STYLY_Action_Spawner” component added in 2.
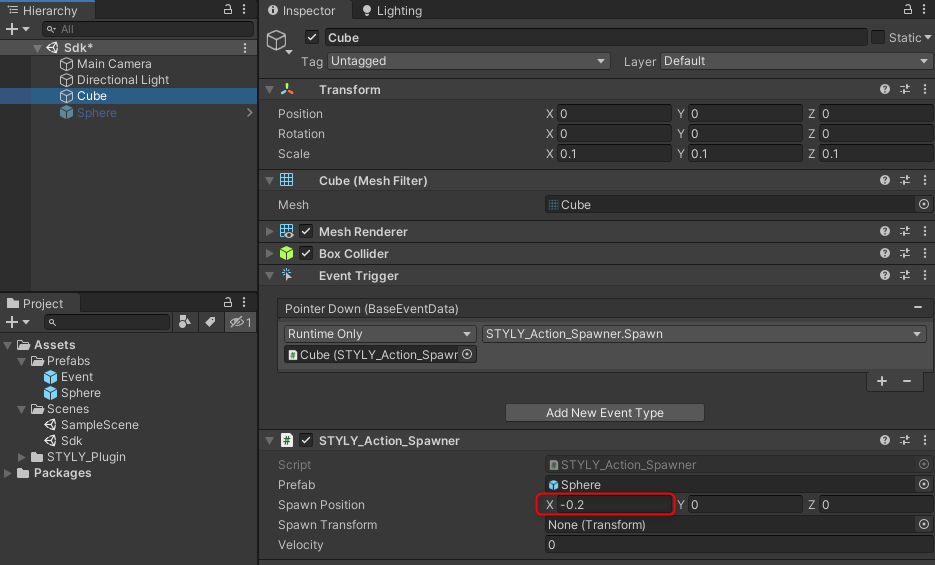
Interaction SDK Component Settings
Configure the STYLY_Action_Spawner component added to the Cube.
Set the Prefab to the prefab you want to generate or the game object on the scene.
In this case, we will set the Sphere placed on the scene.

Spawn Position is set to the position coordinates to be generated, which should be relative to the Cube.
You can use any value you like, but here we set x = -0.2 and left the other values at 0.
Checking the Interaction Behavior
Let’s check the behavior of the interaction you created.
Play the scene.
Use the WASD keys to move closer to the CUBE, then click on the Cube.
Did it work as expected?
Upload to STYLY
To upload STYLY, combine the Cube and Sphere into one game object.
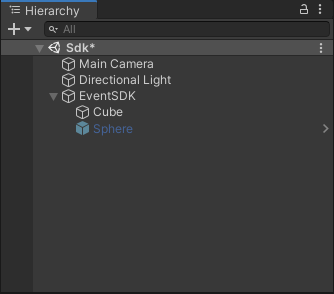
This time, we placed the Empty object in the hierarchy and changed the object name to EventSDK.
Place the Cube (the game object that wants to receive Events) and the Sphere (the game object that has functions called by STYLY_Action_Spanwer) under the EventSDK object.
Prefabricate the EventSDK object.
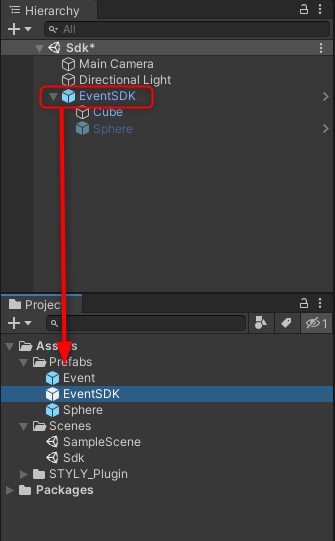
Upload the prefab to STYLY.
Place the uploaded prefab (EventSDK) in STYLY Studio.
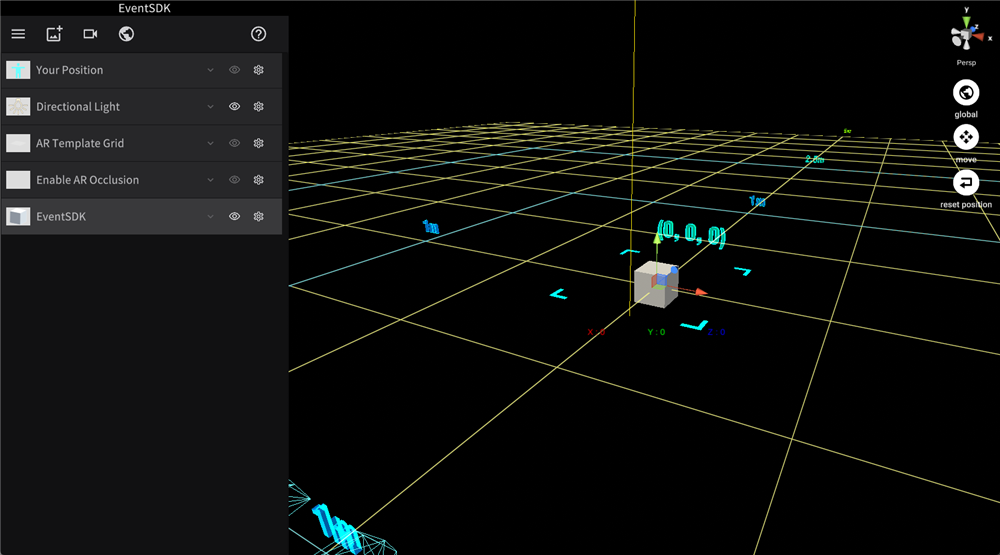
Publish your scene and check its operation in the mobile app.
Tap the Cube and if the Sphere appears, it is successful.