In Unity, there is a Light object, like the Directional Light that exists by default when you create a new scene, which acts as a light source to illuminate the surrounding GameObjects (hereafter simply referred to as “objects”).
This is the basic element of lighting.
However, if we try to construct a space using only light objects, it is difficult to light the entire space evenly.
HDRI is an abbreviation for “High Dynamic Range Images,” which are images that have a more defined lightness and darkness than normal images.
In this course, we will go over basic lighting using the Light object and how to easily express clean lighting using HDRI and Skybox.
The characteristics of an object, such as whether it is affected by light or casts shadows, also depend on its material (shader), but we will assume the Unity built-in Standard Shader and will not discuss other shaders.
This course will cover the basics of lighting, one by one.
- 1 What is a Light object?
- 2 Types of Light
- 3 Shadows by Light
- 4 Light object placement
- 5 What is HDRI?
- 6 Download HDRI
- 7 Import into Unity
- 8 Creating a Skybox Material
- 9 Generating Lighting from Skybox
- 10 Introduction to Skybox Materials
- 11 Let’s experience the scene to be created.
- 12 Creating a space
- 13 Generating Lighting
- 14 Creating Objects
- 15 Attaching Textures
- 16 Placing a lighting object
- 17 upload to STYLY and add effects
What is a Light object?
In Unity, there is a Light object that can be created from the Create menu in the Hierarchy window (hereafter referred to as the Hierarchy), which acts as a light source to illuminate the surroundings.
A Light object is actually a GameObject to which a Light component is attached, and the type of Light that can be created from the Create menu also depends on the Type property of the Light component.
The characteristics of each Light object are described below.
Place them in your scene and check them out for yourself.
Types of Light
Directional Light
A large light source that illuminates the entire scene with rays of light parallel to each other coming from infinity.
In other words, you can safely assume that the lighting effect is equivalent to that of the real sun.
Point
- There is no definite light source position on the scene, i.e., changing the Position does not affect the lighting effect, but illuminates the entire scene with the same intensity.
- Rotation has a significant effect on lighting effects because of the direction of light rays.
Let’s rotate the Directional Light that is present in the scene by default.
Then the Skybox (sky) will be linked and become a sunset sky or dark like night (we will explain how this works later).
Let’s create another Directional Light from the Create menu in the Hierarchy and add it to the scene.
When you rotate this one, the effect of illuminating the surrounding objects changes, but the sky does not change.
Point Light
A light source that emits rays of light from a point in space in all directions.
The intensity of the light is inversely proportional to the square of the distance from the light source and is zero at the distance set by Range.
You can visually see the change in the size of the Gizmo sphere in the scene view as you change the value of Range.
Since it shoots rays of light in all directions, Point Light has a higher drawing load than other types of light.
Depending on the scene and target platform, it is best to avoid excessive use of Point Light.
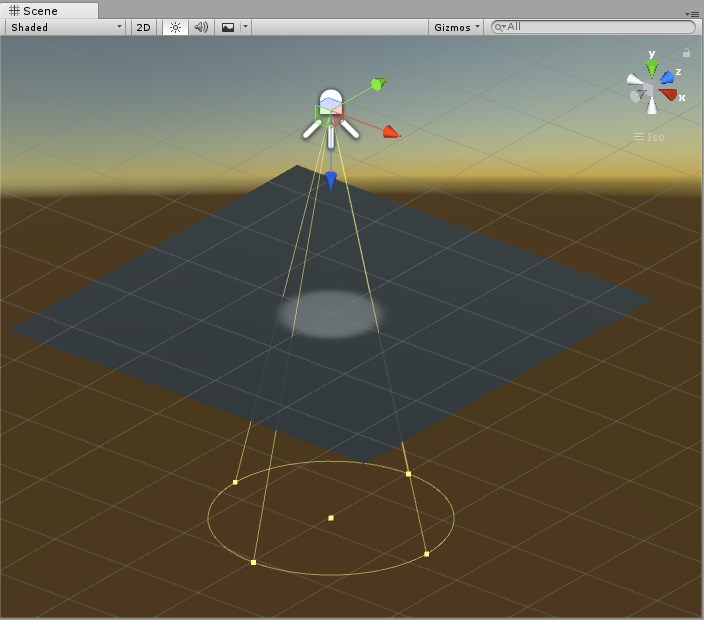
Spotlight
A light source that illuminates a cone from a point in space in the positive direction of the Z axis.
When created in the Create menu of the Hierarchy, the light is rotated 90 degrees along the X axis by default, so that the ground is illuminated.
The angle of the cone can be changed with the SpotAngle property.
As with Point Light, the intensity of the light is inversely proportional to the square of the distance from the light source, and is zero at the distance set by Range.
Area Light
A light source that emits rays of light uniformly from a rectangular or circular plane.
To use Area Light, you must use Global Illumination (GI), a technique for expressing indirect light.
GI can also be used to create beautiful lighting effects such as the following.
Shadows by Light
As an effect of light, in addition to illuminating objects as in reality, light can be blocked by illuminated objects to create shadows on surrounding objects.
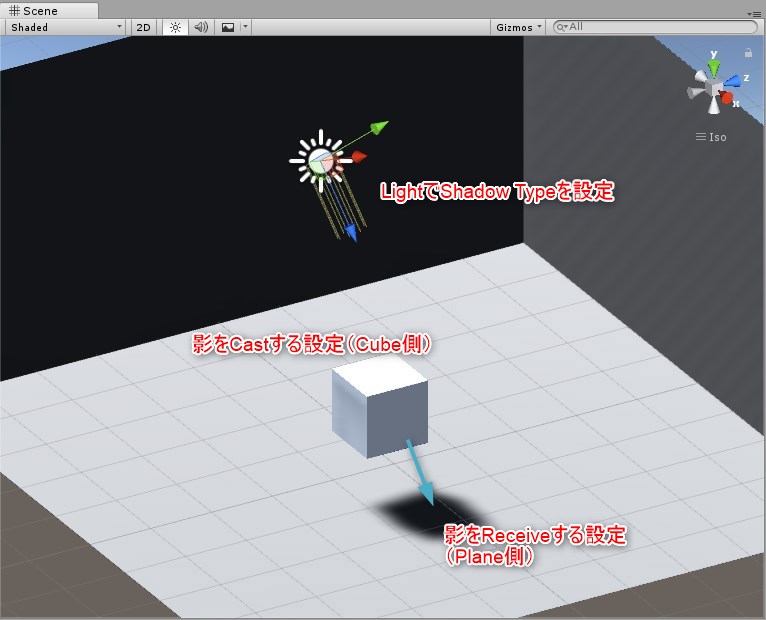
The following conditions are required to create shadows.
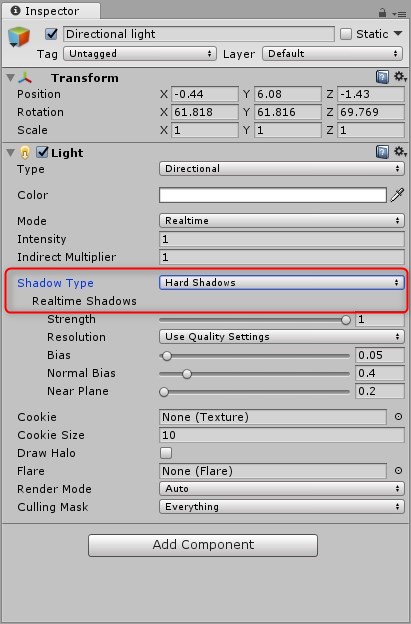
Light
Shadow Type must be other than “No Shadows
Light Note that “No Shadows” is the default when creating a new Light!
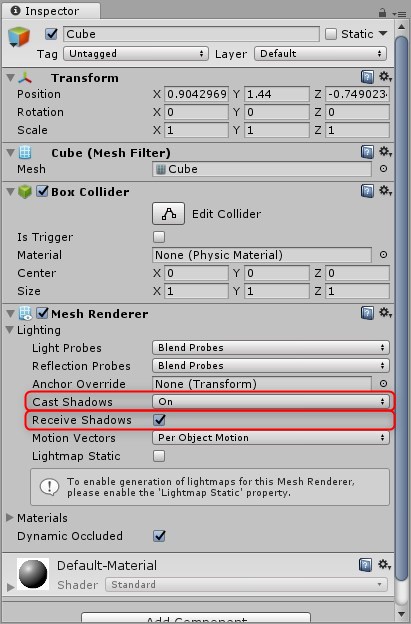
The object on which the shadow is cast (projected)
Cast Shadows in Mesh Renderer is other than “Off”.
Objects on the Receive (projected) side of the shadow
Receive Shadows in Mesh Renderer is ON
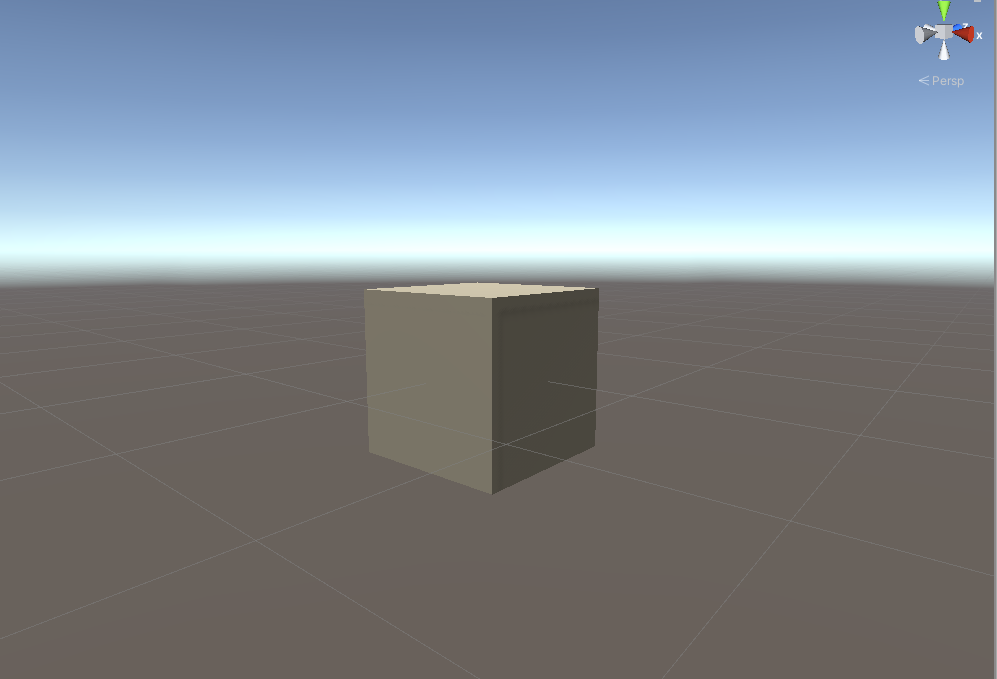
Light object placement
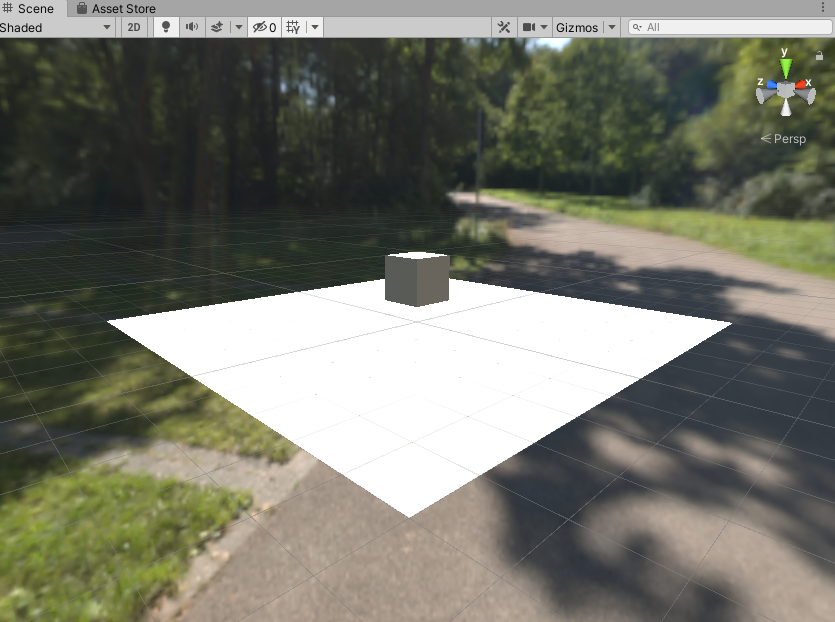
Let’s actually watch the effect of lighting using a simple object in Unity.
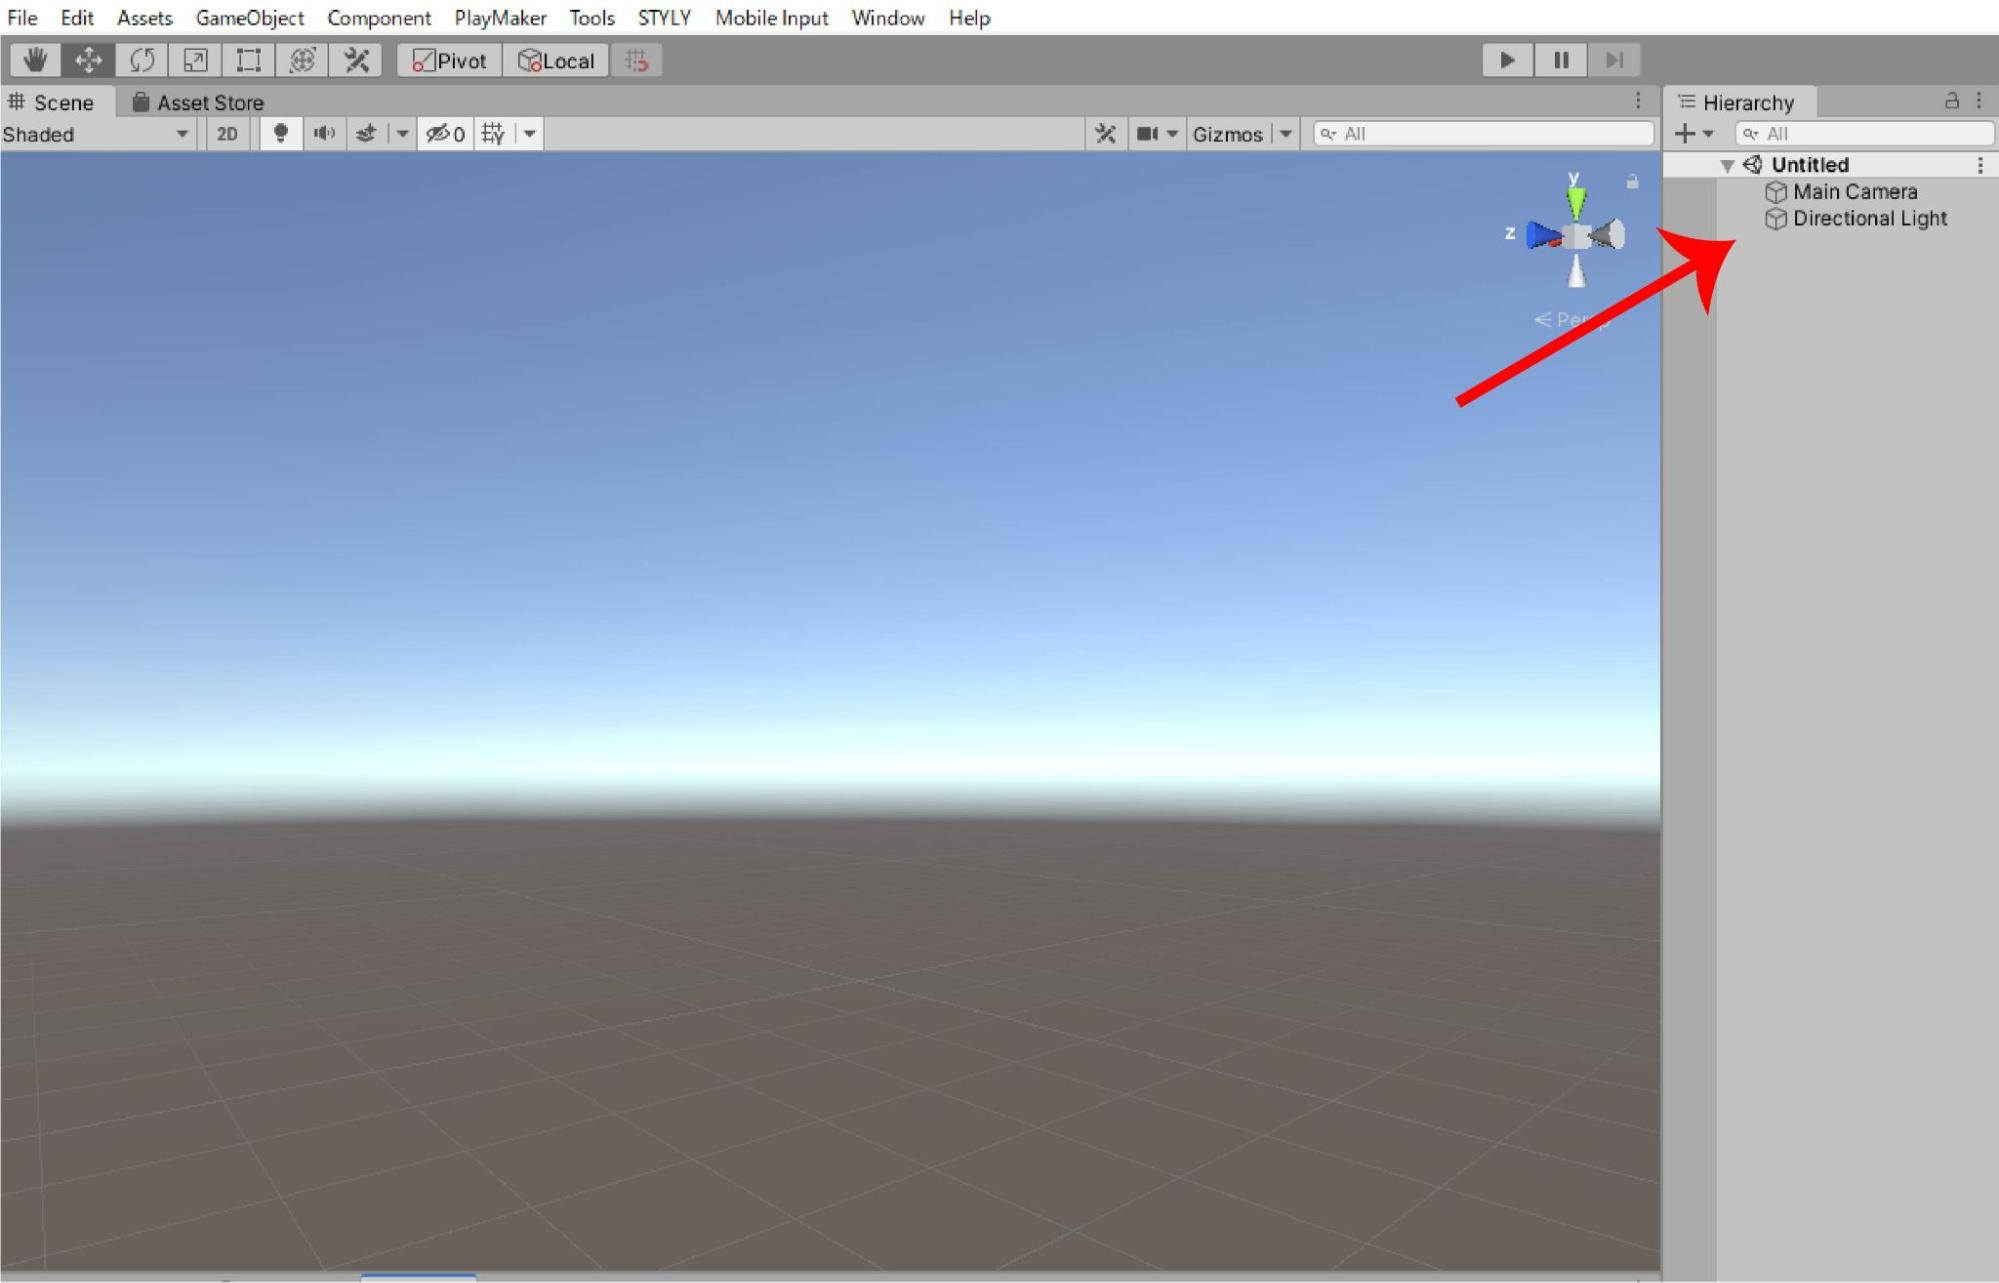
Open a Unity project and start a new scene from New Scene.
In the scene, a Directional Light is pre-populated from the beginning.
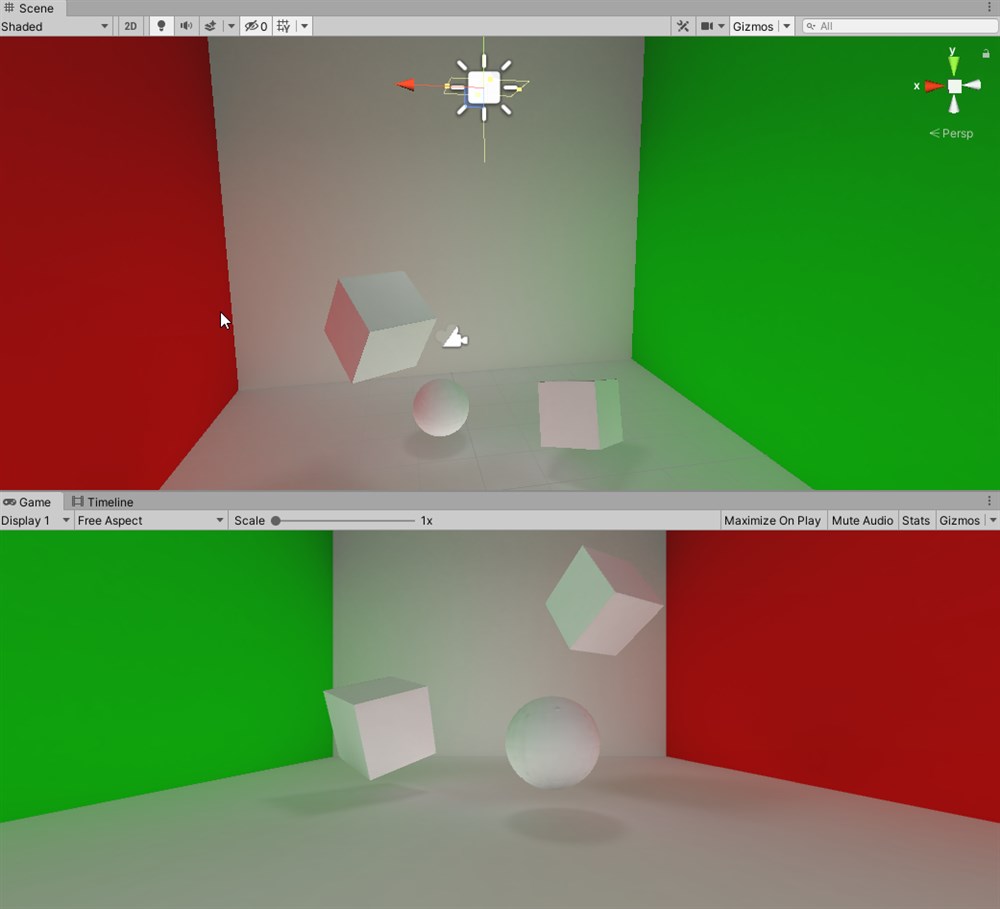
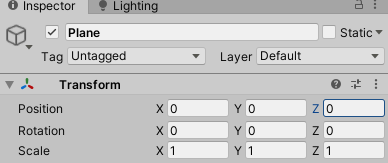
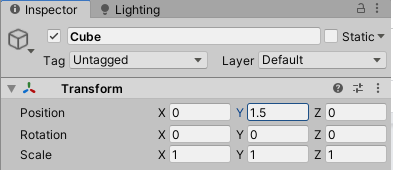
In addition, place a Cube object and a Plane object as a floor.
Place the Cube and Plane objects as shown below.
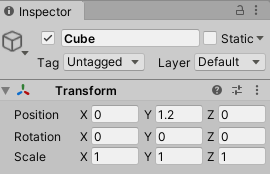
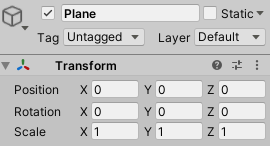
The scene will look like the following.
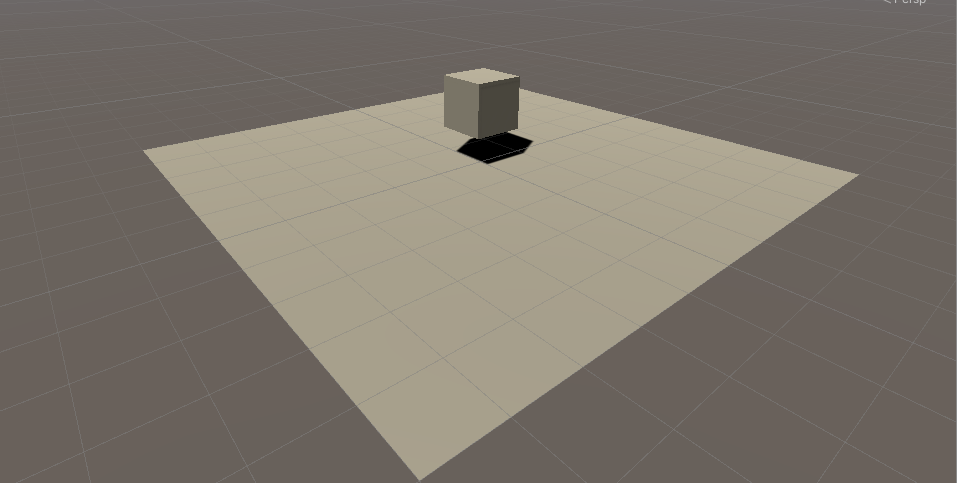
Let’s look at the other side where the light is shining.

The other side of the cube is in shadow and completely dark.
In the real world, the shadowed areas are slightly illuminated by reflected light, etc. If this were the case, the lighting would be too far from the real world, and we would not be able to create a beautiful scene.
The same phenomenon occurs with Point Light and Spot Light.
In the next section, we will discuss an easy solution to this problem using HDRI.
What is HDRI?
As verified in the previous section, it is difficult to express a full and bright realistic lighting in Unity by just placing Light objects.
Therefore, we use “HDRI.
“
The official name for HDRI is “High Dynamic Range Images”; the literal translation is High Dynamic Range Image, where dynamic range is the width (range) of values a single pixel has, given by the ratio of the highest, luminance to the lowest.
(Taken from “HDRI (High Dynamic Range Image) Glossary,” Okuda Laboratory, School of International Environmental Engineering, The University of Kitakyushu, http://vig.is.env.kitakyu-u.ac.jp/etc/hdri.html )
“
Compared to jpg/png, which are normal image formats, HDRI is image data with more information in dark and bright areas.
Software that deals with 3DCG uses 360-degree image data to represent ambient light and reflections.
This is called Image Based Lighting.
The method introduced here also handles this Image Based Lighting.
Download HDRI
Download HDRI.
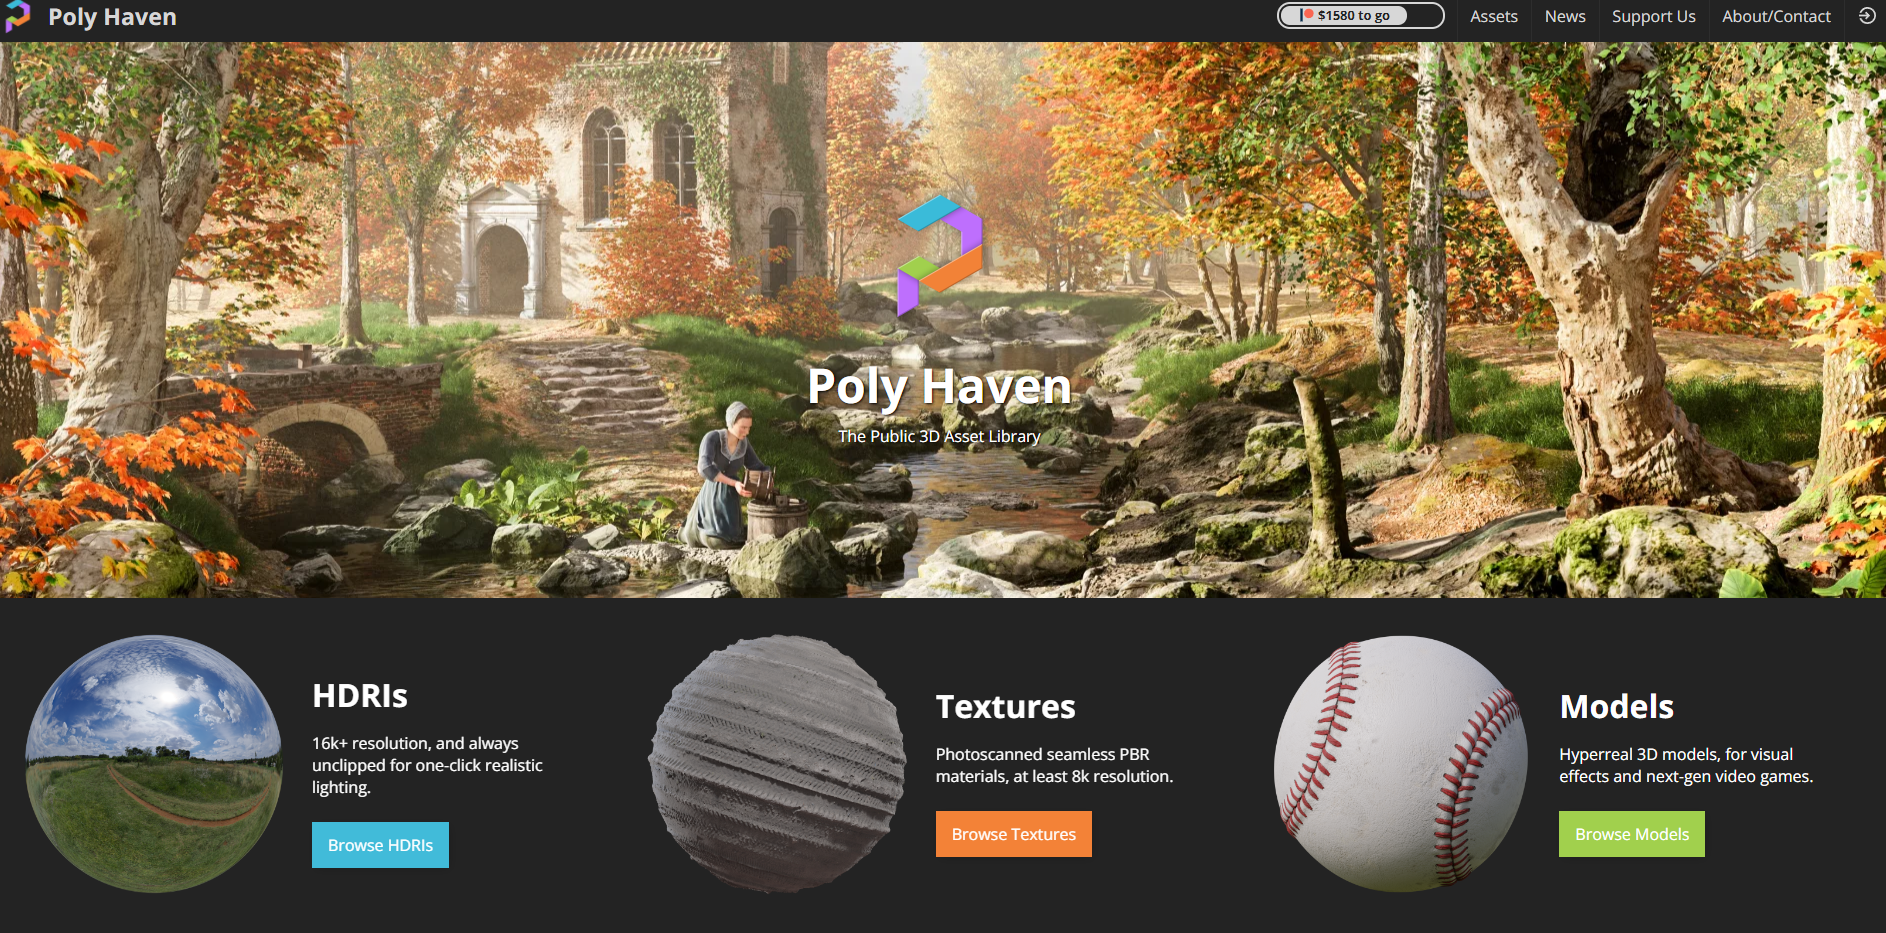
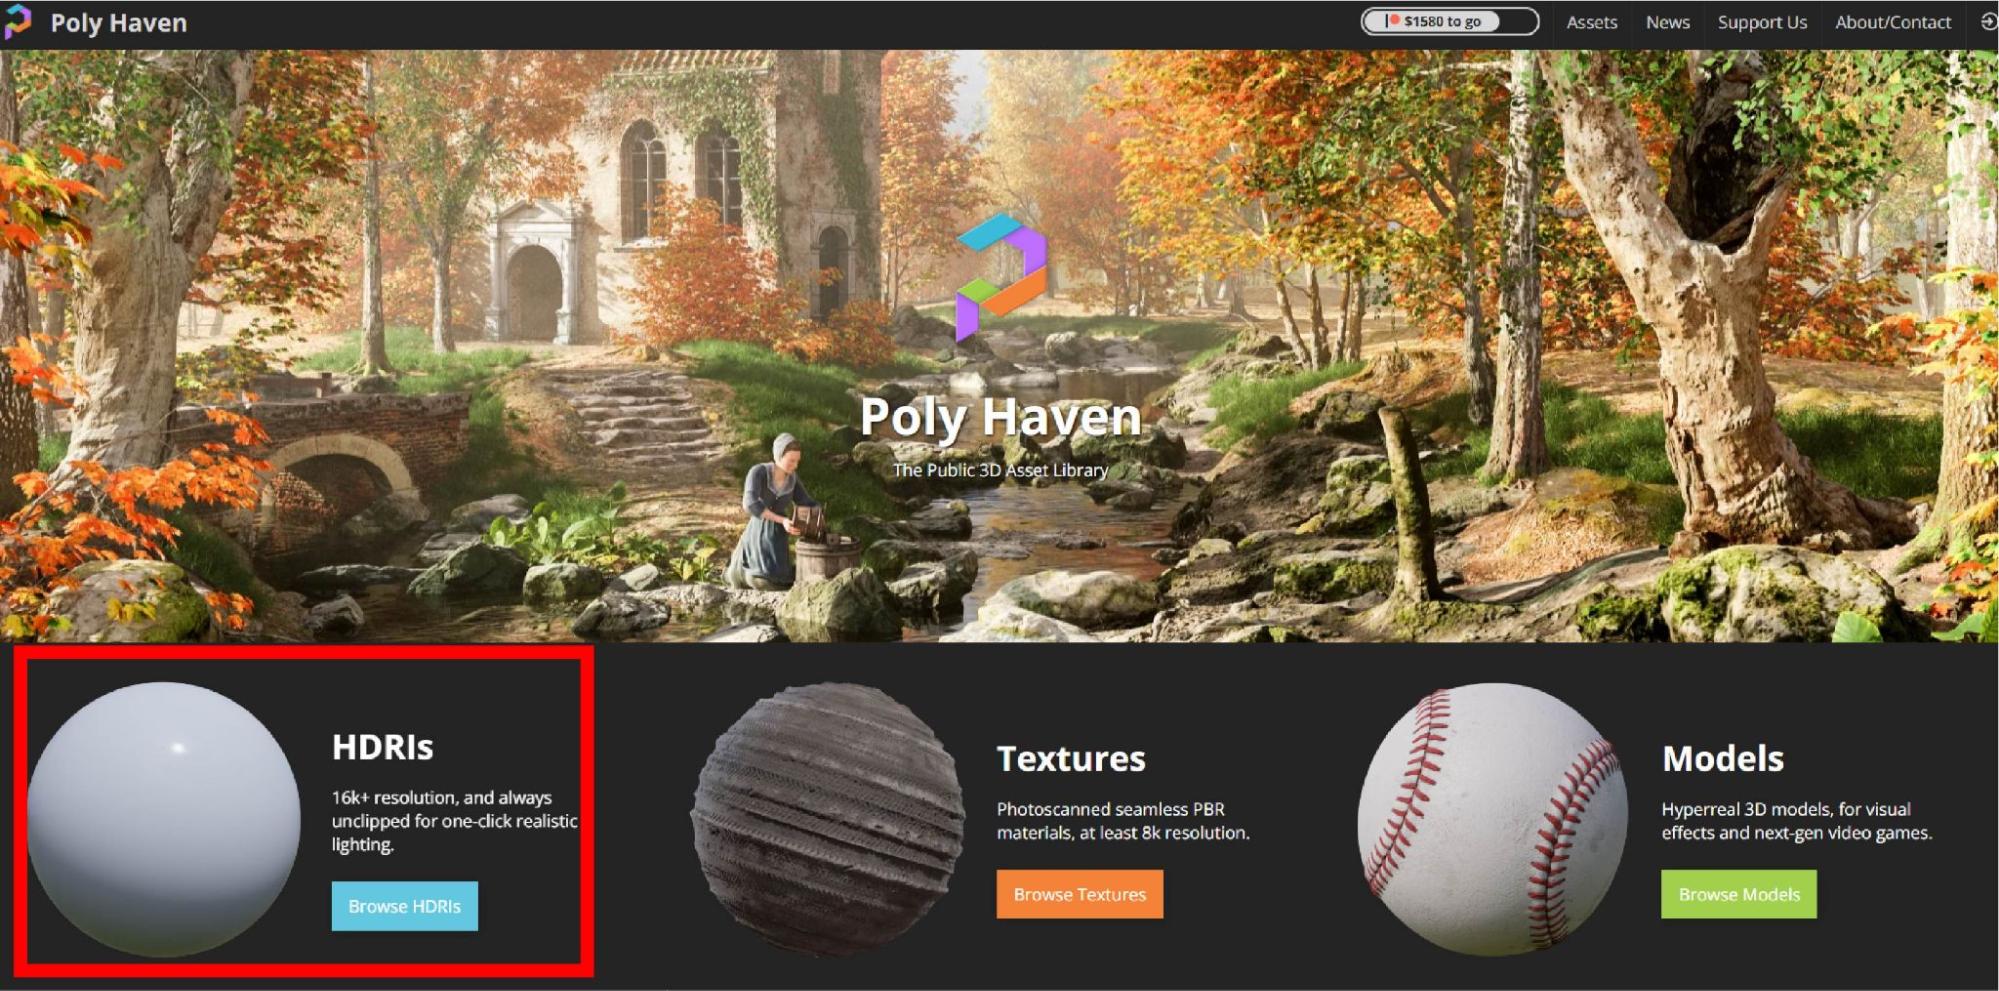
Download images from ” Poly Haven,” which distributes HDRIs that can be used copyright-free, for commercial use, and without credit notation (CC0).
Poly Haven distributes high-quality HDRIs, textures, and 3D models under CC0.
In this case, we will download HDRIs.
Click on HDRIs in the lower left corner.
Various types of HDRIs are distributed.
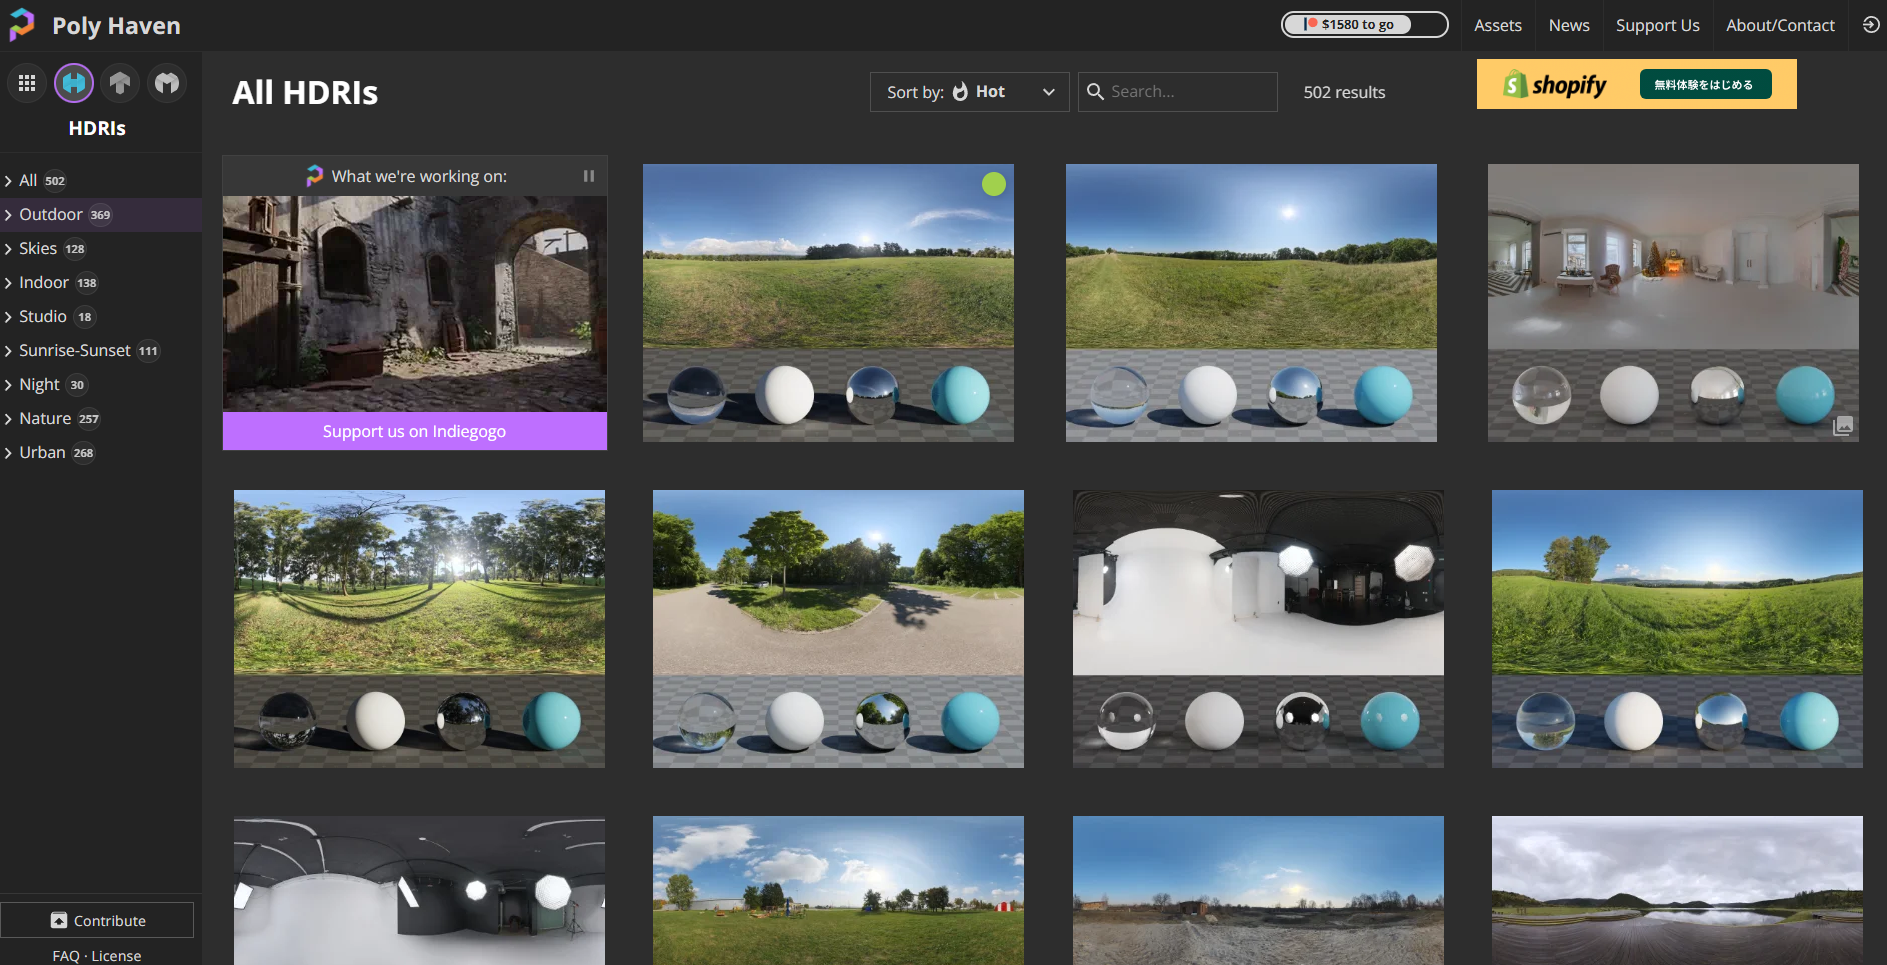
Download the HDRI of your choice.
In this case, we will download the following HDRIs.
Once you are on the image page, set the items in the upper right corner.
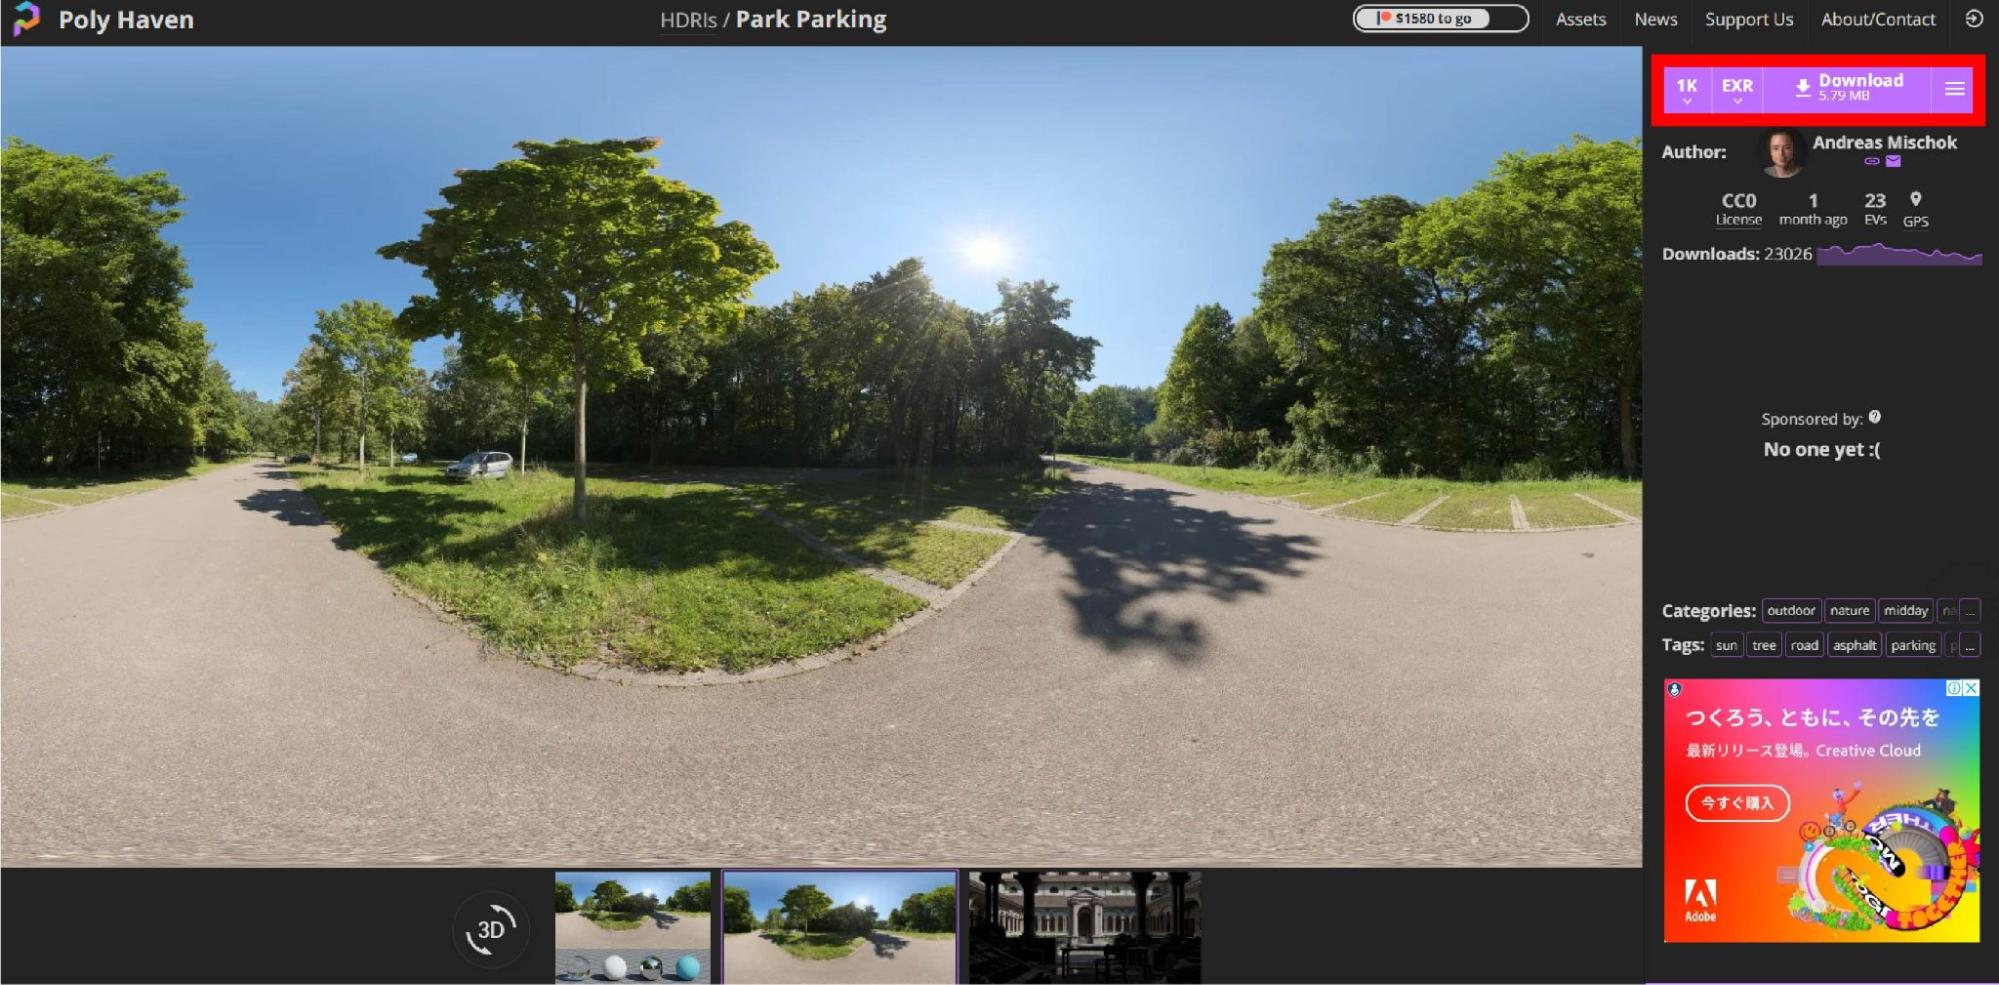
Where it says “1K” is the resolution of the image.
In this case, we selected a 1K (1920*1080) image.
Note that the higher the resolution, the better the quality, but the larger the capacity!
Change the EXR field to HDR.
When the settings are complete, you should see the following
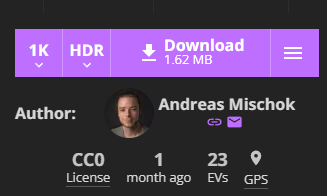
Select “Download” to download the HDRI.
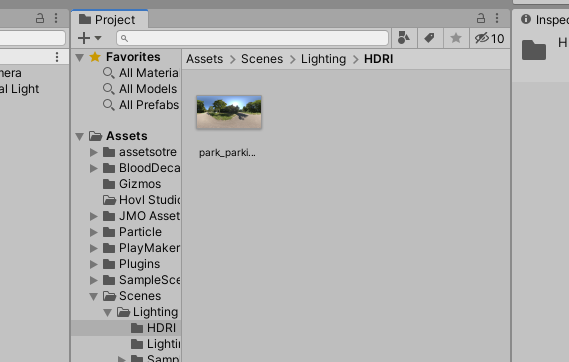
Import into Unity
After the download is complete, drag and drop it into your Unity project and save it in the desired location.
You will not be able to use HDRI for lighting at this point.
With HDRI selected, bring up the Inspector window.
Change the Texture Shape from 2D to Cube.
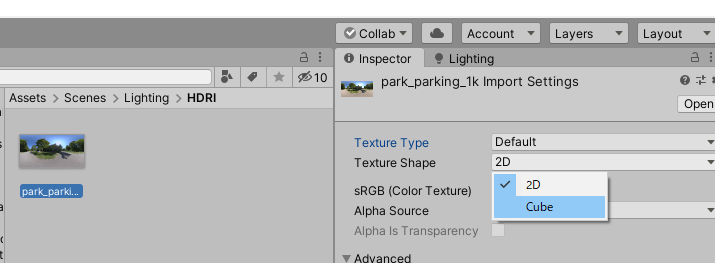
After changing to Cube, select “Apply” at the bottom.
The HDRI will then change to a spherical shape.
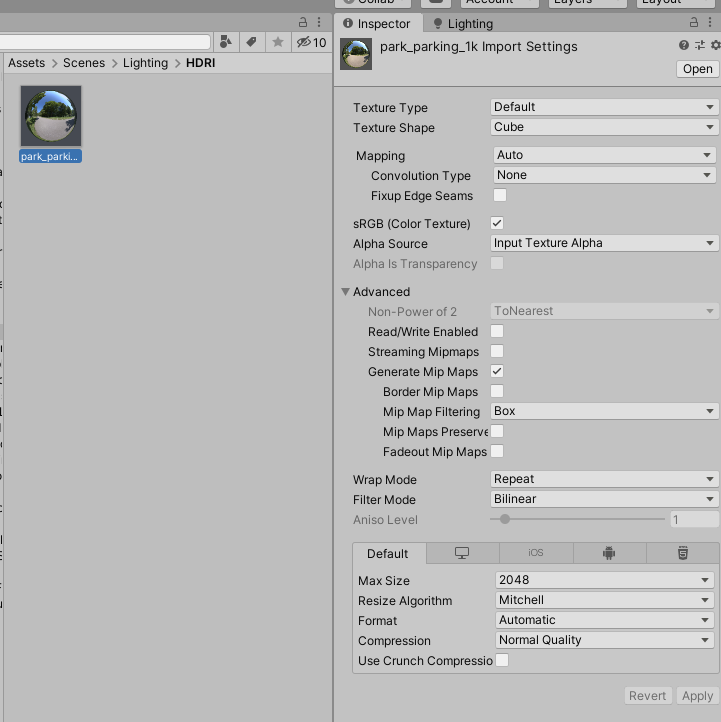
This completes the setup.
To do Image Based Lighting with HDRI in Unity, HDRI must be used as a Skybox.
The next section describes the Skybox.
Creating a Skybox Material
A skybox is like a “background” in a Unity scene.
The default background is a monotone sky.
By changing this background from the HDRI default to HDRI and setting Image based Lighting, the entire space can be illuminated.
To set the background, the HDRI must be changed to a Skybox material.
In this case, we will use the HDRI we downloaded earlier and change it to a Skybox material.
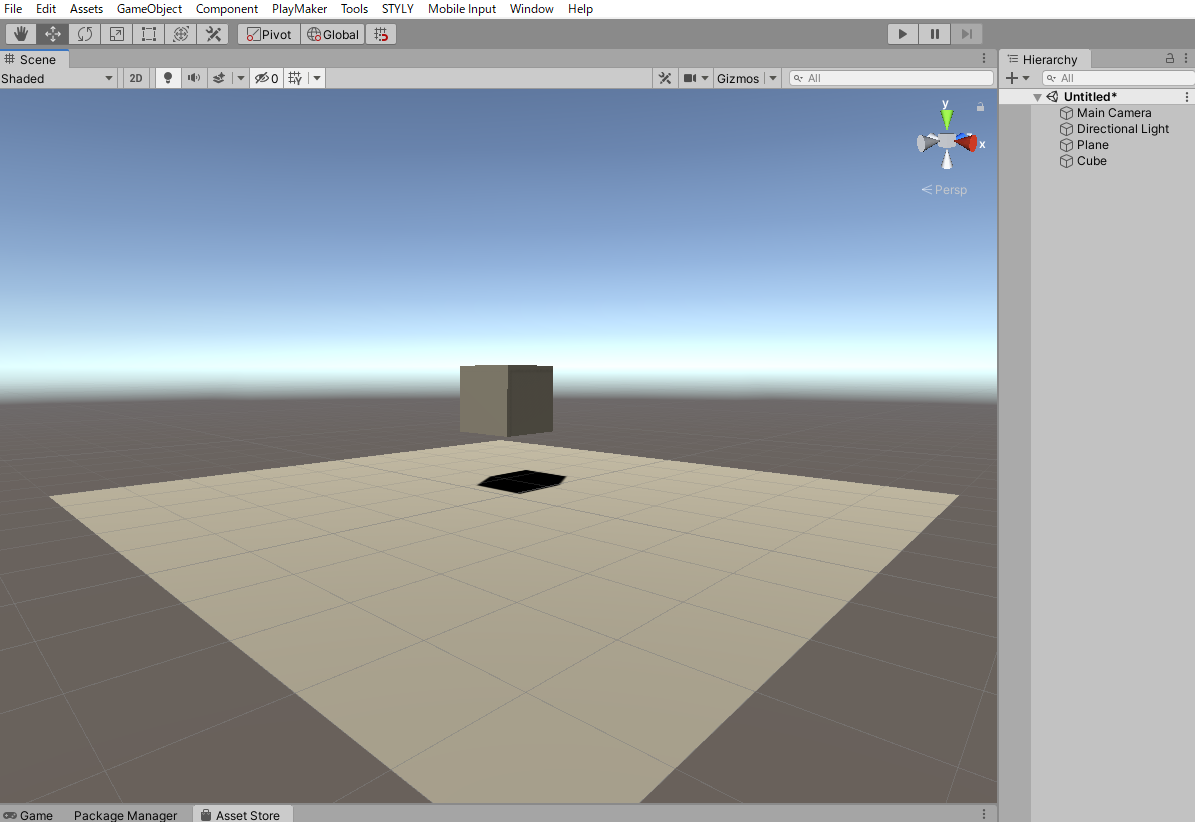
First, let’s create a simple space by launching New Scene.
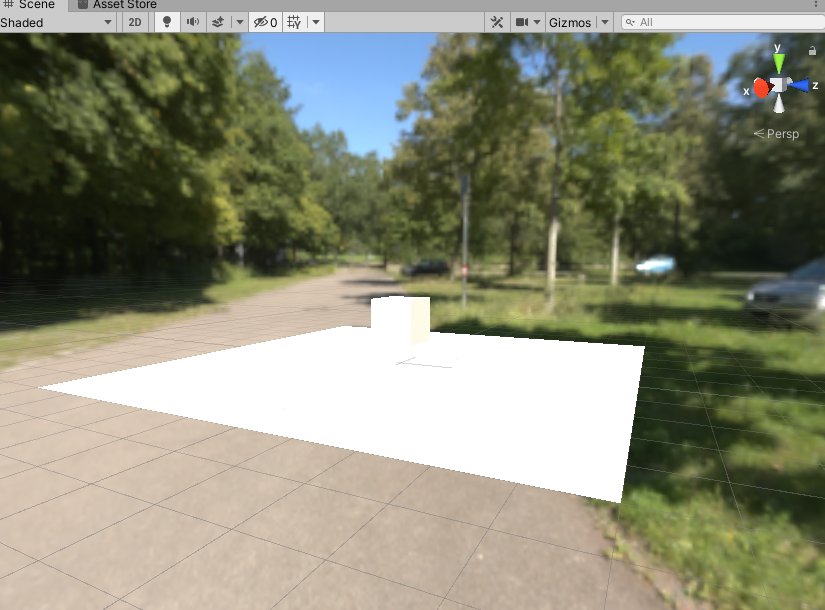
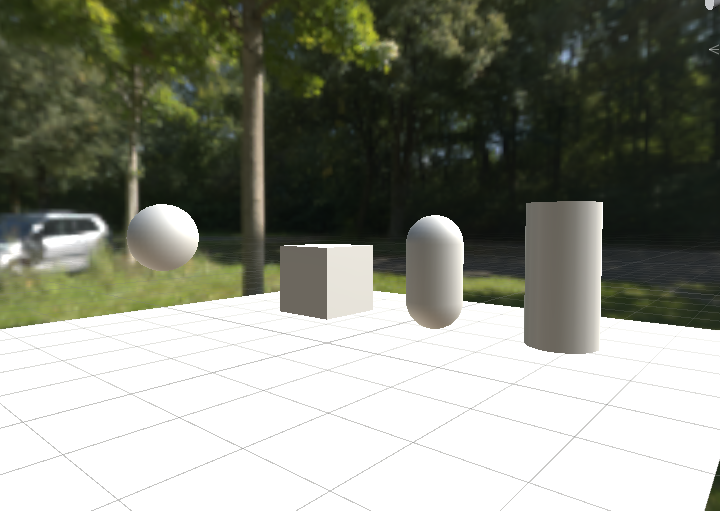
Create a Plane and a Cube from the Hierarchy window and place them as shown below.
The space will look like the image below.
Next, create a Skybox material from the HDRI that was used for the Cube map.
Right-click on the project window and create a new material by selecting Create > Material.
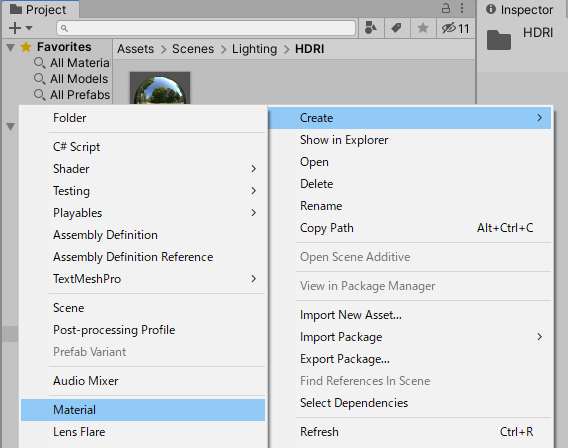
Name the material “HDRI_SKYBOX.
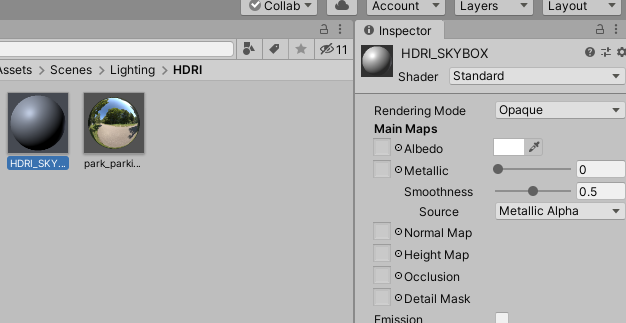
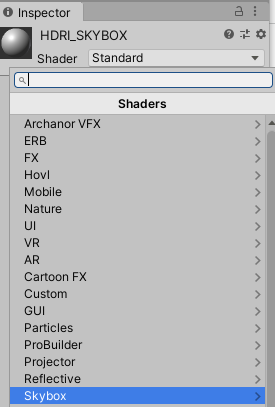
Change the Shader type.
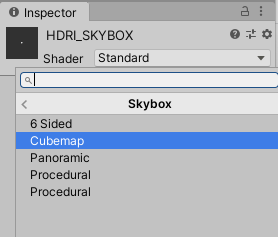
Currently it is set to Standard, but change it to Skybox > Cubemap.
Once changed, the material will look like the following.
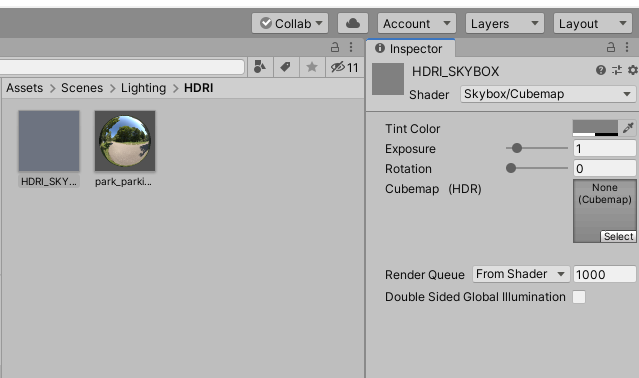
Drag and drop an HDRI image into the Cubemap (HDR) field.
The Skybox material is now set up.
Generating Lighting from Skybox
Next, apply the Skybox material to Skybox to generate lighting.
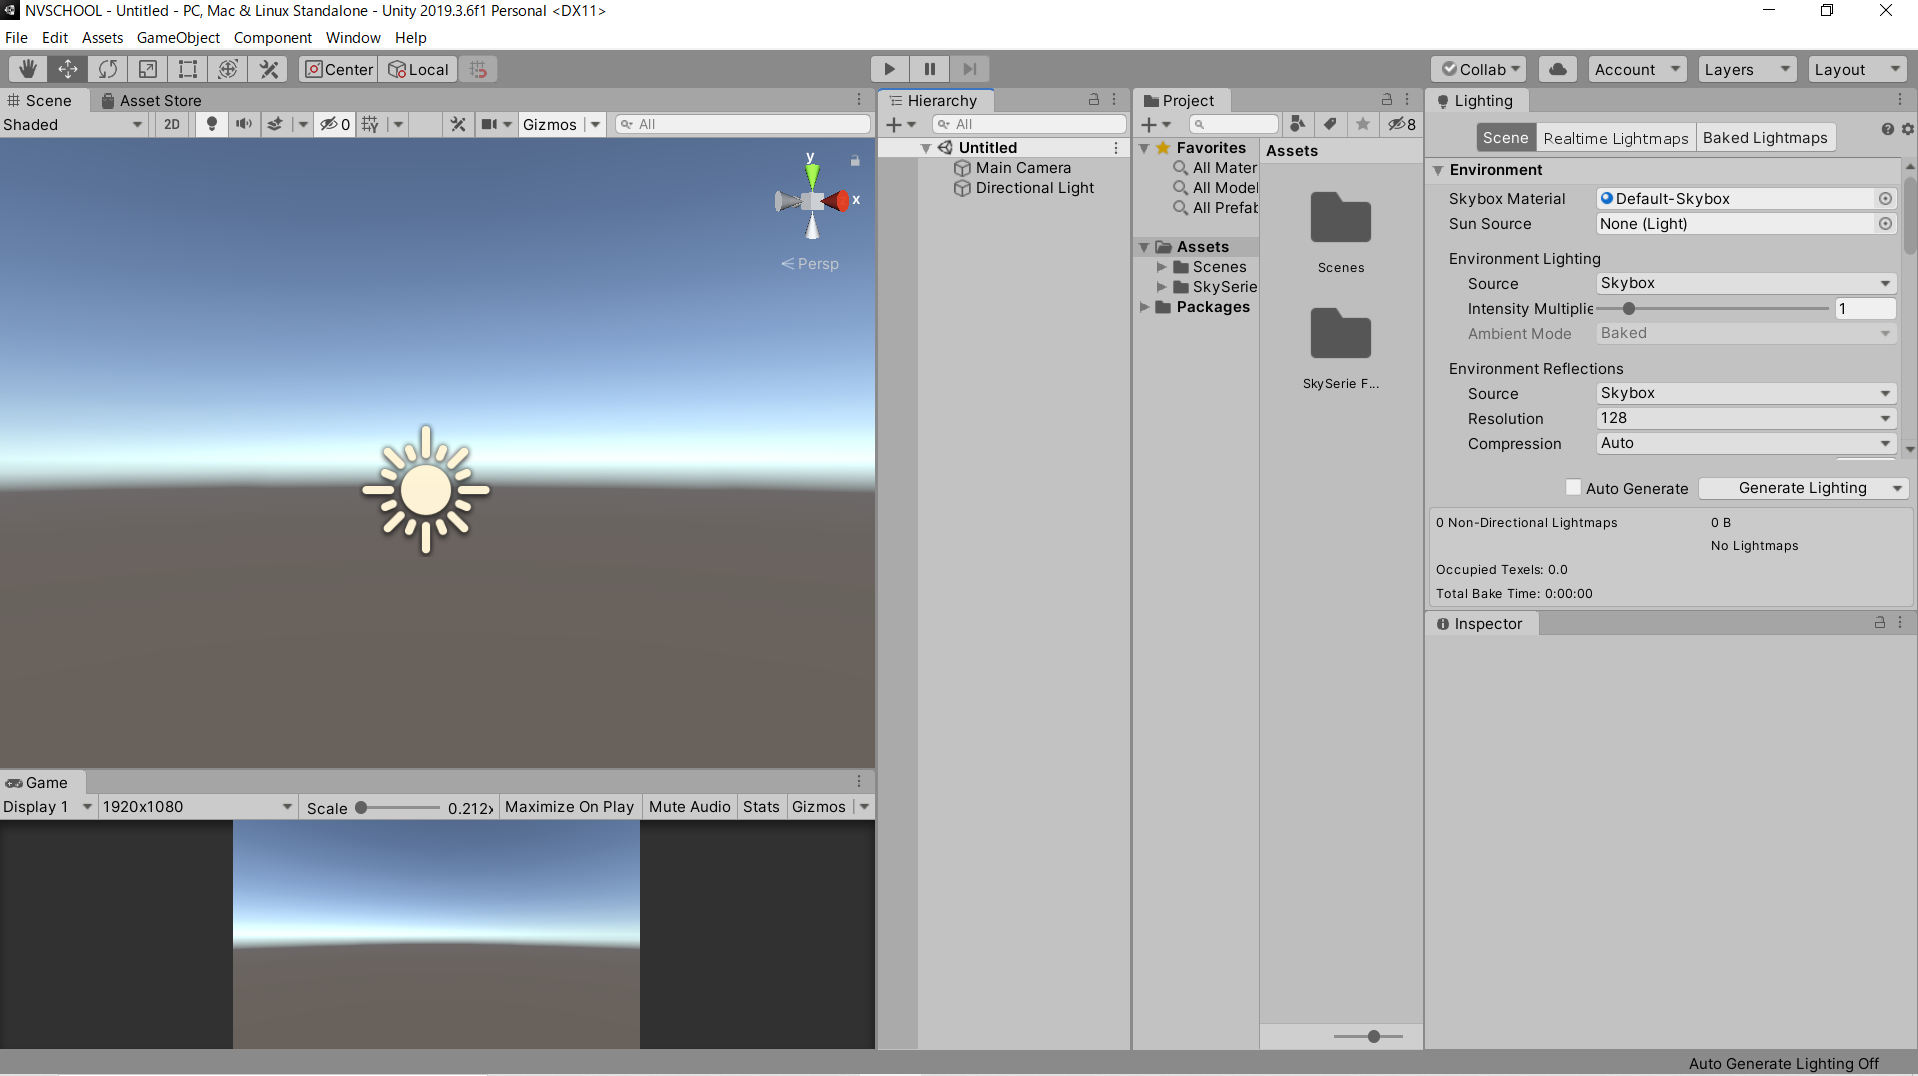
Generating and setting up lighting is done in the Lighting window.
Display the Lighting window.
Select Window > Rendering > Lighting Settings from the top menu.
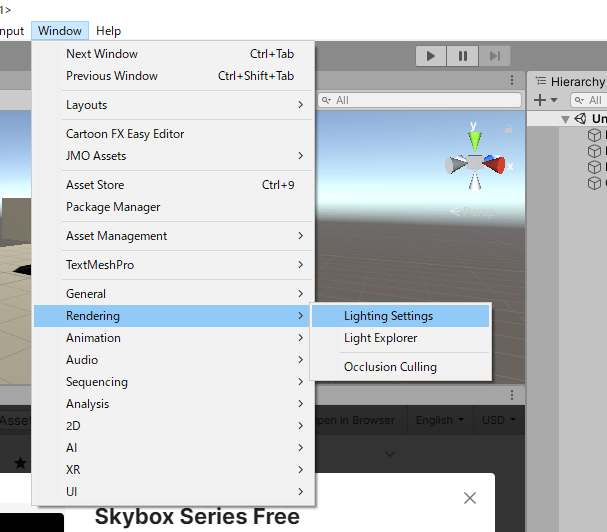
The Lighting window will appear.
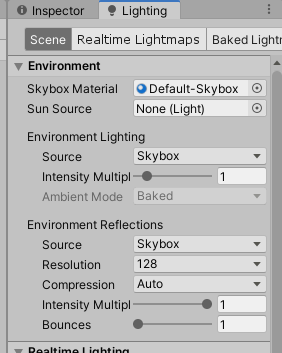
Drag and drop the HDRI_SKYBOX from the Skybox Material in the Environment.
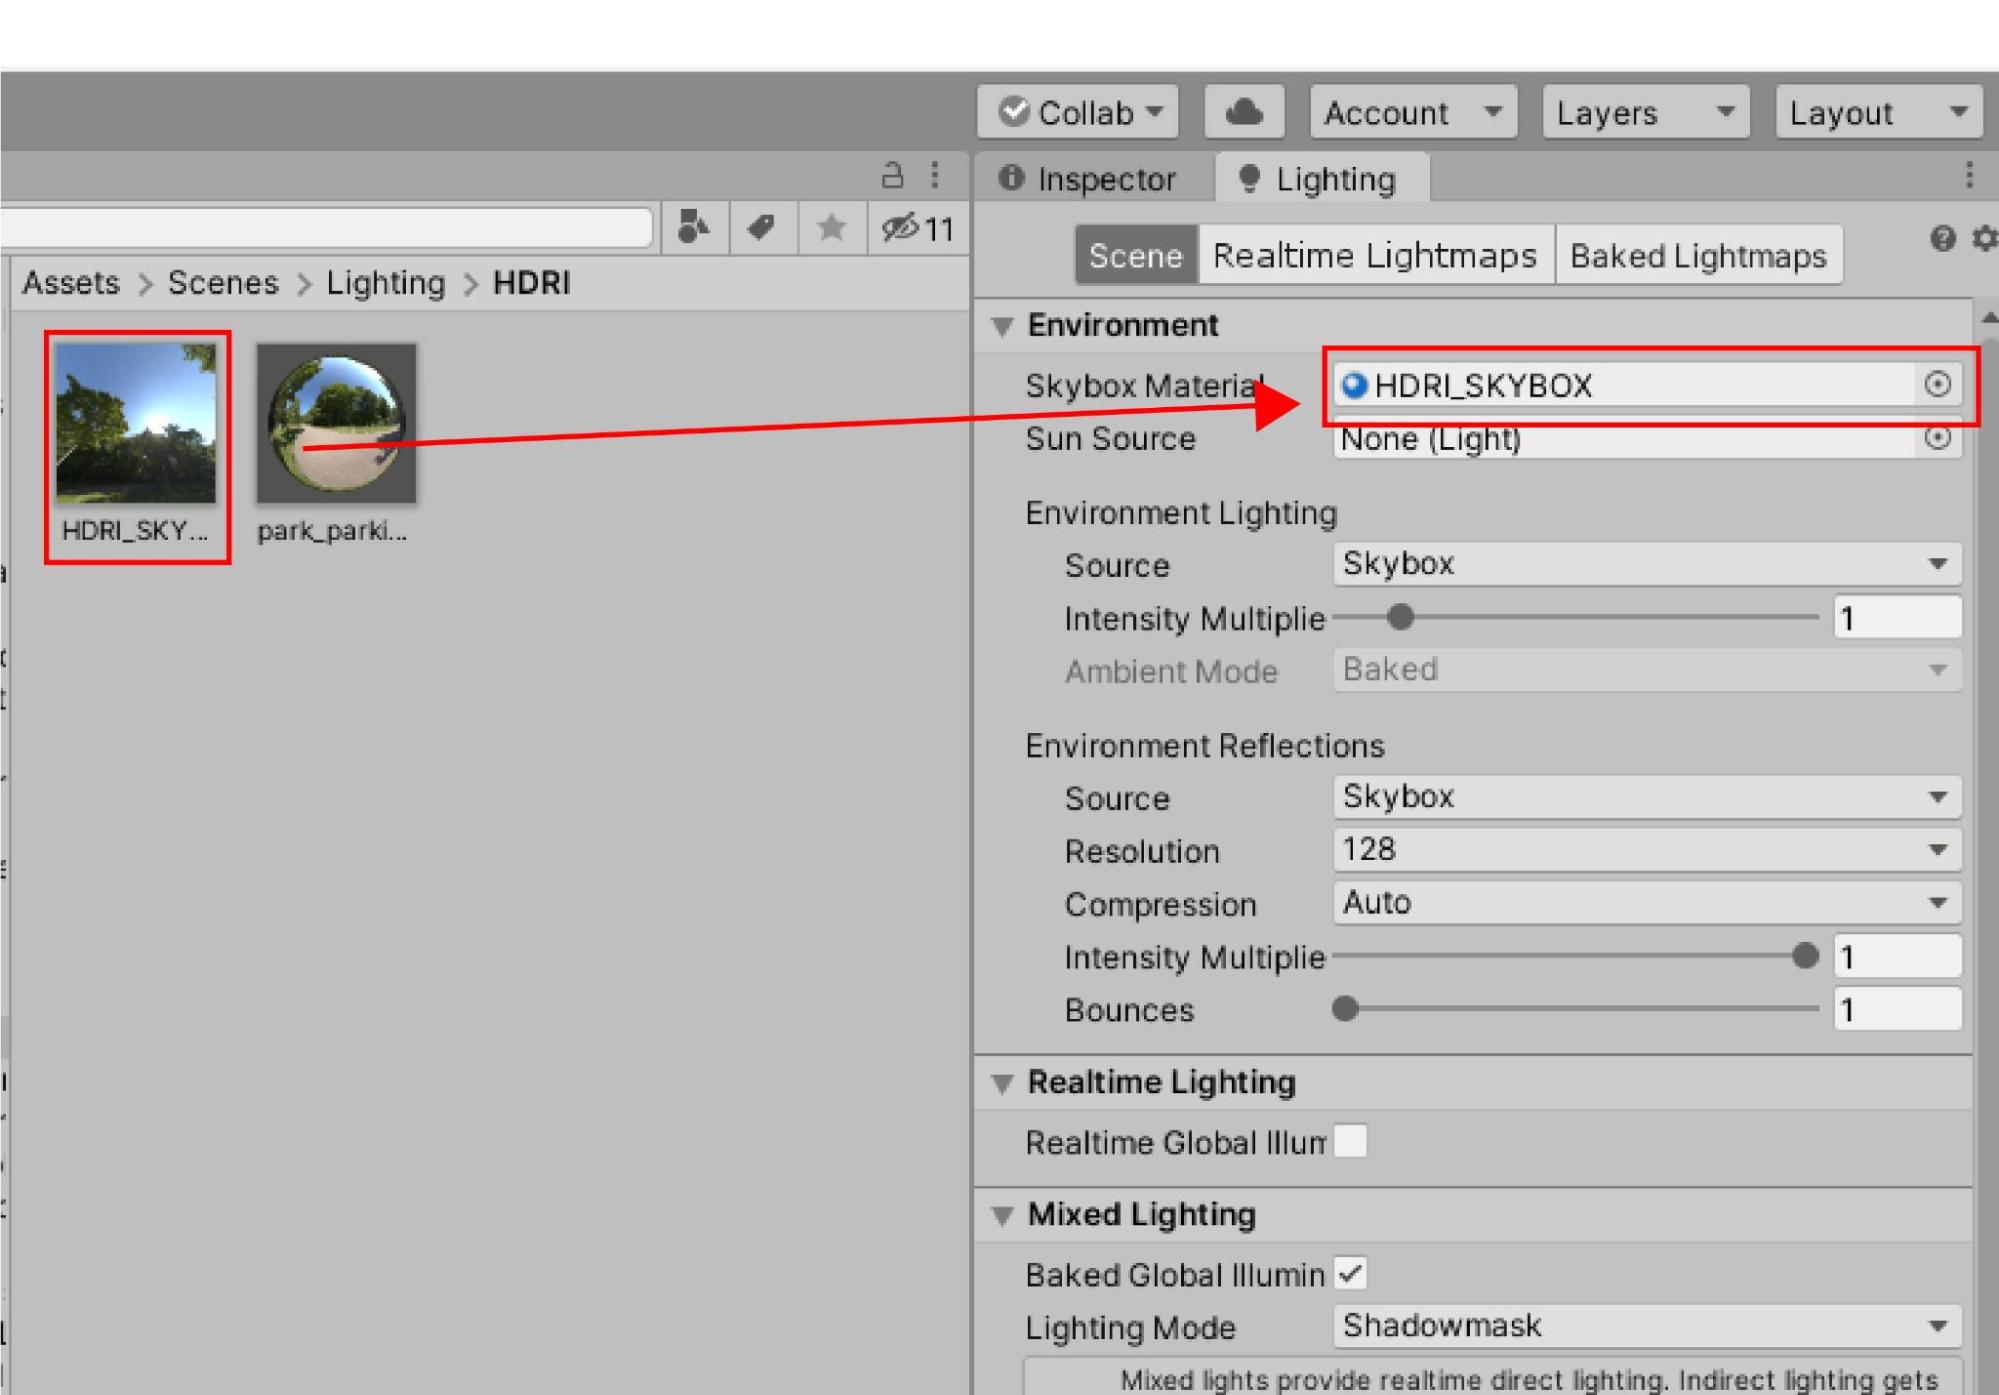
The background of the scene view will change.
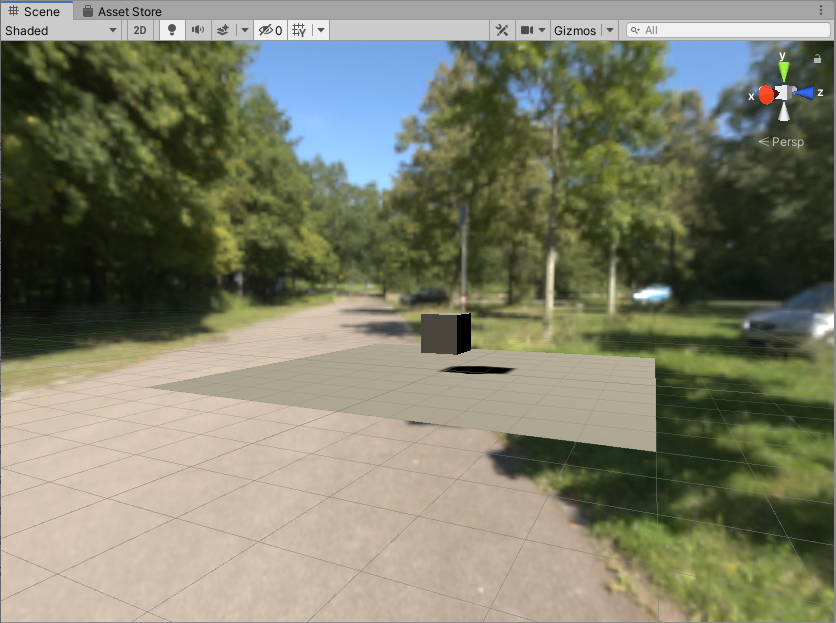
Changing the Skybox changes the background of the scene.
HDRI is now the background.
However, the lighting of the HDRI image is not applied as it is.
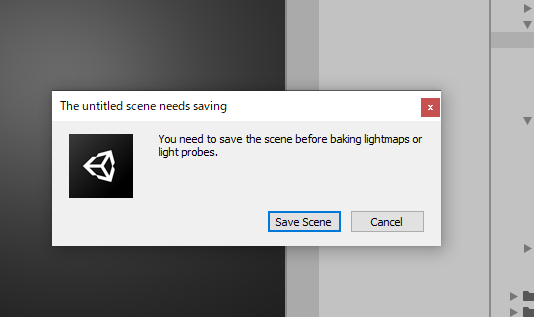
Click on Generate Lighting at the bottom of the Lighting window.
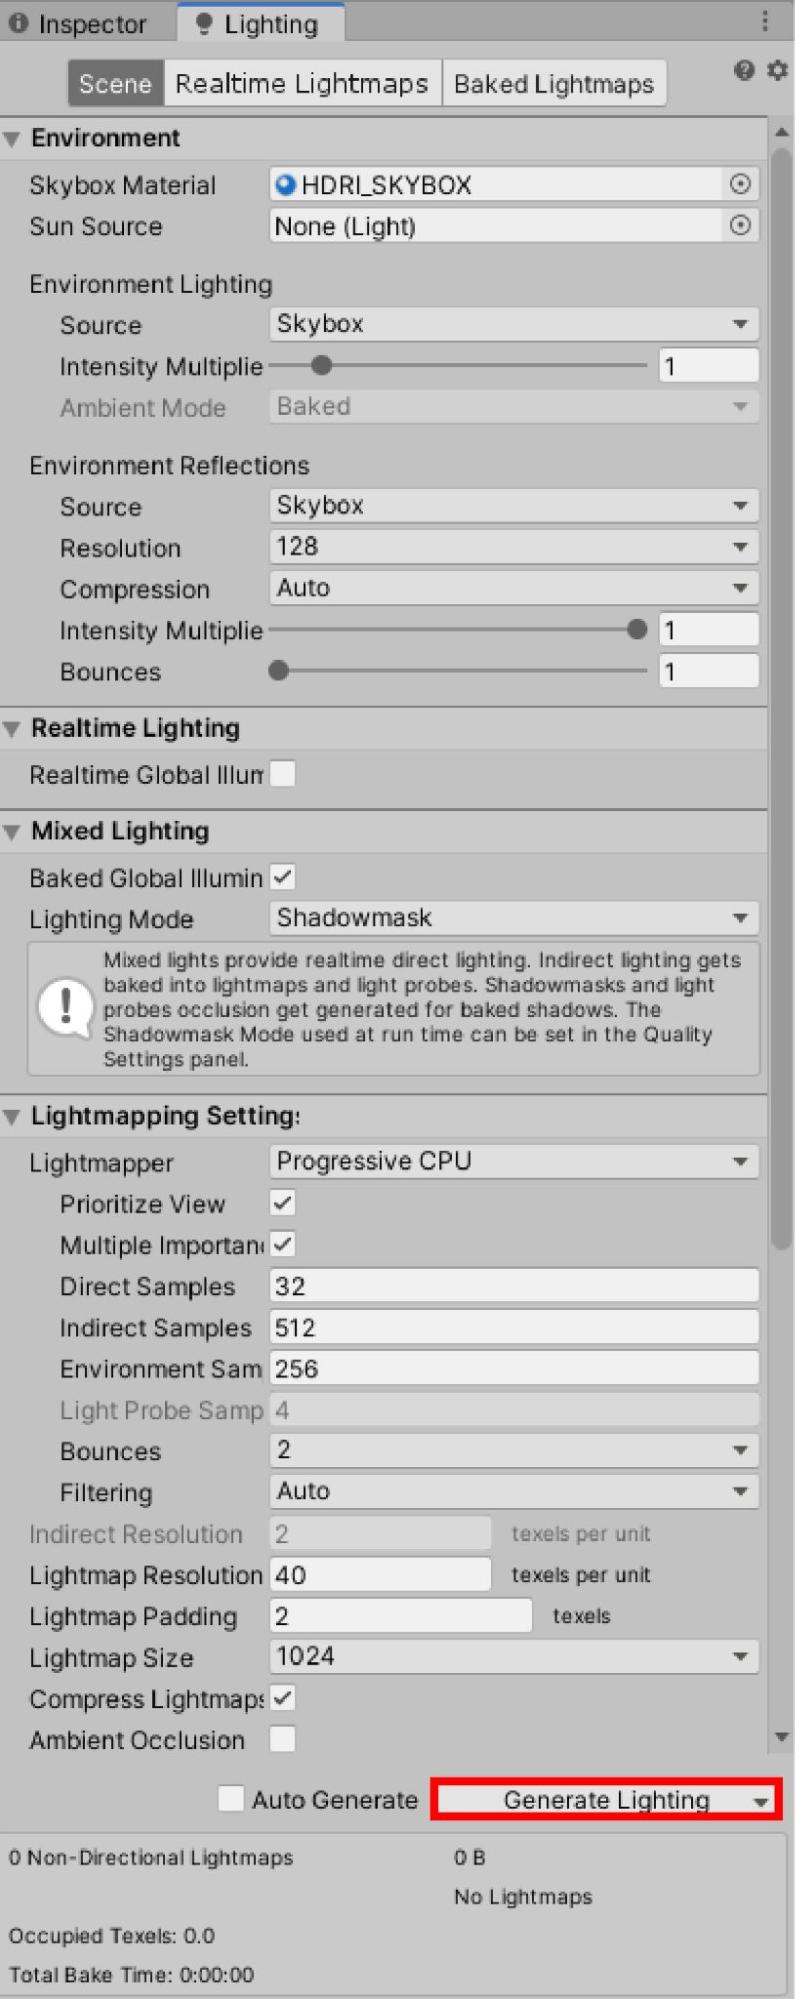
A window will then appear asking you to “Save Scene.
Click “Save Scene” to save the scene anywhere in the project.
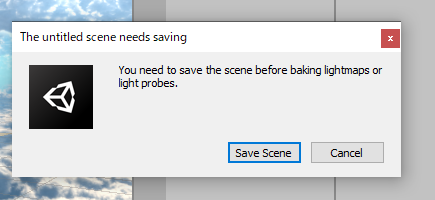
Once saved, the lighting will be generated automatically.

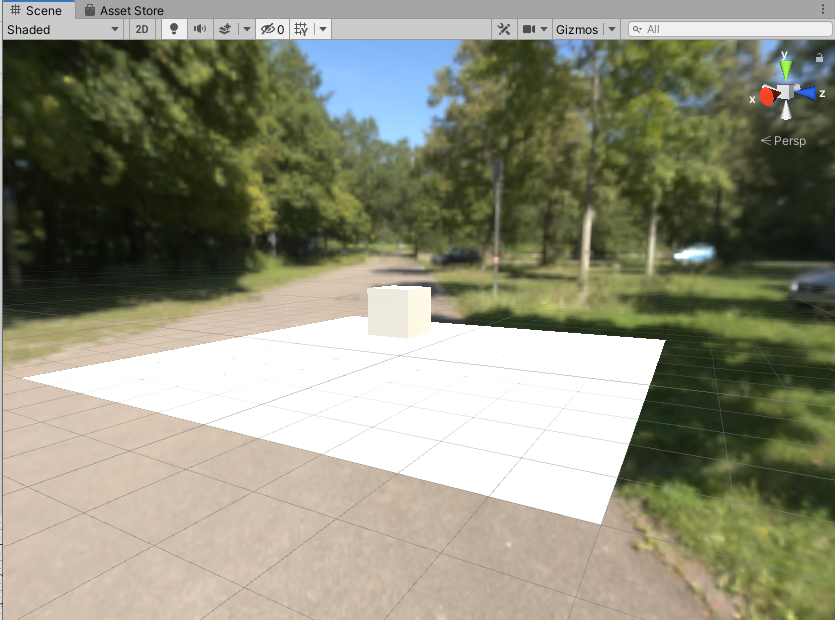
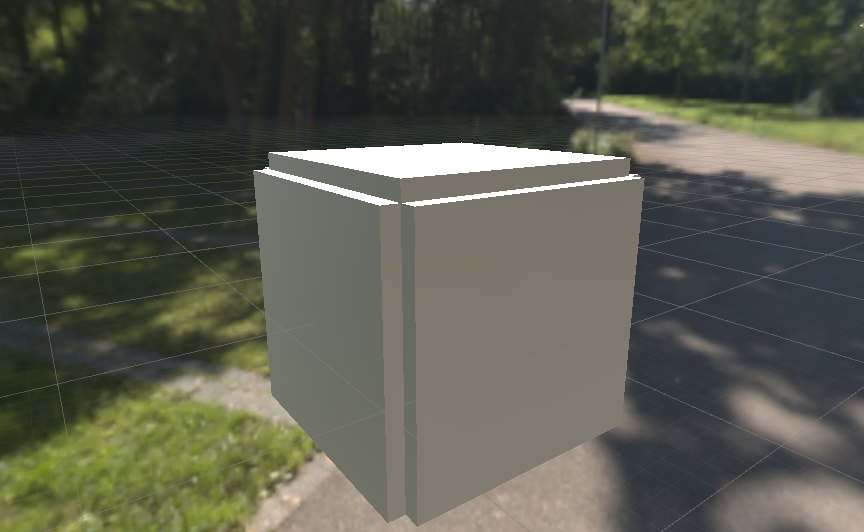
Once the lighting generation is complete, HDRI lighting will be applied to the objects in the scene window and the objects in the scene will be brightened.
The Direction Light has caused them to become too bright.
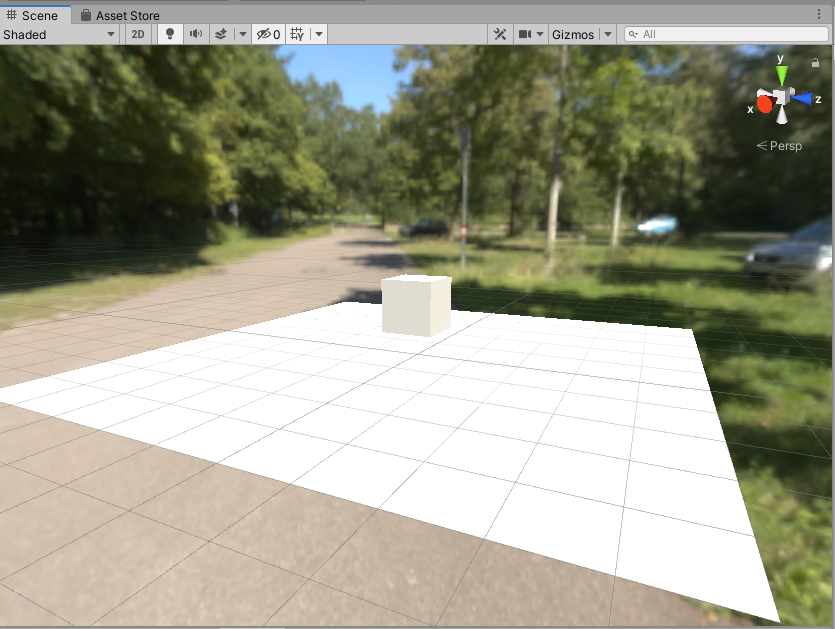
If the Direction Light is removed, the result is as follows.
The boundaries of the surfaces are now a little more visible.
In addition, if you want to change the value of the HDRI lighting, change the value of “Intensity Multiplie” in the Lighting window.
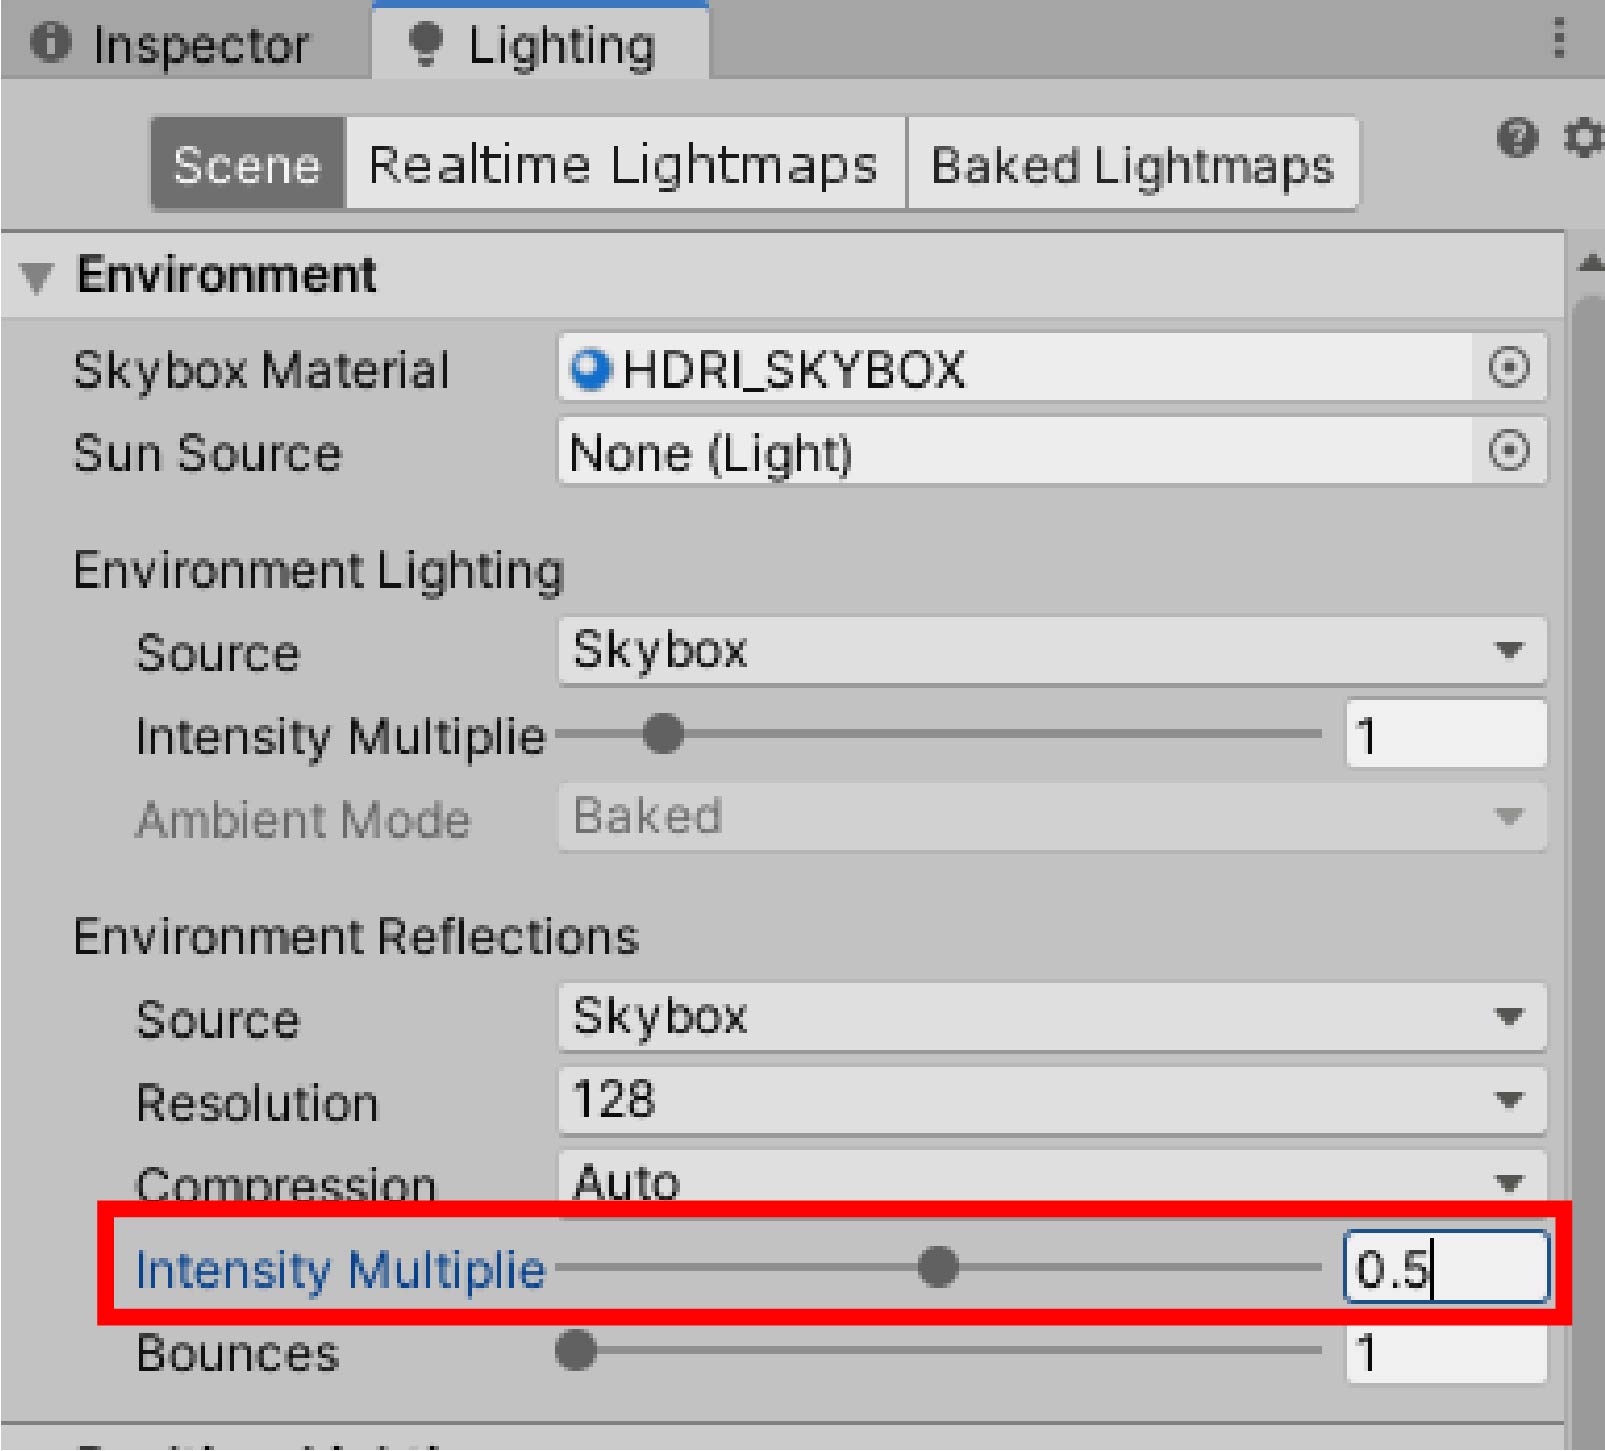
In this case, we changed the value from 1 to 0.5. The boundary is more clearly expressed.
Let’s look at the other side.
The light is slightly shining and the color is gray instead of pitch black.
In this way, lighting can be easily expressed.
Other objects are also placed.
It is not necessarily a perfect representation of realistic lighting, but by generating lighting from HDRI, you can represent lighting closer to reality.
Introduction to Skybox Materials
In this case, we downloaded an HDRI from a website and used it as a Skybox.
However, with this HDRI, the background is too realistic and may cause a sense of discomfort when creating a game.
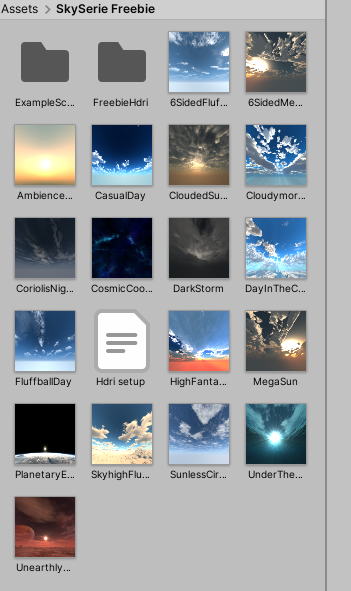
To avoid this, we will introduce the “Sky” HDRI / Skybox material distributed on the Asset Store.
The material introduced here is ” Skybox Series Free “.
Download and import it from the Unity Asset Store.
After downloading and importing is complete, save the material to any location in the project.
Select one of the objects with the image icon to display the inspector window.
This is one of the Skyxbox materials.
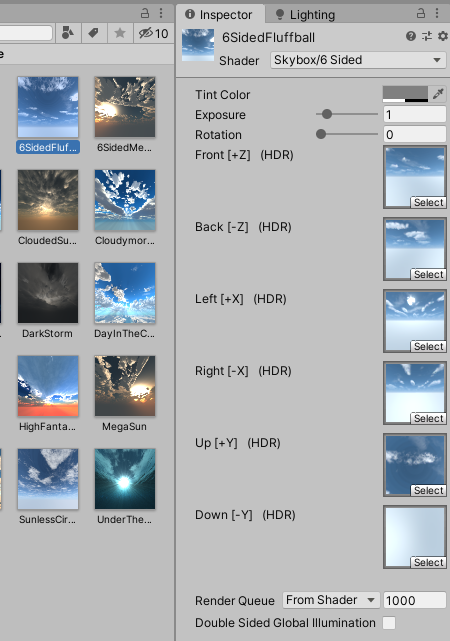
There are two main types of Skybox materials.
One type is 6 Sides with 6 images pasted on the surface.
The other is the Cubemap type, in which an HDRI image is made into a Cubemap and materialized.
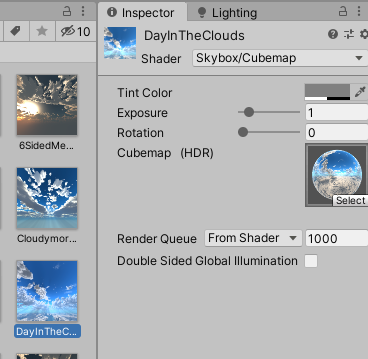
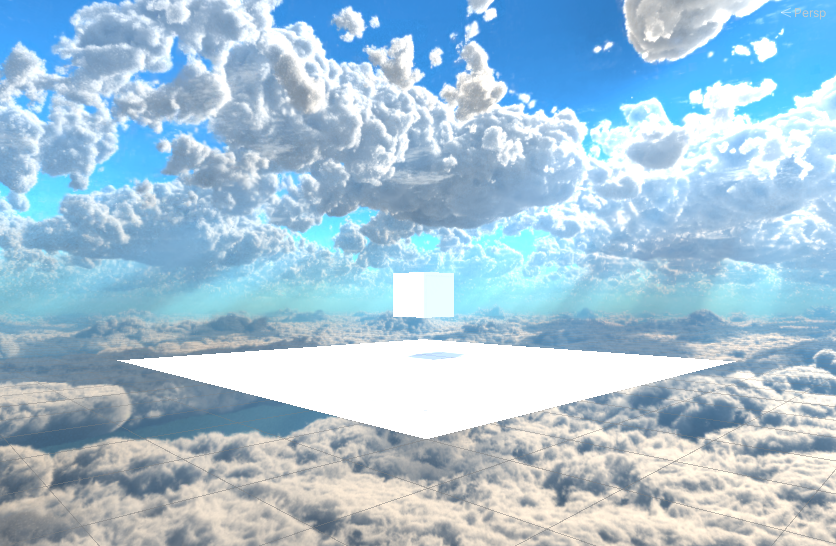
Let’s use this “DayInTheClouds” in this case.
Follow the same procedure as before to generate lighting.
HDRI lighting is applied to the objects in the scene window and the objects in the scene are now brightened.
The Unity Asset Store distributes appropriate Skybox materials for creating VR scenes set in the outside world, so you can use whatever you like.
That’s all for the Skybox settings.
Next, we will explain how to use Reflection Probe.
Let’s experience the scene to be created.
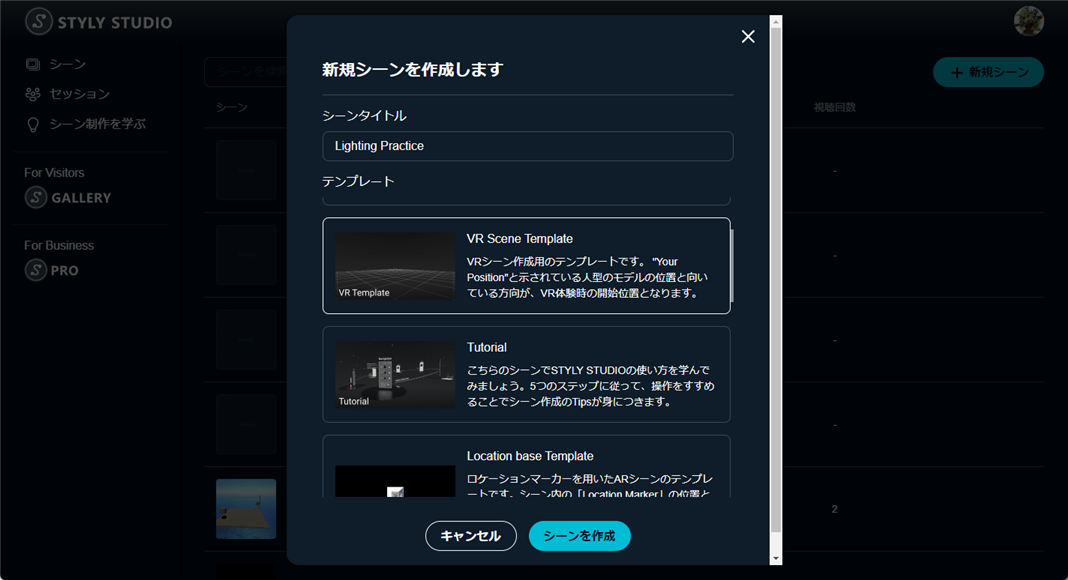
Finally, to wrap up the course, let’s practice creating spatial effects using Light objects and HDRI/Skybox.
Create a scene similar to the following

Lighting Practice: https: //gallery.styly.cc/scene/0b03c2f3-a2eb-484c-9ea8-a39dd8d702cd
Create a space set indoors and use lighting to enrich the space.
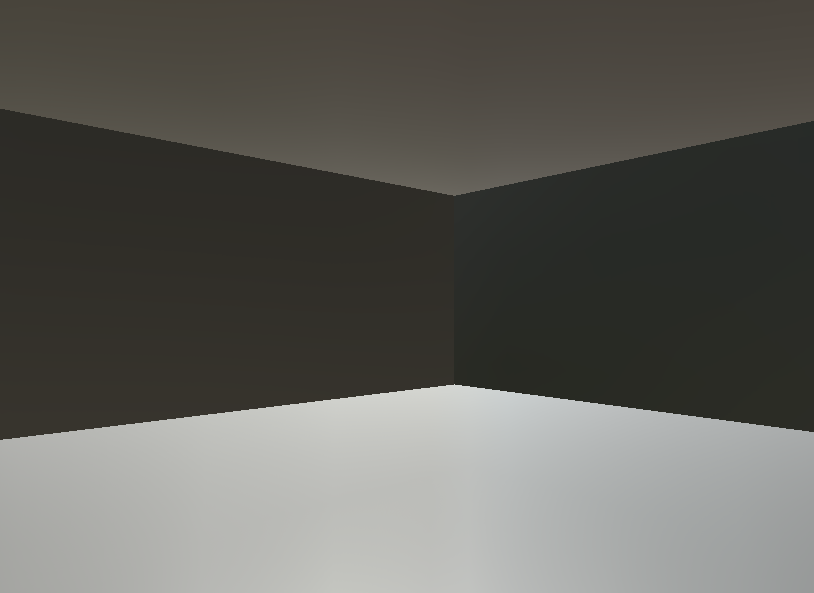
Creating a space
Select New Scene to create a new scene.
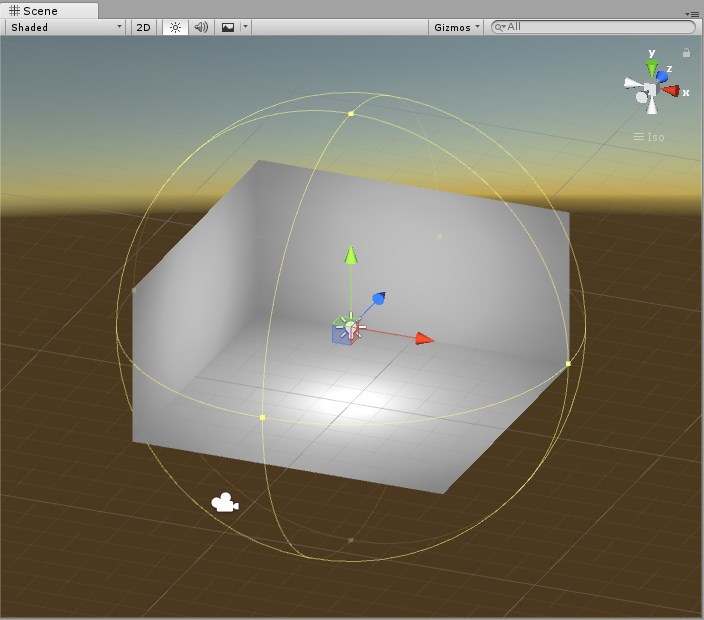
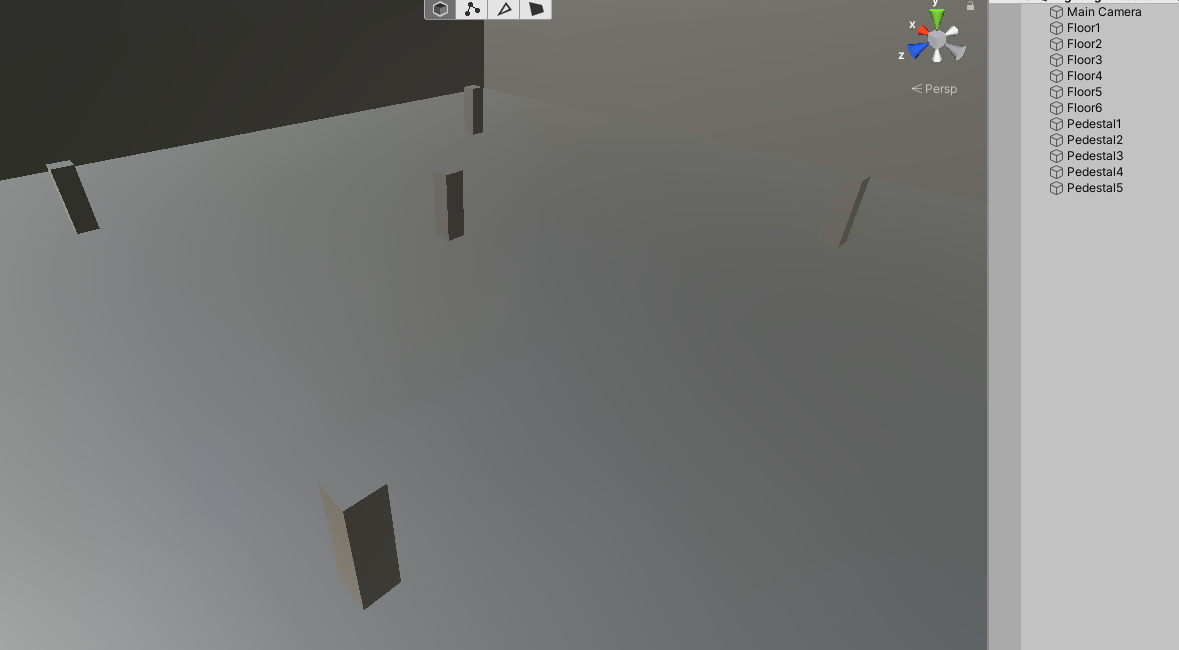
Prepare six Cubes from the Hierarchy window.
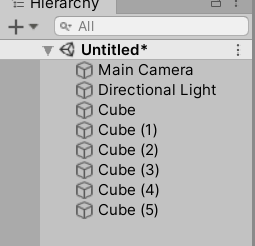
Each Cube will be a wall or floor of a room.
Place them with the following names and Transforms.

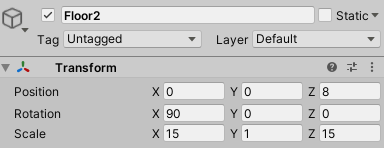
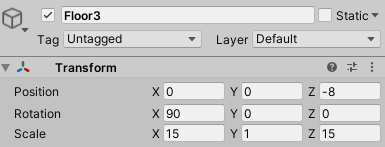
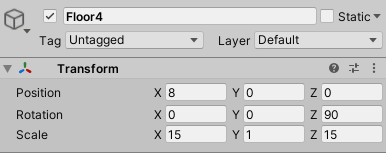
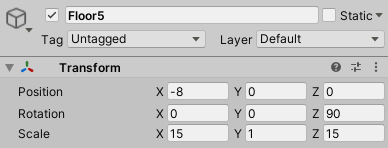
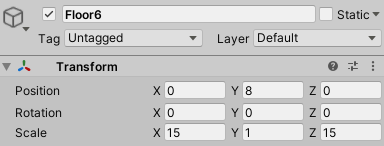
They will then be arranged in a cube shape as shown in the image below.
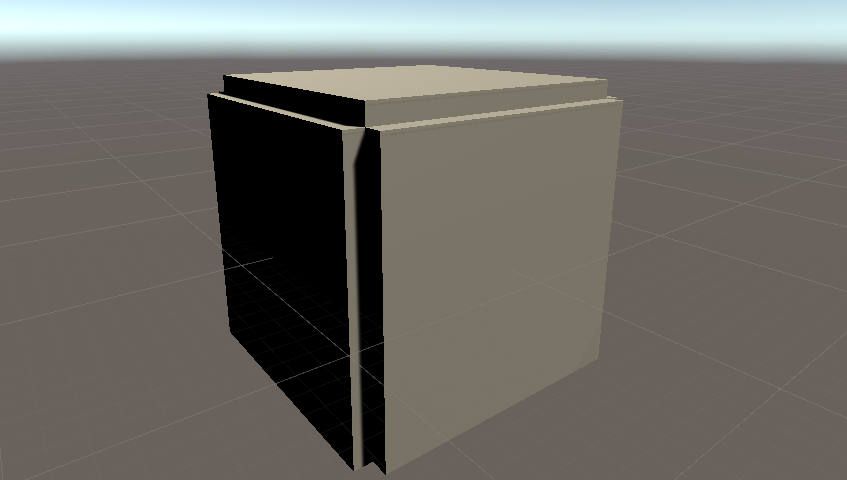
Generating Lighting
The Direction Light, which is placed by default, is not used this time, so let’s delete it.
Next, let’s generate lighting using HDRI.
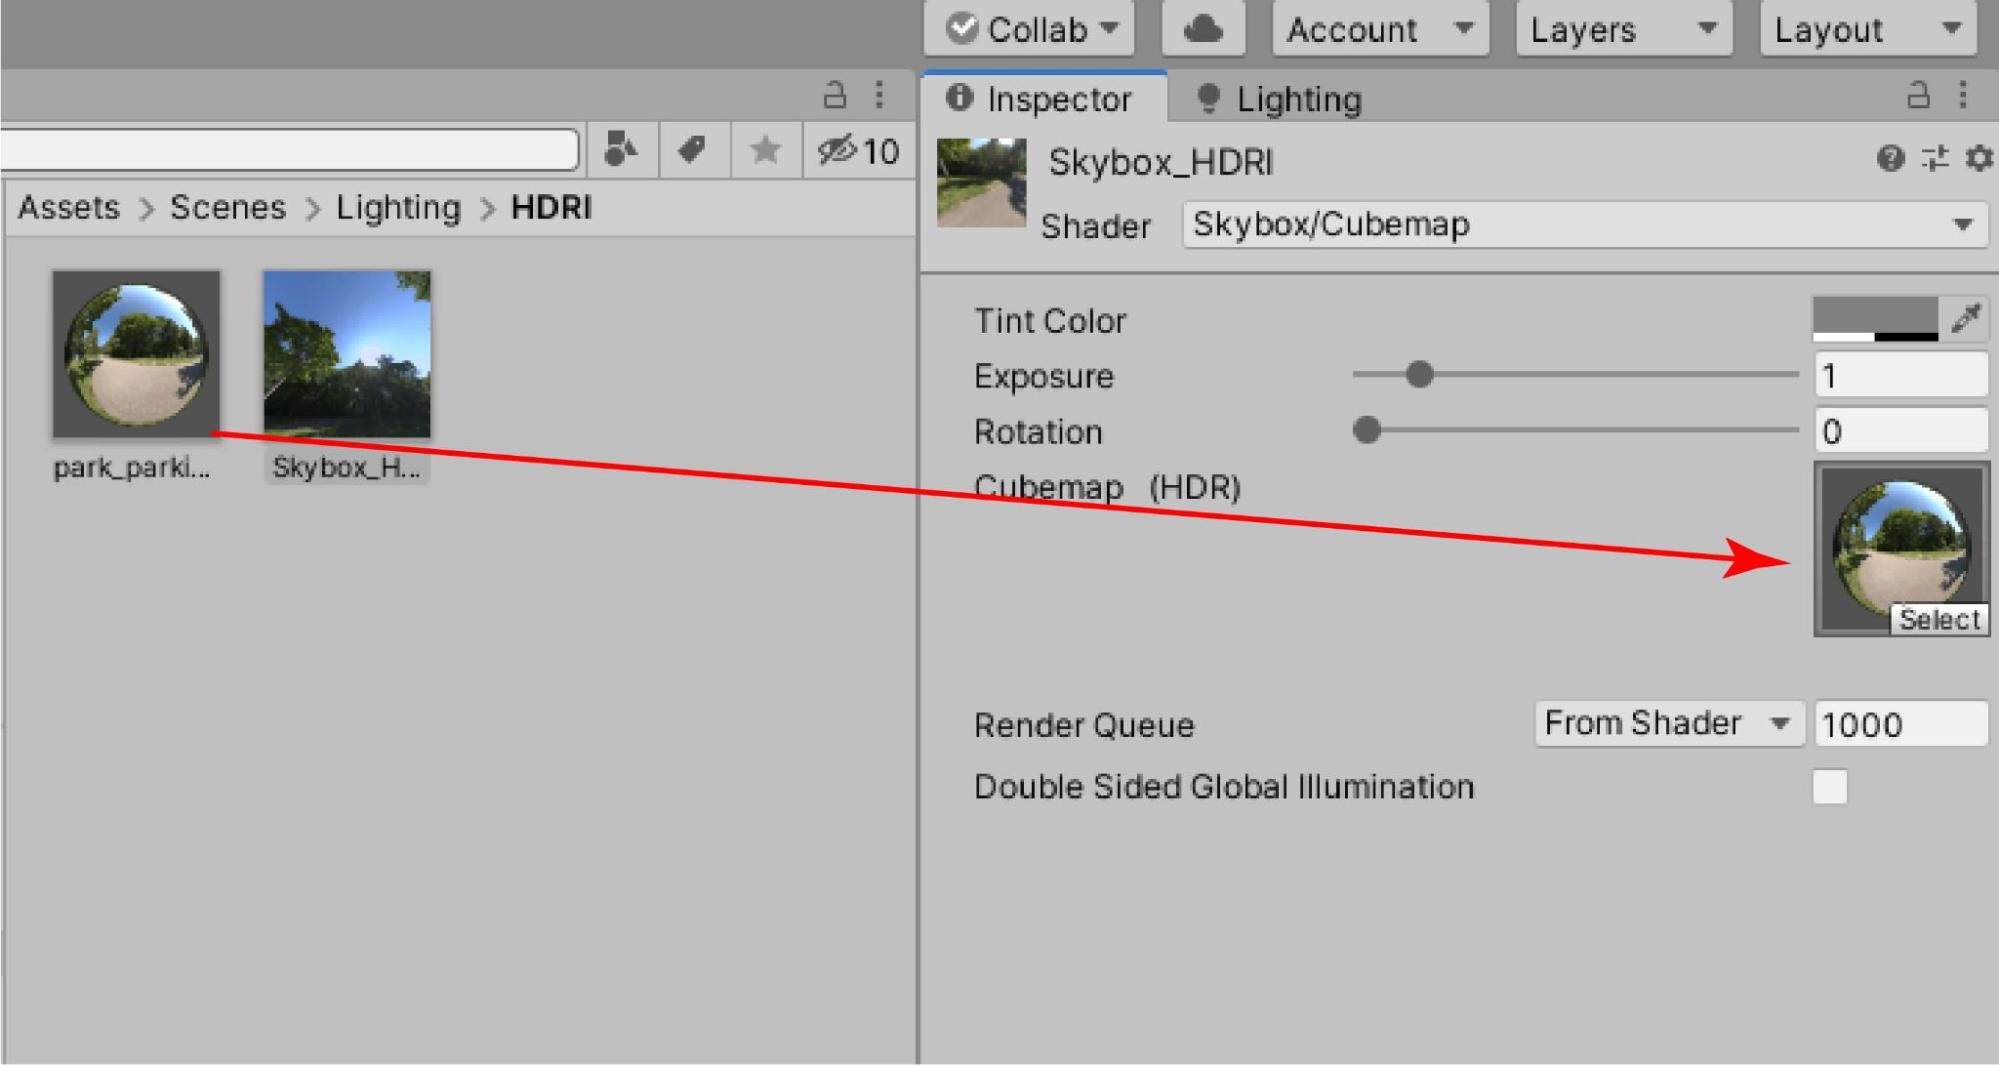
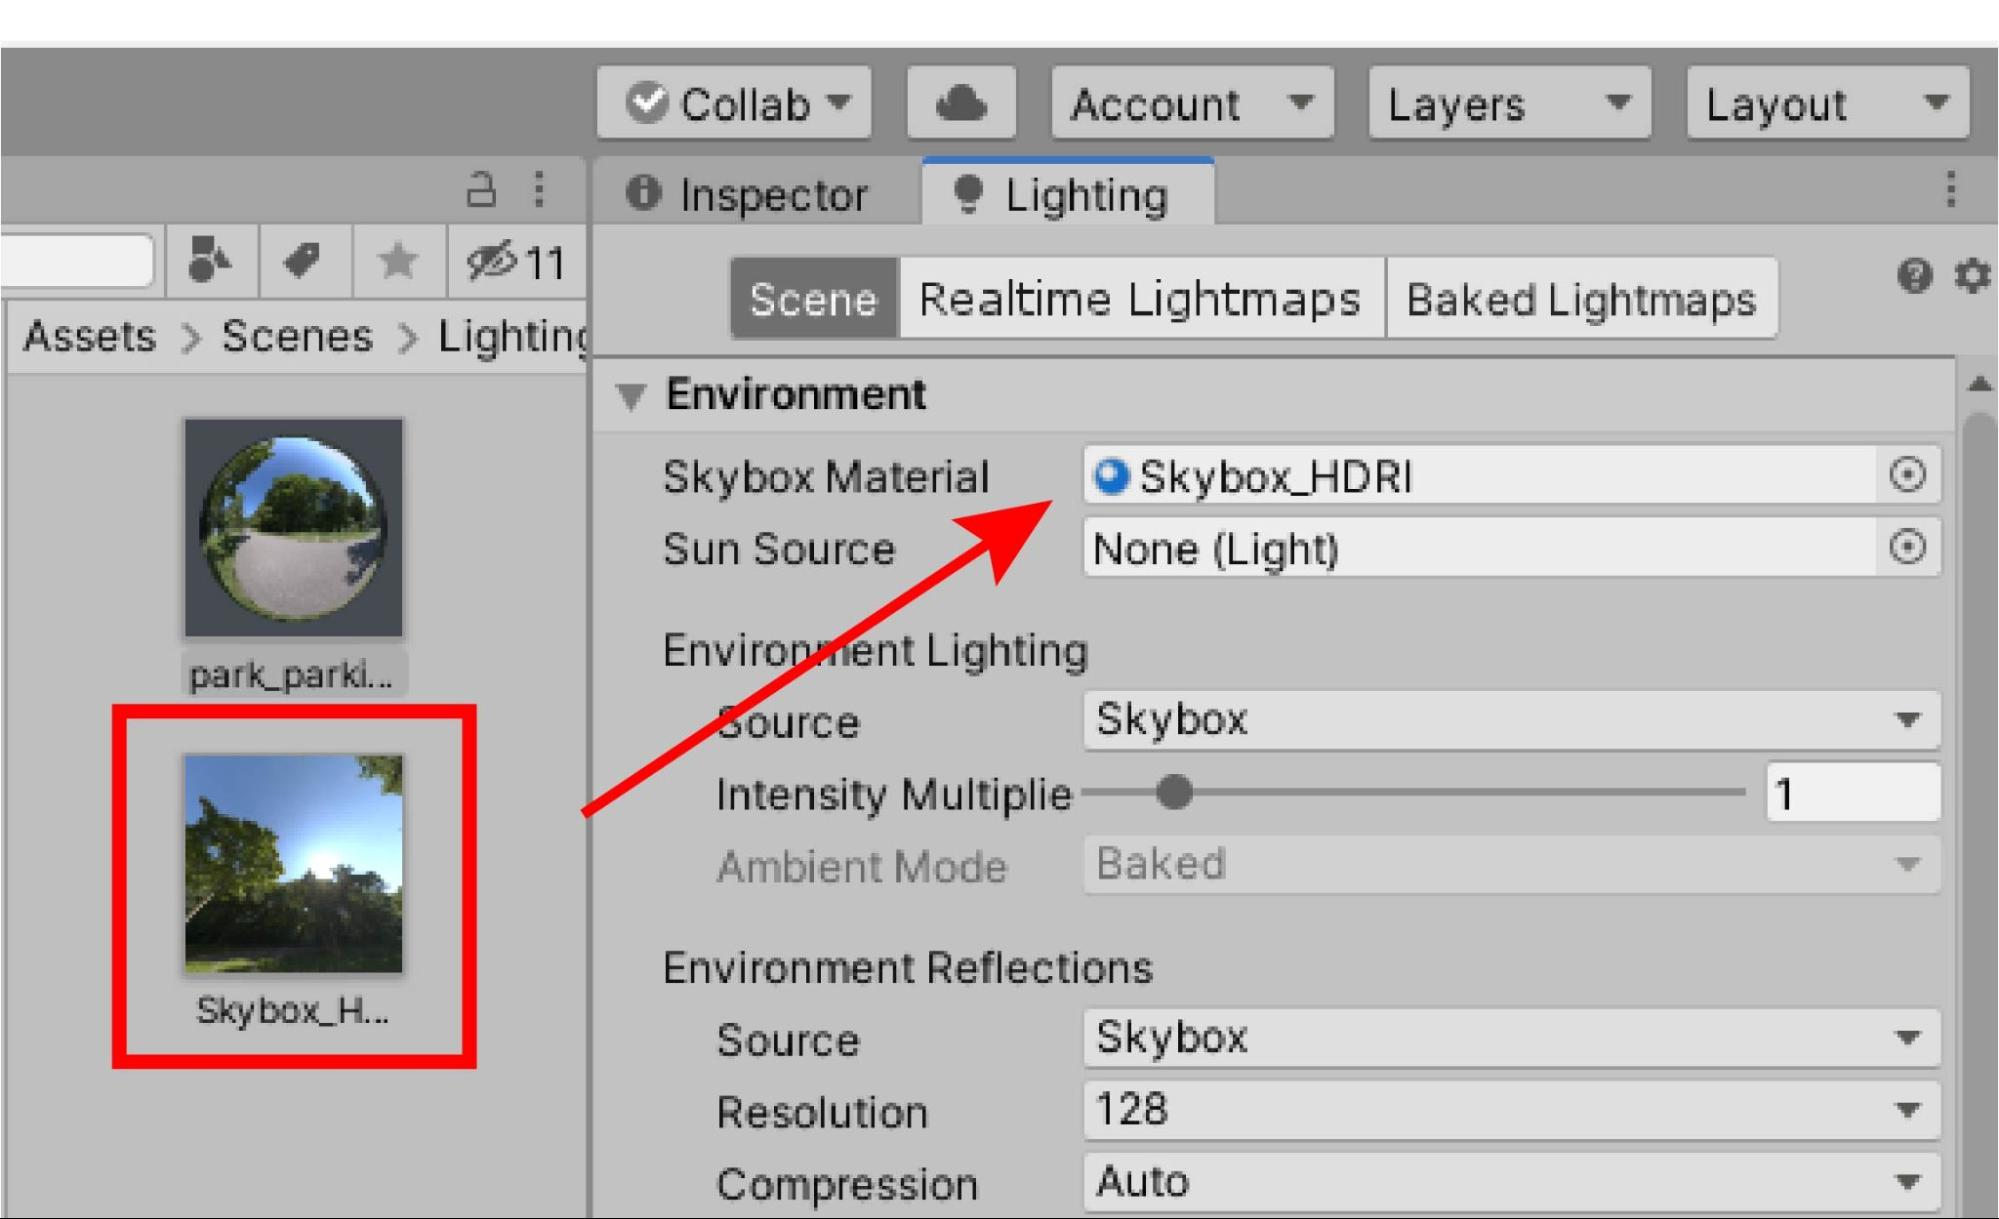
HDRI can be any data; this time we will use the “park_parking_1k” data downloaded earlier.
Display the Lighting window and apply the “Skybox_HDRI” Skybox material prepared earlier to the Skybox Material.
As in the previous step, click “Generate Lighting” at the bottom of the Lighting window to generate lighting.
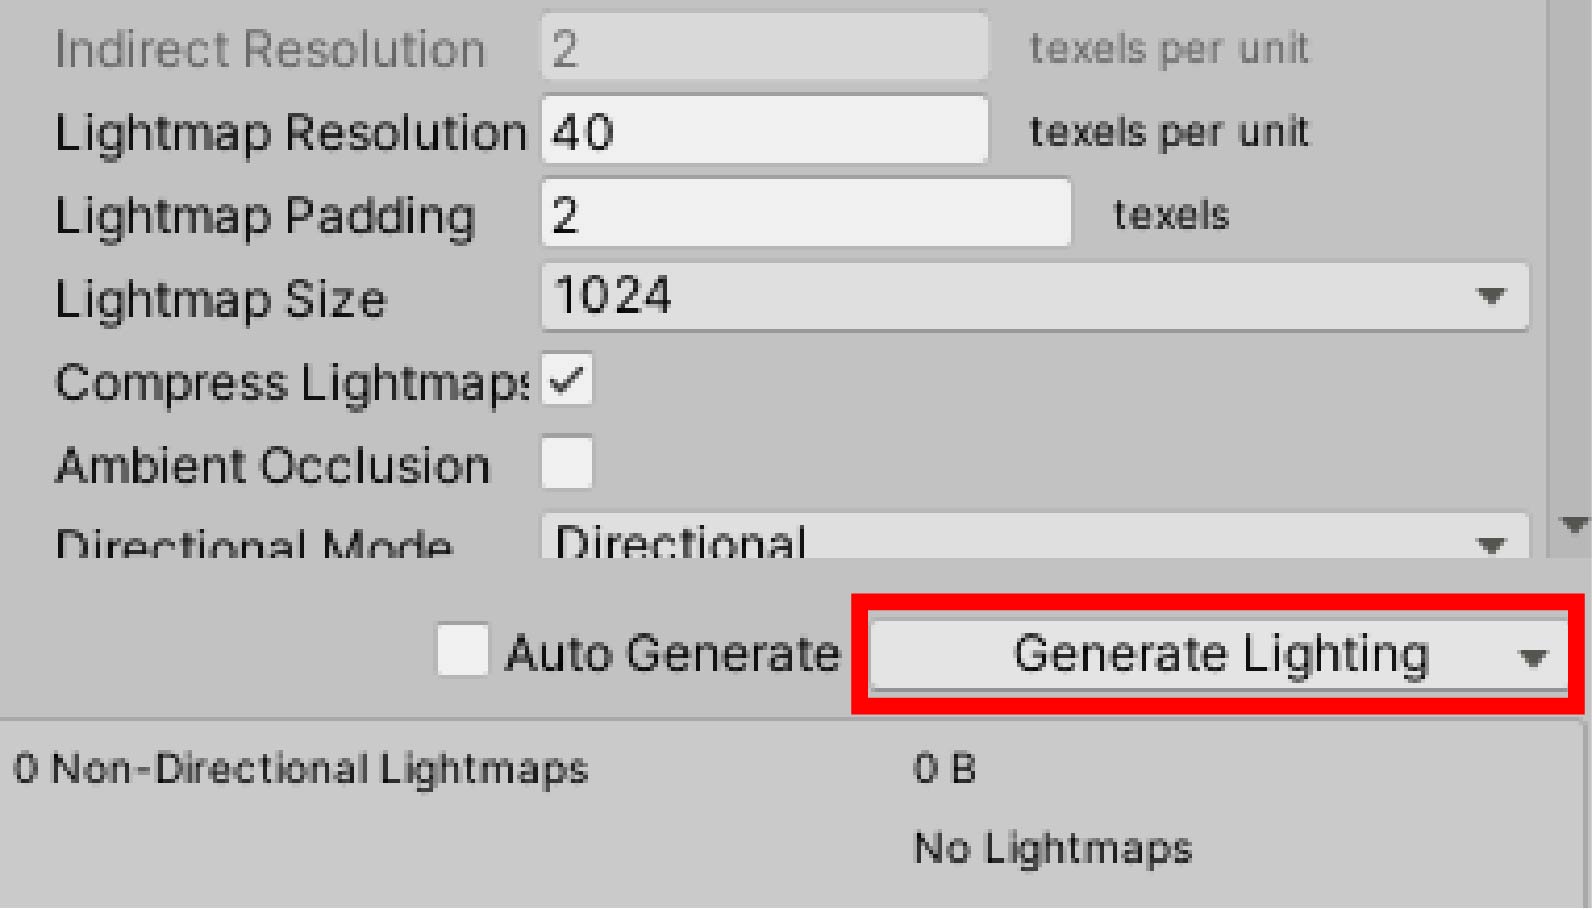
The Save Scene window will appear, and you can save the scene to any name and location.
In this case, we will save the scene under the name Lighting Practice.
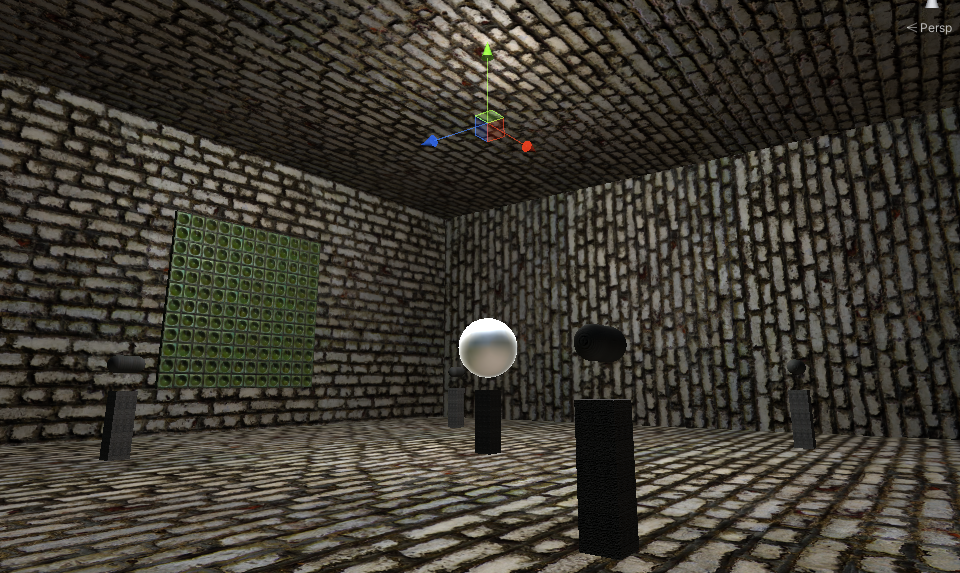
When lighting is generated, the entire space will be brightened.
The inside will also be brightened.
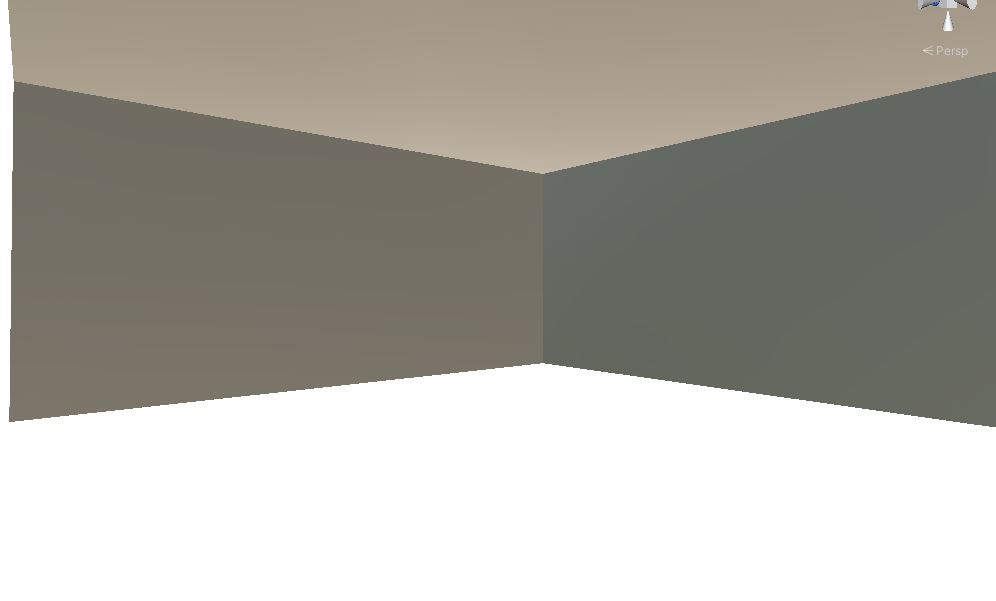
In its current state, it is too bright, resulting in a white-out effect.
The intensity of the lighting can be adjusted by adjusting the “Intensity Multiplie” value in the Environment Lighting section of the Lighting window.
In this case, the value is set to 0.3.
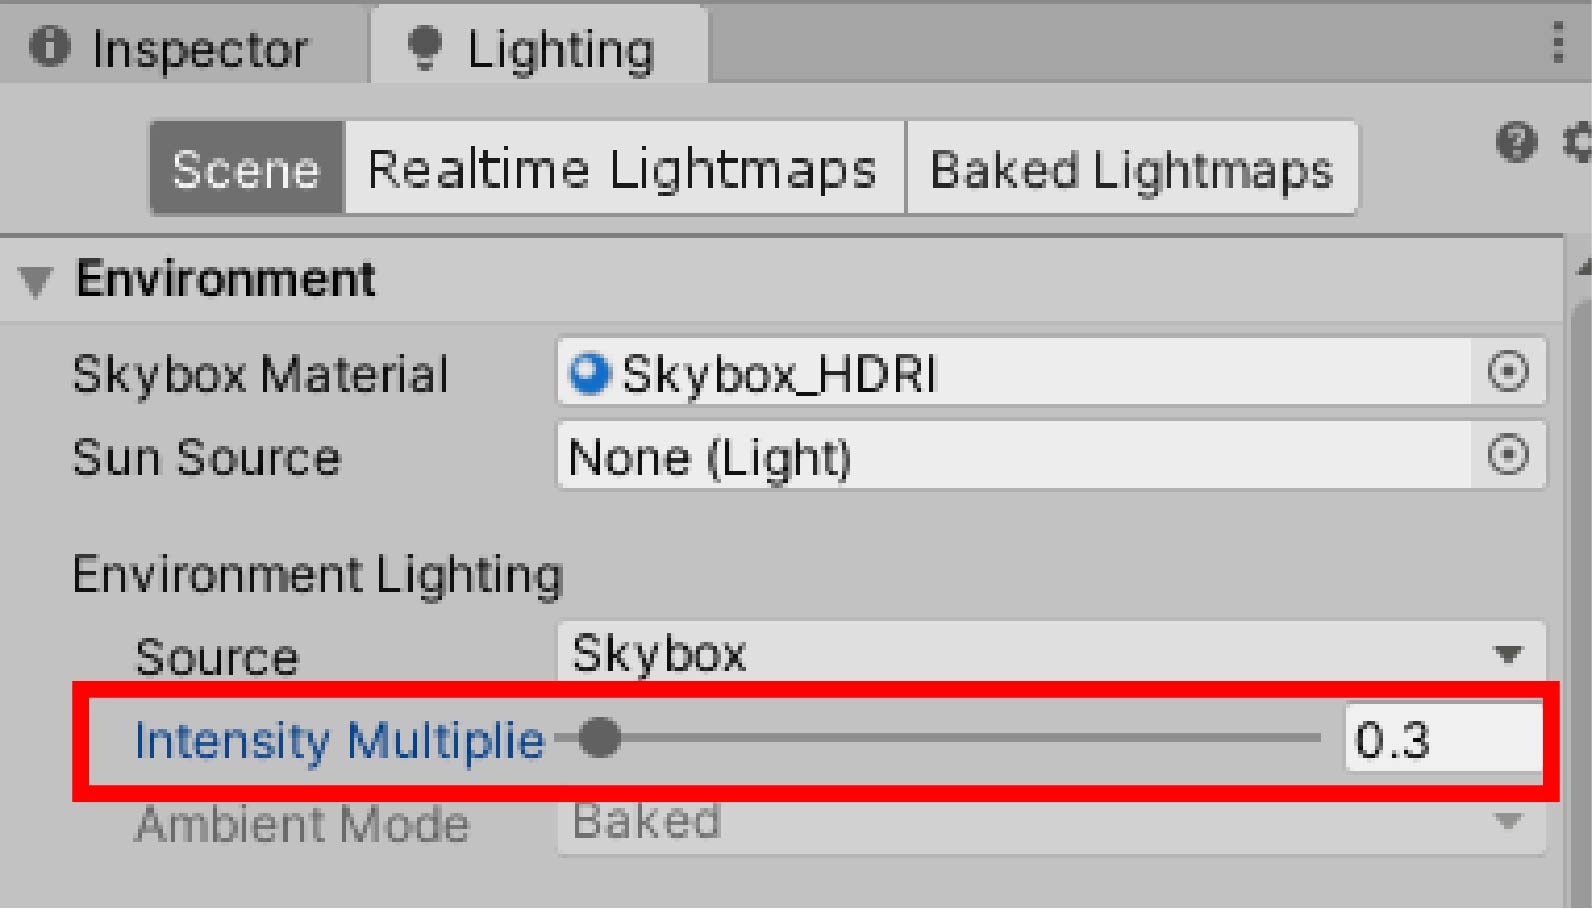
The overall brightness is now just right, as is the brightness of the Point Light.
We can now place objects in this space and use the lighting to create the effect.
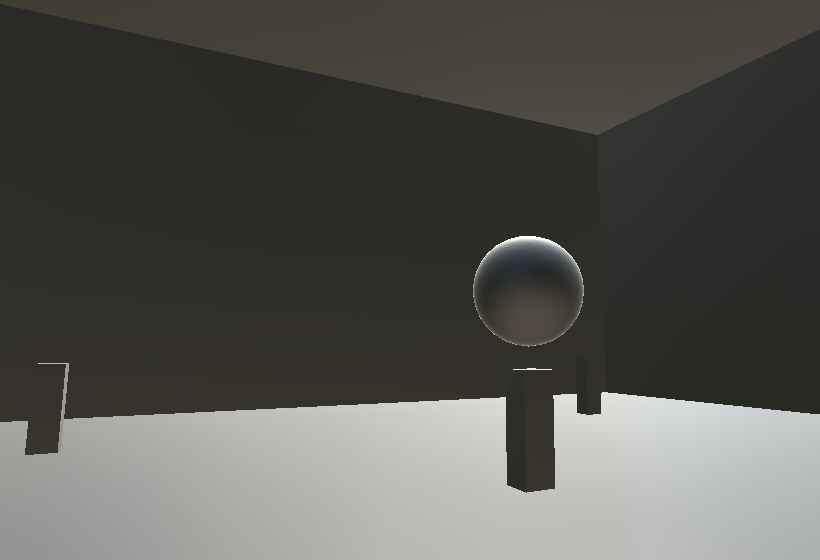
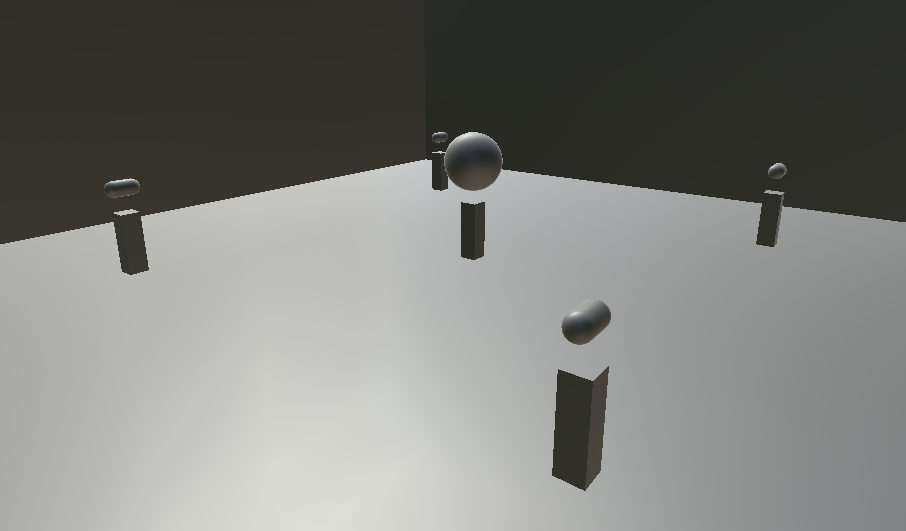
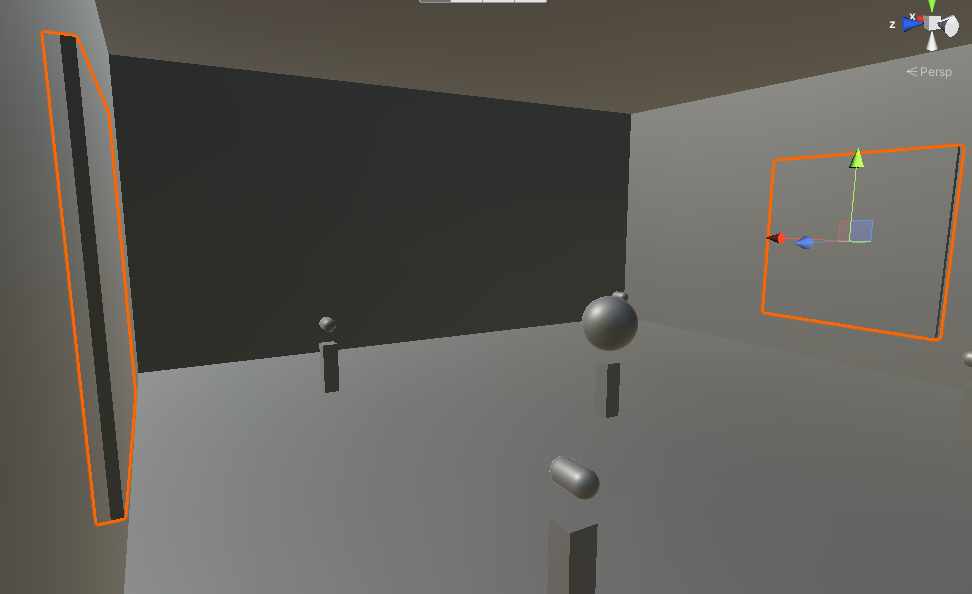
Creating Objects
First, we create a pedestal to place the object.
Create five Cubes from the Hierarchy window, name them as shown below, and place them.

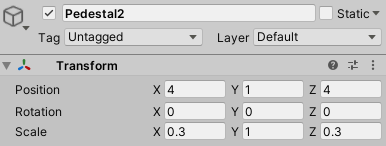

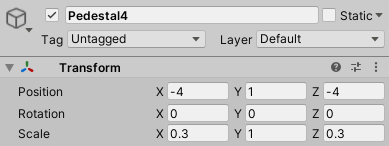
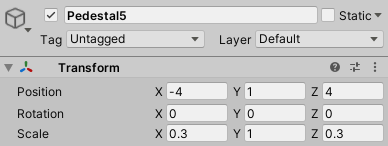
The pedestals have been placed.
Let’s place the objects.
Create a Sphere from the Hierarchy window.
Name the Sphere as follows and place it.

The object has been placed in the center.
Create a Sphere from the Hierarchy window, name it as follows and place it.
Next, place a Capsule type object.
Create four Capsules from the Hierarchy Window, name them as follows and place them.


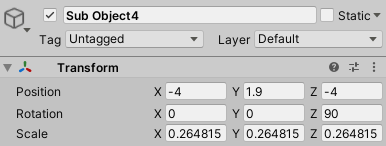
Sub Object placement is complete.
Next, place the Wall object.
Create two Cubes from the Hierarchy Window, name them as follows and place them.
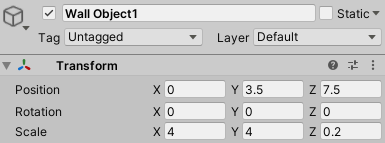
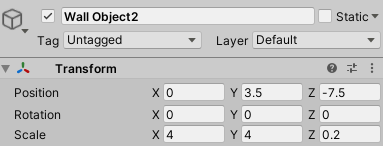
The wall objects have been placed.
Attaching Textures
Let’s add textures to each object.
Download textures from the Asset Store.
This time, we will use ” Yughues Free Architectural Materials,” which are free to use.
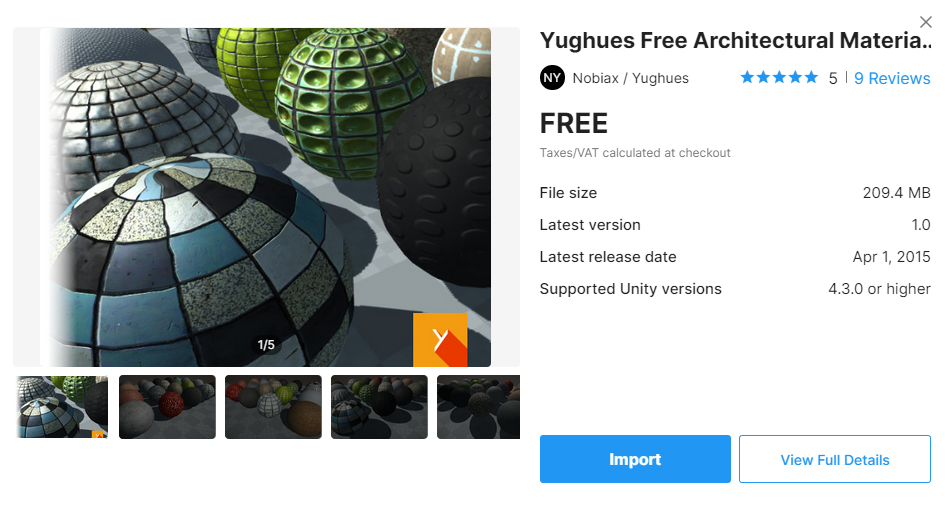
The Yughues Free Architectural Materials will be displayed, so download and import it.
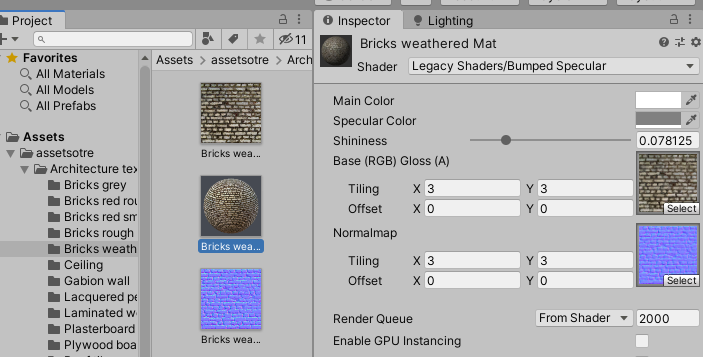
After the download is complete, apply the material to the object.
You can use any material you like, but in this case we will apply the following.
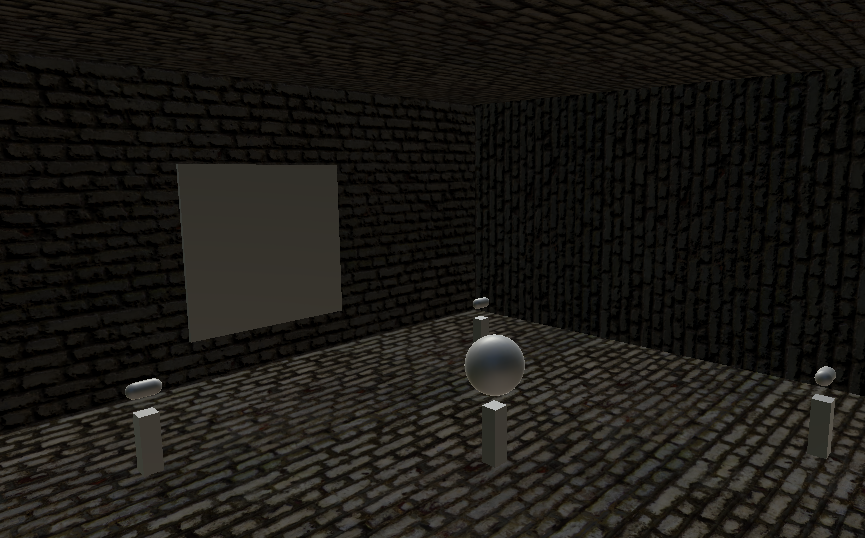
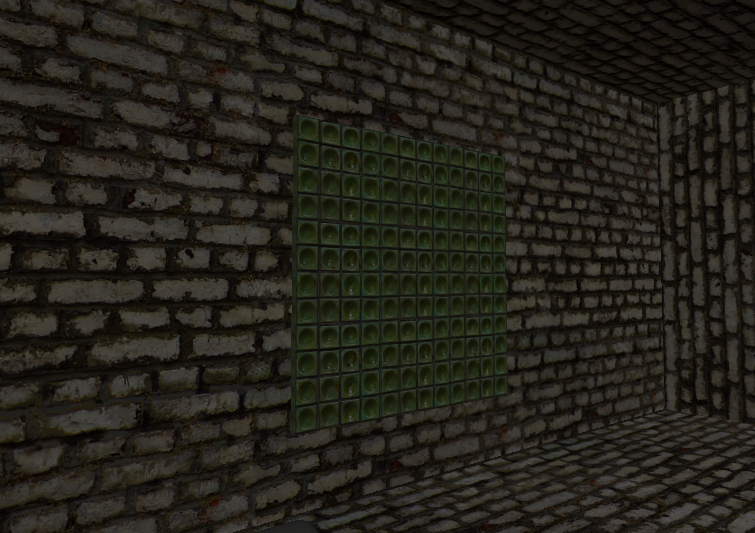
For the floor, we will apply “Bricks weather Mat”.
The result is as shown in the image.
Skip the Main Object because we will apply a different material to it.
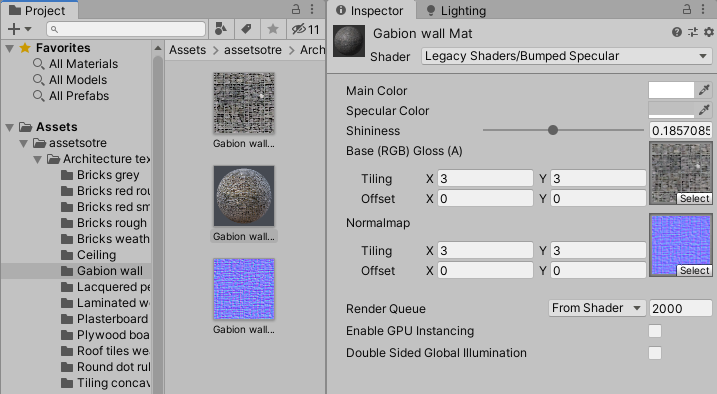
Apply “Gabion wall Mat” to the Pedestrial.
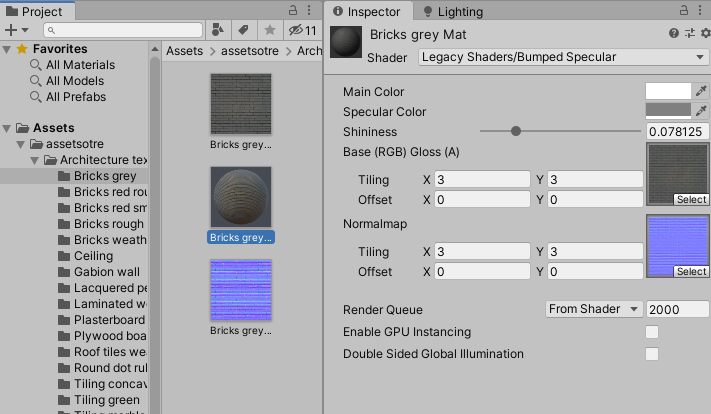
Apply “Bricks grey Mat” to the Sub Object.
The result is as shown in the following image.
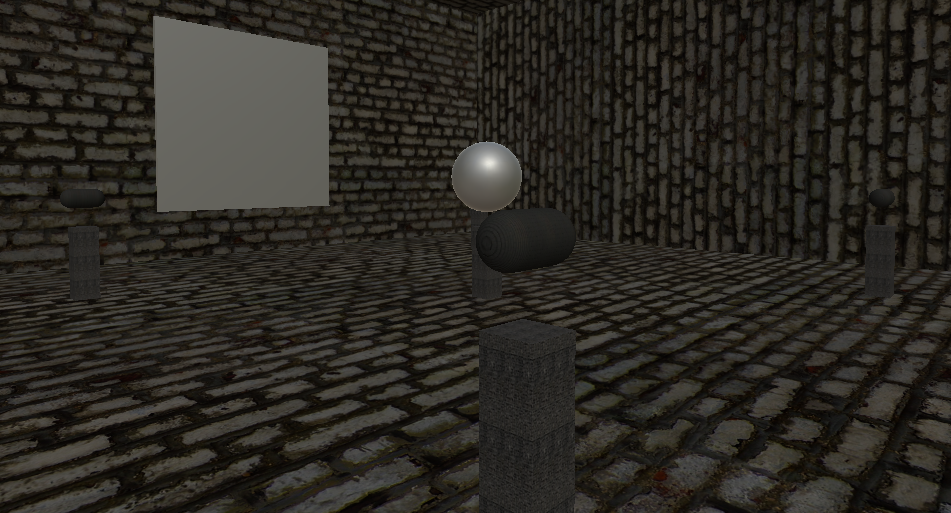
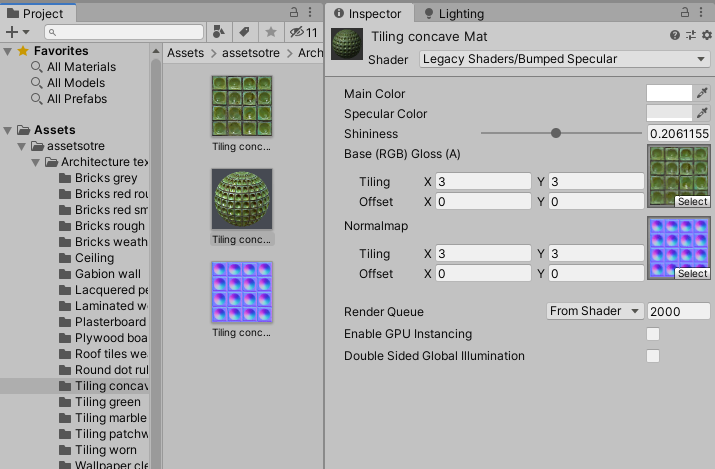
Apply “Tiling concave Mat” to the Wall.
Finally, apply the material to the Main Object.
In this case, we will apply a material like a pearl to the Main Object.
We will apply the material from Unity’s Standard shader and adjust the texture to make it look like a pearl.
Right-click anywhere in the project window and create a Material from Create.
Name it “Pearl” and set the Metallic and Smoothness to the following values

The following is the result when applied to the Main Obejct.
Reflections have been expressed and a pearl-like appearance has been achieved.
This is because the lighting is generated by HDRI and applied to the material’s reflections.
Placing a lighting object
Since the space is dark at this point, let’s place lighting objects to create light.
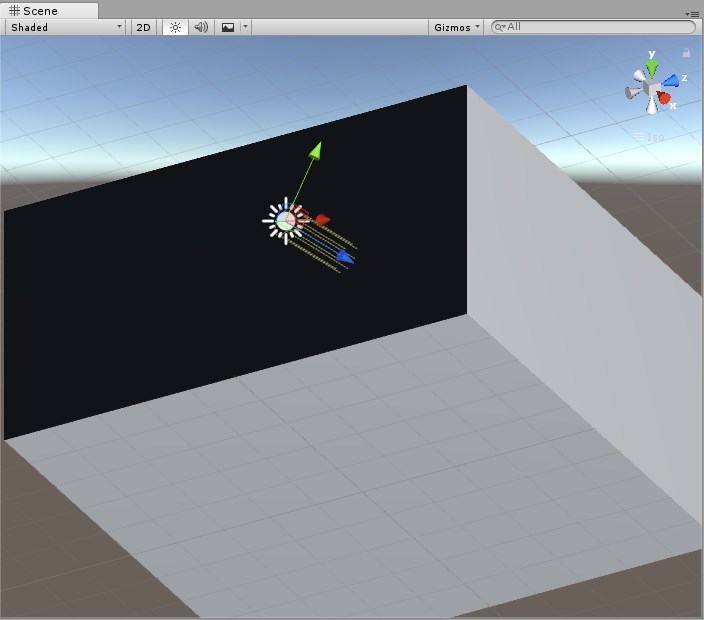
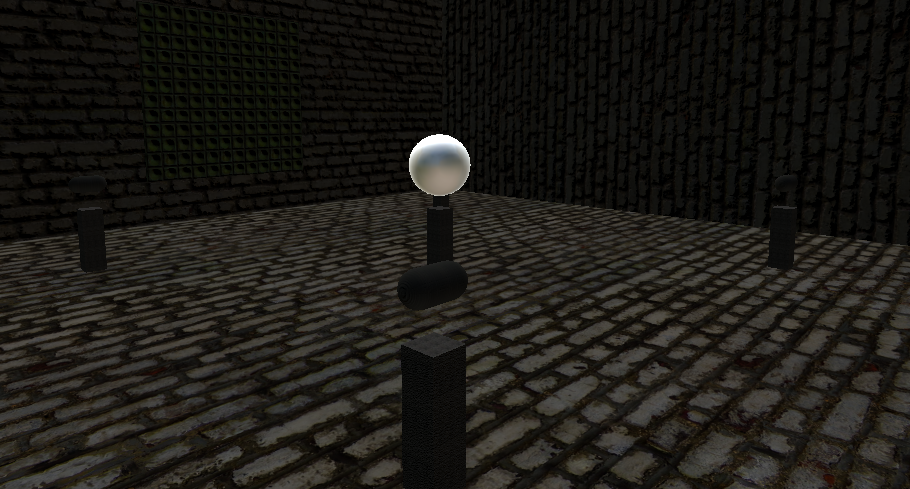
First, place a Point Light to brighten the entire space.
Place it as follows
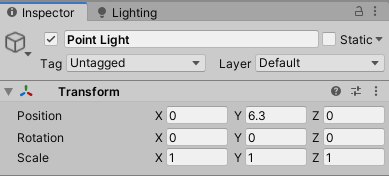
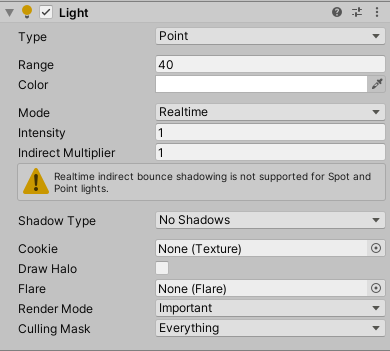
Adjust the light component.
Set Range to 40 and Render Mode to Important.
The entire space is now brightened.
Areas not illuminated by the Point Light are still dark.
Let’s adjust the overall lighting.
The Intensity Multipile in the Lighting window is set to 0.3, but you can adjust the overall lighting by adjusting this value.
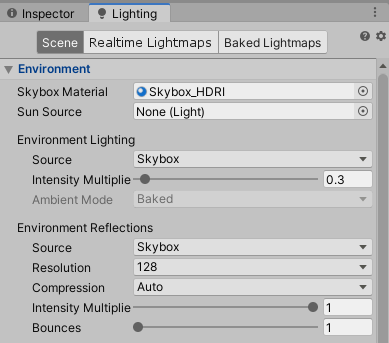
Set it to 0.5.
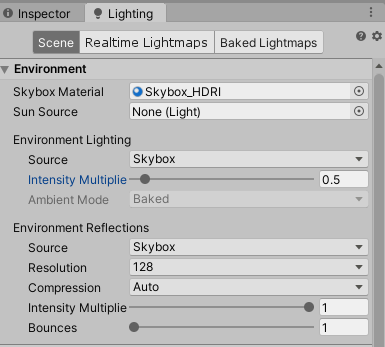
The space is now brighter.
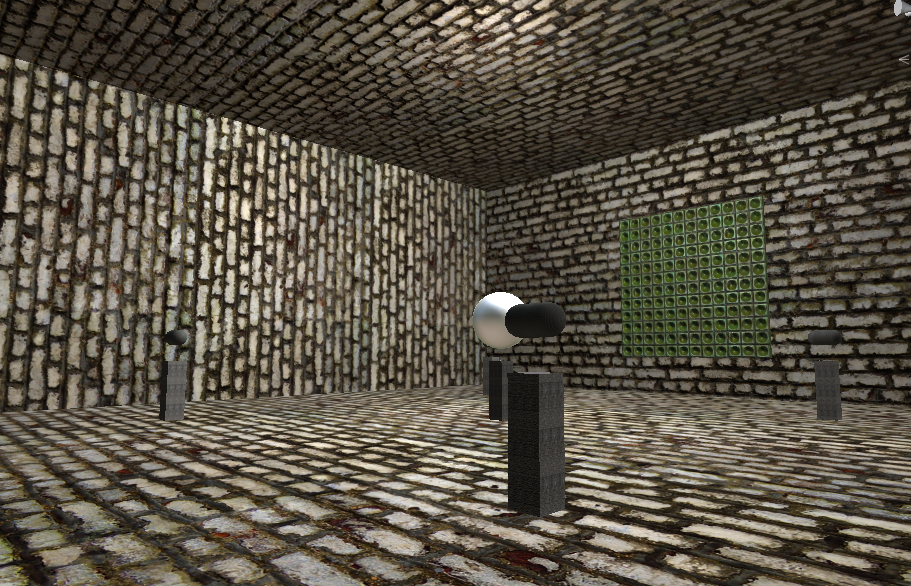
If the brightness of the Point Light is too strong, adjust Range and Intensity to the desired brightness.
When illuminating lights from the top of the room, as in the Point Light placed this time, it will be more realistic if the objects are placed like fluorescent lamps.
Again, we will actually place the object.
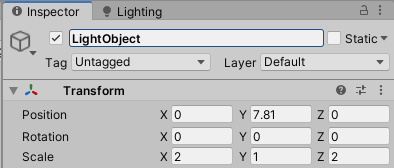
Create a Cube, name it as follows, and place it.
Apply the Emmissive material to the Cube.
Create a Standard shader material anywhere.
Name it Emmissive and place it as follows
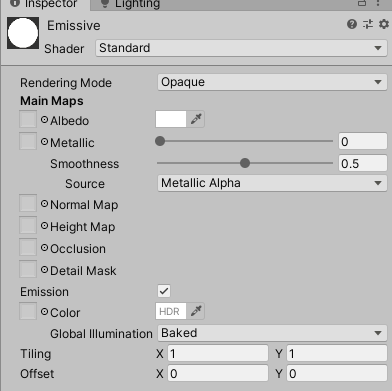
We have placed an object that looks like a fluorescent light.
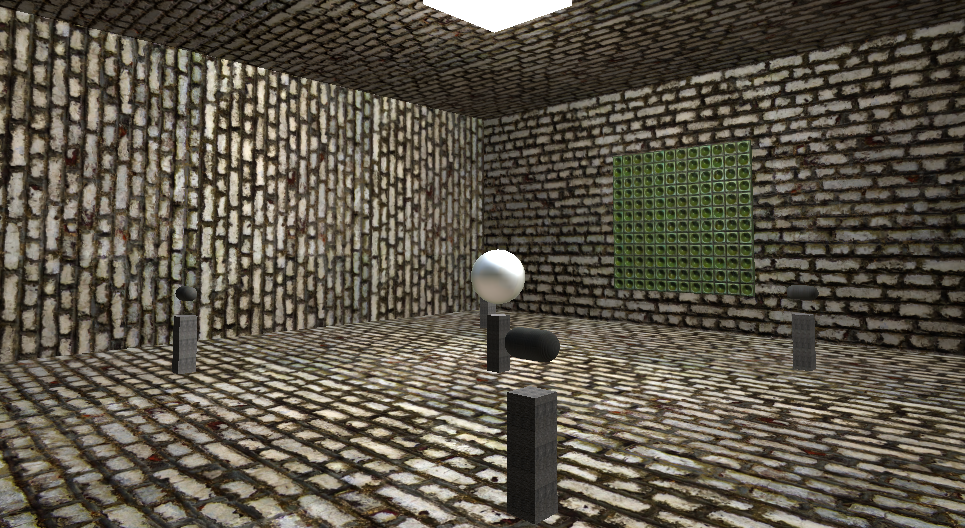
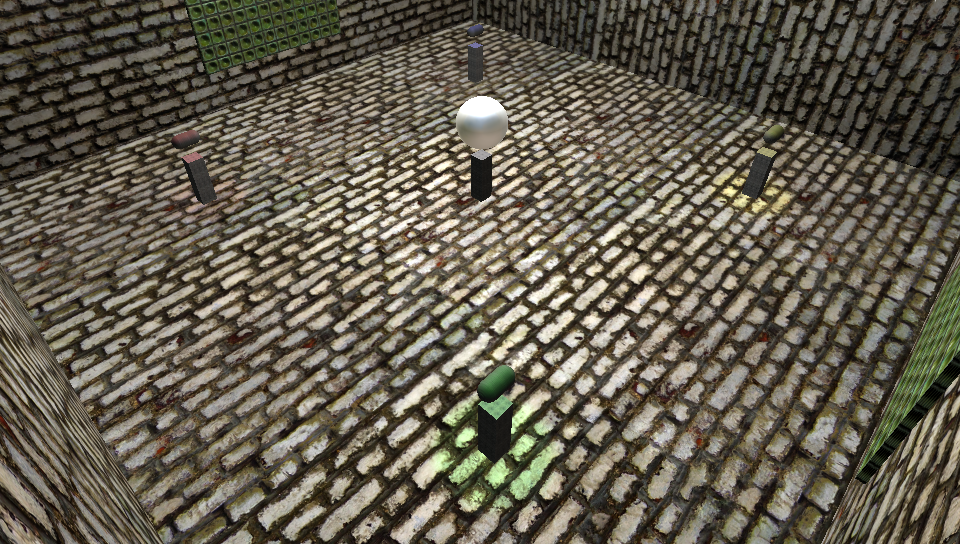
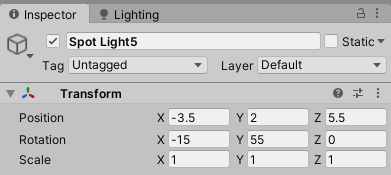
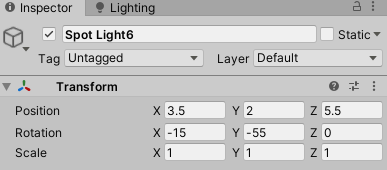
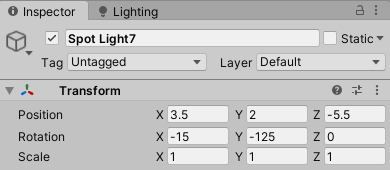
Next, we light the Sub Object with Spot Light.
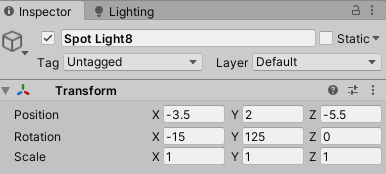
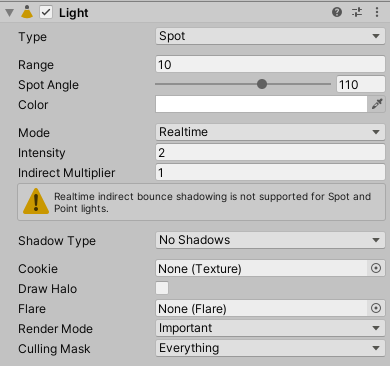
Prepare four Spot Light objects and place them as follows.
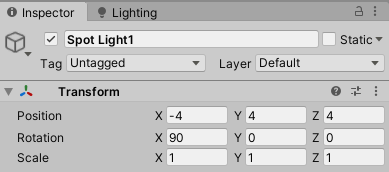
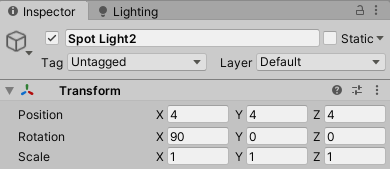
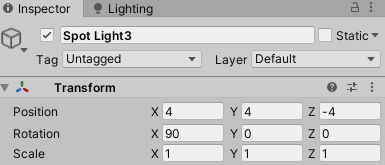
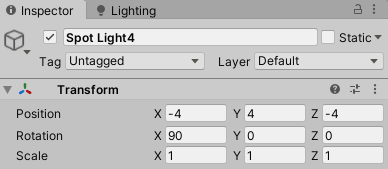
Set the light component of each Spot Light as follows.
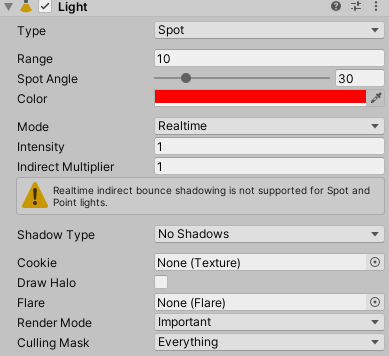
Change the color of each Point Light.
You can use any color you like, but this time, set as follows.
1 : red
2 : Blue
3 : Yellow
4 : Green
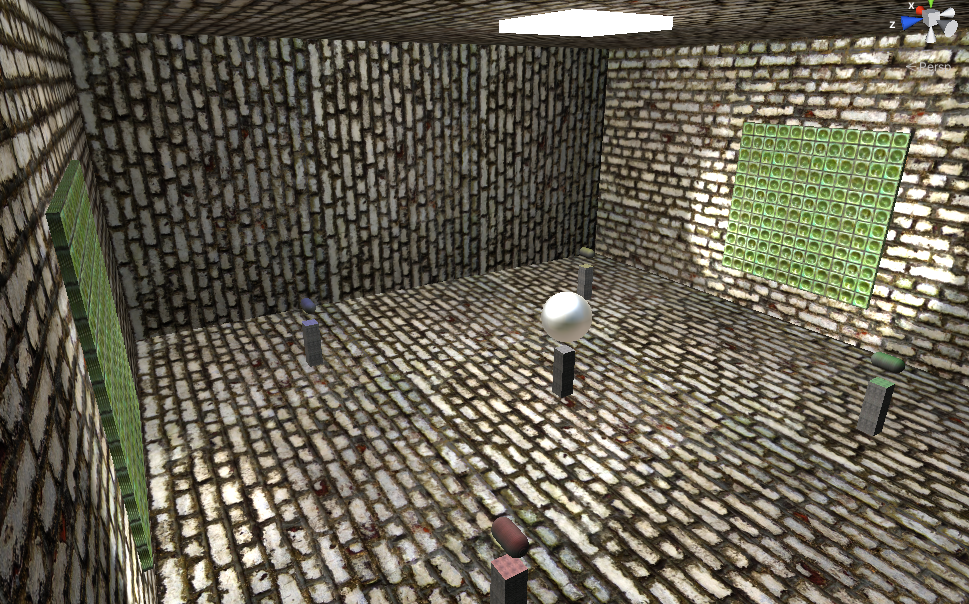
Now we can shine a colored spotlight on the Sub Object.
Next, we will illuminate the Wall Object with Spot Lights.
Create four Spot Lights, name them as follows, and place them.
The light component of each Spot Light should be as follows.
The Wall Object is now illuminated.
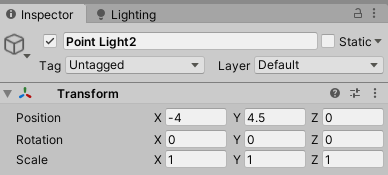
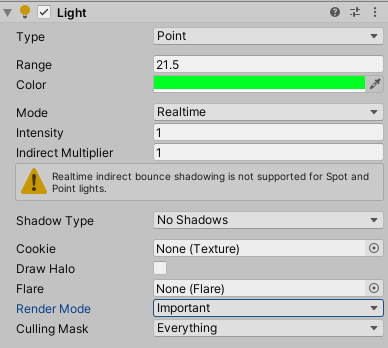
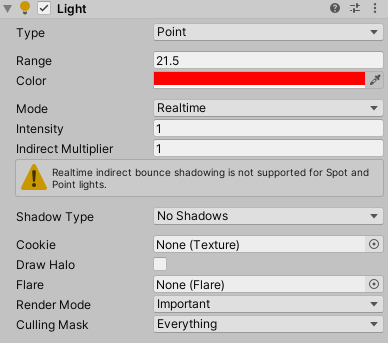
Finally, we will illuminate the wall with the Point Light.
Create two Point Lights and place them as follows.
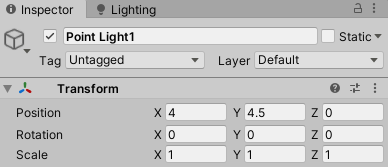
Set the light component of Point Light 1 as follows
Set the color to green and the Render Mode to Important.
Set the Point Light2 light component as follows
Set the color to red and the Render Mode to Important.
All light settings are now complete.
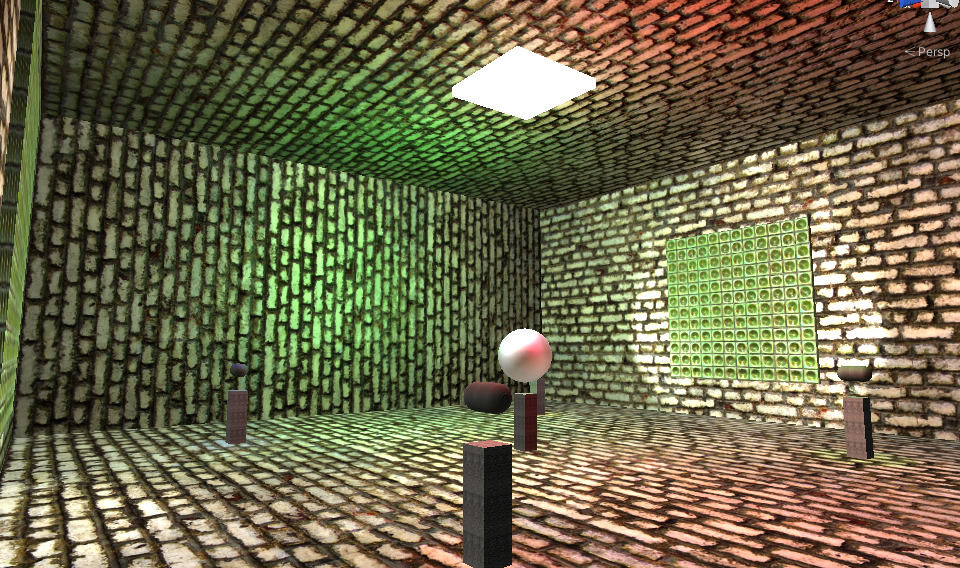
Compared to the state where there were no lights, the color information has increased and the space has become richer.
upload to STYLY and add effects
Save your scene and upload it to STYLY.
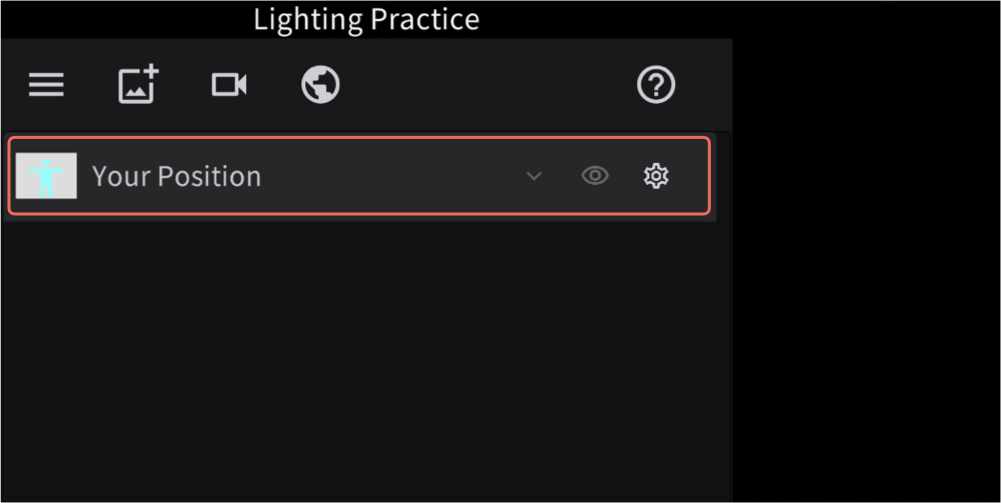
Create a VR scene, name it Lighting Practice.
Delete all objects placed in the scene except Your Position.
Go to [ My uploads ] > [ Unity ] and place the Lighting Practice scene you just uploaded.
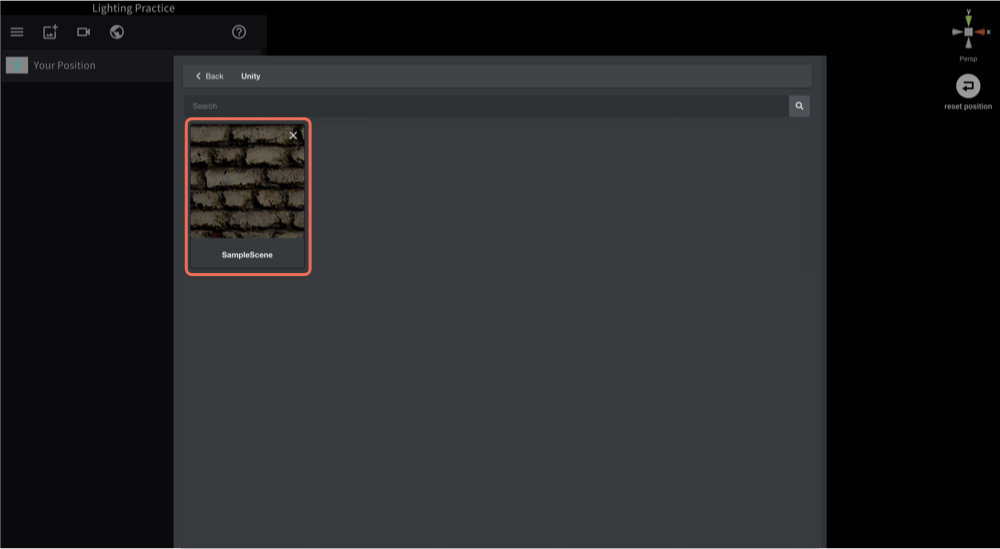
The scene has been placed.
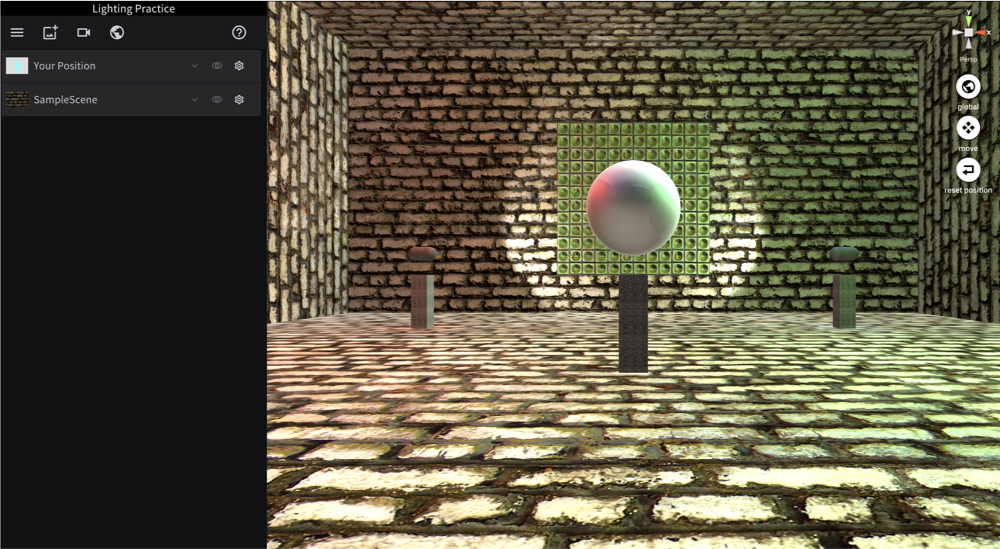
You can leave the scene as it is, but you can use a STYLY asset filter to enrich the light.
Select a filter for the STYLY asset.
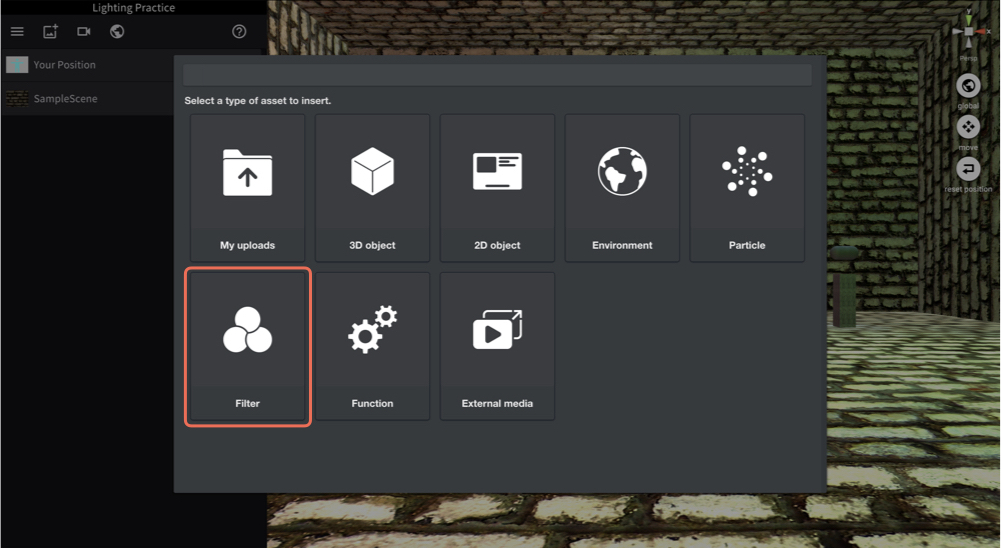
In this case, select Standard.
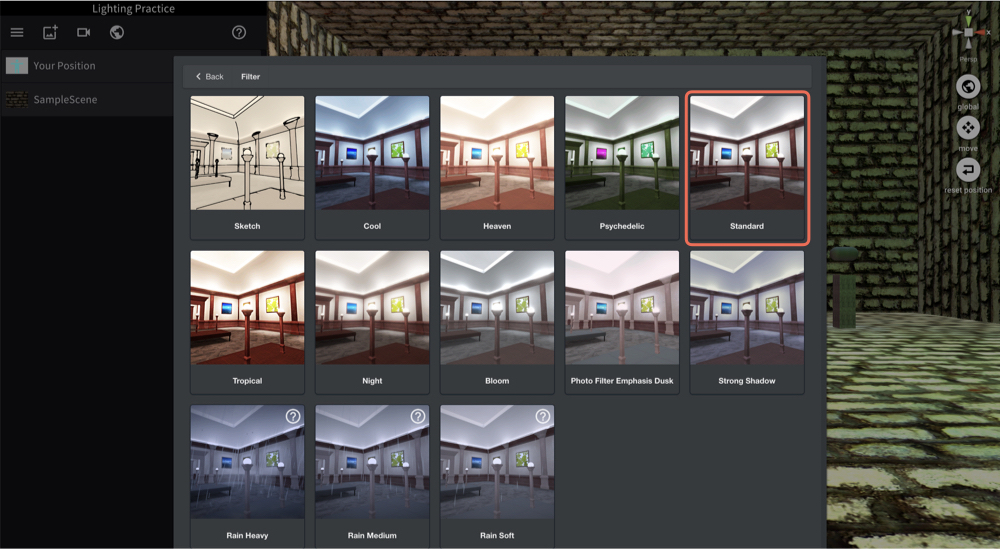
In this case, I chose PostEffect Standard.
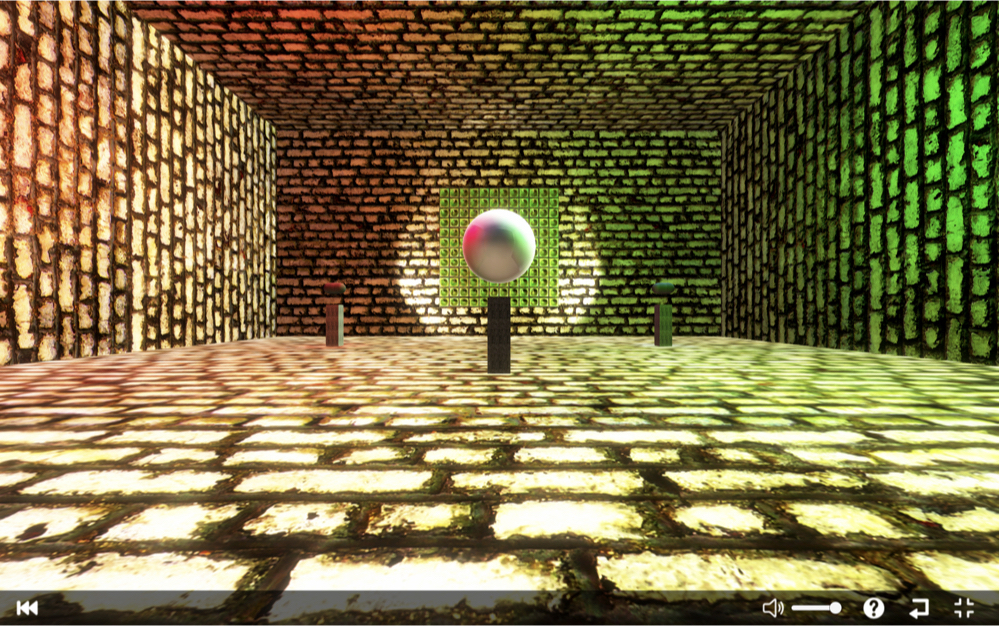
The result is as follows.
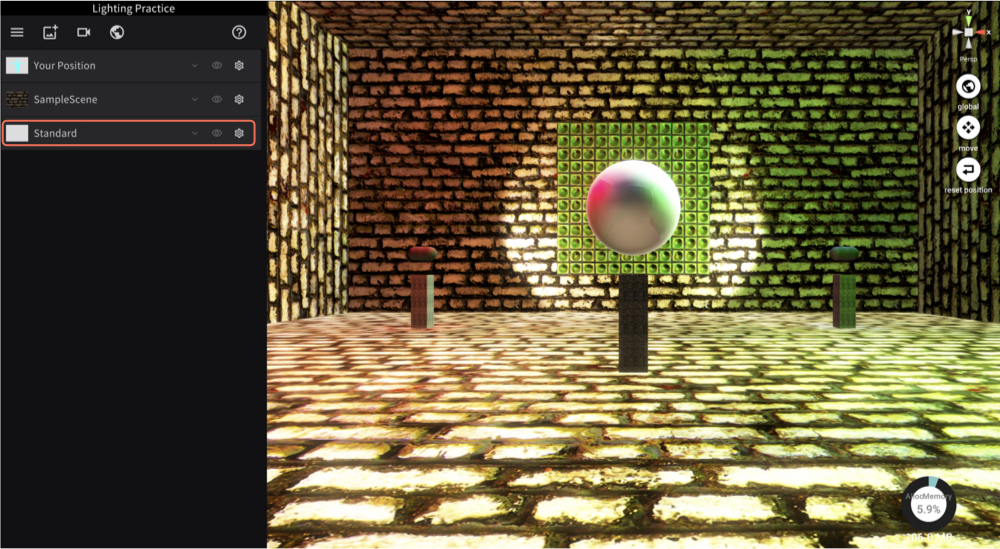
The color saturation is increased and the light is softly expressed.
By using this Filter, you can create a variety of spatial effects.
Try it out!
Finally, publish the scene and you are done.
We have learned how to generate lighting for an entire space using HDRI and how to use lighting objects for individual lighting.
This time we learned about lighting methods that even beginners can easily use.
Let’s challenge ourselves to create rich spatial expressions by making full use of lighting.