In this article, I will explain how to set the skeleton of a modelled character. We use Maya 2016 here.
This time, we use the model of a mannequin.
The mannequin model used here has been downloaded from TURBOSQUID for free.
Create Skeleton
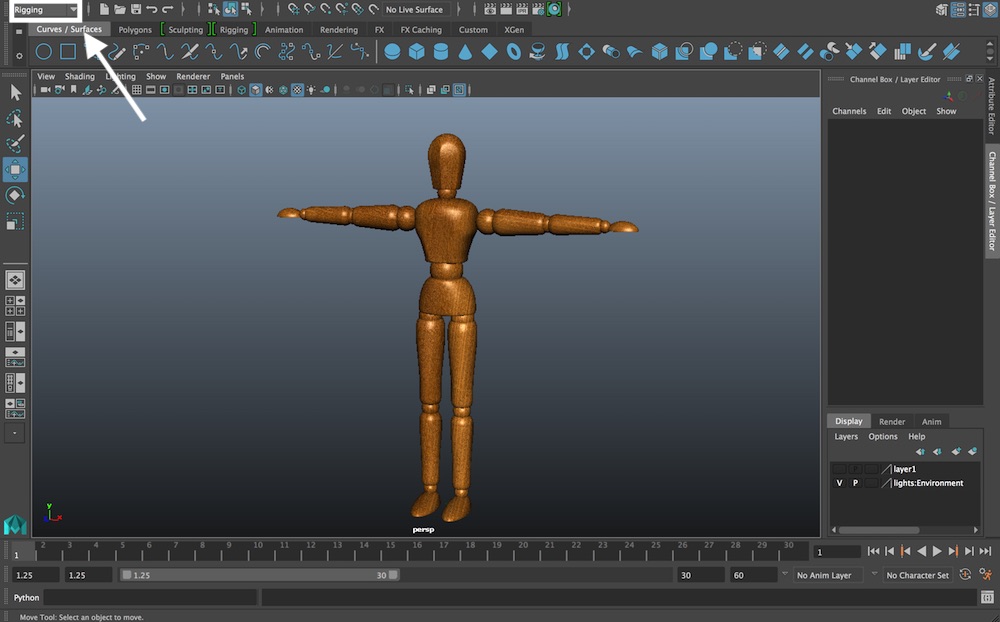
To rig a character, switch the menu set to ‘Rigging’ by the drop-down in the top-left corner of the screen.
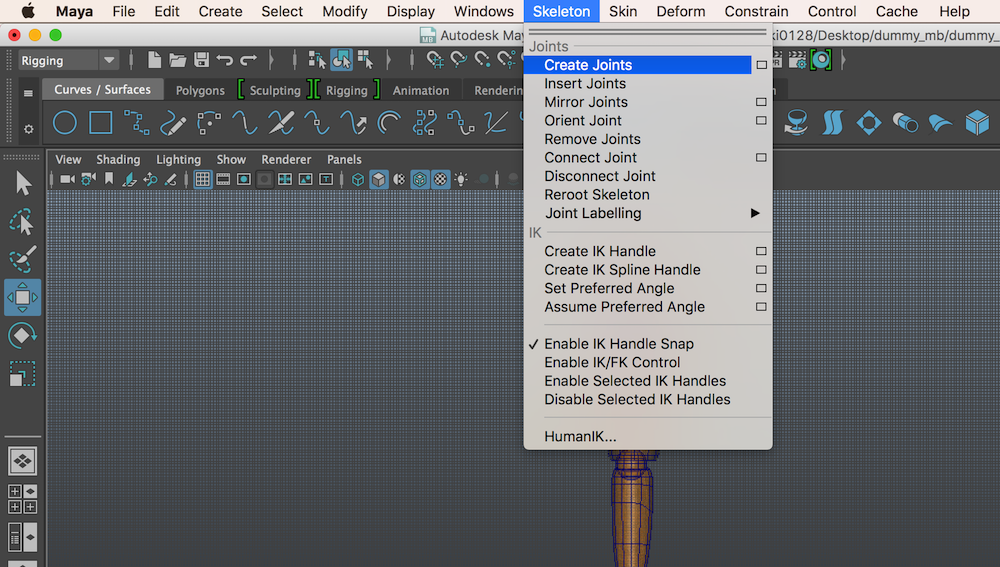
Skelton > Create Joints
It’s handy to set the screen to a side view.
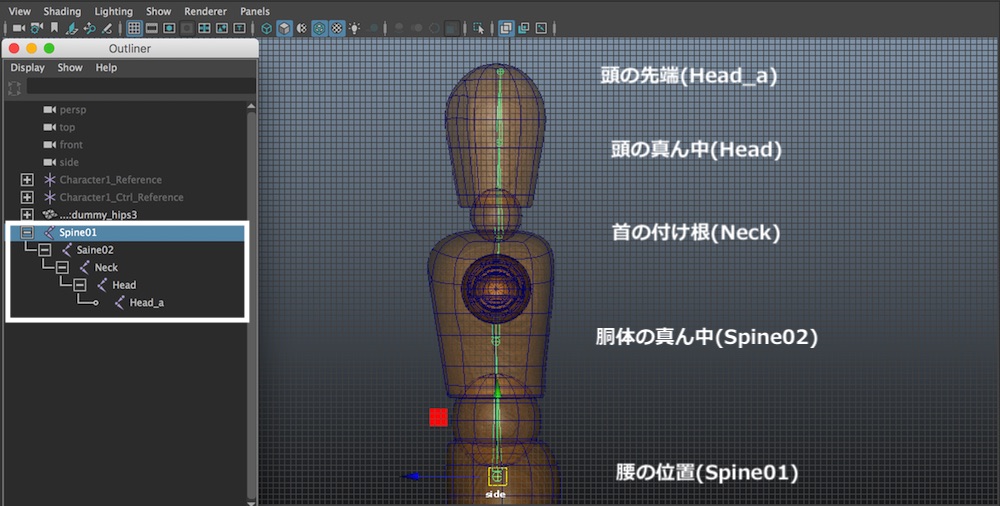
As shown in the screenshot above, place the joints from the waist to the top of the head by clicking the mouse. When you reached the top of the head, confirm them by pressing ‘Enter’ key.
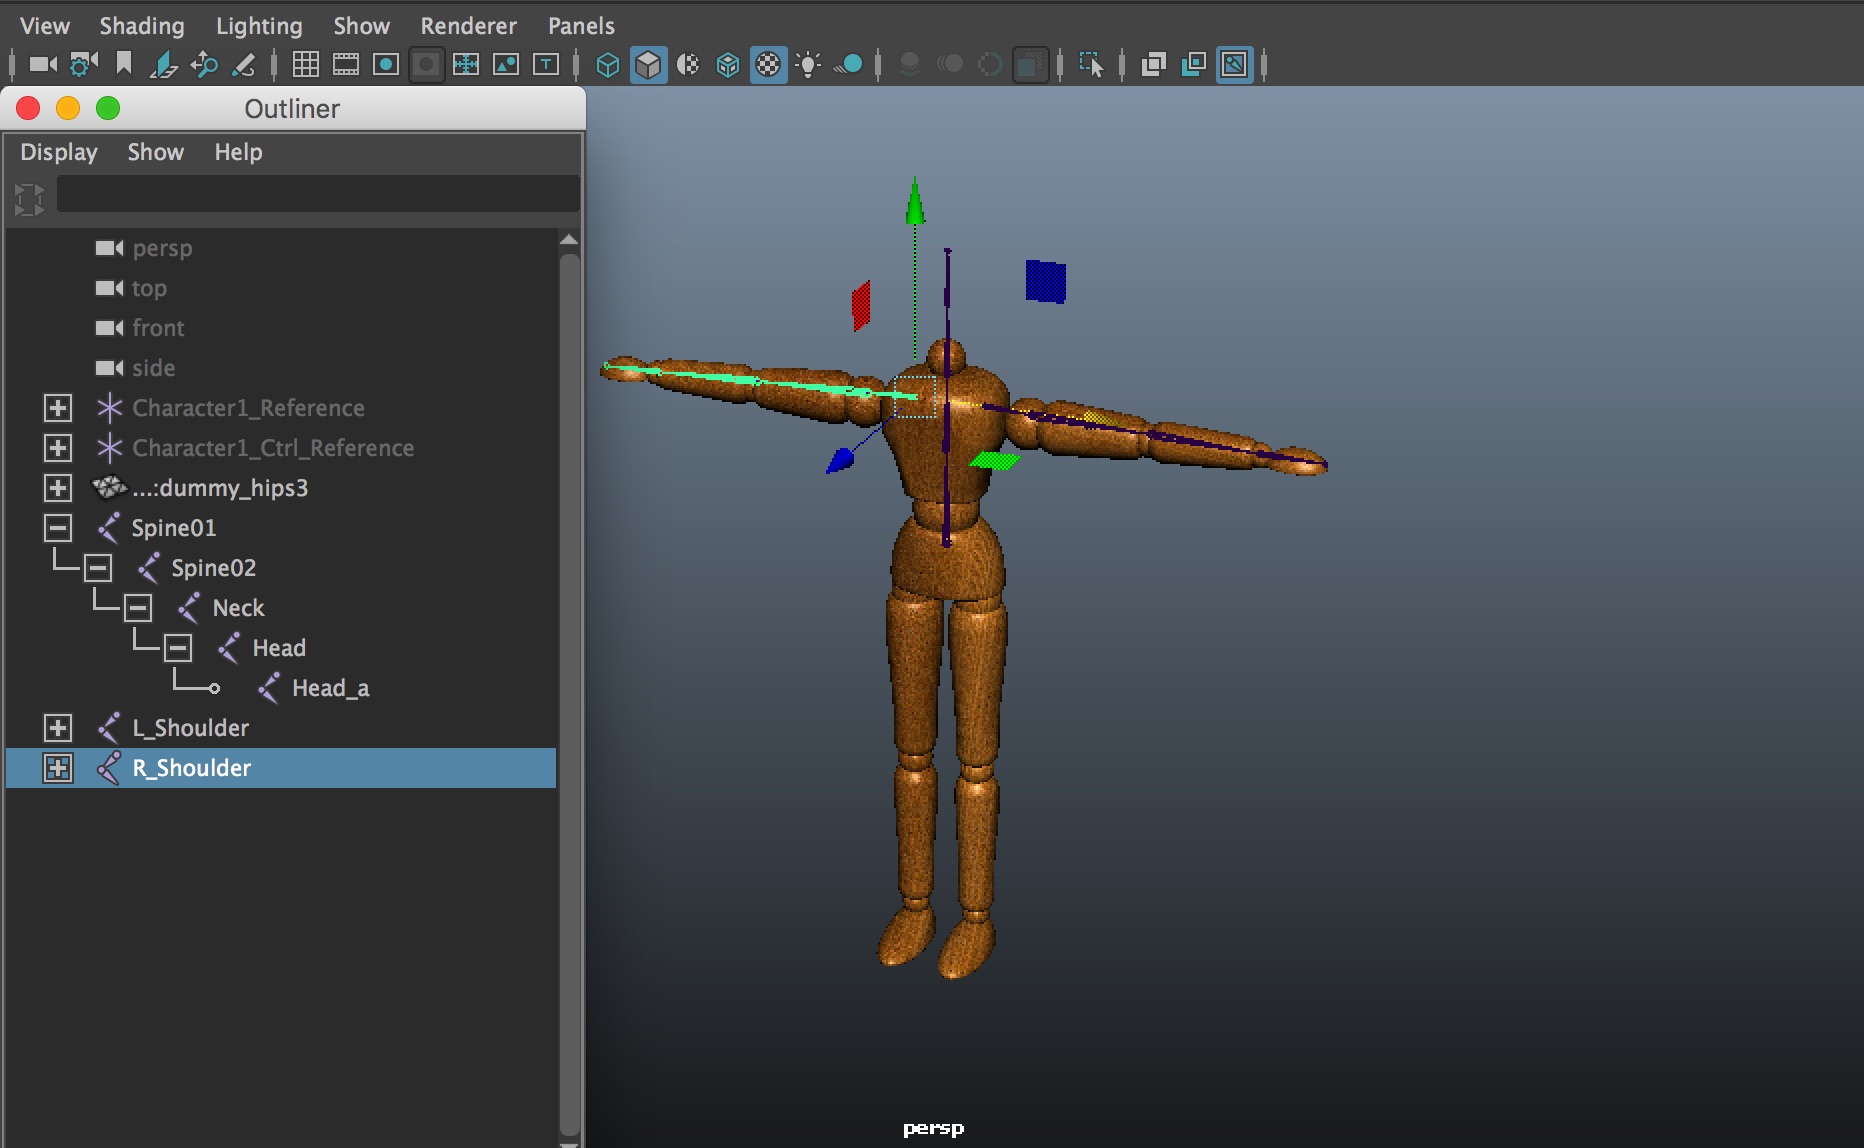
In the Outliner window, you now find the hierarchy of the joints. Rename the joints as the shown above. It’s a good idea to rename joints every time you created them, which helps you to manage them easily.

In the same way, set the skeleton for the left arm. The head is hidden temporarily to work on the arm in a top view.
Place a joint at each physical joint.
As shown the screenshot above, switch to the Perspective View, and align the joints with the arm by moving and rotating.
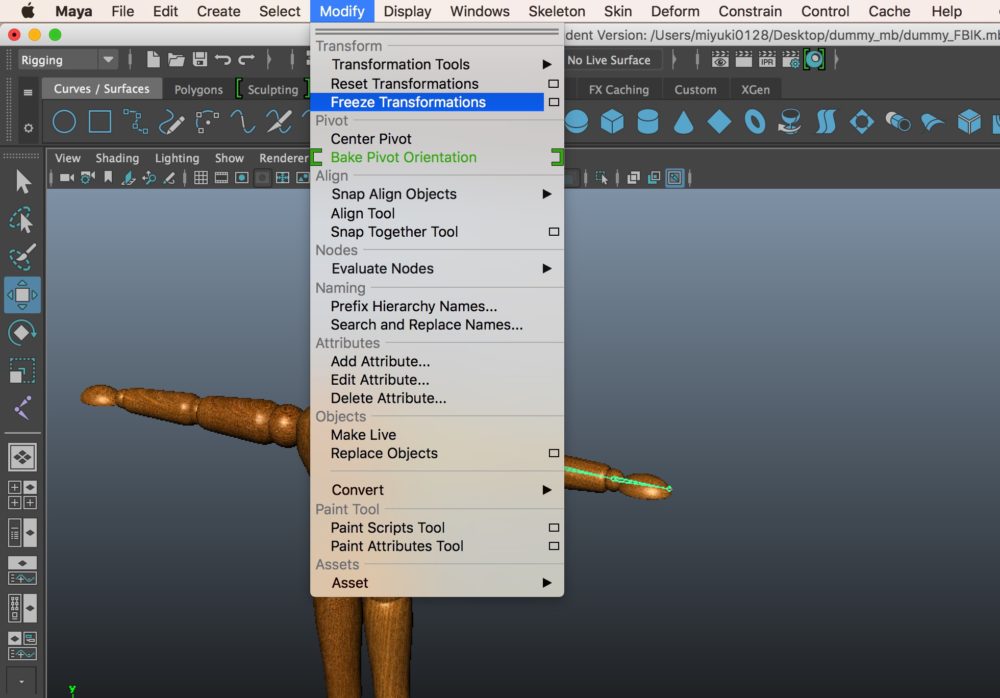
With the joints of the arm selected,
Modify > Freeze Transformations
This command adjusts the transformations applied to the left arm to be zero so that you can rotate it by the value in the arm’s local coordinate. It helps you to control the animation later.
※Make sure that Transform is set to 0.
With all the left-arm joints selected,
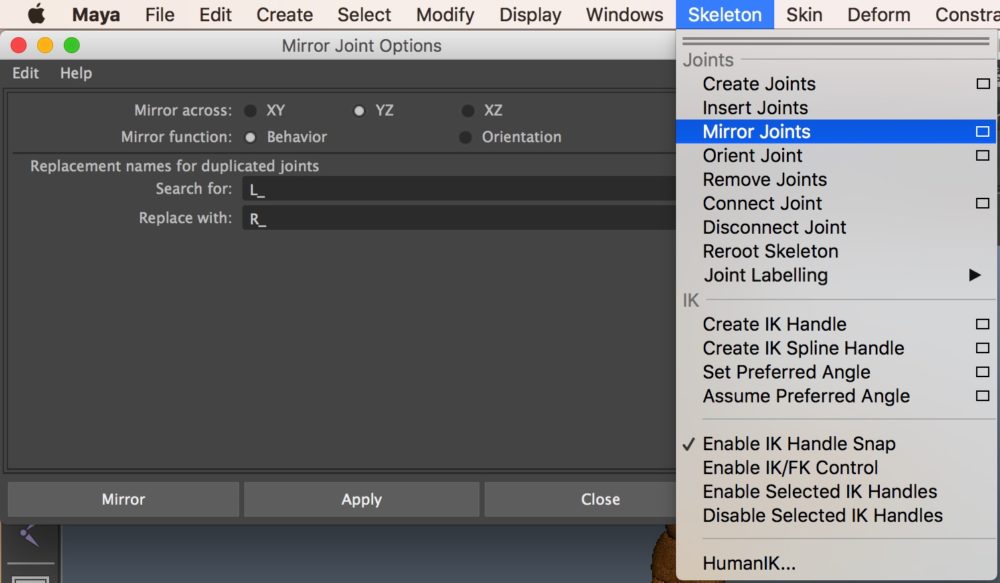
Skelton > Mirror Joints Option
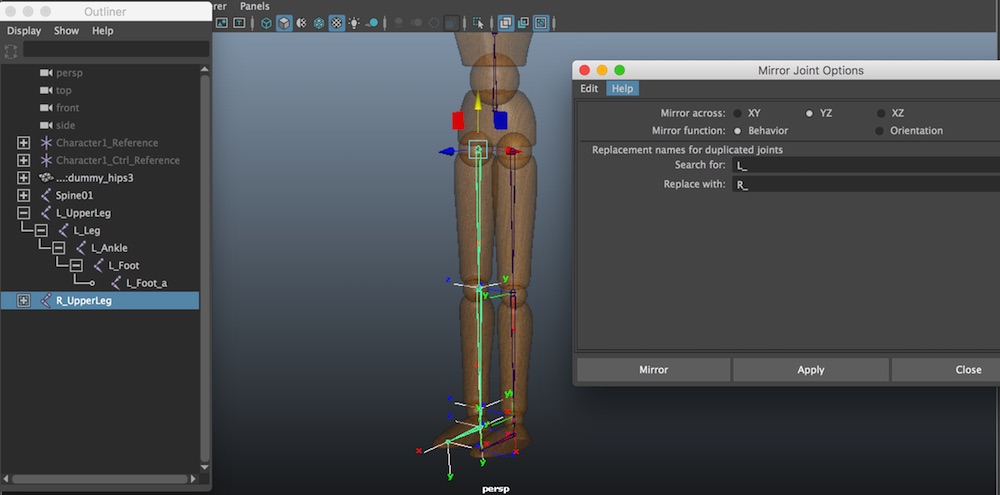
It brings up the Mirror Joints Option window. Select Edit > Reset Setting. It reset all existing settings.
After applying ‘Reset Setting’,
Set ‘Mirror Across’ to XY.
Enter ‘L_’ in ‘Search For’, and ‘R_’ in ‘Replace With’.
Press ‘Apply’.
Now the left-arm joints have been copied symmetrically to the right side. In addition, the copied joints have been renamed as intended.
Then, set L_Shoulder and R_Shoulder as Spin02’s children.
With both L_Shoulder and R_Shoulder selected, drag them onto Spine02 by holding down mouse’s middle button. They are now set as Spine02’s children.
In the same way, set the left-leg joints.
Set the local axis of the joint

After setting the left-leg joints, we set the local axis of the joint. Click ‘Select Hierarchy’ with the parent of the left-leg joints selected. It selects all instances under the left leg.
Keeping them selected, click Display > Transform Display > Local Rotation Axes.
It shows the local axis of the joint.
To make the work easier, hide the model temporarily.
At the moment, the local axis of each joint is not aligned with the others. So let’s align those local axes.
Temporarily, break the parent-child link between the joints you want to align. In this example, for now, unlink L_Foot and L_Foot_a as shown below.
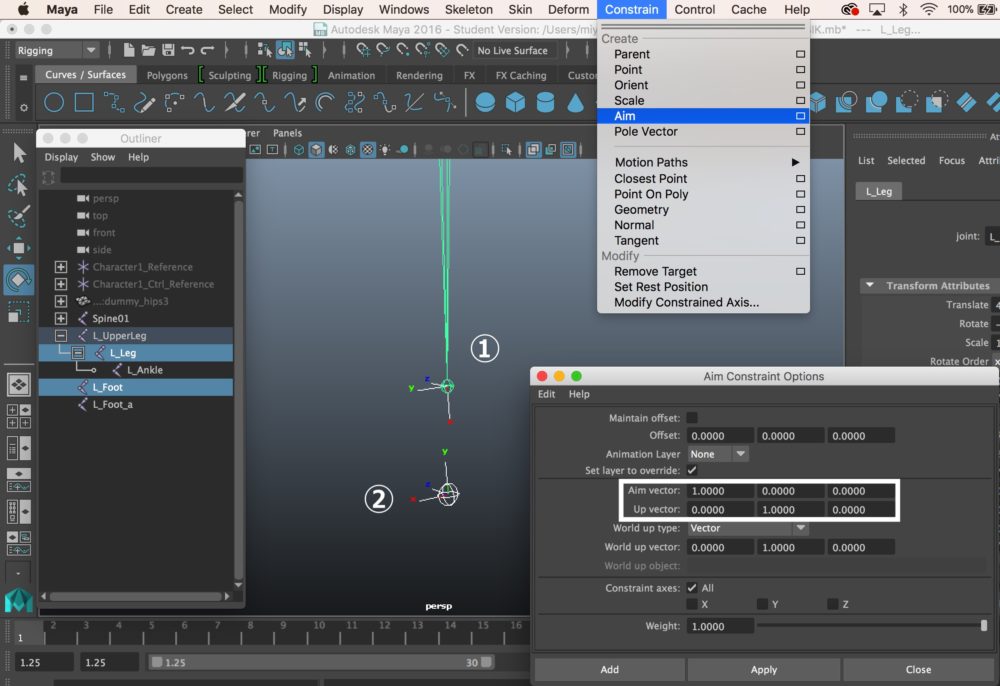
Select ① →② in sequence.
Constrain > Aim Constraint Option
Specify ‘Aim vector’ and ‘Up vector’ to align with the reference axis as shown in the screenshot above. Then press the ‘Apply’ button. It also makes a constraint node in the Outliner window but it’s OK to delete it.
Then, with ② selected,
Modify > Freeze Transformation
It sets the current value of ‘Transform Attributes Rotate’ in the Attribute Editor as the initial value. Once you set the local axis of the joint, restore the parent-child link you unlinked earlier.
You now finished setting the local axis of the joint.
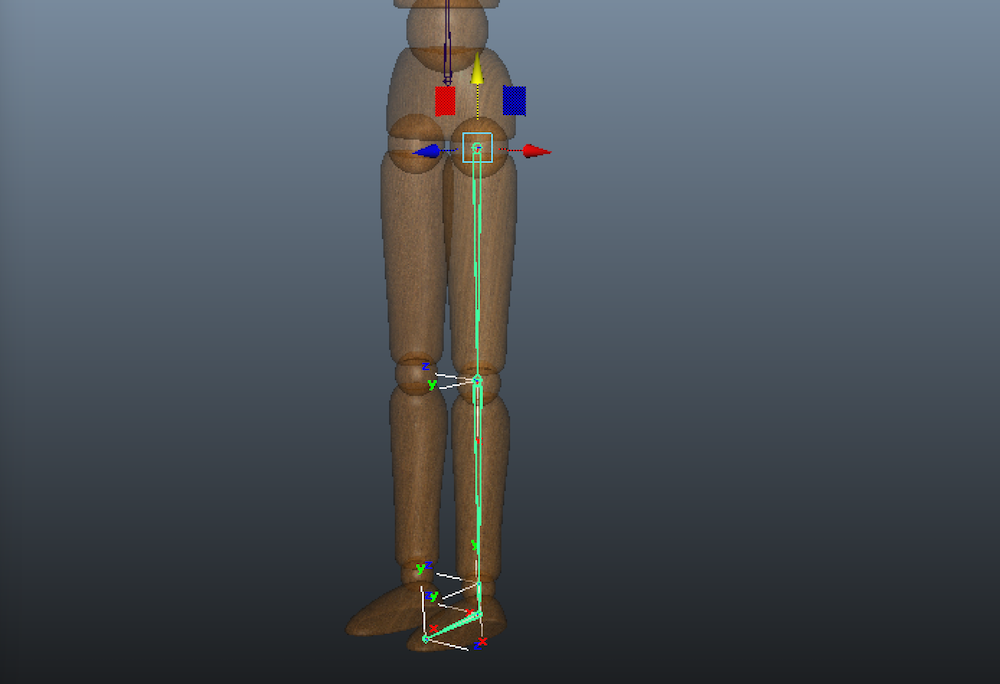
After setting the local axis of the joint, unhide the model and move and rotate the joint to the relevant point in the model. Then, select ‘Freeze Transformation’ to set Rotation to 0.
Skelton > Mirror Joints Option
Create the right-leg joints by mirroring the left-leg joints.
The setting for Centre of Gravity
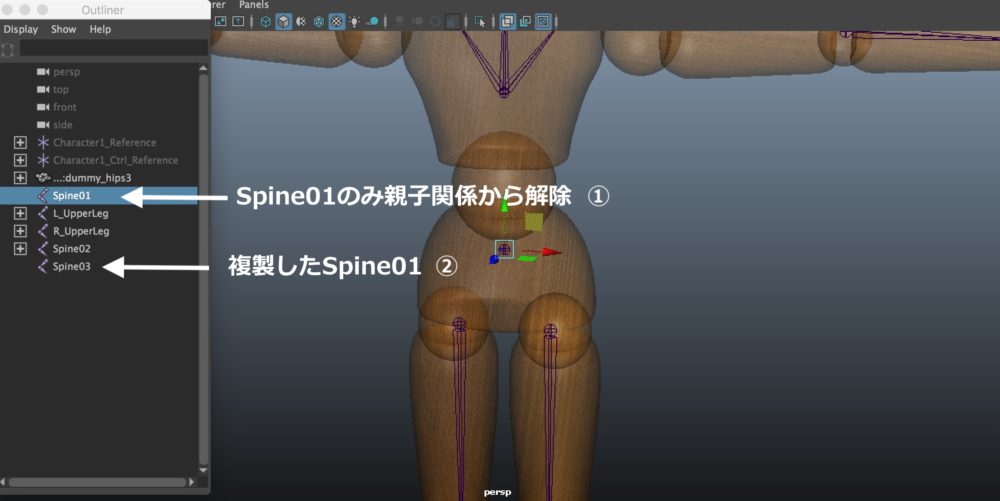
Break the parent-child link of Spineo1. Then, duplicate(CTRL+D) Spine1. It’s named Spine03. Rename it ‘COG’.

Rearrange the hierarchy as shown above.
By the way, you can resize the joint size by:
Display > Animation > Joint Size
Setting for the root joint
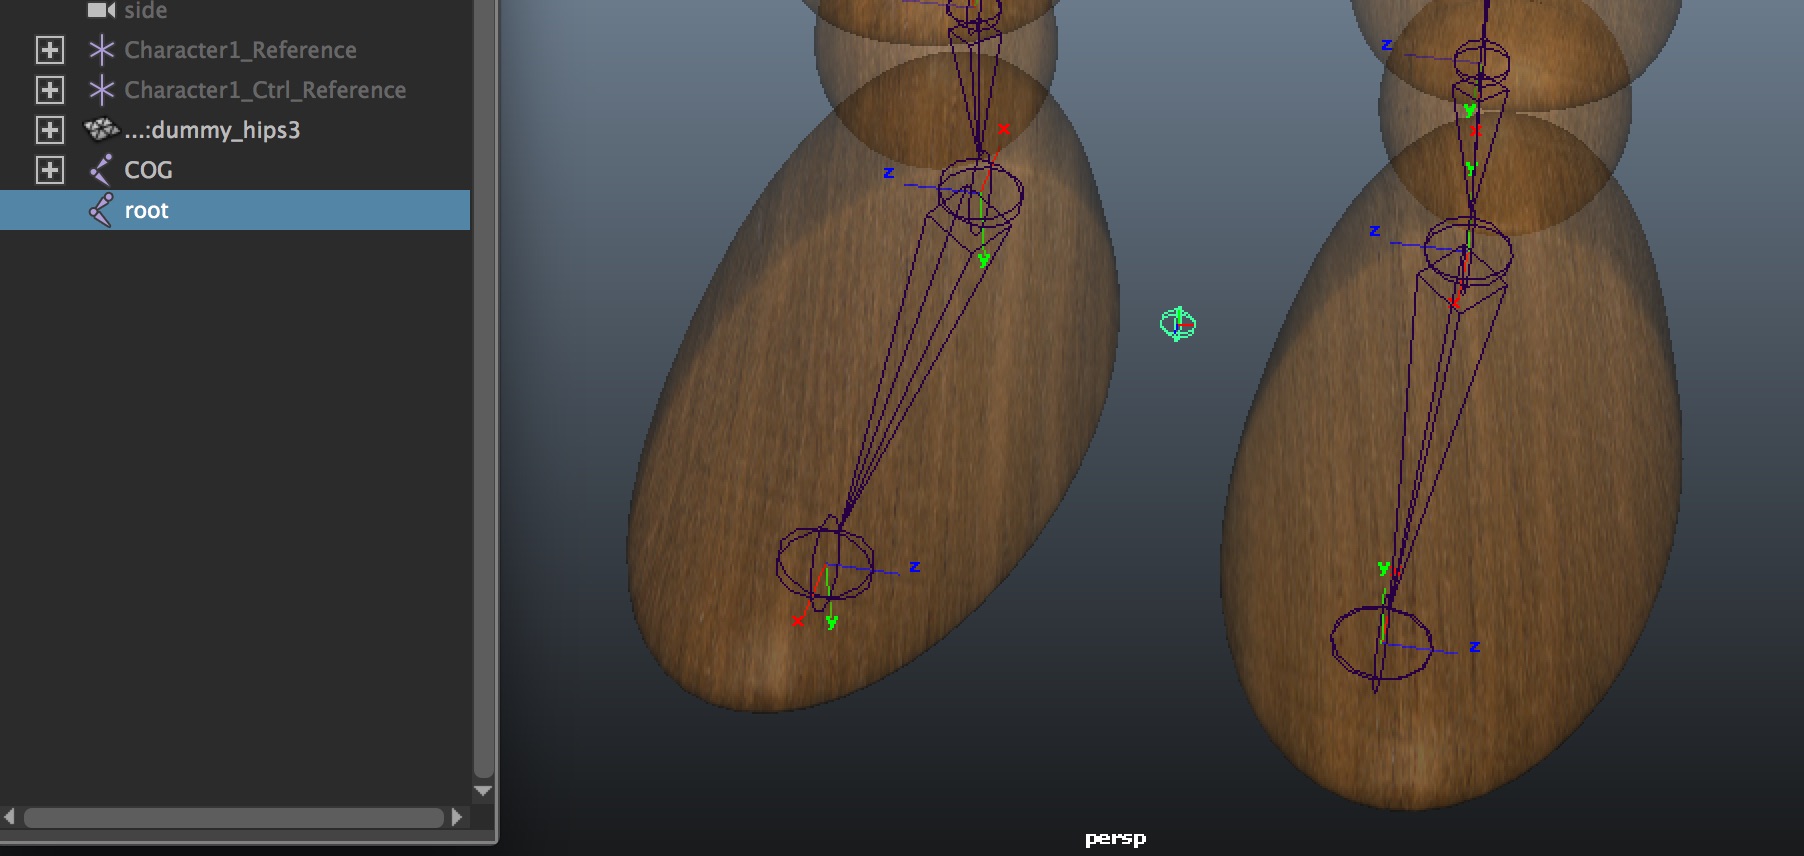
Create a joint at the origin, (0,0,0). Rename it ‘root’.
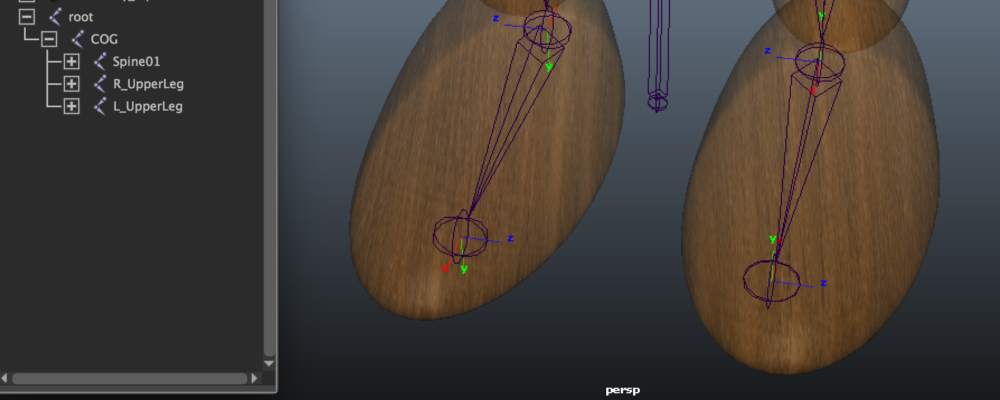
Set root as the parent of COG.
It finishes the setup of the skeleton.
You might face a lot of tasks, for example, trying to solve an error. But, they are unavoidable to set a skeleton. Personally, I also had some difficult time to write this article.
I am happy if you got a rough idea of what tasks are involved and how long they take.
(Reference: AREA JAPAN Maya Learning Channel)