In this article, I will introduce how to create a maze-like scene with many rooms using Unity. By learning how to create ceilings, walls, and corridors, you will be able to create VR spaces with rooms.

Sample
You can experience this sample scene in STYLY GALLERY.
https://gallery.styly.cc/kotaonaga/e18e1ce4-9d96-11e9-b34d-4783bb2170d0
You can download the Unity project that I used in this article here.
https://github.com/styly-dev/STYLY-Unity-Examples
Plan and Design On Paper
Since you will be using the position coordinates often, it will be useful to write them down. It will help even if the project is as simple as the one shown below.
The values in () are the Positions for each object.
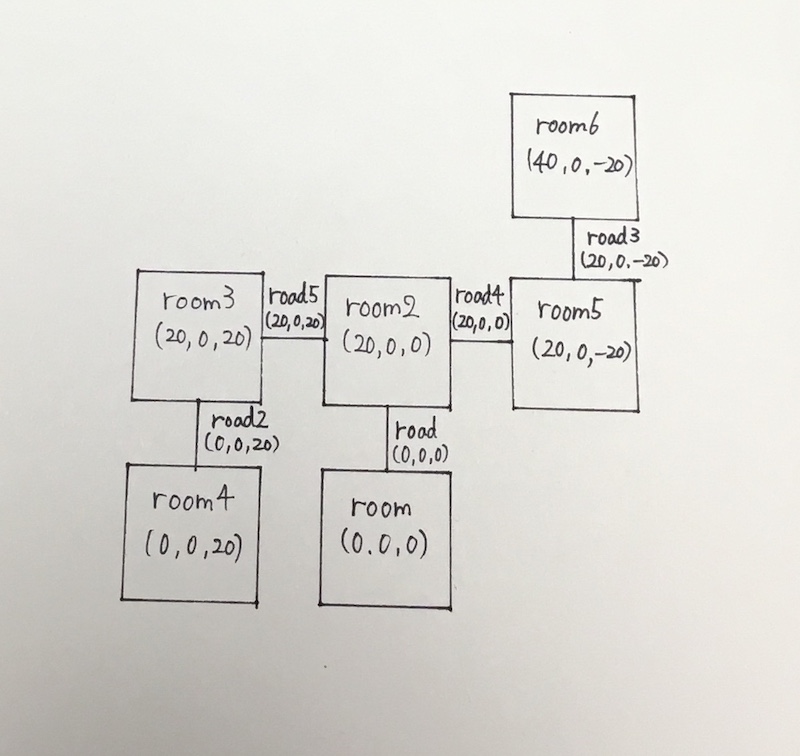
Blueprint on paper
Creating the Floor, Walls, and Ceiling
If you rotate the STYLY floor or Unity Plane by 90° and create walls, the wall will be slightly transparent when viewed in the VR scene.
To prevent this, we will create a wall by enlarging a cube in Unity.
Create Floor
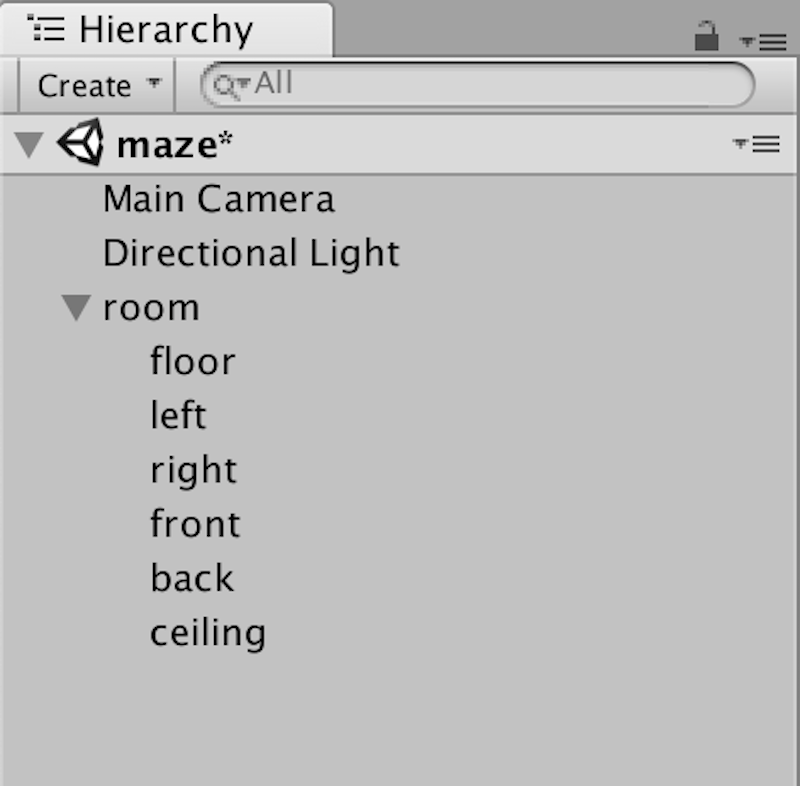
It is useful to gather all objects you need to create a room, so begin by choosing Create Empty and naming it ‘room’.
Set the Position to (0, 0, 0).
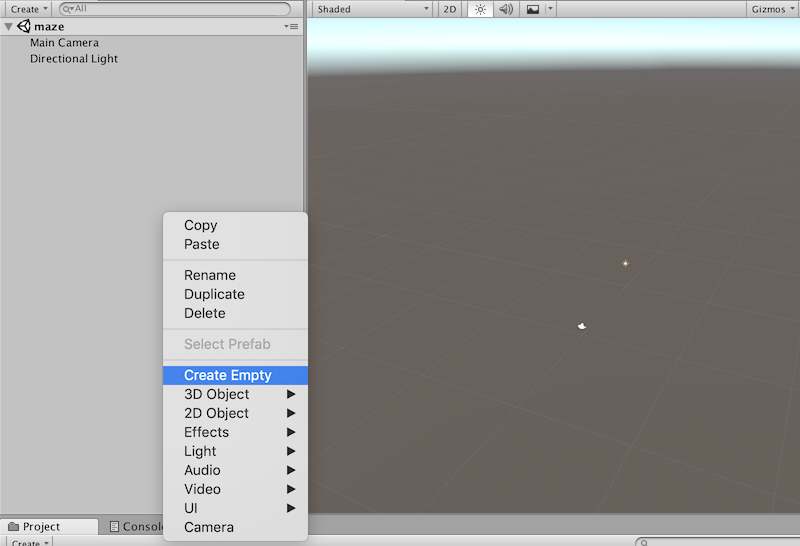
Create Empty and name it ‘room’
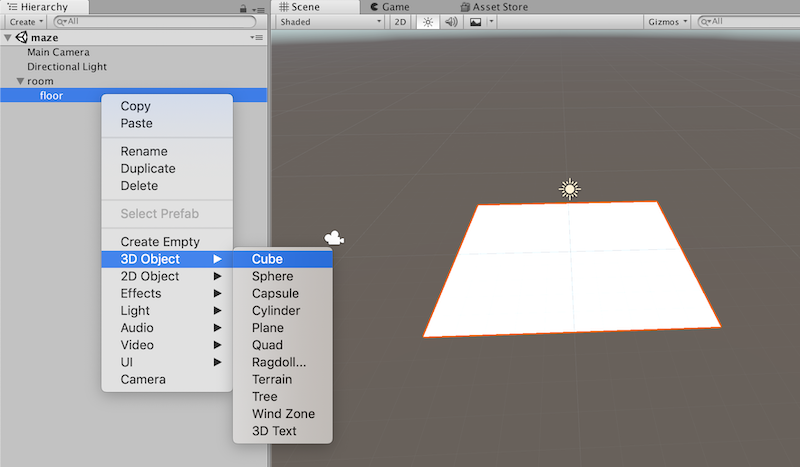
Next, create the floor.
Click Create > 3D Object > Plane.
Set the Scale to (1,1,1). Name it ‘floor’.

Create floor
Create Walls
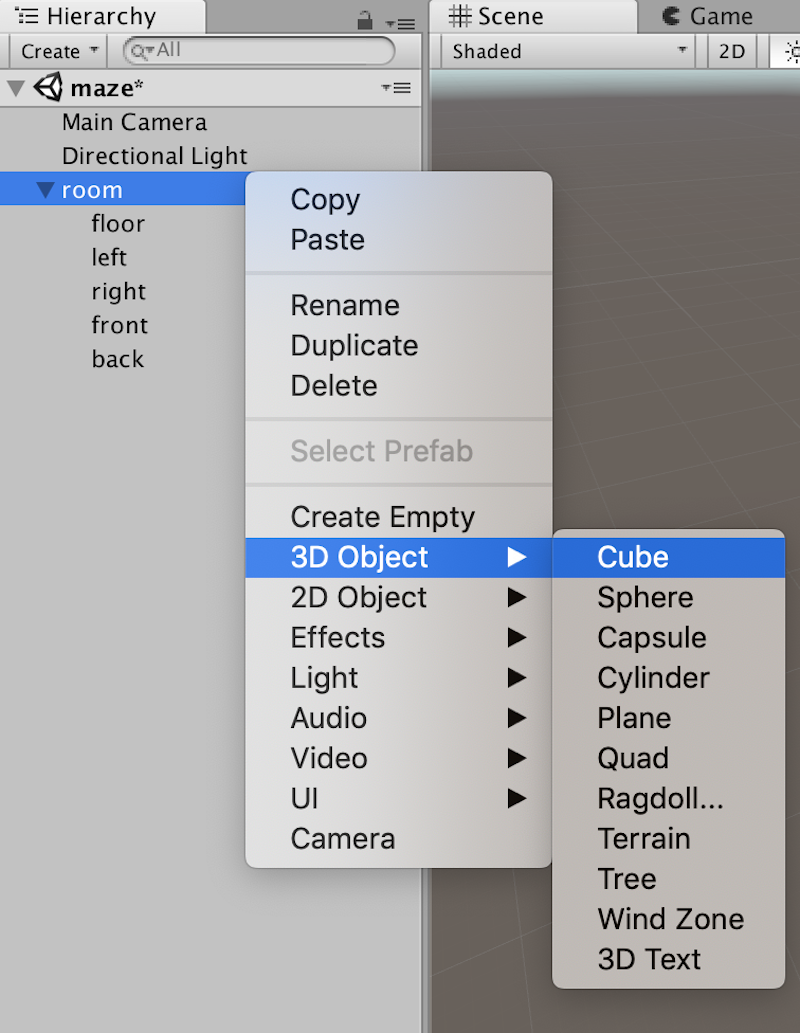
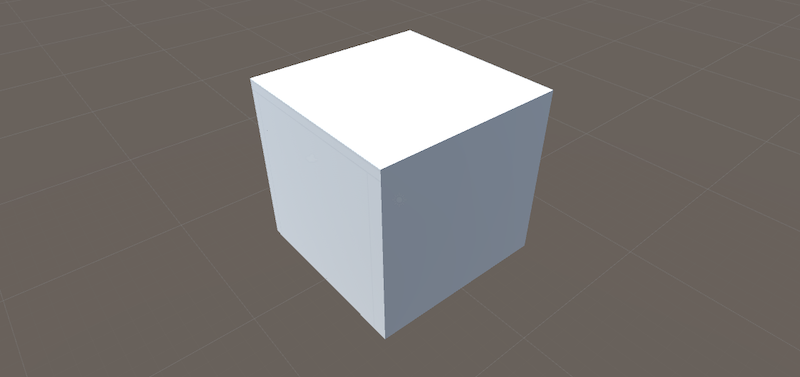
Next, create the walls. Click Create > 3D Object > Cube.
Create walls
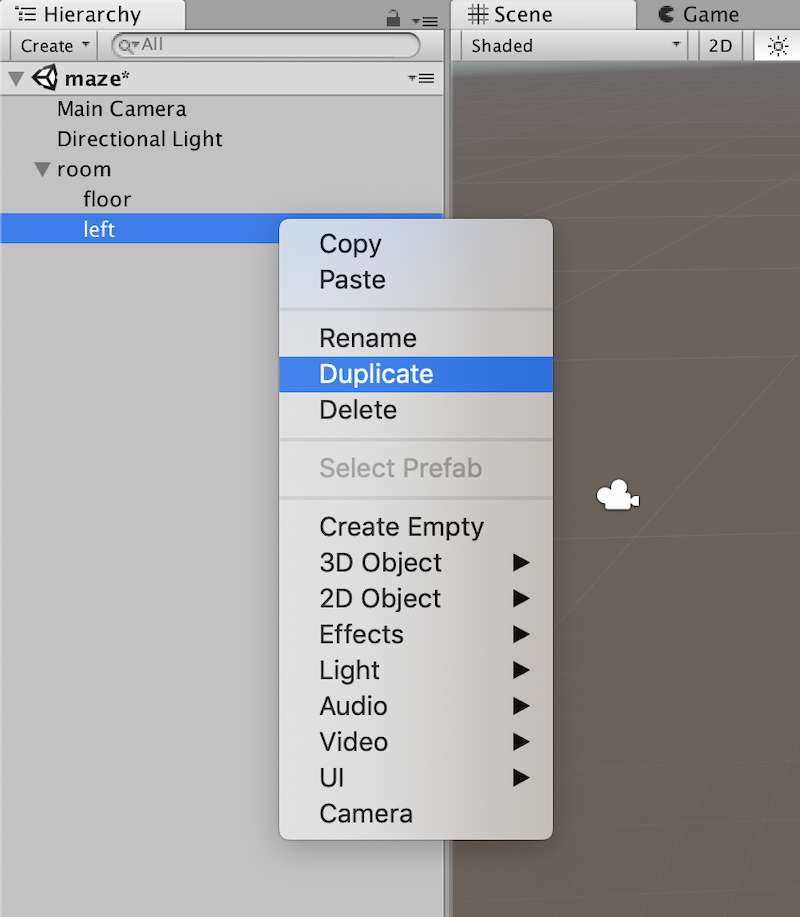
Name it ‘left’, and set the Scale to (1,10,10). The walls are done now. Next, we need to move the walls.
Set the Position to (5,5,0).
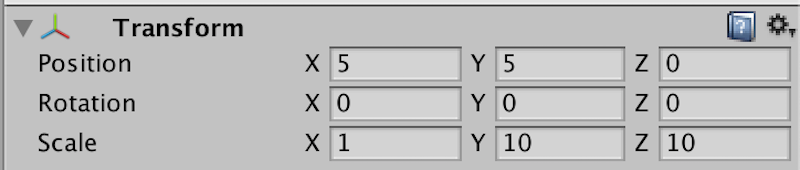
Inspector values of left
Duplicate left, and name it ‘right’, then set the Position to (-5,5,0).
Duplicate left
The left wall and right wall is done.
Walls complete image
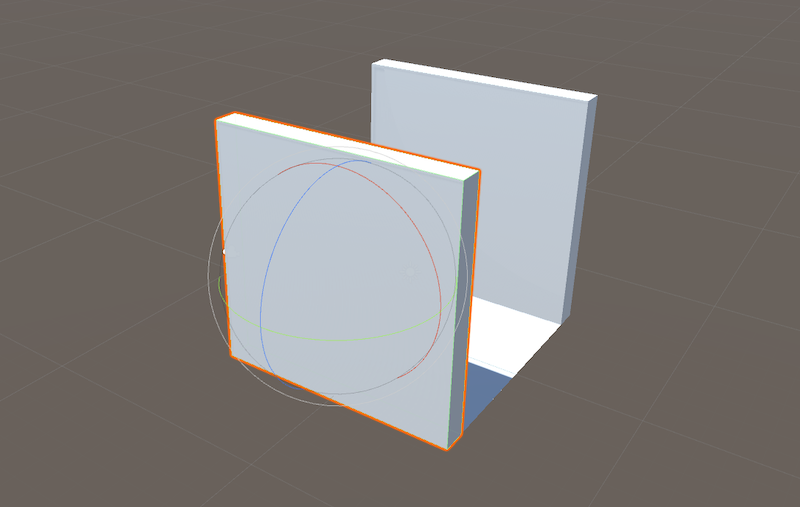
Then, let’s create the front and back wall. The steps are basically the same.
Click Create > 3D Object > Cube. Name it ‘front’.
Set the Position to (0, 5, 5), Scale to (11, 10, 1).
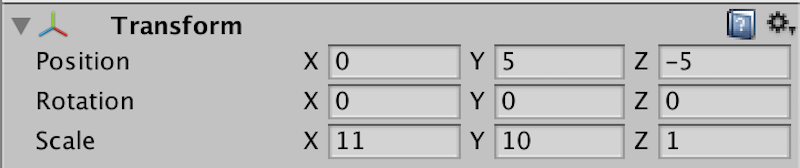
Inspector values of front
Next, duplicate front, and name it ‘back’. Set the Position to (0, 5, -5). We are done creating the 4 walls.
Walls complete image
Create Ceiling
Lastly, let’s create the ceiling. Click Create > 3D Object > Cube. Name it ‘ceiling’. Create it so it fits inside the room.
Create a cube inside the room
Set the Position to (0, 10, 0).
Set the Scale to (11,1,11).
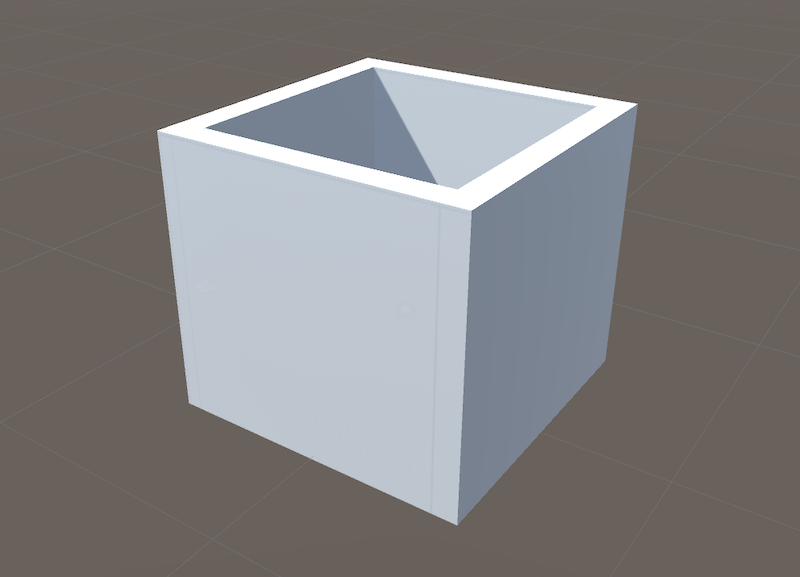
The ceiling is complete now and a box shaped room has been created.
Complete room
Check if the floor, right, left, front, back, and ceiling fits properly in the room as in the image below.
room configuration
Create Corridor Walls
Next, let’s create the corridor walls.
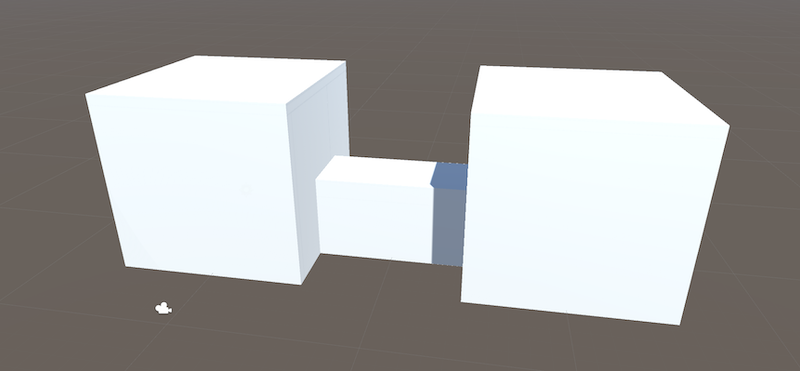
The corridor walls need holes for pathways.
Create a wall with holes like in this image, combining 3 cubes
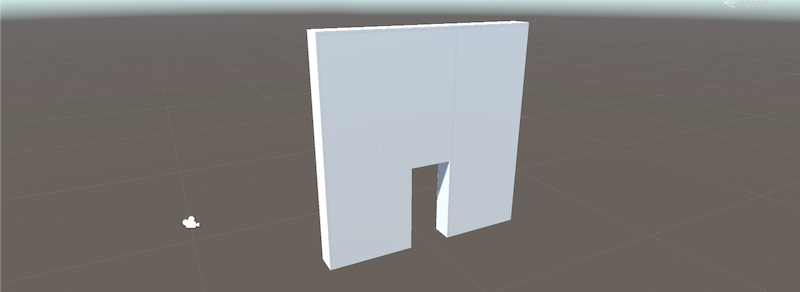
Complete image of the corridor walls
Use Create Empty to create a group. Name it ‘exit’. Check that the exit’s Position is (0, 0, 0).
We will connect it to where the front wall is, so delete front first.
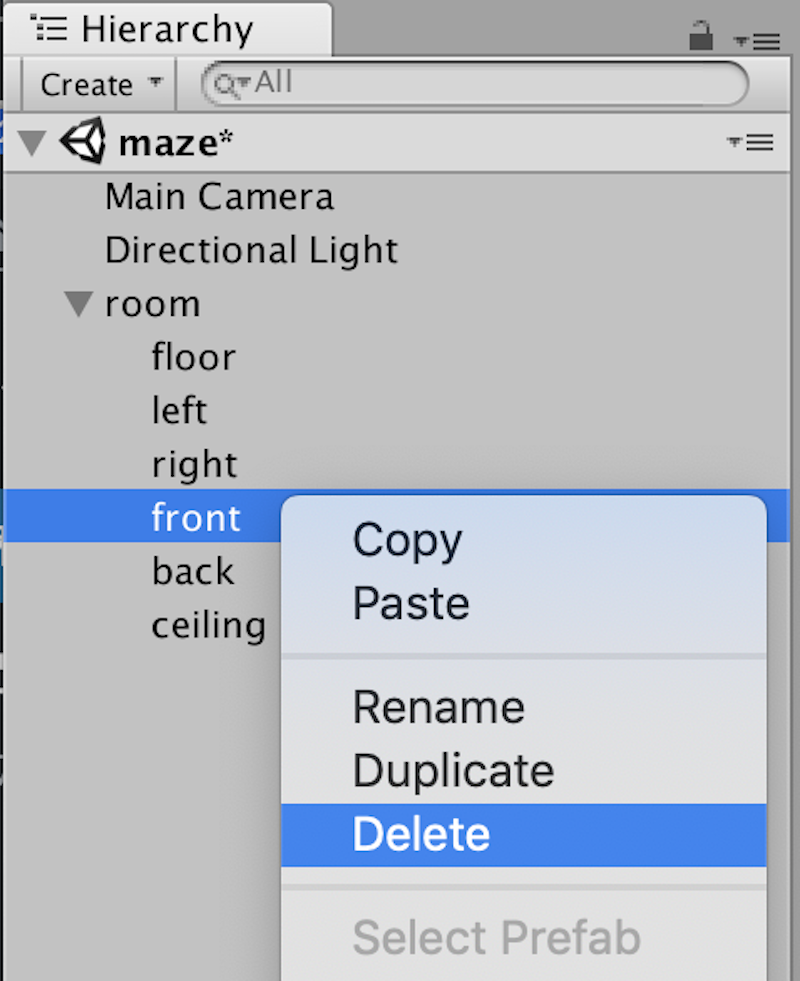
Delete front
Create 3 cubes by Create > 3D Object > Cube, and name them ‘exit-right’, ‘exit-left’, and ‘exit-top’. Place them all in the Exit section.
Set the exit-right Position to (5, 5, -3), and Scale to (1, 10, 4).
Set the exit-left Position to (5, 5, -3), and Scale to (1, 10, 4).
Set the exit-top Position to (5, 7, 0), and Scale to (1, 6, 10).
The corridor walls are complete now.
Check that the exit is now like in the image.
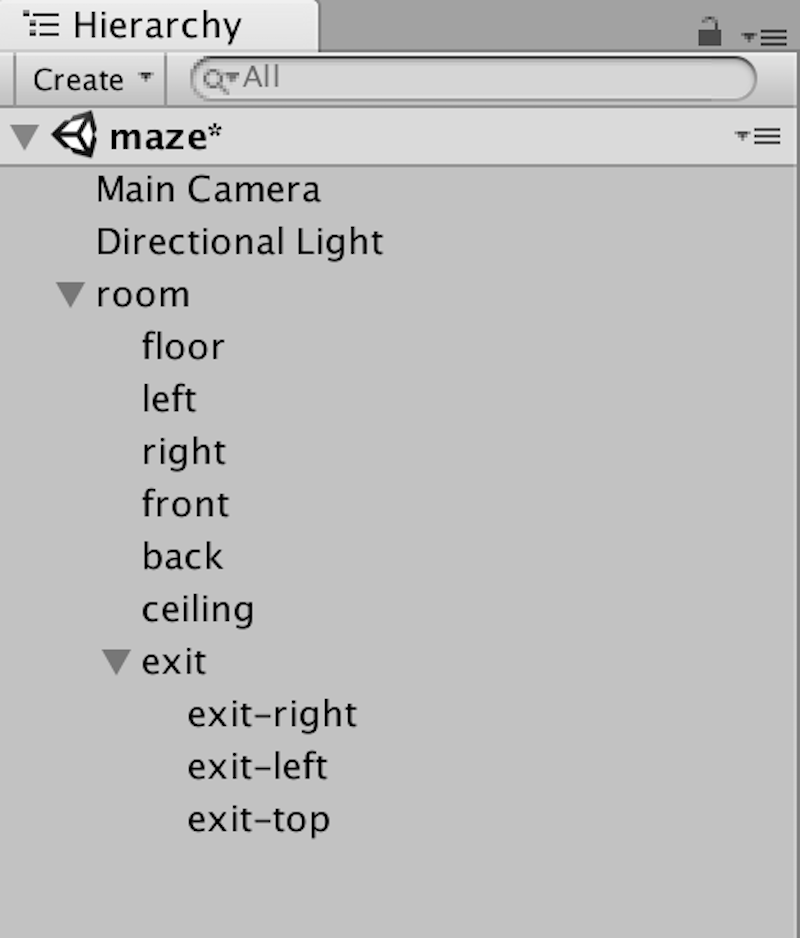
exit configuration
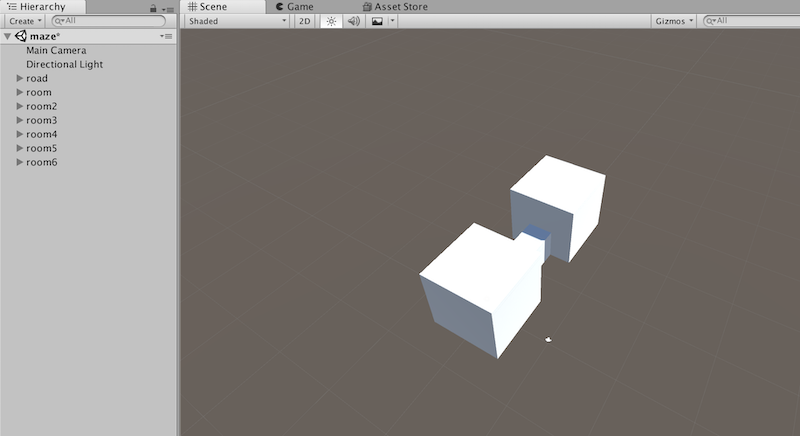
Duplicate the Created Room to Create a Second One
Duplicate the room you just created. Set the Position to (20,0,0). Name it ‘room2’.
Set the Rotation to (0, 180, 0) and rotate the room for 180°, so that the holes will be across from each other.
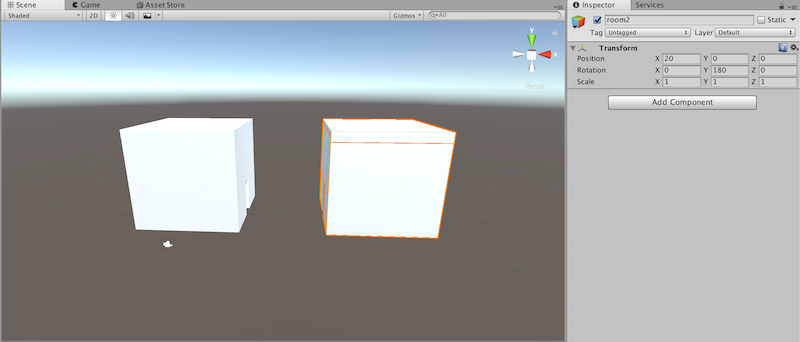
Complete image of 2 rooms
These 2 rooms are complete now.
Create Corridor
Once you’ve finished these 2 rooms, let’s create a corridor between them.
Create Empty and name it ‘road’.
Set the Position to (0, 0, 0).
Create a Plane by clicking Create > 3D Object > Plane in the road you just created. Name it ‘road-floor’
Coordinates of objects created in Unity will be set as the object center. So, set the Position for road-floor to (10, 0, 0), the center position between the 2 rooms.
We want it to cover the hole precisely, so set the Scale to (1,1,0.2).
The corridor floor is complete now.
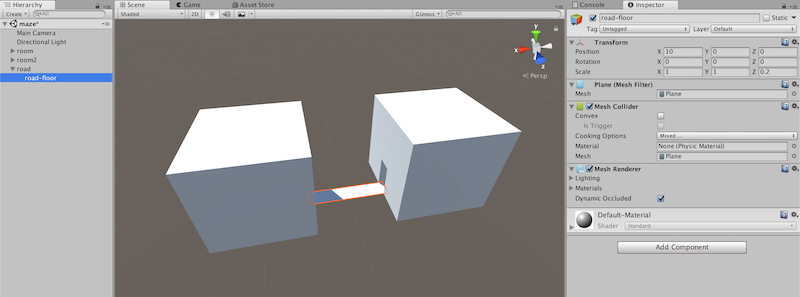
Creating the corridor floor
Next, we will create the corridor walls and ceiling.
First, let’s create the walls. Click Create > 3D Object > Cube and create 2 cubes. Set the Position to (10, 2, 1.5), Scale to (10, 4, 1).
For the opposite road, duplicate road-left and set the Position to (10, 2, -1.5).
Next, let’s create the ceiling. Click Create > 3D Object > Cube and create a cube. Set the Position to (10, 4.5, 0), Scale to (10, 1, 4).
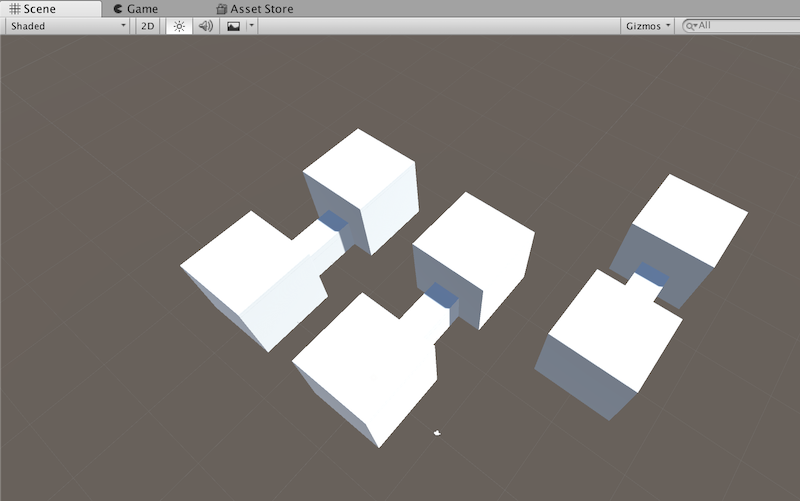
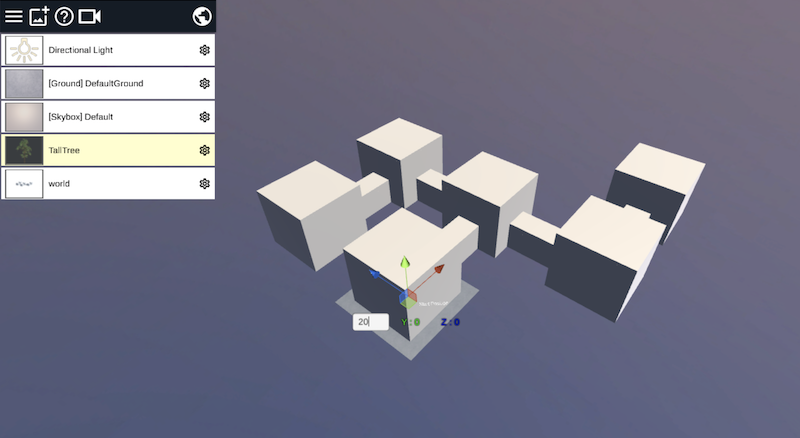
The corridor is complete now. The 2 rooms with a corridor between them has been created.
Complete image of area
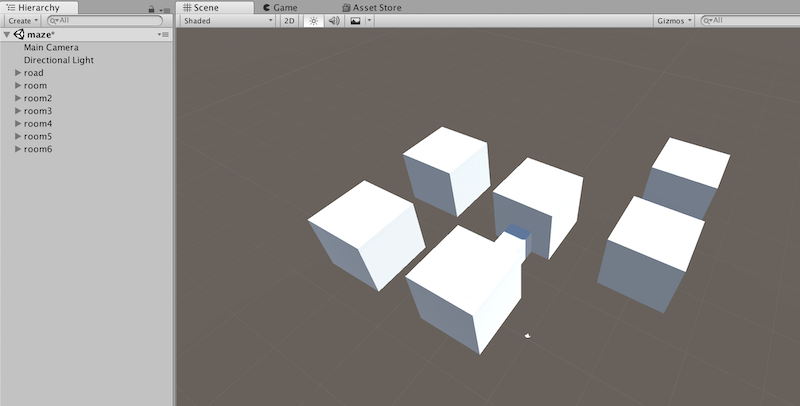
Duplicate the Rooms and Corridor
Duplicate the Room
Duplicate the room to create several rooms. For this tutorial, I created an additional 5 rooms (room2 through room6).
Create room1 through room6
The Position of room2 through room6 is (0, 0, 0) by default, so refer to the blueprint you created at the beginning and set positions according to it.
Paper blueprint
For example, the Position of room3 should be (20, 0, 20). The finished model should be similar to your blueprint.
6 cube positions
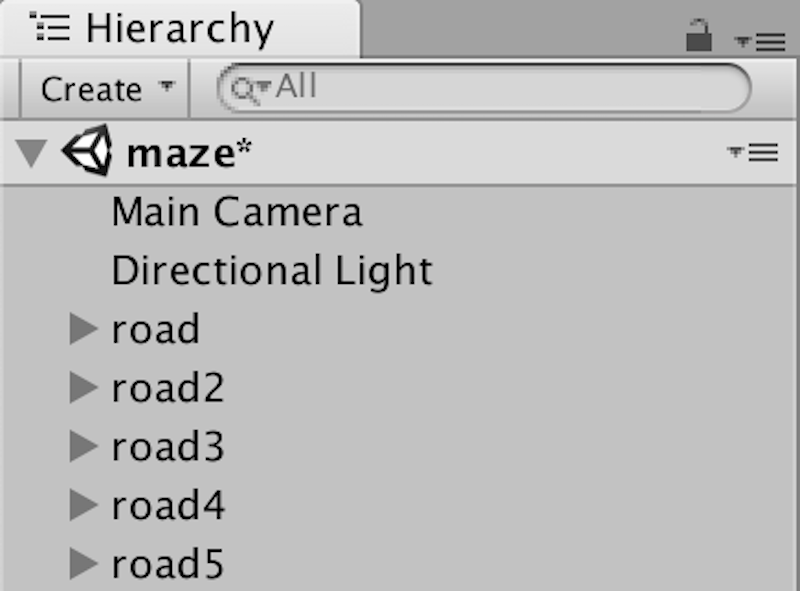
Duplicate the Corridor
Connect the 6 rooms with the corridors. Create 4 duplicates of the road model.
Duplicate road
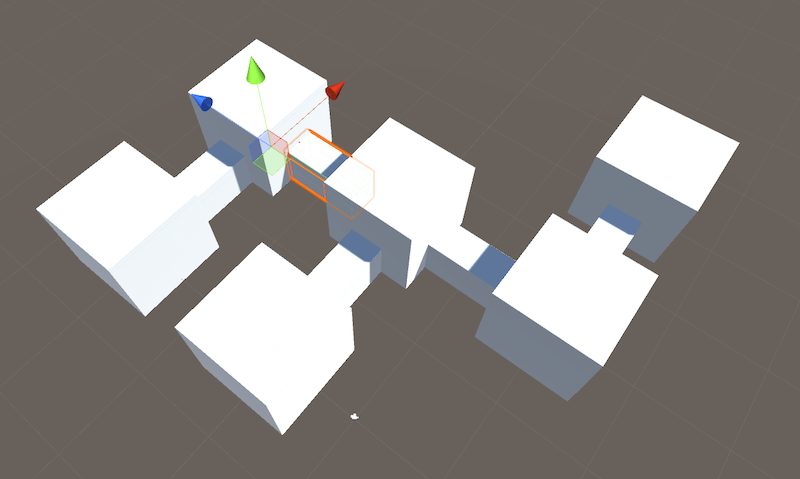
The vertical corridors can be used without changing the direction, we just need to change the Position. Refer to the blueprint for the Positions. The position of the corridor between room3 and room4 is (10, 0, 20).
vertical corridor
The sideways corridor has to be rotated 90° before we set the positions. For the Position and Rotation for road4 and road5, please refer to the following image. The positions for these corridors are according to the paper blueprint as well.

road4 Inspector values
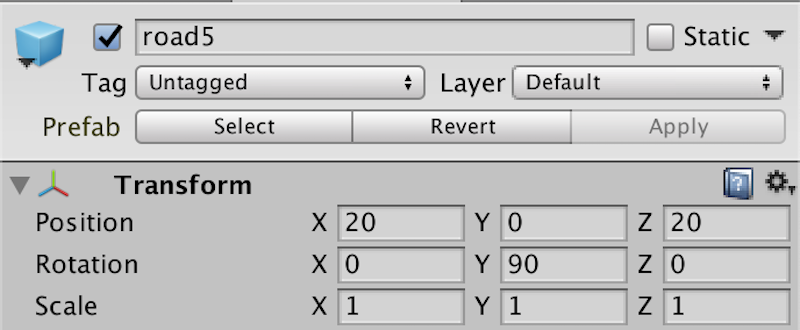
road5 Inspector values
Each room should be connected now.
Although the corridors and rooms are connected, some are without holes, so let’s take care of that next.
Place a side corridor
Edit the Closed Wall
For the room’s front and back, we can use the exit we used in the previous steps, let’s duplicate this and use it.
For the right and left, the Scale needs to be different, so we need to change it.
Let’s create a wall with holes for the right and left.
Create Empty and name it ‘side-exit’. Set the Position to (0, 0, 0).
Inside side-exit, select Create > 3D Object > Cube to create ‘side-exit-right’, ‘side-exit-left’, and ‘side-exit-top’.
Set the side-exit-right Position to (-3.25, 5, -5), Scale to (4.5, 10, 1).
Set the side-exit-left Position to (3.25, 5, -5), Scale to (4.5, 10, 1).
Set the side-exit-top Position to (0, 7, -5), Scale to (11, 6, 1).
Now, the side-exits are complete.
Switch the left side of room 5 with a side-exit.
Place side-exits under room3 and room5 and we’re done.
Then, select Create > 3D Object > Cube for room3, and create ‘front’ (with Position set to (5, 5, 0), Scale to (1, 10, 10)), and delete right for room3, left for room5.
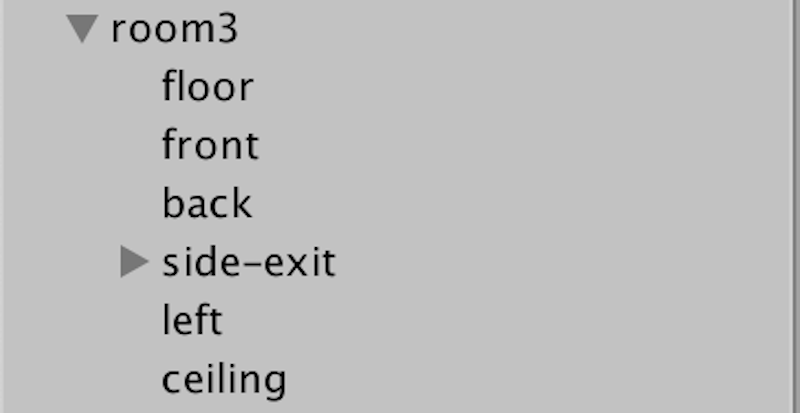
room3
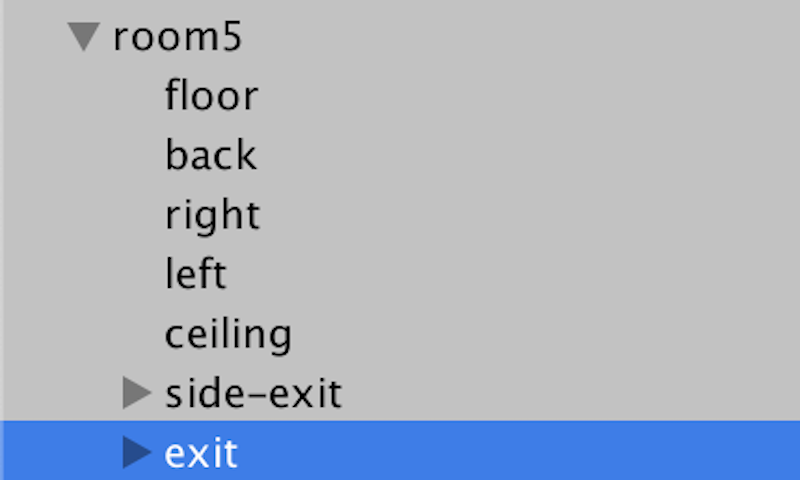
room5
We are finished with all steps. There should be 6 rooms created.
When uploading to STYLY, it’s annoying to upload each room and road separately. You can use Create Empty, name it ‘maze-boxes’, and put all rooms and roads under it.
At this time, please check if the Position of the maze-boxes is set to (0, 0, 0).
Upload to STYLY
Let’s try uploading to STYLY. To learn how to upload assets from Unity to STYLY, please refer to this article.

Place Objects in STYLY
Let’s place objects in the uploaded rooms in STYLY.
The coordinates in Unity are linked to those in STYLY, so we can use them directly.
For example, Unity Position (20, 0, 0) is the same as STYLY Position (20, 0, 0).
We can use this to place objects where we want.
Let’s try placing an object in room2.
Place an object in STYLY, then set the Position to (20, 0, 0).
The object will be moved to room2. The room is not transparent, and it is hard to locate the object, so press the F key and move to where the object is. By using this procedure we can place objects wherever we want.
Moving objects in STYLY
How did you like this tutorial?
We used only 6 rooms for this tutorial, but if you duplicate a room or make the corridor longer, you can create various types of mazes with more complex construction.
If you use the duplicate option in Unity, it makes things very easy and simple to create additional rooms. I hope you get the chance to make your own maze or house using the techniques explained in this tutorial.