In this article, I’m going to introduce you to a Unity asset that makes tree modeling quicker and more intuitive.
The asset I will be introducing in this article is called “Mtree”.
In this article, I will give you an overview of the asset and how to import it into Unity.
Mtree
Sample
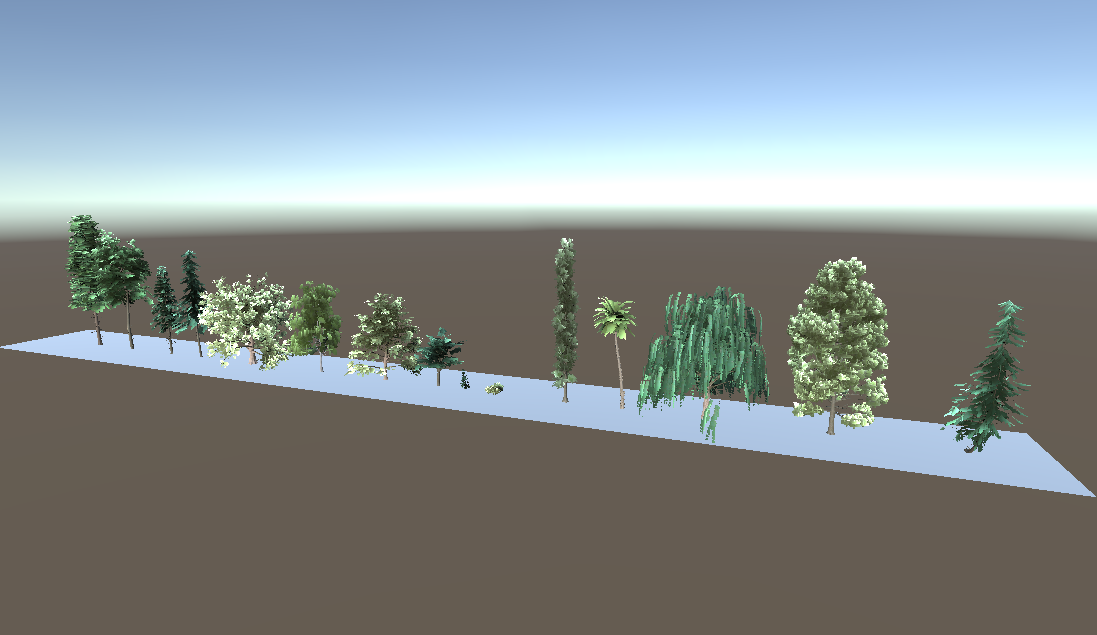
You can experience a sample space from the STYLY GALLERY.
Here you can see 16 different types of trees created by Mtree.
Features of Mtree
Some of the features include procedural modeling, automatic UV expansion, and automatic LOD configuration.
Also, the trees you create are saved as a Prefab, allowing them to be migrated between projects.
How to introduce Mtree into your Unity project
Buy on the Unity Asset Store
It is available from the Unity Asset Store.
- Asset Price $50
- Unity version 2017.4.34 or higher supported
This asset may also be discounted at sale events such as the Summer Sale and the Black Friday Sale.
Importing to Unity
Once the purchase process is complete, you can import the files into your project from the Mtree store page or from the My Assets list.
Please make sure that all files are checked before importing, as everything you need to make it work is included in the package.
How to use it
Check out a sample scene from Mtree
Mtree ships with the tree template by default.
Open Assets/Mtree/Examples.unity and check it out.
We can see that there already exist 16 different tree templates of various shapes.
Mtree
If you want to create an original tree using Mtree, we recommend that you choose and edit one of these templates that is closest to your ideal shape.
In this article, I’d like to show you how to use Mtree through editing one of the samples, “SmallTree”.
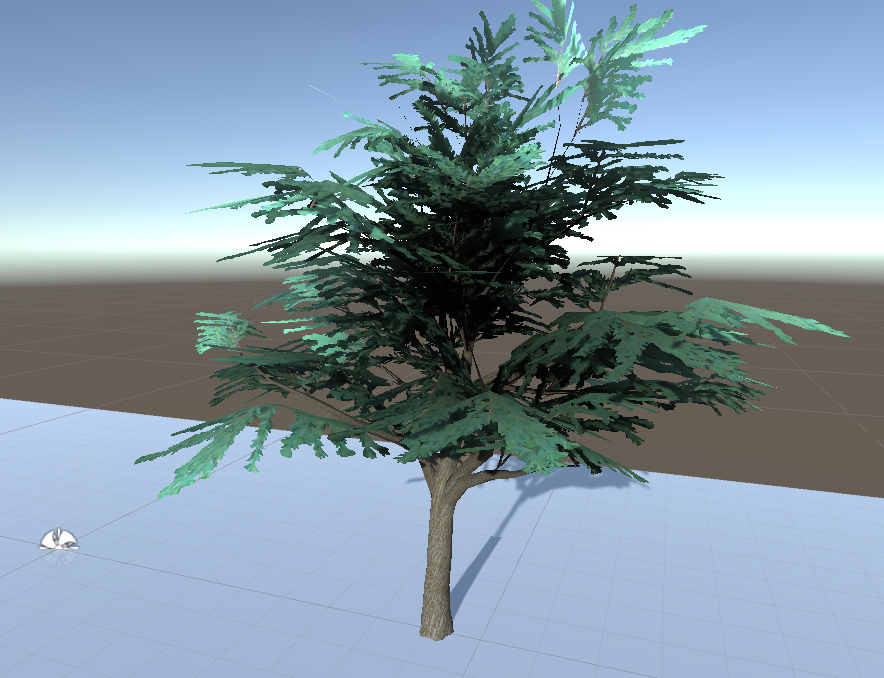
SmallTree
Editing the sample tree
Before editing the sample tree, we will duplicate the tree we are going to edit. You can duplicate it by right-clicking on the target tree and selecting “Duplicate”.
From now on, we will edit the duplicated tree.
Basic component
If you check the Inspector, you can see that there is a component called “Mtree Component”.
In the Functions tab of the Mtree Component, you can change the values in the Trunk, Branch, and Leaves items to change the form and shape of the tree.
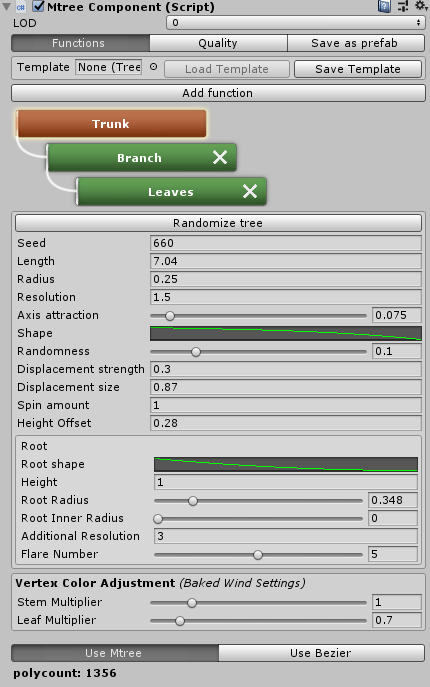
The Functions tab
If you change the values, you can see the shape of the tree changing in real time.

The shape of the tree changes in real time.
Next, let’s take a look at the main settings of Trunk, Branch and Leaves.
Trunk
The Trunk Function allows you to change settings related to the base tree trunk. The main settings are as follows.
- Length: Length of the tree
- Radius: Thickness of the trunk
- Spin Amount: Amount of twist
Branch
The Branch Function allows you to change settings for the stems and branches that split off from the tree trunk. The main settings are as follows.
- Number: Amount of branches to be split off from the trunk
- Length: Length of a branch
- Radius: Thickness of a branch
- Angle: Angle of the branch
- Gravity Strength: The strength of gravity compensation (as the value is increased, branches look like they are hanging down more.)
- Start: Height at which branches begin to grow from the trunk
Leaves
The Leaves Function allows you to configure settings related to the leaves growing from branches. The main settings are as follows.
- Number: Amount of leaves
- Size: Size of each leaf
- Leaf weight: Weight of each leaf
There is also a tab in the Leaves Function that controls how the leaves are textured, and you can change this setting to change the way they are textured.
Working with trees using Bézier curves
You can also make changes to the tree using Bézier curves by switching the tab called “Use Mtree” at the bottom of the Mtree Component to “Use Bezier”.
In this mode, the tree will have a white curve and edit points on it. You can stretch or bend the tree by changing the position of the edit points.
You can also increase the number of edit points with the “Add Curve” button.

Working with trees using Bézier curves
Save the created tree as a Prefab
When you are done in the Function tab, switch the tab from “Function” to “Save as Prefab” to save the tree you created.
Specify the destination folder from the Save folder and set the name of the Prefab.
You can then save the tree you created by pressing the “Save as Prefab” button at the bottom.
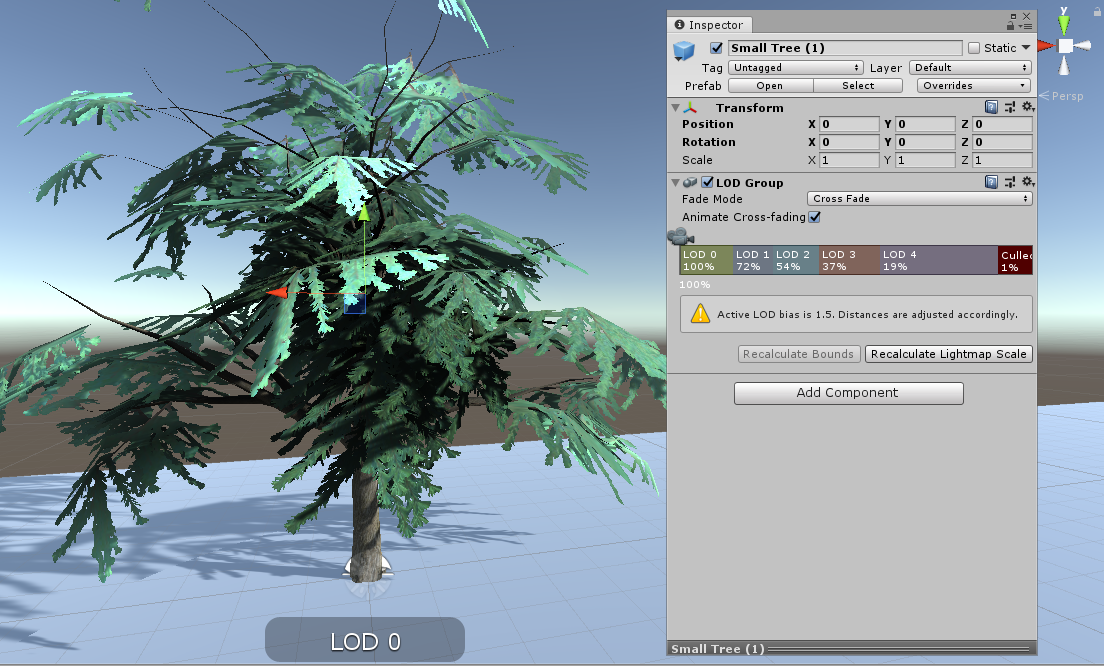
The saved tree can be placed as a Prefab at any time. Also, the LOD will be set automatically.
Save the created tree as a Prefab
These are the main ways to use the Mtree asset.
Creating leaf textures
The Mtree asset comes with the ability to create a leaf texture (Albedo or NormalMap).
Open the edit screen by selecting Window→Mtree→BranchEditor.
As with the Mtree Component, you can save the texture by pressing the “Save Texture” button at the bottom of the screen after changing various parameters.
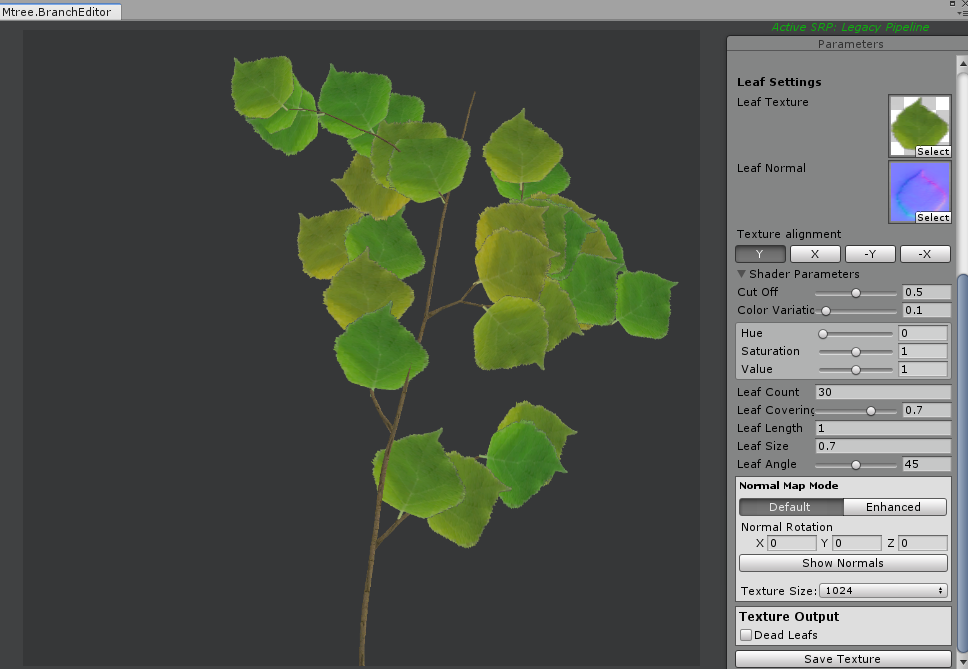
Creating a leaf texture
How to upload assets from Unity to STYLY

In this article, we showed you how to use Mtree to model trees.
Mtree is a highly recommended asset for those who want to create their own trees quickly, as it allows you to model trees more intuitively than the standard Tree component in Unity.