In this article, I introduce how to make a Shader to add up-and-down motion on the water surface by Shaderforge in Unity.
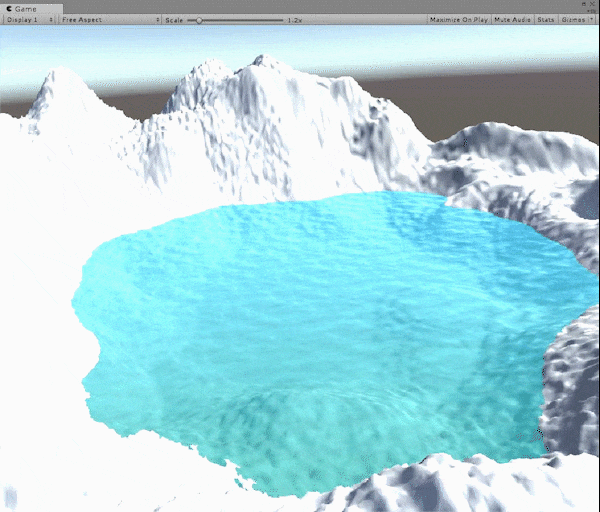
The completed image – the waves moving up and down.
We make an animation that the water surface moves up and down slowly.
Samples
You can taste a sample space in STYLY GALLERY.
You can download the Unity project in this article. Wave_Sample
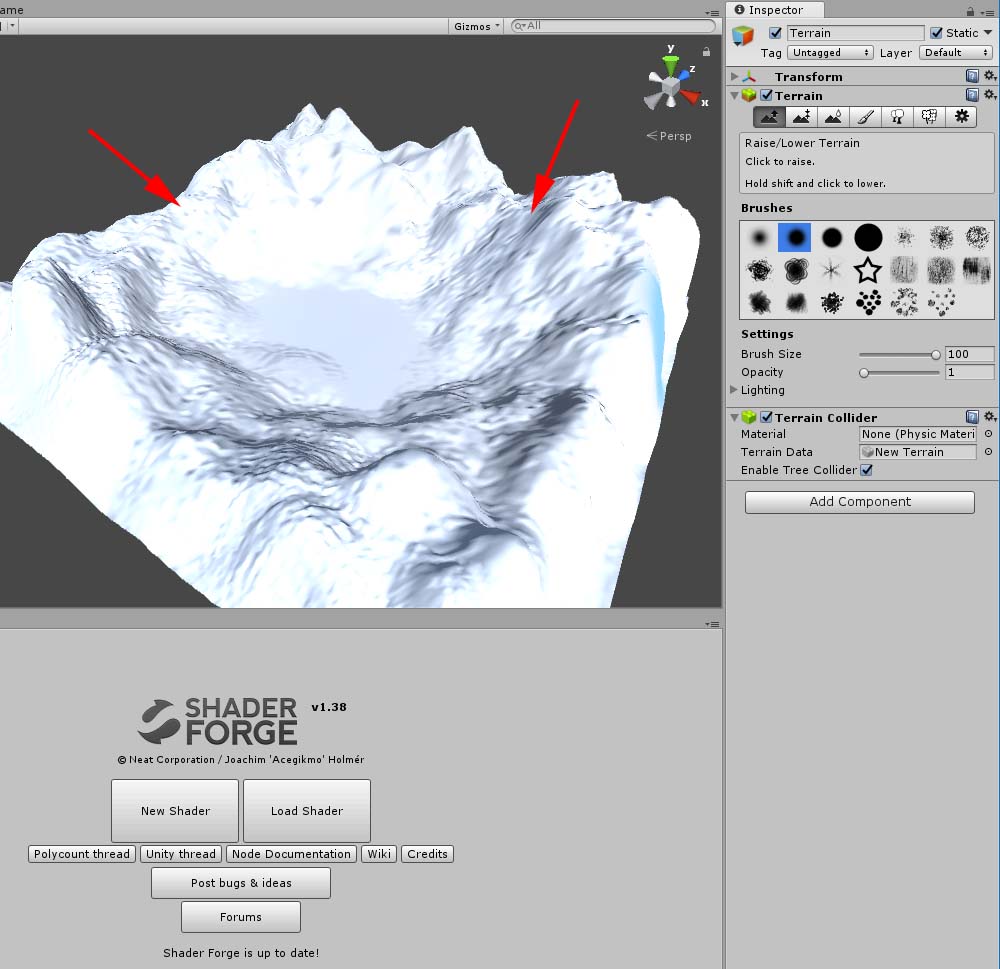
Make a terrain by “Terrain”
Add a Terrain
Make a shape with a depression at the centre to store some water by Terrain. You can create a Terrain by selecting GameObject > 3D object > Terrain.
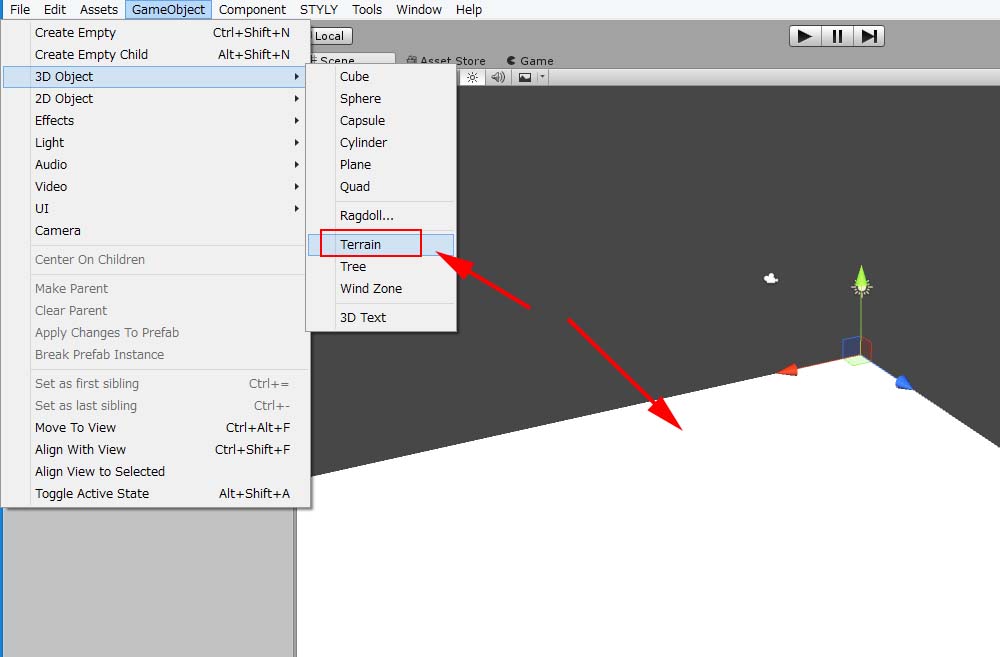
Create a Terrain
Change the size of Terrain
Adjust the size as the default is too large. Click the cog icon on the right to open the window for the setting. Adjust the size by Terrain Width and Terrain Width under the Resolution section.
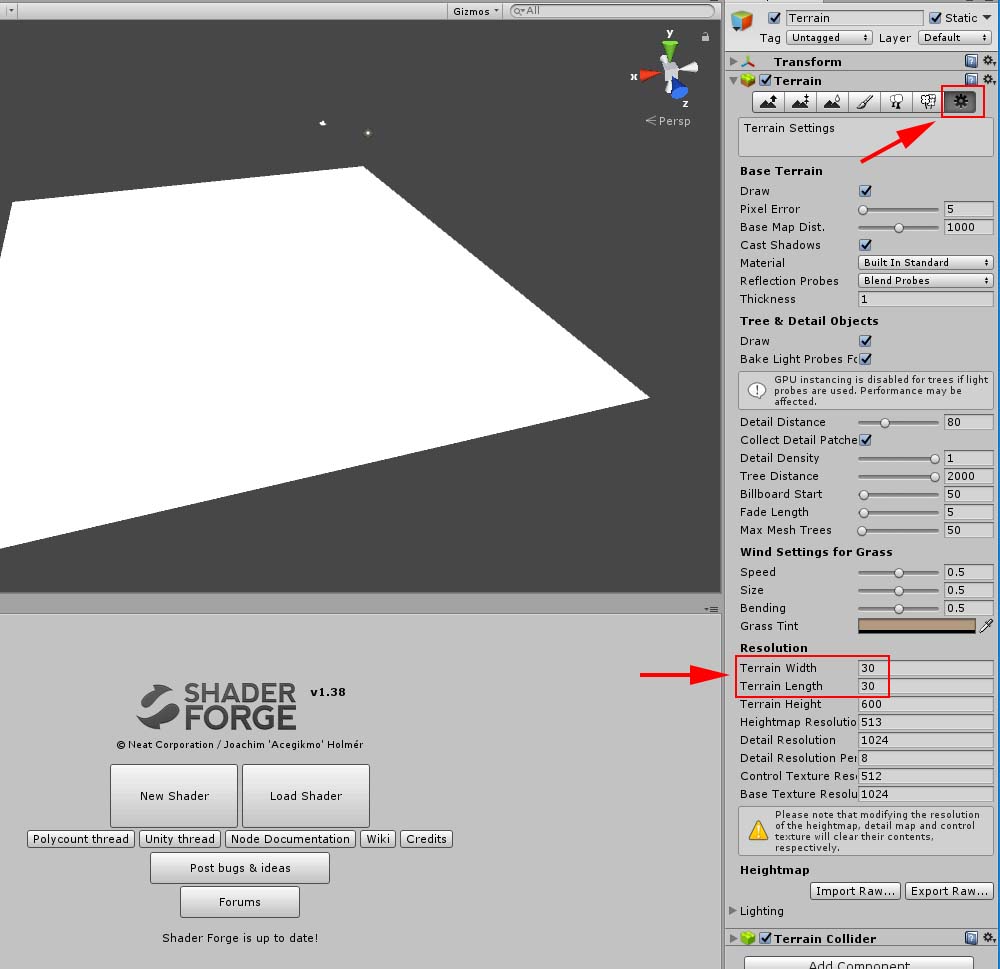
Adjust the size of Terrain
In this example, I set both to 30.
Create a terrain
Once you set the shape and the size of the brush and the Opacity value, let’s create a terrain steadily.
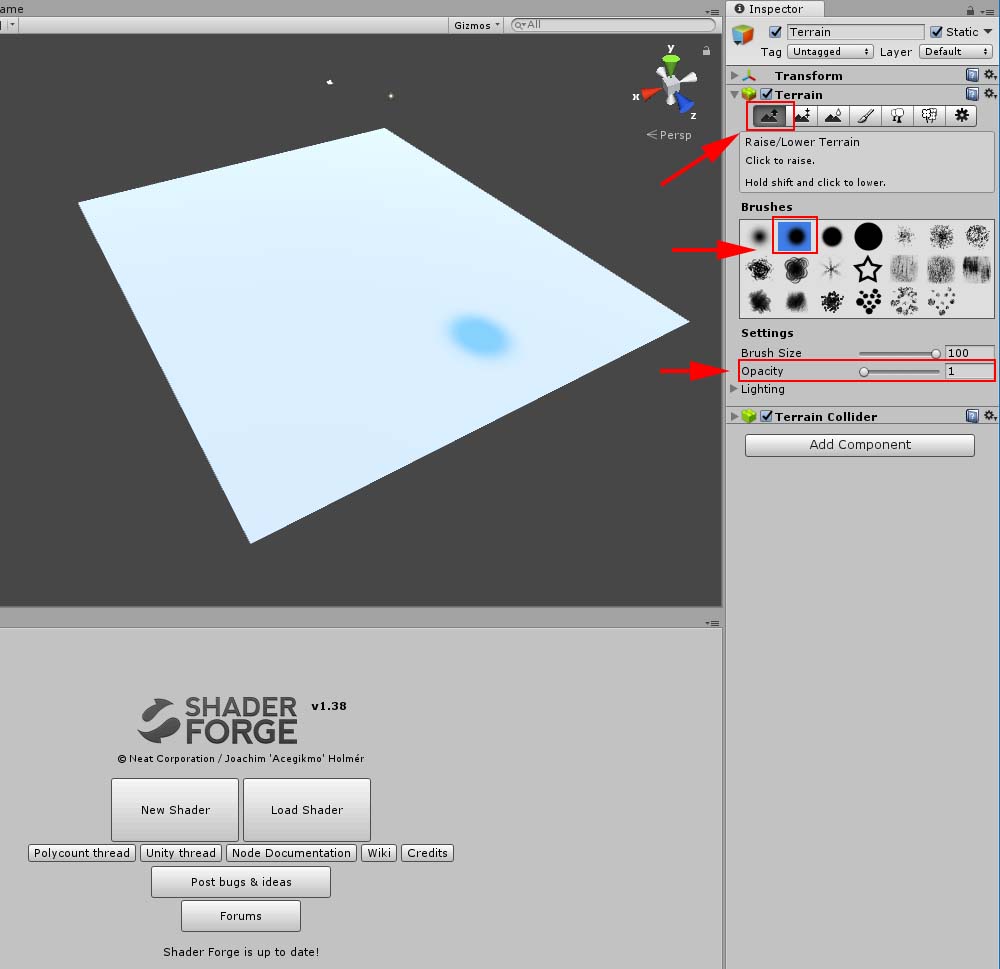
Adjust the brush
Make a terrain so that the surrounding area rises. I made it like a basin.
Create a terrain.
The terrain is ready now.
Create a Shader for water
Place a Plane to apply Material to
Place a Plane at the centre of the depressed ground to express water. I adjusted it to a bit larger not to look too shallow when water moves up and down.
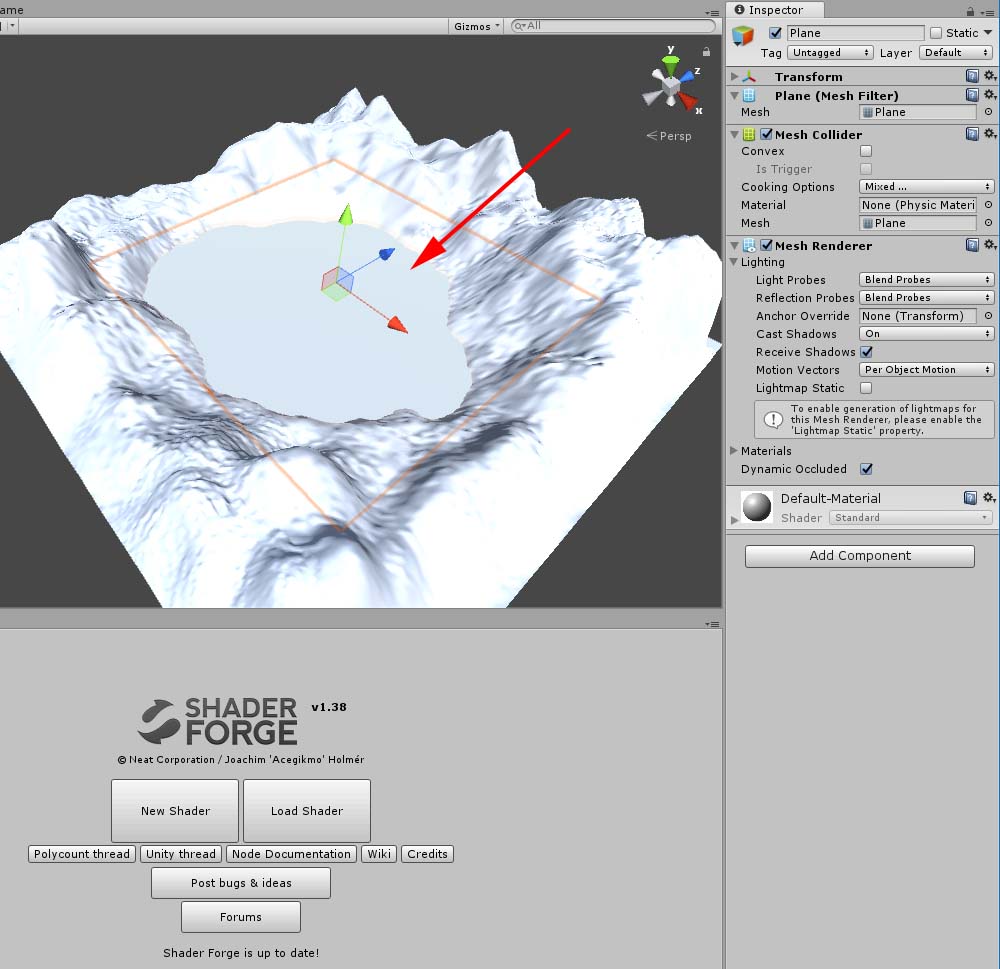
Place a Plane.
The setting for Shaderforge
Open Shderforge and select New Shader > Lit(PBR).
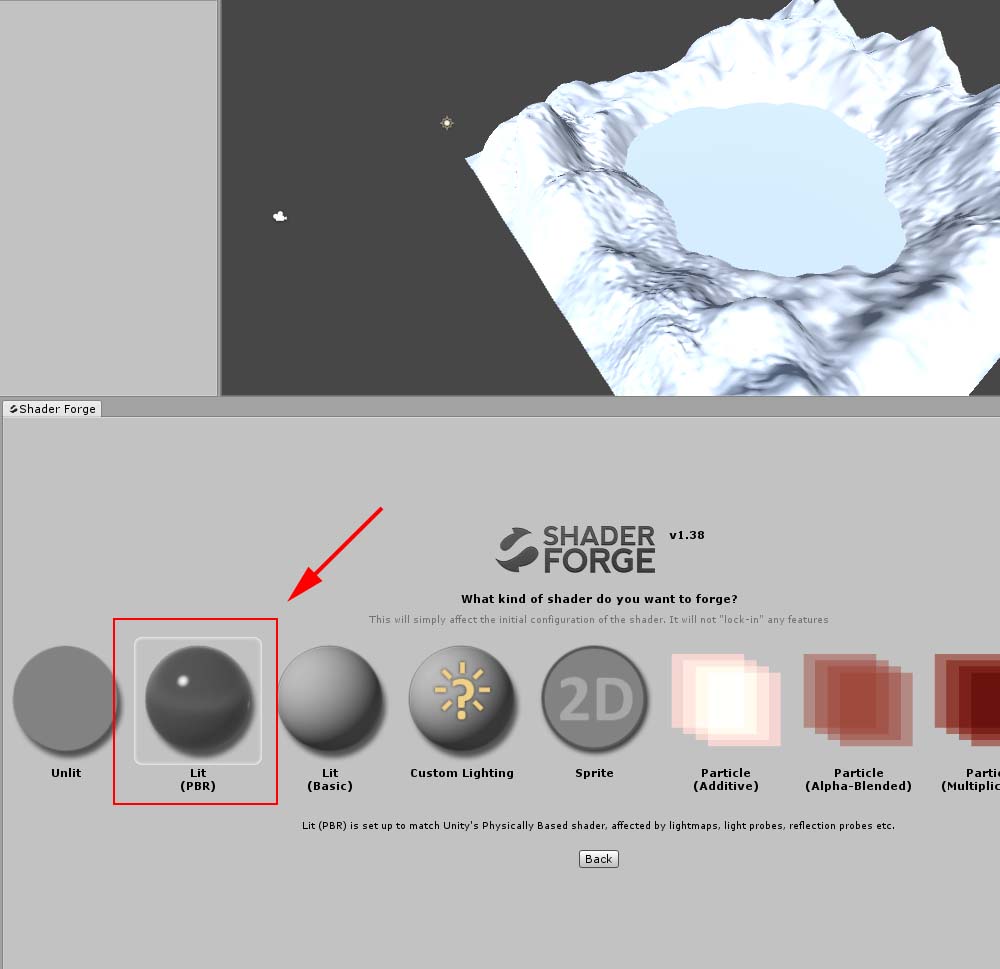
Select Lit(PBR).
Set Blend Mode to Alpha Blend to adjust transparency. Set Face Culling to Double Sided to make the backside visible. Check the box for OpenGL ES3.0.
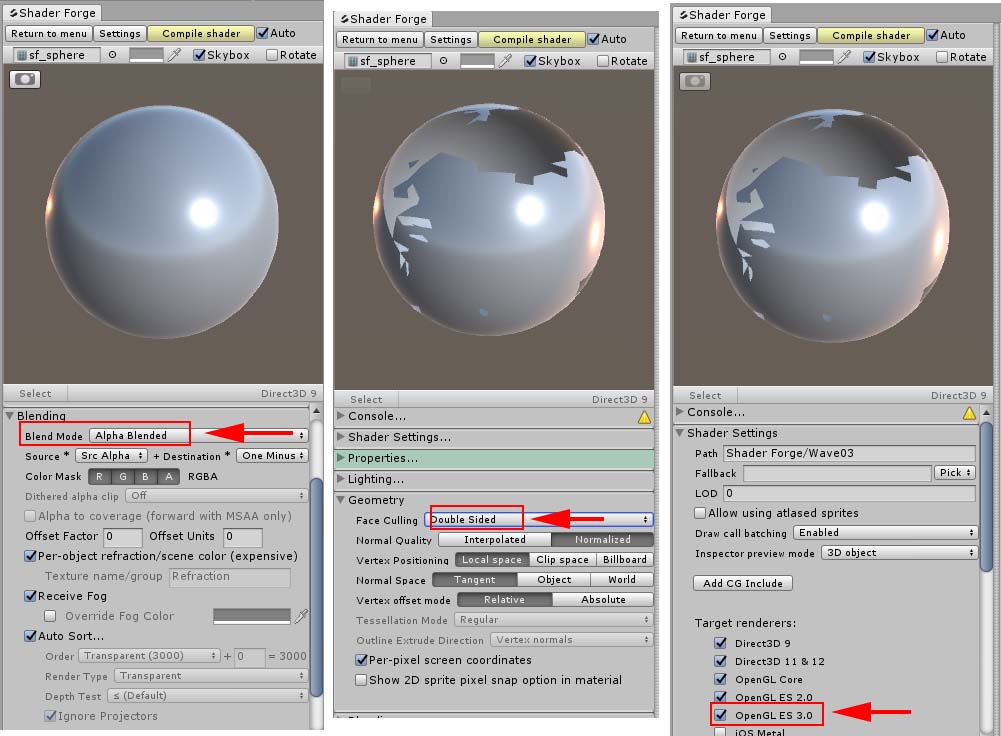
The setting for the Shader
Change the Shader of the Material
Assign a Material to the Plane and change the shader of the Material to the one you made in Shaderforge.
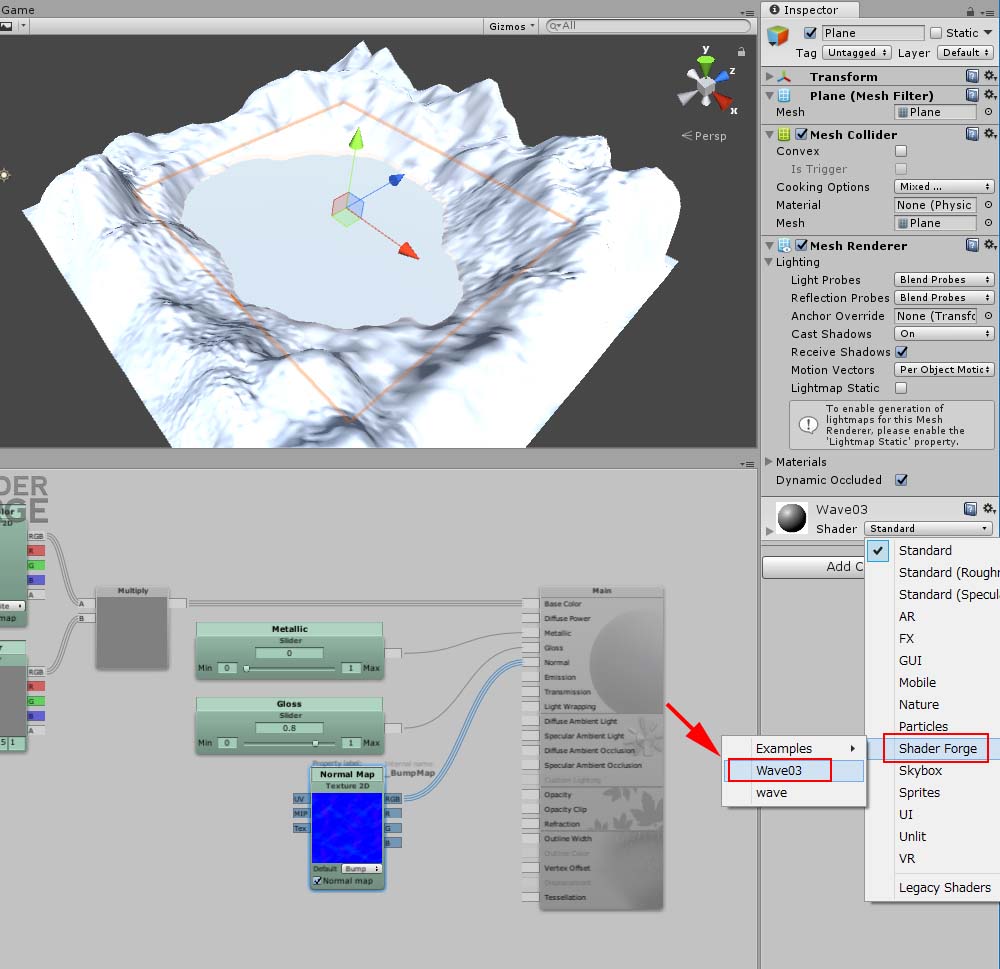
Change the shader of the Material
Use Normalmap for water surface
Express the water surface by Normalmap.
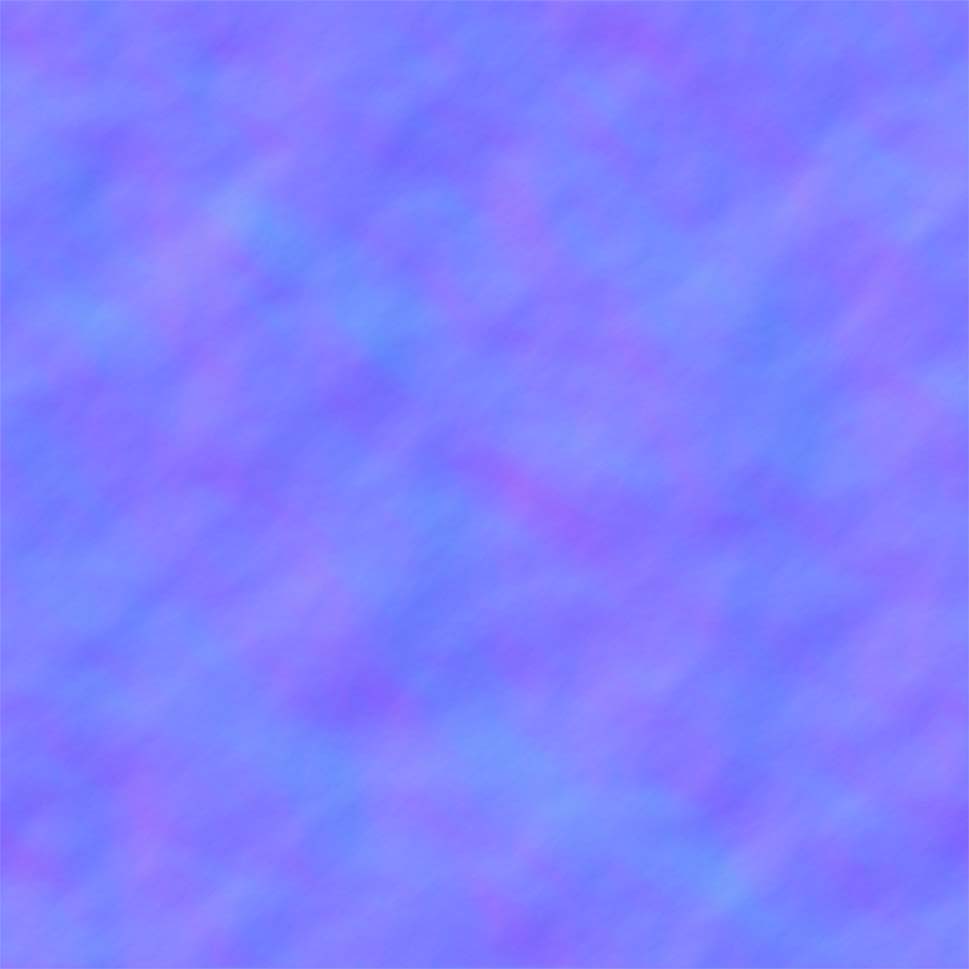
Normalmap for water surface
In this example, use the Normalmap as shown above. Assign the Normalmap to “Normalmap” in the Inspector window.
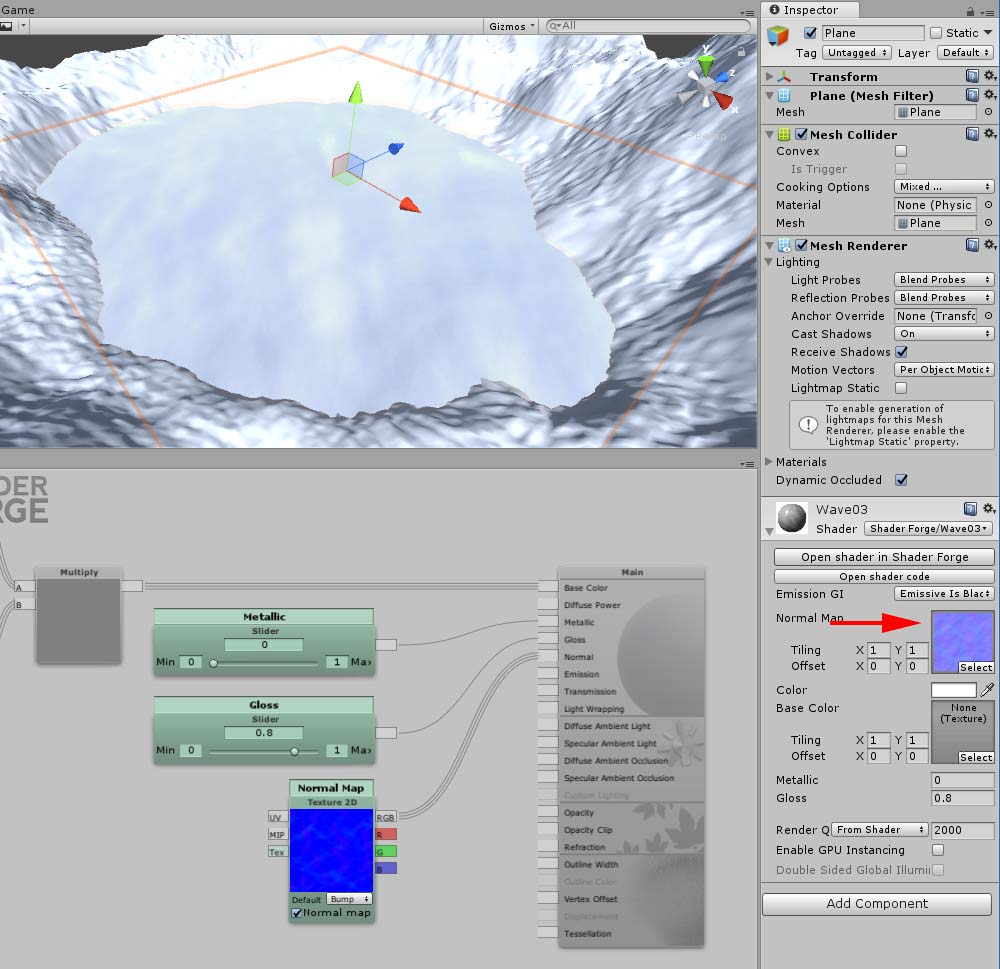
Apply the Normalmap
As the waves are too large with the default setting, adjust Tiling to make them finer. Adjust X and Y of Tiling to set the number of the tiles.
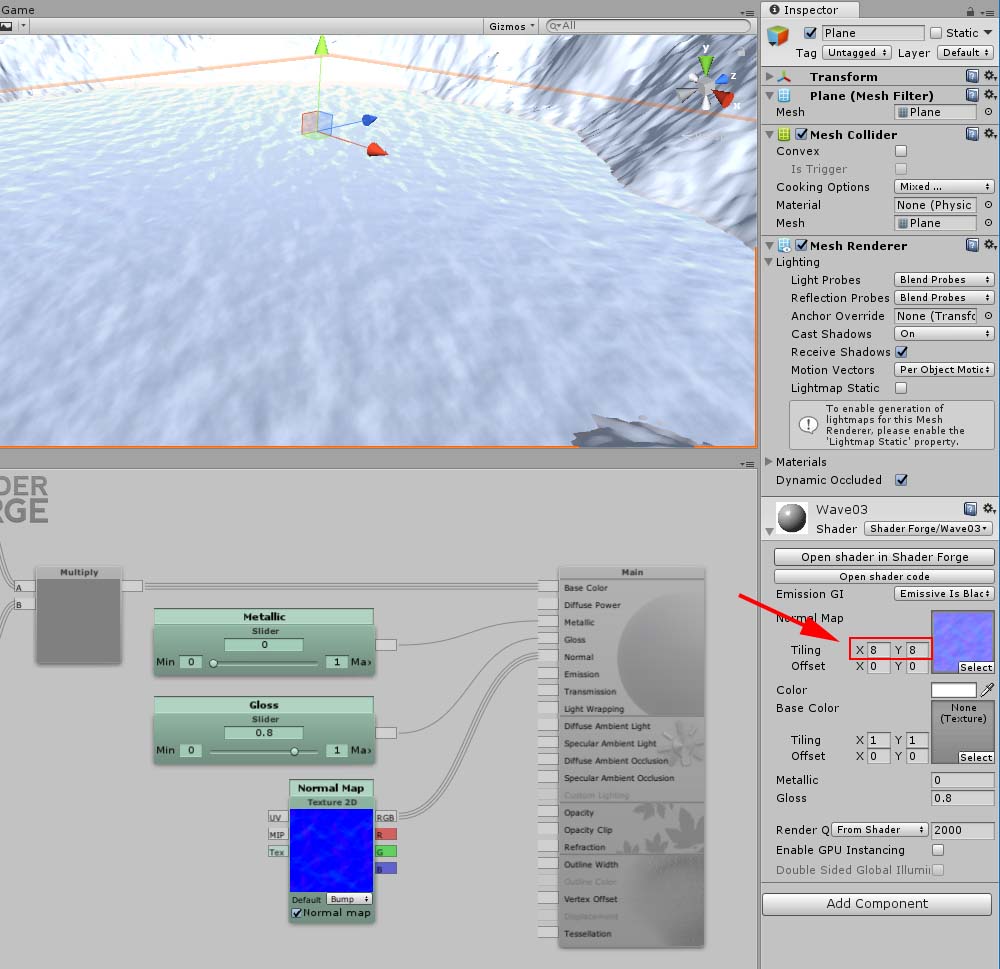
Adjust Tiling.
Set both X and Y to 8 in this example.
Add a motion to the Plane by Vertex Offset
Add a back-and-forth motion by Sin. Adjust the speed by “Time” and the range of the motion by “Remap”.
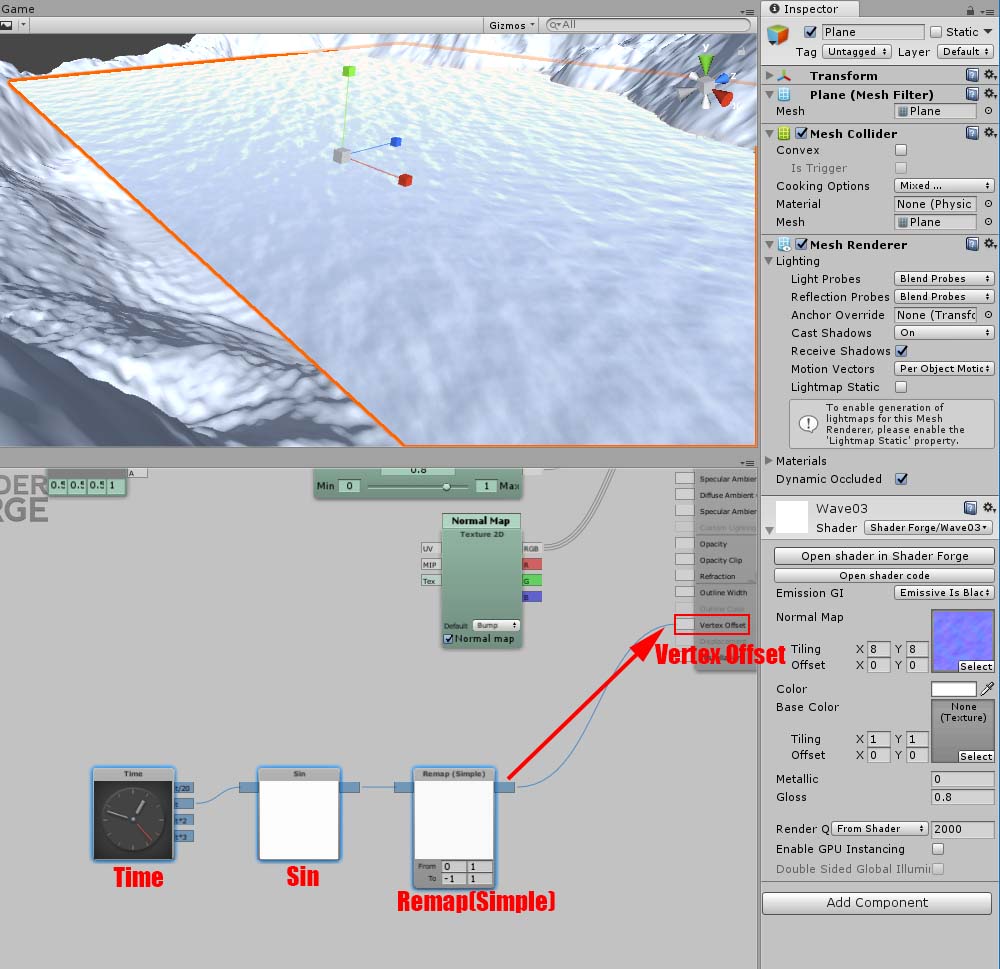
Connect it to Vertex Offset
The motion will be activated once you connect it to Vertex Offset. Enable the Inspector to adjust the range of the motion.
Make the range of the motion adjustable
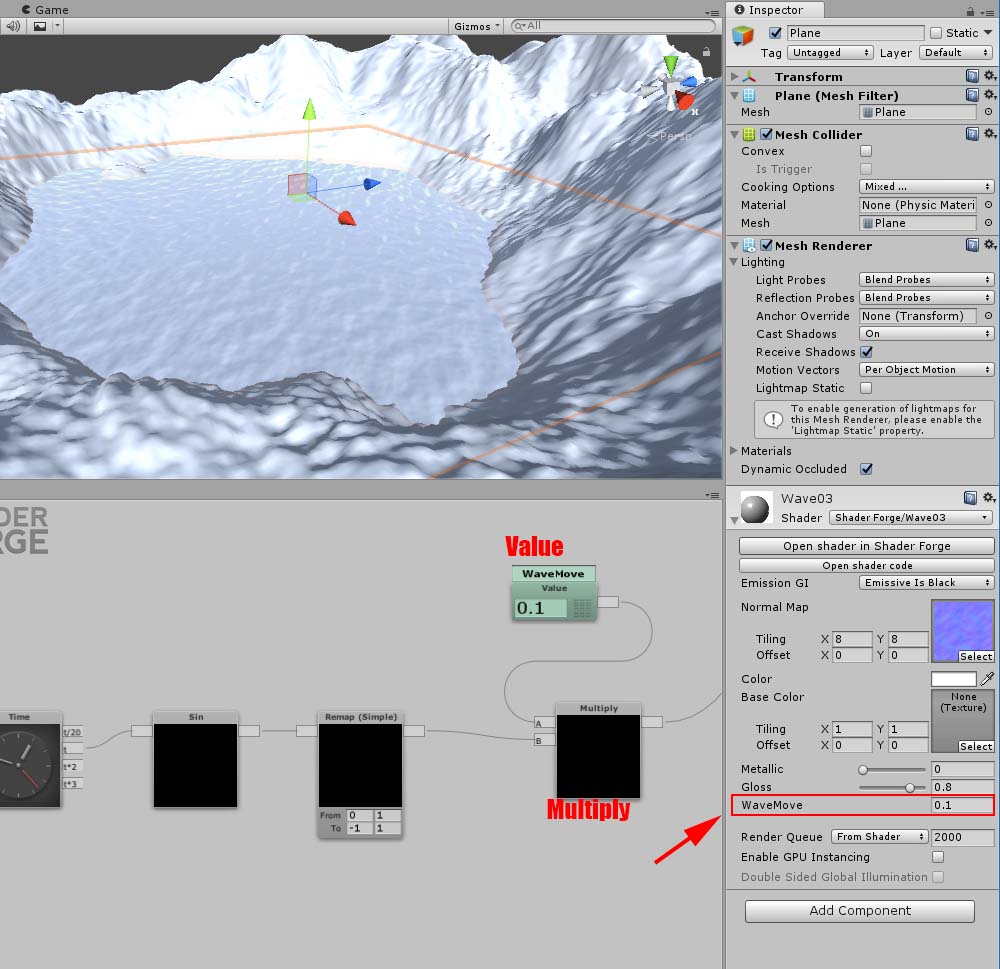
Add a Value node called “WaveMove” to adjust the range of the motion.
Make it move up and down
In this state, the water moves in the all directions, X, Y and Z. So make it move only in the Y direction. Add a Value node with the value set to zero to stop the motion along X and Z direction. Connect to “G” of the Append node to restrict the motion to the Y direction.
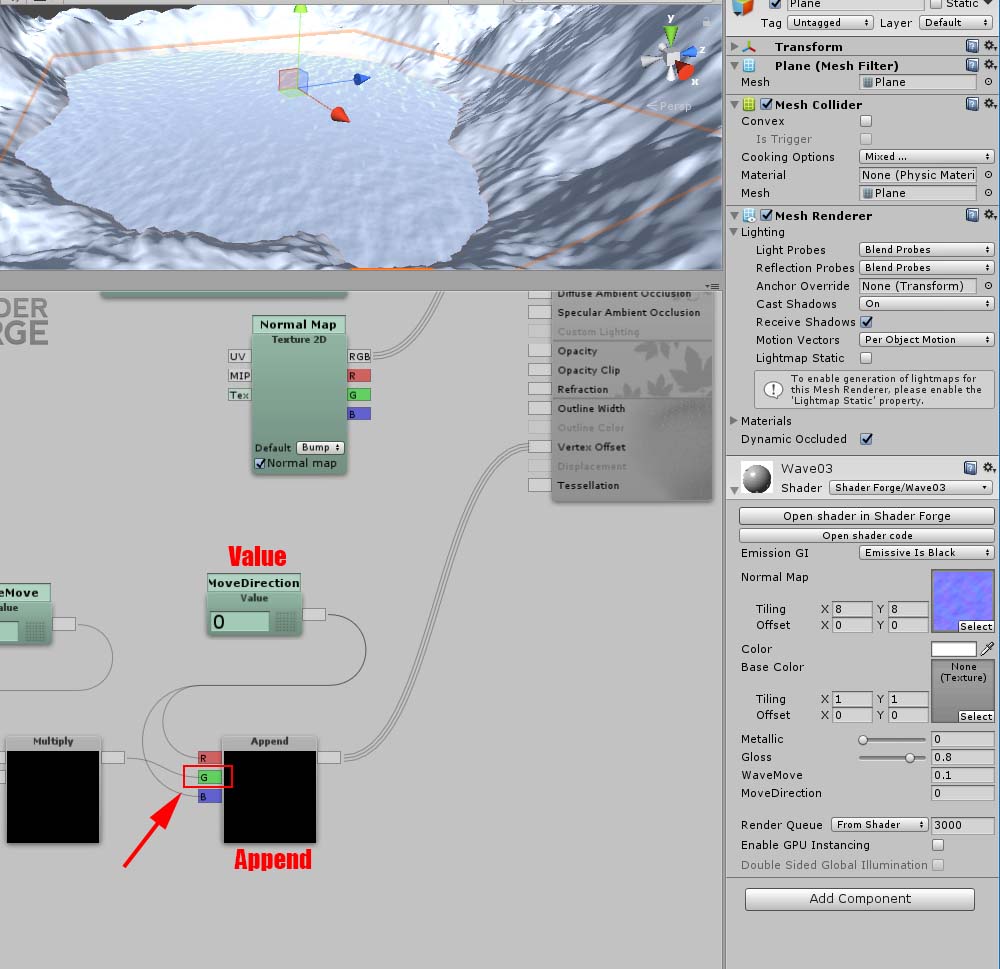
Set the direction of the motion.
The setting for the colour of the water
Make two Colour nodes and combine them by a Lerp node. Connect a Normal Dir and a Value node to a Fresnel, and then, connect the Fresnel to the Lerp.
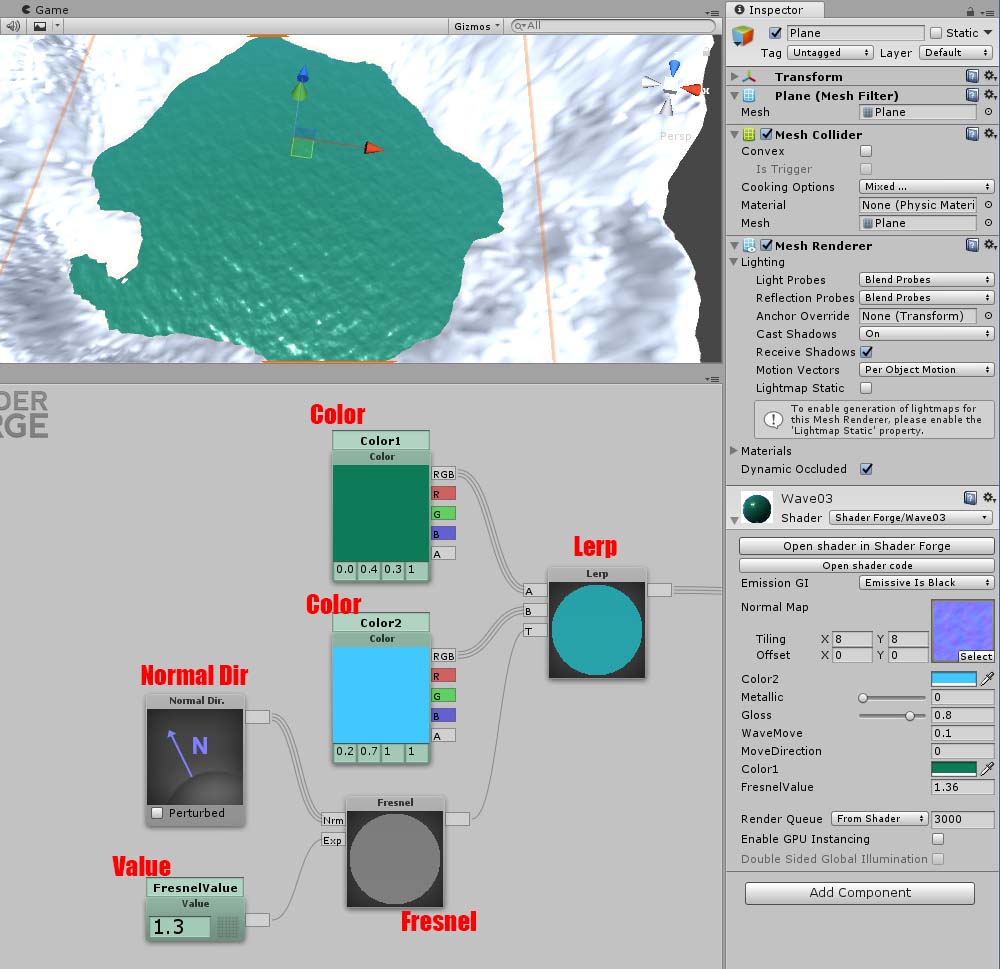
The setting for the colour of the water
You can make the colour responsive to viewing angle by Fresnel. The more perpendicular your viewing angle is against the water surface, the greener it looks. Likewise, when you look at the water surface with a shallower angle, the colour gets closer to sky blue (=Color2).
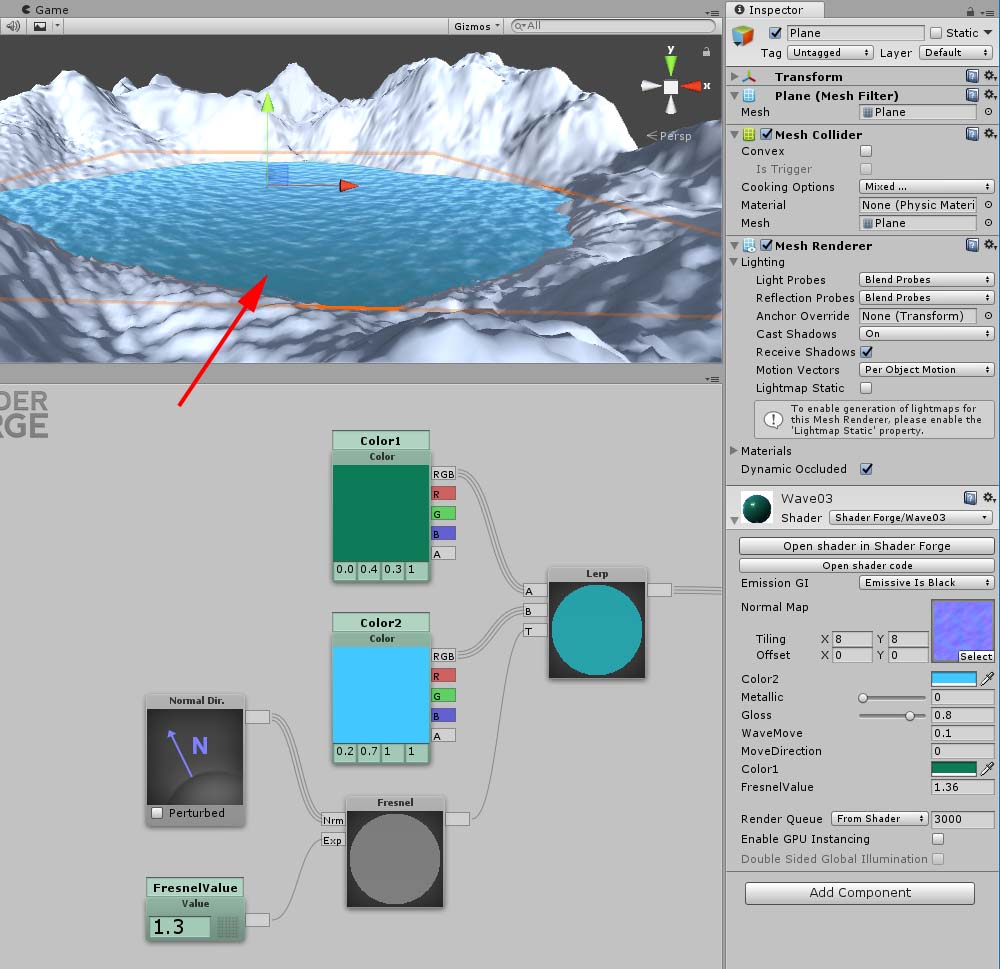
The effect of Fresnel
The setting for transparency
Adjust transparency to make the water more realistic. Add a Slider and connect it to Opacity. I set the default value to 0.7.
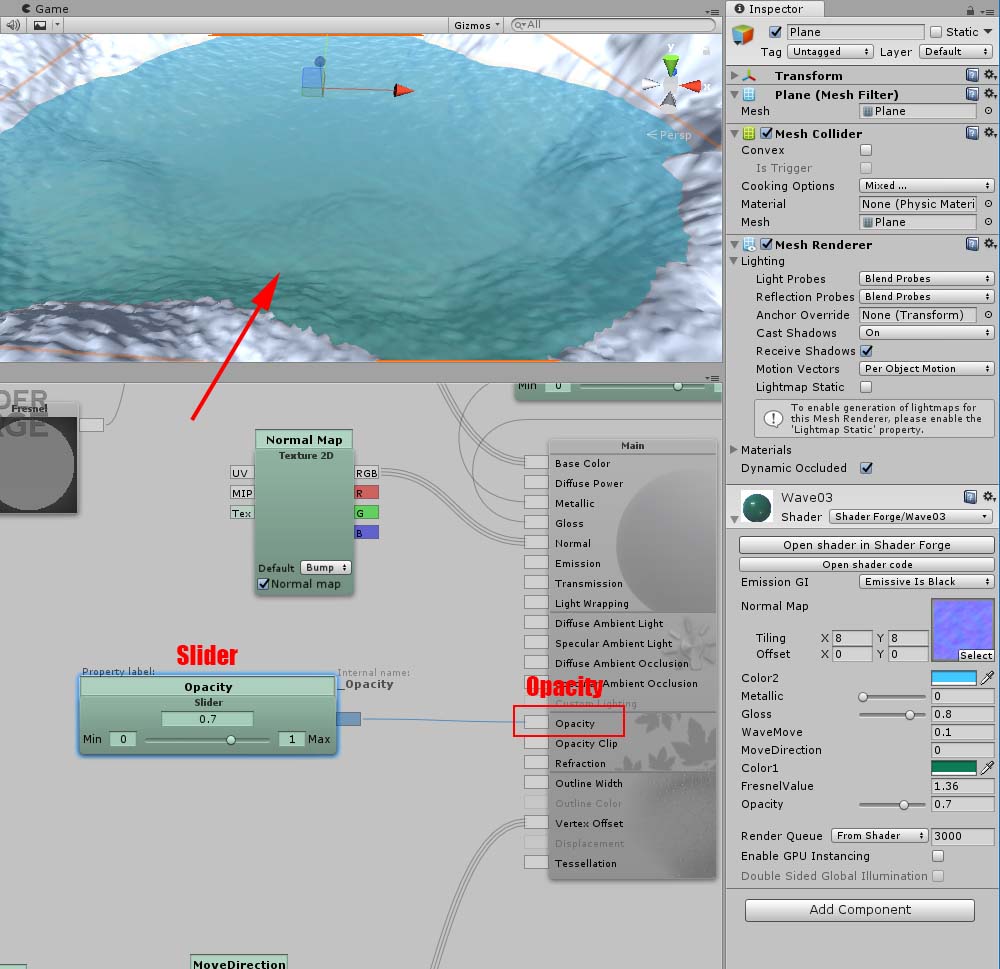
The setting of transparency
This completes the water surface with an up-and-down motion.
The completed image – the waves with an up-and-down motion.
In this article, I introduced how to make the water surface with an up-and-down motion by Shaderforge in Unity. I wonder it would be quicker to make this kind of motion by key-frame animation. However, you can find a suitable use for this approach as you can easily adjust it by Inspector window How to upload an Asset from Unity to STYLY: Read the article