How to use CinemaScene in STYLY.
This time, we will introduce how to use CinemaScene in STYLY.
What is CinemaScene?
Cinemachine is a powerful tool in Unity that makes it easy to create cinematic camera effects. By using the “Cinemachine Virtual Camera,” you can intuitively set up various camera movements such as target tracking and smooth camera transitions.
Preparing CinemaScene
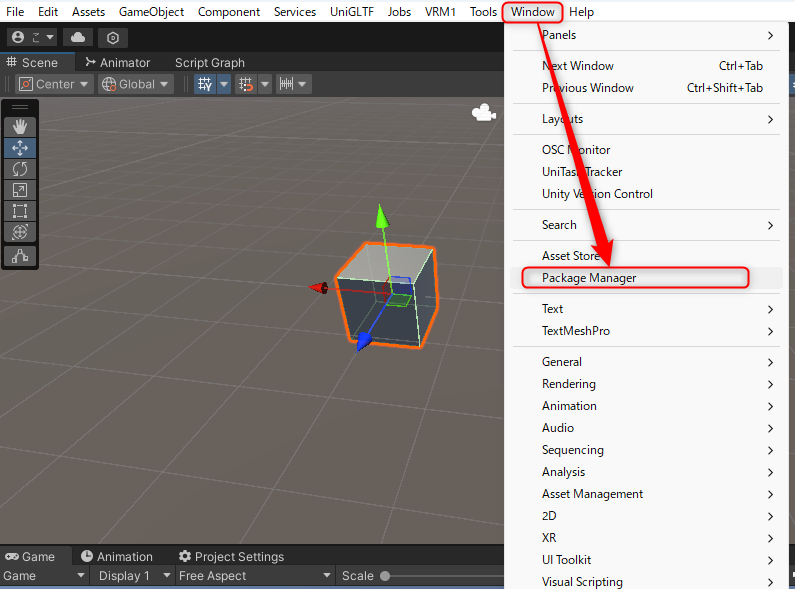
Open Unity’s menu bar and go to Window → Package Manager.
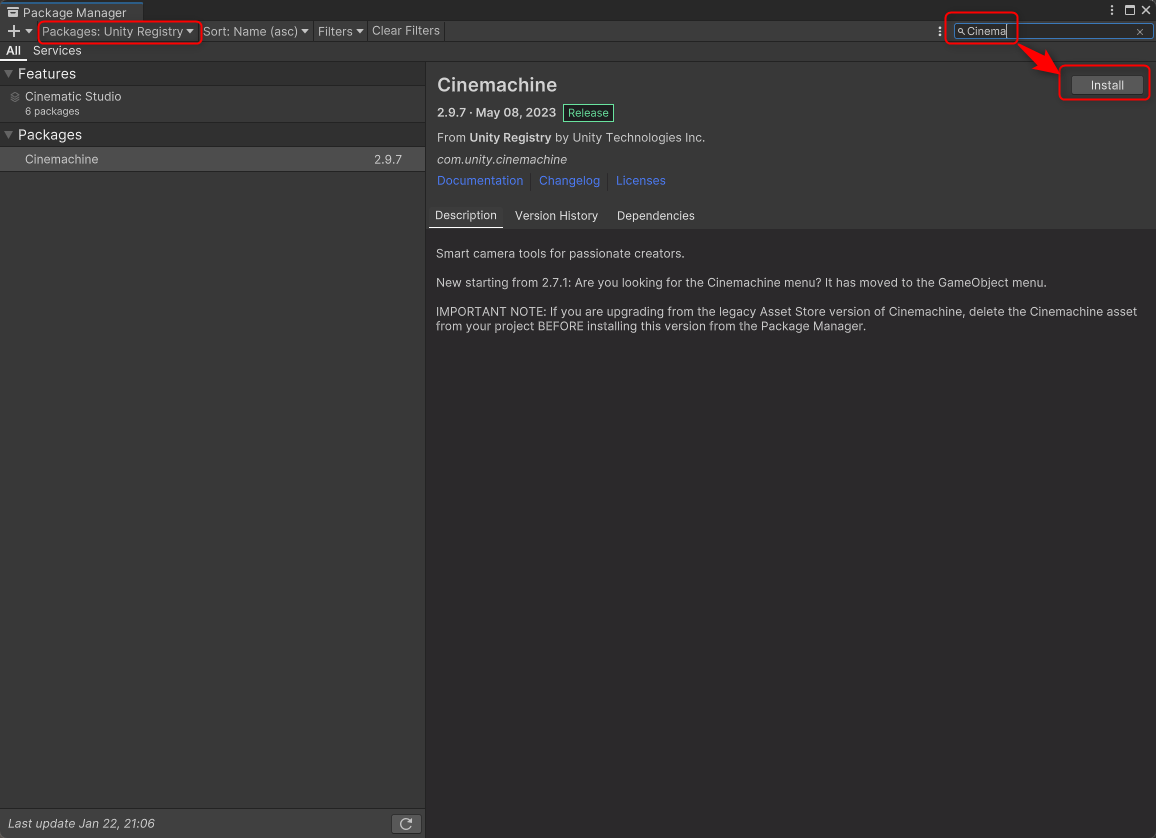
– Select Unity Registry and enter “Cinemachine” in the search bar at the top right.
– Select “Cinemachine” and install it.
Dolly Cart (Move an Object Along a Path)
Move an Object Along a Path Using Dolly Cart
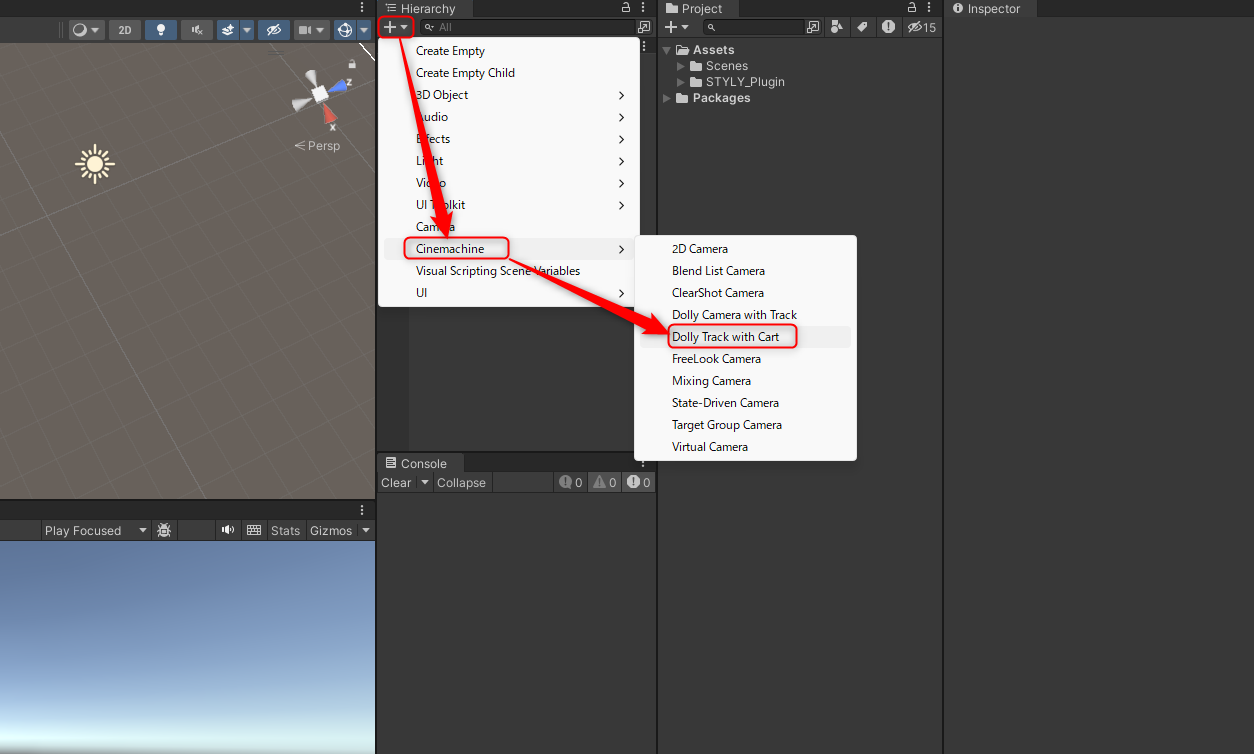
- Place Dolly Track with Cart
- In the Hierarchy window, select “+” → Cinemachine → Dolly Track with Cart and place it in the scene.
2. Prepare the Object to Move
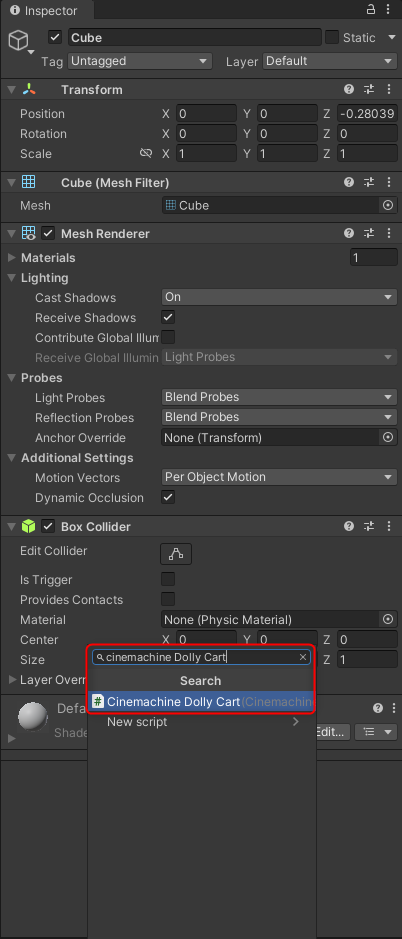
- Place a “Cube” in the scene.
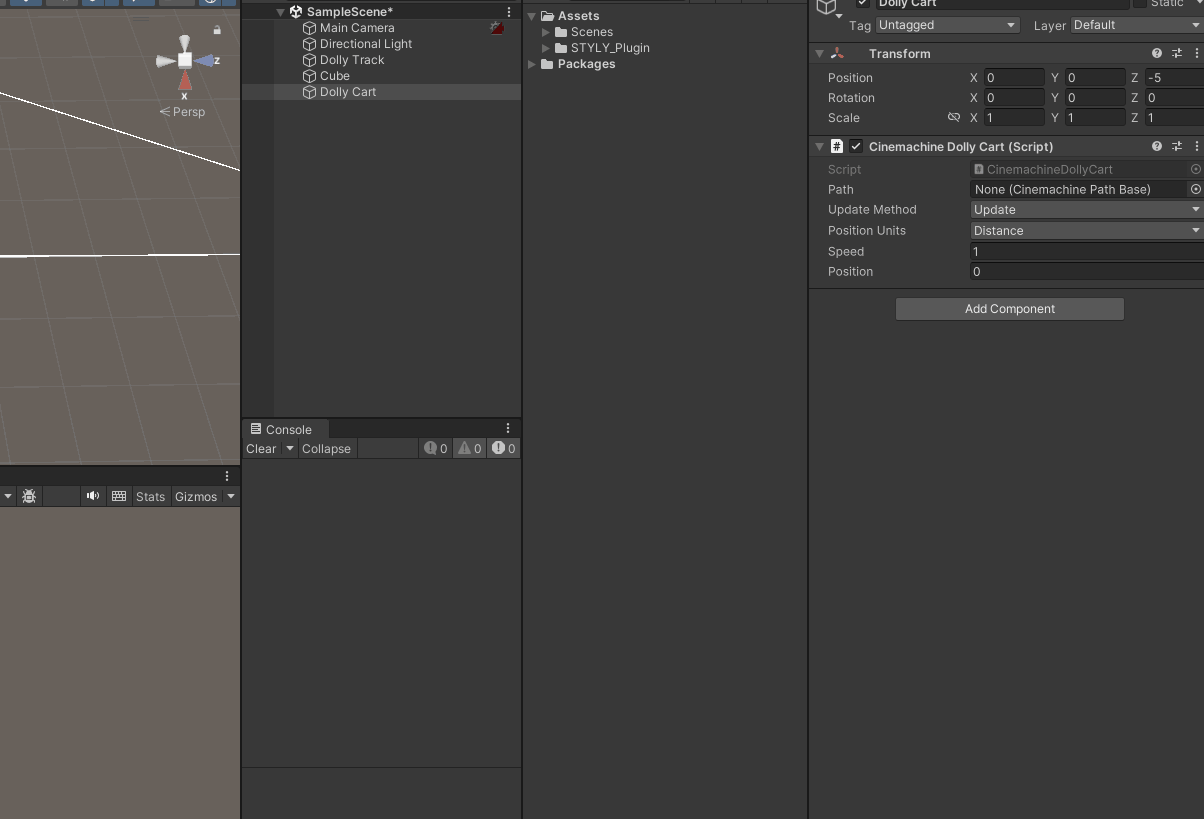
- Attach the “Cinemachine Dolly Cart” component to the Cube using Add Component.
* In this tutorial, we will show how to move any object along the track. Therefore, we won’t use the Dolly Cart that was placed automatically.
3. Set the Path
- Assign the “CinemachineSmoothPath” attached to the Dolly Track to the Path field of the “Cinemachine Dolly Cart” attached to the Cube.
- Set the Speed to “1”.
Attaching the Created Path
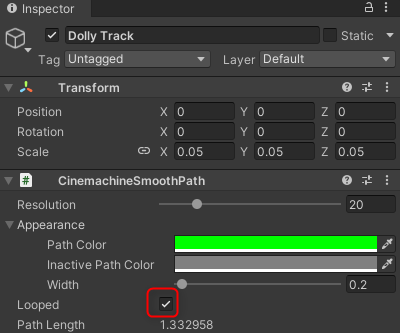
4. Enable Looping
- Select the Dolly Track and check the “Looped” option in the “CinemachineSmoothPath” settings.
5. Test the Movement
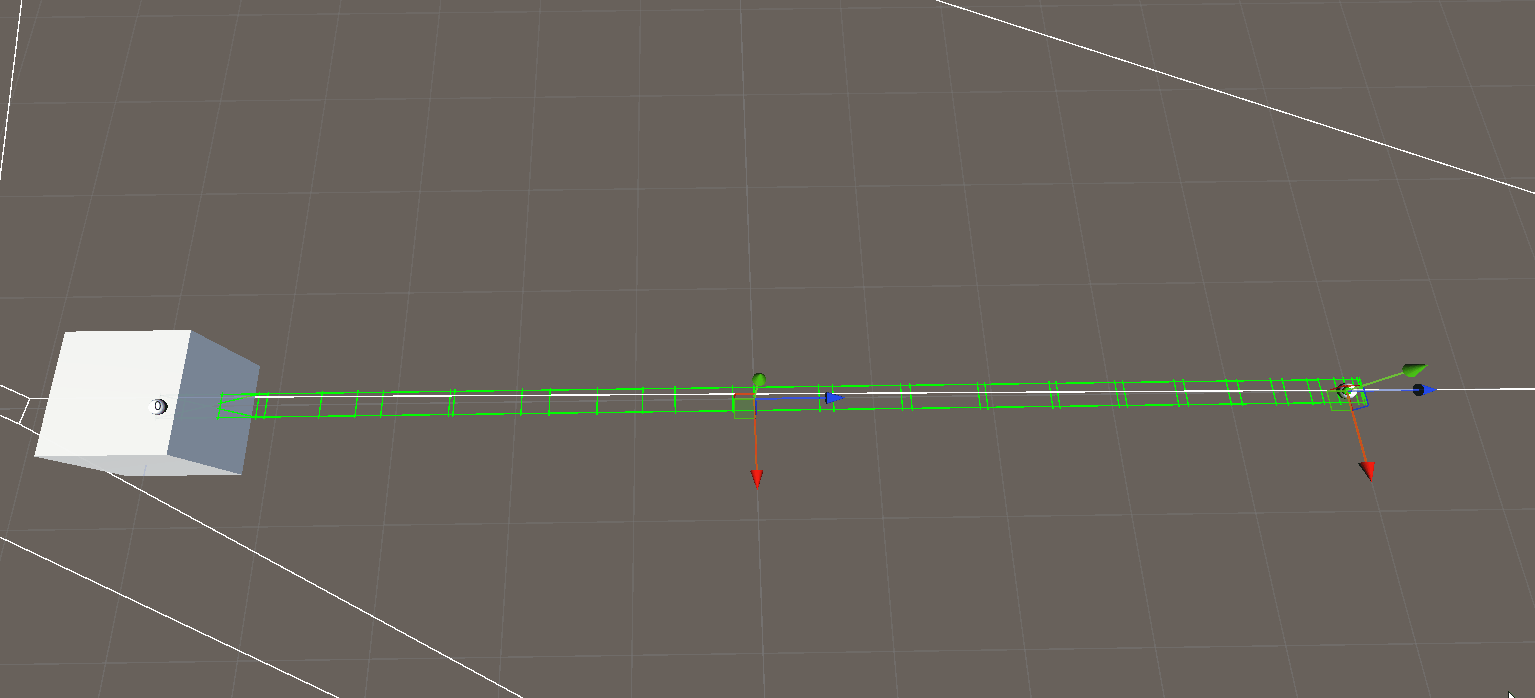
- When you run the scene, the Cube will move along the green rail (path).
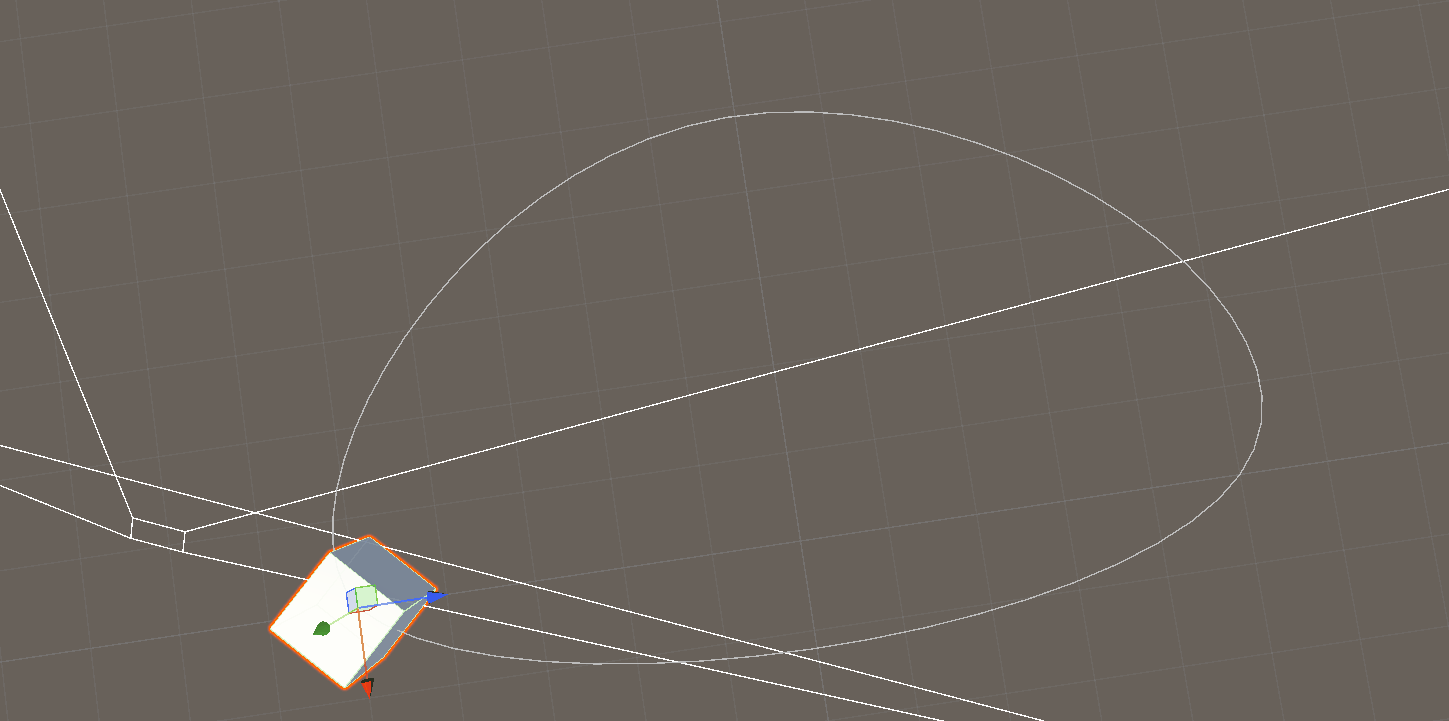
Move the Cube in a Circular Path
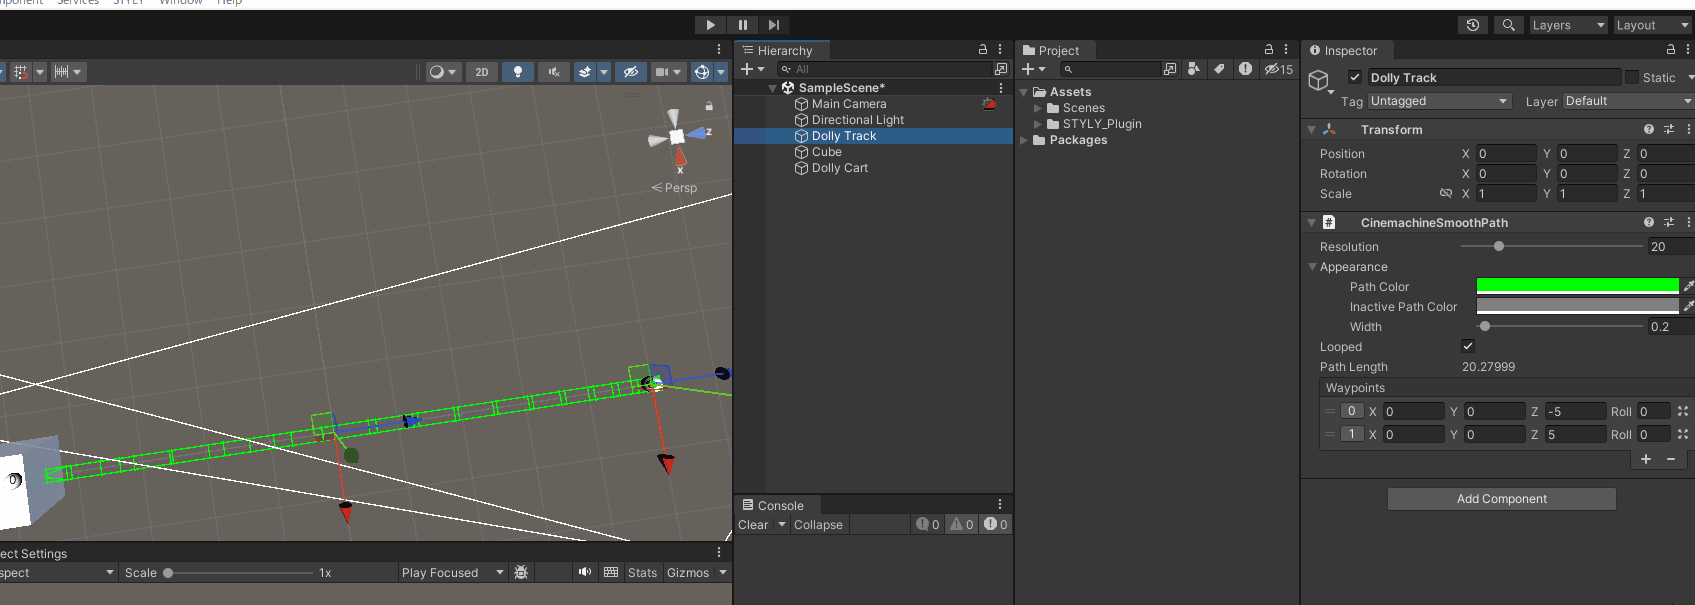
1. Edit the Path
- In the Dolly Track’s “CinemachineSmoothPath” Waypoints, click “+” to add more points.
- Move the newly created points (spherical markers) to form a circular path.
Modifying the Path
2. Test the Movement
When you run the scene, the Cube will move along the circular path.
Upload the scene to STYLY and check the movement.

The scene is now successfully running in STYLY.