In How to Build a VR Shooting Game, I will show you how to build a VR shooting game using Unity and Playmaker, upload it to STYLY, and publish it.
In this article, I will show you how to set the bullets for the gun controller that I created last time.
- Advance preparation
- Gun Controller Settings
- Setting up the bullets
- How to generate enemy characters
- Enemy Character Settings
- BGM and SE Settings
- How to upload to STYLY
Parts 1 to 7 are continued, so let’s read through to the end and create your own.

Last time, we set up the gun controller for the game.
![[Unity/Playmaker] How to make a VR shooting game – Setting the gun controller](https://styly.cc/wp-content/uploads/2018/05/-2018-05-10-14.01.35-e1584421548660.jpg)
Setting up the bullets
First, create an empty Game Object in the Scene Hierarchy and name it “bullet”.
Similar to the RainbowCrossbow for the gun object set up in the previous article, create a visual bullet prefab in the Scene Editor and tweak the prefab before inserting it into the appropriate controller FSM.
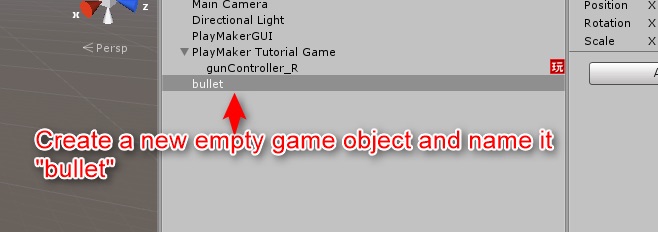
Create a game object called bullet
Find the “Teddy Grenade” asset under the 3D section of the Weapons Pack folder in FPL_ISBIT and drag it to the bullet object to make it a child.
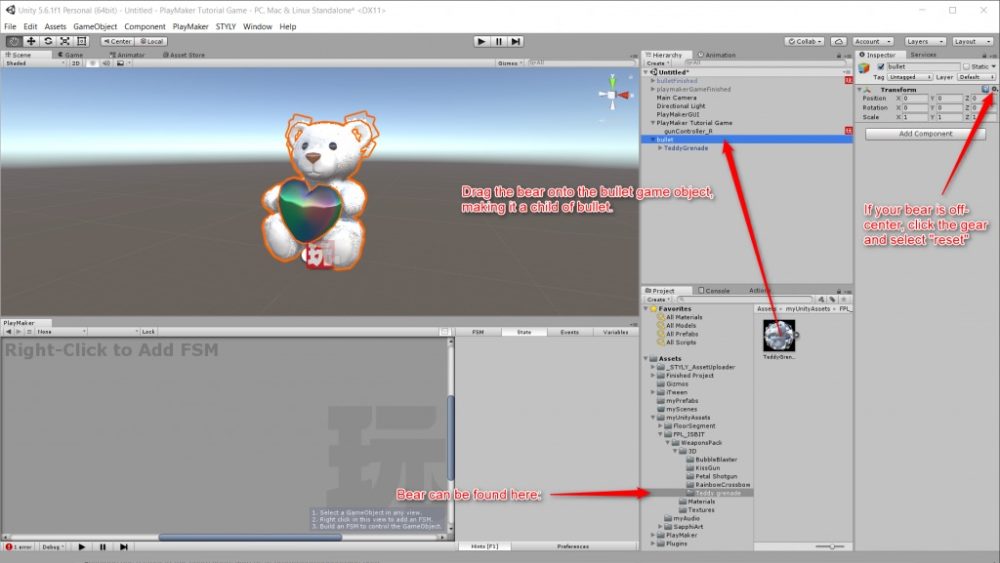
Dragging the Teddy Grenade
The following will appear on the Scene Editor screen.
If the bear is off-center, click on the gear icon under the Transform component of the Inspector and select “Reset”.
Configure the Capsule Collider
Setting the bullet
Next, select the bullet, select Add Component in the Inspector window, and then search for “Capsule Collider”.
Once found, click to add this component to the bullet.
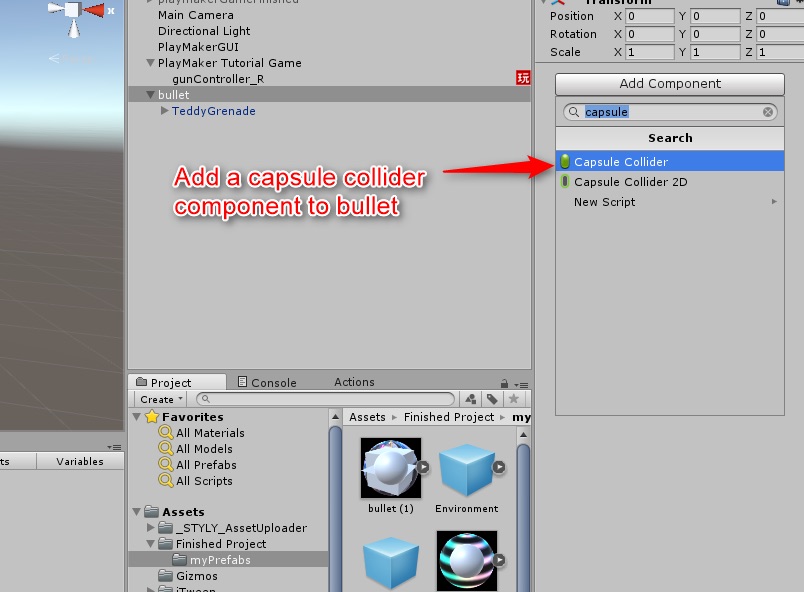
Add Capsule Collider
Edit the shape of the Collider to roughly wrap the bear.
Click Edit Collider to enable click-and-drag editing, or change the radius and height directly to manipulate the Collider.
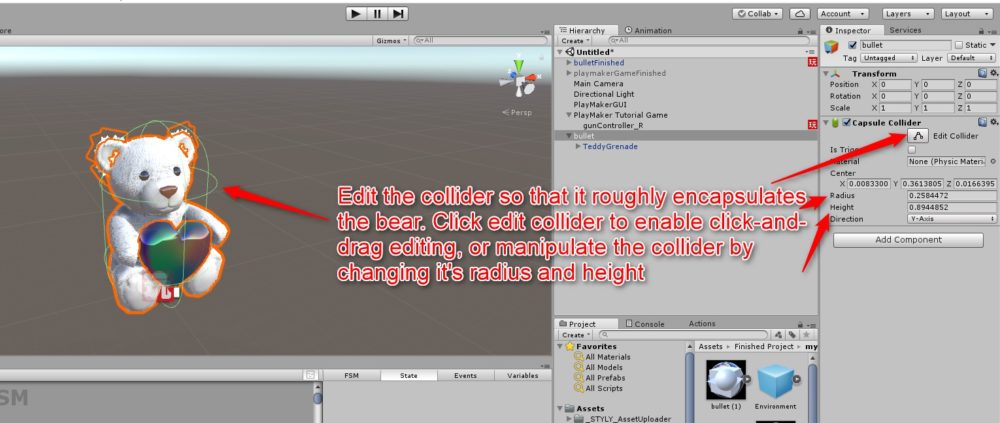
Edit Collider shape
Also, give the bullet a “Rigid Body” so that the physics of the game world can be applied.
Make sure “Use Gravity” is checked so that the bullets fall as they fly and look like the real world.
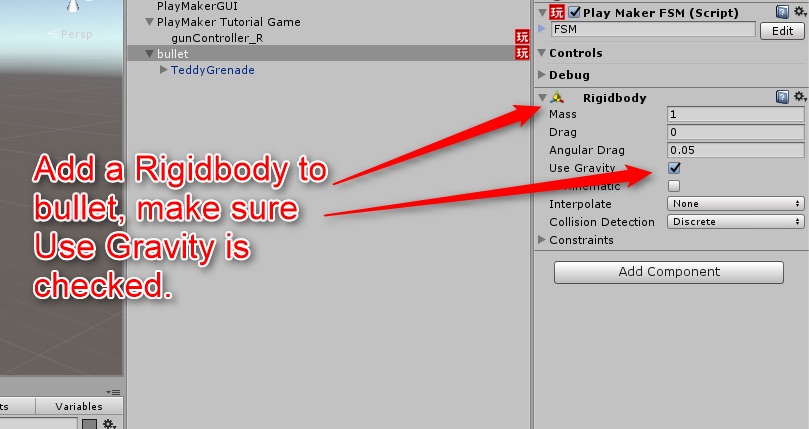
Check on Rigid Body
Configuring TeddyGrenade
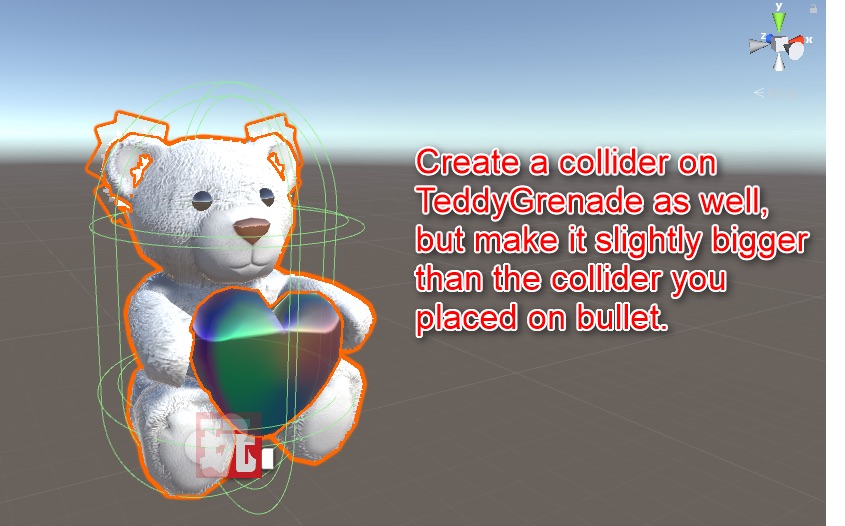
Create a collider for TeddyGrenade as well, but make it slightly larger than the collider you placed on the bullet.
This is necessary because TeddyGrenade’s collider triggers specific actions upon contact with an enemy, but the triggers prevent the asset from colliding with other objects, such as the floor.
Therefore, a trigger area that is larger than the actual COLLIDER of the bullet is needed, so that the trigger area overlaps with the enemy’s model when the bullet hits it before bounces off.
Bullets need a proper COLLIDER and should not be something to bounce off the enemy or the floor.
Create a collider for TeddyGrenade too!
To trigger TeddyGrenade’s collider, check the “Is Trigger” box on TeddyGrenade’s collider property screen in Inspector.
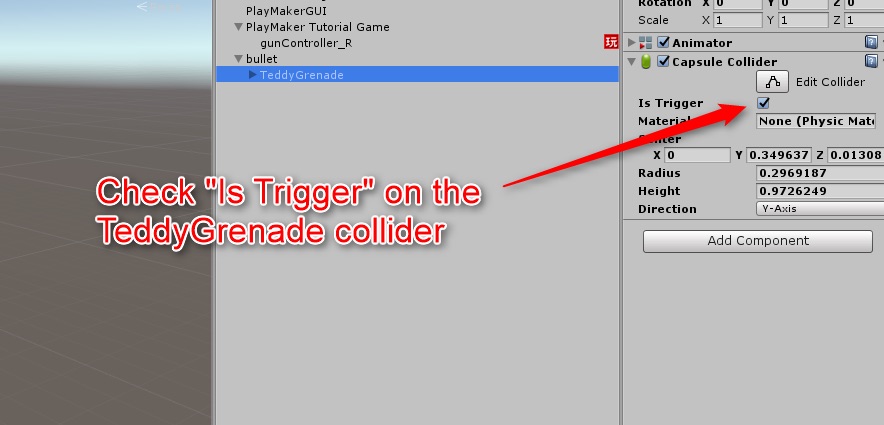
Check the Is Trigger
FSM Settings
Creating a Moving Forward State

Creating a Moving Forward State
Click on the bullet game object and create a state called “Moving Forward”.
Adding an AddForce action
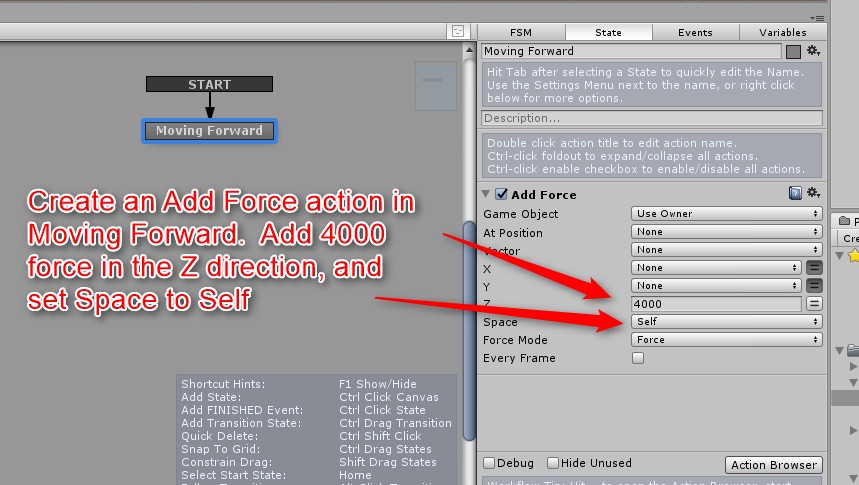
Create an “AddForce” action in the Moving Forward state, set the value in the Z direction to 4000, and set the force.
The other directional axes are left as they are.
This causes the bear’s bullets to fly from the gun.
Adding an AddForce action
Set Space to Self and make sure the Z-direction is tied to the bullet and not to the game world itself because here it means that the direction of the bullet, not the Z-direction of the world, is directly from the main axis of the crossbow.
Create an event
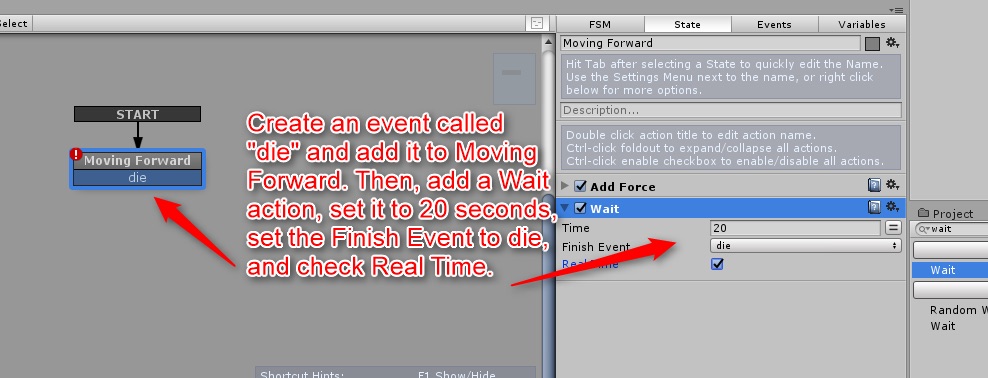
Here, we create an event called “die” and add it as a transition to the Moving Forward state.
Next, add a Wait action to the state and set it to 20 seconds in real-time by checking the corresponding box.
The finish event should also be set to “die”. This causes the bullet to enter the DIE state, where it will be destroyed after 20 seconds.
This is necessary in order to avoid the screen being filled up by bullets and causing the game to slow down significantly over time.
Add a “die” event
Creating a Dying State
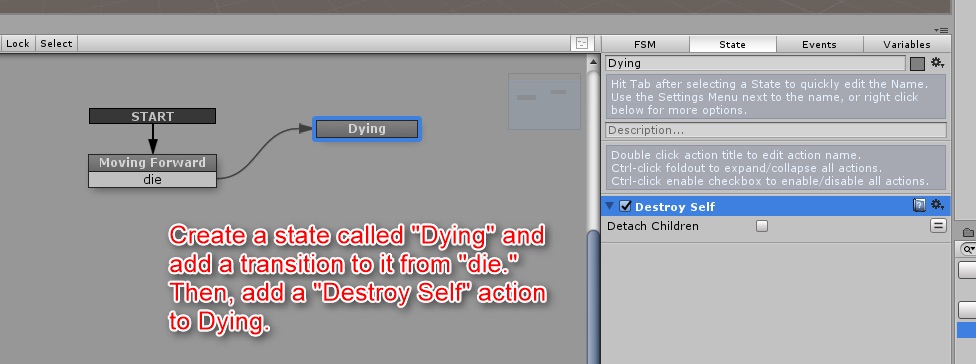
To ensure the destruction of the bullet, create a state called “Dying” and connect it to the transition arrow from the “die” state.
Next, add it to the Dying state from the Destroy Self action browser.
This action removes the bullet from the scene altogether.
If Detach Children is left unchecked and the bullet is destroyed, the TeddyGrenade asset will remain attached and will be removed together with the bullet.
Create a Dying State
Prefabricate.
Drag the bullet to the myPrefabs folder and make it prefab.
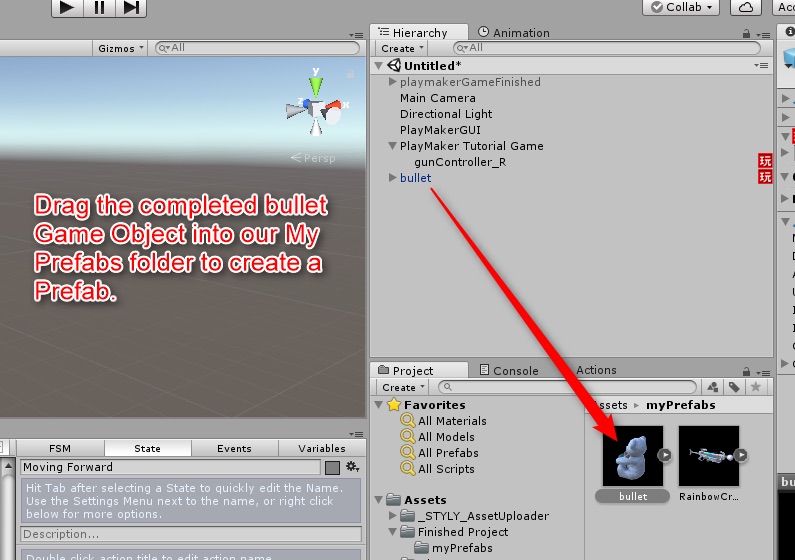
Prefabrication of bullet
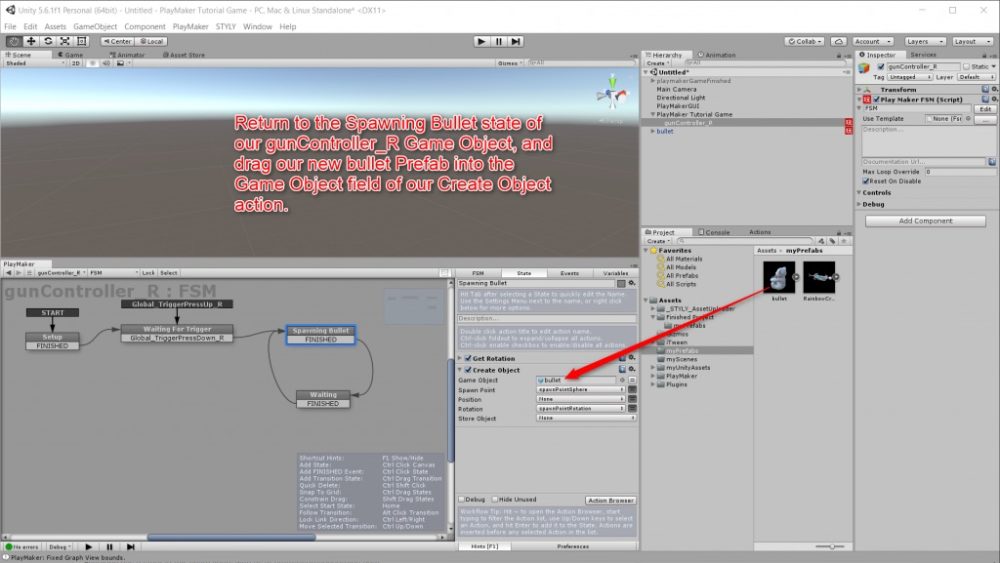
Now we go back to the Spawning Bullet state in the FSM of the gunController_R game object.
Drag the new bullet prefab into the Game Object field of the Create Object action, which was left unfinished in the previous article.
There should be a small red warning mark next to it, making it easy to find.
Drag a bullet to Create Object
Now that we don’t have to edit on the Unity Scene Editor, we’ll remove the bullet prefab from the Scene Hierarchy.

Remove bullet
That’s all for the bullet setup.
In the next article, I will show you how to set up the Enemy Counter to manage the number of enemies and the Spawner to spawn enemies.
![[Unity/Playmaker] How to make a VR shooting game and generate enemy characters](https://styly.cc/wp-content/uploads/2018/05/コメント-2020-03-28-053330-160x160.png)
Sample Scene
You can try out the sample game in the STYLY GALLERY.