Introduction
This article explains how to use the Unity feature, Shader Graph, with STYLY.
We are using Unity 2022.3.24f1, STYLY Plugin 2.0.0, and Shader Graph 14.0.11.
You can download the latest version of the STYLY Plugin from the article below.
Sample Scene
How to Introduce Shader Graph
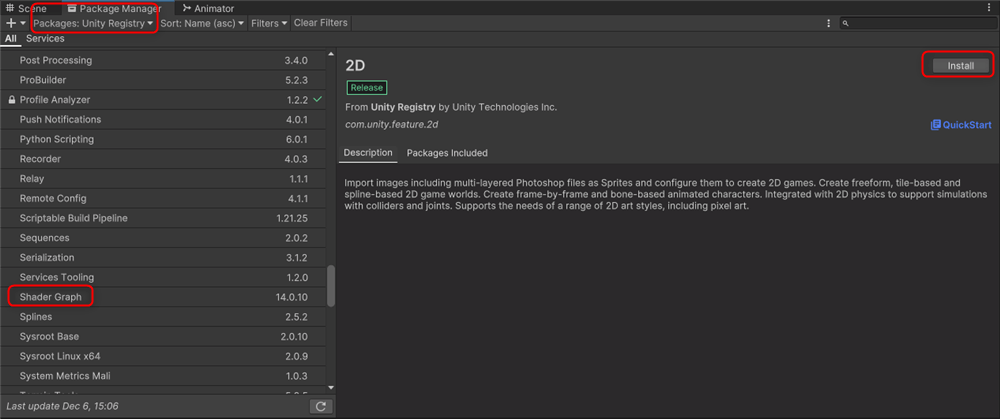
Select Shader Graph from the Unity Registry in the Package Manager and click Install.
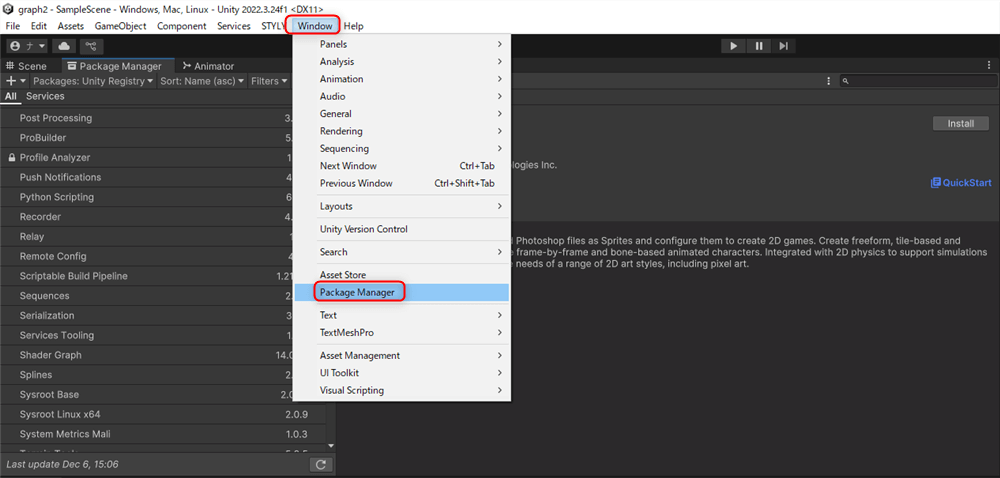
If the Package Manager is not displayed, click Window→Package Manager.
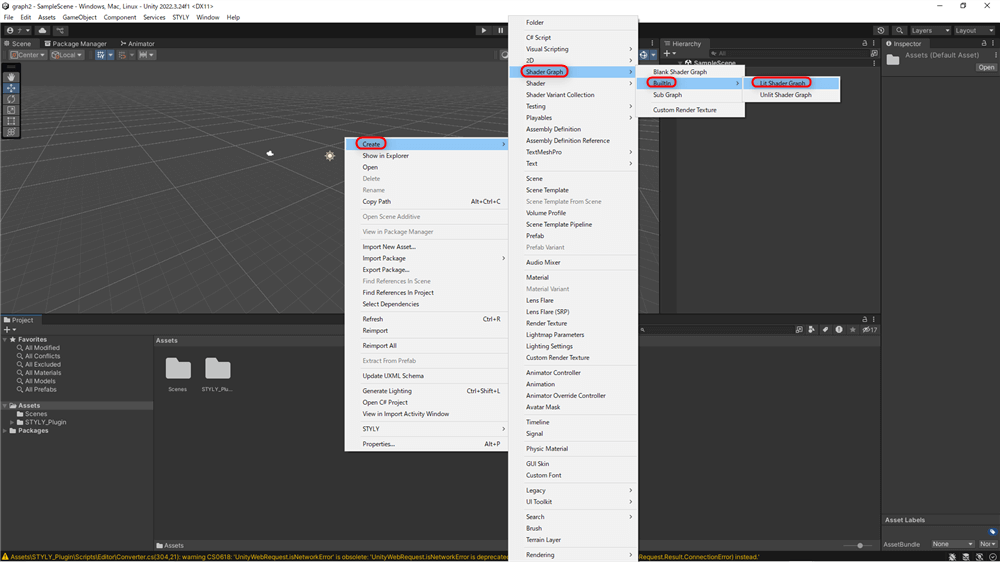
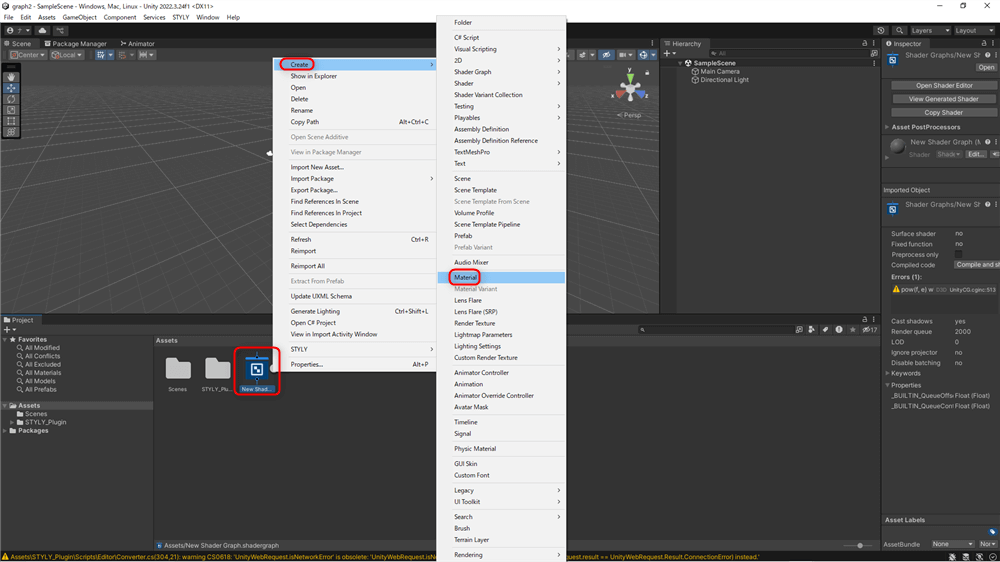
Right-click in the Assets and select Create→Shader Graph→Builtin→Lit Shader Graph to add it.
After adding Shader Graph, right-click on the icon and select Create→Material to create a material. The material created this way is automatically linked to the Shader Graph.
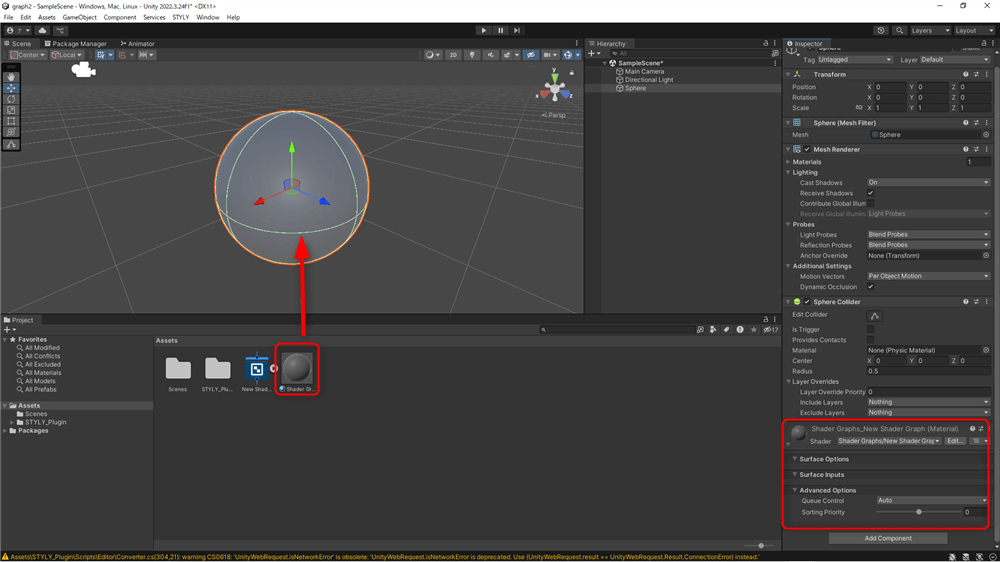
Right-click in the Hierarchy and create a 3D Object→Sphere.
Drag and drop the material created earlier onto the Sphere.
This completes the preparation for Shader Graph.
How to Use Shader Graph
From here, we will create a sample using Shader Graph.
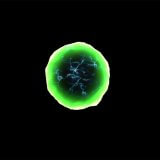
This is the kind of shader we will create this time.
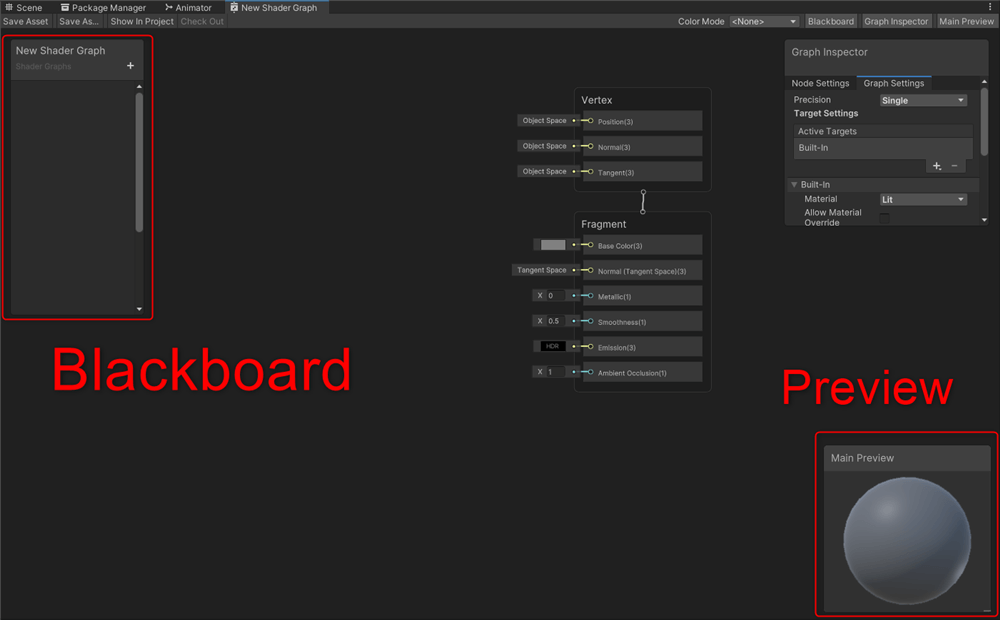
First, double-click the Shader Graph you created earlier to open the Shader Graph editing screen.
The screen layout is as follows:
Creating the BaseColor
Here, we will use a noise texture, so please download a texture from the following site and add it to your Assets. You may also prepare your own texture.
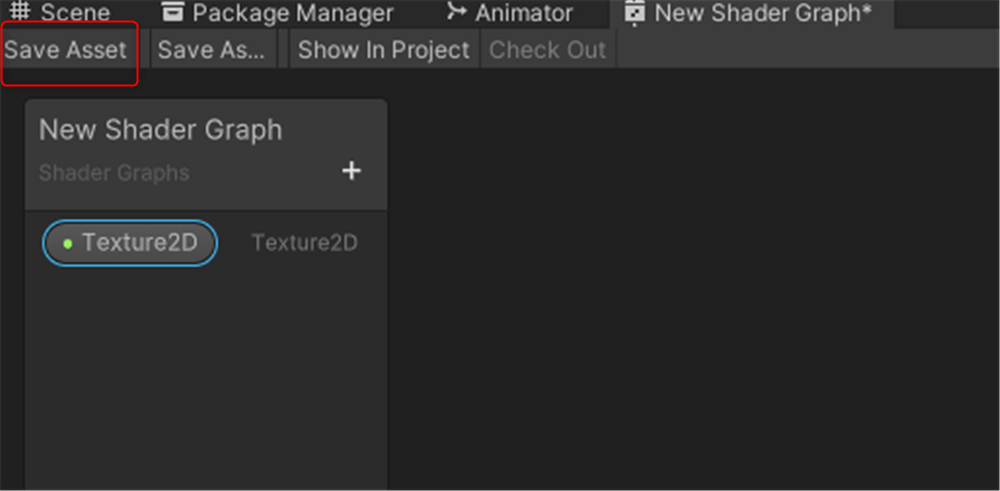
First, click the “+” icon on the Blackboard and add [Texture2D].
After adding it, drag and drop it to add it as a node.
Think of the Blackboard as a place to store variables.
To save or update the content of the Shader Graph, click Save Asset at the top-left corner of the screen.
It is recommended to save frequently.
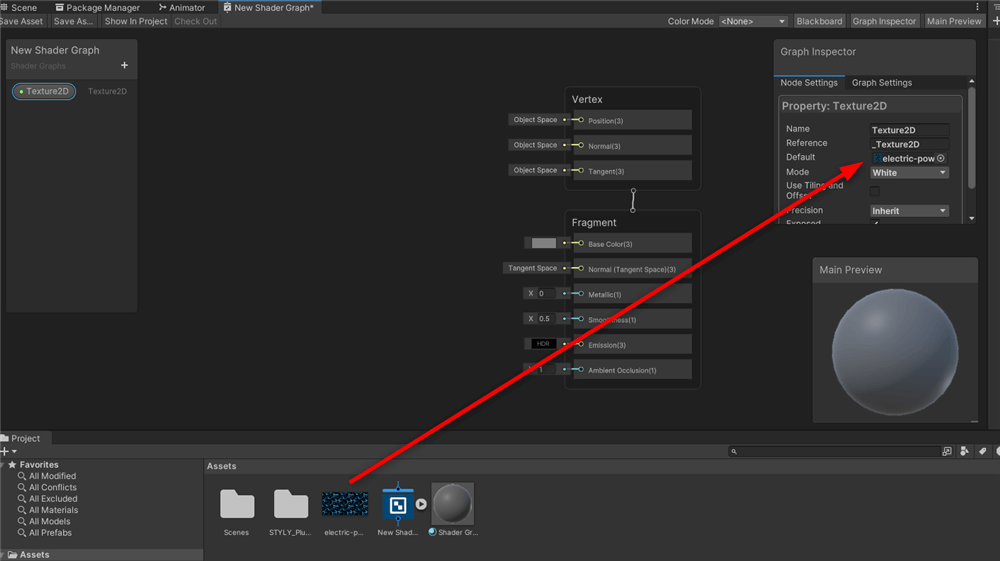
Drag and drop the image into the Default field of the added Texture2D.
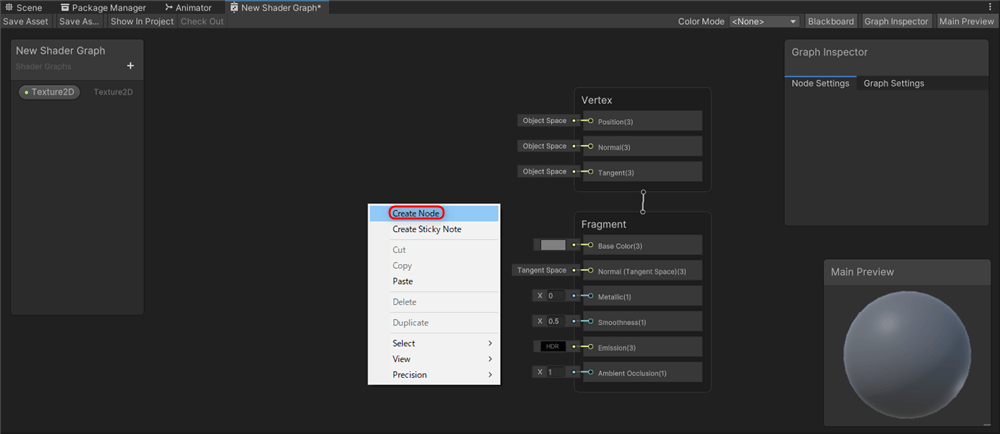
To add nodes in Shader Graph, right-click and select Create Node.
In the Create Node search bar, search for “Sample” and add [Sample Texture 2D].
Connect the [Texture2D] to the Texture (T2) input of [Sample Texture 2D].
The texture is now displayed.
Next, we will animate the texture.
Add a Float in the Blackboard, name it [Tiling Speed], and set the Default to 0.1.
Add [Time], [Multiply], and [Tiling And Offset].
Connect the nodes as shown below to make the texture move.
![[Time], [Multiply], [Tiling And Offset]](https://styly.cc/wp-content/uploads/2024/12/15.png) [Time], [Multiply], [Tiling And Offset][/caption>
[Time], [Multiply], [Tiling And Offset][/caption>
To change the speed of the texture, adjust the value of [Tiling Speed].
To add movement in the opposite direction, duplicate [Sample Texture 2D] and [Tiling And Offset] using Ctrl+[D].
Add [One Minus] and connect the nodes as shown below.
Add [Add], connect the two [Sample Texture 2D] nodes to it, and then connect [Add] to the BaseColor of the Fragment.
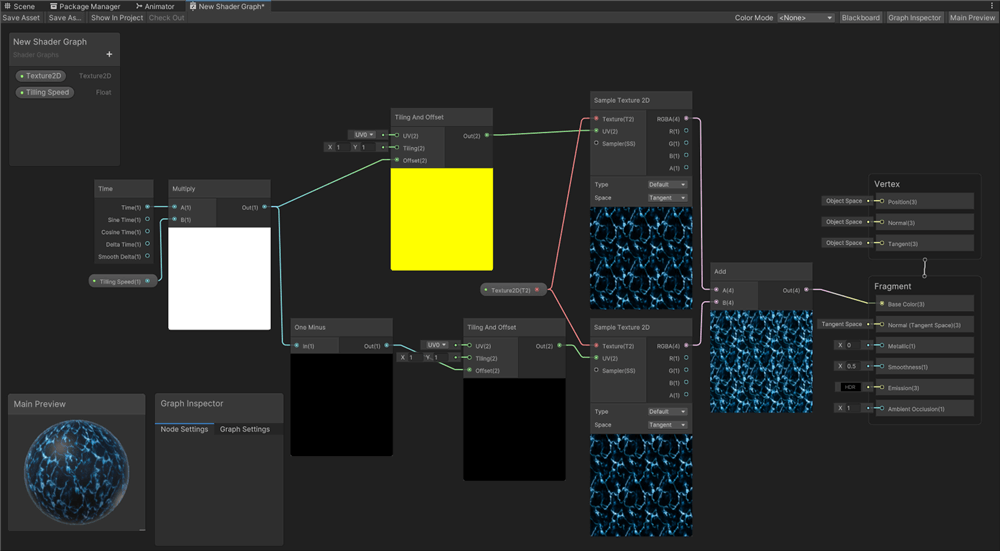
Node[/caption>
The shader will now be displayed in the Preview in the bottom-right corner of the screen.
If you want to group multiple nodes, select all the nodes you want to include in the group and press Ctrl+[G].
[caption id="attachment_56984" align="aligncenter" width="1000"]![Ctrl+[G]](https://styly.cc/wp-content/uploads/2024/12/18.png) Ctrl+[G]
Ctrl+[G]
Creating Emission
Add a Color to the Blackboard, name it [Fresnel Color], and change it to a greenish color.
[caption id="attachment_56985" align="aligncenter" width="1000"]![[Fresnel Color]](https://styly.cc/wp-content/uploads/2024/12/19.png) [Fresnel Color]
[Fresnel Color]
Add [Fresnel Effect] and [Multiply], and connect the nodes as shown below.
[caption id="attachment_56986" align="aligncenter" width="1000"]![[Fresnel Effect], [Multiply]](https://styly.cc/wp-content/uploads/2024/12/20.png) [Fresnel Effect], [Multiply]
[Fresnel Effect], [Multiply]
Change the Power of [Fresnel Effect] to 4.
This makes the edges appear softly green.
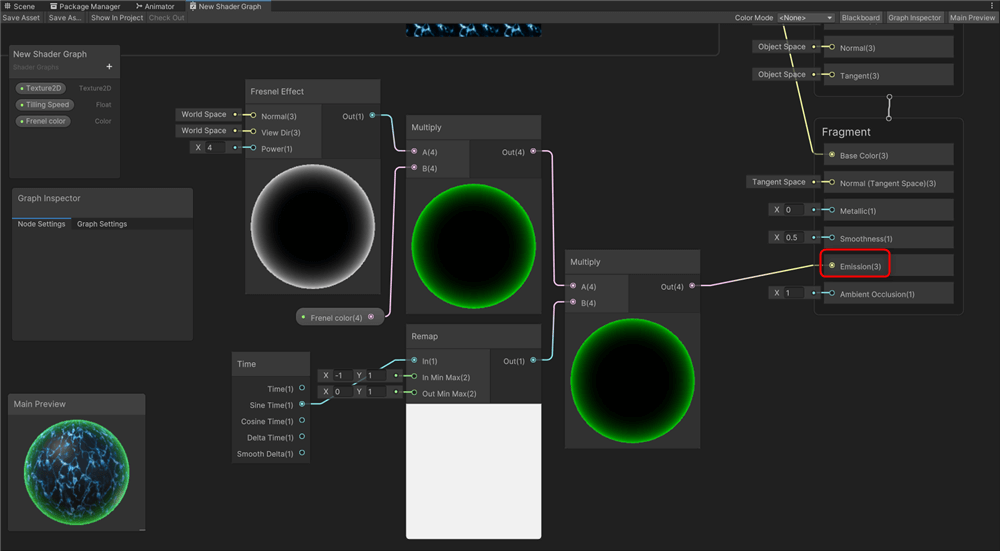
Add [Time], [Remap], and [Multiply], and modify the values in [Remap].
Connect the nodes as shown below to create a blinking Fresnel effect.
Finally, connect [Multiply] to the Emission of the Fragment.
Creating a Vertex Shader
Next, use a vertex shader to make the sphere appear wavy.
First, add two Floats to the Blackboard and name them [Displacement Speed] and [Noise Scale], setting both Defaults to 0.1.
Add [Time], [Position], [Multiply] × 2, [Add], and [Simple Noise], and connect the nodes as shown below.
Add [Normal Vector], [Position], [Multiply], and [Add], and connect them to the Position of the Vertex to make the sphere’s surface appear wavy.
Important Notes
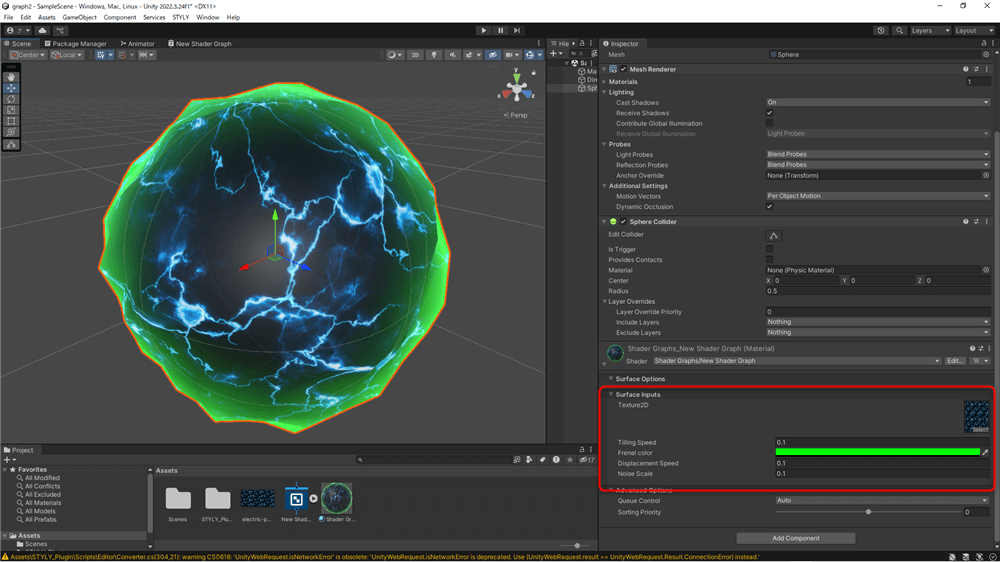
Sometimes, the Shader Graph preview may display correctly, but the appearance in the Scene is different.
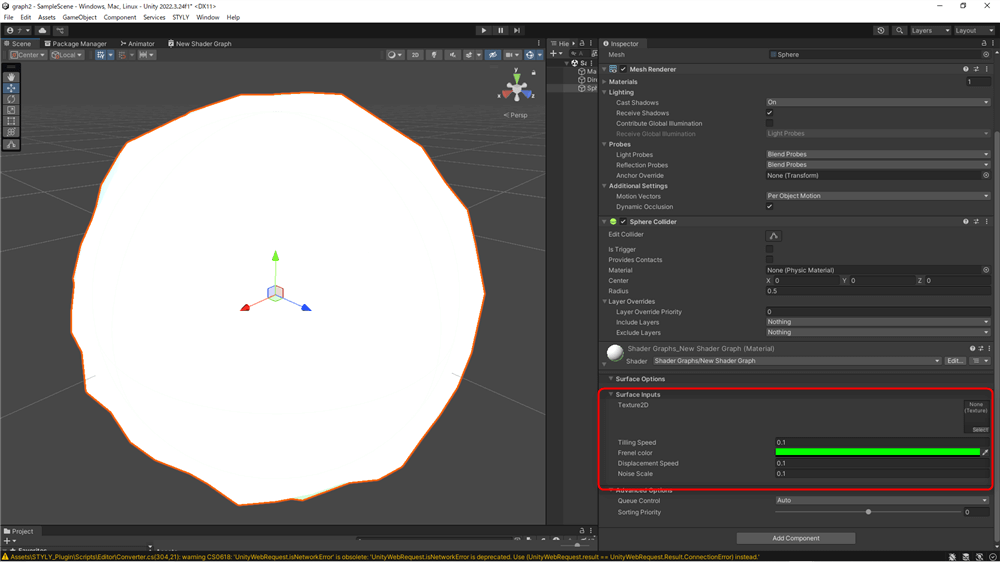
Select the object using the Shader Graph material and check the Inspector.
In the Inspector’s Shader Input section, the textures and values are still set to their defaults. Assign the correct values to each field.
Shader Input[/caption>
The values, textures, and colors here do not automatically apply even after saving the Shader Graph. You will need to manually adjust them to match the values and colors in the Shader Graph at the end.
Uploading to STYLY
How to create an account

![[Texture2D]](https://styly.cc/wp-content/uploads/2024/12/8.png)
![[Sample Texture 2D]](https://styly.cc/wp-content/uploads/2024/12/12.png)
![[Texture2D]](https://styly.cc/wp-content/uploads/2024/12/13.png)
![[Tiling Speed]](https://styly.cc/wp-content/uploads/2024/12/14.png)
![Ctrl+[D]](https://styly.cc/wp-content/uploads/2024/12/16.png)

![[Displacement Speed], [Noise Scale]](https://styly.cc/wp-content/uploads/2024/12/23.png)
![[Time], [Position], [Multiply]×2, [Add], [Simple Noise]](https://styly.cc/wp-content/uploads/2024/12/24.png)
![[Normal Vector], [Position], [Multiply], [Add]](https://styly.cc/wp-content/uploads/2024/12/25.png)

