When creating a VR space, you need ‘world’ components, that is, the ground, the sky, mountains, and the sea.
Some skies are available in STYLY by default and you can also create your original one from Unity’s ‘Skybox’ assets.
However, you cannot create your favorite ground and mountains with existing assets.
In this case, you will find a terrain engine called ‘Terrain’ useful.
‘Terrain’ is an engine to create pseudo terrains or mountains, which is a built-in function of Unity.
But, when uploading a terrain created by ‘Terrain’ to STYLY directly, you may not be able to resize or rotate it. In the worst case, you can’t even upload it due to the insufficient capacity.

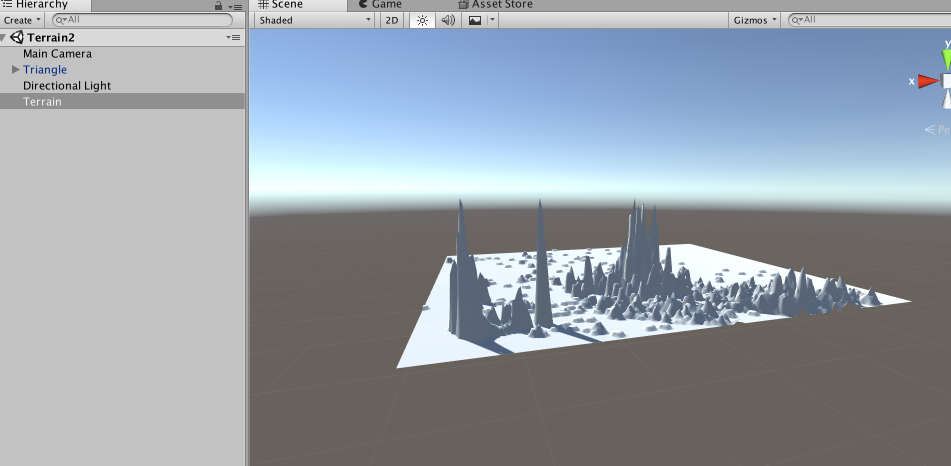
Terrain uploaded from Unity to STYLY directly
Therefore, in this article, I will show how to convert terrain into an OBJ file and upload it to STYLY by using a free function called ‘TerrainObjExporter’.
※ This article doesn’t introduce how to create terrains with the ‘Terrain’ engine, so please refer to the following article if you use ‘Terrain’ for the first time.
https://gametukurikata.com/terrain/makefield
How to Use TerrainObjExporter
TerrainObjExporter is a script that exports a terrain as an OBJ-format 3D model.
In the Project window, create a C# script under the Assets folder (Right-click in the blank space in the Assets folder and select ‘Create > C#Script’).

Create a C# script
Any file name will do. This time I named it ‘Editor’.
Next, click on the following link to open the site for ‘TerrainObjExporter’.
Click on the red square in the image below to copy the script.
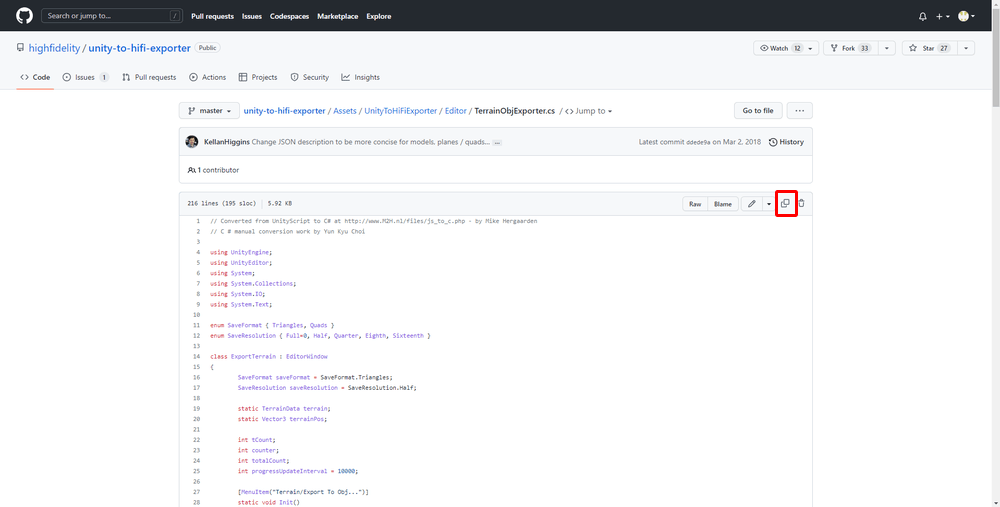
Copy the script
Open the Editor script created earlier, delete the default code, and then copy and paste the contents of ‘ExportTerrain.cs’.
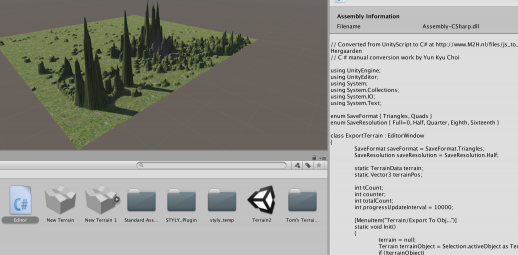
The Inspector window of the script
Save the script. Now, you can check that ‘ExportTerrain.cs’ has been applied by the Unity’s Inspector window of the Editor script.
In the Unity’s menu bar, you can see an item ‘Terrain’ added (It may take a while to be added).
The menu bar
When finished creating the terrain, select ‘Terrain > Export To Obj’ in the menu bar.
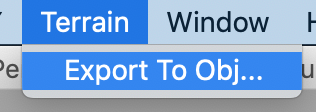
Select ‘Export to Obj’
It brings up the Export-setting window.
Set ‘Export Format’ to ‘Triangles’.
This time I set ‘Resolution’ to ‘Half’. You can reduce the number of vertices to export (i.e. you can reduce the file size) by selecting anything other than ‘Full’. So set ‘Quarter’ or less if you found the output file size too large.
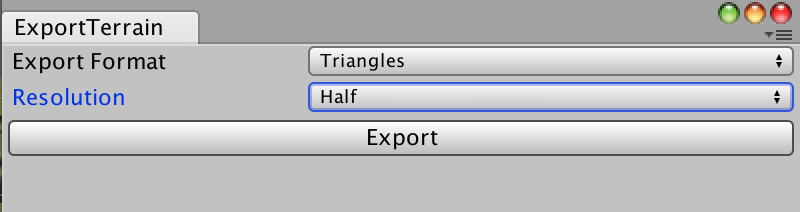
The setting for ‘ExportTerrain’
Edit the Exported 3D Model in Unity
The exported 3D model doesn’t have any texture.
So, upload the 3D model back to Unity to apply textures.
First, upload the exported 3D-model file to Unity’s ‘Assets’ and place it in Unity’s Scene.
Place the 3D model in Unity’s Scene
Next, find the Texture file used earlier.
Open the Inspector window for the terrain you created first and select ‘Edit Textures > Edit Texture’.
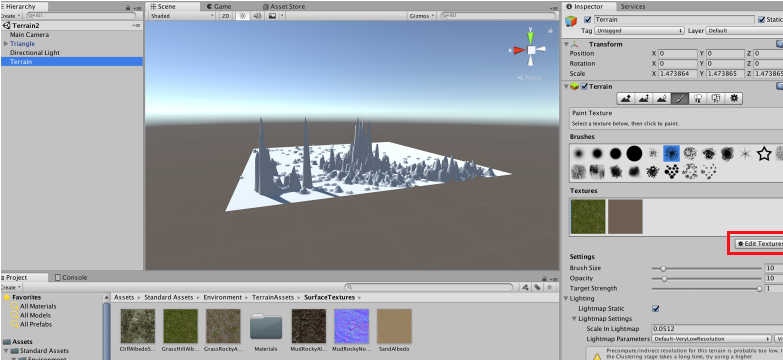
Check the inspector window for ‘Terrain’
You will find the texture created when you created ‘Terrain’. Click it to display the location of the texture file.
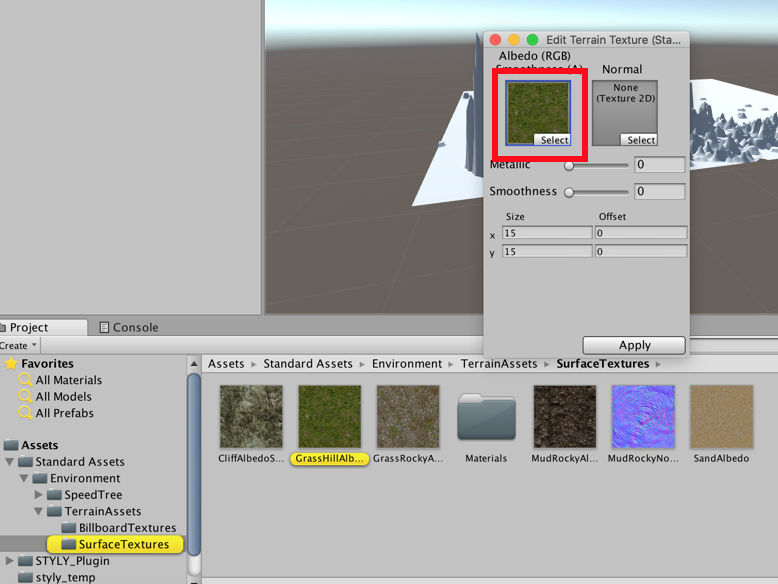
Click the texture
Drag and drop the texture file into the 3D model placed earlier in the Scene.

Apply the texture
The texture has been applied.
Then, we finally upload ‘Terrain’ to STYLY. However, it causes the following error when uploading the Prefab converted from this 3D model.
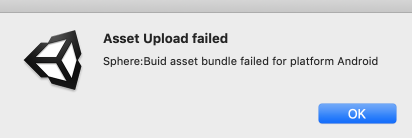
Error message
So, after converting the ‘Terrain’ (obj) with the texture into a Prefab, you need to delete the Editor script (ExportTerrain.cs).
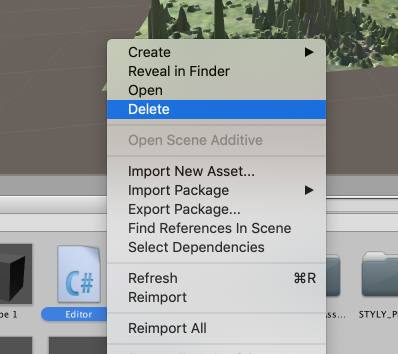
Delete the script
Please refer to the following article to learn about how to upload a Prefab to STYLY.

It’s uploaded successfully.

Place ‘Terrain’ in STYLY Studio
The terrain uploaded in this way can be rotated and resized, so you can make it more suitable for the Scene.
For questions about STYLY, bug reports, and improvement requests, please contact the STYLY FORUM:
https://en.forum.styly.cc/support/discussions