This article is the second part of the Unity Basics series and covers saving and creating scenes, using prefabs, parent-child relationships of objects, and how to set materials and textures.
Saving and Creating Scenes
Saving a Scene
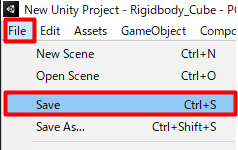
To save the scene you just created, click on File in the upper left menu and select Save As…. where Save As means “Save As.
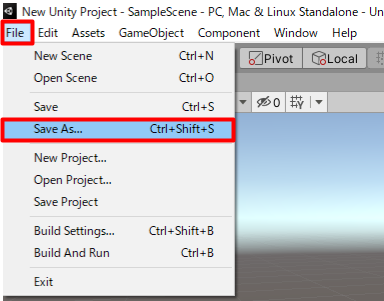
You can name your scene anything you like, but use alphanumeric characters (except Japanese).

Save the project under the Project Name > Assets > Scenes folder.
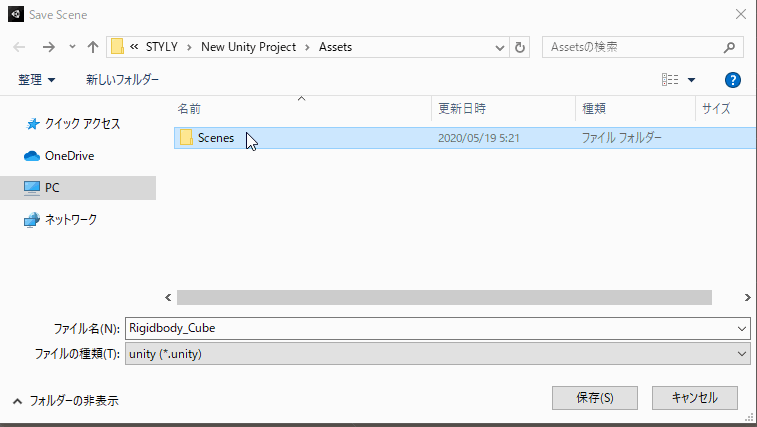
This is called the scene file.
It is not easy to see, so slide the slider in the lower right corner to the left.
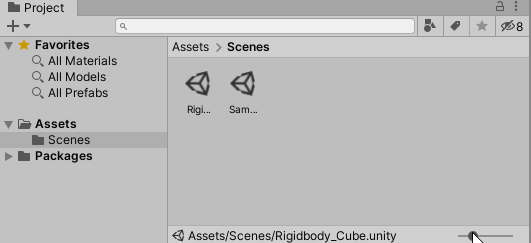
If you want to overwrite the file, click Save.
|
Windows |
Ctrl + S |
|
macOS |
Command + S |
It is recommended that you save scenes frequently, and make a habit of saving each time you save a scene by setting a rule such as “save only after this point.
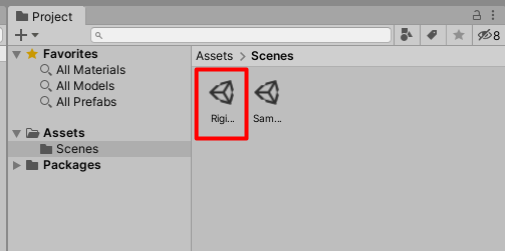
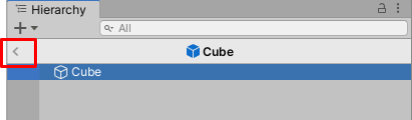
The saved scene name is now reflected in the hierarchy.

Creating a New Scene
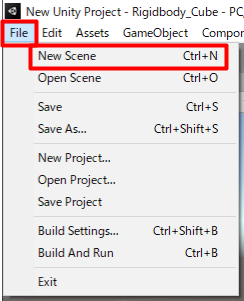
To create a new scene, click “File” in the upper left menu and then click “New Scene.
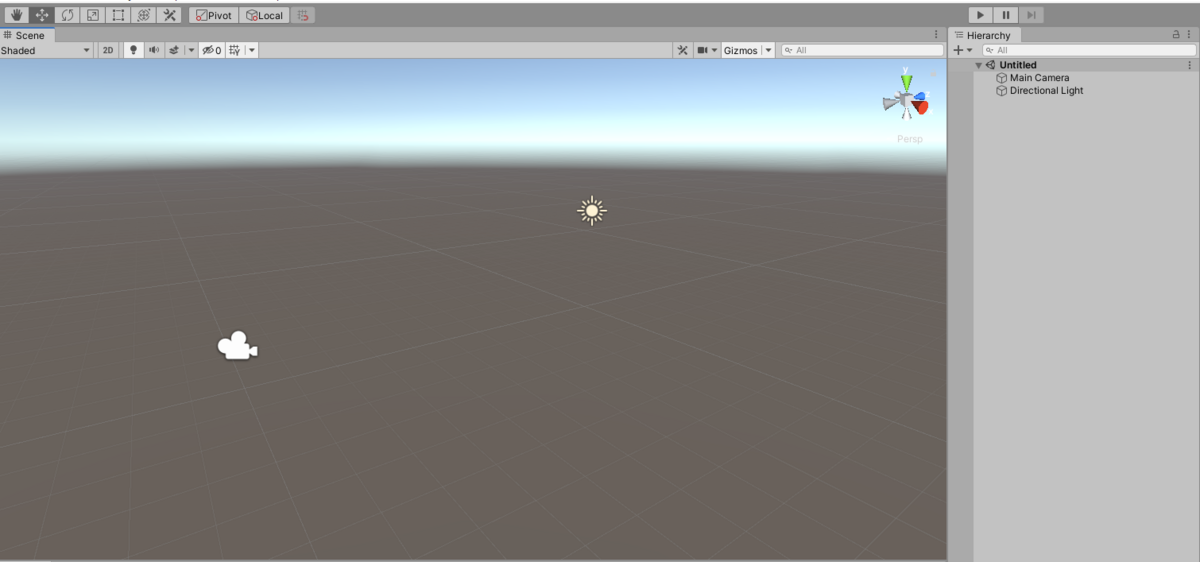
A new scene will be created.
Prefab
Prefabrication
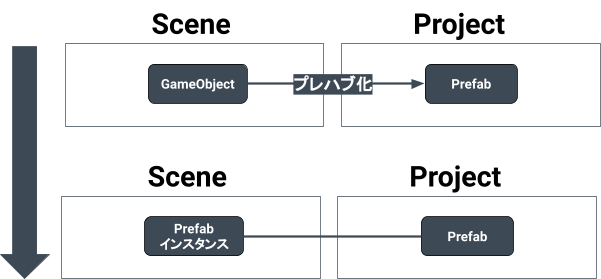
Prefabs are game objects and components that are stored in the project as reusable game objects.
Once a game object is prefabbed in a project (see below), it can be used over and over again, in different scenes, or uploaded STYLY as a prefab.
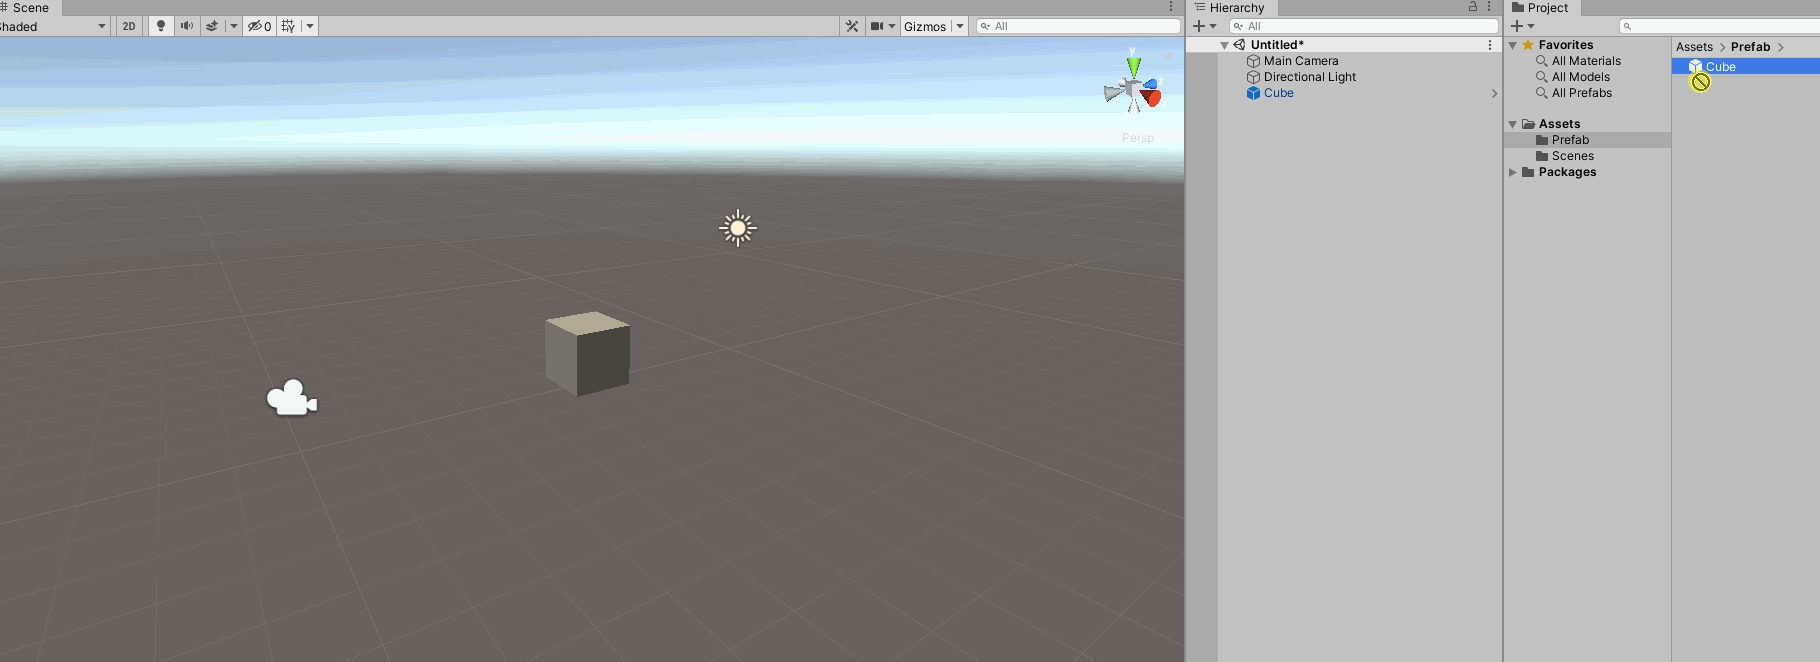
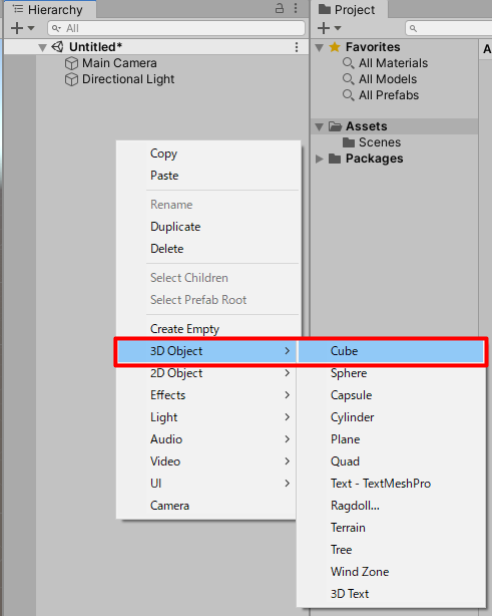
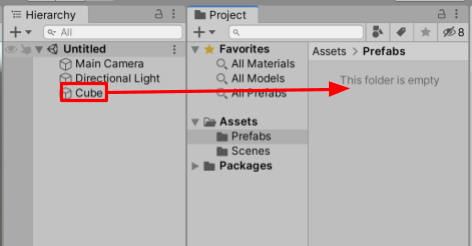
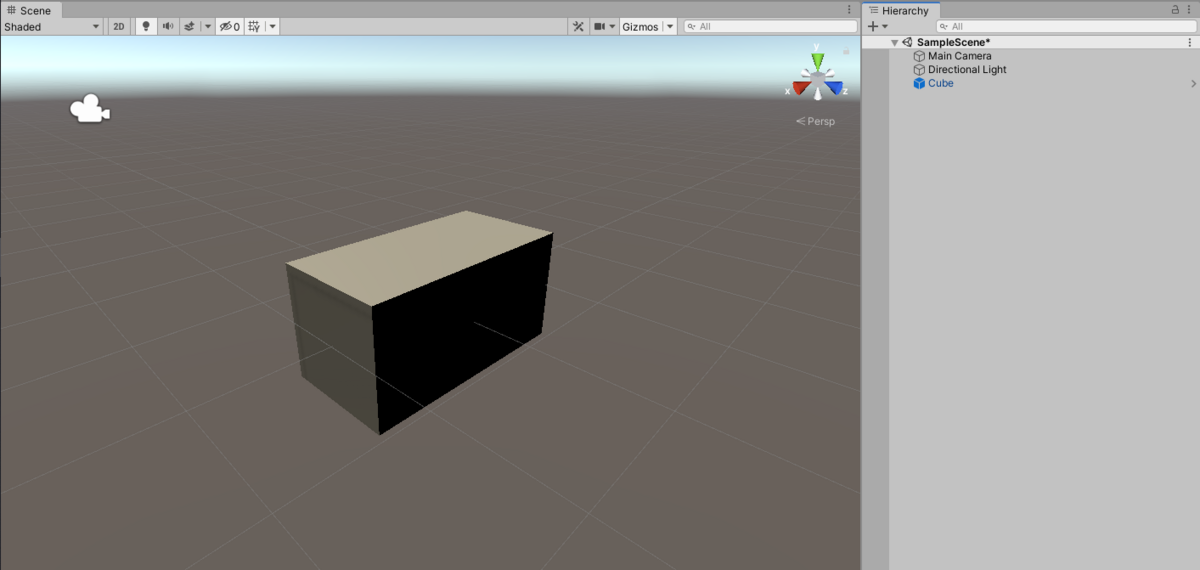
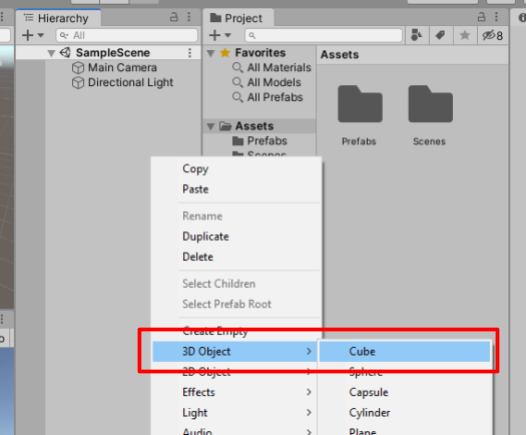
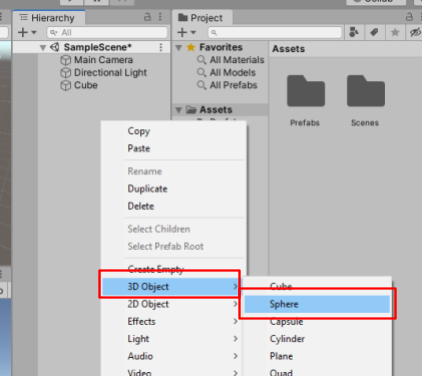
Create a Cube in the hierarchy, this time by right-clicking on the hierarchy and clicking on 3D Object > Cube.
Remember that when adding game objects to the hierarchy, right-clicking on the hierarchy will bring up a menu.
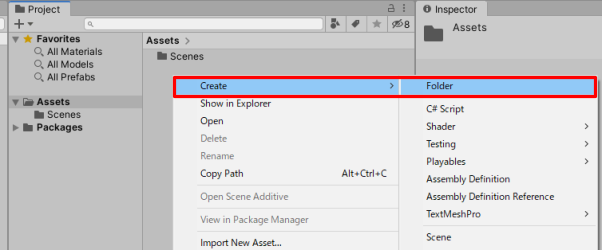
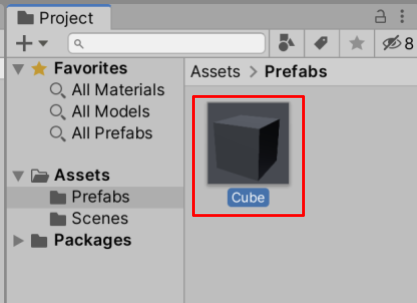
Create a folder by right-clicking on the project and clicking in the order Create > Folder.
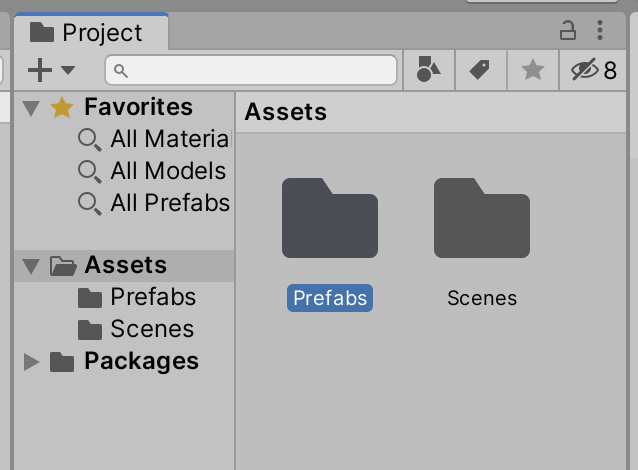
I named the folder Prefab and created the Prefabs folder.
Inside this folder, create a prefab.
Drag and drop the Cube of Hierarchy into the project.
The prefab is now created, and the prefab will appear as a blue Cube icon.
The game objects in the hierarchy have been turned into prefab instances.
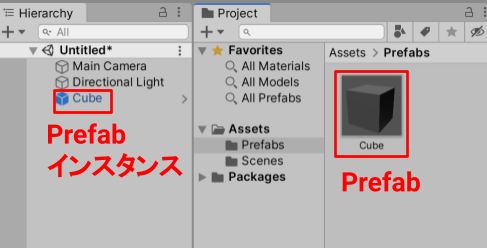
A game object created from a prefab is called a prefab instance.
When a game object is prefabricated, the prefabricated game object is turned into a prefab instance.
Creating an object from a prefab is also called instantiating.

When you edit the information of a prefab (see below), the edited content is reflected in all prefab instances.
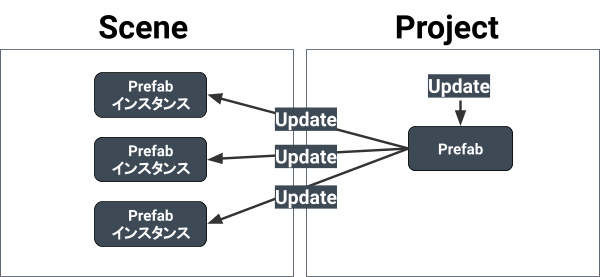
Editing a prefab
When you edit a prefab, the edited information is reflected in all prefab instances.
Let’s see how editing a prefab actually changes the contents of the prefab instance.
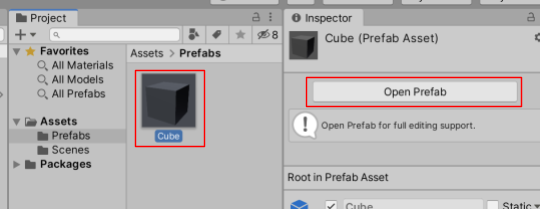
There are three ways to start prefab mode.
(1) Double-click on the prefab (Cube) in the project
(2)Click the arrow button next to the prefab instance (Cube) in the hierarchy

(3)Click Open Prefab in the inspector of the prefab (Cube)
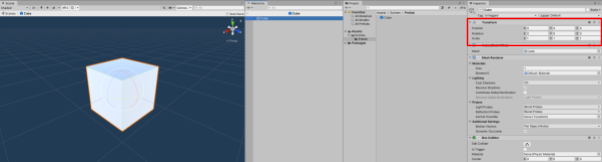
Once prefab mode is initiated, only the prefab contents will be displayed in the scene view and the hierarchy.
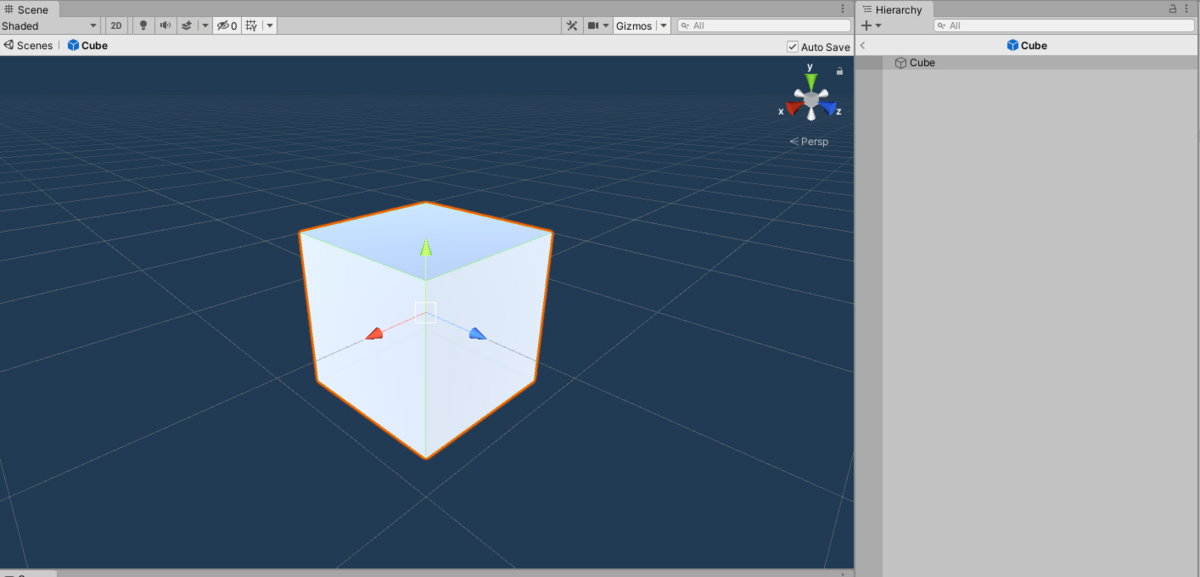
A breadcrumb list will appear at the top of the scene view, allowing you to return to an open scene or prefab asset (exit prefab mode).
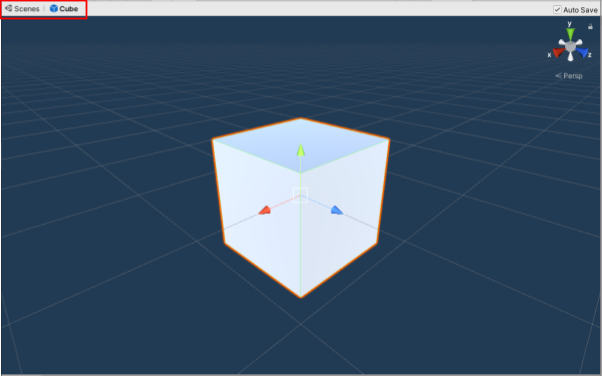
In the hierarchy, a “prefab header bar” appears at the top indicating the currently open prefab, and you can use the back arrow on the header bar to return (exit prefab mode), similar to the breadcrumb list in scene view.
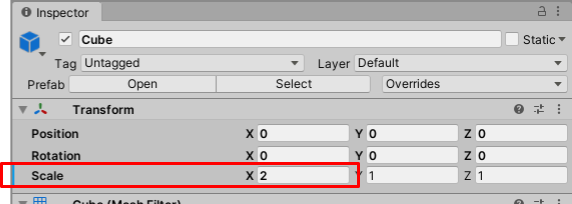
While in prefab mode, select the Cube in the hierarchy.
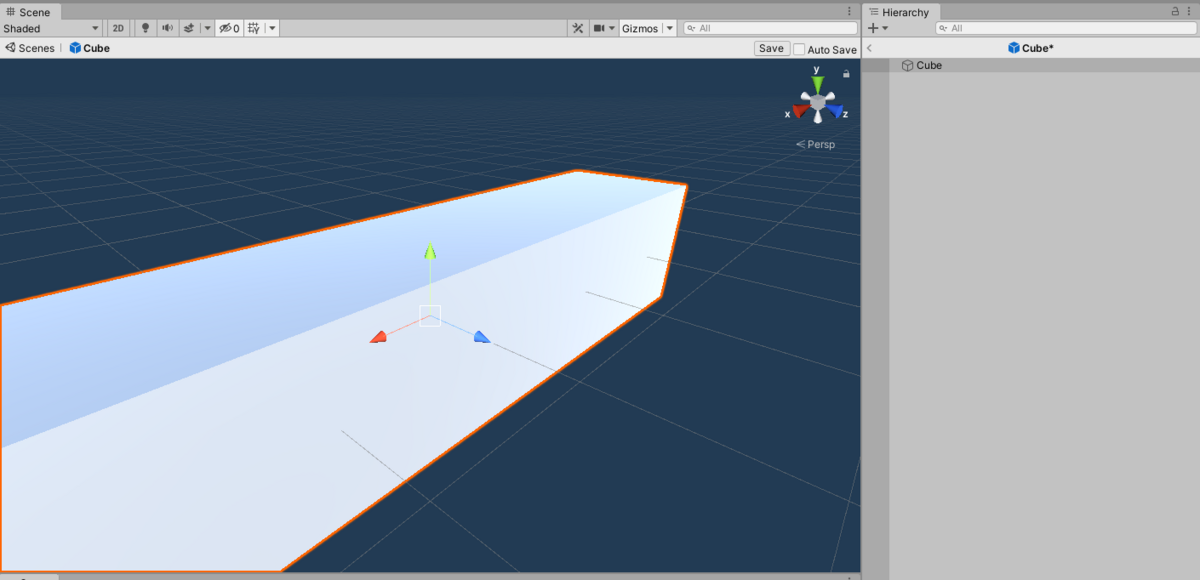
Change the Transform Scale X in the inspector from 1 to 2.
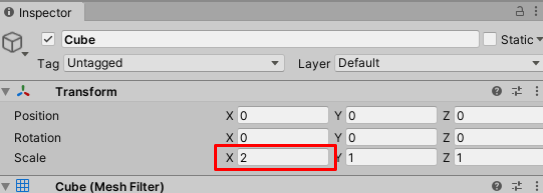
The scale of the Cube in the scene view should now change.
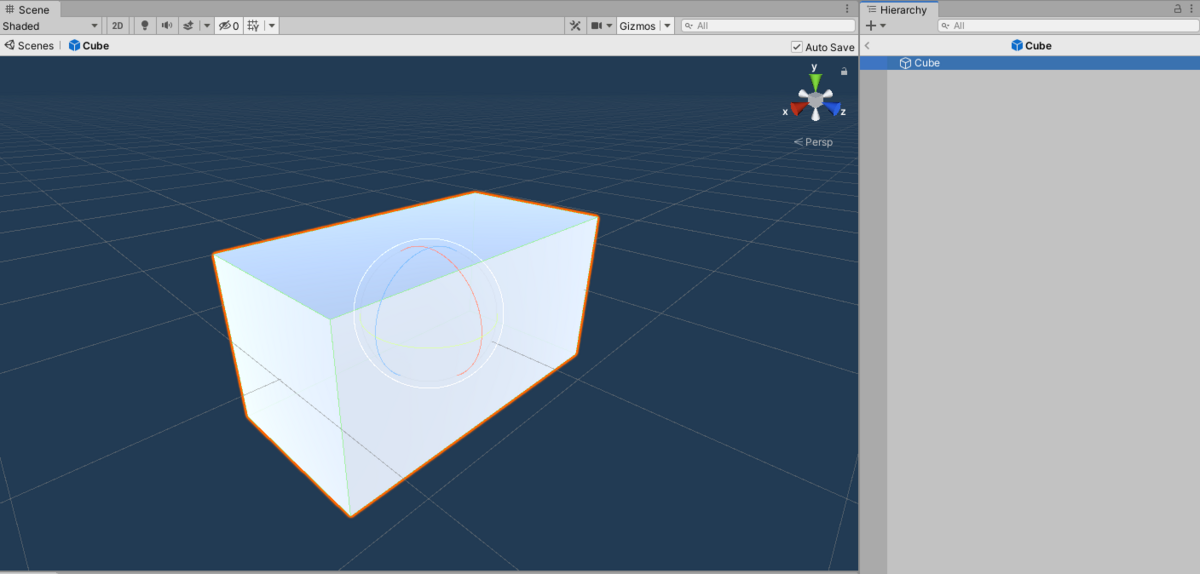
When you return to the scene from the breadcrumb list, the information of the Cube (prefab instance) in the scene will also change because the prefab information has changed.
About the Auto Save setting
When in prefab mode, there is an Auto Save setting in the upper right corner of the scene view.
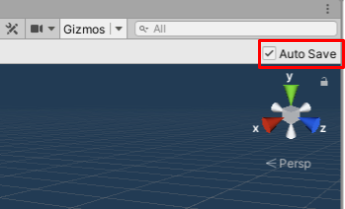
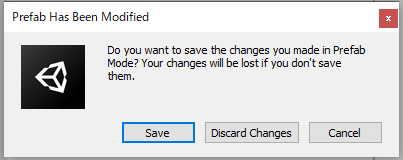
If you do not want Auto Save, uncheck the box to disable it; if you make changes to a prefab while Auto Save is disabled, you will see the message “Do you want to save changes made in prefab mode?”
Selecting Save will save the changes made; selecting Discard Changes will cause the changes to be lost.
Overriding a prefab instance
When you change the content of a prefab, all prefab instances will reflect the changes, or you can change each prefab instance directly.
Changing a prefab instance creates an instance override.
An instance override is an override of a prefab instance’s own functionality in a prefab instance inherited from the prefab.
There are four types of instance overrides
- Override property values (i.e., scale values)
- Adding a component
- Deleting a component
- Adding a child game object (see below)
For example, from the default Cube (refers to a Cube with no changes made) prefab, create prefab instances A and B.
Change the scale of prefab instance A and remove the collider (see below); for prefab instance B, add gravity.
In this way, you can override the prefab instance while inheriting its information; changing the information in the prefab instance does not change the information in the prefab.
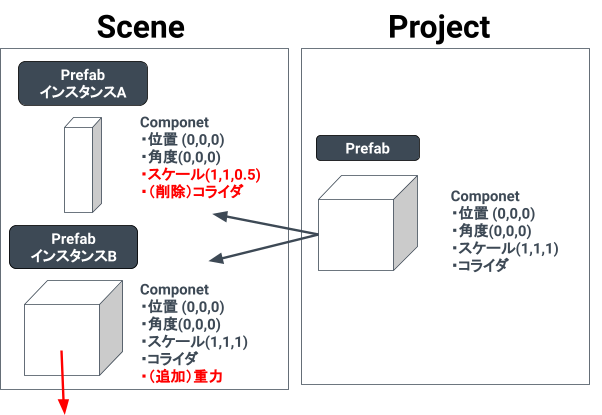
In the inspector of the prefab instance, the overridden areas are indicated by bold name labels and a blue line on the left side.
Also in the inspector, added and removed components are marked with plus and minus batches.
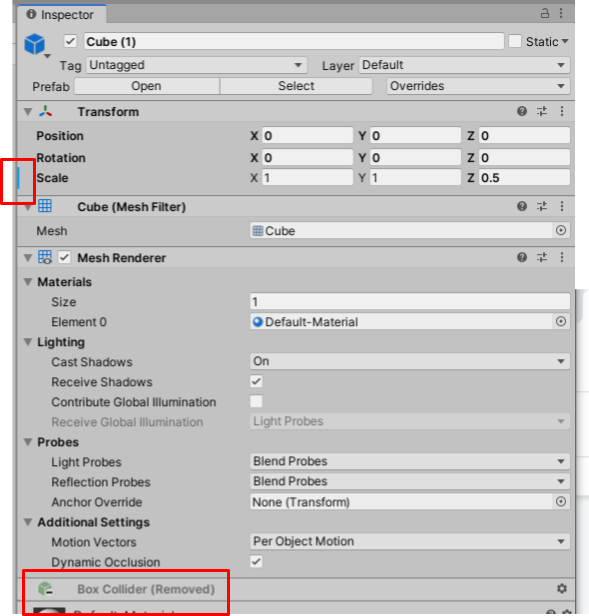
prefab instance A
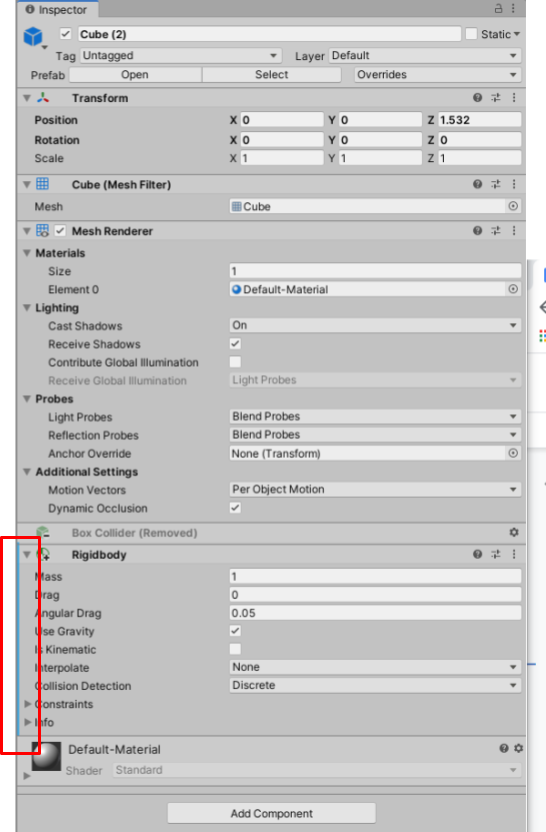
prefab instance B
Override takes precedence
The overridden property values of a prefab instance always take precedence over the prefab’s property values, meaning that changing the prefab’s property values will not affect the instance whose property values are being overridden.
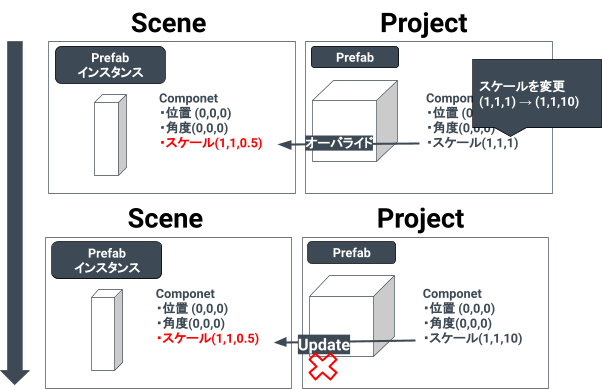
For example, create two prefab instances from a Cube prefab, and change the Scale X value by 2 for only one prefab instance.
In prefab mode, change the Scale X value of the prefab to 5.
Back in the scene, the Scale X of the prefab instance that changed Scale X to 5 and overrides the property value has not changed.

Parent-child relationship of objects
About the parent-child relationship of objects
Objects have a parent-child relationship: child objects are moved, rotated, and scaled with respect to their parent object.
Every object can have multiple child objects, but only one parent object, and multiple child objects can be set for a parent object.
The hierarchy sets and breaks the parent-child relationship.
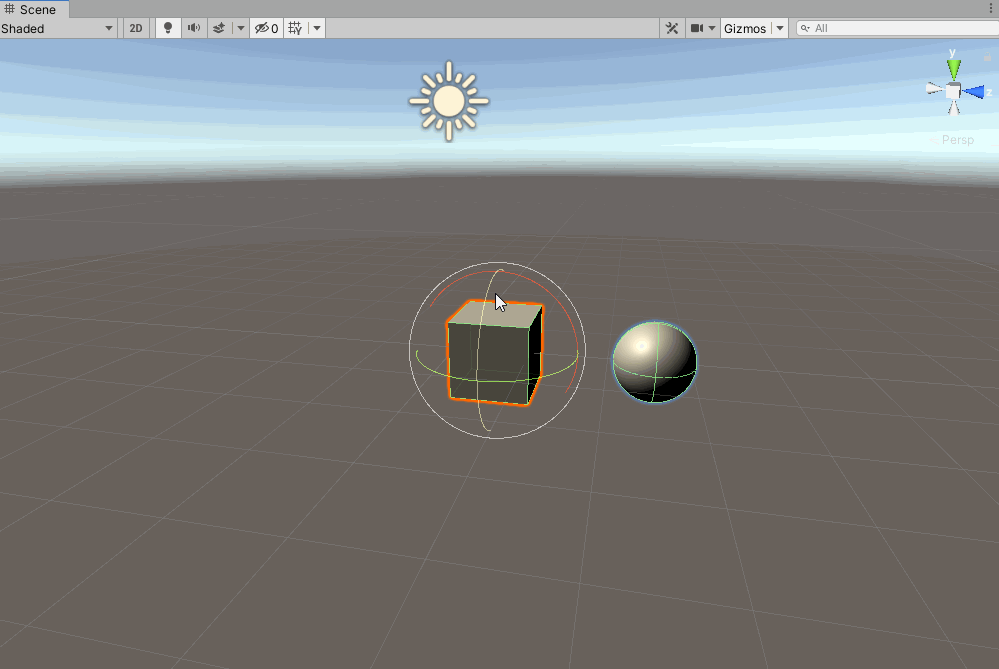
Create a new scene: create a parent object: right-click on the hierarchy and click 3D Object > Cube to create a Cube.
Next, create a child object.
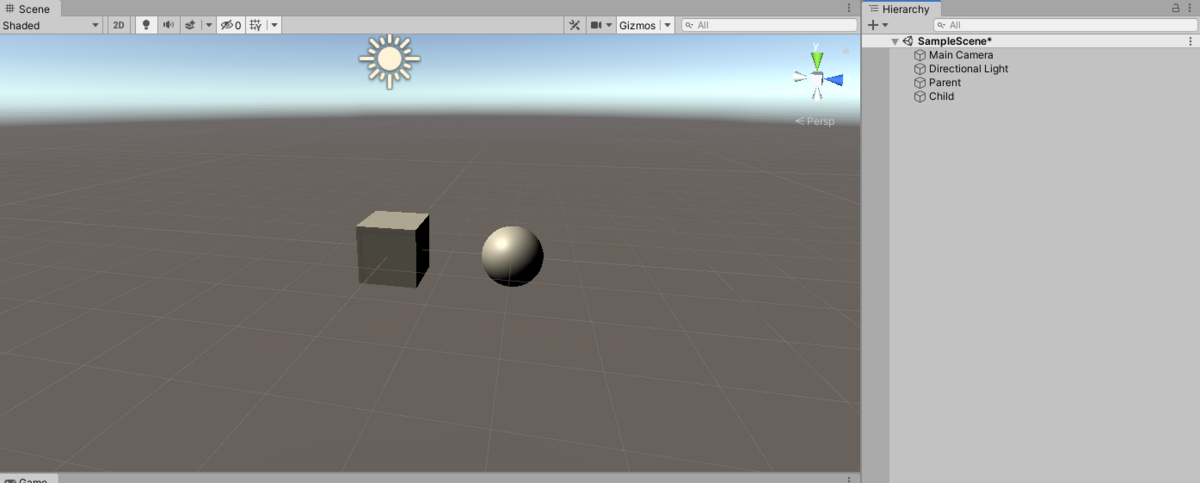
Create a Sphere by right-clicking on the hierarchy and clicking on 3D Object > Sphere.
You will see that the Cube and Sphere overlap, so change the position of the Cube and Sphere.
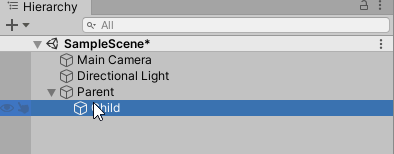
Also change the names of the Cube and Sphere
|
Object Name |
Transform Name |
X |
Y |
Z |
|
Cube → Parent |
Position |
0 |
0 |
0 |
|
Sphere → Child |
Sphere → Child |
0 0 |
0 |
0 |
Let’s make a parent-child relationship.
Parent: Parent object
Child: Child object
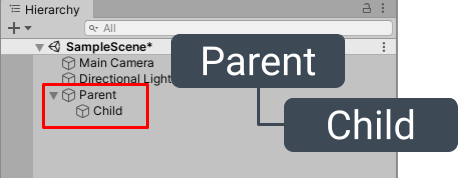
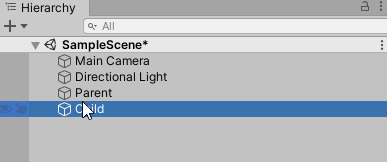
In the hierarchy, a child object (Child) is dragged and dropped onto the parent object (Parent) to create a parent-child relationship.
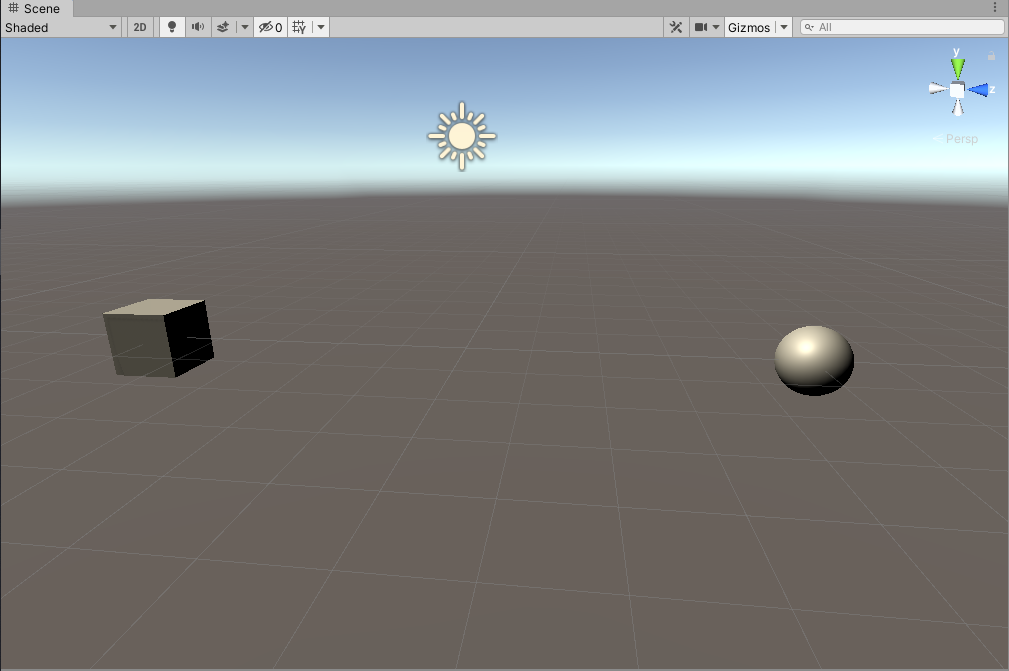
When the parent object (Parent) is moved, rotated, or scaled, the child object (Child) will also move with it.
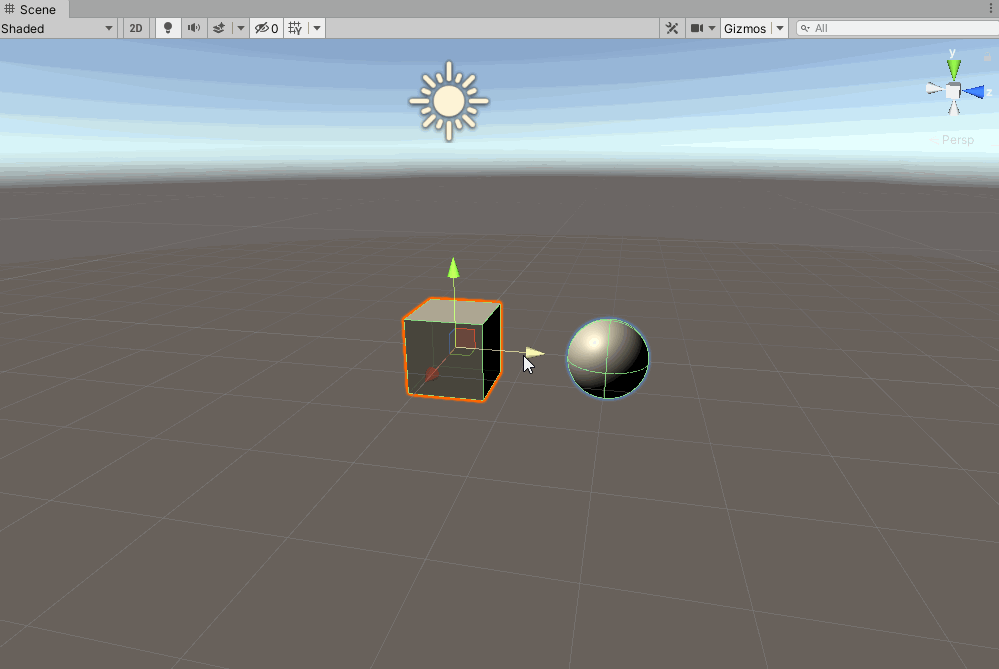
When the parent object (Parent) is moved, the child object (Child) will also move.
Rotating the Parent also rotates the Child.

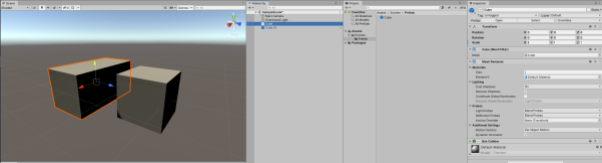
#image_title
Scaling the parent object (Parent) also scales the child object (Child)
Moving, rotating, or scaling a child object (Child) does not affect the parent object (Parent).

To break the parent-child relationship, drag and drop the child object (Child) out of the parent object (Parent) in the hierarchy.
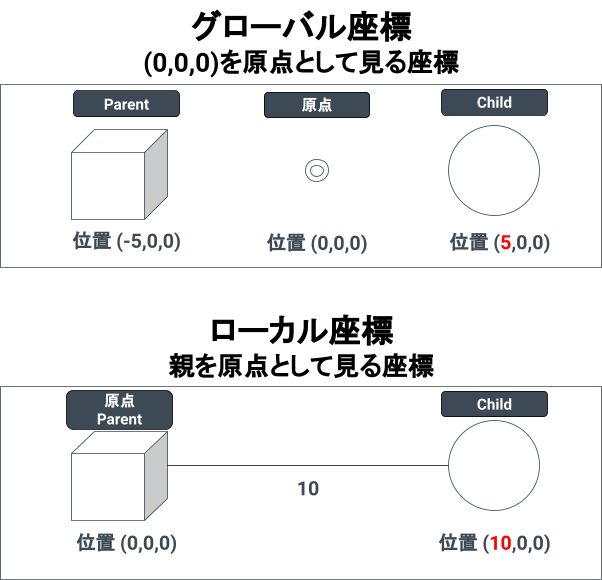
Local and World Coordinates
With the parent-child relationship broken, change the Position of Parent and Child to the following
|
Object Name |
Transform name |
X |
Y |
Z |
|
Parent |
Position |
-0 |
0 |
0 |
|
Child |
Position |
0 |
0 |
0 |
After changing the Position, we again create a parent-child relationship, with Parent as the parent and Child as the child.

Select Child in the hierarchy and note the Position in the inspector, where X should have been set to 5, but it is now 10, because it shows coordinates (called local coordinates) relative to Parent.
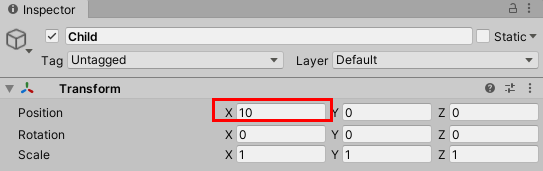
The coordinates of the Parent (-5 , 0 , 0) are still displayed in global coordinates (-5 , 0 , 0).
Materials and Textures
Material Settings
Materials are used to express the color and texture of an object’s surface.
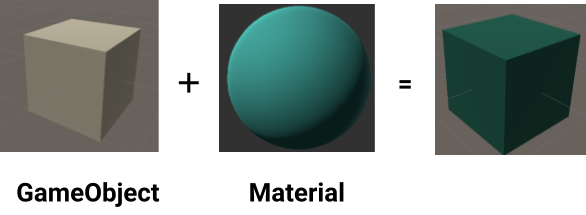
Let’s create a material to change the color of an object, but this time we will only create a material to change the color.
Materials are not placed in a scene by themselves; they are created in a project, as they are parts of a project.
Right-click on the project and click Create > Folder to create a Materials folder.
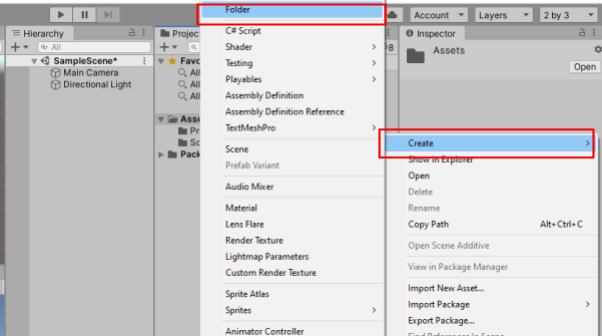
Create a new folder under the Assets folder to store scenes, prefabs, materials, etc. Under the Assets folder, create a folder for each asset type to keep the folders organized.
Now, create a material by right-clicking on the Materials folder and selecting Create > Material.
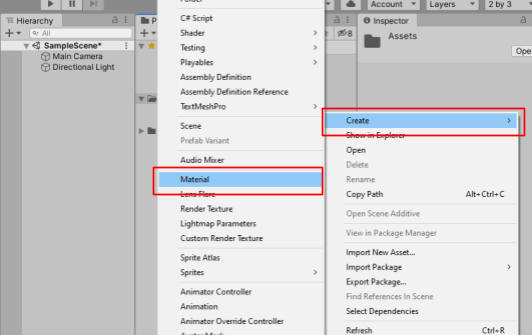
Once the material is created, name it Red.
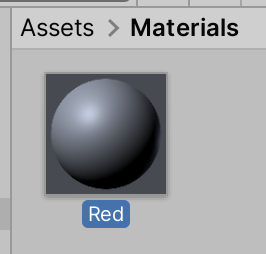
Take a look at the Material inspector. Drag the bottom bar up so you can see the state of the material.
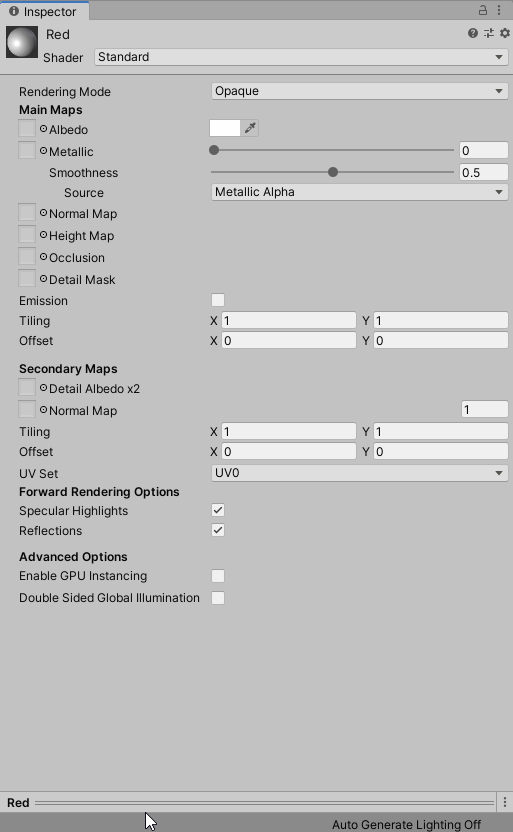
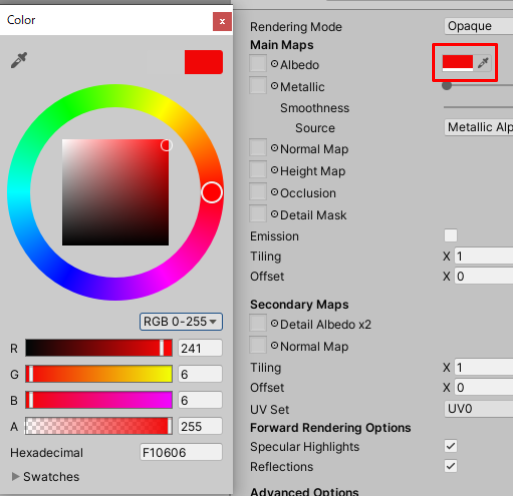
Click on Albedo’s color picker and choose the color you want.
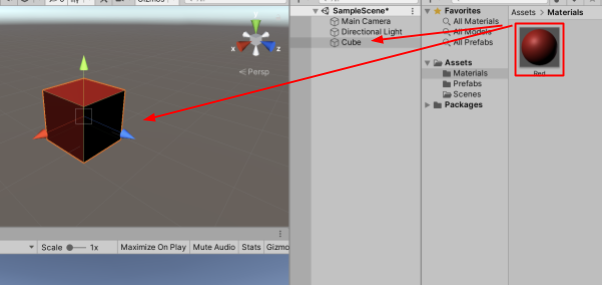
Let’s reflect the color-changed material in the Cube.
Drag and drop the material from your project to the “Cube in Hierarchy” or “Cube in Scene View” to reflect the material in the Cube.
Texture Settings
Textures are images that can be applied to game objects, such as wood grain, etc., by setting the texture to the material.

Prepare the image data for the texture of your choice.
Unity can handle the following image data:
BMP / EXR / GIF / HDR / IFF / JPG / PICT / PNG / PSD / TGA / TIFF
Reference source: https: //docs.unity3d.com/ja/2019.3/Manual/ImportingTextures.html
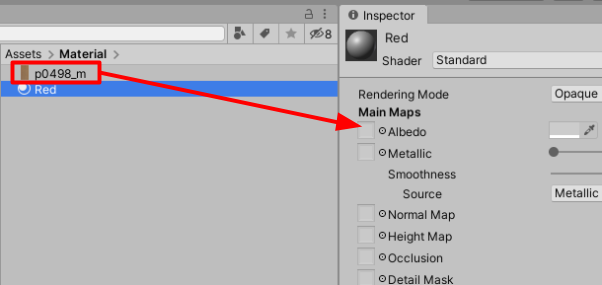
Drag and drop the prepared image data into the project and import it into Unity.
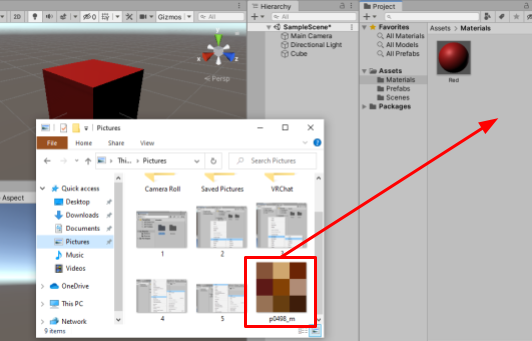
Select a material in your project to display the Material inspector.
Drag and drop the imported image data into the square on the left of Albedo.