This article describes an example of using GetARCameraTexture, a PlayMaker custom action added in STYLY plugin for Unity v1.8.0.
This article is an explanation of a specific use case, and you can find a detailed explanation of GetARCameraTexture in the manual below.
“]
![[Unity / PlayMaker] How to use the custom action “GetARCameraTexture”](https://styly.cc/wp-content/uploads/2024/01/w-160x160.jpg)
The prerequisite is to install the STYLY plugin and PlayMaker.
GetARCameraTexture can capture smartphone camera information in a texture in real time.
Sample scene
https://gallery.styly.cc/scene/70b9dd33-b19c-4546-85f7-bca39cbc3241

Sample Scene
How to use GetARCameraTexture
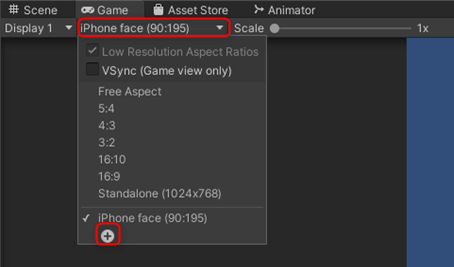
First, change the screen ratio in the Game window to 9:16, the smartphone screen size.
Click next to Display1 and specify a new Display Size from the + symbol at the bottom.
9:16
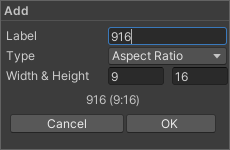
9:16
Creating Materials
Creating a material is explained in the GetARCameraTexture manual, which can be found here.
![[Unity/PlayMaker] Example of GetARCameraTexture custom action](https://styly.cc/wp-content/uploads/2024/01/アートボード-1-160x160.jpg)
Creating the main system
Next we create the main FSM: right click in the hierarchy and add a GameObject, then add the FSM in the PlayMaker editor. rename the GameObject to FSM for clarity.
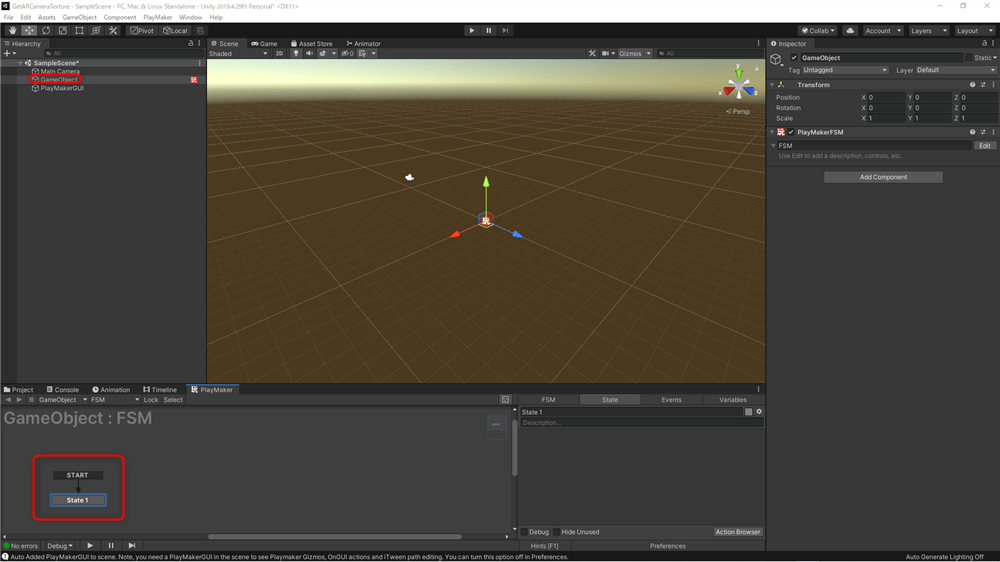
GameObject→PlayMaker editor→FSM
In this case, we want to implement two ways to texture a still image taken by the camera and a real-time video, so we will name the still image event “One Shot” and the video event “Every Frame”.
Create an event by entering “One Shot” and “Every Frame” respectively in the Add Event of Event.
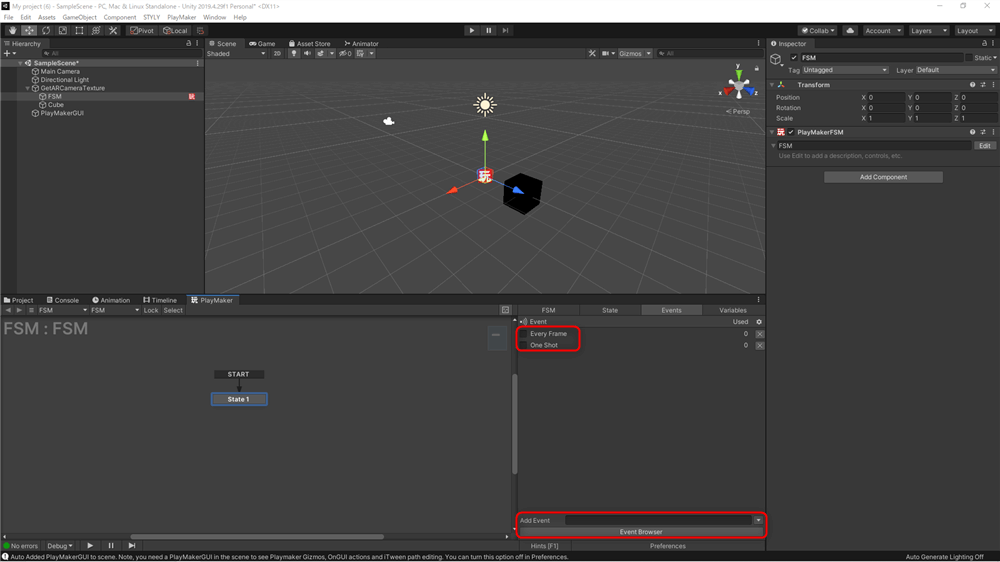
One Shot, Every Frame
After creating the event, right click in the editor and add One Shot and Every Frame from Add Global Transition.
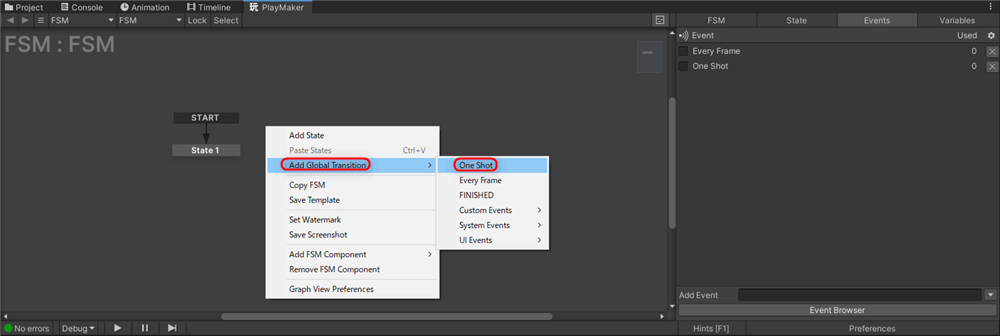
Add One Shot and Every Frame
Once added, add an action: select state 1, search for Get AR in the Action Browser and add Get AR Camera Texture.
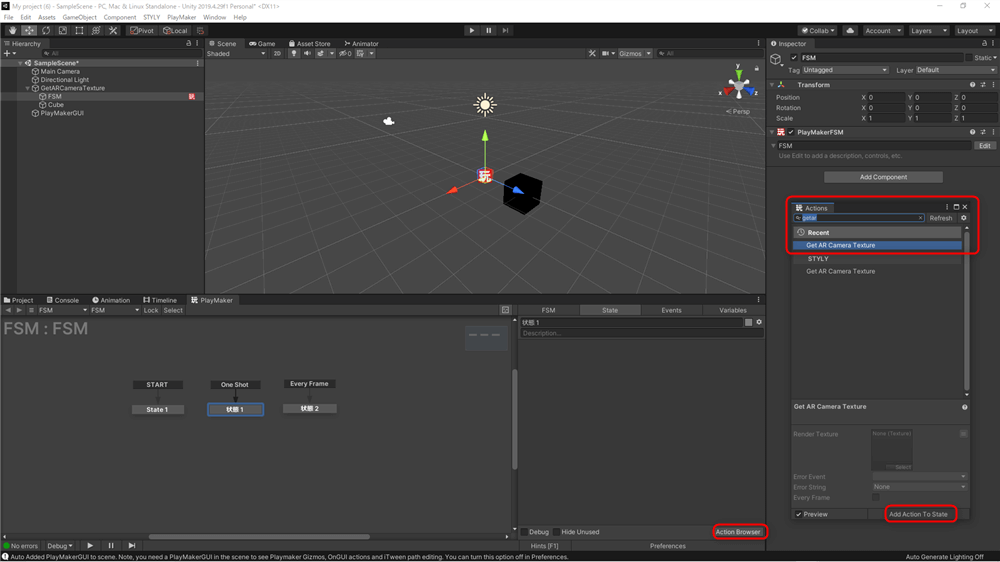
Get AR Camera Texture
Create a new variable “RenderTexture” by clicking on the two-line icon in RenderTexture, also create a new variable “error” in the Error Event section.
Check the “Every Frame” checkbox, as the program will repeat the process of displaying the camera’s information every frame, which will naturally allow you to acquire the camera’s image in real time.
The same process is used for both OneShot and Every Frame, but do not check the Every Frame checkbox for OneShot.
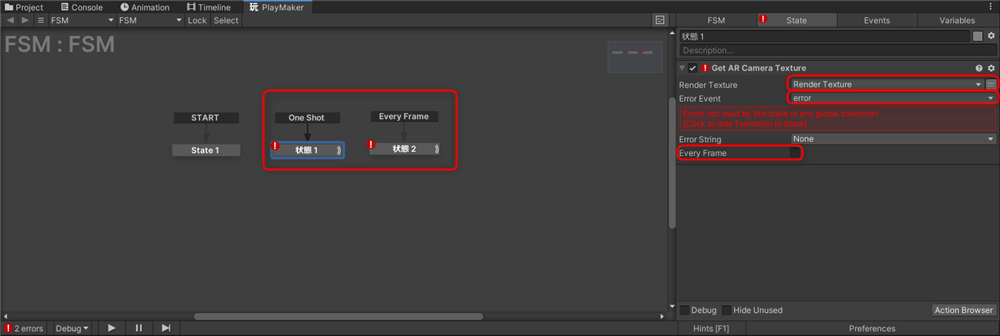
Do not check EveryFrame on the OneShot’s side
Right click on both state 1 and state 2 respectively and add the error you just created from Add Transiton.
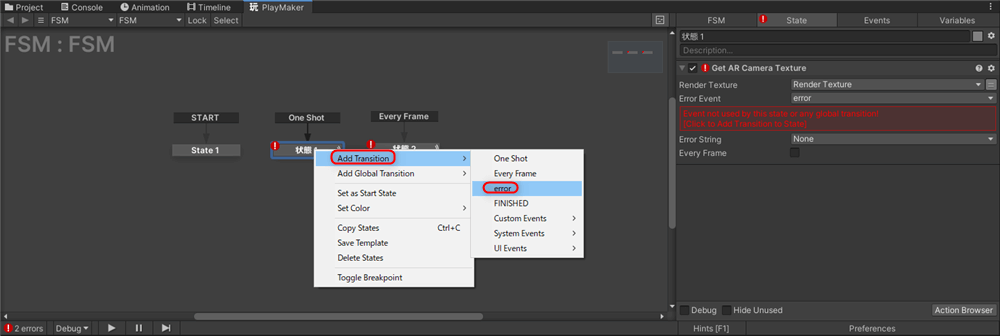
Add Transiton→error
Once this is done, create a new State and connect it to State 1 and State 2.
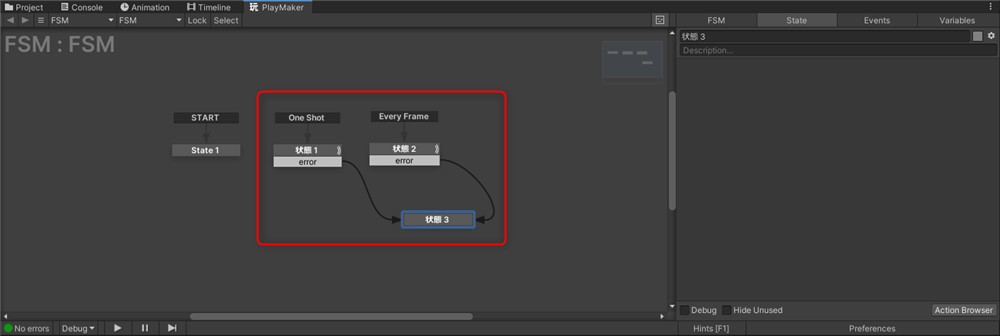
Add new state
Next, create a button to switch between still and video.
Right-click in the hierarchy and go to UI→Botton to add two buttons.
Rename them “One Shot” and “Every Frame” for clarity.
Change the UI Scale Mode to Scale With Screen Size in the Canvas Scaler.
Adjust the button positions as desired.
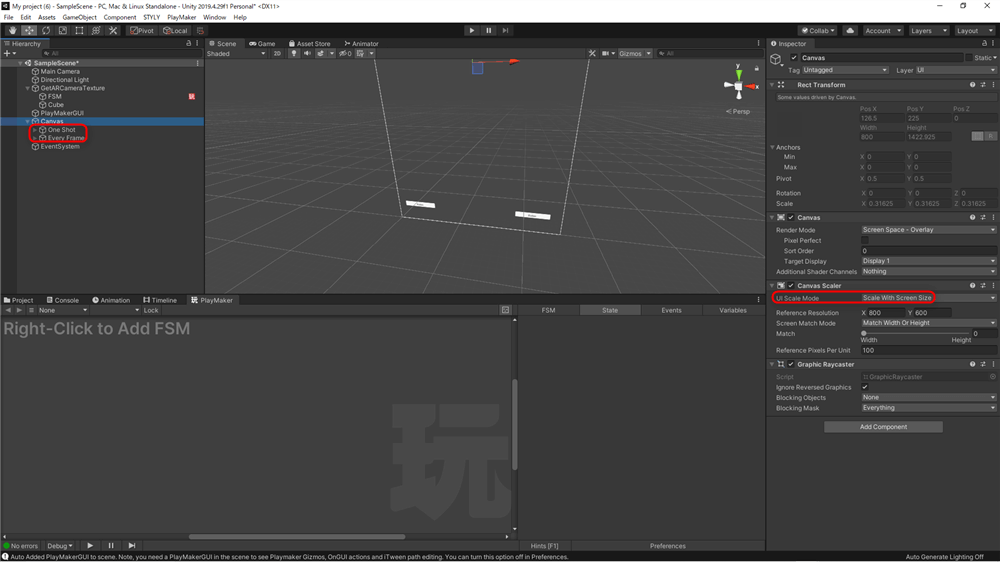
Add new bottons
Select the Text stored in One Shot and change the Text to One Shot from the Inspector.
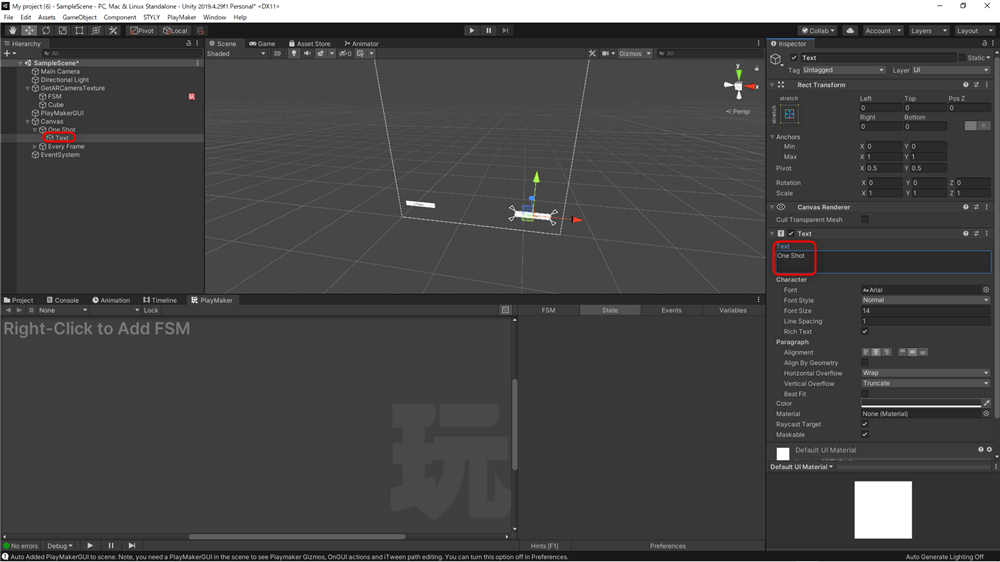
Text→One Shot
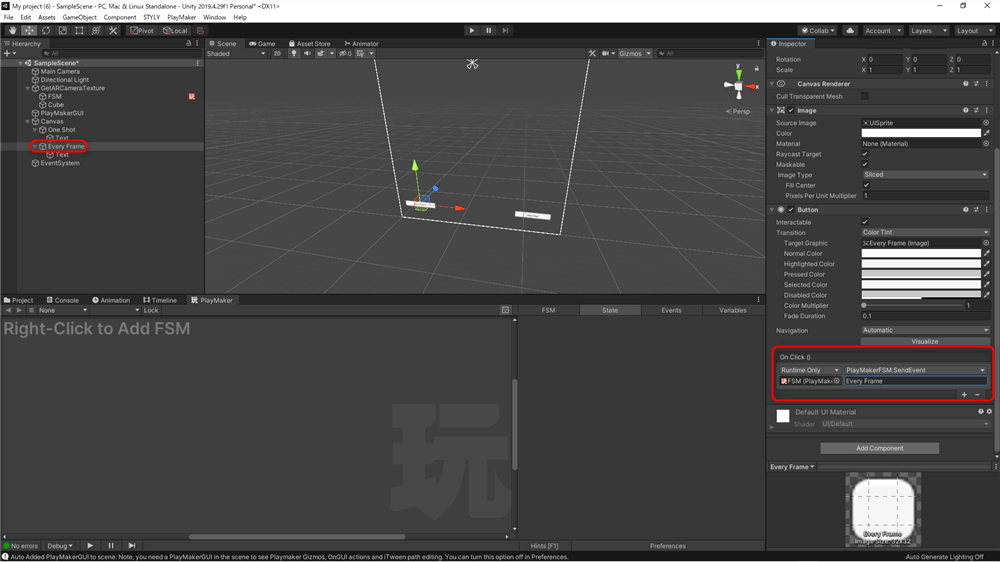
Select the button (One Shot) and click the + symbol for On Click in the inspector to add the list. For None (Object), specify the FSM in the scene.
For No Function, select PlayMakerFSM→SendEvent(String), below that type One Shot (the spelling here should be exactly the same as you entered in Add Global Transition)
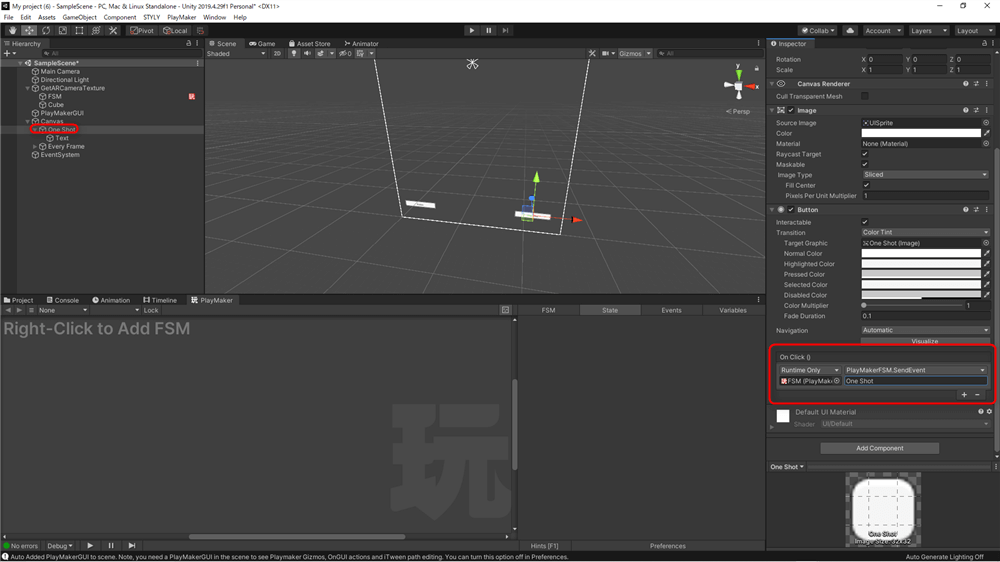
PlayMakerFSM→SendEvent(String)
.
Once you have done this, do the same for Every Frame.
Every Frame
Next, we will create a system that makes it easy to see what was captured by the camera on the screen.
Right-click on the hierarchy and add UI→Raw Image.
Change the size and other settings as you see fit.
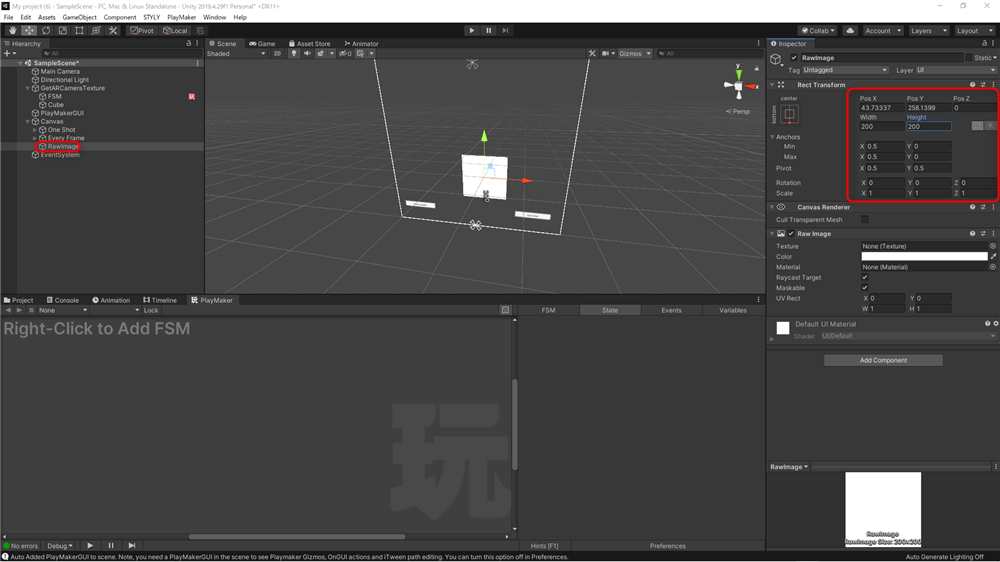
UI→Raw Image
Specify the RenderTexture you just created in the Inspector’s Raw Image→Texture.
Add an Aspect Ratio Fitter from Add Component at the bottom of the Inspector and change the Aspect Mode to Height Controls Width.
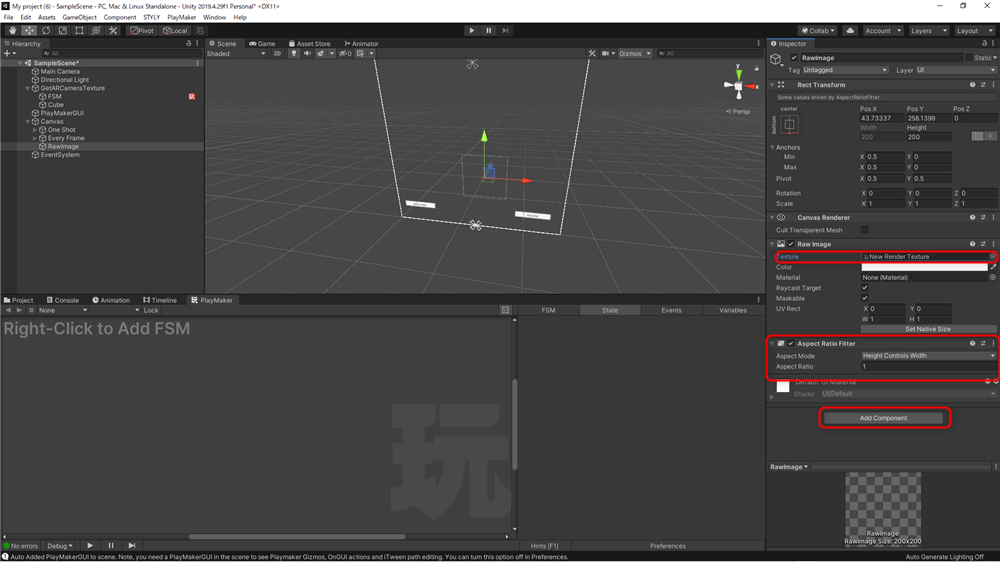
Add Component→Aspect Ratio Fitter→Aspect Mode→Height Controls Width
Then add a State to Raw Image, go to Variables and add variables.
Add variables to New Variables named h, w and ratio respectively, Variable Type should be Float.
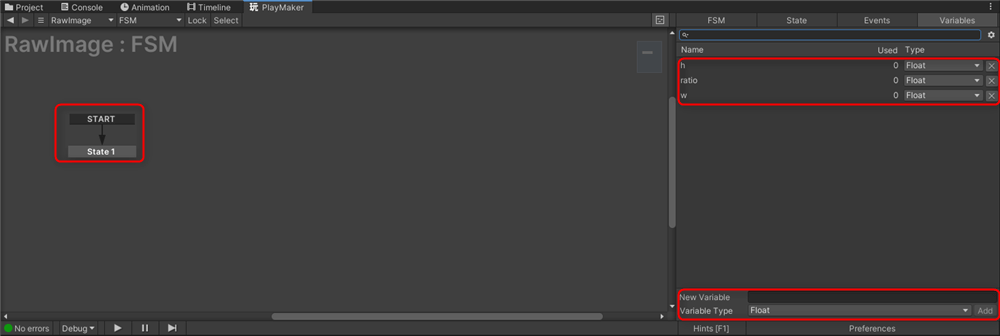
New Variables→h, w, ratio
Enter fitter in New Variables, change Variable Type to Object and press Add.
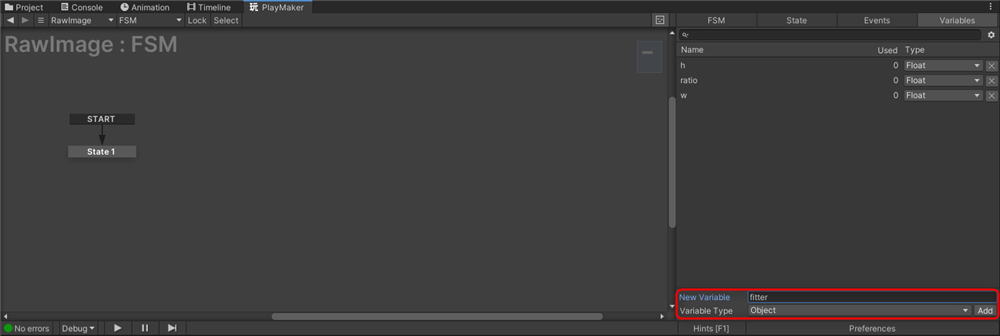
New Variable→fitter
Change Object Type to Unity Engine→UI→Aspect Ratio FItter.
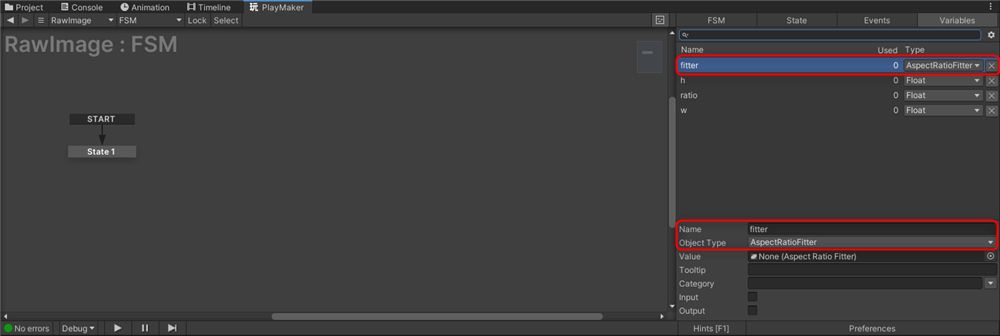
Object Type→Unity Engine→UI→Aspect Ratio FItter
Add an action from the Action Browser and change the content as shown in the image.
Formore information, please check the official Unity documentation.
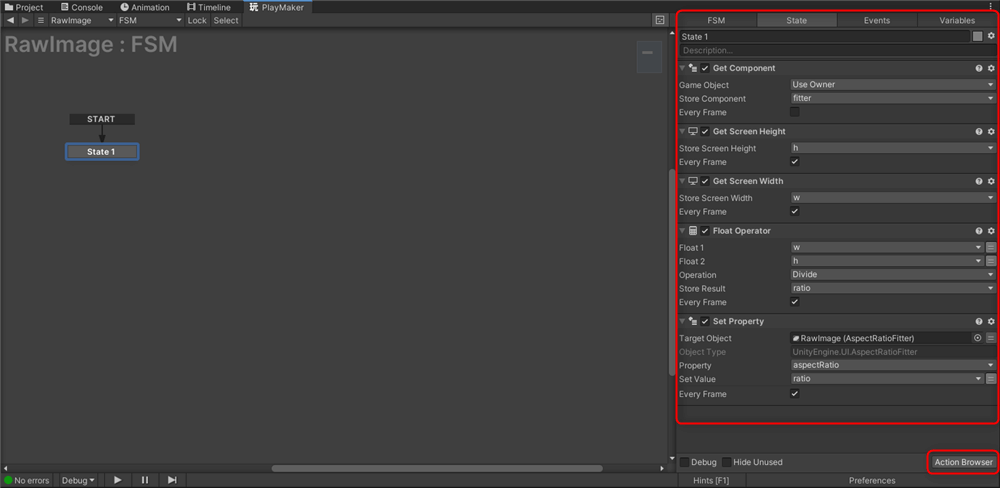
Add actions
Return to the PlayMaker Editor of the FSM in the scene and set the GameObject, Raw Image, and Render Texture in Variables.
First, set the Render Texture that already exists.
Click RenderTexture in Variables and put a checkmark in Input.
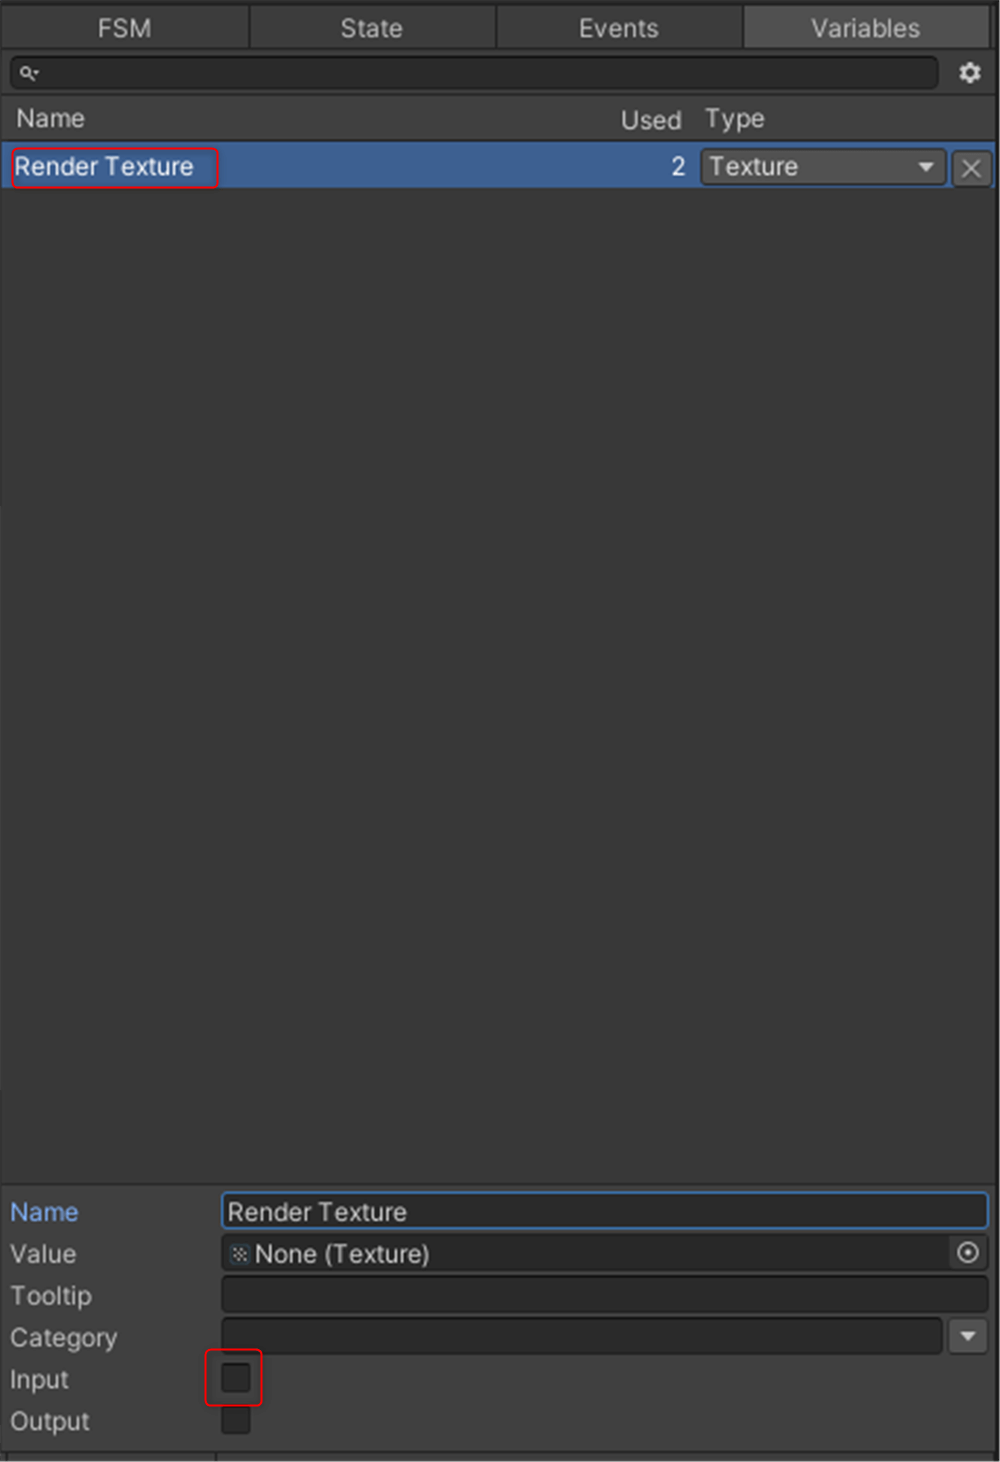
Input
Next, set the GameObject(Cube).
Enter Cube in the New Variable of Variables, change the Variable Type to GameObject and press Add to add it.
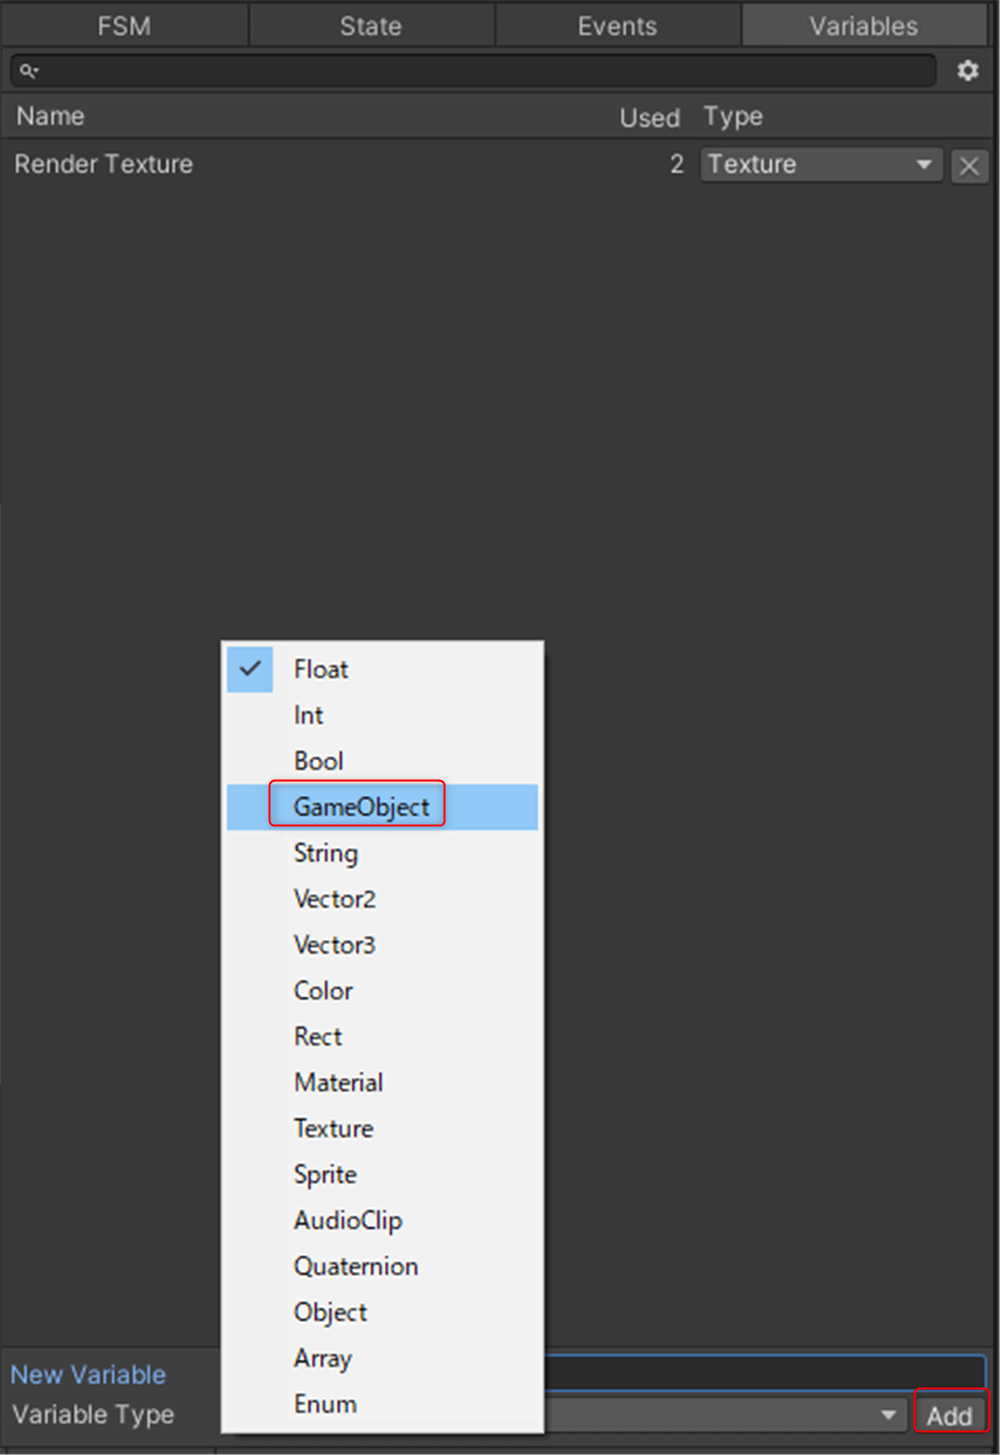
GameObject(Cube)
Once added, click on the Cube’s variable and check the Input checkbox.
Finally, set the Raw Image.
Enter “Raw Image” in the New Variable field of Variables, change the Variable Type to Object, and press Add to add it.
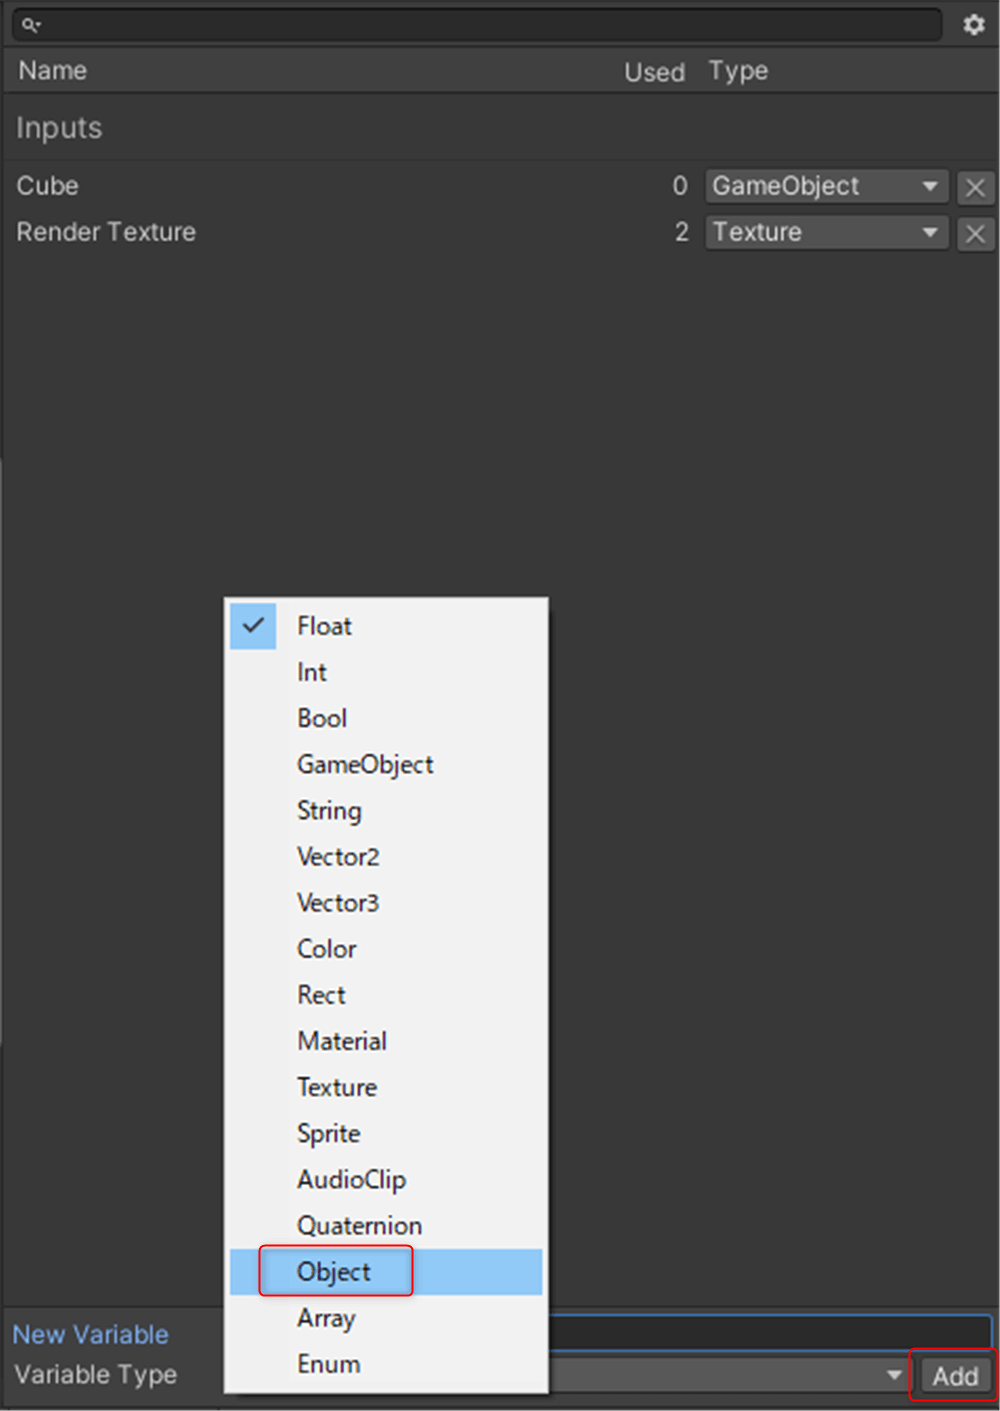
Object
Once added, click on the Raw Image variable and check the Input checkbox.
Click on Object under Object Type and select Unity Engine→UI→Raw Image.
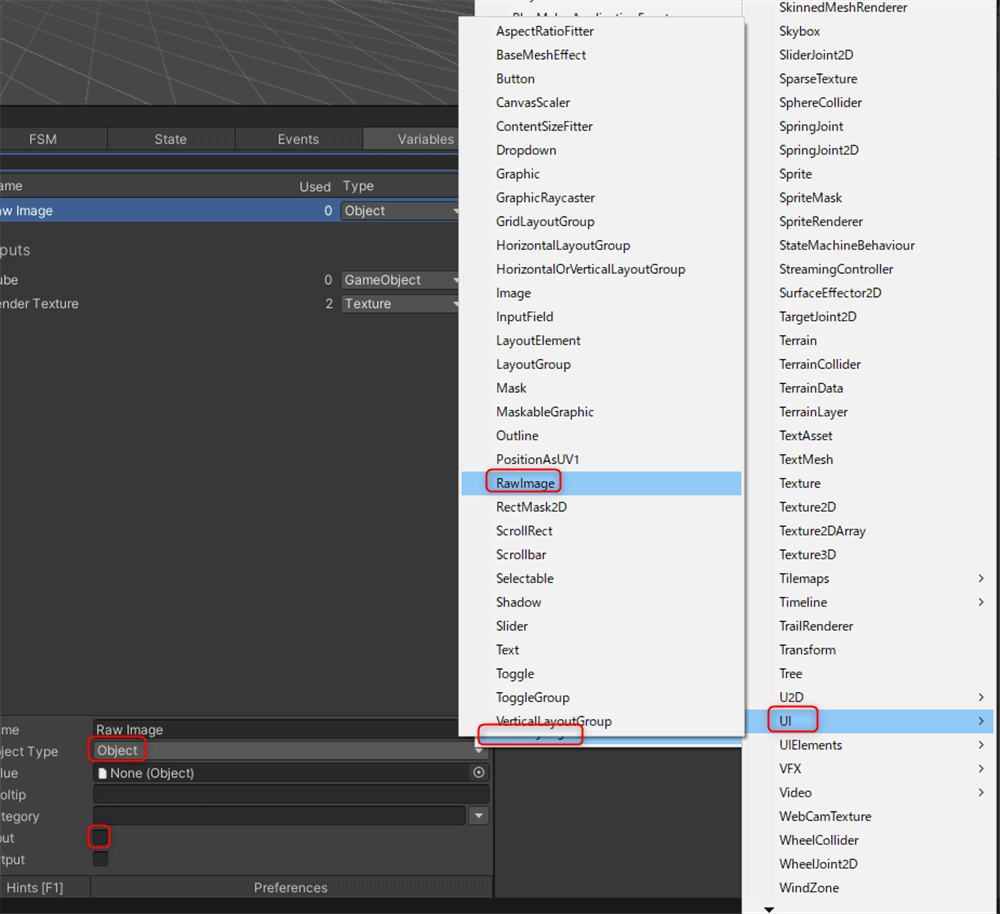
Unity Engine→UI→Raw Image
You will then see a list of Inputs in the FSM inspector, and for each of them, specify the item you just created. The FSM inspector will then display a list of Inputs, and for each of them, specify the item you just created.
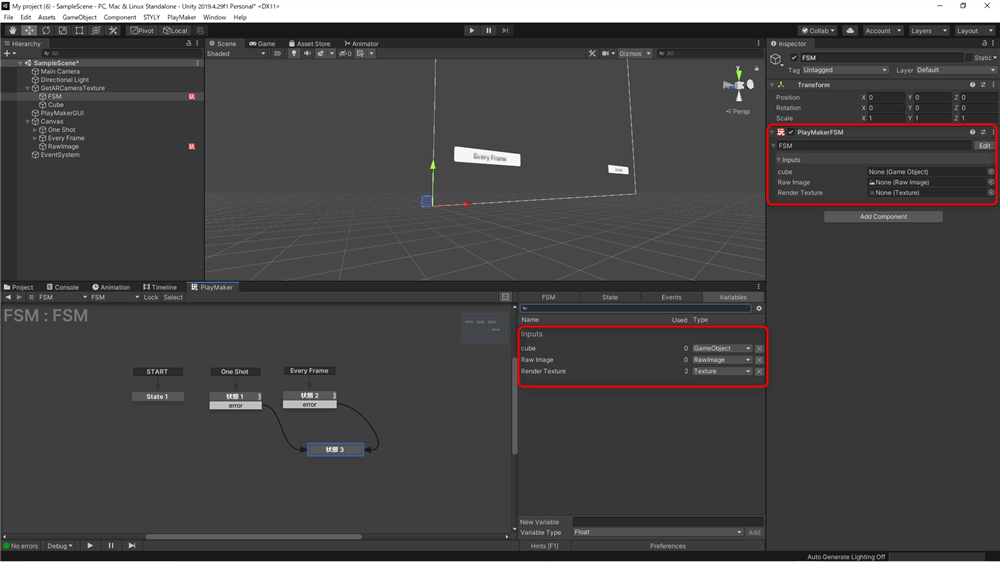
Select items
Finally, to make the Cube’s texture more visible in the AR scene, add a rotation animation: add an FSM to the Cube, and add a rotate from the Action Browser.
Change the X, Y, and Z values to 0.1.
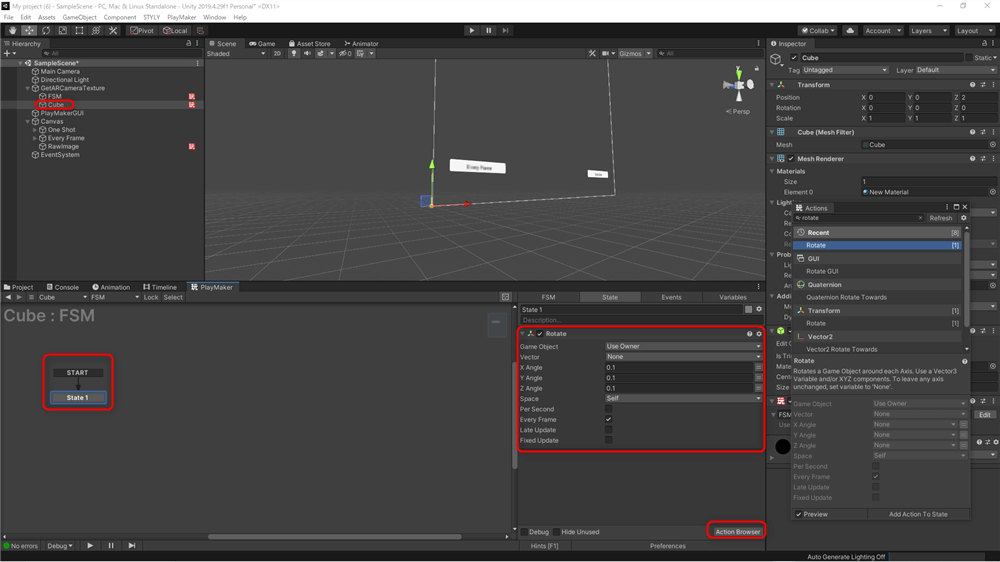
Action Browser→rotate→X,Y,Z=0.1
Now that it is complete, let’s upload the scene to STYLY.
Upload to STYLY
Let’s actually upload the scene to STYLY and use it.
This time we will upload the Unity scene directly to STYLY.

How to create an account
