This article is the fifth installment of the Introduction to Visual Scripting series. You can check the previous article from the link below.
![Introduction to Unity Visual Scripting Part 4: Switching screens and displaying scores [Part 2 of the continuous hit game]](https://styly.cc/wp-content/uploads/2024/08/11-1-160x160.png)
This time, we will explain the basic operations of objects using AddForce and Transform.
Moving with AddForce
Add an empty GameObject to the Hierarchy and name it [ObjectController].
![Rename GameObject to [ObjectController]](https://styly.cc/wp-content/uploads/2024/08/1-1.png)
Rename GameObject to [ObjectController]
Attach a Script Machine to [ObjectController].
Click New to create a graph.
![Attach Script Machine to [ObjectController]](https://styly.cc/wp-content/uploads/2024/08/2-2.png)
Attach Script Machine to [ObjectController]
Click New on the Script Machine to create a graph.
Create a folder named Macros, and save it as [ObjectManager] within that folder.
![Create a folder and save it as [ObjectManager]](https://styly.cc/wp-content/uploads/2024/08/3-3.png)
Create a folder and save it as [ObjectManager]
Add a Cube to the Hierarchy, set its Position to (0, 0.5, 0), and add a [Rigidbody] from AddComponent.
This time, we will move this object.
![Set Cube Position to (0, 0.5, 0) and add [Rigidbody] from AddComponent](https://styly.cc/wp-content/uploads/2024/08/4-2.png)
Set Cube Position to (0, 0.5, 0) and add [Rigidbody] from AddComponent
Rigidbody is a feature in Unity that handles physics calculations.
It allows you to add gravity or apply forces to an object.
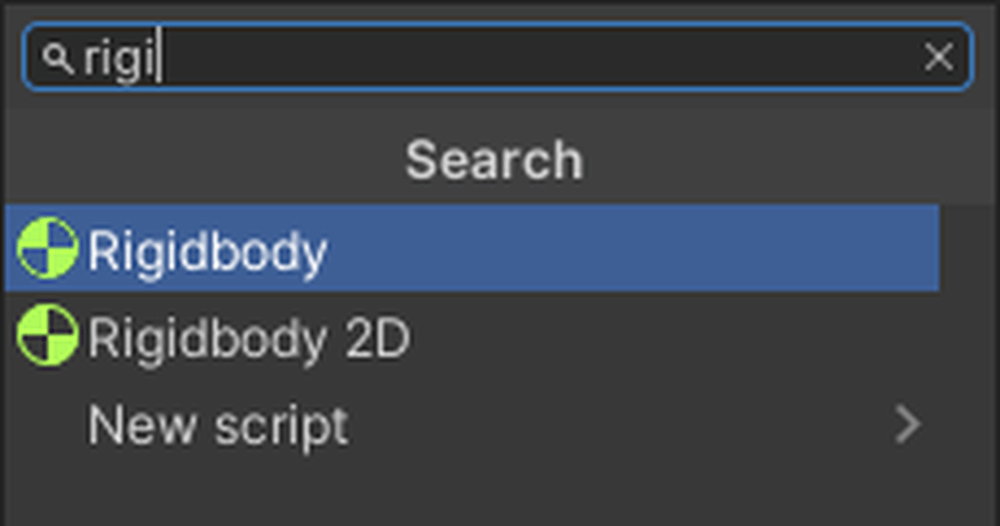
Rigidbody
Next, add a Plane to the Hierarchy to place this object on.
Add Plane
Set its Position to (0, 0, 0).
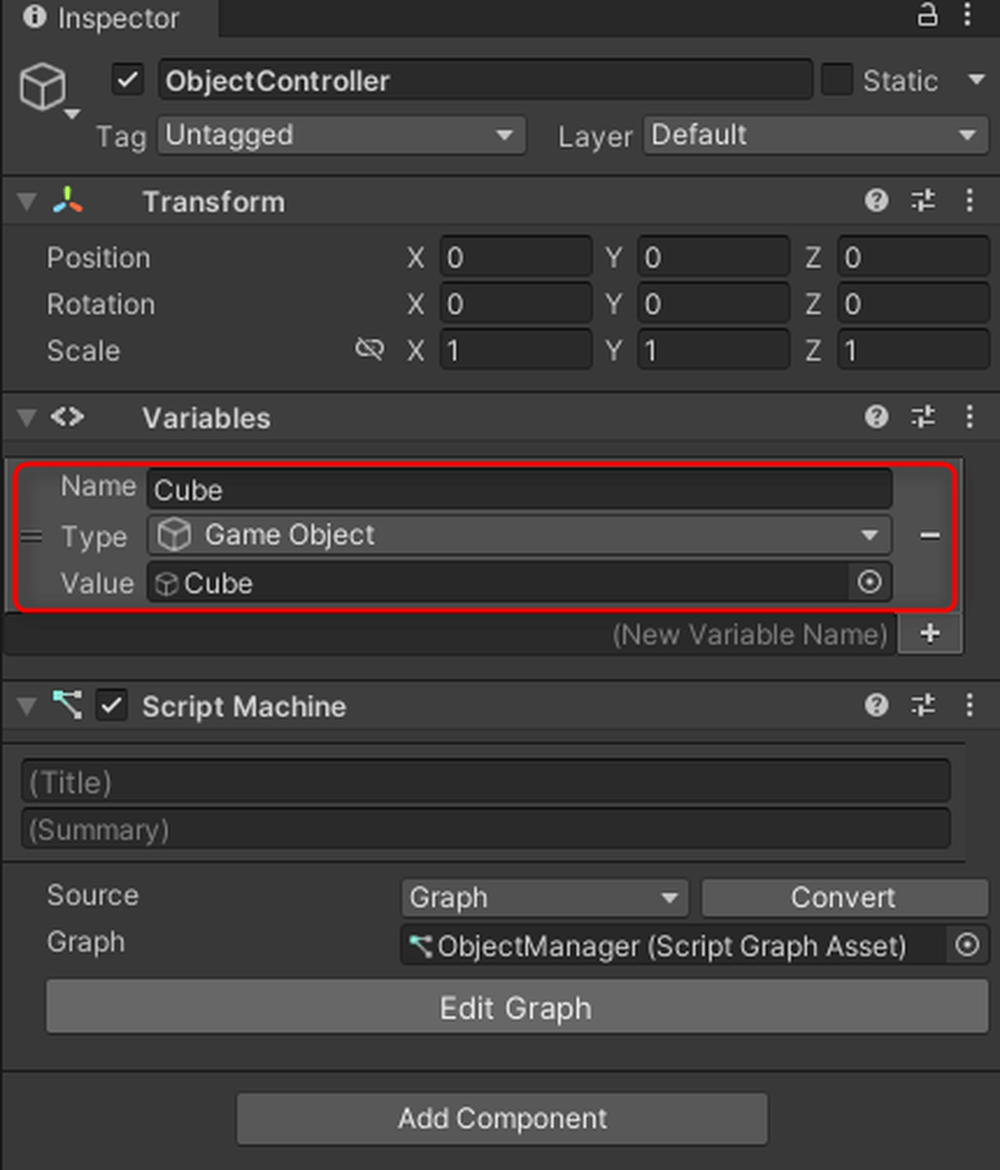
Add a GameObject type variable to the ObjectController’s Variables, name it [Cube], and set its Value to the Cube.
Add a GameObject type variable to the ObjectController’s Variables.
Add nodes to respond when the space key is pressed, and connect them as shown below.
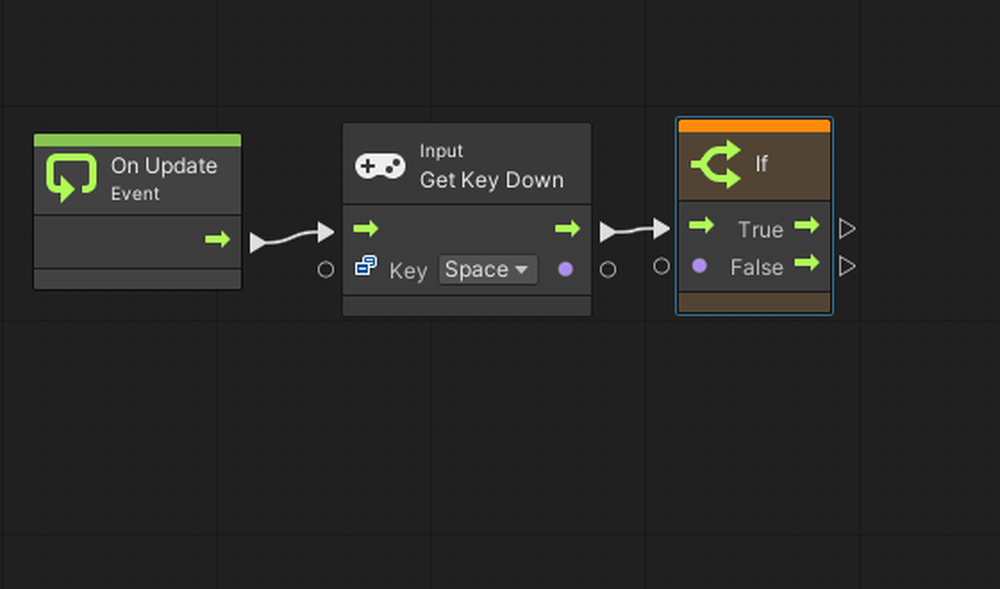
Connect nodes
Add an Add Force node to the Graph Editor.
Enter the direction you want to apply force in the Force value.
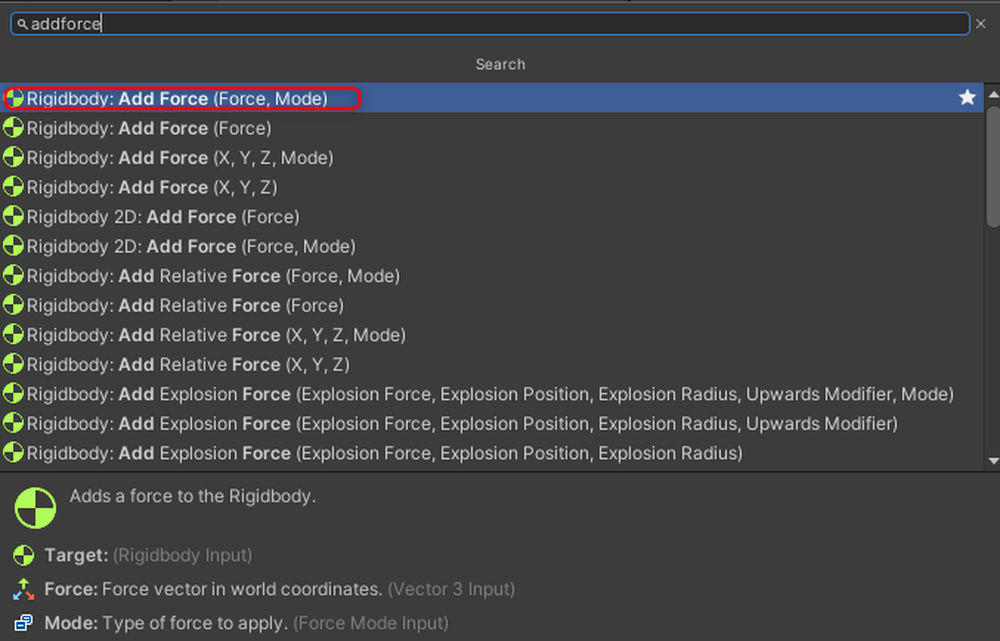
Add Force
AddForce is a node that applies force to an object.
This time, we want to make the object jump, so we entered (0,300,0). Feel free to try other values.
The second node from the top of AddForce connects to the object you want to move.
Add [Cube] from Variables to the Graph Editor, and connect the nodes as shown below.
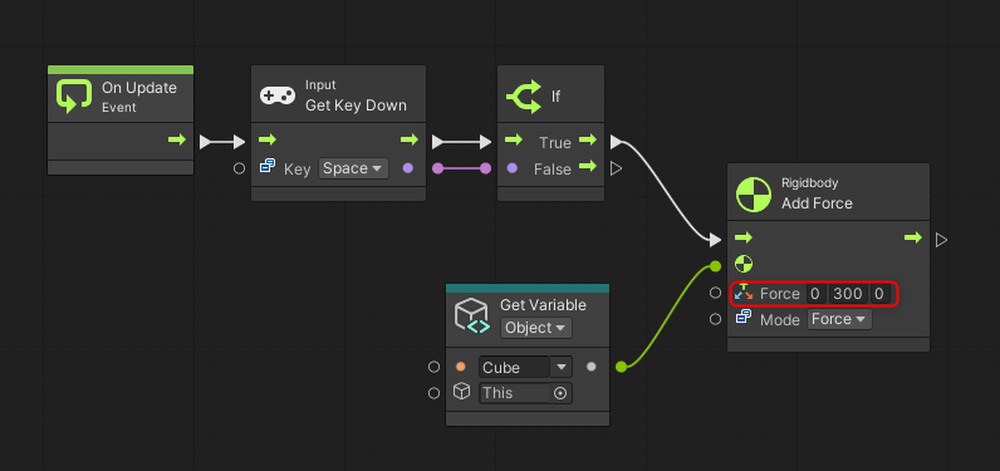
Connect nodes
Run the program.

Jump with the space key
Press the space key to jump.
Moving Objects with Transform
Movement
Add Get Position, Set Position, Vector3Literal, and Add to the Graph Editor.
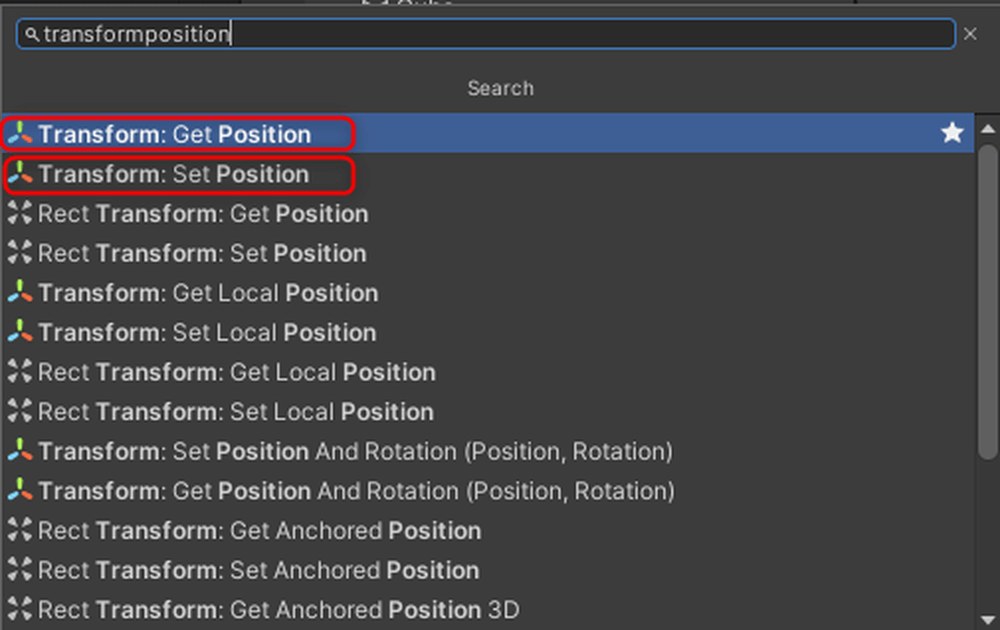
Add Get Position, Set Position, Vector3Literal, and Add
Add Vector3Literal
Disconnect AddForce and remove the Rigidbody from the Cube.
To remove a component that has been added, click the three dots on the right and select Remove Component.

Disconnect AddForce and remove Rigidbody
Add another Cube from Variables to the Graph Editor. In Vector3Literal, enter the distance to move when the space key is pressed.
This time, enter (0,1,0).
Get Position retrieves the coordinates of the object connected to the node.
Set Position assigns the coordinates connected to the bottom port to the position of the node connected to the middle port.
Reconnect the nodes as shown below.
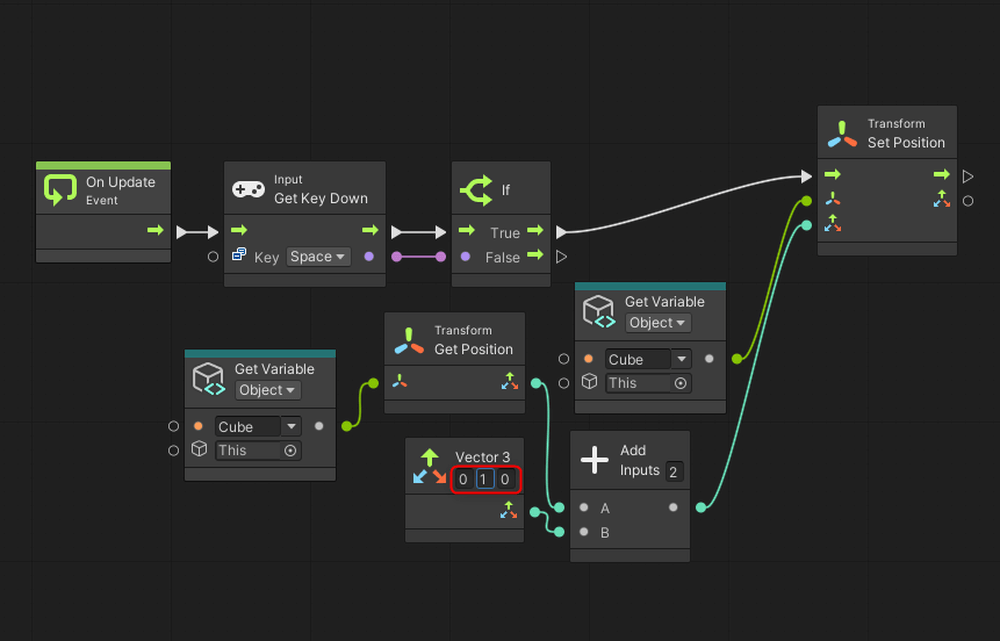
Connect nodes
Let’s run it.
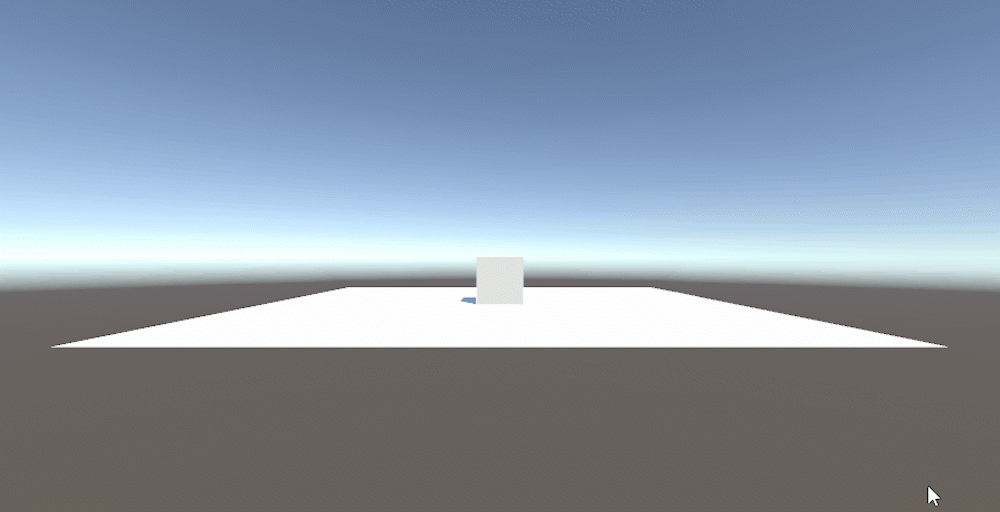
Moved up
Scaling
Add Get Local Scale and Set Local Scale to the Graph Editor.
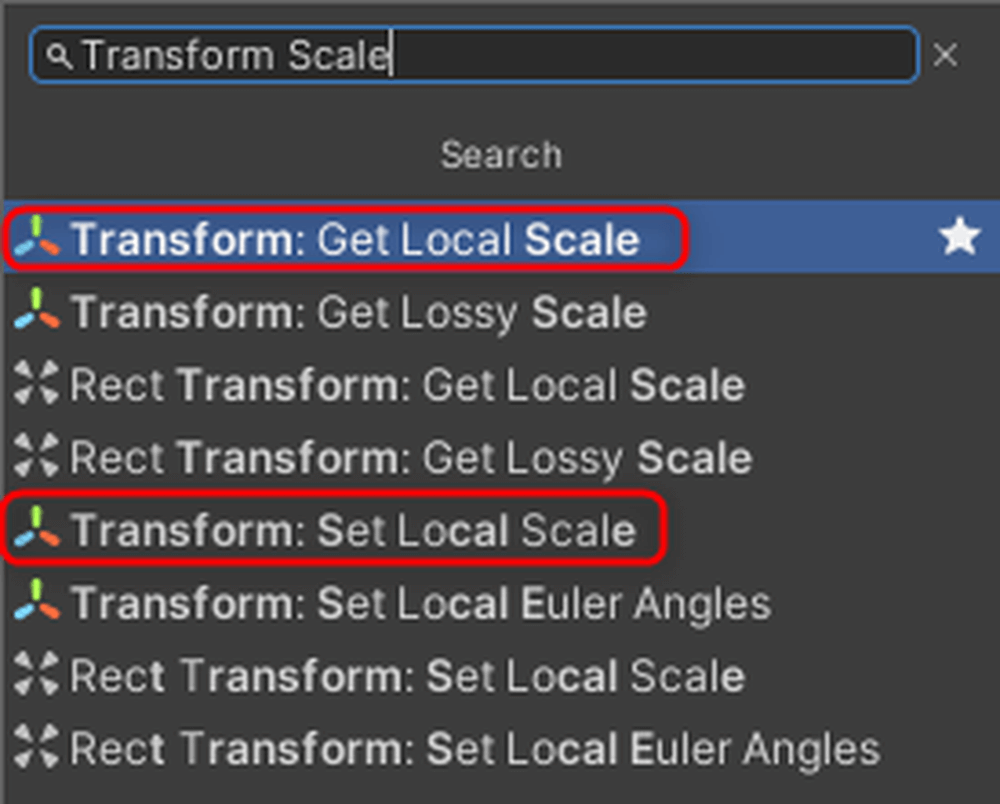
Add Get Local Scale and Set Local Scale
Disconnect the Get Position and Set Position connections.
Change the value of Vector3Literal to (1,1,1).
Get Local Scale retrieves the scale of the object connected to the node.
Set Local Scale assigns the scale connected to the bottom port to the scale of the node connected to the middle port.
Connect the nodes as shown below.
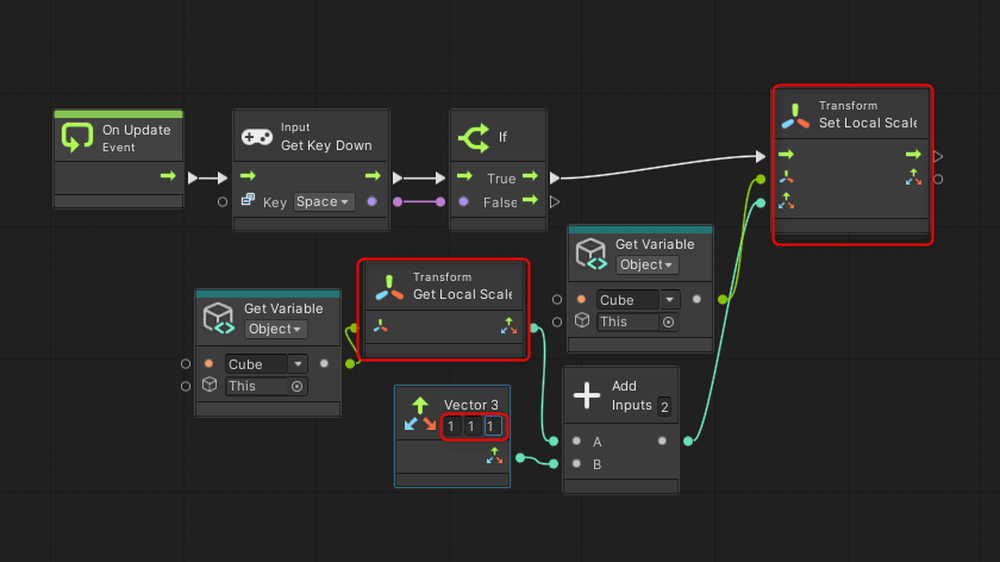
Connect nodes
Run the program. The object will grow by 1 meter each time you press the space key.
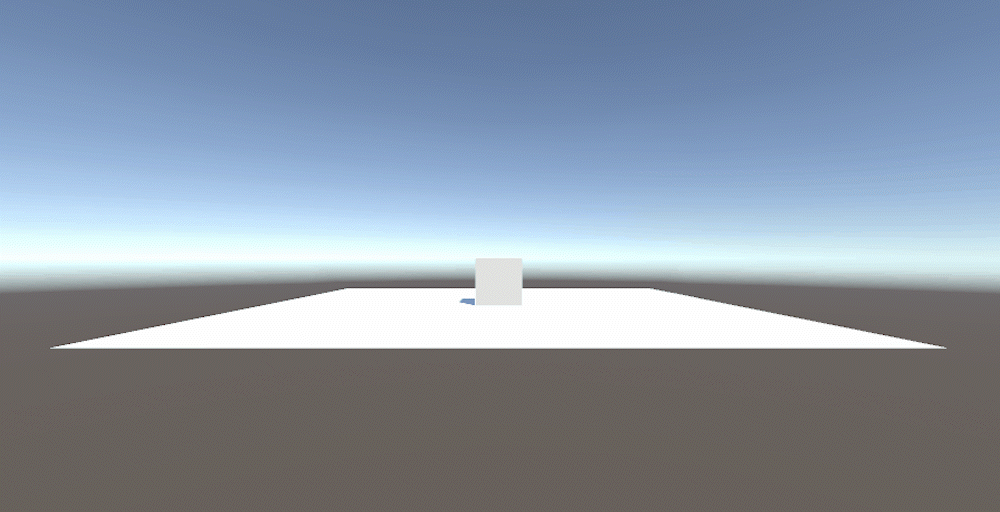
Grows larger with each press of the space key
Rotation
Add Rotate to the Graph Editor.
Add Rotate to the Graph Editor
Rotation is calculated differently from Position and Scale, so a separate function called Rotate is provided.
Disconnect the nodes used for scaling, and reconnect them as shown below.
This time, we will rotate the object by 30 degrees each time, so enter (30,0,0) for the Vector3 value.
For Rotate, connect the current angle to the second port from the top, and the amount to rotate to the third port from the top.
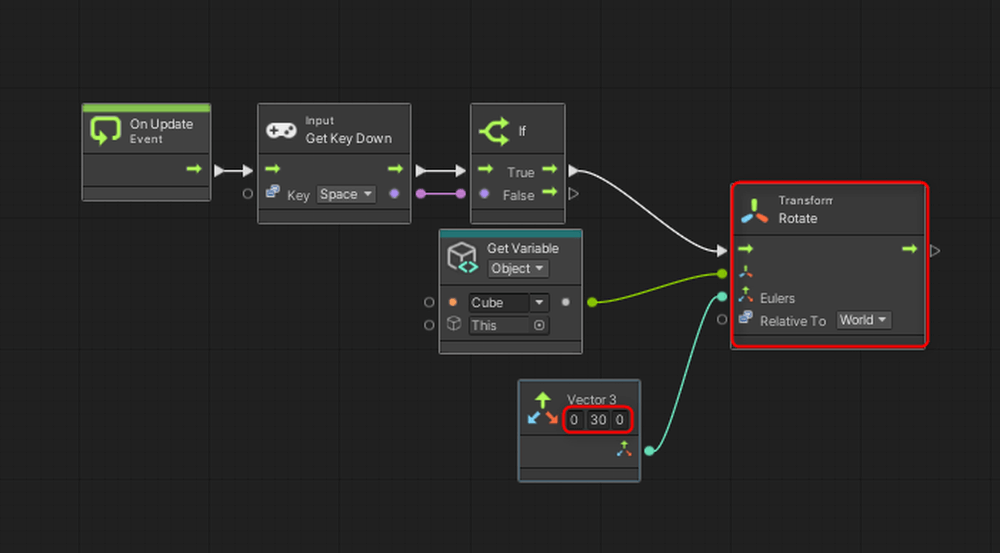
Connect nodes
Run the program. Each press of the space key rotates the object by 30 degrees.

Rotates 30 degrees with each press of the space key
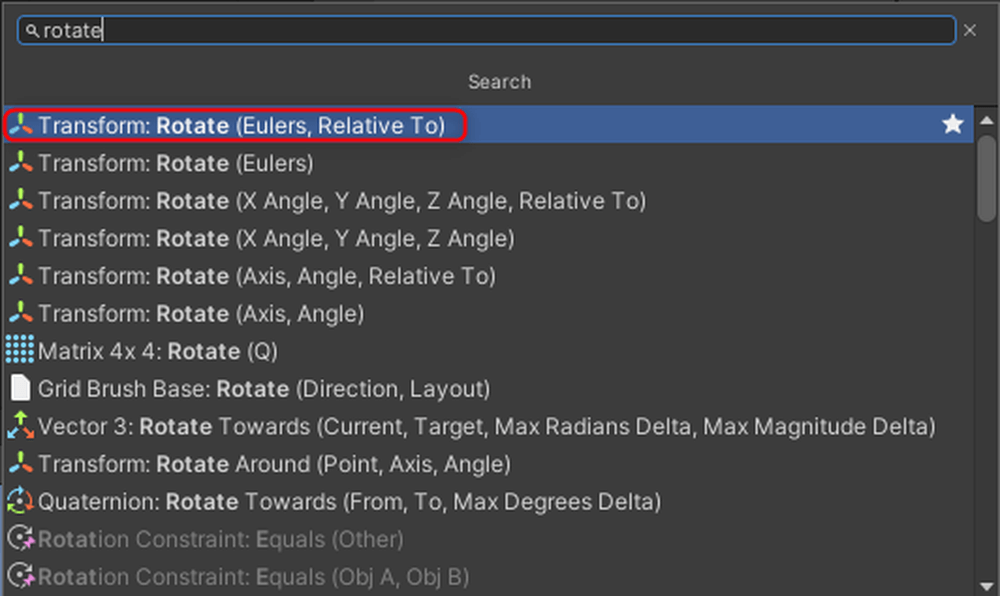
Rotating to a Specific Angle
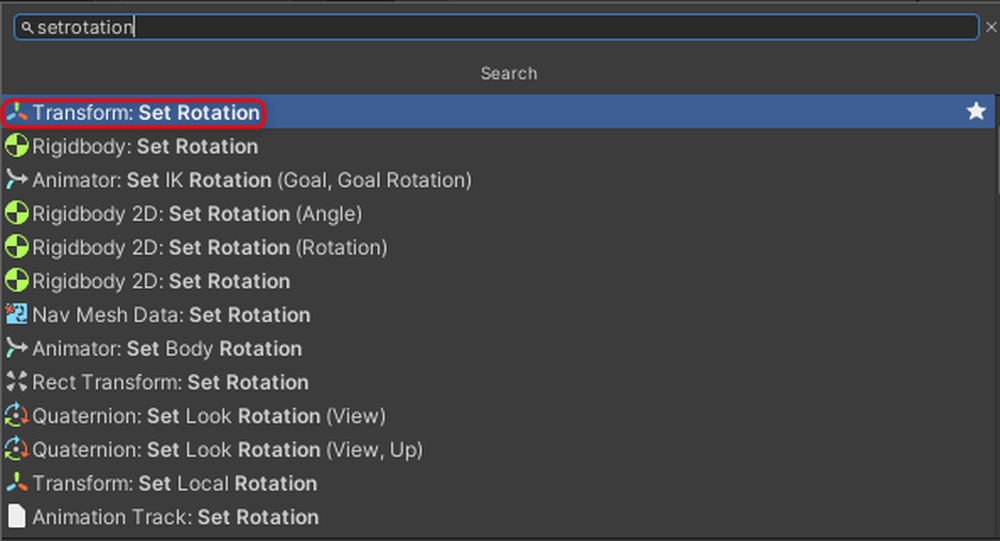
Add Euler (Euler) and Set Rotation to the Graph Editor.
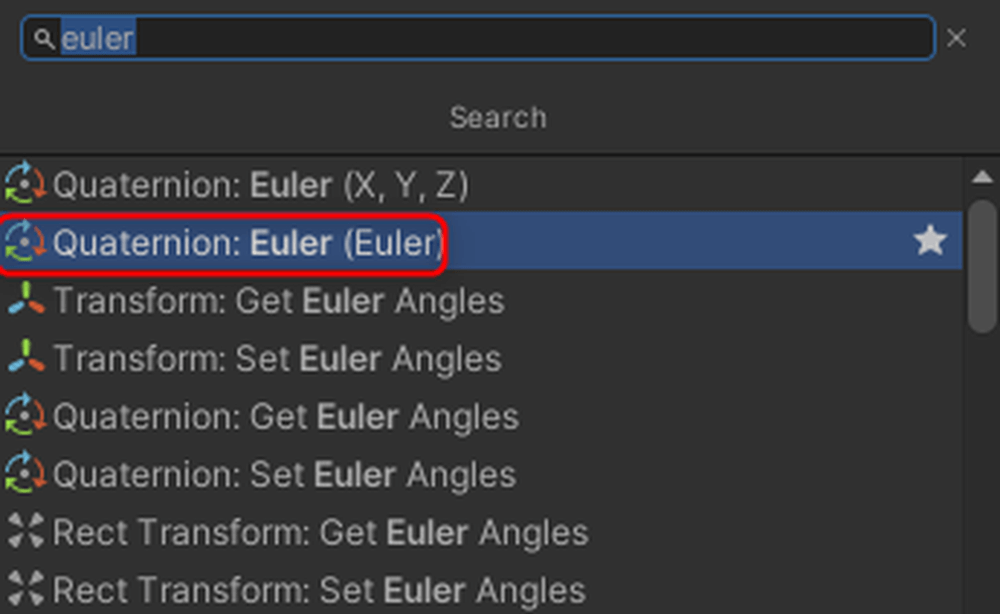
Add Euler (Euler) and Set Rotation
Add Set Rotation
Disconnect the nodes used for rotation and reconnect them as shown below. Set the value of Euler to (0,30,0).
For Set Rotation, connect the object to be modified to the middle port and connect the Quaternion type variable to the bottom port.
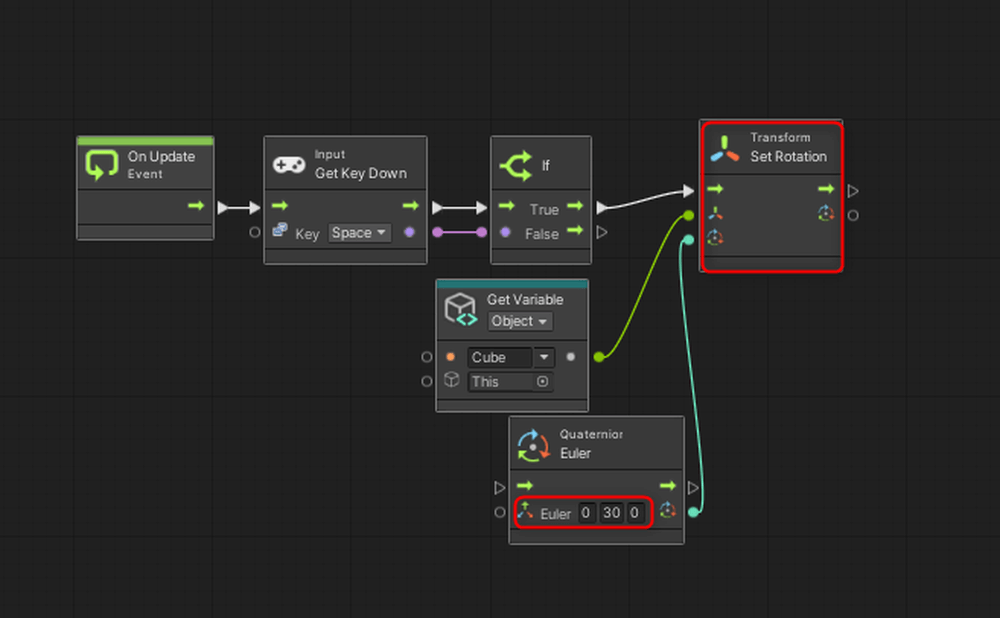
Connect nodes
Run the program. When you press the space key, the Cube rotates 30 degrees on the Y-axis.
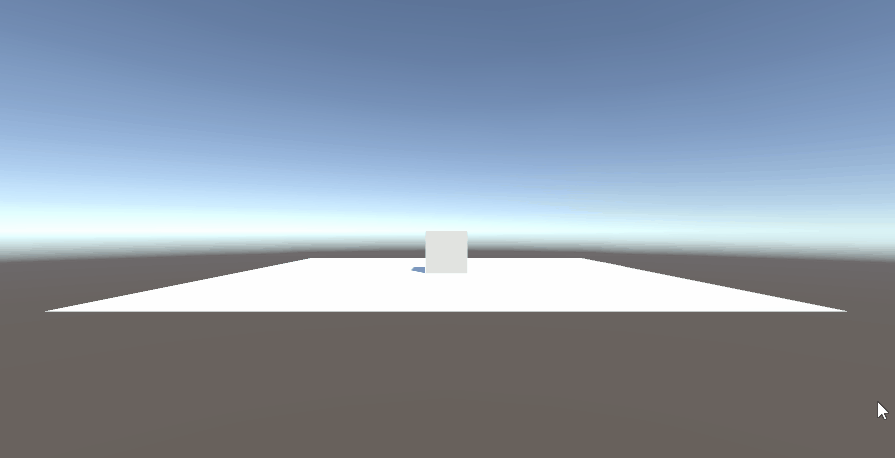
Rotates 30 degrees on the Y-axis when the space key is pressed
This time, we learned how to move objects.
In the sixth session, we will introduce collision detection.
You can check the next article from the link below.