This article explains how to combine PlayMaker and STYLY to create a mechanism that warps to another location when touching a specific point in the VR space.
This warp function works with a click not only in VR but also in a web browser.
This article uses the paid asset PlayMaker.
The following article explains in detail how to install PlayMaker.
![[Unity Tutorial] Creating a Game Using Playmaker ① From Basic Introduction to Installing](https://styly.cc/wp-content/uploads/2019/06/1200px-160x160.jpg)
Creating a Sample Environment
Create a simple scene to implement the warp functionality.
Right click on the hierarchy, select 3D Object→Cude and place a Cube in the scene.
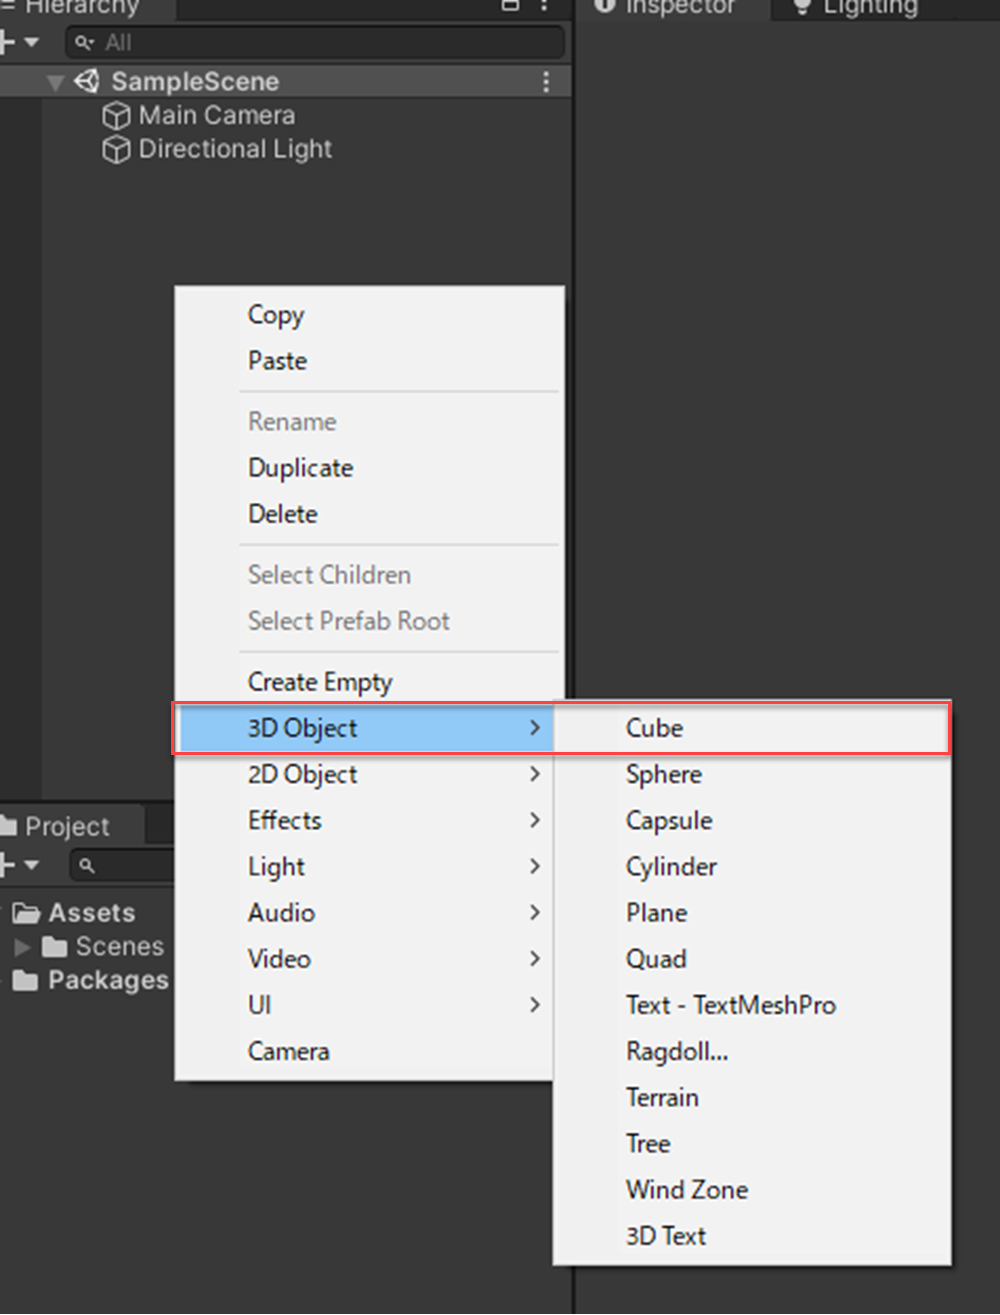
Place a Cube in the scene
.
Select the Cube on the Hierarch and press Ctrl+[D] to duplicate the Cube.
Duplicate the Cube again and rename the three Cubes with different colors to make the Cubes easier to recognize.
Expand the Floor and transform it to look like a floor surface, and place the other Cubes in different colors to make them easier to recognize.
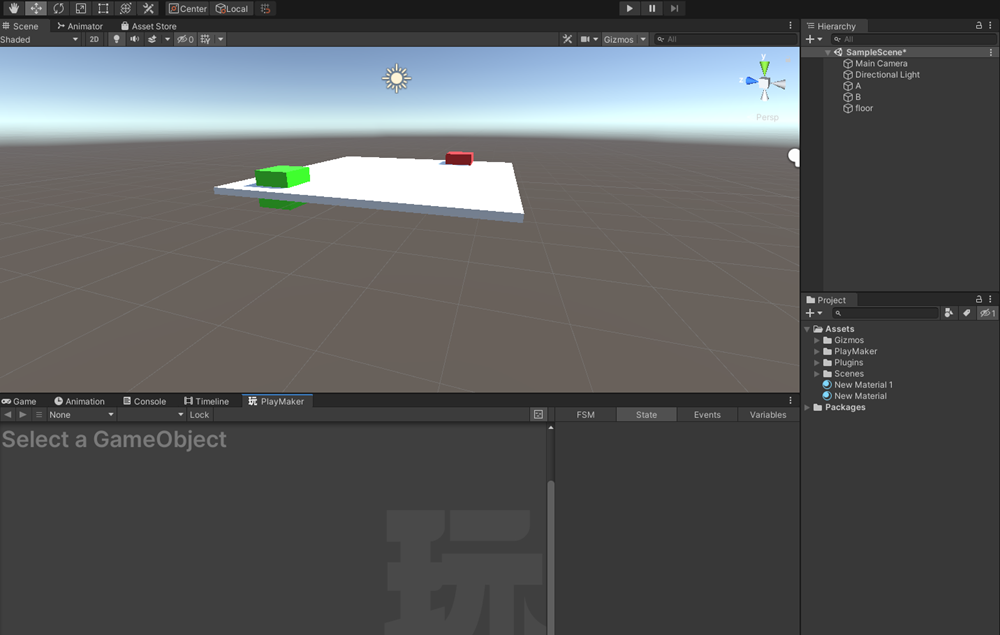
Place the Cubes in different colors for clarity
.
The scene is now ready.
We will create a system so that when you touch or click on CubeA, it will warp to point B.
Creating the warp system
With A selected, right click on PlayMaker and Add FSM to add a State.
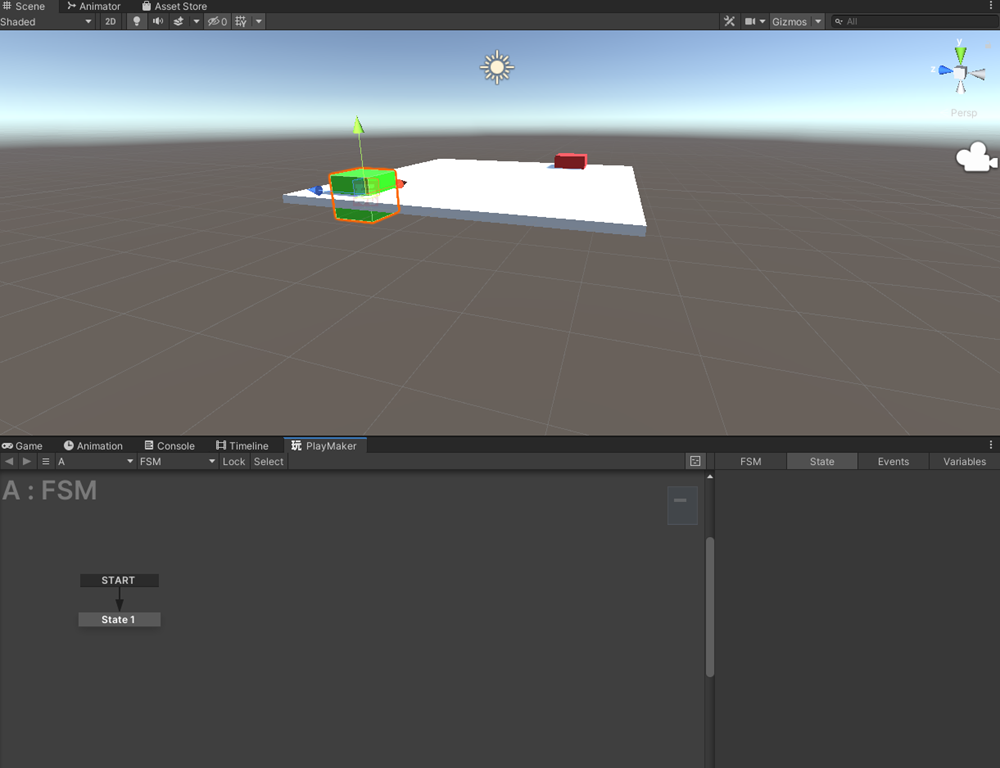
Add State with Add FSM
.
Rename this State to “Waiting for Trigger”.
Select Waiting for Trigger, right click and select Add Transition→System Events and add TRIGGER ENTER.
Follow the same procedure to add MOUSE DOWN.
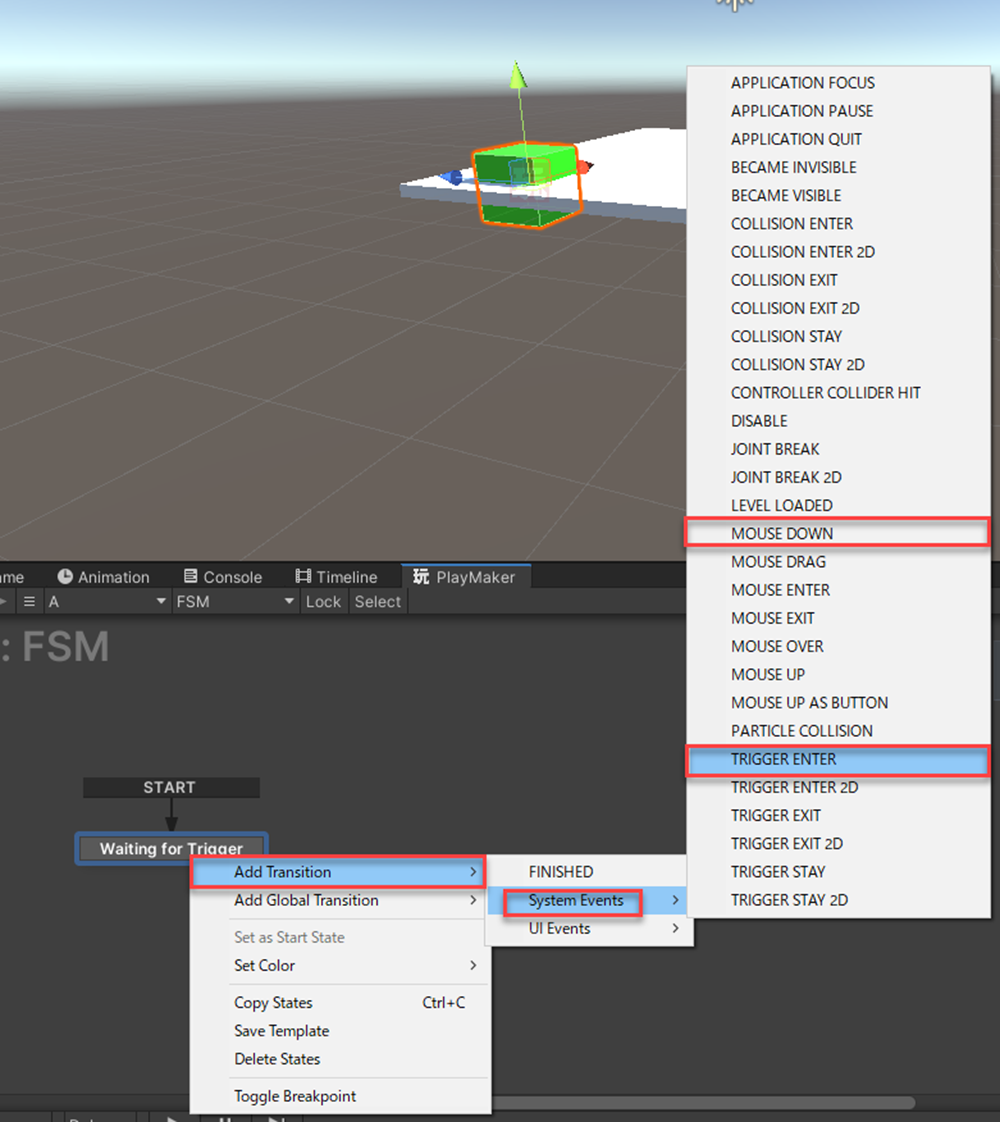
TRIGGER ENTER&MOUSE DOWN
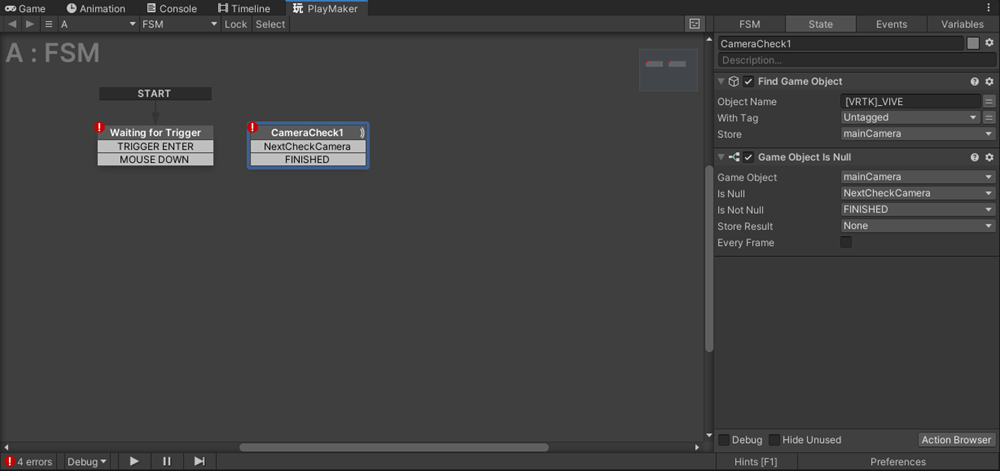
Right click on PlayMaker and use Add FSM to add a State and name it ” CameraCheck1 “.
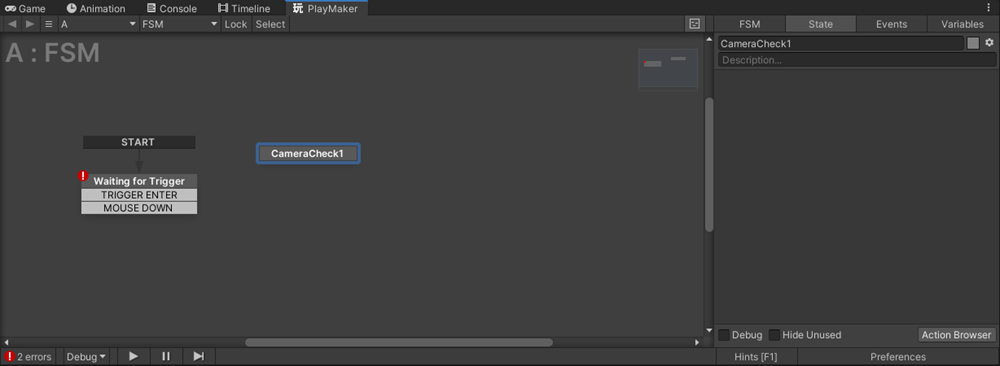
CameraCheck1
Select CameraCheck1, click on Acton Browser in the lower right corner, search for ” Find Game Object ” and click Add Action To State to add it.
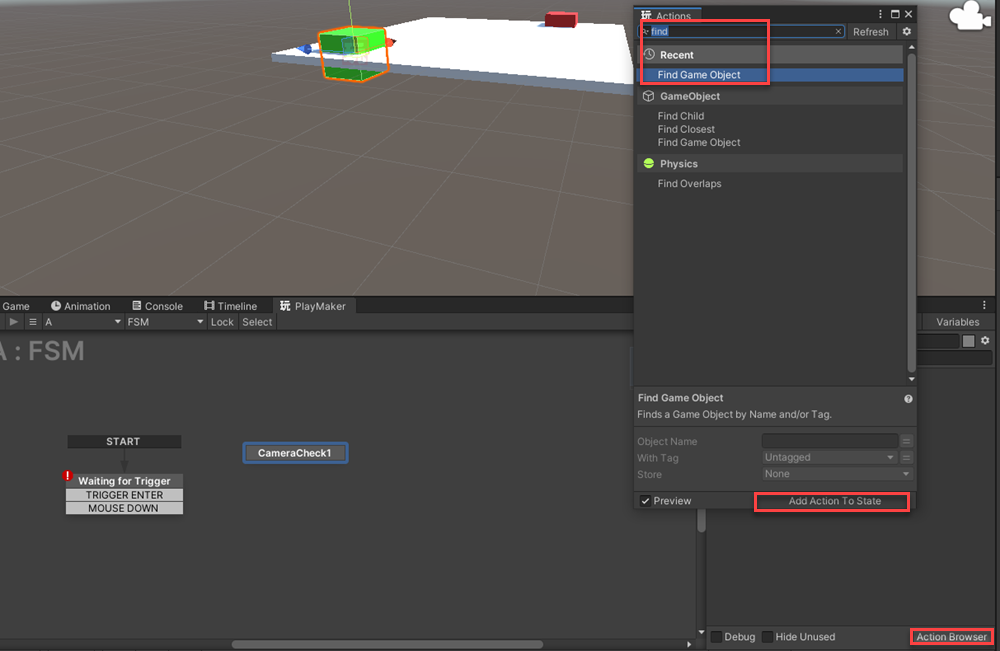
Find Game Object
Add ” Game Object Is Null ” in the same way.
Change the Object Name in Find Game Object to [VRTK]_VIVE.
Be careful that [VRTK]_VIVE does not recognize the controller correctly if there is a space before or after it.
See below for more information on acquiring the player’s position on STYLY.
Obtaining and operating the player’s own position
Click None in the Store, select New Variable, and name it ” mainCamera “.
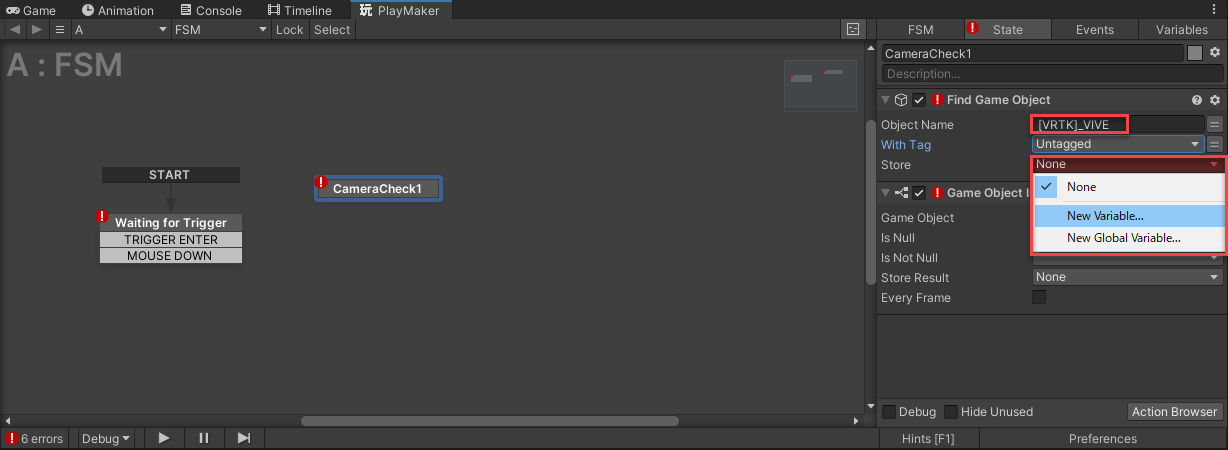
mainCamera
Next, set Game Object Is Null to mainCamera and select New Variable for Is Null and name it ” NextCheckCamera “.
Similarly, add a New Variable to Is Not Null and name it ” FINISHED “.
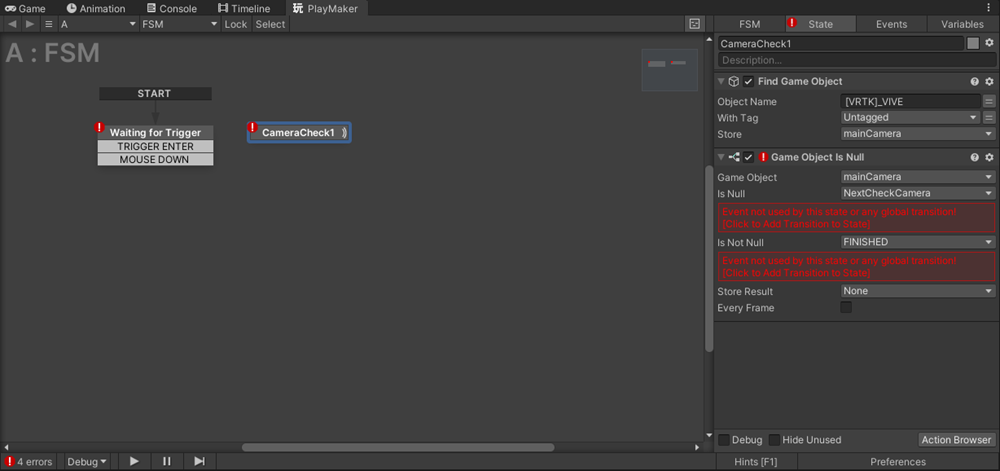
NextCheckCamera
Right click on CameraCheck1 and select Add Transition→NextCheckCamera to add it.
Once this is done, right click on CameraCheck1 and select Add Transition→FINISHED to add FINISHED.
Add Transition→FINISHED
Right click on PlayMaker and Add FSM to add a State and name it ” CameraCheck2″.
Click on Acton Browser and add ” Get Main Camera ” and select the variable mainCamera from StoreGameObject.
Right click on CameraCheck2 and select Add Transition→FINISHED to add FINISHED.
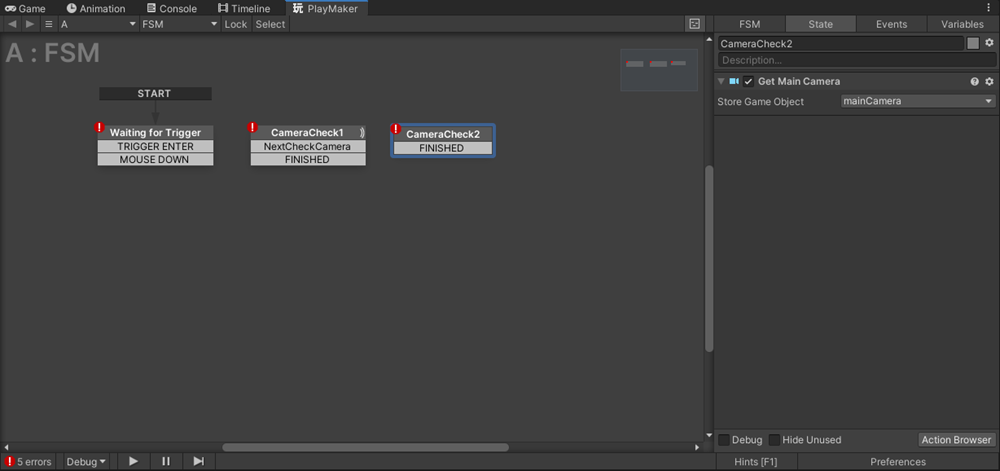
ameraCheck2
Add FSM and name it ” Start”.
Click on Acton Browser and add ” Get Position ” and change GameObject from Use Owner to SpecifyGameObject.
Click the ◎ next to None (Game Object) and select the CubeB to warp to.
Click None on the Vector, select New Variable, and name it ” PosWarpPoint “.
Add FINISHED.
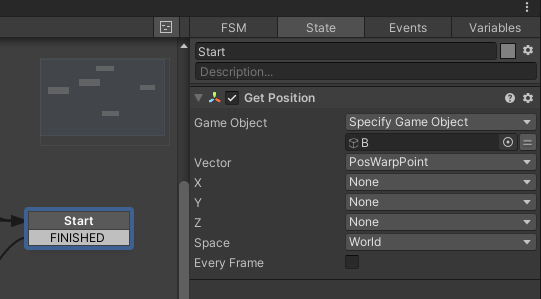
Start
Add a State and name it “Warp Camera”.
Click on Acton Browser, add ” Set Position ” and change GameObject from Use Owner to SpecifyGameObject.
Click on the double line mark next to None (Game Object) and select the variable mainCamera.
Click on None in Vector and select PosWarpPoint.
Change Space from Self to World.
Add FINISHED.
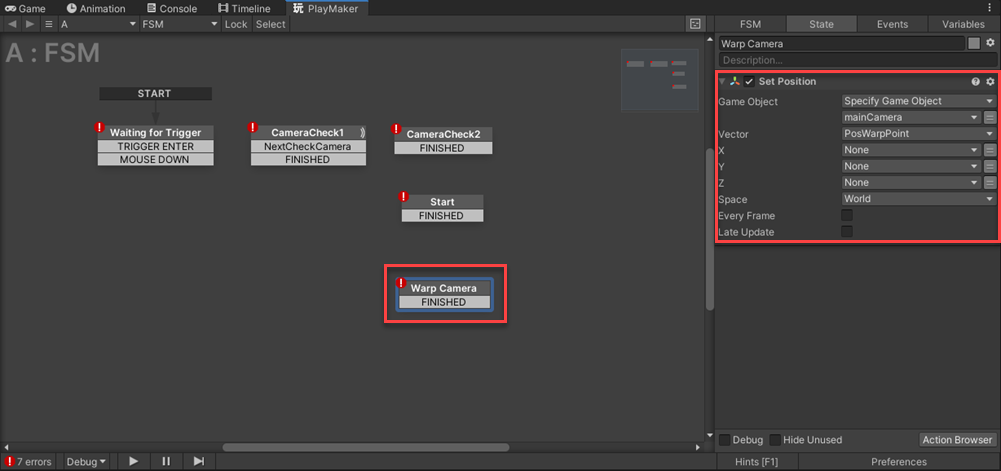
Warp Camera
Once this is done, connect the State arrows as shown in the image below.
This completes the warp system.
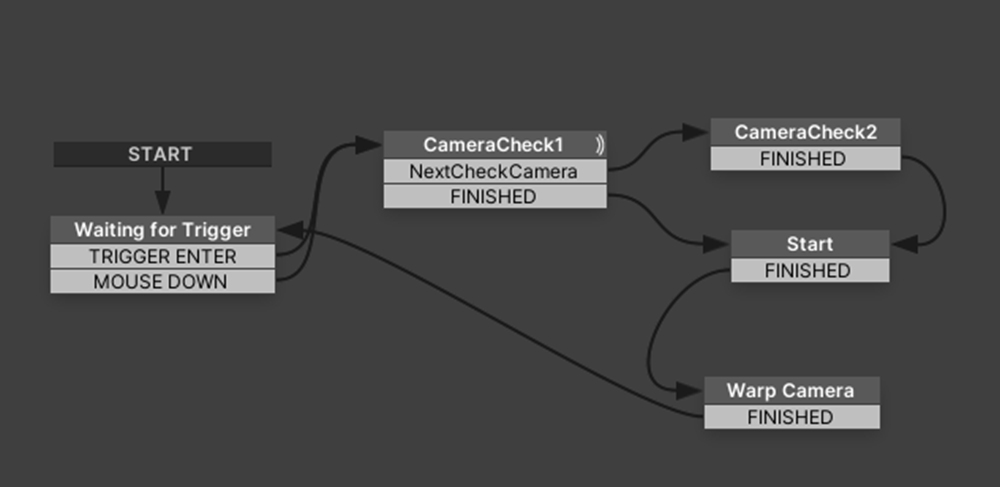
Connect the tate arrows as shown in the image below
.
If you play the scene and click on CubeA in the game view, you will see that the camera is moving.
camera is moving
.
How to change the trigger object to something other than a Cube
Next, I will explain how to change the object that will be the starting point of the warp when the controller makes contact with it from a Cube to another object.
Simply put, all you need is a Collider attached to the object you want to use as a trigger.
Here we will use Monkey as an example.
Select the object you want to target on Hierarch, click on Add Component in Inspector, search for “Mesh Collider” and add it.
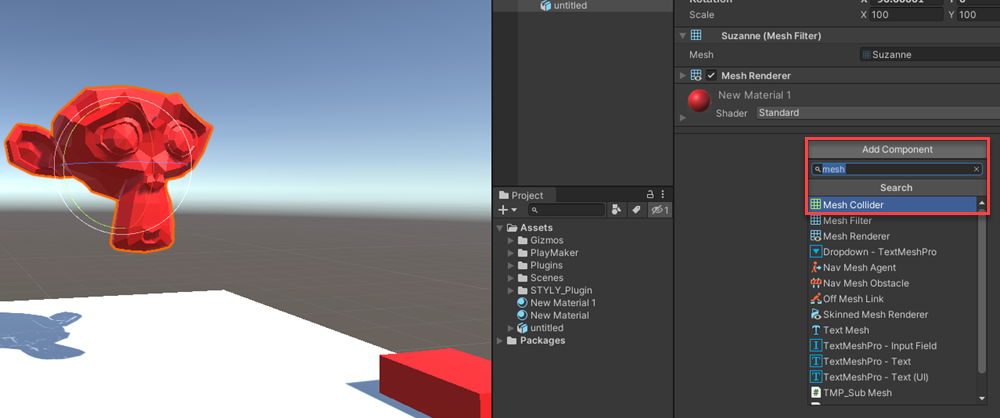
Inspector→Add Component→Mesh Collider
.
Add and put a check mark in Convex and you will see a green wire around Monkey representing the Collider.
Then you can add PlayMaker as above and you are good to go.
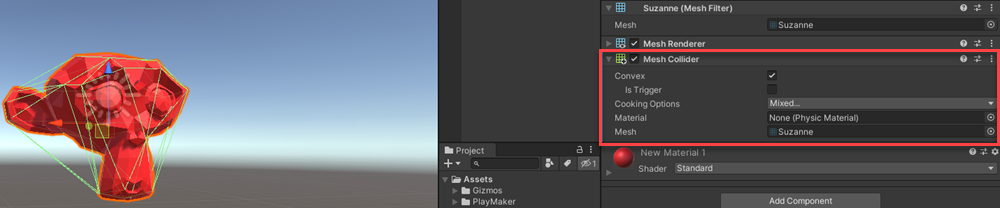
green wire appears
How to upload to STYLY
To learn how to upload assets from Unity to STYLY, please refer to the following article.

If you check the scene in VR, you will see that the moment the controller hits the green Cube, your position is warped to the position of the red Cube.
warping
For questions about STYLY, bug reports, or requests for improvements, please contact the STYLY FORUM at
https://jp.forum.styly.cc/support/discussions