In this article, I introduce how to import images to STYLY and how to adjust them.
How to upload images
Screenshot – Web Editor
Firstly, open Web Editor in STYLY. Click the ‘Asset’ Button in the top-left corner.
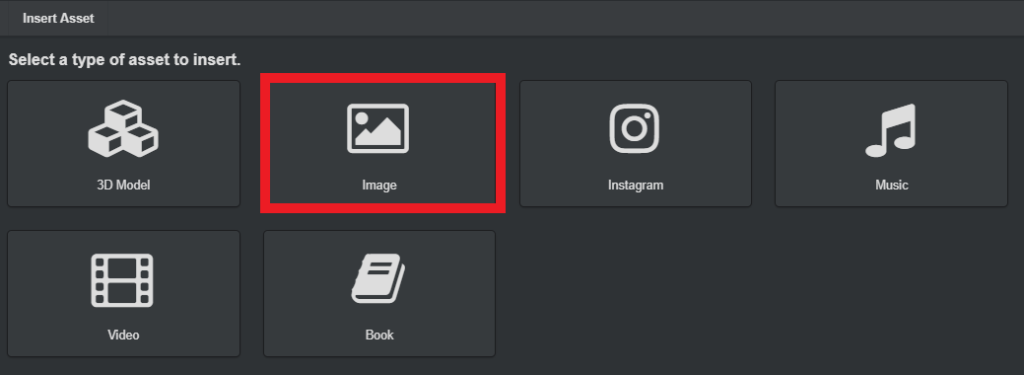
Menu to select Asset type to import
This time, select ‘Image’ to insert an image.
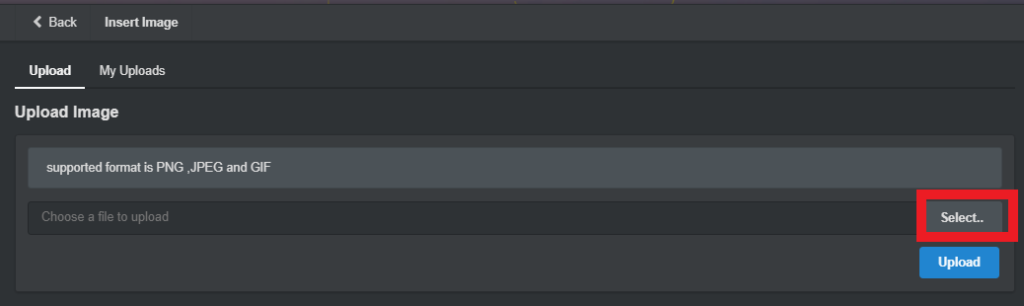
Screenshot – upload an image
Click the ‘Select’ button. It brings up Explore to select an image. Now, select the image you want to insert. If the image to insert has not been saved to the PC, save it first.
Once you confirm the filename of the image appeared in the box next to the ‘Select’ button, click ‘Upload’ below it.
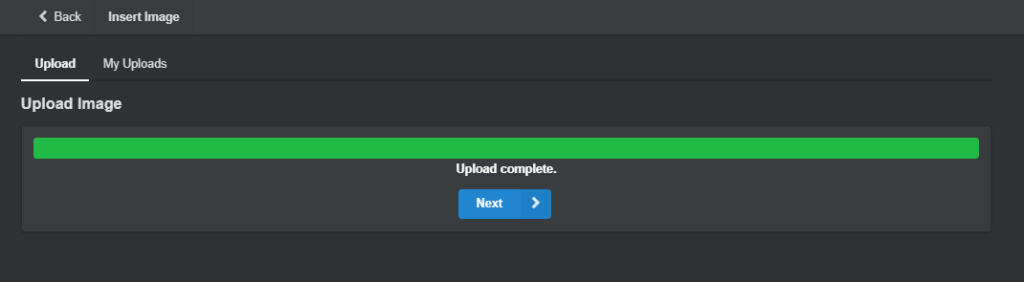
If you see the screen shown above, the upload was successfully completed. Select ‘next’ to progress.
Insert the uploaded image in the Scene
Insert image #1
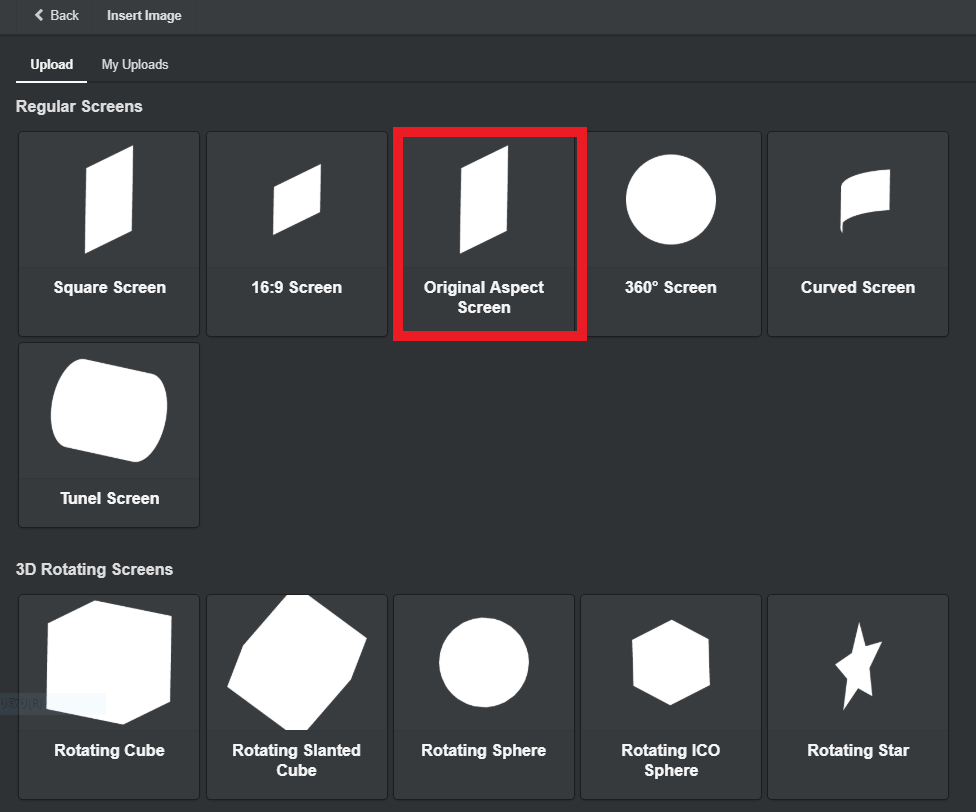
Select the type of screen to put the image in. I explain about the screens available. Under the ‘Regular screens’, there are screens with different aspect ratio, screens with different shape and 360° screen. In addition, there are 3D Rotating Screens, which are three-dimensional and have a rotating motion.
Insert image #2
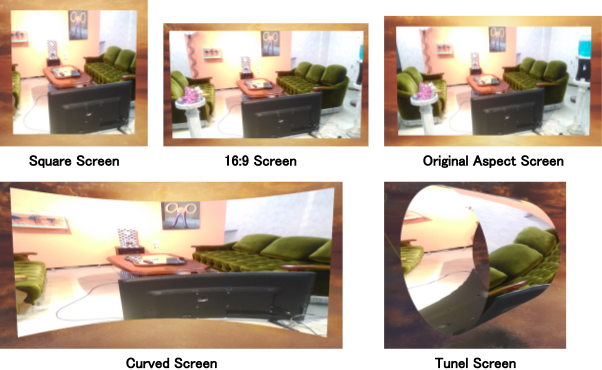
- Square Screen (One with 1:1 aspect ratio)
- 16:9 Screen (One with 16:9 aspect ratio)
- Original Aspect Screen (One with the same aspect ratio as the original image)
- Curved Screen
- Tunnel Screen
360°Screen
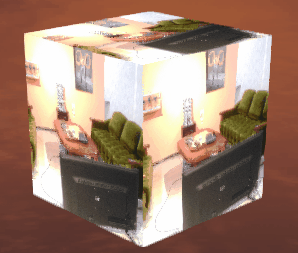
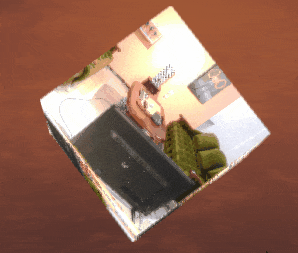
Rotating Cube
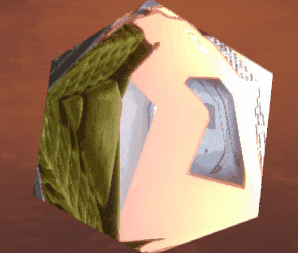
Rotating Slanted Cube
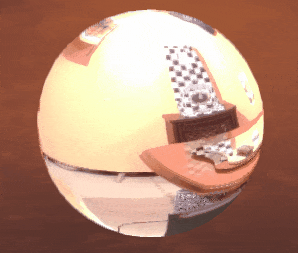
Rotating Sphere
Rotating ICO Sphere
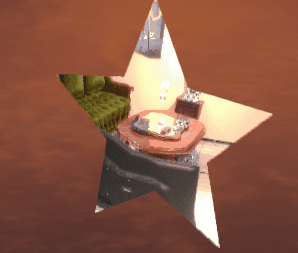
Rotating Star
- Rotating Cube
- Rotating Slanted
- Rotating Sphere
- Rotating ICO Sphere (ICO: icosphere, approximated sphere by simplicial polyhedrons.)
- Rotating Star
This time I take ‘Original Screen’ as an example.
How to adjust the image – #1 Scale

to keep the aspect ratio of the original image.Adjust the image #1
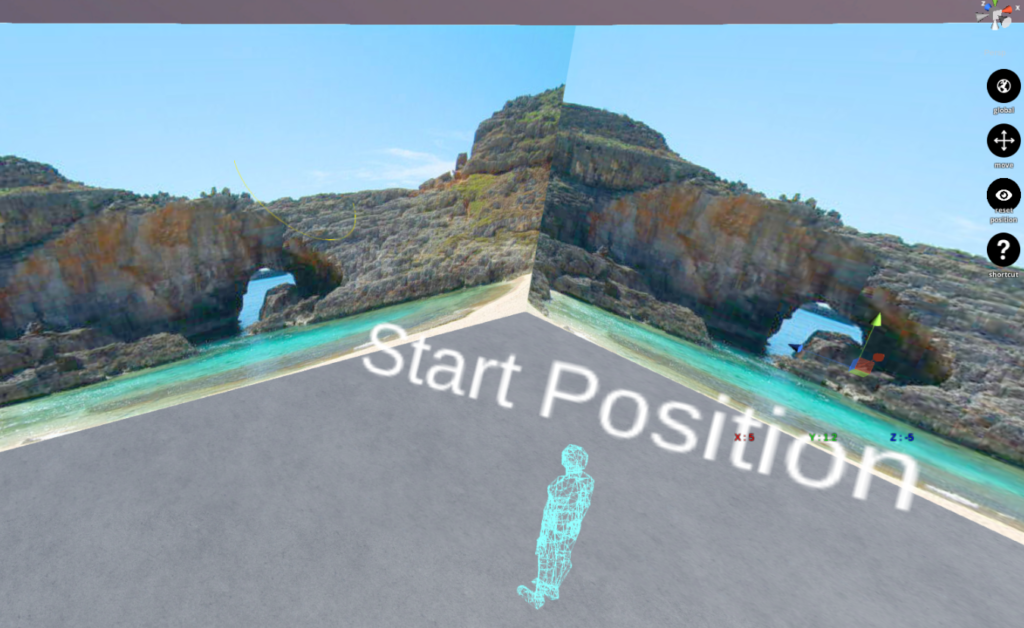
I inserted the image but looks too small. Scale it to the size you like.
Adjust the image #2
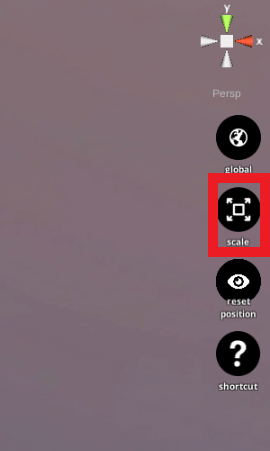
Press the side button on the right to switch to the ‘Scale’ mode.
※Those side buttons are to select move/rotate/scale mode for the assets. I explain it later.

Adjust the image #3
By dragging the red, blue, green or white cube, you can scale an object in the respective direction.
To keep the aspect ratio of the original image, scale with the same value set to X, Y and Z here.

Adjust the image #4
Click the label of ‘X’, ‘Y’ or ‘Z’ to enter the value. I enter 10 for each axis.
How to adjust the image – #2 Move
Now the image has been scaled up but the Default Ground looks breaking through the image. So let’s move the image to correct it.*
*Alternatively, you can move the Default Ground to correct.

Adjust the image #5
Switch the mode from ‘Scale’ to ‘Move’ by the side button.
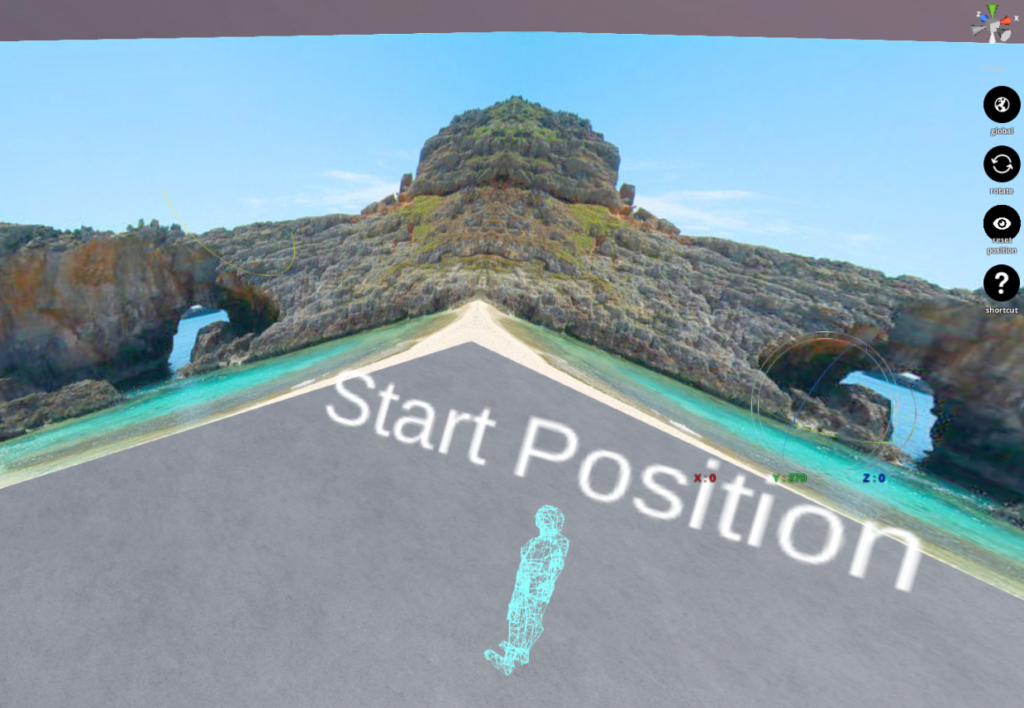
I set the Y value to 1.2 to make the sandy beach visible.
How to adjust the image – #3 Rotate
Finally, I will show the third function, ‘Rotate’.
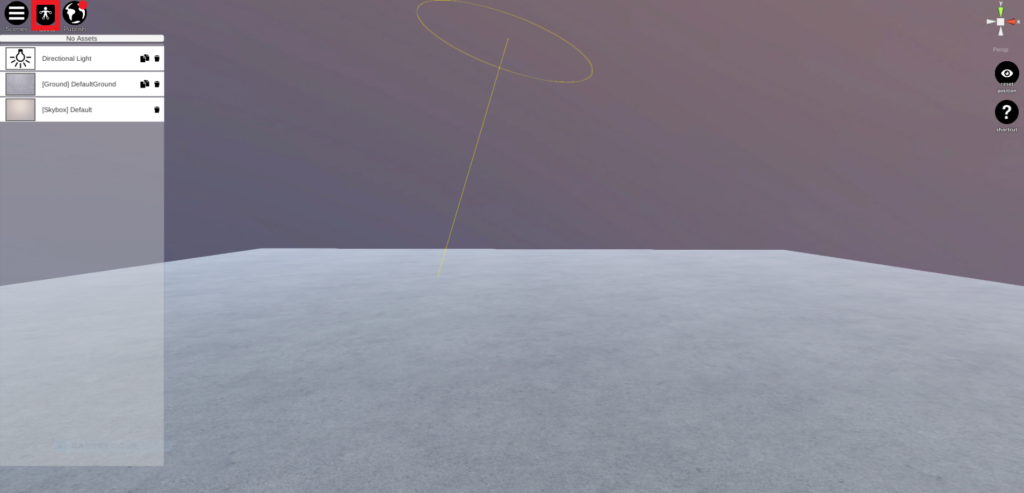
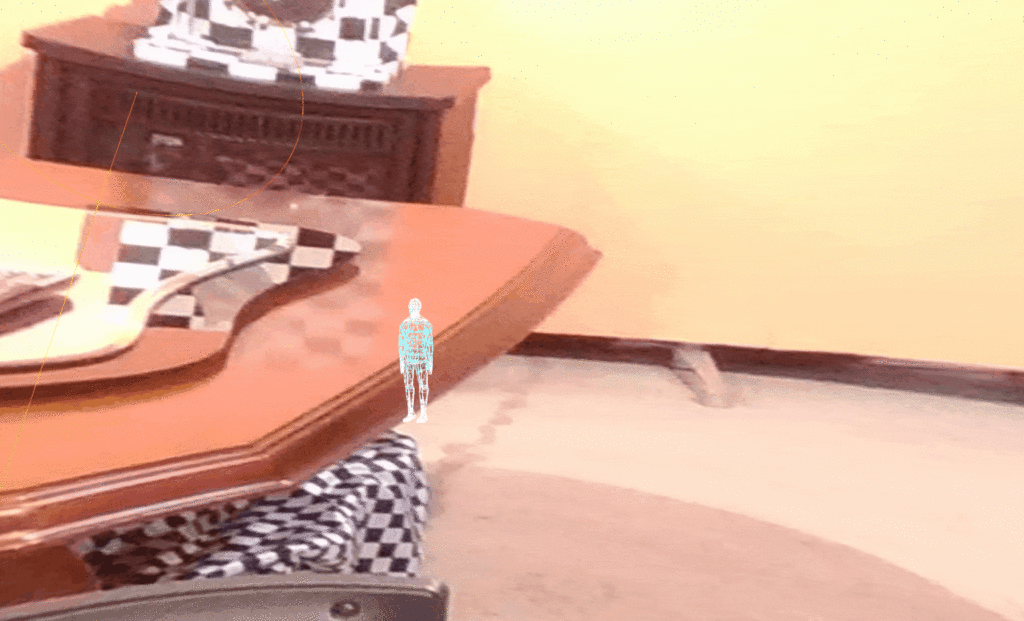
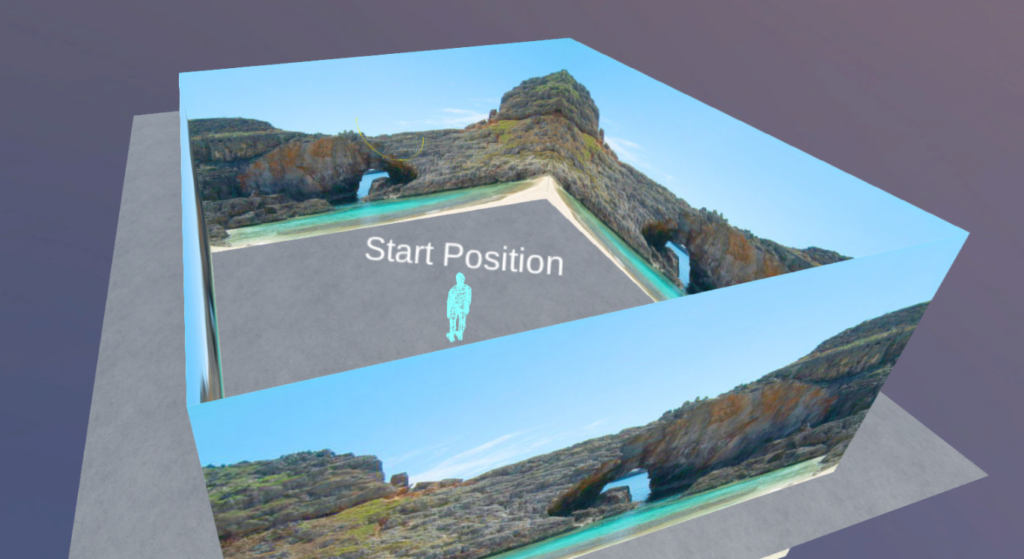
Let’s place the image above around the human model at the StartPosition to make a scene where there is nothing but the image of sandy beach as far as the eye can see.
Adjust the image #6
With the placed image selected in the Hierarchy view, press the Copy icon three times.
Now, there are four identical images. Place them around the StartPosition.
Arrange the three duplicated images by the Move button. You don’t need to change the Y value (as their heights are to be kept). So, by adjusting the value of X and Z, arrange the images so that they don’t overlap.
Adjust the image #7
Now, the images have been arranged correctly. However, you would spot something to correct at the boundary between the images. Let’s mirror the next image to have ‘continuous’ landscape.
Switch to the ‘Rotate’ mode by the side button and add 180 to the Y value of the next image.
Adjust the image #8
It looks ‘continuous’ landscape now. This completes the Scene with a single continuous landscape as far as the eye can see.
Congratulations. I explained how to upload and insert an image with the Original Aspect screen, but there are more screen types available. So please taste them to find the one suitable to the image used and the scene you want to create.