In this article, I will introduce the basic functions on how to use CLO, a 3DCAD software tool for the apparel industry. Also, I will explain how to create a simulation to dress an avatar with clothes.
There are 2 articles for this series. For part 1, I will explain what preparations you need, the basic operation methods, and how to import avatars and garments from the library.
About CLO
Please refer to this article in order to learn the basics of CLO and how to install the software.
![[CLO/3D] Introduction to CLO – A 3D CAD Tool for the Apparel Business – How to Install](https://styly.cc/wp-content/uploads/2019/07/スクリーンショット-2019-07-31-17.48.08-160x160.png)
Preparations
First, I will explain what settings you should do beforehand, how to use different mouse actions, and how to save files.
Gizmo Settings

Gizmo ①
In order to make the functions in the 3D view easier to understand, I would advise you to change the gizmo settings for pattern movements and rotation functions.
Select [Environments] > [Gizmo] > [World coordinates], and set the gizmo coordinate type to world coordinates.
I will not go into the details, but if you want to learn more about this function, please search the internet with keywords such as ‘Gizmo’ or ’World coordinates’.
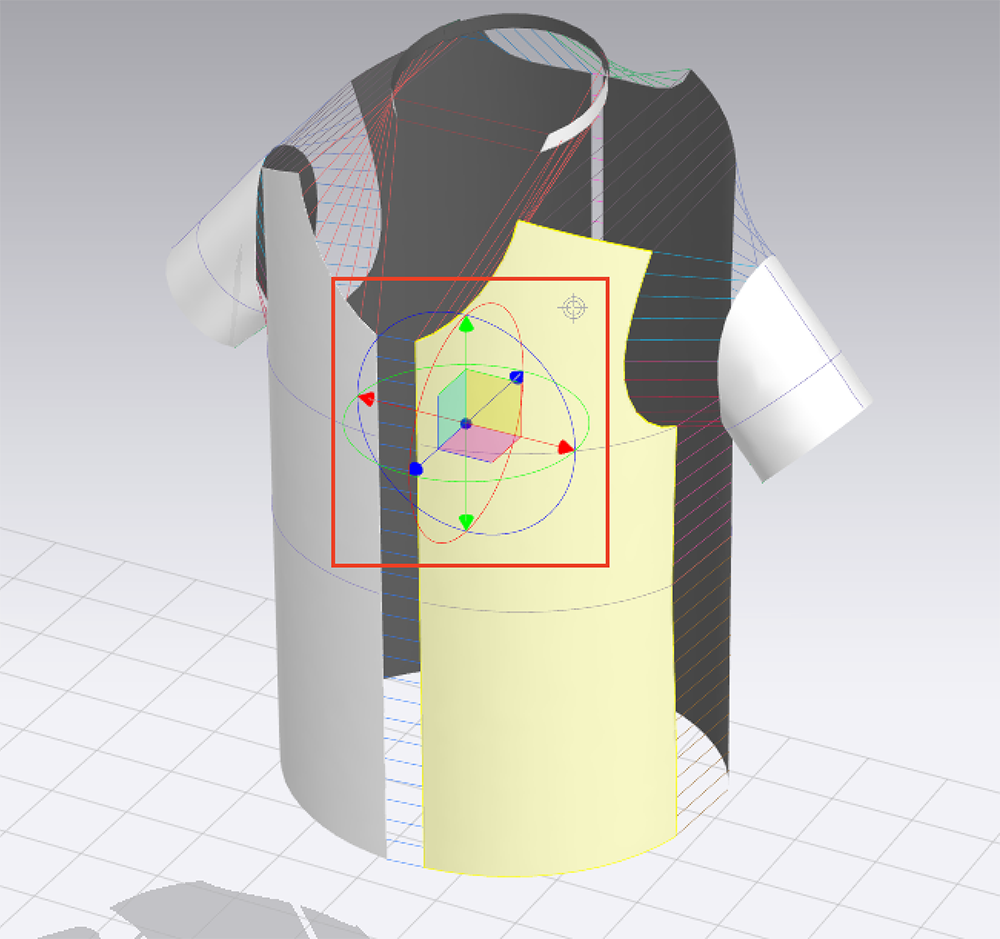
Gizmo ②
The interface that is shown in the red square is called a gizmo. It is used to interact with the object in 3D view.
Change to Simulation Mode
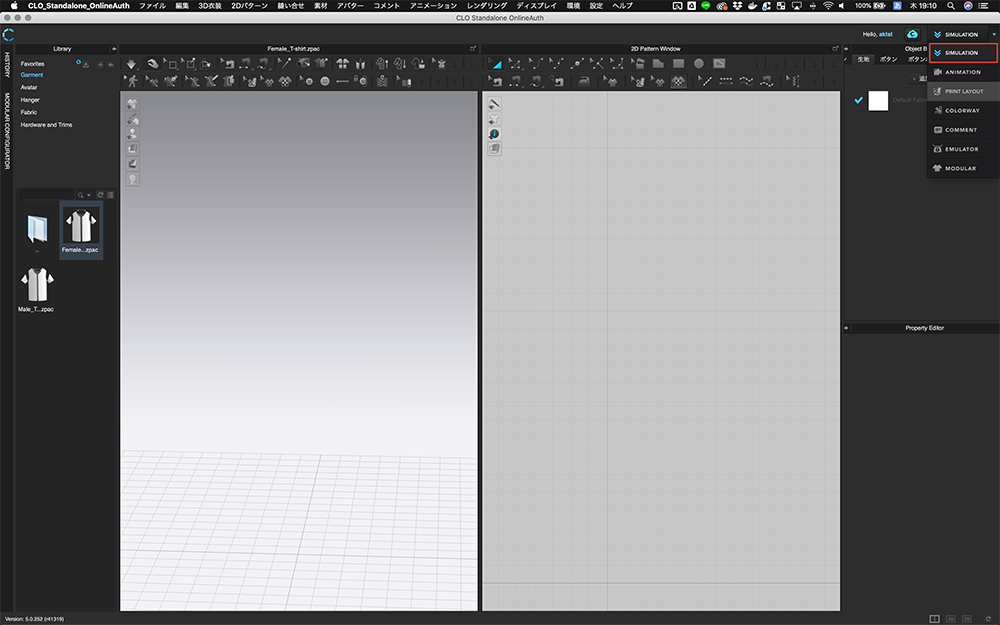
Simulation Mode
In this tutorial, I am going to use the simulation mode. If you are using a different mode right now, please change the mode in the upper right corner to [SIMULATION].
Saving a Project
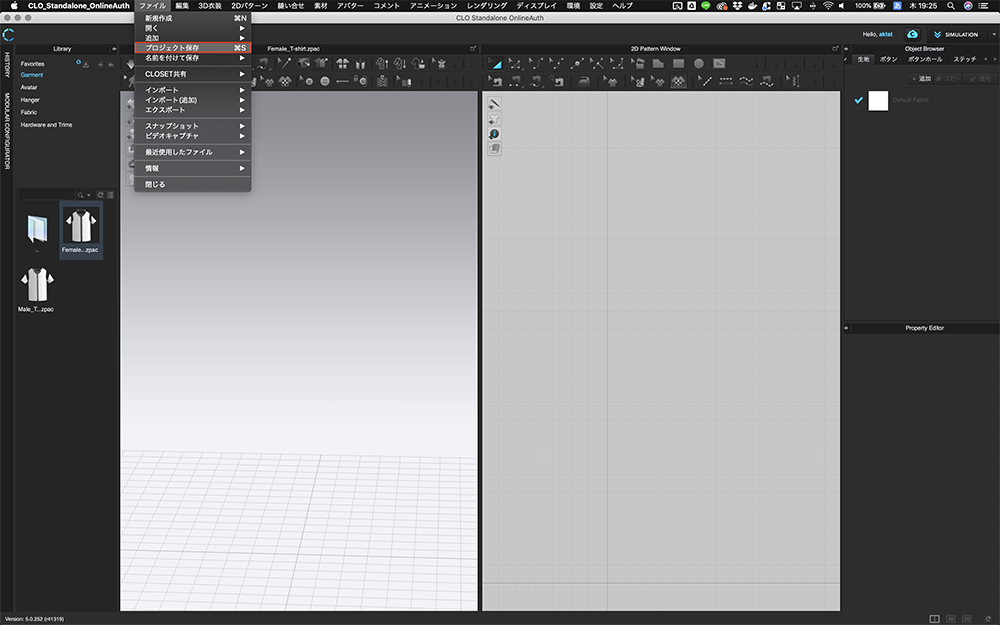
Save ①
You can save a CLO project file by selecting [File] > [Save Project].
When you create a new project, always take the time to name the project and then save it.
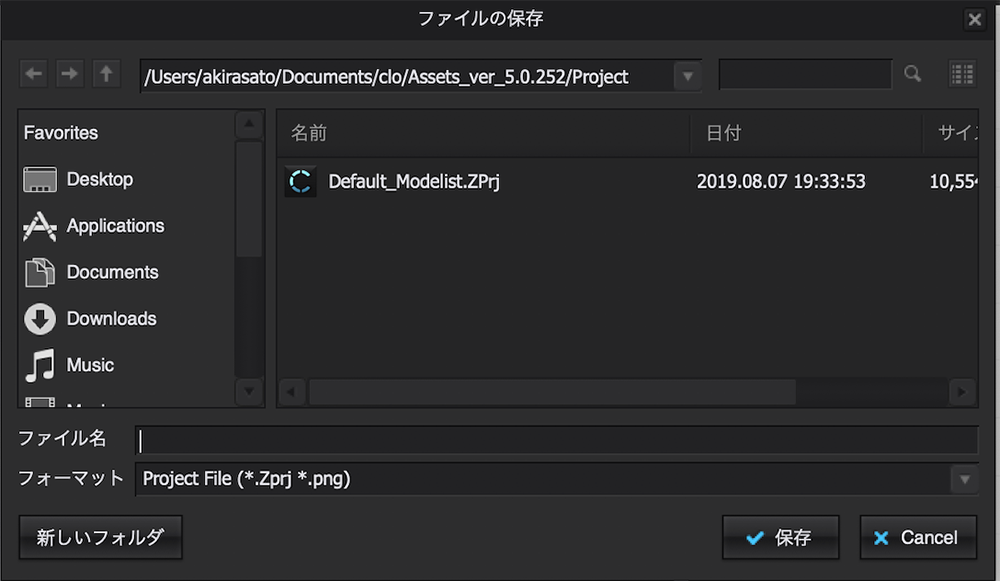
Save ②
After that, please periodically save the project by using the keyboard shortcut [⌘+S] (In Windows [Ctrl+S]).
The software may suddenly shutdown when you are using large files or because the computer specs are not high enough when you are simulating. Please, save your work whenever possible.
Adding Avatars and Garments
In order to learn the basic operations, let’s import avatars and garments from the library.
Adding an Avatar from the Library
In order to add an avatar, we need to open the library window. Please follow the following directions to import an avatar from the library.
Add avatar ①
Click on the [LIBRARY] tab in the upper left corner and open the library window.
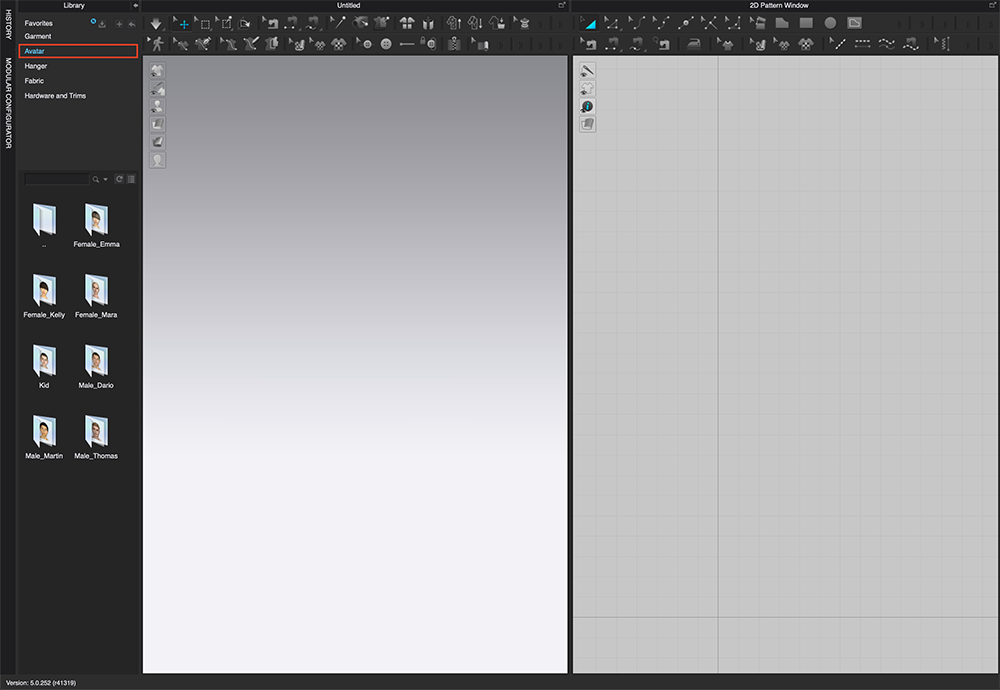
Add avatar ②
Next, double click on [Avatar].
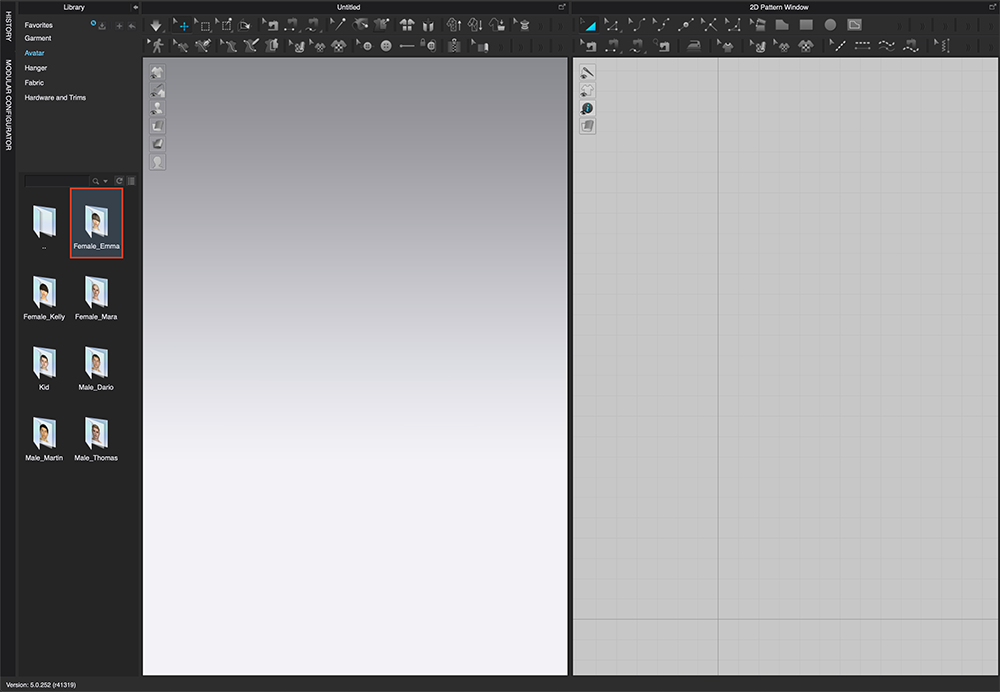
Add avatar ③
In the [Avatar] window, you will find numerous avatars, but for this tutorial, please double click [Female_Emma].
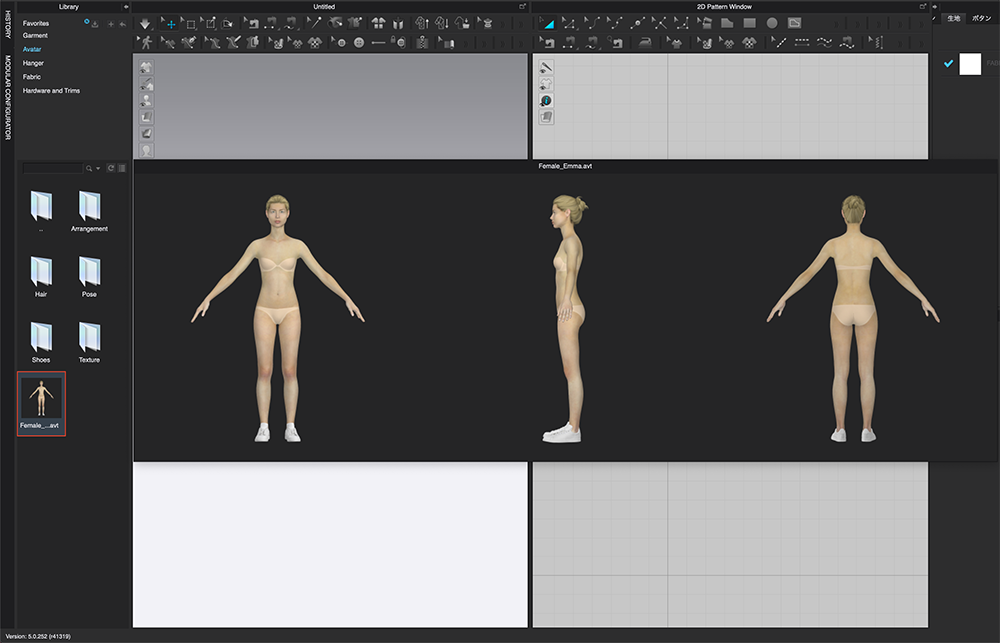
Add avatar ④
In the details screen for [Female_Emma], you will find files such as [Arrangement], [Hair], and [Pose] which you can use to customize this avatar. Also included is an avatar file named [Female_Emma.avt]. Please double click on [Female_Emma.avt].
If you place the cursor over the [Female_Emma.avt] file, you can preview the file.
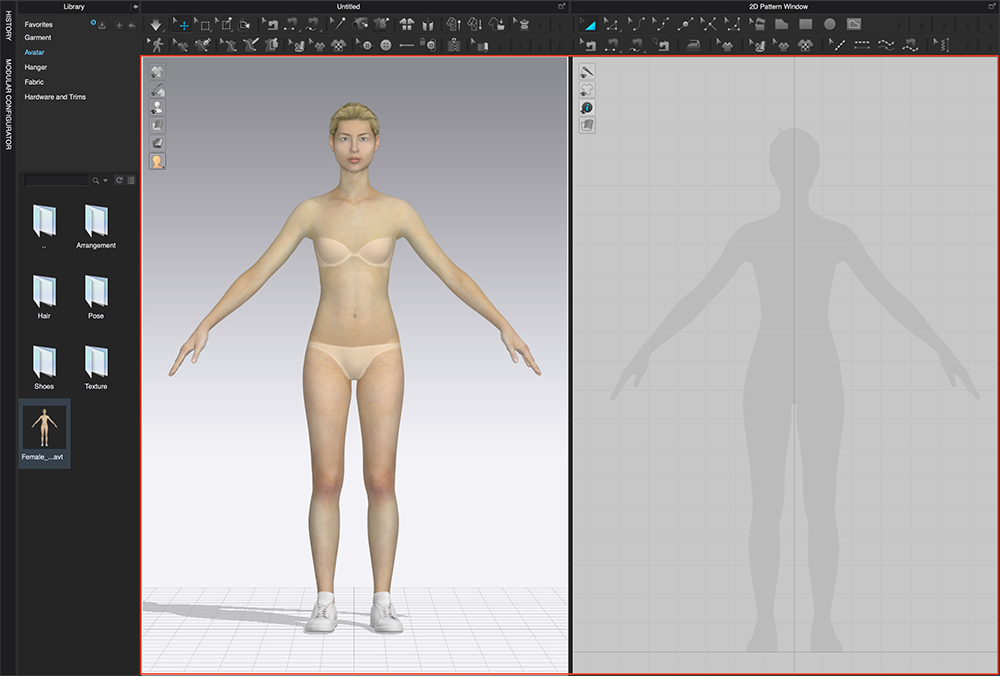
Add avatar ⑤
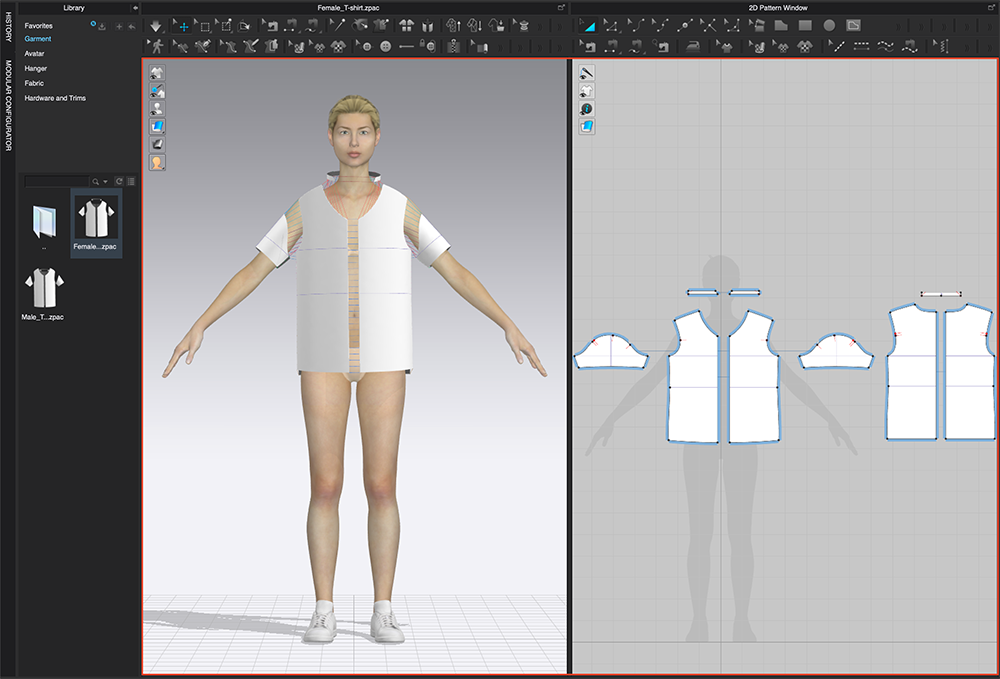
Once the avatar is imported, it will be displayed like this in the 3D and 2D screen. If your screen matches this, then the avatar import was successfully completed.
Adding a T-shirt from the Library
Once the avatar import is complete, let’s import a T-shirt file from the library.
Add T-shirt ①
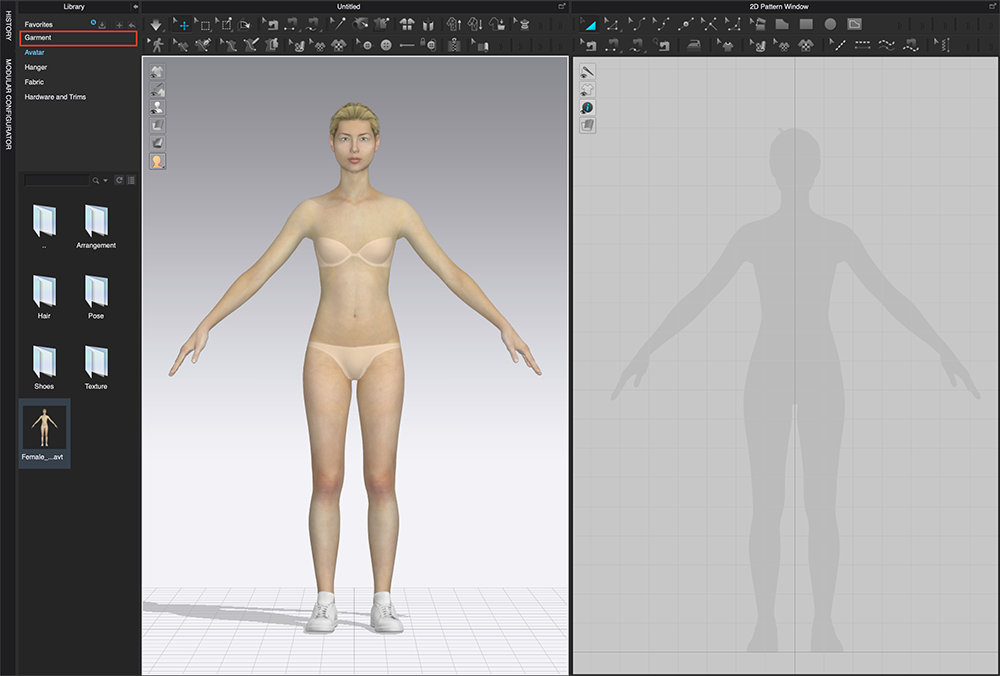
Double click on [Garment] in the library window.
Add T-shirt ②
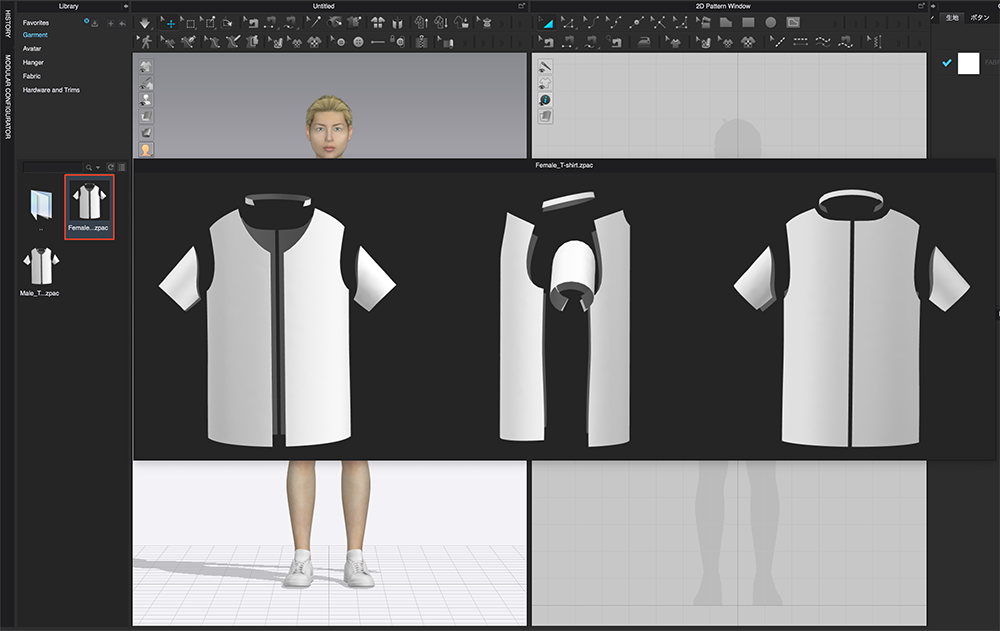
In [Garment], there will be two files named [Female_Tshirts.zpac] and [Male_Tshirts.zpac].
Please double click [Female_Tshirts.zpac].
You can preview the file by placing the cursor over the file.
Add T-shirt ③
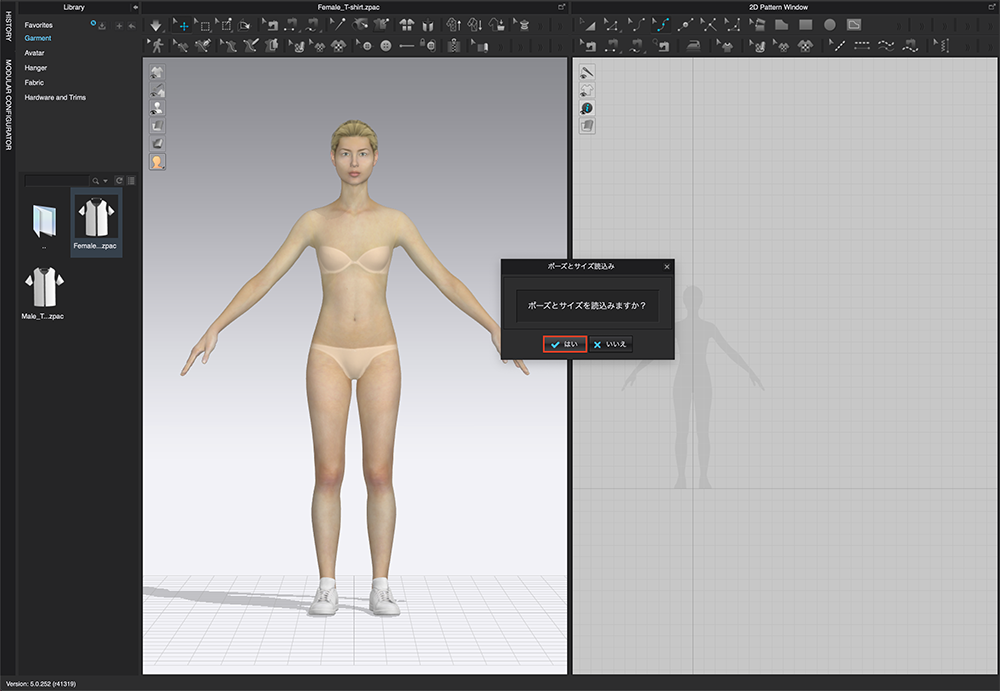
When the import of [Female_Tshirts.zpac] begins, a [Pose and size import] dialog will be displayed, so please click on [Yes].
Add T-shirt ④
Once the [Female_Tshirts.zpac] import is done, it will be displayed in the 2D and 3D screens like this.

Close Library
The import of the avatar and T-shirt is complete, so click on the [←] at the upper right of the library window to close the tab.
Viewpoint Operations
We are done with importing files. Now, I will explain how to change points of view.
Changing Viewpoints Using your Mouse
I will explain how to change the viewpoints using your mouse.

Zoom
By scrolling with the mouse’s middle button, you can zoom in or out in the 3D and 2D windows.

Rotate
By pressing down on the mouse’s right button and dragging the mouse, you can rotate your viewpoint in the 3D screen.

Translation
By pressing down on the mouse’s middle button and dragging it, you can move your viewpoint in a fixed and parallel fashion in the 3D and 2D screens.
(NOTE: The mouse’s middle button may not function due to your mouse settings, so in that case, please try [Option+drag])
Changing Viewpoint to Fixed View
Change viewpoint
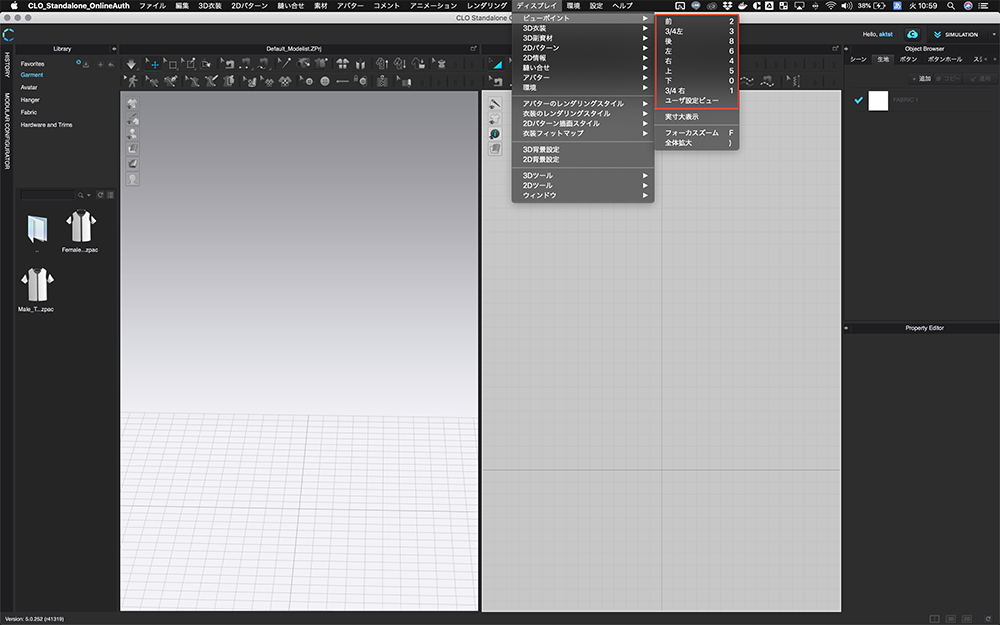
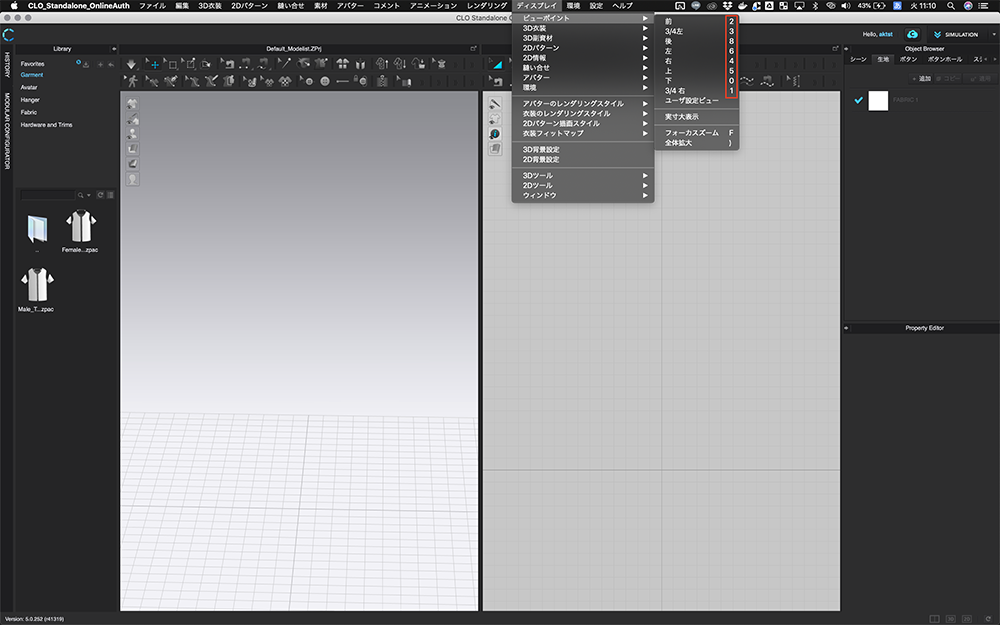
You can change to a fixed viewpoint from [Display] > [Viewpoint].
When you want to fix the viewpoint when you are working on a certain object, it may be useful to remember this next shortcut.
Viewpoint shortcut
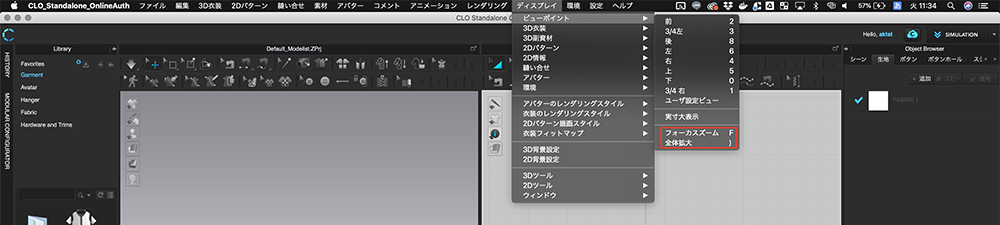
When there are many patterns in your project, you may want to focus on a certain pattern in it. In that case, you can focus on a certain pattern by clicking [Display] > [Viewpoint] > [Focus zoom].
On the contrary, when you want to stop focusing and see all the patterns in the 2D screen, please click on [Display] > [Viewpoint] > [Overall Expansion].
Both of these are shortcuts, it is useful if you memorize them.
Change viewport
That’s all for part 1 of this tutorial. Don’t forget to save your project often.
In part 2, I will explain how to use the stitching function and dressing simulation.
![[CLO] Dressing Up an Avatar ② [For Beginners]](https://styly.cc/wp-content/uploads/2019/08/スクリーンショット-2019-08-26-19.31.21-160x160.png)