In this article, I will introduce a 3D CAD tool for the apparel business called CLO. I will explain about the payment plans, how to download and install it, and the UI. CLO has different modes which you need to know for basic operations.
CLO
What is CLO
CLO is a 3D CAD tool for the apparel business provided by CLO Virtual Fashion Inc. CLO can perform clothing simulations based on 2D patterns and 3D models Users can check dress silhouettes and understand the feelings about the clothing without creating physical samples.
You can also export the 3D dress model data using the dressing simulation and use this data on 3DCG characters.
3 Merits of CLO
I will introduce 3 merits for using CLO.
Increased Productivity
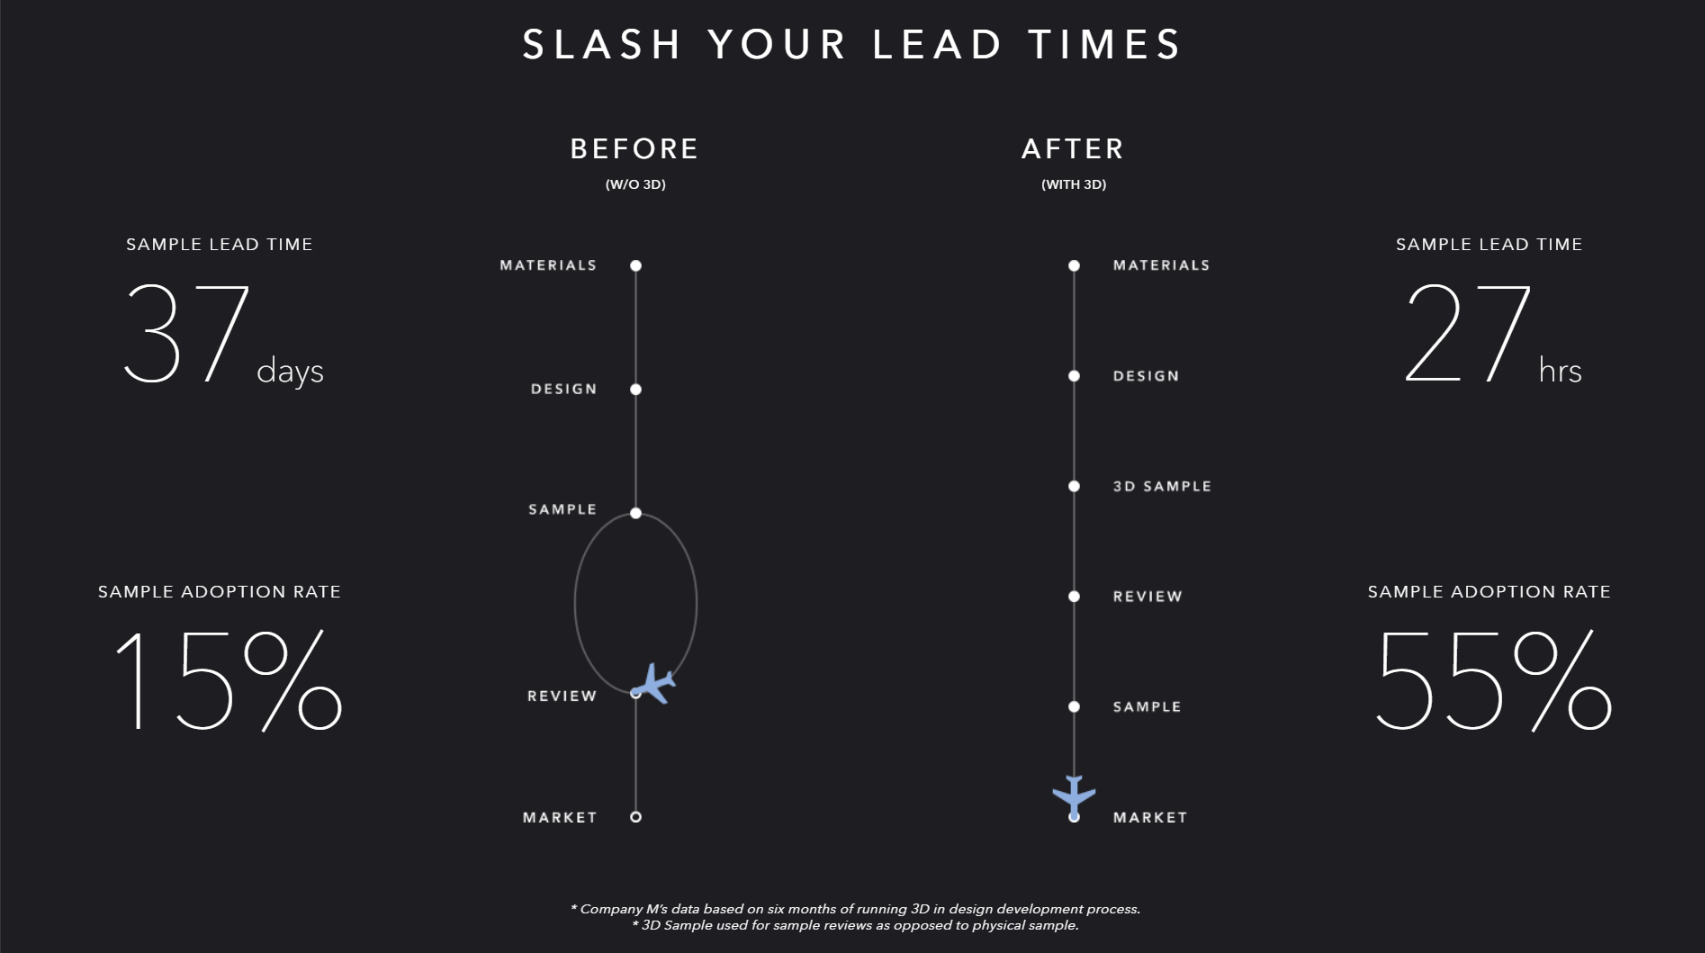
SLASH YOUR LEAD TIMES (copyright CLO Virtual Fashion Inc.)
By using CLO, users can immediately simulate different 2D patterns. Changing colors, textures, and cloth materials can shorten the time for creating samples.
According to the official site, the lead time of creating dress samples can be reduced from 37 days to 27 hours.
Data Compatibility with Apparel CAD
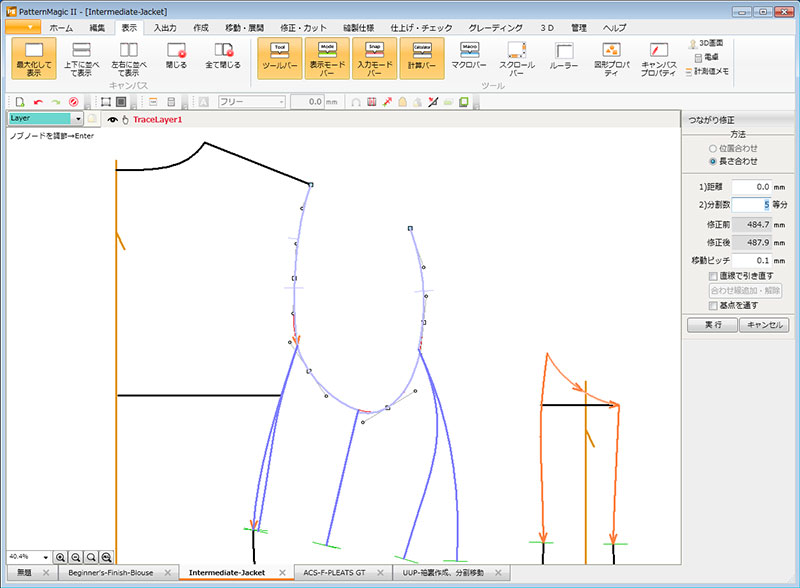
Pattern Magic Ⅱ Copyright © 2019 TORAY Advanced Computer Solution, INC.
Not only can pattern data be created in CLO, but also other apparel CAD data that is currently used in the apparel industry can be used with CLO (such as “Pattern Magic II” provided by Toray). By using this compatible extension, it is possible to construct a flexible workflow for wearing existing apparel using 3D CAD.
Using 3D Data

CLO × VRoid × STYLY
CLO can export model data for dressing simulations as CG data to CG tools like Blender, MAYA, Cinema4D, and game engines like Unity.
By creating 3DCG from pattern data, the data can be used by virtual influencers and VTubers making this type of data an asset.
System Requirements
Now that you know what CLO is, let’s check the system requirements for installing CLO.
The system requirements for CLO are written below.
Windows
System Requirements for Windows
Official Supported OS
Windows 7, Windows 8, 8.1, and Windows 10
Recommended
・CPU: Intel Processor Corei7 3.0Ghz or higher
・RAM: 16GB or more
・GPU: NVIDIA GeForce GTX 1060 or higher (not including the Quadro series)
・Hard Drive available space: 20GB or more
Mac
System Requirements for Mac
Official Supported OS
Mac OS X Mavericks, Yosemite, El Capitan, macOS Sierra, macOS High Sierra
Recommended
・Model: 2018 MacBook Pro, Mac Pro, iMac i7 3.0 GHz or higher
・RAM: 16GB or more
・GPU: AMD Radeon PRO 580 (4GB RAM) or higher (A Graphics card better than G3D Mark 7000), latest drivers, 4GB or more graphic memory.
・Hard Drive available space: 20GB or more
How to Install
Create an Account
Select a price plan, and create an account from the official page.
After you create your account, click [MY PAGE] > [LICENSE] > [MY LICENSE], then the DOWNLOAD button to download it.
Price Plans
There are 3 different price plans.
| MONTHLY | YEARLY | |
| INDIVIDUALS | 50 USD | 450 USD |
| SMALL BUSINESS | 600 USD | 5,400 USD |
| ENTERPRISE | Contact information from the official page https://www.clo3d.com/business/business_solution |
Download
TRIAL DOWNLOAD
There is a trial download available for CLO, so you can try the software for free for 30 days after you finish creating an account.
If you are not sure that this software is right for you, then try out CLO for the 30 day trial period.
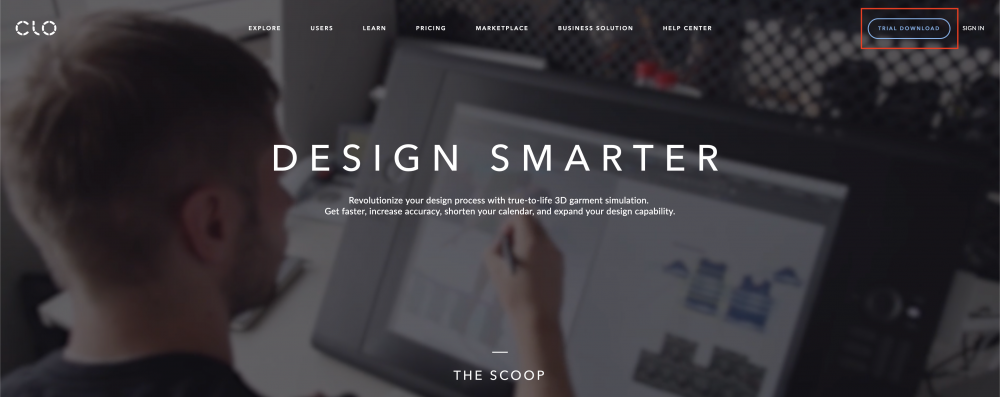
TRIAL DOWNLOAD
After you create your account, click on the [TRIAL DOWNLOAD] bordered in red and download the installer.
Download
If you want to download after payment, you can download the application here.
Download ①
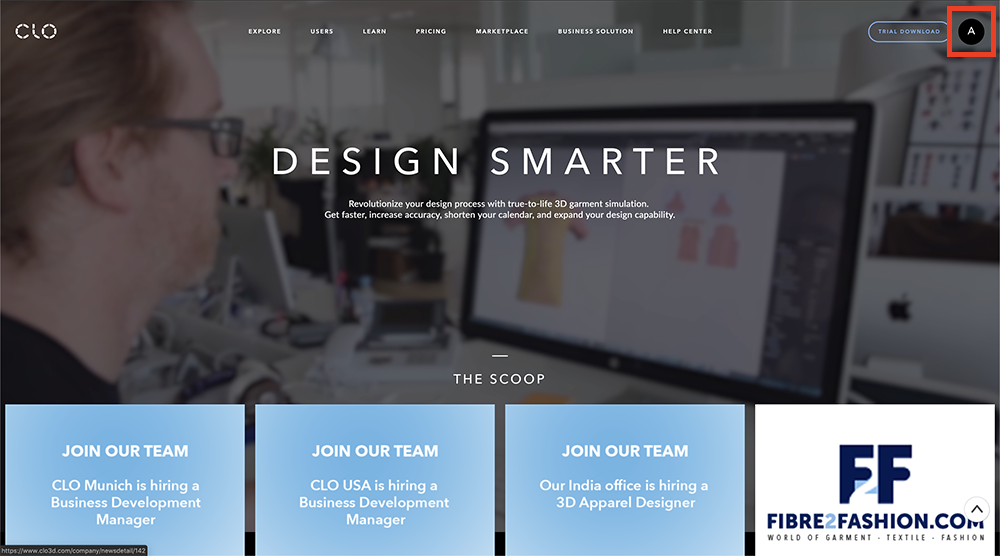
Click on the [Account Icon] and open the drop down menu.

Download ②
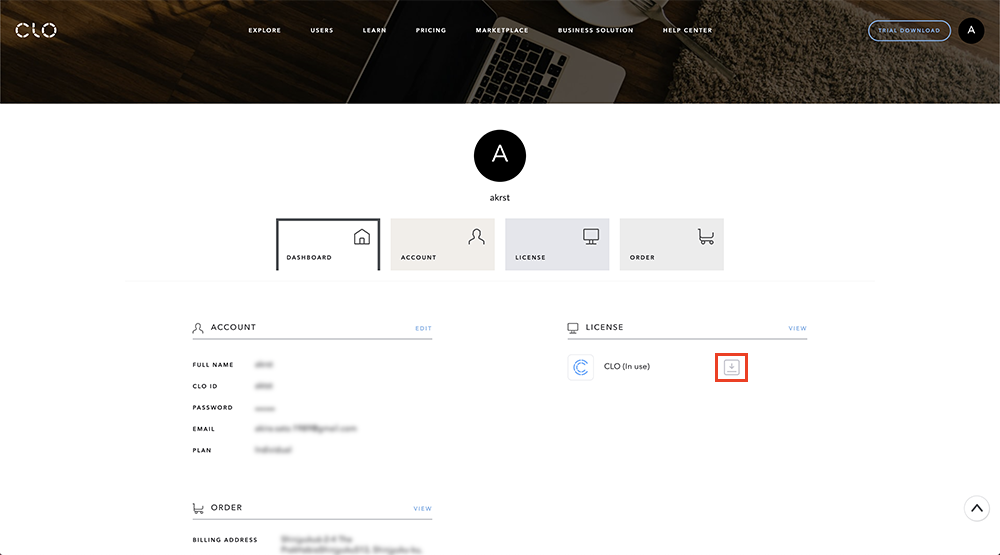
Open the [DASHBOARD] from the account menu.
Download ③
Click on the download button in the [LICENSE] list and download the installer.
Install ①
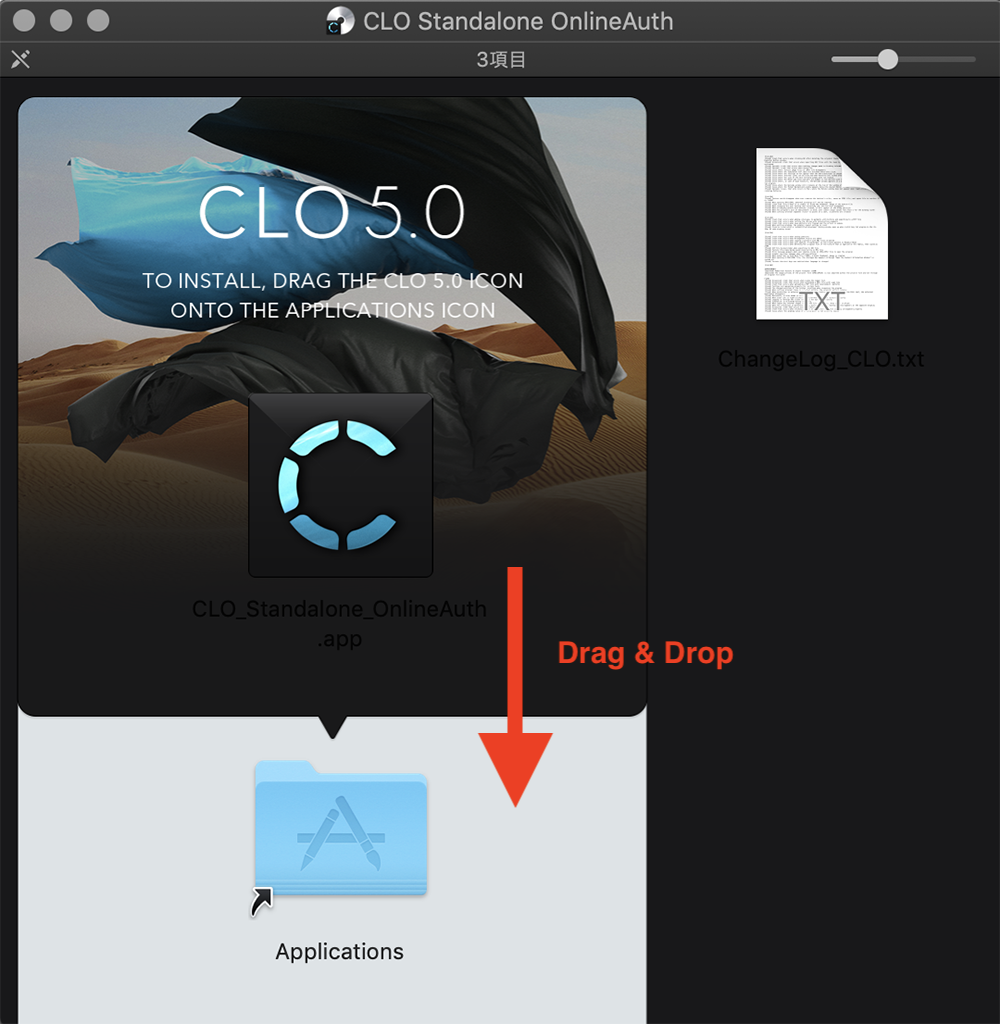
After your download is complete, click on the installer. A screen like the one shown will appear.
This is the Mac install screen.
※ To learn how to install CLO for Windows, please refer to this article.
Drag & Drop the CLO application icon to the Applications folder.
Install ②
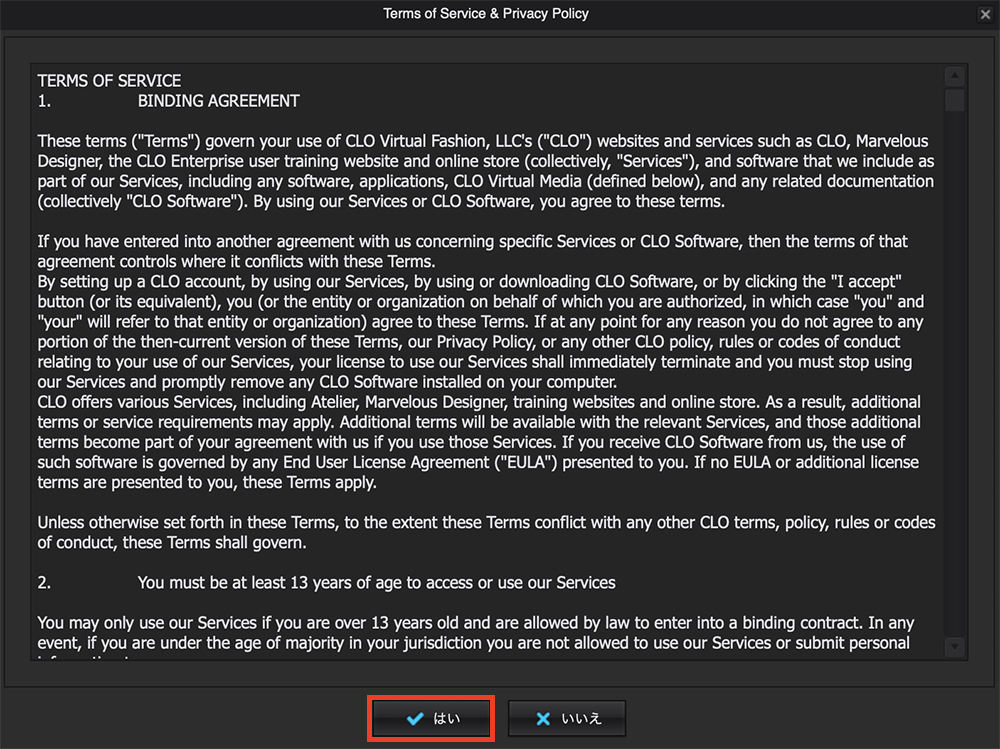
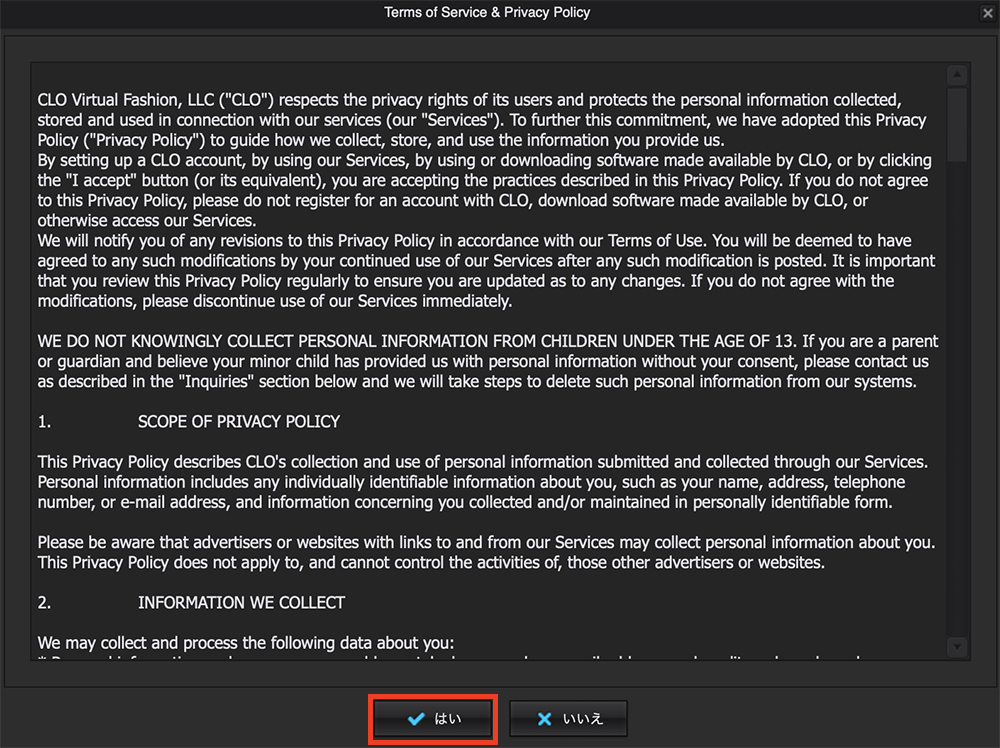
You will need to agree to the terms of service, so click [Yes].
Install ③
You will need to agree again, so click [Yes].

Log in
After you agree to the terms of service, the login screen will appear. Type in your [User ID] and [Password], and [Login].
Settings
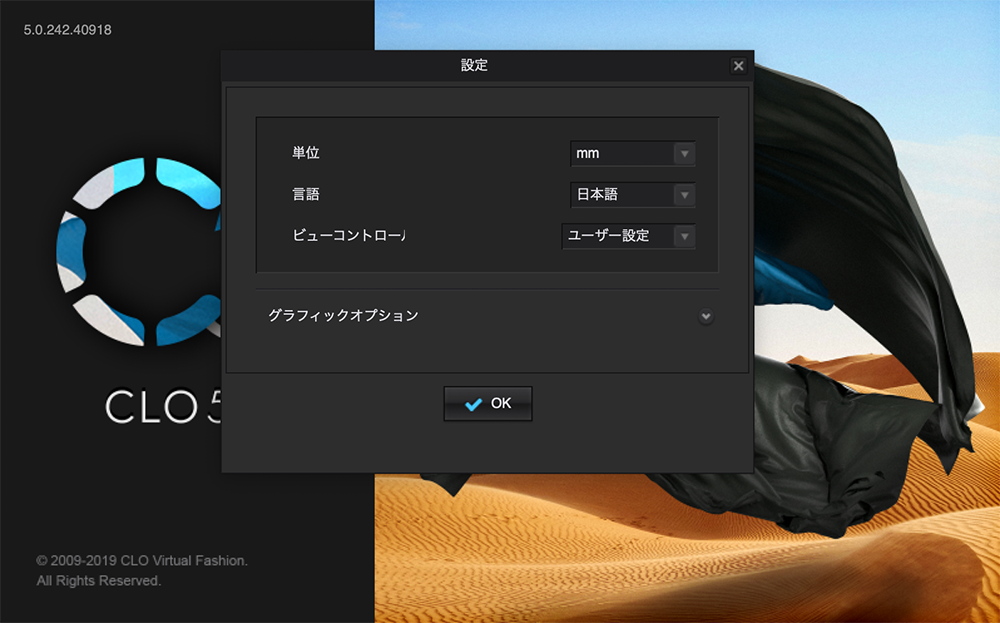
For your first boot, an initial settings window will appear, choose the [language] you prefer. If you don’t have any other preferences, you can just keep the other options as is. After you are ready, press [OK].
After completing these steps, you have successfully installed, logged in, and set the initial settings for CLO.
The Basic UI and the 7 Modes
After you have successfully installed CLO, you need to set up the UI for basic operations and learn about the 7 modes of CLO.
UI Areas
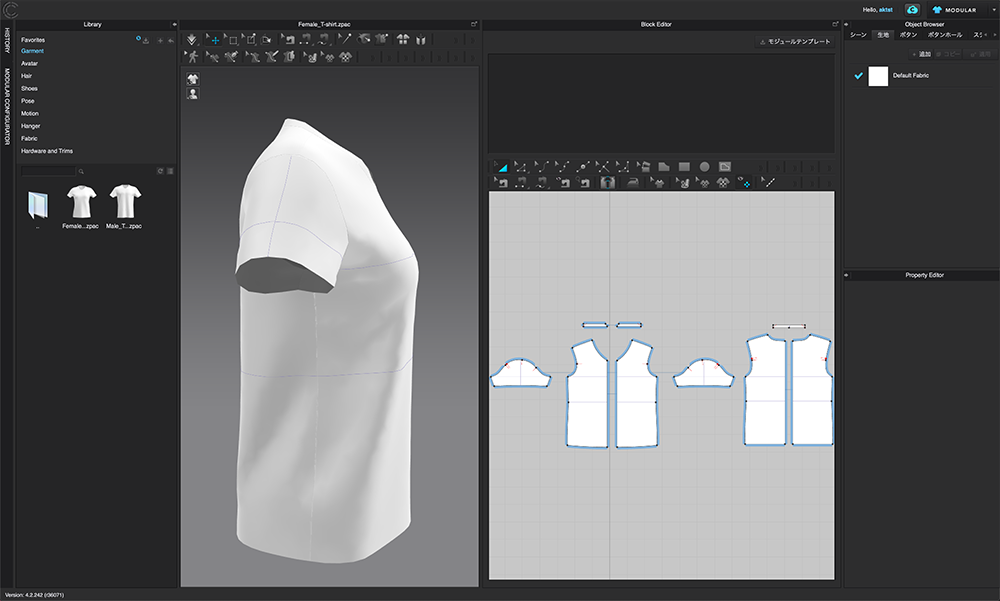
3D Screen
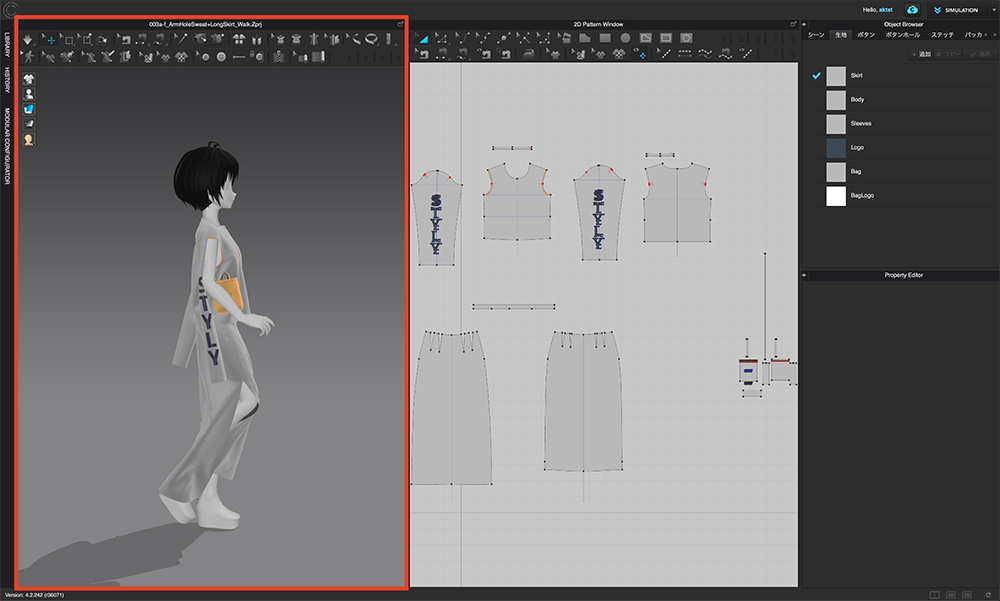
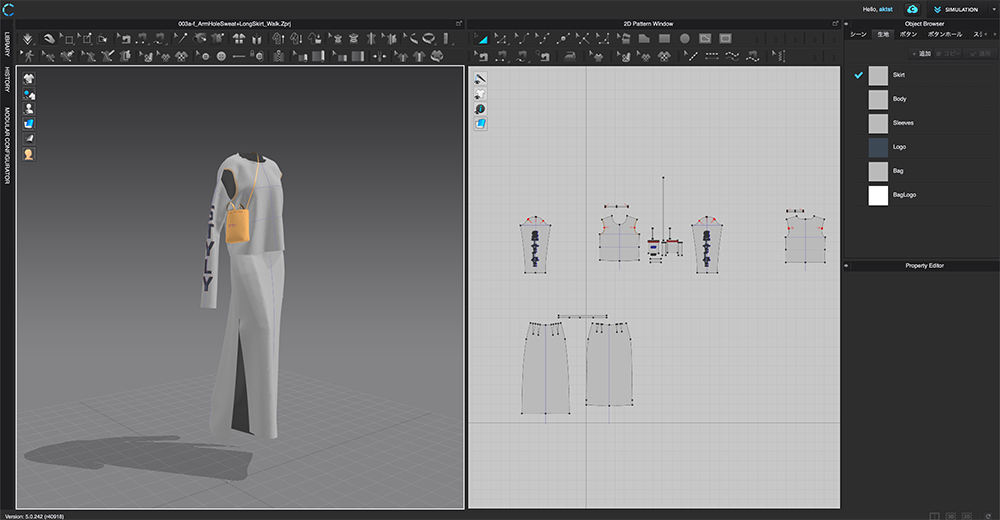
3D GARMENT Window
This screen allows you to simulate the dress and check it from 360 degrees.
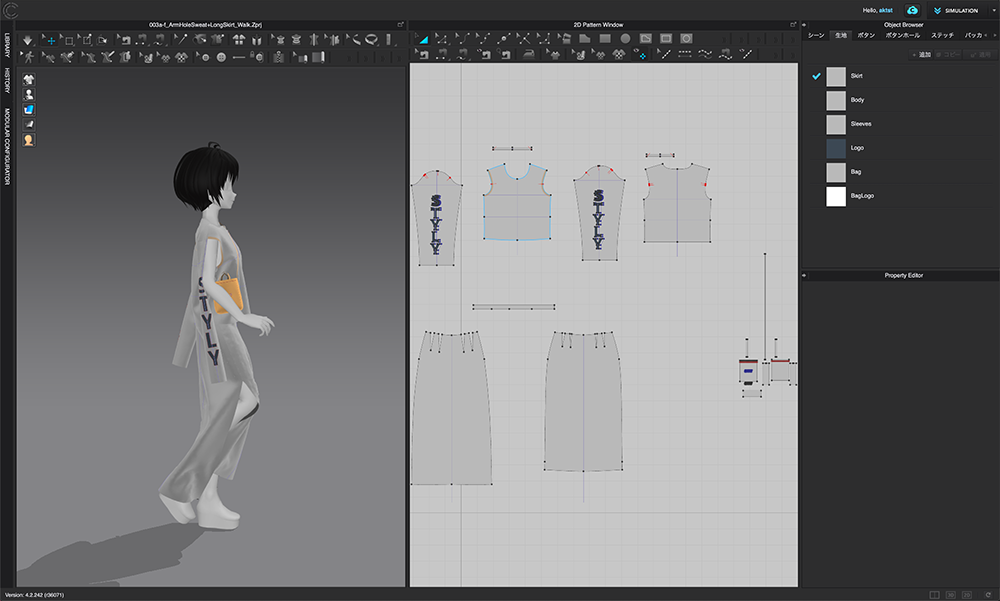
2D Screen
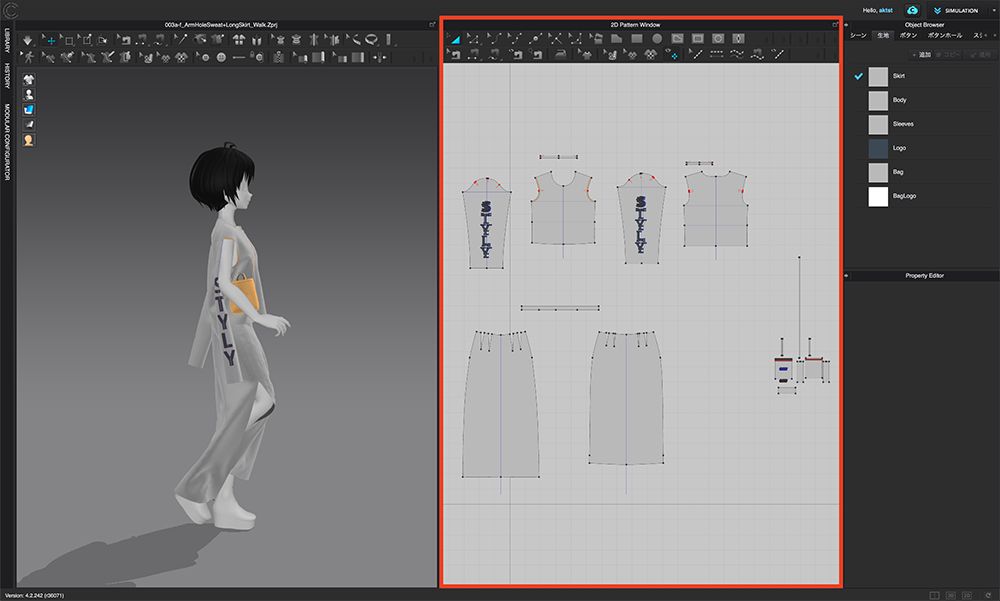
2D Pattern Window
The screen allows you to create, edit, and stitch patterns.
Object Browser Screen
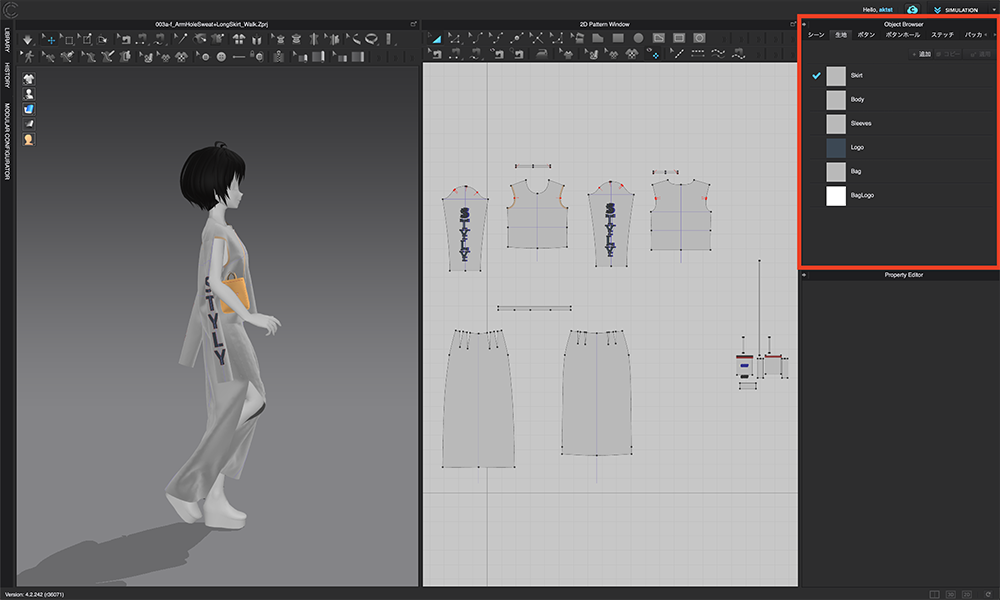
Object Browser Window
This screen allows you to check each element of the pattern, cloth, and stitches.
Attribute Editor Screen

Property Editor Window
This screen allows you to check and set the attributions (properties) of each element.
Library Screen
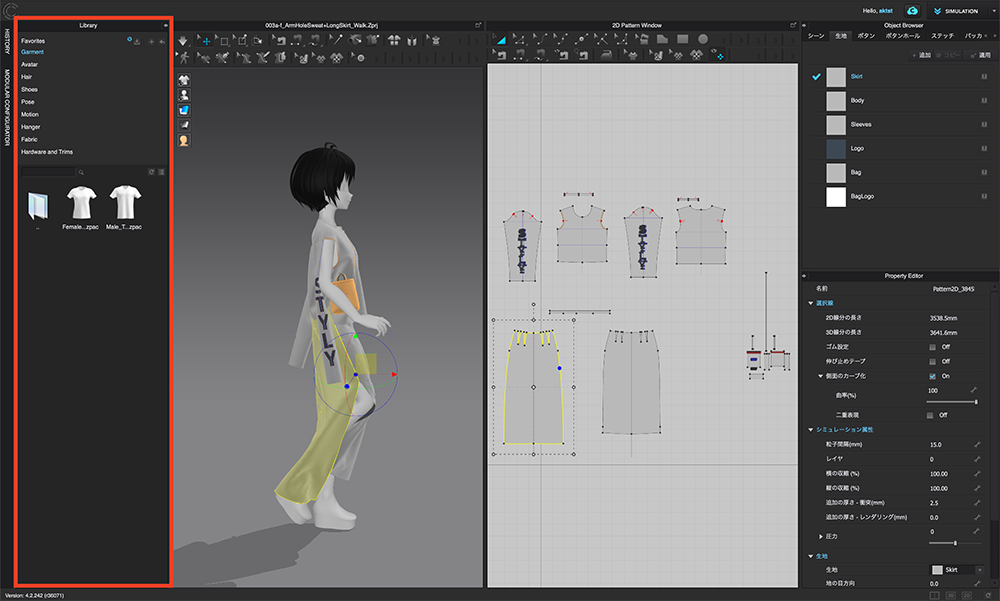
Library Window
This screen allows you to open each CLO file or register folders you use often.
History Screen
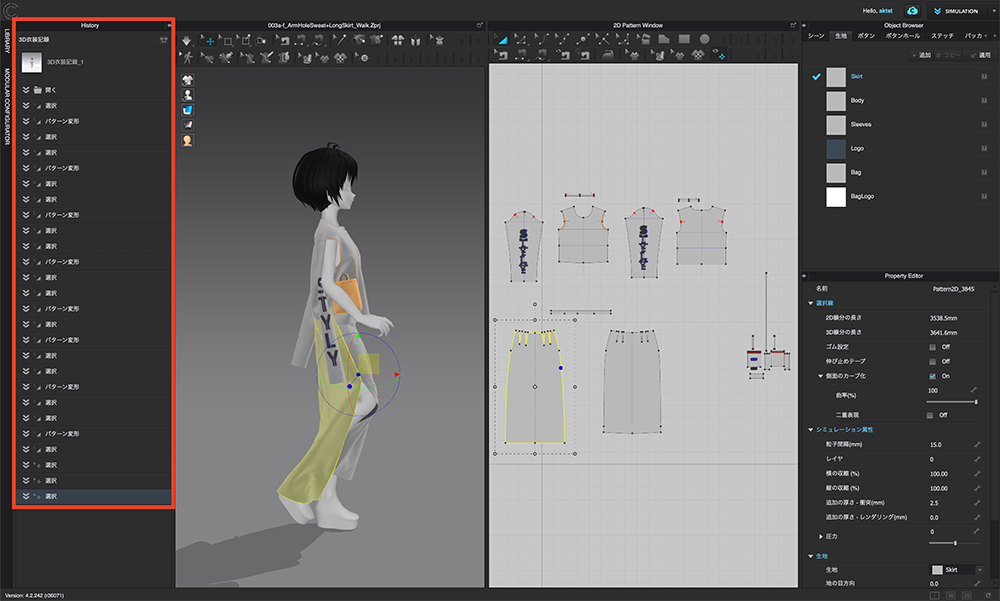
History Window
This screen allows you to view your recorded work history.
7 Modes of CLO
Simulation
SIMULATION Mode
This mode allows you to create and edit in a 2D screen or simulate dresses in 3D.
Animation
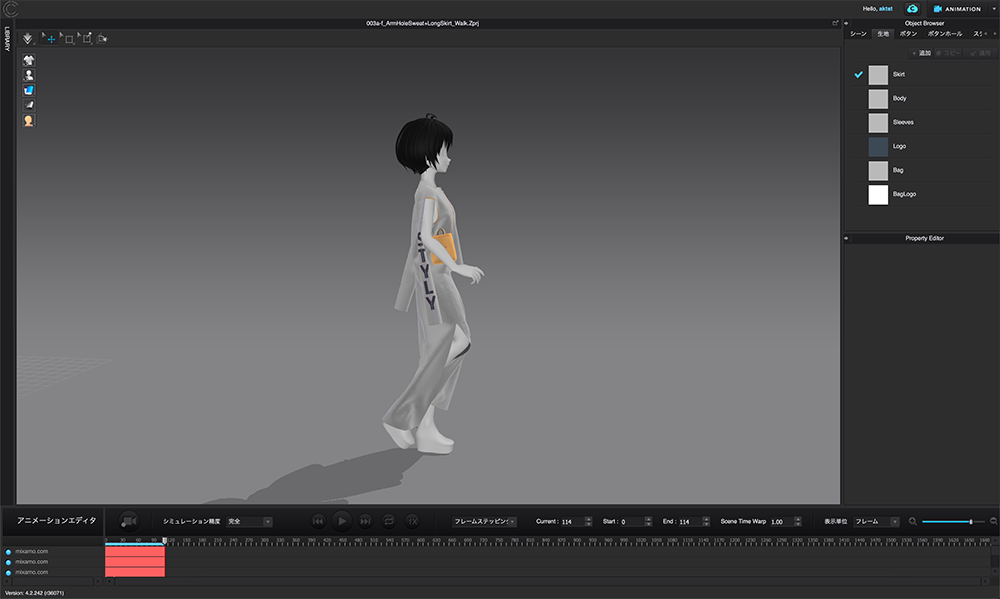
ANIMATION Mode
This mode allows you to record, play, edit, and export dress animations.
Print Layout
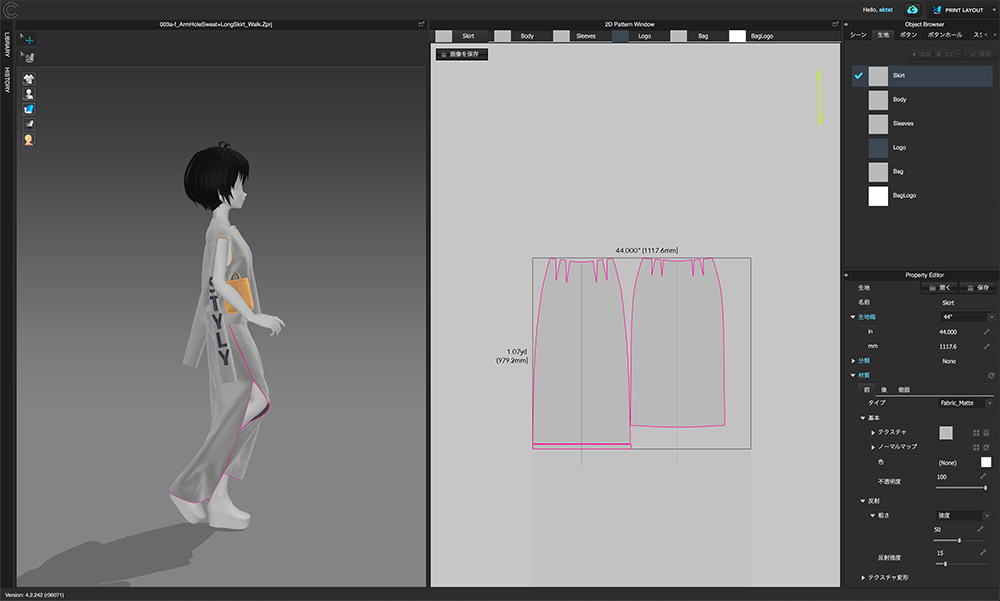
PRINT LAYOUT Mode
This mode allows you to check pattern positions and approximate scales of the cloth fabric based on the pattern.
Color Way
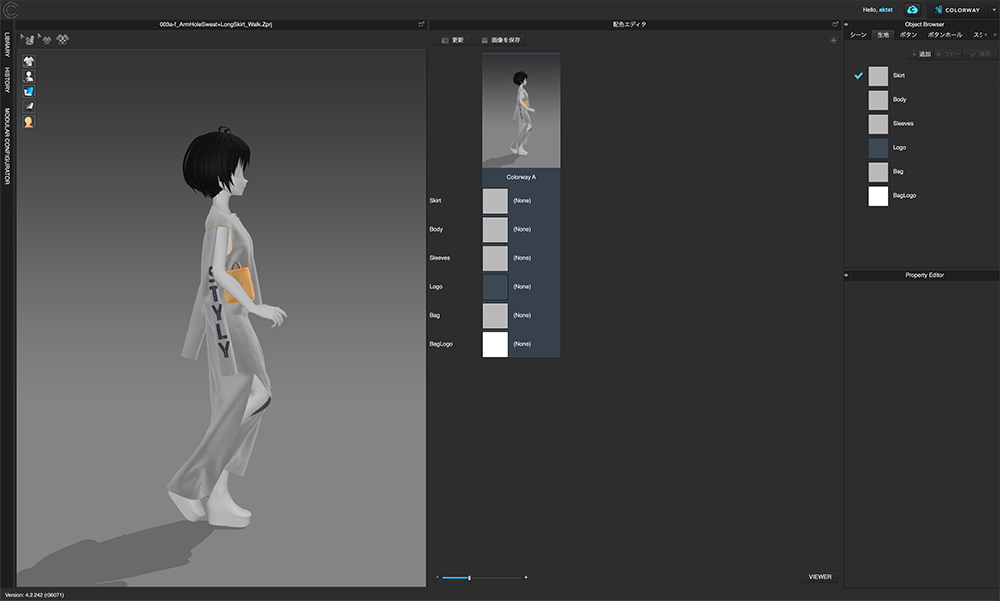
COLORWAY Mode
This mode allows you to set different color variations to a dress.
Comment
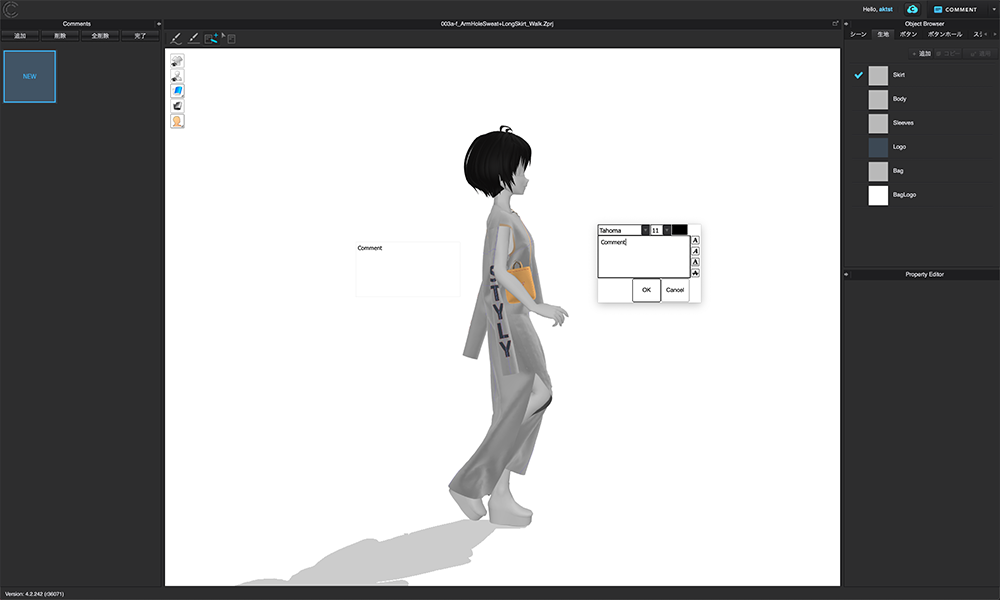
COMMENT Mode
This mode allows you to add dress explanations and edit notes as comments.
Emulator
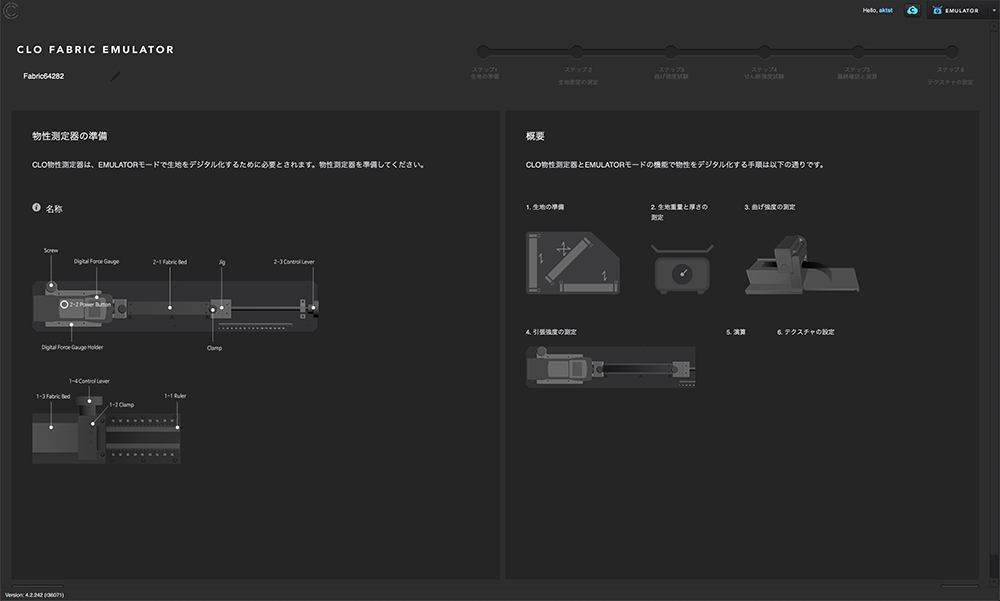
EMULATOR Mode
This mode allows you to use the CLO physical property measuring instrument and digitalize the cloth.
Modular
MODULAR Mode
This mode allows you to design freely by combining and transforming the configurator block patterns.
In this article, I introduced CLO and how to install it. I also gave a brief explanation about the UI.
In my next article, I plan to explain how to use CLO in more depth.
I hope you install CLO, and try to use it for your next project.