In this article, I will introduce the basic functions on how to use CLO, a 3DCAD software tool for the apparel industry. Also, I will explain how to create simulations to dress an avatar with clothes.
There are 2 articles for this series. For part 2, I will use the avatar and T-shirt file we imported in part 1, and explain how to dress up the avatar.
Simulation
Return to Part 1
This article is part 2 of this series. If you have not read part 1 yet, please read it first.
![[CLO] Dressing Up an Avatar ① [For Beginners]](https://styly.cc/wp-content/uploads/2019/08/回転p-1-160x160.gif)
Simulating
In order to get an image for the final picture, let’s dress the avatar with the added t-shirt file.
Simulation Tool
Simulation tool
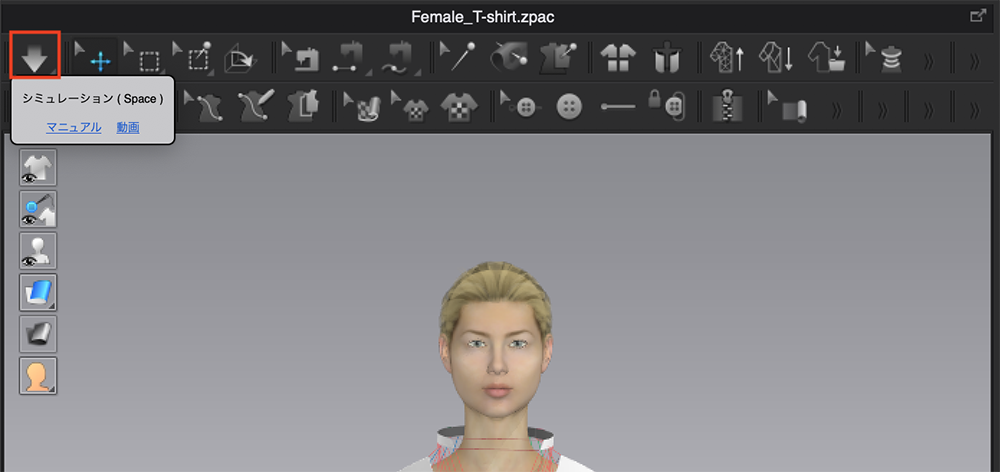
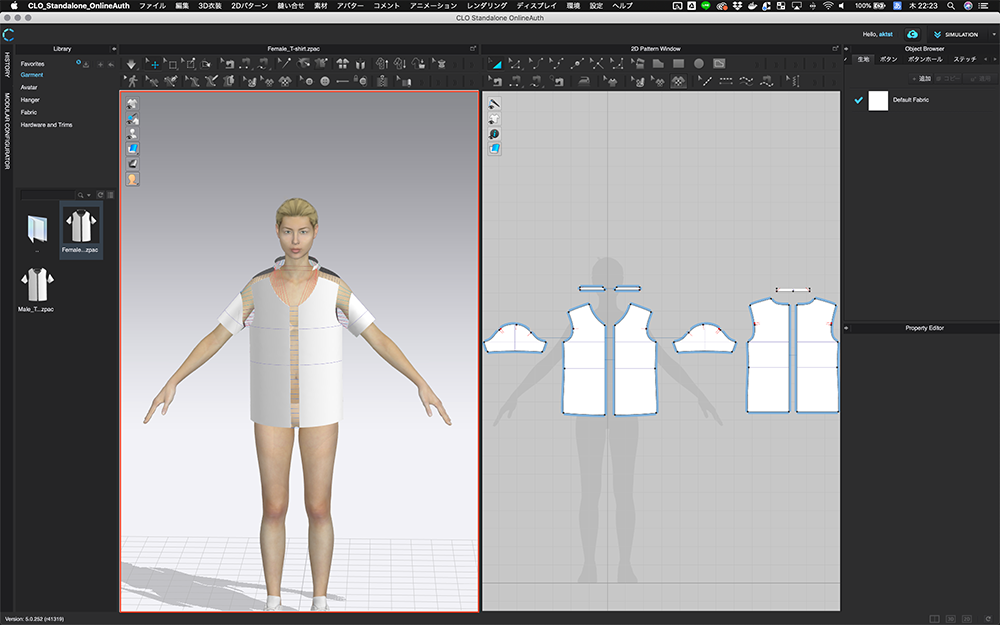
First, click the [Simulation] tool on the 3D screen to start the simulation.
Simulation
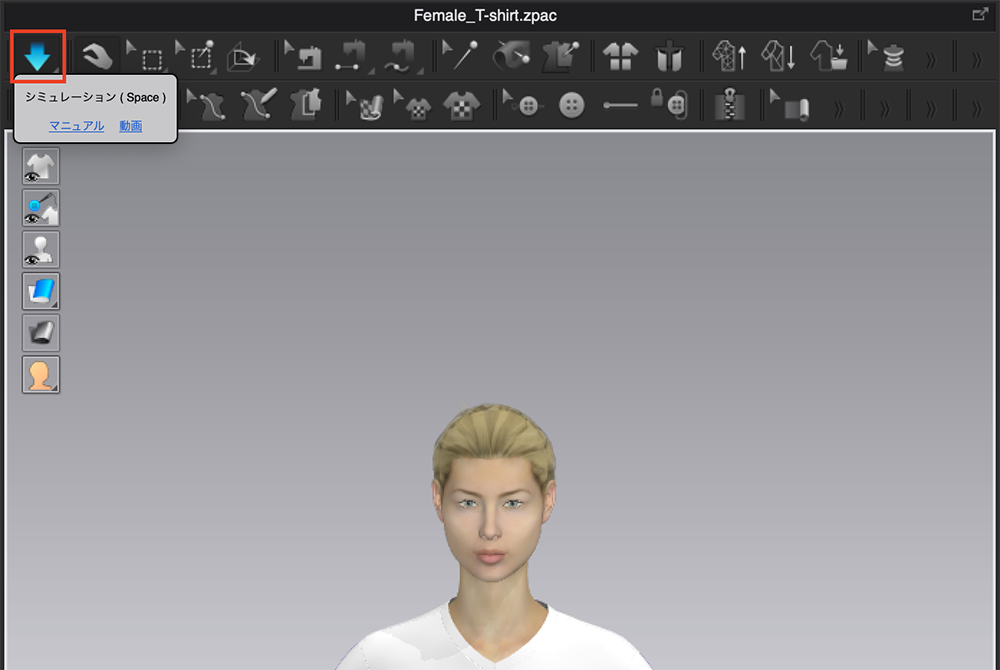
As in the image, the patterns gather together and the T-shirt is dressed around the body of the avatar.
During the simulation, the simulation tool will become blue, meaning it is active.
Simulation active
During the simulation, physics rules will be applied and the stitching settings will become active. All the pattern pieces will get stitched together to form the T-shirt.
Once you see that the T-shirt was applied properly to the avatar, click the [Simulation] button again to stop the simulation.
In this article, I will explain the operations you need to do in order to perform this simulation using stitch settings.
Undo
First, we need to undo the sample simulation we just performed.
Undo
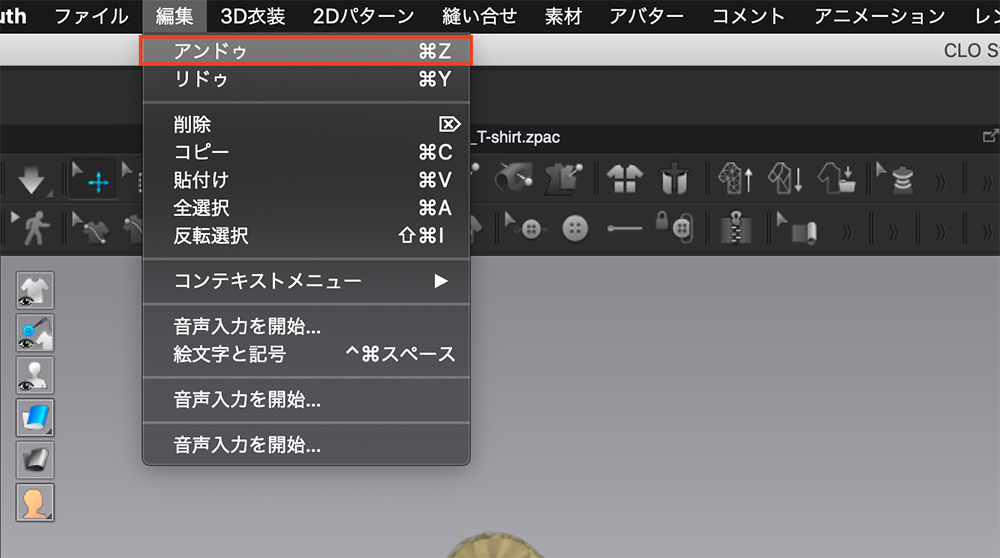
In CLO, we can undo operations by clicking [Edit] > [Undo].
When doing this, please stop the simulation first.
This is an operation that we will use very often, so memorize the shortcut [⌘+Z] (In Windows, [Ctrl+Z]).
Undo simulate
If your screen matches the image above, then the undo operation was successfully completed.
Before Stitching
Before stitching, first select pattern and delete the stitch settings that are already applied.
Select Pattern
There are 2 ways to select a pattern.
Select a Single Pattern

Select pattern
In order to select a single pattern, click on the pattern in the 2D or 3D screen.
The selected pattern will be outlined in yellow.
When you want to deselect a pattern, click on somewhere other than the pattern.
Selecting Multiple Patterns

Select patterns
When you want to select multiple patterns, you can click and drag the mouse to cover all the patterns you want to select.
Or, you can hold the [Shift] key and select each pattern one by one.
Deleting the Stitch Settings for the Garment
In order to edit the stitch settings, we need to delete the original settings.
Edit stitching
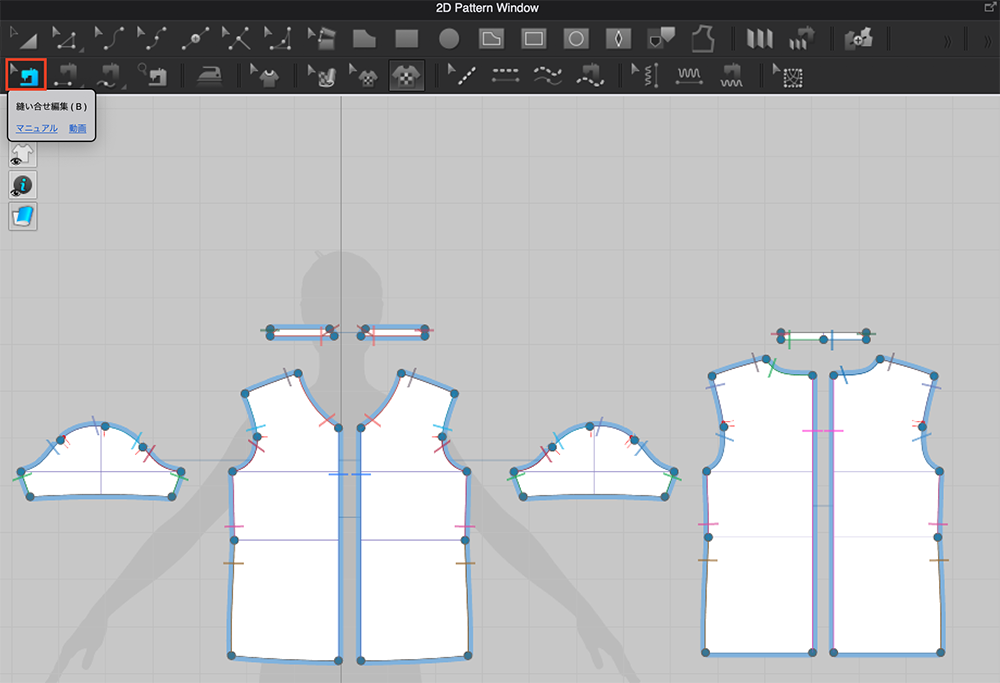
Click the [Edit stitching] tool and the patterns will change like in the image shown.
The [Edit stitching] tool is used to edit stitch settings.
Select all patterns in the 2D screen.
Delete stitching ①
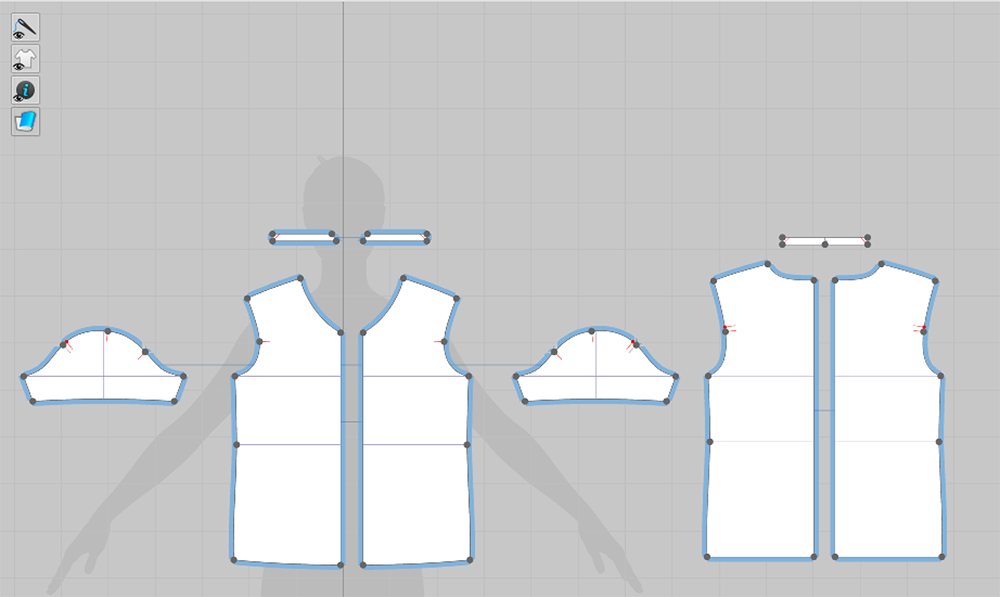
Once you select all the patterns, right click and select [Delete stitching].
Delete stitching ②
If your screen matches the image, your stitch settings have been successfully deleted.
Body
Let’s start editing the stitch settings.
It is possible to edit all of the stitching at once and then simulate the result. But we can only do so for very simple clothes, so I will explain the procedure for normal clothes. Looking at each part from ‘Body’ → ’Sleeve’ → ’Collar’.
Stitch the Body Clothing Parts ①
First, we will stitch the body clothing parts.
Stitching ①
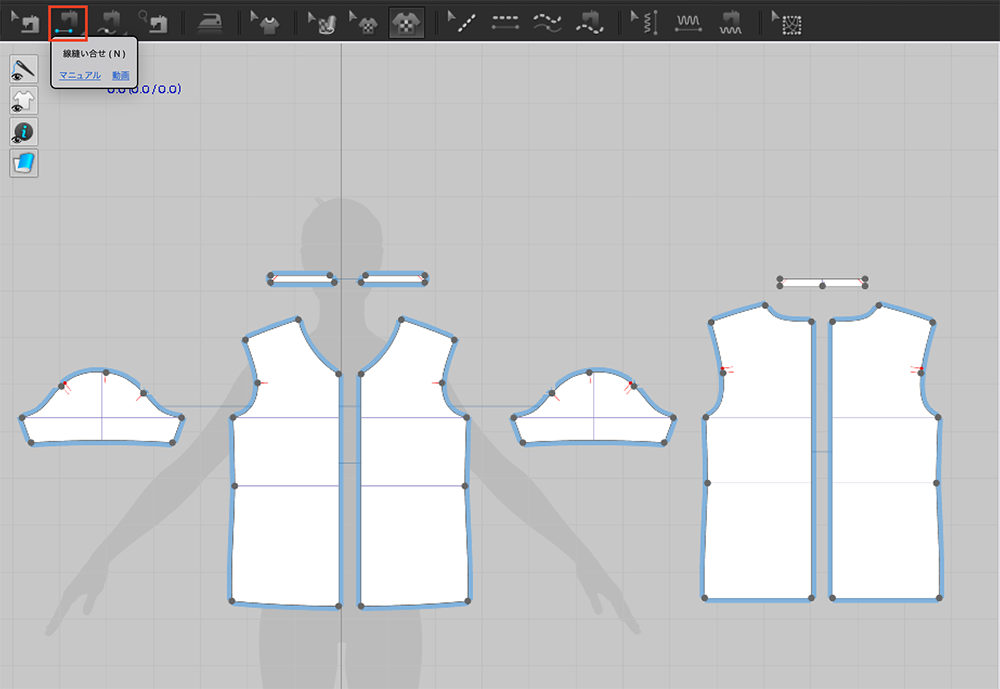
To edit the stitch settings, select the [Line stitching] tool.
We will start from the front body part. Select the middle line on the front right body panel.
Stitching ②
Please refer to the image above for more details.
Stitching ③
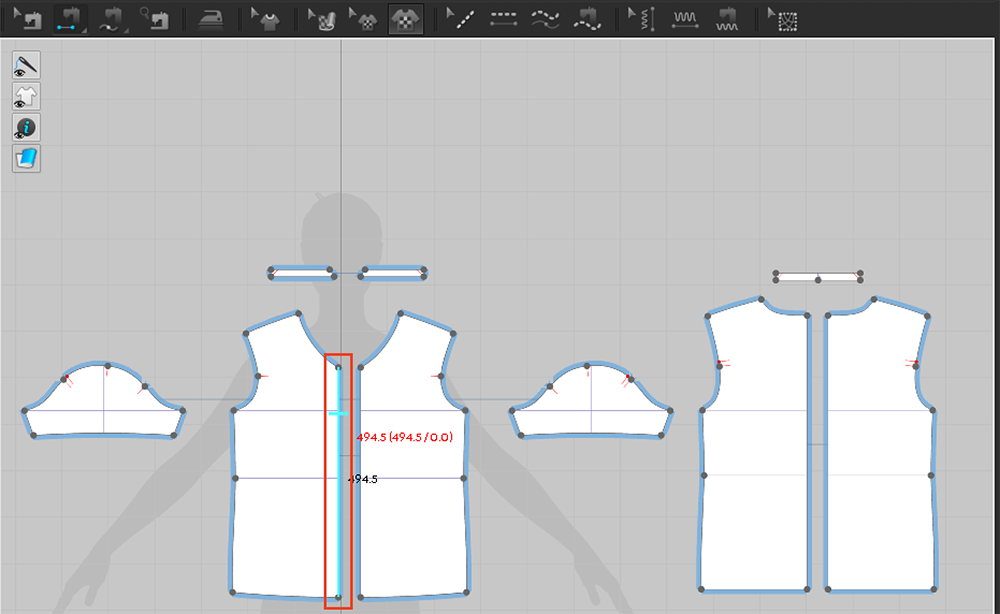
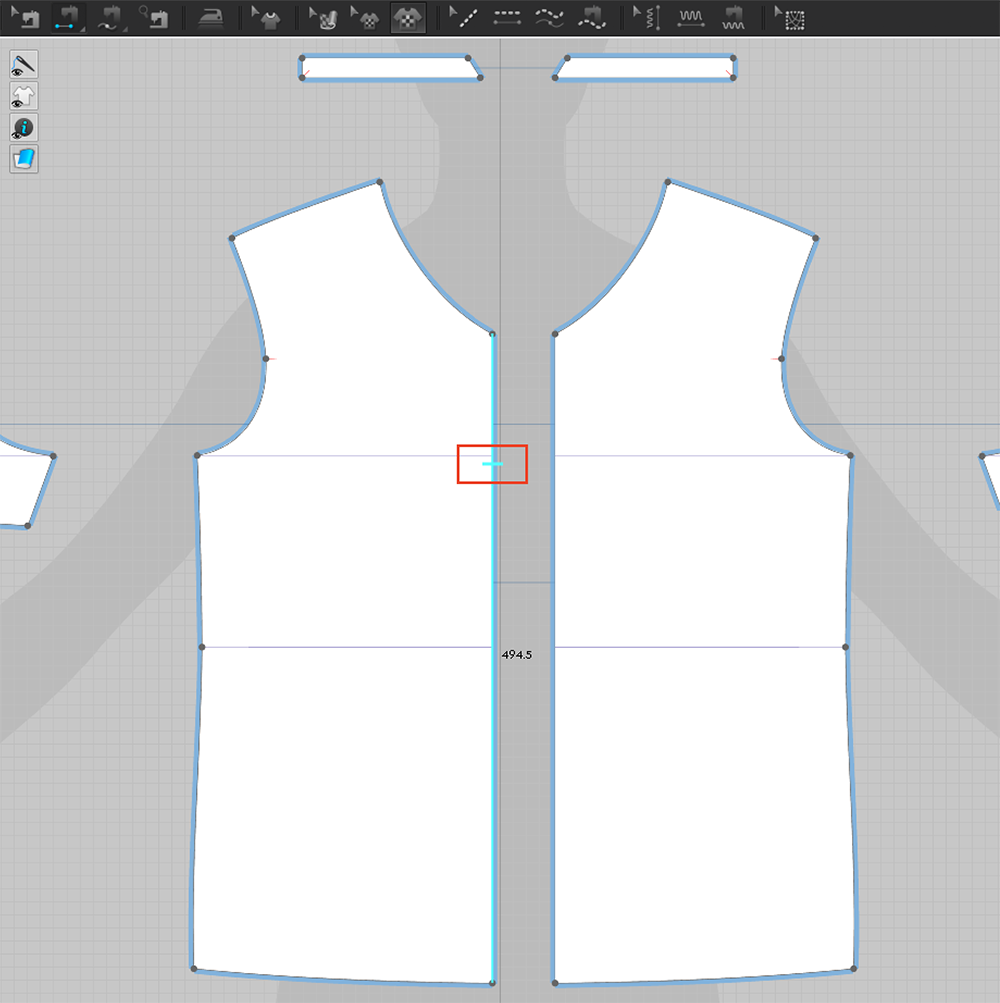
Next, select the middle line on the front left body panel. Please refer to the GIF image. Once the stitch settings are complete, the line colors will match.
Note
When editing stitch settings, please take care of the following.
Stitches have directions.
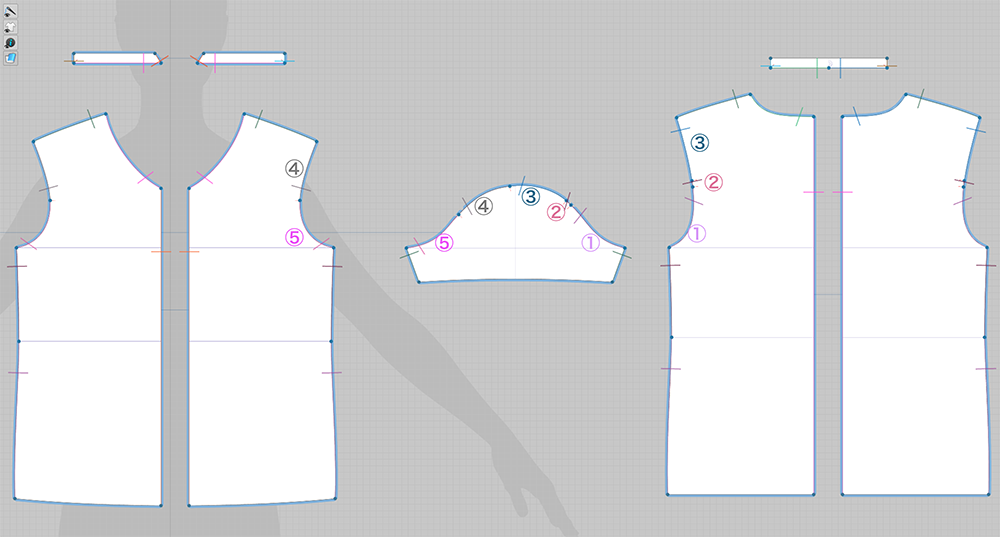
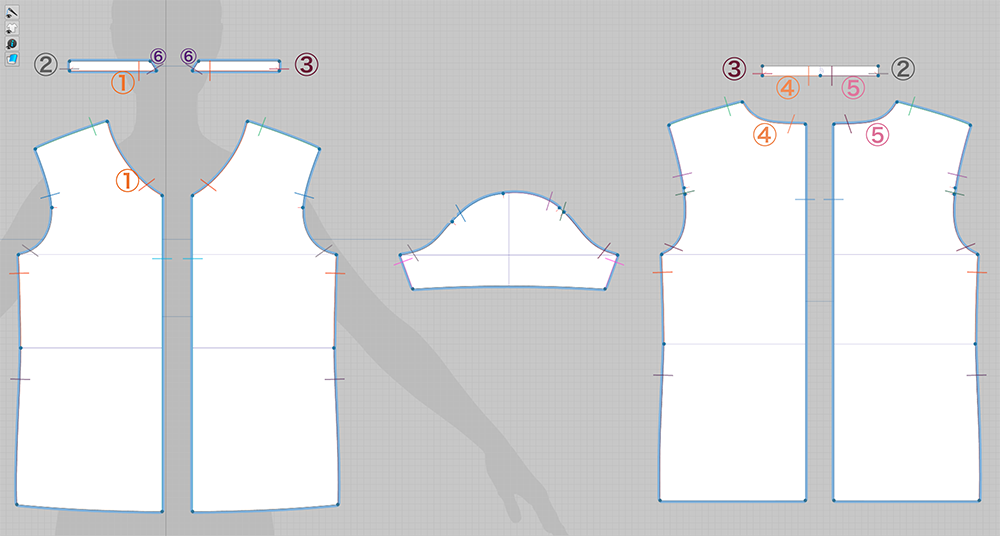
Stitching ④
As in the area shown in red in the image above, the line vertical to the stitch line is the direction line.
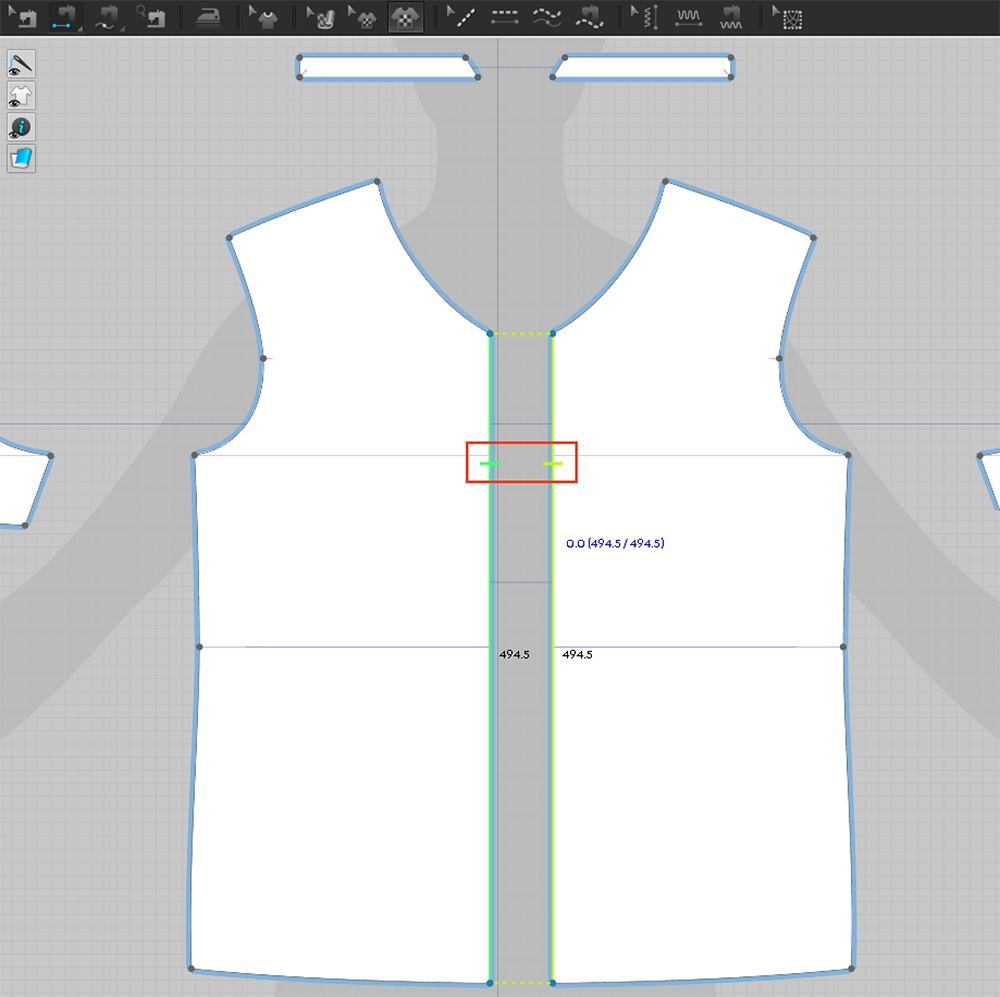
Stitching ⑤
When stitching lines together, please check that the directions are the same.

Stitching ⑥
If the directions do not match, the directions will become crossed, so please be careful.
Stitch the Body Clothing Parts ②
Let’s continue.
Please refer to the image below, and perform the same stitch settings.

Stitching ⑦
That’s all for stitching the body clothing parts.
You may have realized when following step ②, ③, and ④, the T-shirt file that we imported from the library had [Clone settings] applied, so when you edit symmetrical lines, the settings will be auto applied to the other.
I will not go into more details about [Clone settings], so please just take note that symmetrical line settings will be auto applied.
Simulate the Body Stitches
We are done with the body stitch settings, so let’s simulate the results.
Activate the [Simulation] tool.
Simulation ②
In the simulation, since we have not set the sleeve and collar stitch settings, those parts will not get stitched and just fall off.
We have to edit these settings, so please stop the simulation and undo the process.
Inactive
Before going on with the simulation, to prevent patterns without stitch settings from falling off, let’s set a function called [Inactive].
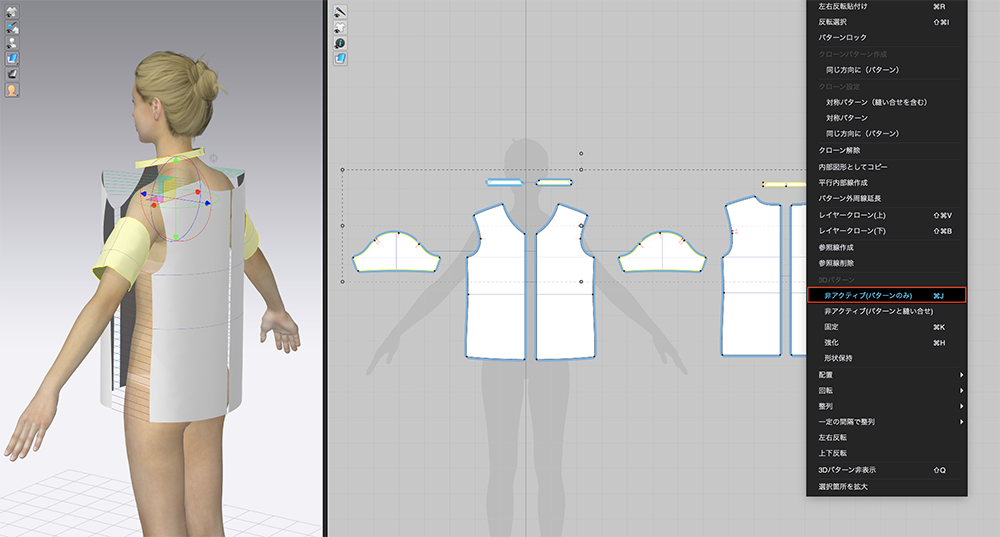
Pattern inactive ①
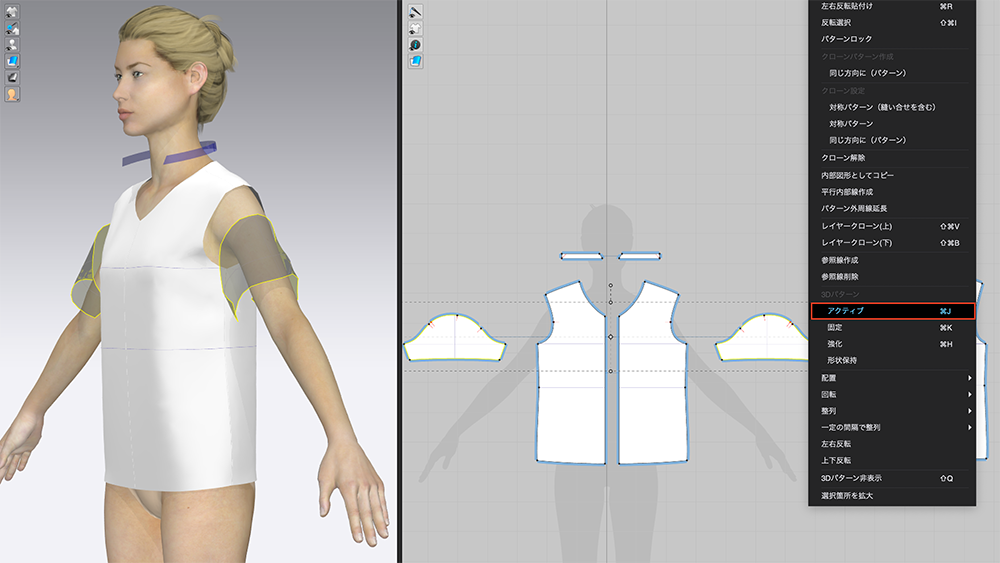
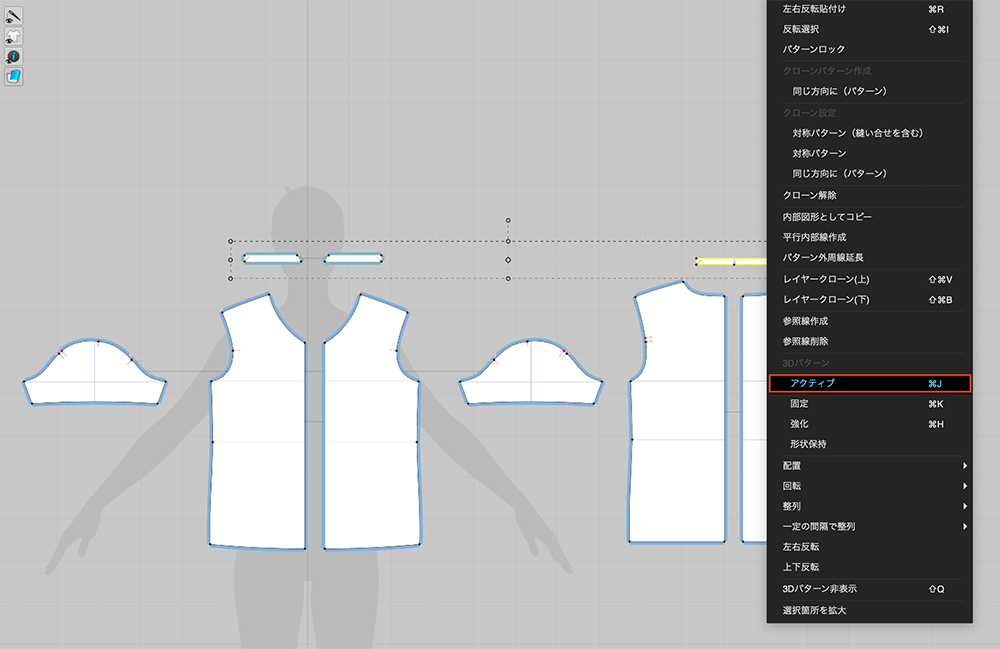
Select both sleeves and the collar patterns, then [Right Click] > [Inactive (Only patterns)].
Pattern inactive ②
When [Inactive (Only patterns)] is activated, the patterns will become transparent.
By inactivating certain patterns, those patterns are no longer simulation targets.
When we run the simulation now, only the body patterns will be simulated.
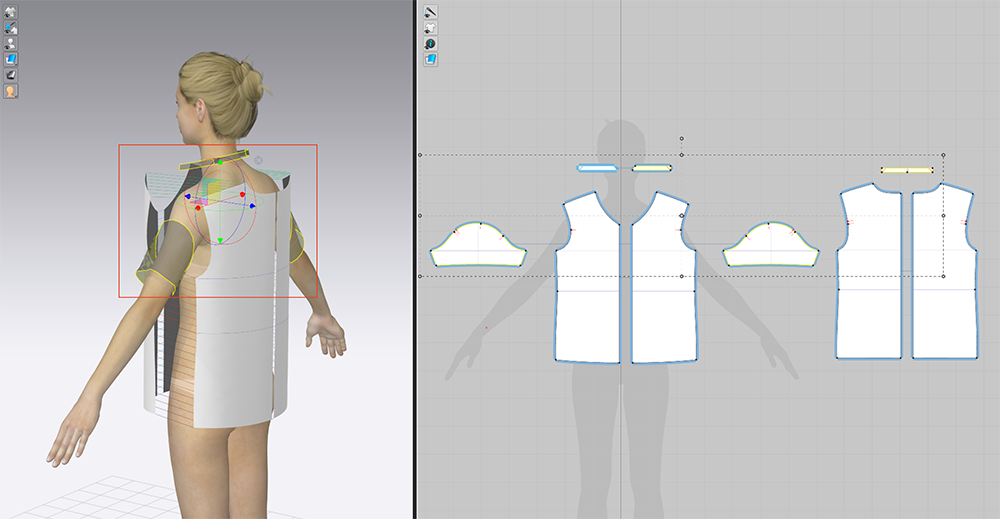
Pattern inactive ③
If the body patterns are stitched together properly, it will be a success.
Sleeves
Next, let’s do the sleeve stitch settings and simulation.
Activate
First, we need to undo the [Inactive (Only patterns)] settings we just performed.
Pattern active ①
Select both sleeve patterns, and [Right Click] > [Active].
When active is selected, the transparent pattern will return to the original white state.
Stitching Sleeve Caps
We will proceed to stitching the sleeves. Please refer to the image below and perform the stitch settings.
Stitching ⑦
Stitching Sleeve Bottoms
Stitch the sleeve bottoms, as shown in the red area in the image.
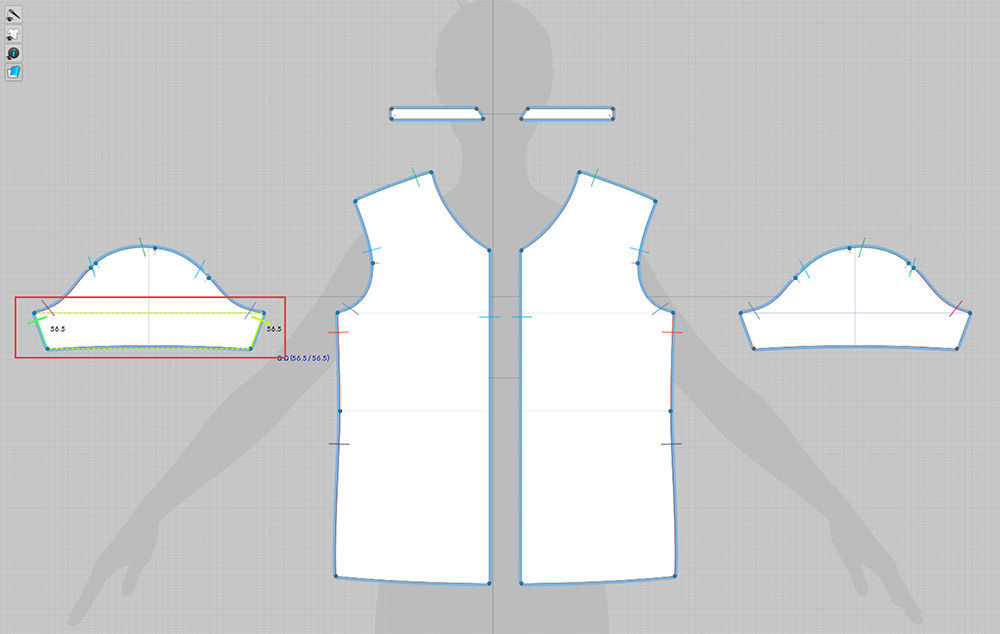
Stitching ⑨
Simulate Sleeve Stitching
When you are done, click the [Simulation] tool.
Simulation ③
Collar
Lastly, let’s stitch the collar.
Collar Stitching
Before editing the stitch settings, don’t forget to activate the collar.
Pattern active ②
After activating it, please refer to the image below and perform the stitch settings.
Stitching ⑨
Simulating the Collar Stitching
Let’s simulate the collar stitching.
Simulation ④
If the simulation goes well and as planned, then dressing the avatar has been successfully completed.