Virtual Motion Capture (VMC) can make moving a 3D model in VRM format on your VR device easy.
The tool called “Easy Virtual Motion Capture for Unity (EVMC4U)”, which I am going to talk about in this article, makes it easy to create advanced expressions via Unity.
This time, I would like to introduce EVMC4U, because it is possible to omit a considerable part of the environment construction in Unity which takes quite a lot of time and effort, by cooperating with VMC and EVMC4U.
What is “Easy Virtual Motion Capture for Unity (EVMC4U)”?
EVMC4U is a tool for controlling 3D models in Unity using VMC. By letting VMC do all the work to control the 3D model, you can drastically reduce the amount of work needed in Unity. For example,
Interaction with SteamVR
Button input
MIDI input
Processing of VRM
Handling and correction of trackers
Processing, including 10-point tracking
Moving the camera
“This and that” of BourneQuoted from:
https://qiita.com/gpsnmeajp/items/a37d29f5fc0632e32577
You don’t have to build these things from scratch because you can let VMC do all of that for you. It’s a great tool for artists such as Vtuber’s because it allows them to spend their time on the more essential parts, such as expression and direction, instead of the technical parts.
The license is an MIT license, so it can be used in a wide range of applications.
Source
You can download it on GitHub and booth.
You can download the latest version on GitHub and the stable version on booth, and GitHub also has detailed instructions.
The latest version (GitHub)
https://github.com/gpsnmeajp/EasyVirtualMotionCaptureForUnity
Stable Version (booth)
https://booth.pm/ja/items/1801535
What to prepare?
EVMC4U connects Unity to virtual motion capture, so Unity and VMC are a must.
If you are using an older version of the VMC, please prepare a newer as OSC motion transmission function is required.
Unity
Unity5.6.3p1 to Unity2019.3(beta) has been tested, so if you have a Unity that you’re currently using, there should be no problem. In addition, some bugs have been reported for Unity2019.3, so please check out how to deal with them here.
Here for the solution▼
https://github.com/gpsnmeajp/EasyVirtualMotionCaptureForUnity/wiki/Unity2019-3-workaround
Virtual motion capture (V0.42 or later)
To use the EVMC4U, a VMC with an OSC motion transmission function is required.
The version with this feature is v0.36 or later, so v0.35 or earlier can’t be used at all. In the tutorial of EVMC4U, V0.42 or later VMC is required, so please use V0.42 or later versions.
The VMC available now is V0.42 or later, so there is no problem as long as you keep downloading the latest version.
Click here to download the virtual motion capture▼
https://sh-akira.github.io/VirtualMotionCapture/download.html
VRM Model
The VRM model running in VMC and the model running in Unity must have the same bone information.
You only need to prepare one VRM model, because you only need to use the same VRM model in VMC and Unity.
There are many ways to get a model, such as downloading a VRM model that can be used by a third party at VRoid hub or Nikoni 3D or buying a paid model at booth.
How to use?
Since detailed instructions and FAQs can be found on GitHub, I’d like to explain how to use External Receiver Pack here.
1. Download the External Receiver Pack from GitHub or Booth.
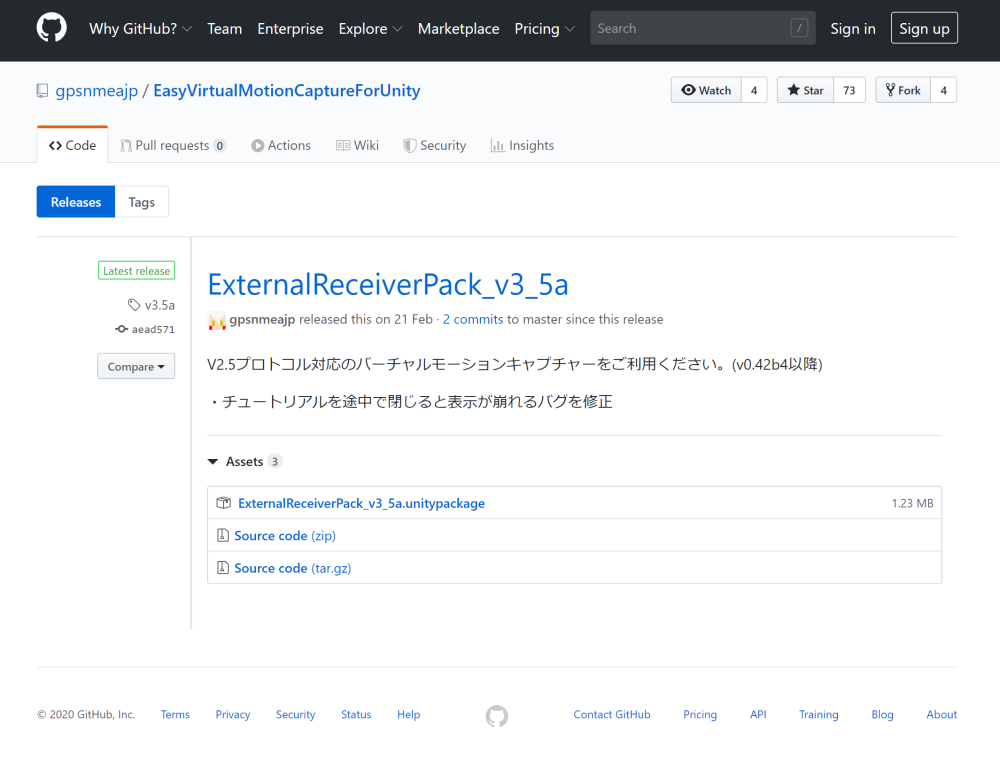
And I am downloading it on GitHub.
2. Then, import External Receiver Pack into a new 3D project in Unity.
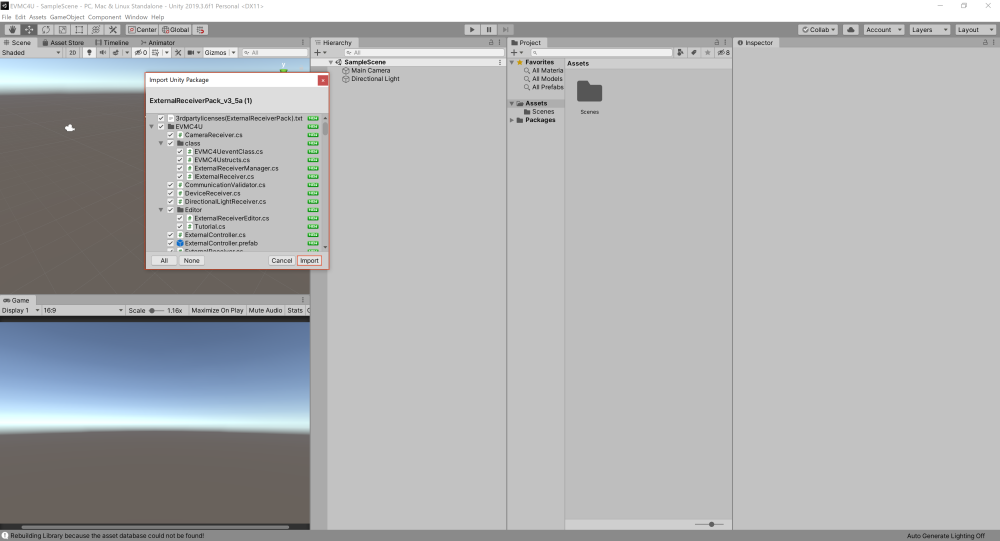
Import External Receiver Pack into Unity.
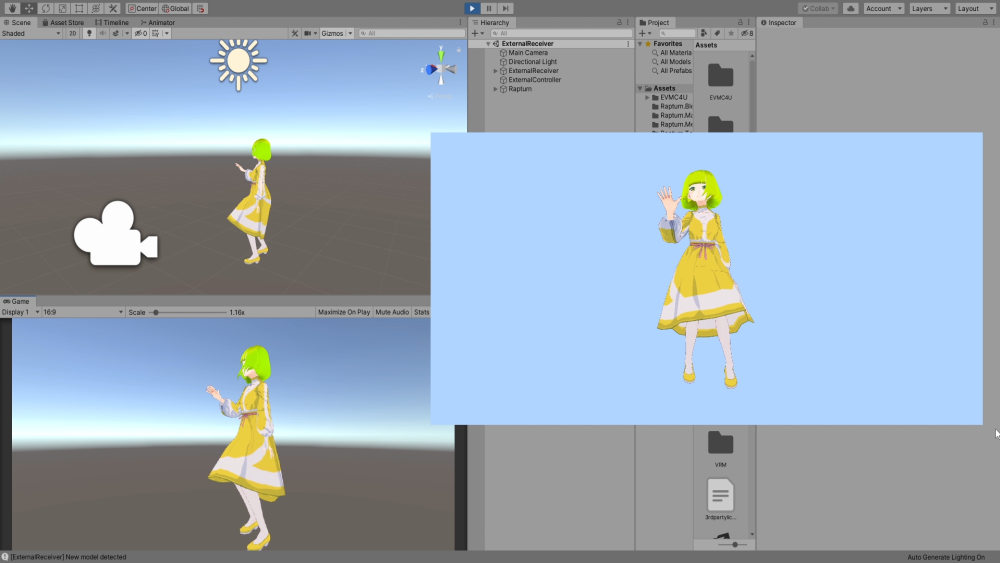
3.Open the External Receiver Scene and place the VRM model that you want to load.

Deploy the VRM model.
4.In the Scene View, assign the read VRM Game Object to a “Model” in the External Receiver.
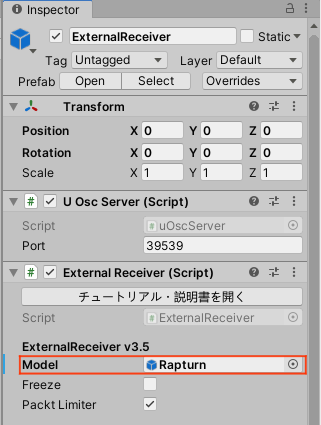
Allocate to Model.
5. Press the play button to run.
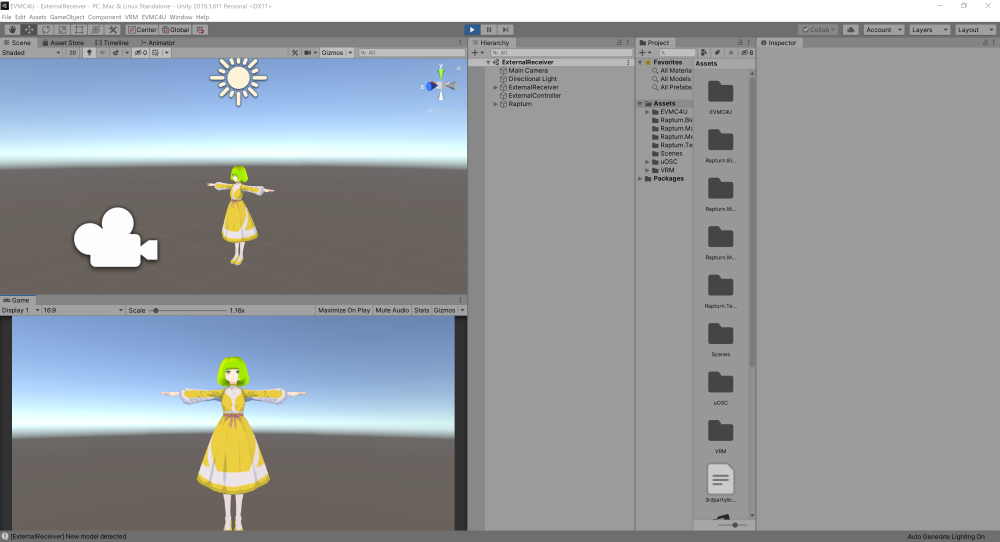
Press the play button to run.
6. Start the VMC and enable motion transmission in OSC.
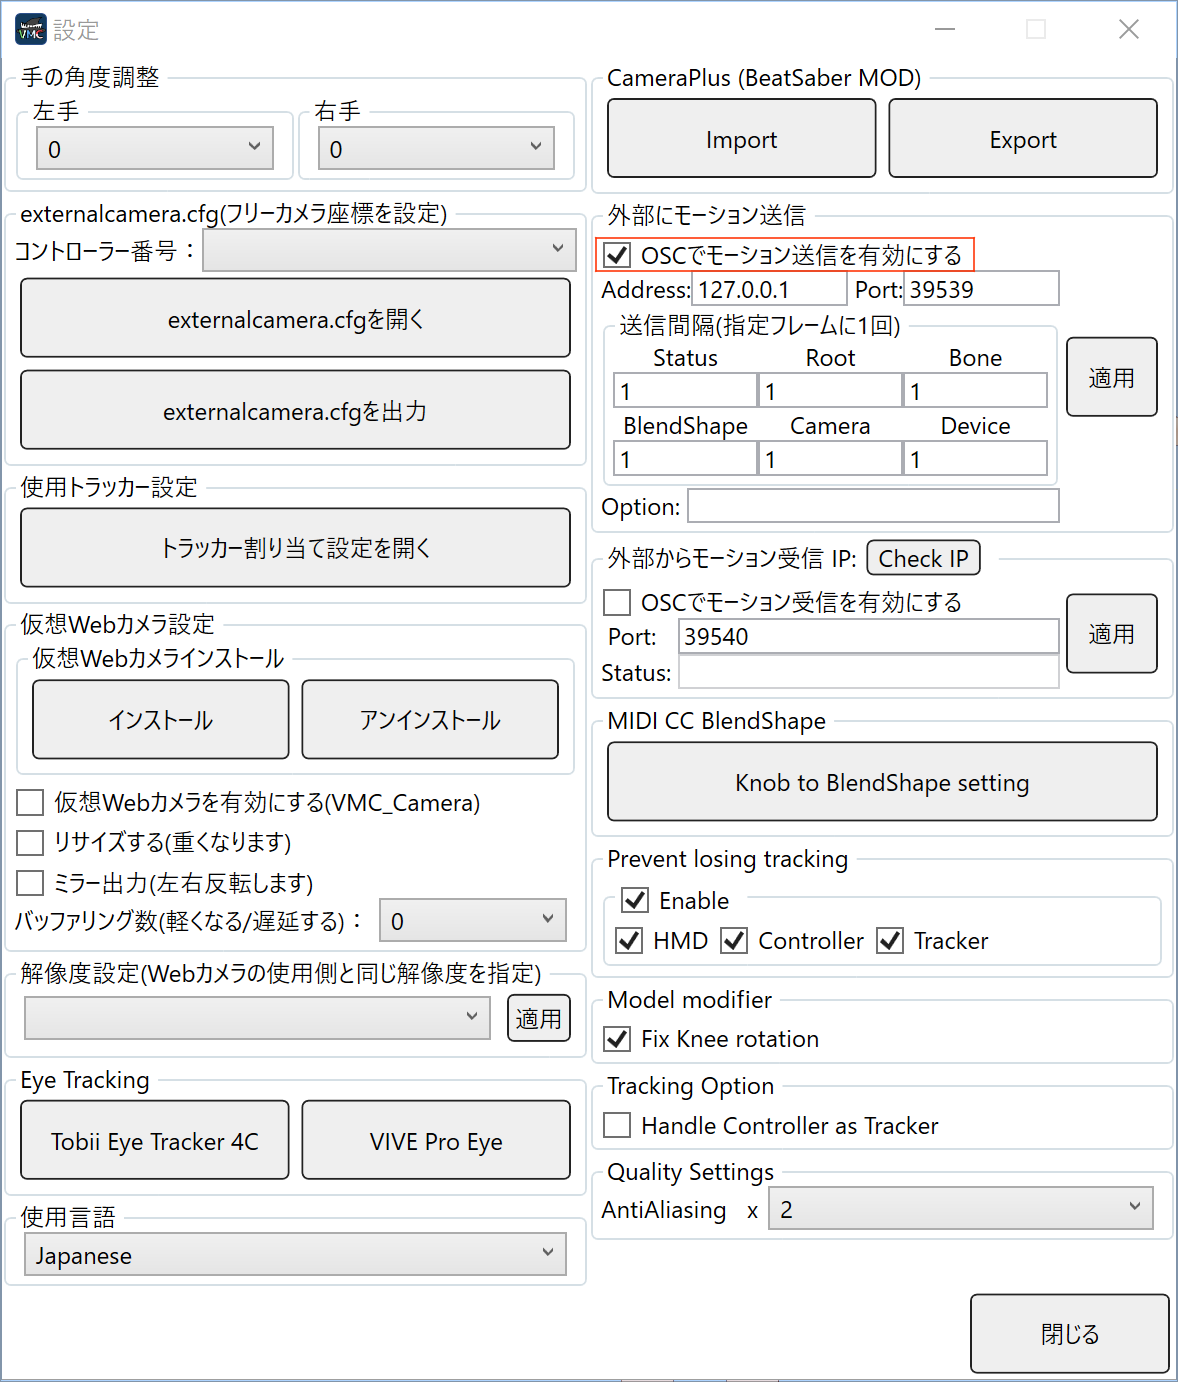
Enable motion sent in OSC
7. calibrate with VMC.

It’s all done!
If you are using External Receiver Pack_v3_5a, tutorials will be displayed on Unity, so if you don’t know how to do it, please make use of that too.
The steps in this article and the steps in the tutorial are in different order, but don’t worry, they work in both orders.
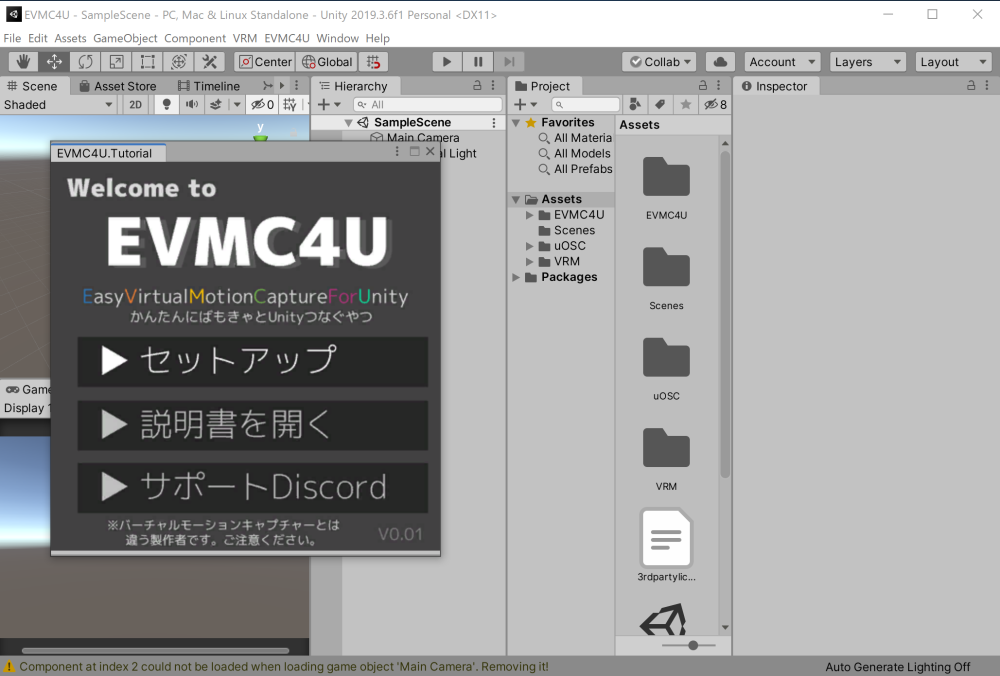
There is also a tutorial.
If you don’t use External Receiver Pack, please check the detailed instructions on GitHub.
The official explanation of how to use it▼ https://github.com/gpsnmeajp/EasyVirtualMotionCaptureForUnity/wiki/How-to-use
Upload to STYLY
The calibrated 3D model will be prefabricated and uploaded to STYLY.
If you don’t know how to upload assets from Unity to STYLY, please refer to this manual article.

We introduced Easy Virtual Motion Capture for Unity, which connects Unity to virtual motion capture.
In this article, we’ve shown you how to use the EVMC4U to move the VRM model. You may also create your own distribution space easily by arranging the room and furniture assets, the camera, and the lighting.
And, sample scripts can be used to add a variety of new functions, so you can go more complicated with your ingenuity.
This is a useful tool for a variety of purposes, and I’d like to introduce it in future articles.